Multivendor Marketplace App for Shopify is here with a new theme now and it would be really exciting to learn about its functions for the Admin and the Seller.
This guide will help you to understand the new theme and its functionalities.
Multivendor Marketplace App is the ultimate tool to convert your store into a fully-functioning marketplace.
Here, multiple sellers can register who can sell their products locally or globally and the admin can charge a commission on each seller’s earnings.
Firstly, let’s see how to install the Multivendor App on the Shopify Store.
Video Guide: App Installation
You can go through the Video Guide to understand how you can install the Multivendor app on your Shopify Store.
Import configurations from other Shopify store
While installing the multivendor marketplace app, you will get a store migration option in which
if you want that your previously installed multivendor marketplace app settings
on other Shopify store should be the same as in this newly installed multivendor marketplace app on the new Shopify store.
Then you can paste your previous Shopify store URL in the Store URL field and select the configuration menu
which settings should be the same in the newly installed multivendor marketplace app and click the next button.

And after this, the admin will set the global commission and have the option set the Google Recaptcha for the seller sign up page.
Then the admin will be redirected to the Multivendor admin dashboard where the admin can click on the sync symbol to the status of the migration like shown below image.

Note:- This migration step will appear while installing the multivendor marketplace app and once you have skipped this then it wouldn’t come again
Once you install the Multivendor app on your store you will be straightaway land to the home page of the Multivendor Marketplace app.

This is the view of the Home Page from where you can check all the recent updates of the app:
New Theme Features:
- More interactive dashboard for the Admin and the Sellers both.
- Translation made easy for all the labels in the app.
- Much more clear and systematic menus.
- Admin can now modify the part of their existing(default) seller URL that appears before “.sp-seller.webkul.com” once, during the app installation and onboarding process.
- The seller login password can be reset by Admin.
- Admin can send “Order fulfillment Reminders” in bulk to the Sellers.
- Moreover, he can send emails to the Sellers.
- The Admin can now upload the default banners for all his sellers which will be visible on the Seller’s profile page.
- He can now change the header and footer background colour of the mail templates of the app.
- The Admin can now create the subcategories of a particular collection for the product page with the help of our new feature name “Multilevel collection“.
- Admin can now add the staff members and assign permissions to them to manage the activities on the admin panel with the help of our new feature app named “Admin staff”.
- He can also allow his sellers to add the staff to manage the activities on the seller panel with the help of our new feature app “Seller Staff“.
- Sellers can now disable their products or can sell their products (with a message display) for customers if in case he/she is not available to fulfill the orders with the help of “Seller Vacation” feature app.
- Both admin and Sellers can now add booking products on their end and allow more than one customer to book a slot at a time using the Booking Product feature app which is now integrated with Booking App for Shopify by Webkul.
- Now, Product Custom Fields are also exported in Order export CSV.
Understanding the Menus
The menu functions the same way but there are changes in the positioning:
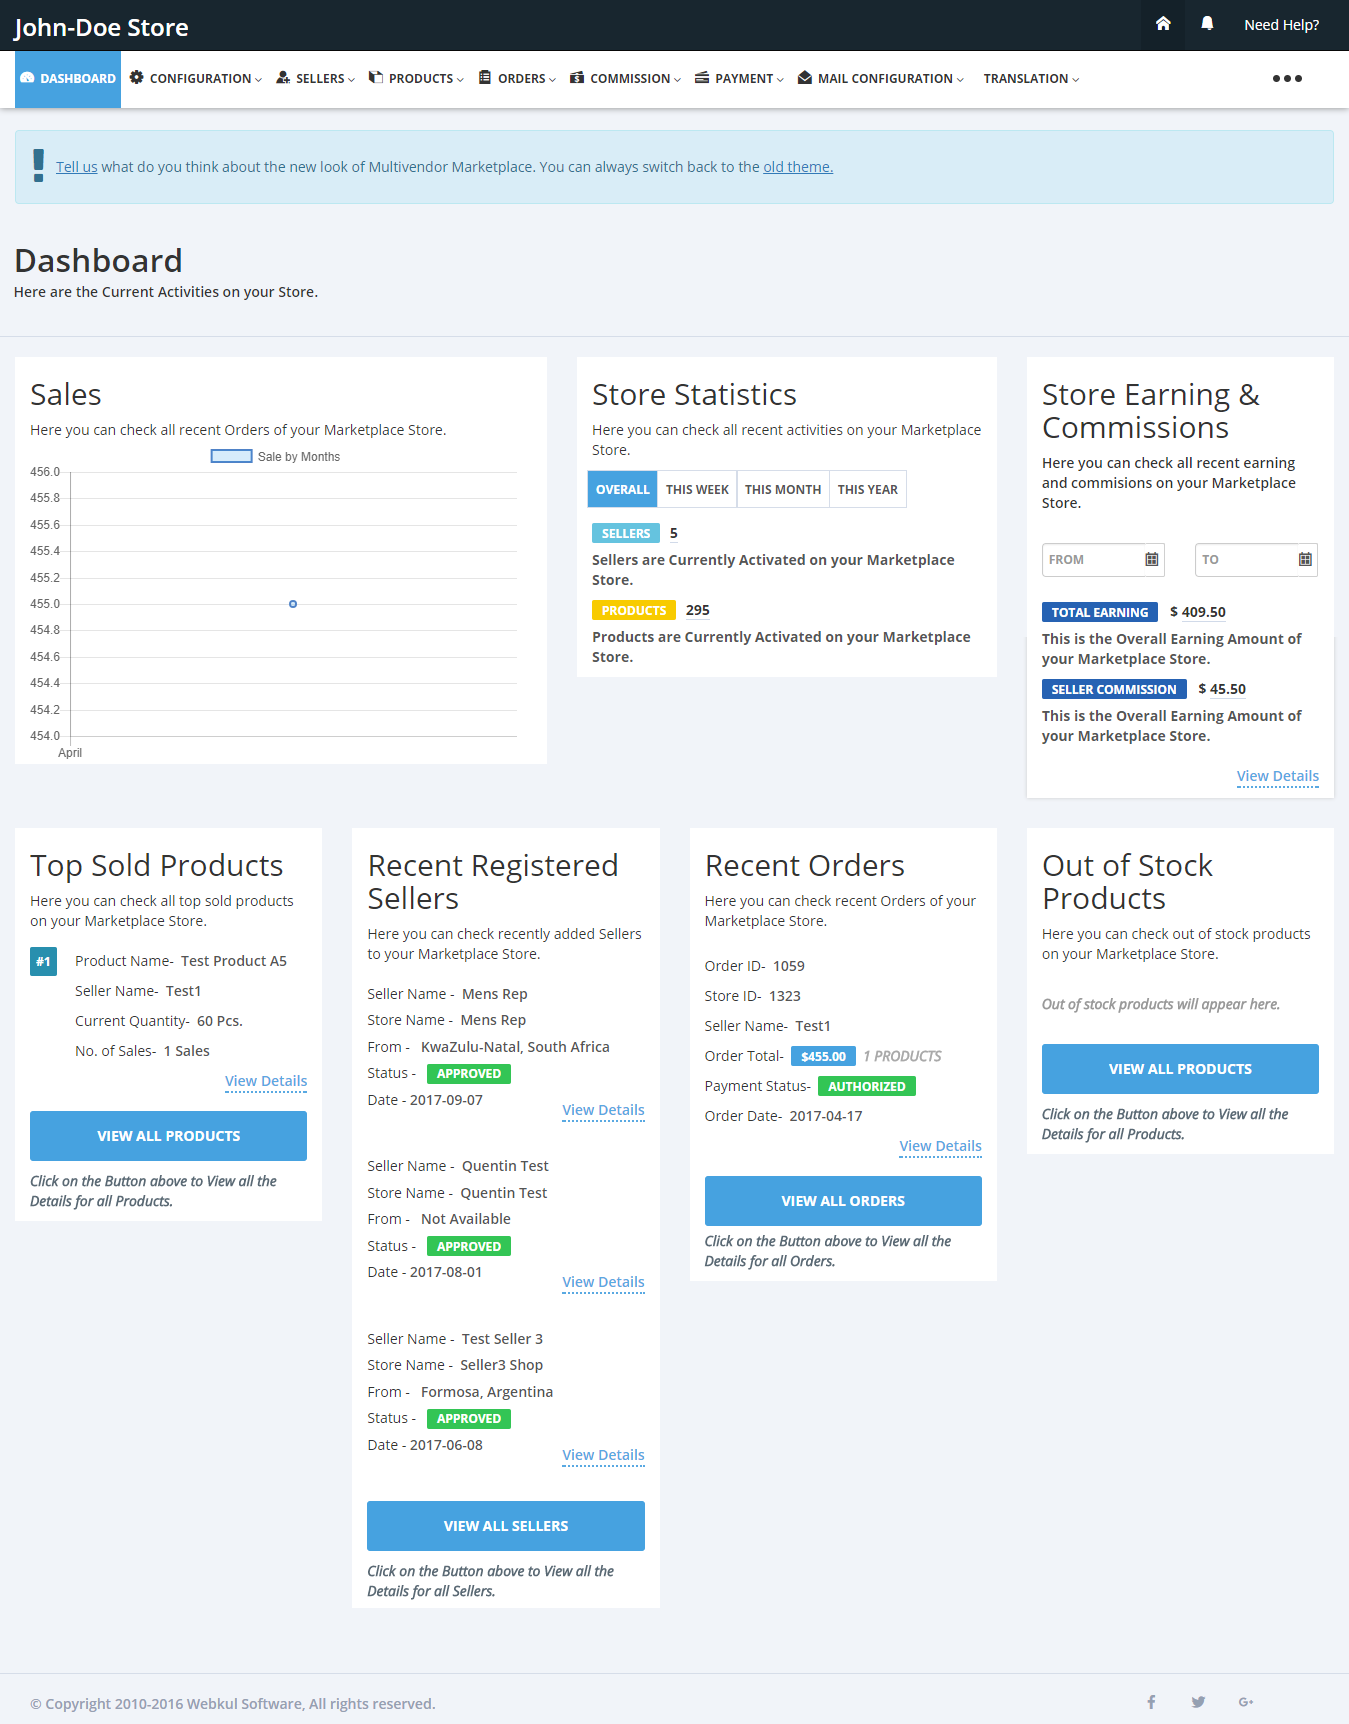
Dashboard
The Admin dashboard is much more informative now. You can now check the Best Selling Product, Recent already RegisterSellers, Recent Order, etc., simply by looking at the dashboard.
Configuration
With this, you can manage the Configuration of the App.

Instruction for Marketplace–

This includes all the information, which was there in the “configuration” menu before, i.e., the old theme.
From here, the admin can view all the instructions provided for the configuration of the marketplace.
In case you need help with adding the codes, feel free to connect via [email protected]
General Configuration-
This includes information that relates to the Admin account.
From here, the admin can enter the business email, set the currency for the shop, choose the weight unit for products, and much more.

To know about the Configuration Updates, Kindly refer: https://webkul.com/blog/configuration-updates-multi-vendor-marketplace-for-shopify/
Product Configuration-
All the Product related configurations can be done from this menu.
Here, you can provide an option to add/edit/delete the products to your sellers, you can enable the option to auto-approve your products, auto-enable the added products and much more.

To know about the Product Updates, please refer: https://webkul.com/blog/product-updates-multivendor-marketplace-for-shopify/
Seller Configuration-
All the Seller-related configuration can be done from this menu.
From here, you can allow your sellers to fulfill items, enable the option to auto-approve the added sellers, allow sellers to view customers’ details and much more.

Order Configuration–
All the configuration related to Orders can be done from here. You can make the “Order Shipping method” and “Order Tracking number” options mandatory.
Also, you can enable the “Order Prepare Status” option to track the order preparation by the sellers and much more.

To know more about the Order-related Updates, Kindly refer: https://webkul.com/blog/shopify-multivendor-marketplace-app-new-upgraded-features/
Seller Payment Configuration-
Admin will set up the Payment Methods for his sellers from here and the same payment methods will be available at the seller’s end.
You can also set the “Shipping cost” and “Taxes” the way you want to distribute these charges between you and your sellers.


Check the Complete Payment Flow of the Multi-vendor Marketplace App: https://webkul.com/blog/shopify-multivendor-marketplace-app-payment-flow/
Restriction Configuration
Also, you can restrict the Product Category, Total Order Commission & Total Order Amount to be displayed on the dashboard.

Custom Fields-
From here, the Admin can view all the custom fields added for sellers/products and can add a new custom field.
The main purpose of this is to have extra information either from the Seller or about the product being added by the Seller.

Know how to add custom fields in the app: https://webkul.com/blog/add-custom-fields-on-multi-vendor-marketplace-for-shopify/
This was all about the App Configuration.
Sellers
All the information related to the Sellers can be managed from this menu. It has the following submenus :
Video Guide: Admin Adding Sellers
You can check the Video Guide to know how the admin can add sellers to the marketplace.
Seller Listing:
This will list all the Sellers that are registered with the Multivendor App. Admin can export the Seller Details. Admin can edit/disable the seller and can also add a new seller from this menu.

Seller Form Settings-
Admin can manage the fields to be shown to the seller at the time of registration from here:

Shop Page Settings –
Admin can manage the labels for the sold by the link on a product page and also all the labels for the Seller Profile page :

Seller Profile Page Settings –
Admin can manage all the fields that are to be shown on the Seller Profile Page. Custom CSS can also be written to change the view of the Seller Profile Page at the Shopify end.

To know more, kindly refer to this User Guide: https://webkul.com/blog/shopify-multivendor-marktplace-custom-seller-profile-page-new-theme/
Customize Seller Page
From here, admin can manage the Seller Login Page fields, labels, logo and can also write its own JS and CSS for the page. The favicon icon upload option is provided here.

Custom CSS for seller dashboard option is now available in all the three plans (Basic, Executive, Pro) of the Multi-vendor Marketplace App.
Feedback –
Here the admin can view the list of all the feedback’s given by the customer from the Seller Profile Page and the same are managed from here :
Seller Policy:
From this menu, the Admin can customize the Seller Policy if & only if, he has selected the seller policy to be ‘Advance Seller Policy’ from the ‘Seller Configuration’ section.

Know more about the advanced seller policy: https://webkul.com/blog/shopify-multivendor-marketplace-advance-seller-policy-new-theme/
This was all about the Sellers part of the Admin end.
Products
Admin can manage all the Products from this menu. You can add Product Tags, Product Types, Collections from this section.
Also, you can import your Shopify Store products into the app and assign products to sellers. You can customize the product’s form from this section of the app.
Multi-Vendor Marketplace for Shopify: Insert Images to Description & FAQs
Screenshot lists the submenu:

Video Guide:
Admin Adding Products Here is the Video Guide to know how the admin adds products on his end.
Product Listing:
Admin can view the list of all the Products added by the Sellers and can manage them easily. He can export product details, add products by CSV, edit products in bulk and much more.

Product Tags:
Admin can add the product tags from here and for this admin firstly needs to enable “restrict the product tags” button from the app under the “restriction configuration” menu.
Once done then the admin can add the tags.
By this seller cannot be able to add any new tags while creating the product and will have to use the tags which are already created by you.

Once done, save the changes.

A new tag added to the app :

Please note:- The tags which are created by admin from the Shopify store cannot be synced in the multivendor marketplace app.
Admin needs to create new product tags from this section as shown in the above screenshots.
Product Types –
Admin can add product types from here and for this admin needs to enable “restrict the product type” section from the app under the “restriction configuration” menu.
Once done then the admin can add the type to the app.
By this seller cannot be able to add any new Product types while creating the product and will have to use the product types which are already created by you.


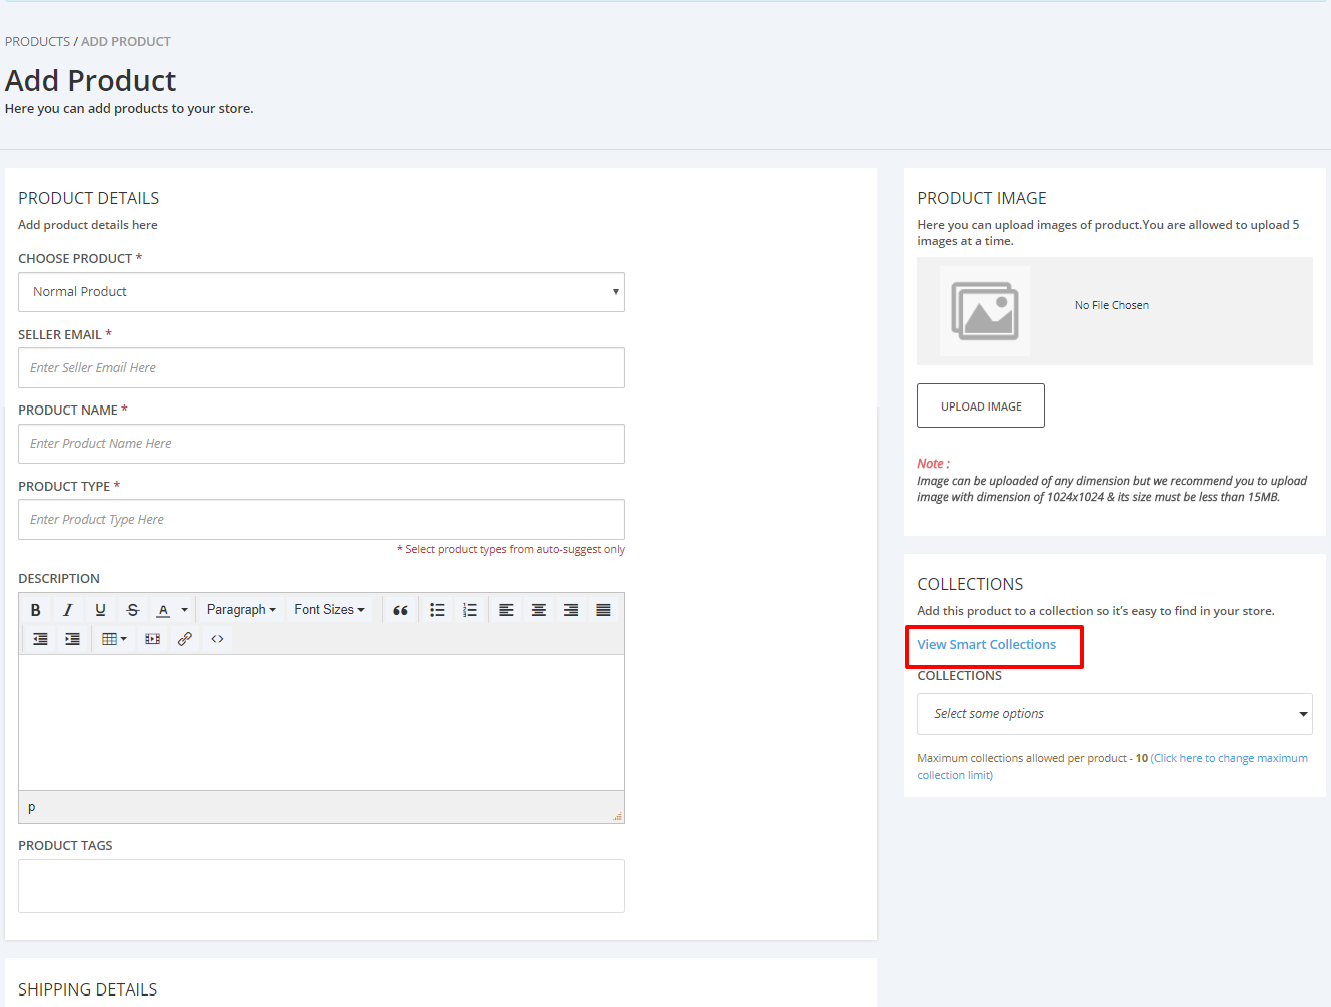
Collections –
You can have the collections sync from the Shopify store to the multivendor app. To do so, you need to enable, “restrict collections” from the configuration :

Then from the collection submenu, sync the collections. This will list all your collections on the app.
You can also disable the collections and those will not be visible to the seller.

Smart collections are synced this way:
To know more about Collection Sync, Please refer: https://webkul.com/blog/shopify-multivendor-marketplace-collection-sync-from-shopify-store/
If you want the seller to view the smart collections then you can disable the “restrict smart collection” from the “Restrict Configuration”
- Import Products – If you have products added to the Shopify Store and now you want to assign them to the sellers, then you can use this option to import products into the app.
Firstly admin needs to click on “import products” section to import the products from Shopify store into a multivendor marketplace


Now make sure to assign these imported products to your sellers because only then the imported products start showing on the “Products Listing’ section of the Multivendor app.

This way you can successfully import the products from your Shopify store into a multivendor marketplace app.
Import Products from Shopify to the App know more: https://webkul.uvdesk.com/da/blog/import-products-in-shopify-multivendor-marketplace
- Product Form Customization – With this, the Admin can manage the “Add Product Form” for normal as well as digital products in the app.

- Batch CSVs- This section will have the list of all the CSVs you have upload on your store till now. They can be the product, seller or any other CSV file.
- It can be approved/disapproved & deleted by the Admin.

This way, you can manage the “Product” menu in the App.
Orders
Admin can see the orders from here, manage the invoice and can send the Reminder to the sellers for order fulfillment.

Order listing –
All the orders are listed, and the admin can send fulfillment reminders to the sellers.
Admin can export order details in a CSV file from the Multi-vendor app.
NOTE:- From now onward, both product properties, as well as the shipping label, are also supported in the order export CSV.
Video Guide: Order Process
You can go through the Video Guide to know the complete order process on the admin side.
RMA Configuration –
Admin can manage the status used in the Return request initiation for the seller products.

Admin can raise the RMA request from the “orders Listing” section of the app and the same will be visible at seller’s end
and by this, the seller will get the information about the order in case of cancellation/exchange/return.

Once you click on the Raise RMA Request button, a new window will open, where you can initiate the RMA request, and you can also mark the comment/ reasons for the RMA.

Invoice Configuration –
Admin can configure the details of the invoice sent to the sellers from here. Also, allow the sellers to generate & print an invoice once generated by the admin.

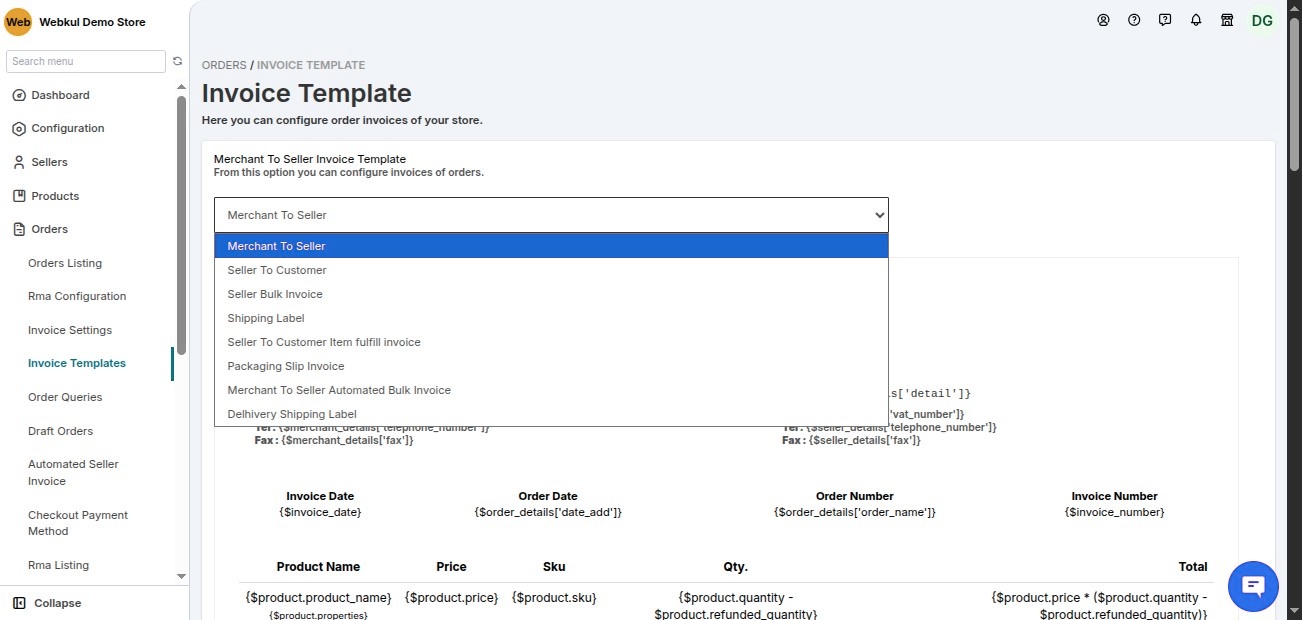
Invoice template –
Admin can manage and edit the content of the invoice sent from “Admin to seller”, the invoice sent from “seller to the customer”, and also “seller bulk invoice”.
The menu helps in managing the invoice layout.
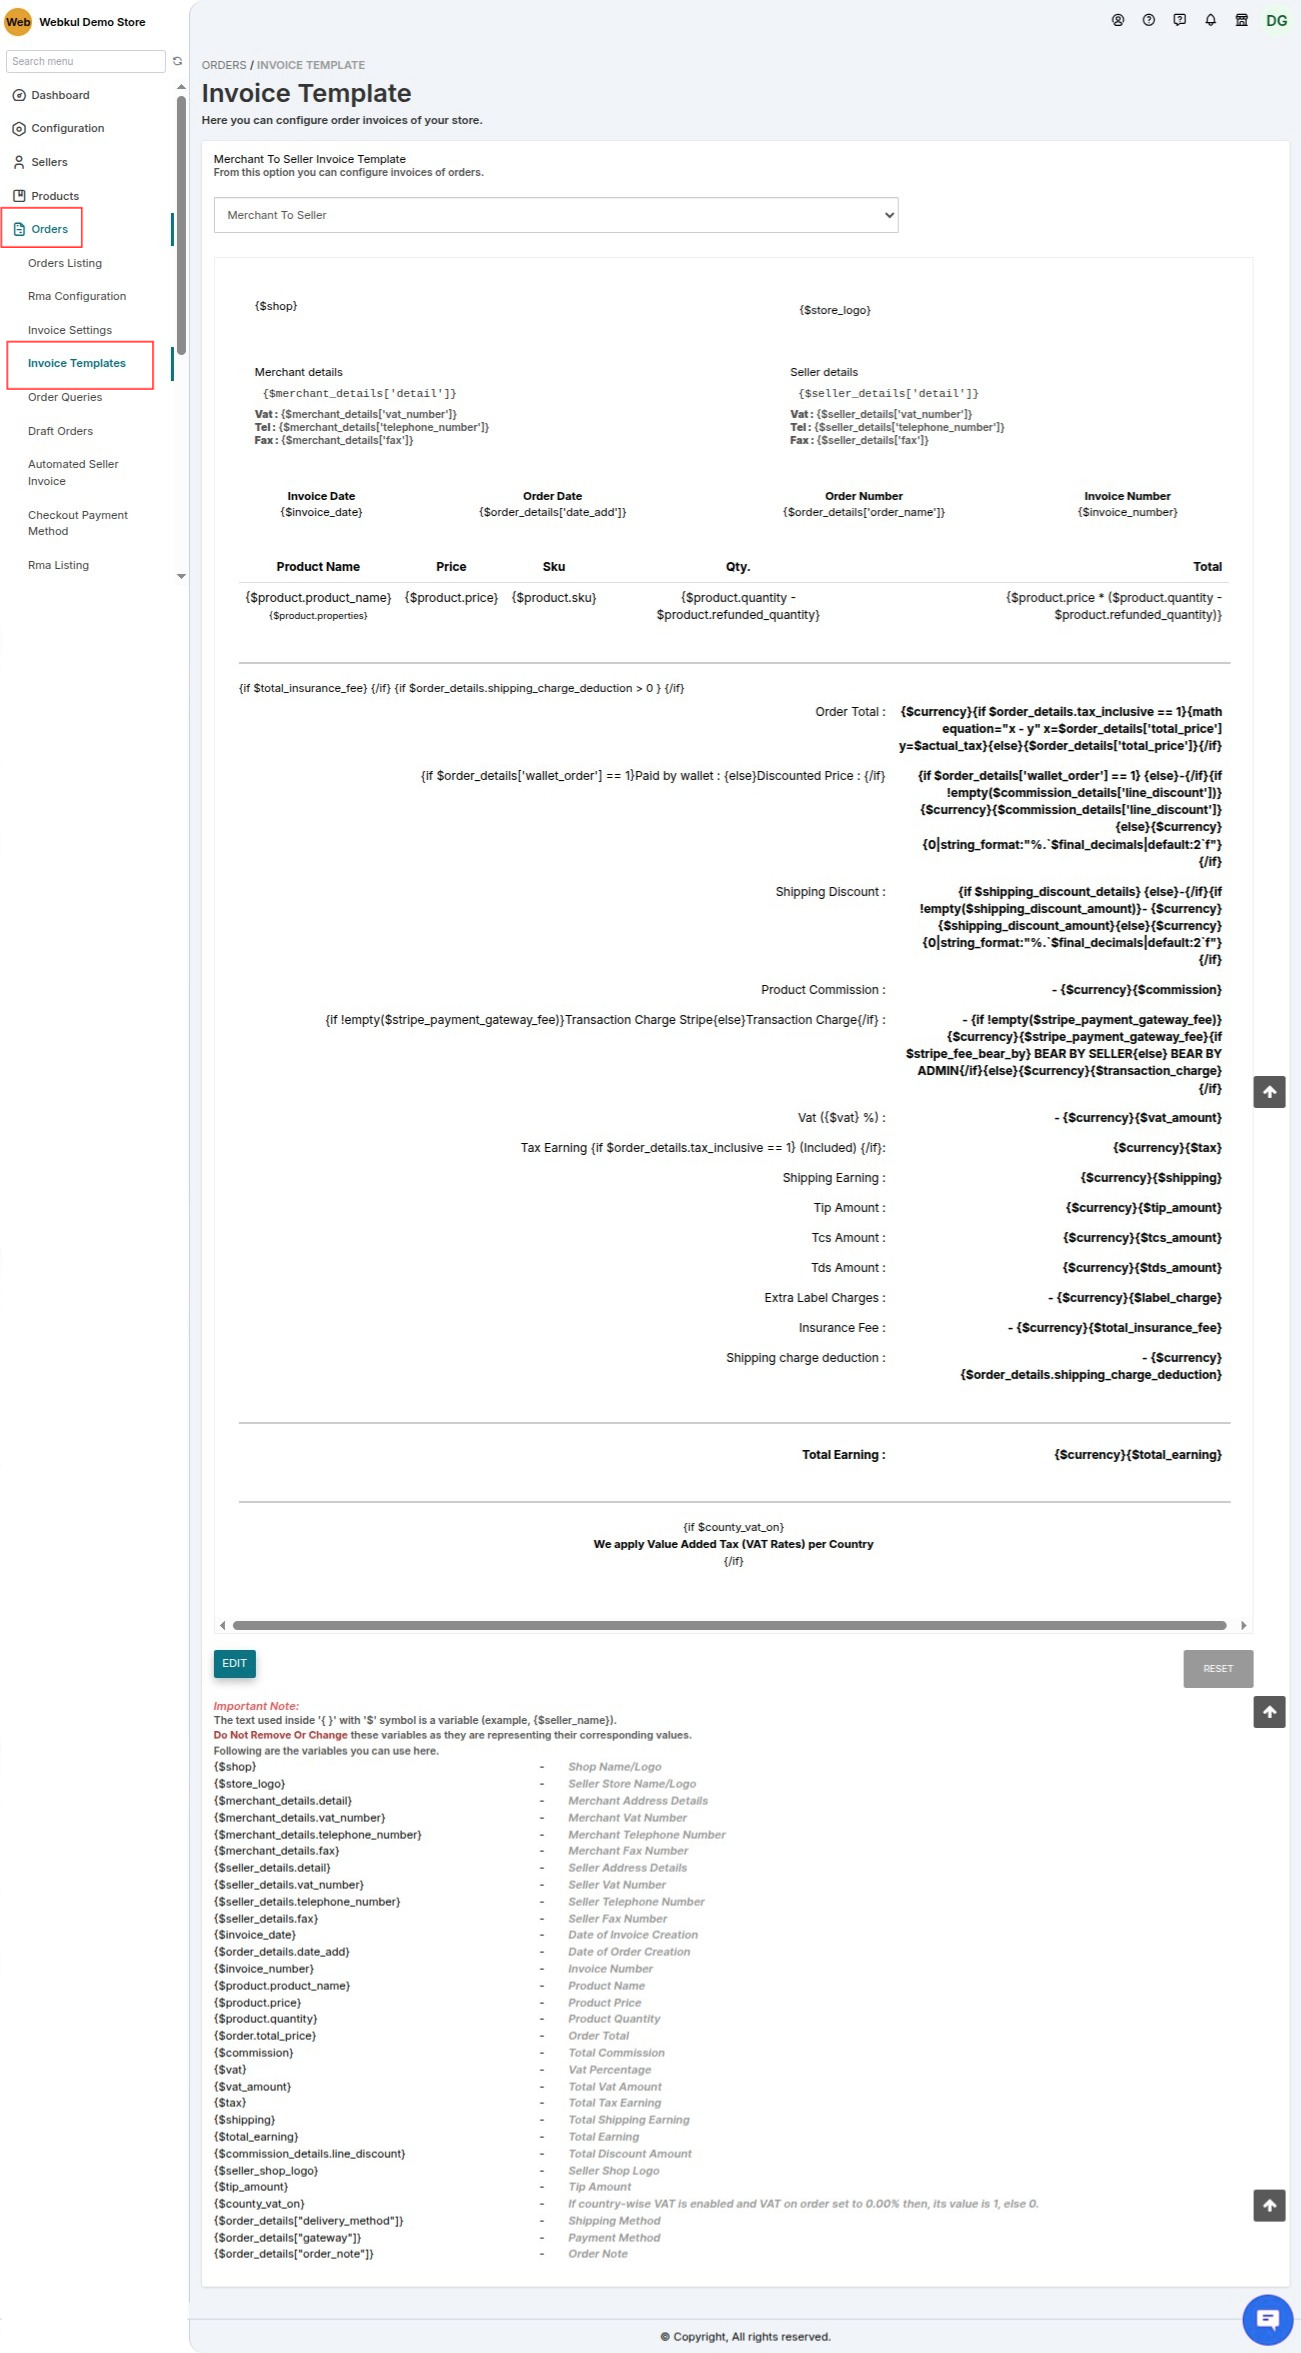
To know about the “INVOICE” feature in detail, Click here.
Know More about Invoice: https://webkul.com/blog/shopify-multivendor-marketplace-invoice-feature-new-theme/
That’s all about the Order Management menu in the app
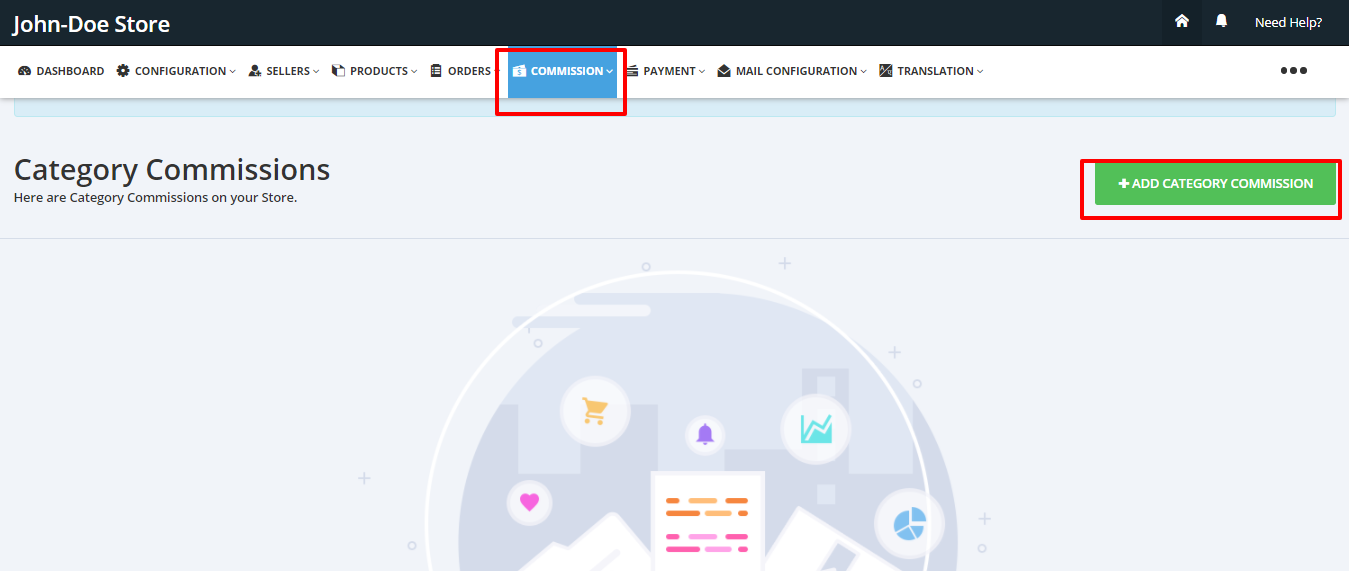
Commission
In the Multivendor Marketplace App, Commission is the share of the admin in each seller’s earning.
From this section of the app, admin can set global commission, seller-wise commission and category-wise commission.

The menu consists of :
- Commission Listing: The menu will list all commissions earned by the Admin for each order.
- Global Commission Settings: Admin can set commission for all Sellers and for all the Products applied to all Collections.

Admin can specify the type of commission and then specify the amount for the same.
Seller Commission Settings:
Admin can also set the Commission for each seller from this menu.


This is how the Admin can set up a commission for each seller.
Please note that in case there is no seller commission, then the global commission will be applicable to the seller.
Collection Commission Settings:
Admin can also have a commission based on the Collections. See how :

After setting this admin can have the commission based on specific collection/category.
Please note that it’s applicable only to manual collections not on automated or smart collection.
You can also refer to the user manual of the commission to know about commissions in detail. Click here
Video Guide: Commissions
Here is the video guide on how to set commissions in a much better way.
Payments
Admin can manage the payments from the menu. Admin can view all the Payment received from the Seller Orders and can view the Payment Methods selected by the Sellers.
Four sub-menus:

Seller Payments:
Admin can view all the Payment information ie. amount received (commission), seller earnings, the amount due to the seller.

Admin can make the payments to the seller, using the “view” button.

If the payment is to be done via PayPal, then select PayPal as shown in the above screenshot and enter the amount that you want to pay to the seller as shown in screenshot below:
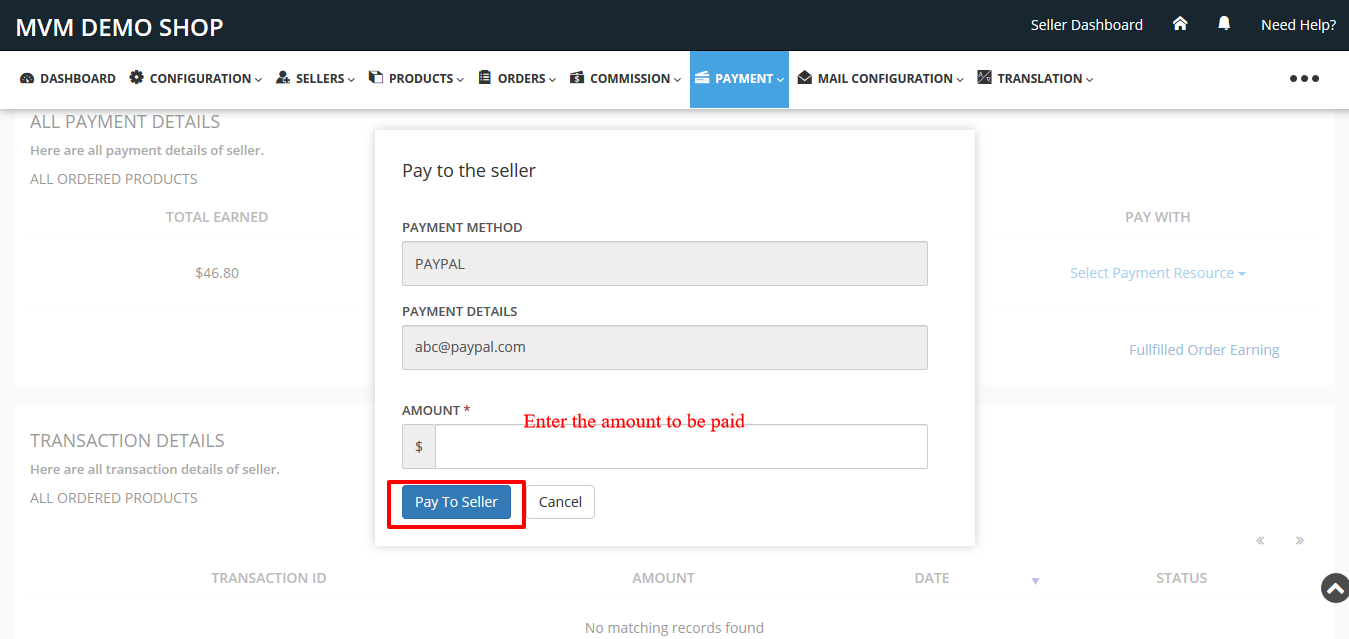
This way the seller is paid.
Also, we have provided an option “manual”, so that in case you have paid the seller from other modes of payment, then you can just keep a record of the same in the app.
Seller Payment Method:
This will list the payment methods selected by the Sellers.
The Seller will have the option to select from the methods added by the Admin from configuration > payment configuration.

Mail Settings
Admin can configure all the emails sent to the Sellers/Customers from the App.
Moreover, the admin can set the header and footer background color of the mail templates from here.

This way, the admin can configure the emails easily.
Now, You can also edit the table content of the Order Placed Mail templates as shown below:

Mail Settings
Admin can now have their own email in the “from” and “reply-to” section of the email sent to the sellers/vendors for the order notification, product approval, etc.
Refer to the user guide for the same.

To know More, Please refer: https://webkul.com/blog/shopify-multivendor-marketplace-app-smtp-configuration/
Mail Counter:
This section will display the mail details as shown in the image below:

Translation
With the “Translation” menu, you can change the language for all the labels at the seller’s end, for all the menus.
So, now you can get the labels changed as per your own requirement and in your choice of language.


Now, translating labels are easier with the help of CSV. Export label CSV of the particular page, edit and save the CSV and then import the same to see the changes.

We will update more on this, so check for updates.
Support
Furthermore, if you have any questions/issue, then please raise a ticket at http://webkul.uvdesk.com/ or drop a mail at [email protected]
Demo Details
Moreover, you can follow the link below to use the demo of the Multivendor Marketplace app:
https://multivendor-marketplace-5.myshopify.com/

Informative tutorial, but there is nothing about the white label and custom domains features for the pro plan.
Could you please add a section about them?
Thanks