INRODUCTION
Are you looking forward to enhancing your speed at work and make it handier?
In today’s scenario, the customers expect the fastest and accurate process while making a purchase on a store. Now, to boost your profitability, you need to have appropriate tools & techniques to serve your customers as good as possible.
Therefore, we have come up with a very useful tool for your POS called Odoo POS Change Product View. This module facilitates the POS user to change the product view in the running POS session. It provides more flexibility and navigation to the POS user. The cashier can switch between grid view and list view during the running POS Session. Moreover, with the POS list view, the cashier can select the product details to show in the list view with columns such as weight, volume. UOM, etc.
FEATURES
1. The Odoo POS Change Product View module allows the POS user to change the product view in the running POS session.
2. The POS user can simply click the product view tab to switch between Grid View and List view in the running POS Session.
3. The POS user can toggle POS product List View to see more product information.
4. You can view more product details in listview with columns such as weight, volume. UOM, etc.
5. You can also see the product cost price on the product on POS front-end
6. The admin can enable/disable the features separately for each Odoo POS shop.
INSTALLATION
1.) Once you purchase the Odoo POS Change Product View module From the Webkul store, you will receive the link to download the zip file of the module.
2.) Extract the file on your system after the download finishes. You will be able to see a folder named- “pos_change_product_view”.
3.) Copy and paste this folder inside your Odoo Add-Ons path.
4.) Now, open the Odoo App and click on the Settings menu. Here, click on Activate the Developer Mode.
5.) Then, open on the Apps menu and click on the ‘Update Modules List’.
6.) In the search bar, remove all the filters and search “pos_change_product_view”.
7.) Now you will be able to see the module in the search result. Click on ‘Install’ to install it.
WORKFLOW
Back-end
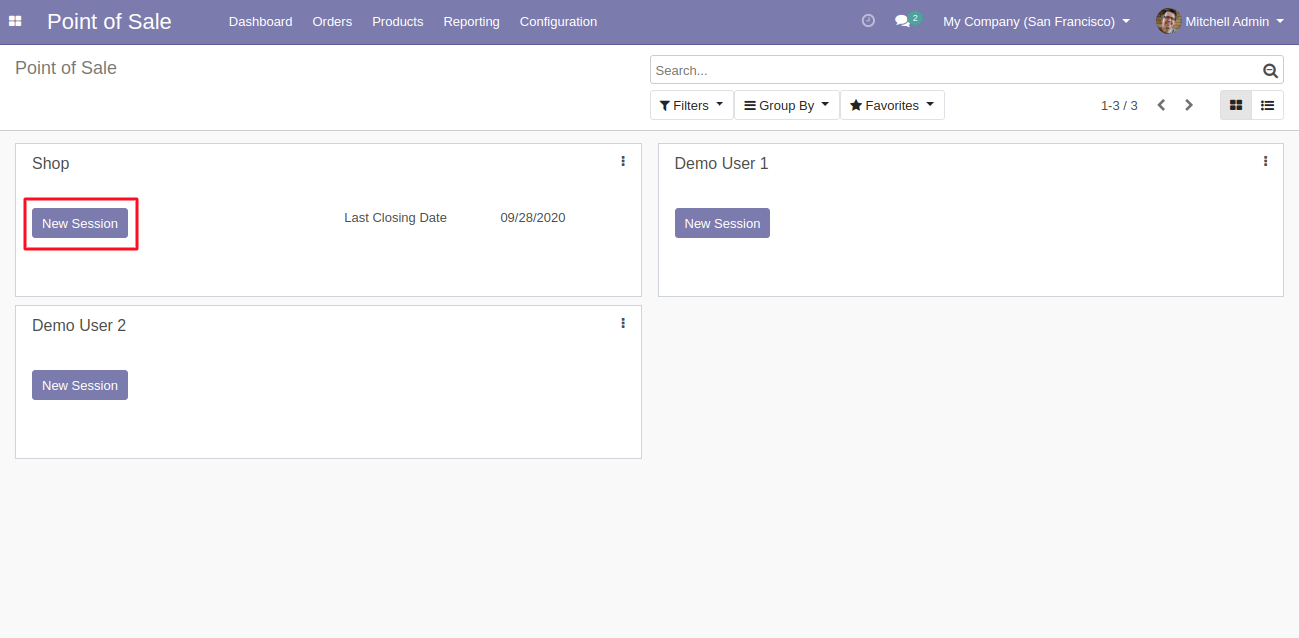
1. Initially, login to your Odoo database and then navigate to the Point Of Sale.
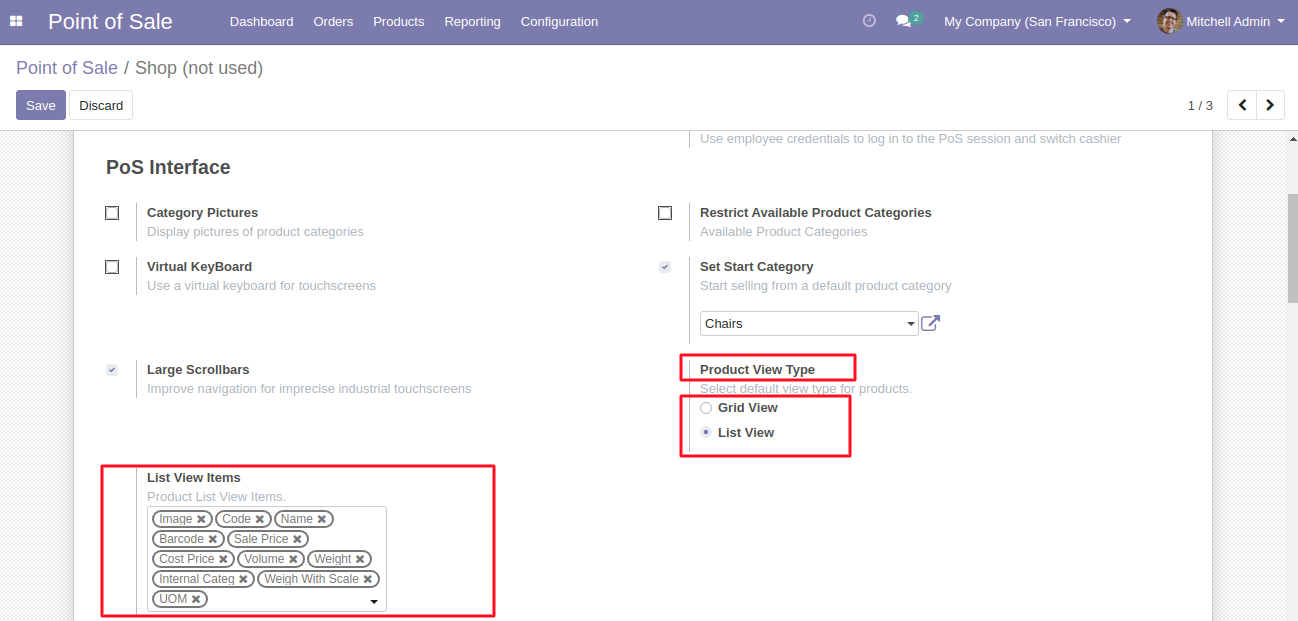
2. Navigate to the settings by clicking on the ellipsis.

3. Now, scroll down under the ‘POS Interface’ section and enable the ‘List view’ and the following information about a product will be shown on the POS front-end.
4. Now, you can launch the POS session.
Front-end
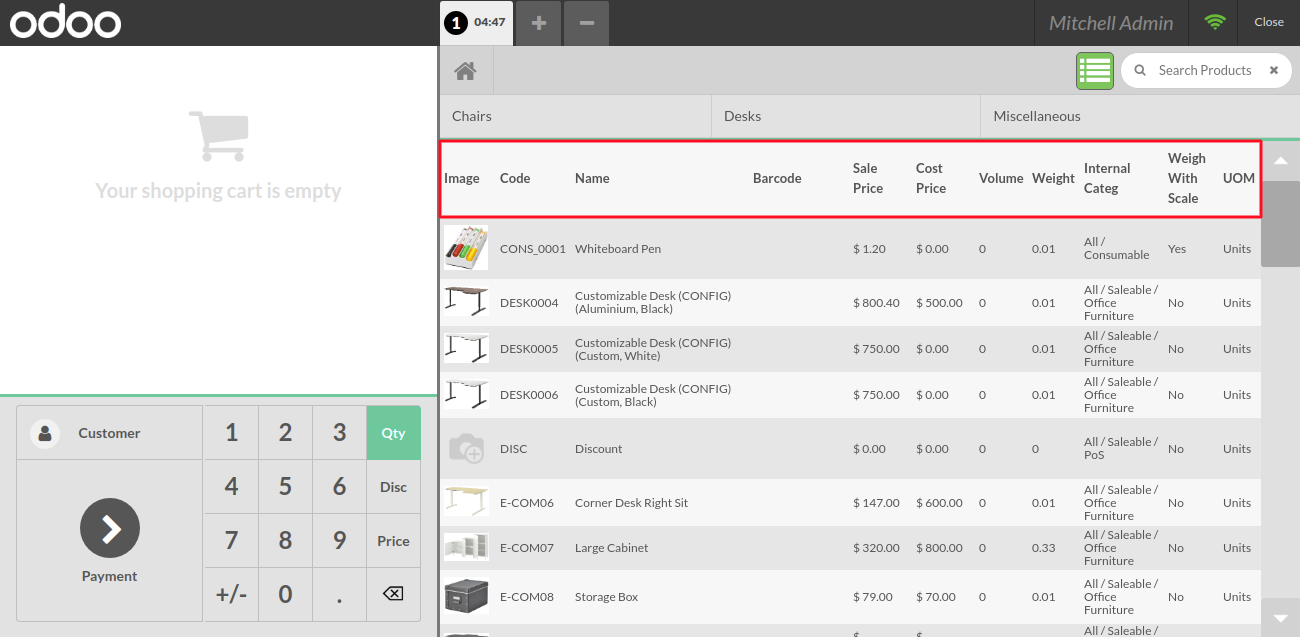
5. Here, you just need to click on the ellipsis to change the product view between Grid View & List View.

6. Now, the product view has been changed into ListView. The cashier can see products details:
- Product Cost Price.
- Volume Weight.
- Weight With Scale.
- Unit Of Measure.
Also Read The User Guides For The Other Modules
NEED HELP?
Was this guide helpful? Please share your feedback in the comments below.
If you have any issues/queries regarding the module please raise a ticket at https://webkul.uvdesk.com/en/customer/create-ticket/
For any doubt contact us at [email protected].
Thanks for reading!!
Current Product Version - 1.0.0
Supported Framework Version - Odoo V13

Be the first to comment.