Odoo Demand and Supply Forecasting helps you make smarter inventory decisions using historical sales data and advanced forecasting models.
With this module, you can generate accurate forecasts, identify seasonal demand spikes, and replenish inventory before shortages occur.
This module provides the insights you need to plan Odoo inventory with confidence. In this guide, we will cover the setup, features, and the full module workflow.
Features of Odoo Demand and Supply Forecasting
- Create forecasting reports from e.g. MIN, MAX, SMA, ARIMA, ETS, SES, and Prophet.
- Event-based forecasting for festivals, e.g. Diwali, Christmas, and Eid.
- Multi-view analytics across Kanban, List, Graph, Pivot, and Form.
- Replenish purchase & manufacturing orders directly from the forecast dashboard.
- Dual data analysis combining regular sales history and event data
- Track RMSE, MAE, and accuracy percent for every forecast to compare model performance.
- Flexible filtering by product, date range, or specific event type.
- No coding needed, fits right into your existing Odoo setup.
Installation Process
1. Once you purchase the App from the Webkul store, you will receive a link to download the module’s zip file.
2. Extract the file on your system after the download finishes. You will see a folder named ‘wk_demand_and_supply_forecasting’.
3. Copy and paste this folder into your Odoo Add-Ons path.
4. Now, open your Odoo app and click on the Settings menu. Here, click to activate Developer Mode.
5. Then, open the Apps menu and click on ‘Update Modules List.’
6. In the search bar, remove all filters and search for ‘wk_demand_and_supply_forecasting’.
7. You will see the module in the search results. Click on ‘Install’ to install it.
Workflow
1. Soon after installing the Odoo Demand and Supply Forecasting module. Then, go to Home> Open module. In this window, you can forecast new demands.
But before creating a forecast report, create some events. So you can forecast reports based on seasonal events that spike demand.
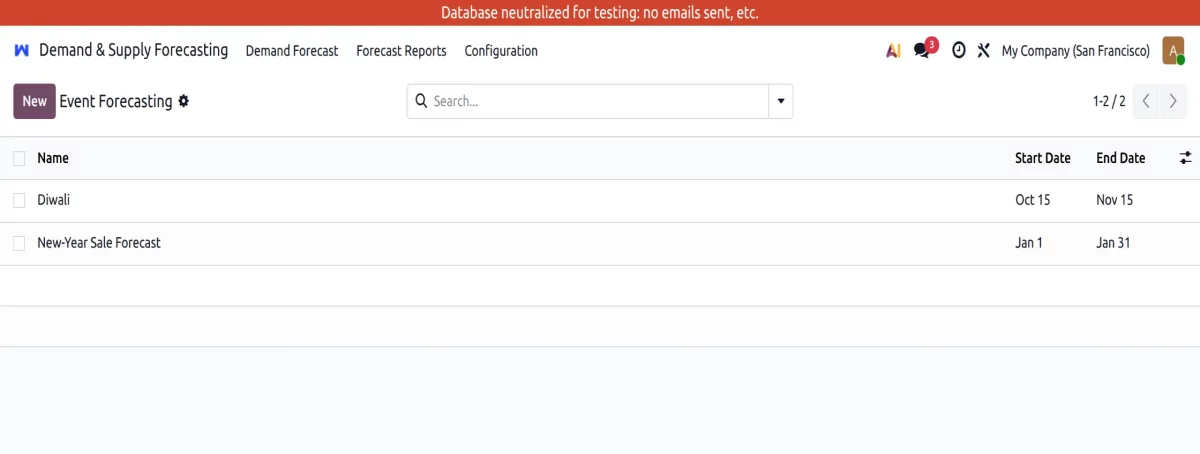
2. To create events, go to the Configuration tab and view your existing events. Then click on New to create a new event.
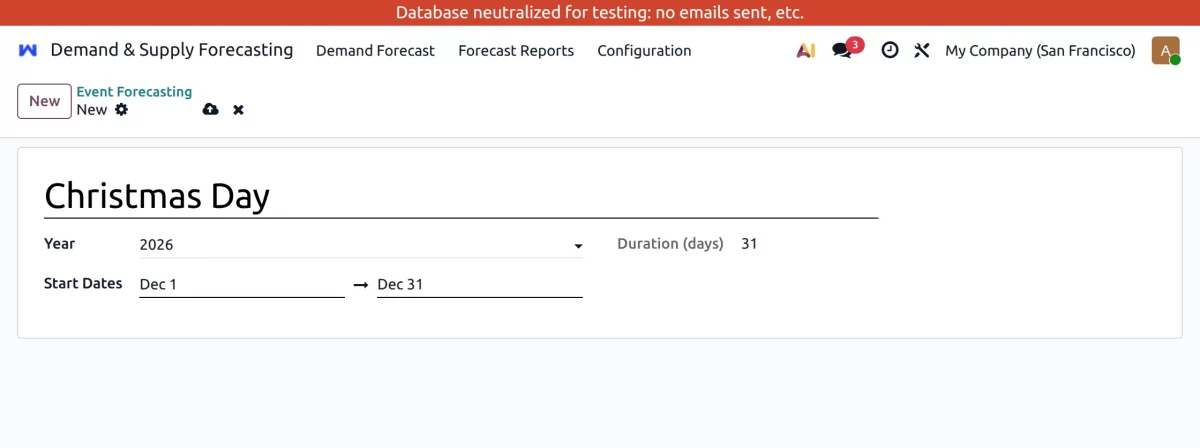
3. Add the event name, select the year, and enter the event duration. You can also check out Odoo Events All in One module if you want to manage or organize your events from one place.
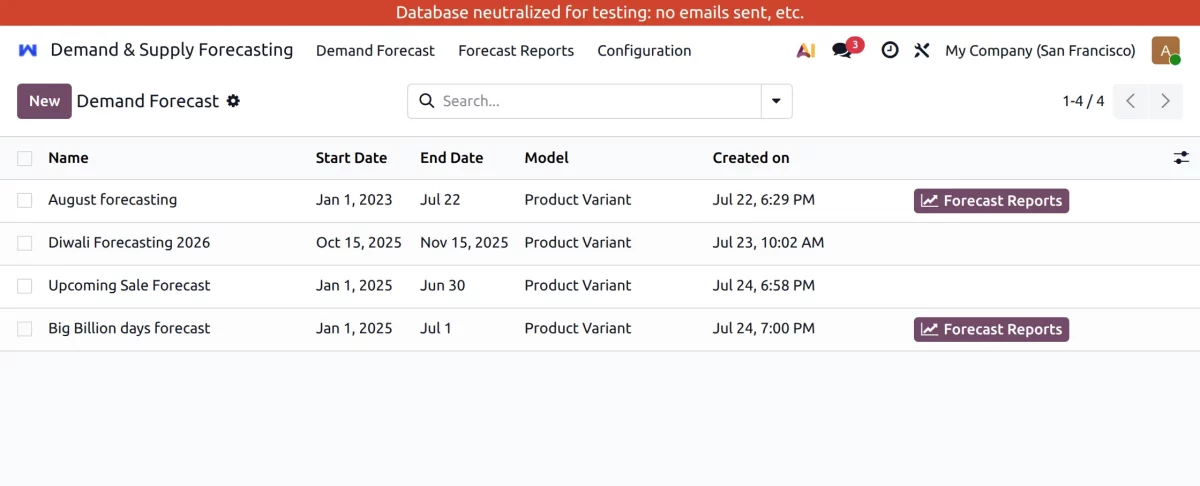
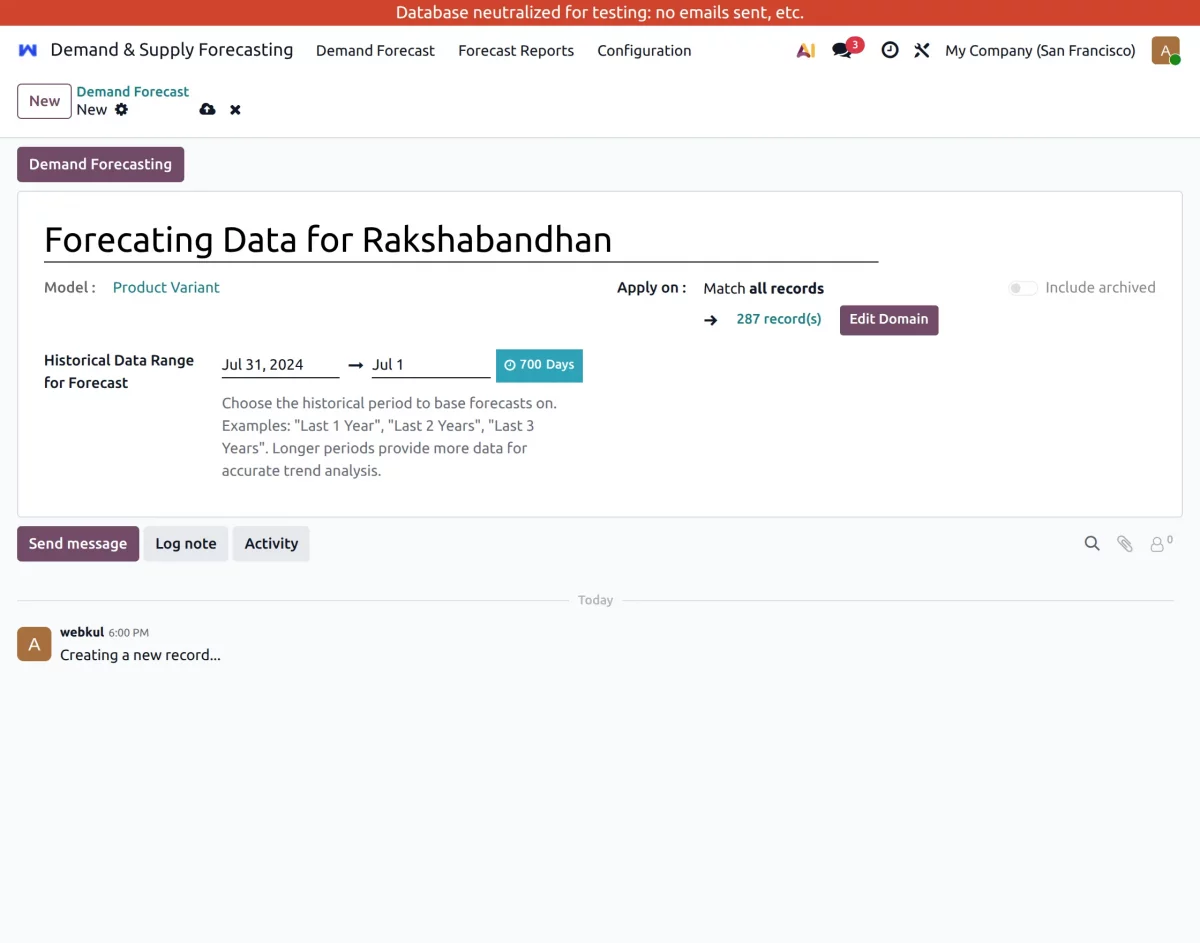
4. Further, go back to the Demand Forecast tab and click on the New button to create a new forecast report.
Here, name your forecast report and select the historical data range to analyze for forecasting. After that, click on the Demand Forecast Button.
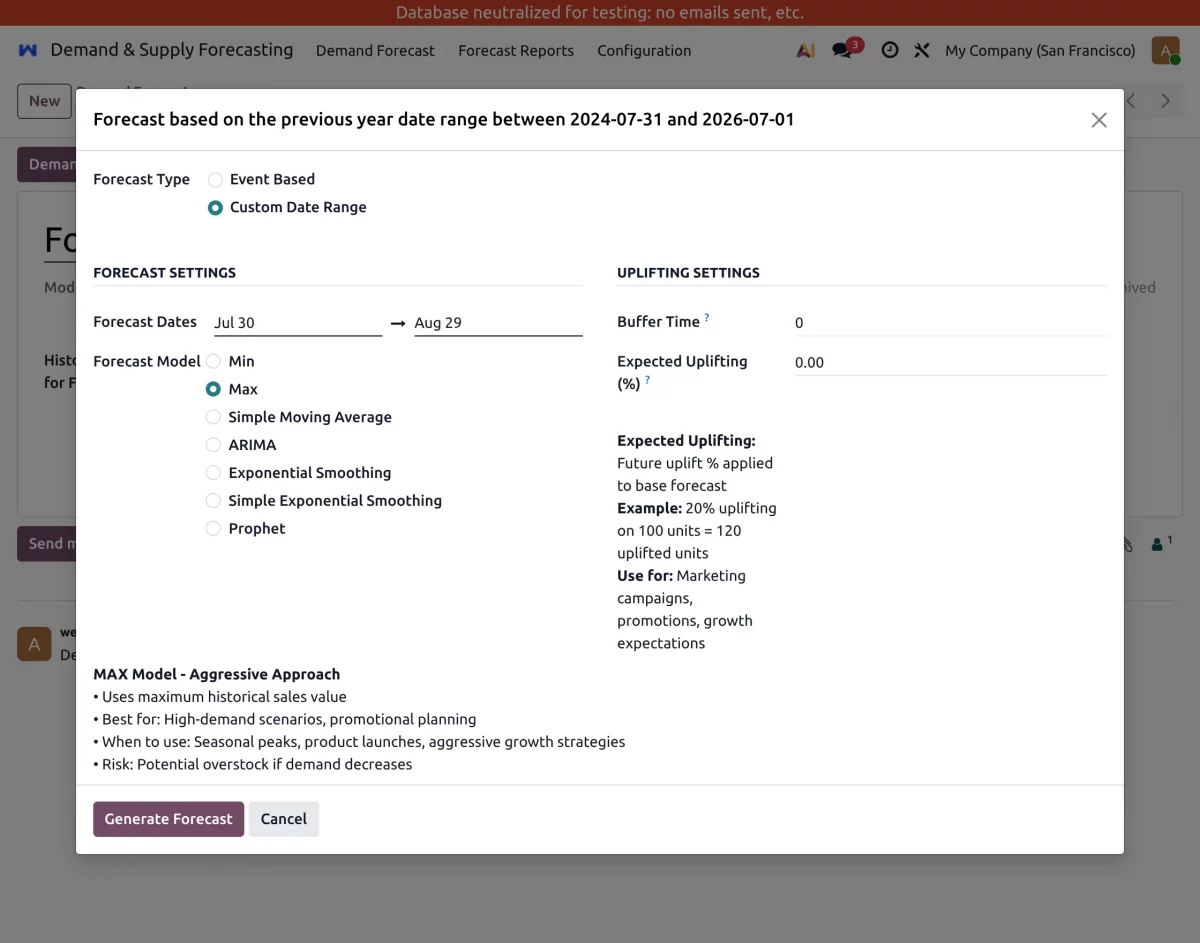
5. In this new window, select the forecast type – you can select from the event that you had configured earlier or select from a custom date range.
Then, choose from different baseline methods and advanced forecasting models to generate a forecast report. You can also get more context about the models from the text below.
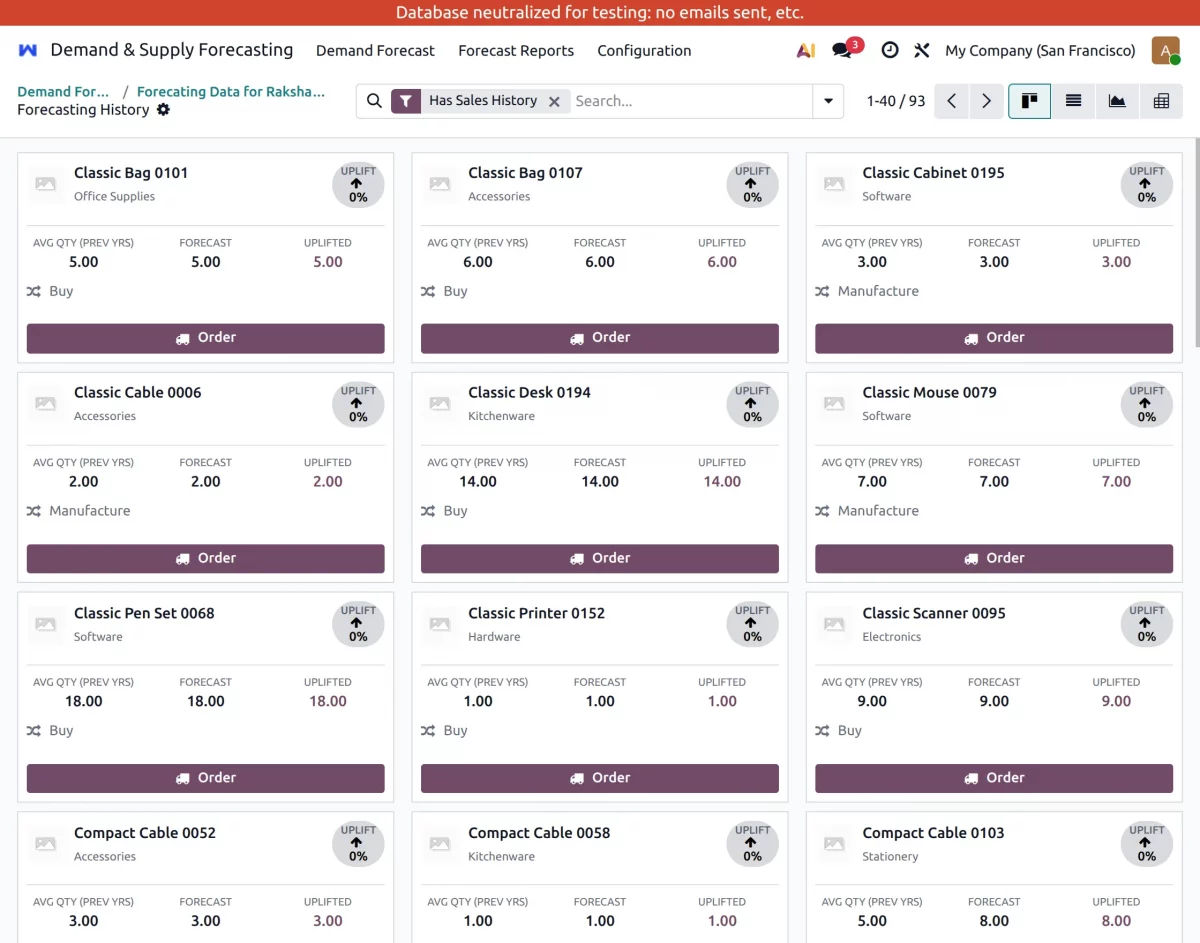
6. After that, In this window, Odoo Demand and Supply Forecasting modules enable their users to evaluate the forecasting report in multiple views. This report view is in Kanban.
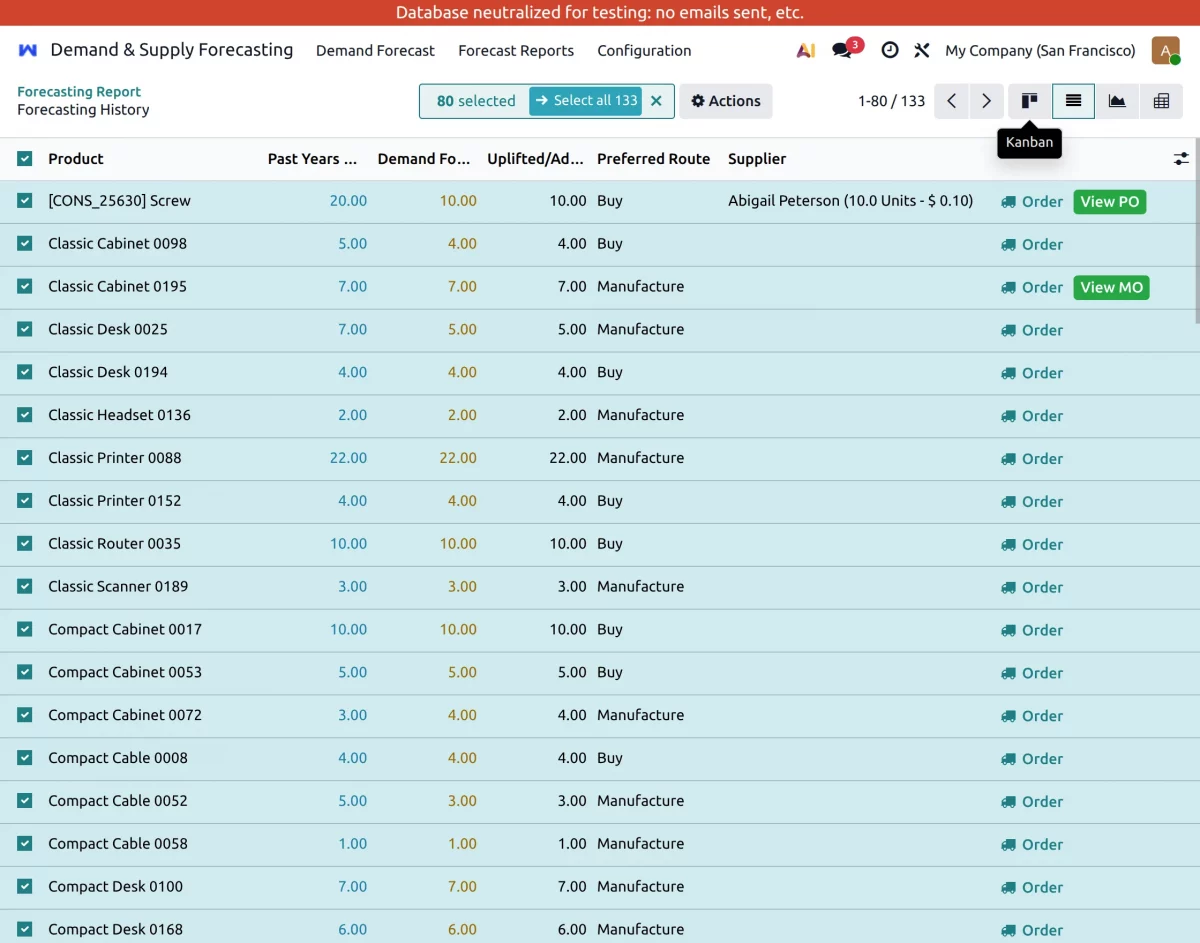
7. If you want to view the report in list view. Switch to the list tab. Further, to download the report as a PDF, select the products and then click the Print button.
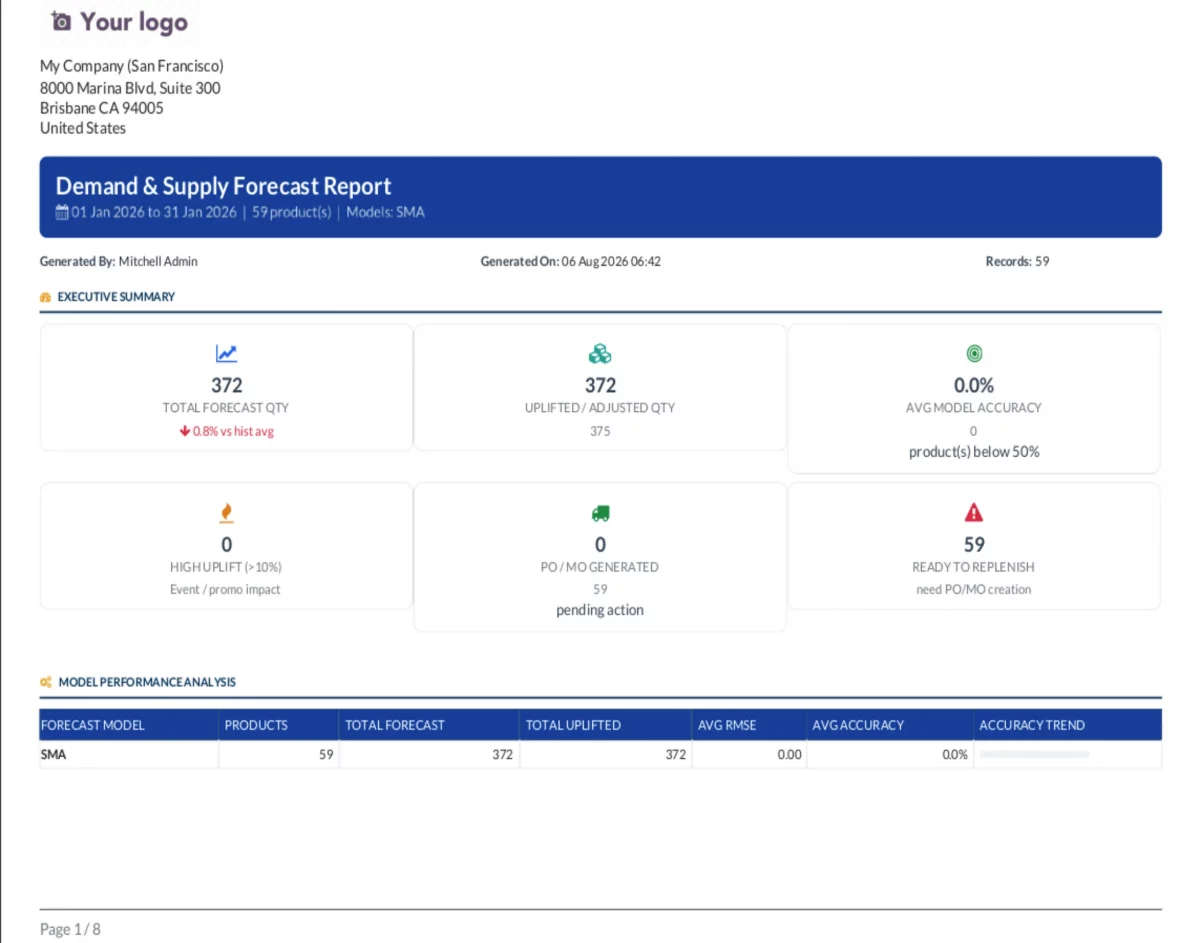
8. After that, your forecast report will be downloaded as a PDF.
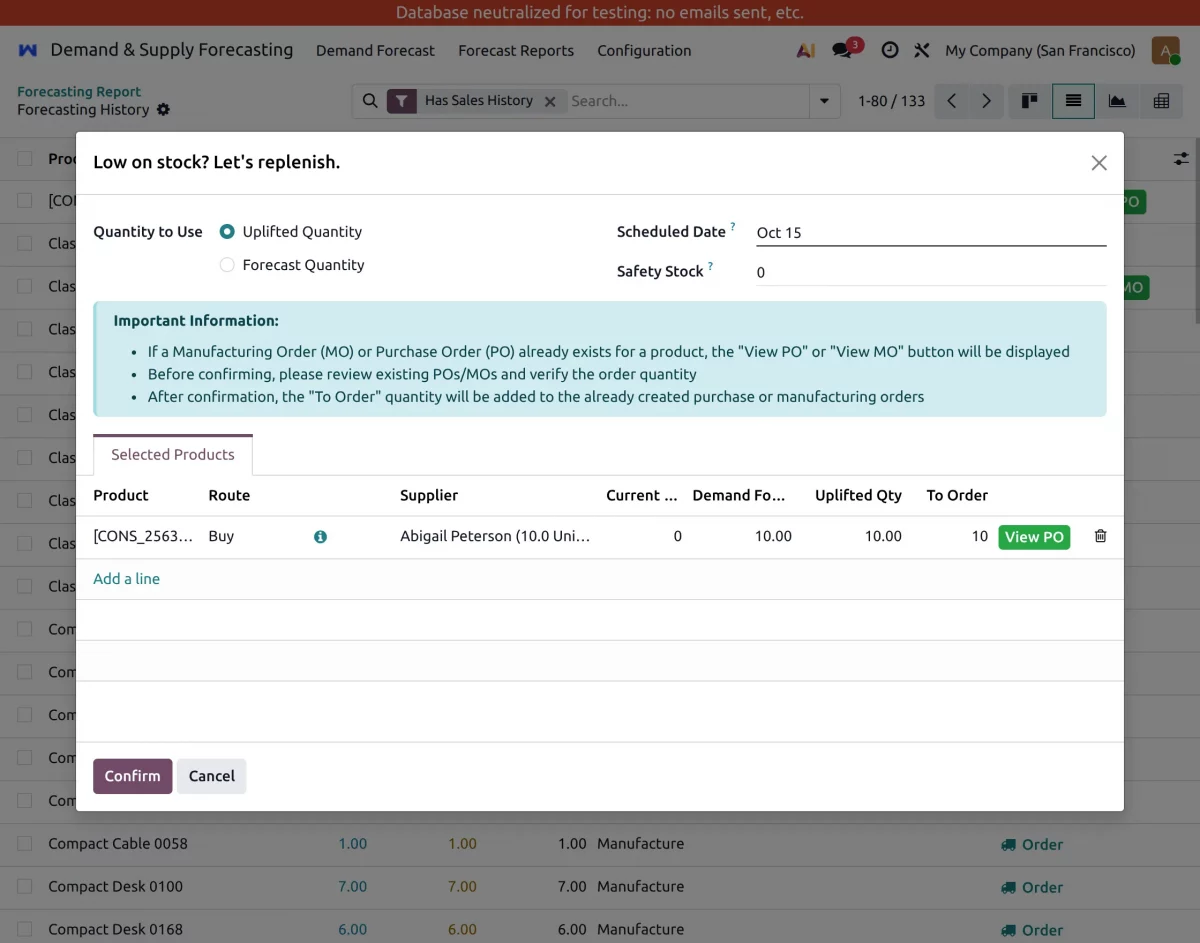
9. Afterwards, replenish inventory directly from forecast results. To do that, click on the order button in the forecast report above and create purchase and manufacturing orders without changing the platform.
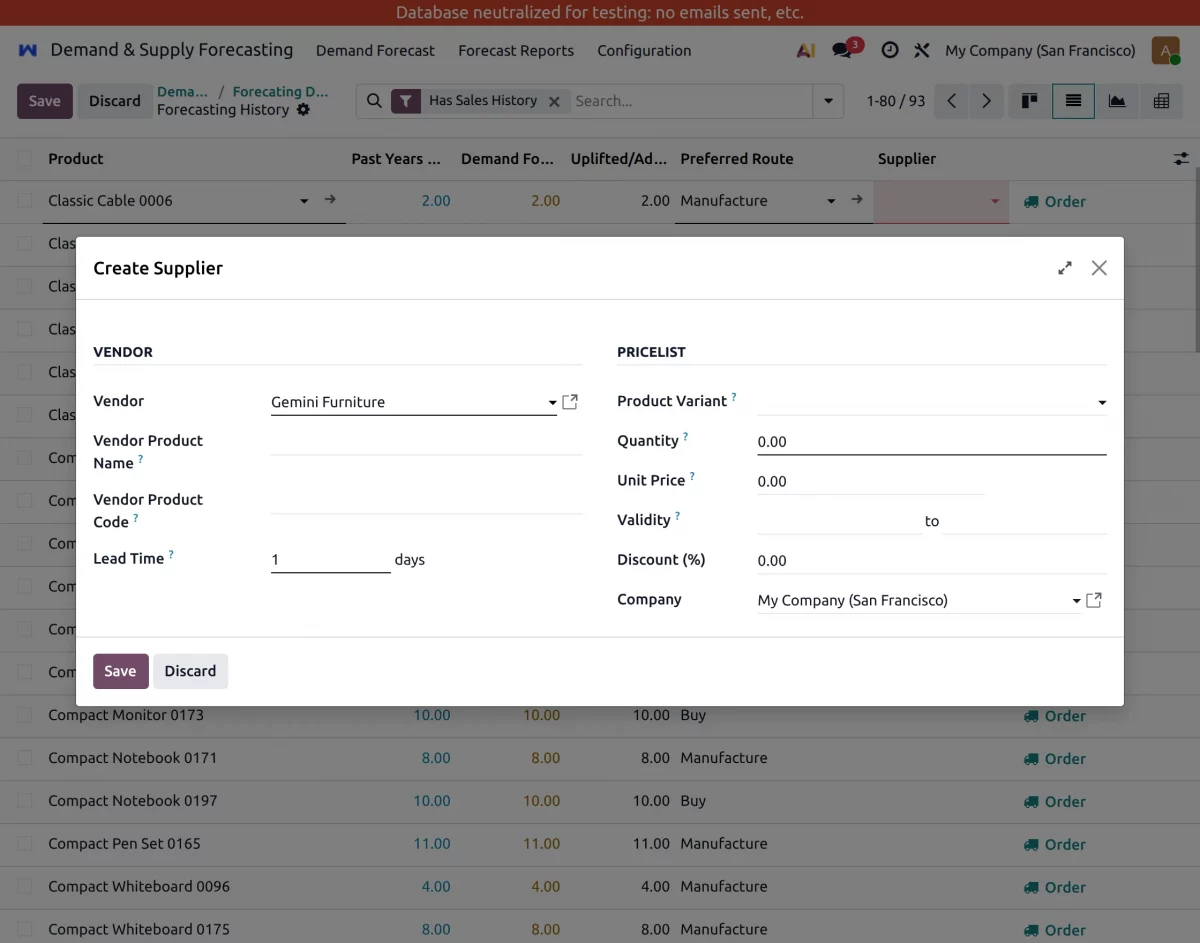
10. Furthermore, you can also create a supplier for the products from the same forecast dashboard.
To do that, click on the supplier column for any preferred product cell. A create option will pop up; here you can fill in and save the supplier’s details.
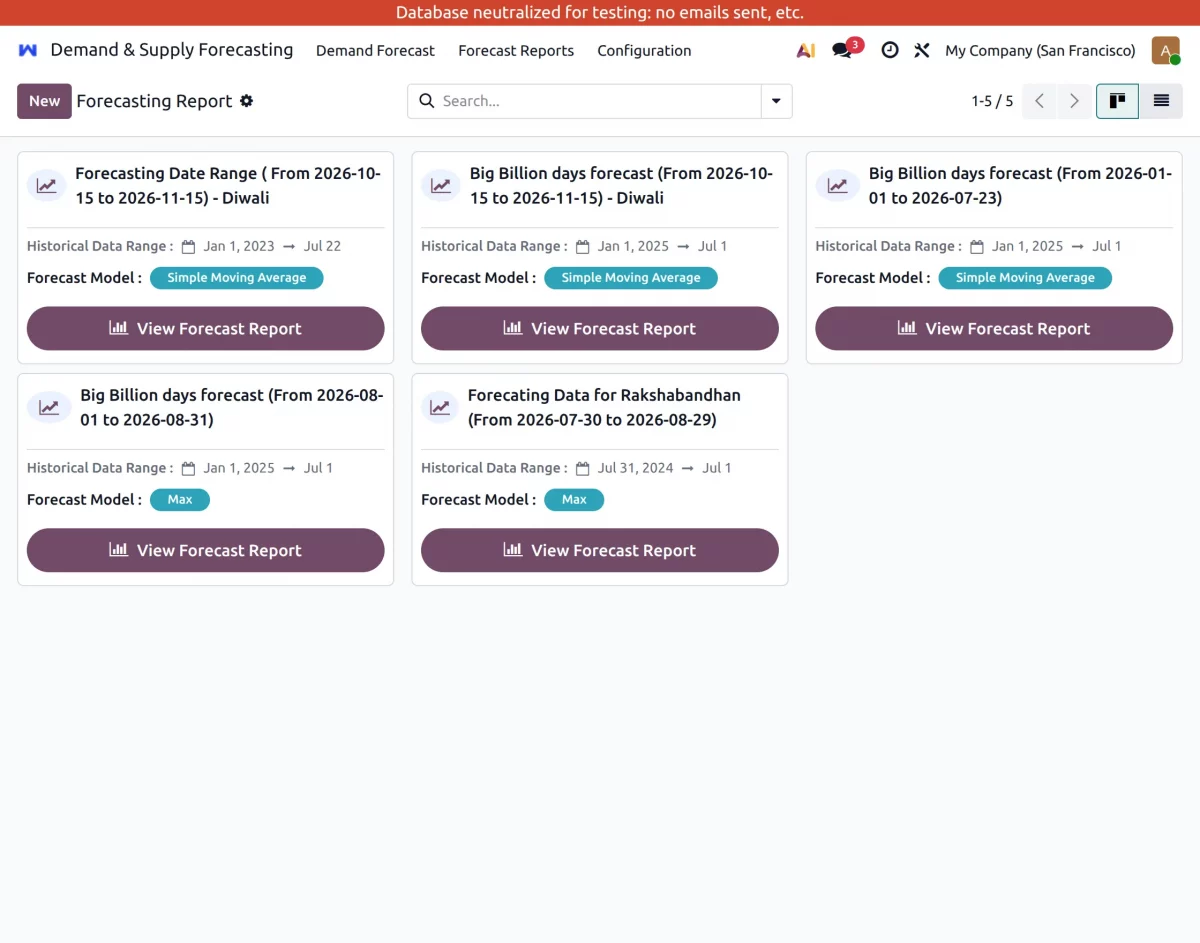
11. Finally, if you want to see the forecast history report. Go to the Forecast Report tab and view the complete forecast details.
Need Help?
Hope you find this guide helpful! Please feel free to share your feedback in the comments below.
If you still have any technical queries or need a custom feature, please raise a ticket or contact us at [email protected].
Current Product Version - 1.0.0
Supported Framework Version - 17.0,18.0,19.0

Be the first to comment.