Introduction
Odoo POS Paystack Terminal Integration helps businesses accept card payments through Paystack payment terminals in Odoo POS. It provides a fast and convenient checkout experience.
Odoo POS Paystack Terminal Integration sends payment requests from Odoo POS to Paystack terminals and receives payment results automatically. This reduces manual work and speeds up transactions.
It allows customers to pay directly on the payment terminal while payment status updates automatically in Odoo POS, helping staff complete orders quickly and efficiently.
Features
- Connect Paystack terminals with Odoo POS easily.
- Configure Paystack API details in Odoo.
- Send payment requests directly from the POS screen.
- Take card payments through Paystack terminals.
- Get payment updates automatically in Odoo POS.
- Receive real-time payment notifications through webhooks.
- Store Paystack transaction records in Odoo.
- Track payment history and transaction status easily.
- Reduce manual work during checkout.
Installation
- Once you purchase the App from Webkul store, you will receive a link to download module’s zip file.
- Extract the file on your system after download finishes. As a result, you will be able to see a folder named- ‘pos_paystack_terminal_integration.’
- Copy and paste this folder inside your Odoo Add-Ons path.
- Now, open Odoo App and click on the Settings menu. Here, click on Activate Developer Mode.
- Then, open Apps menu and click on ‘Update Modules List.’
- In the search bar, remove all the filters and search ‘pos_paystack_terminal_integration.’
- You will be able to see module in the search results. Click on ‘Activate’ to install it.
Workflow
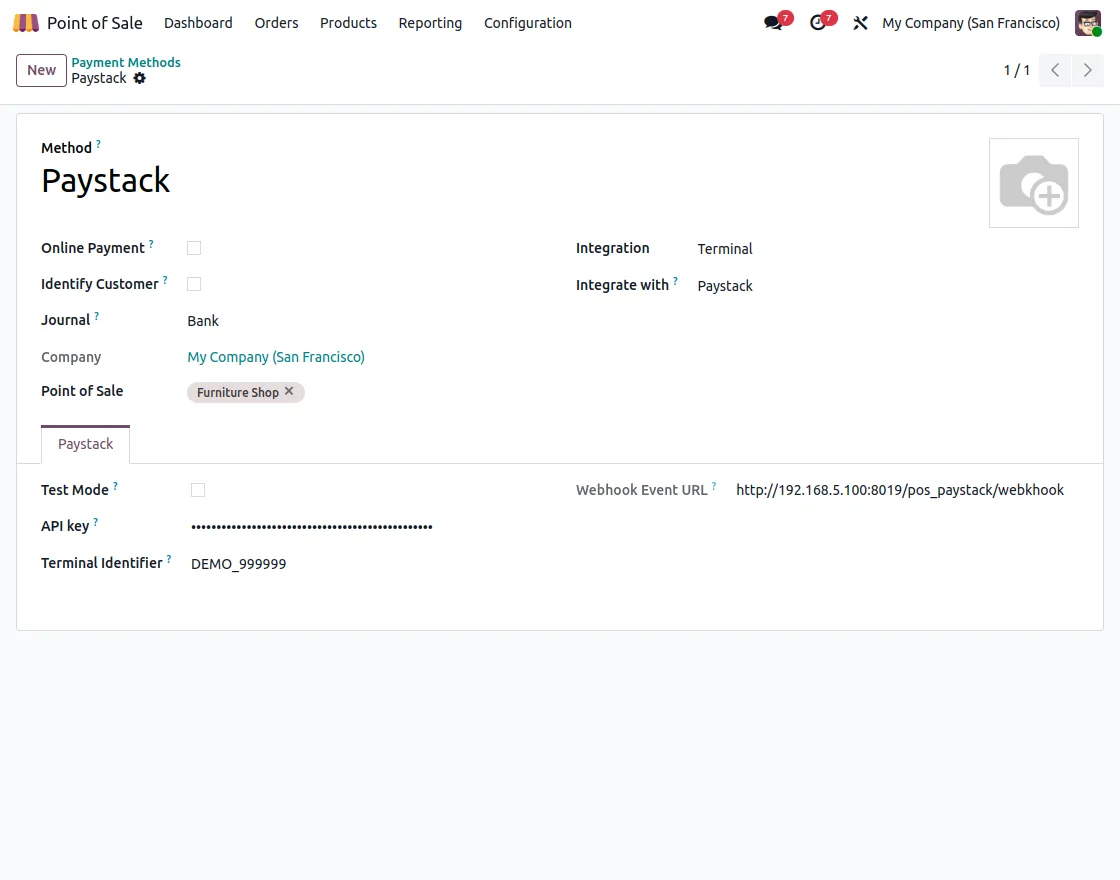
- After installing Odoo POS Paystack Terminal Integration, navigate to the payment method configuration and enter the Paystack API details and save them.
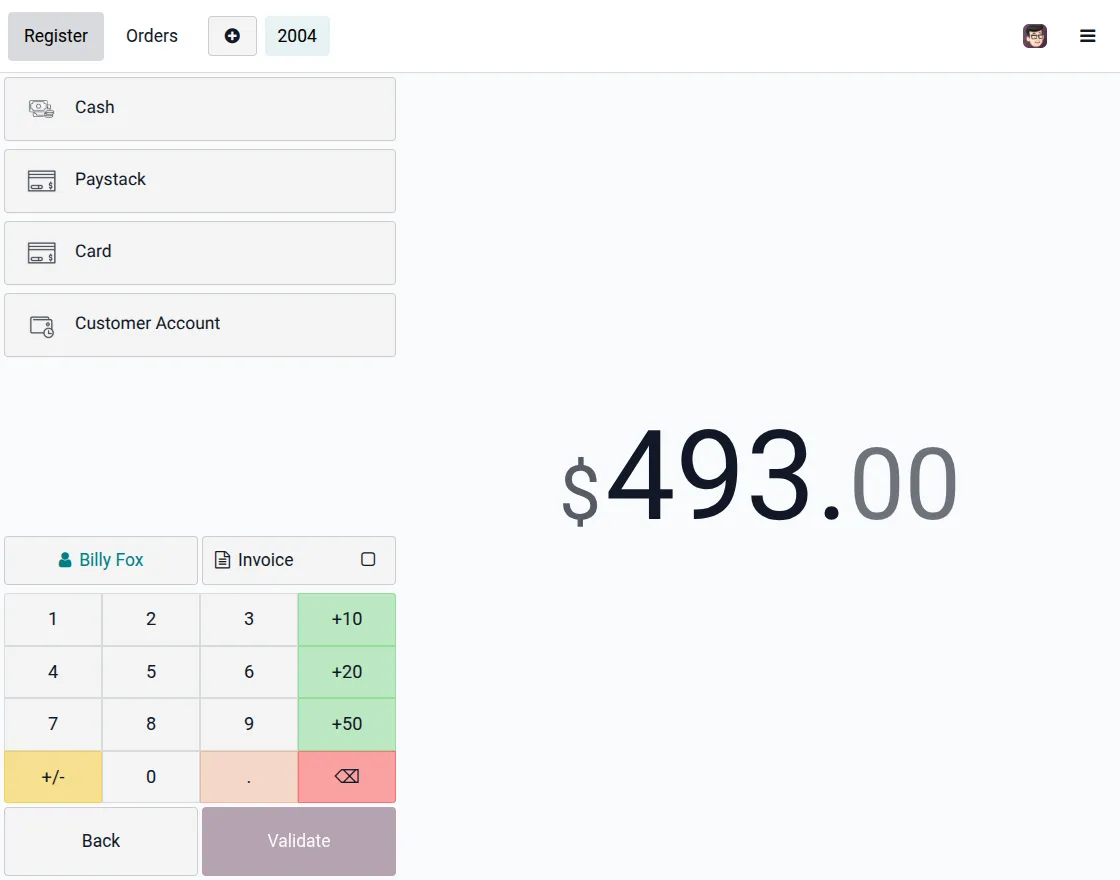
2. After setting up the payment method, you can see the Paystack payment option on POS screen.
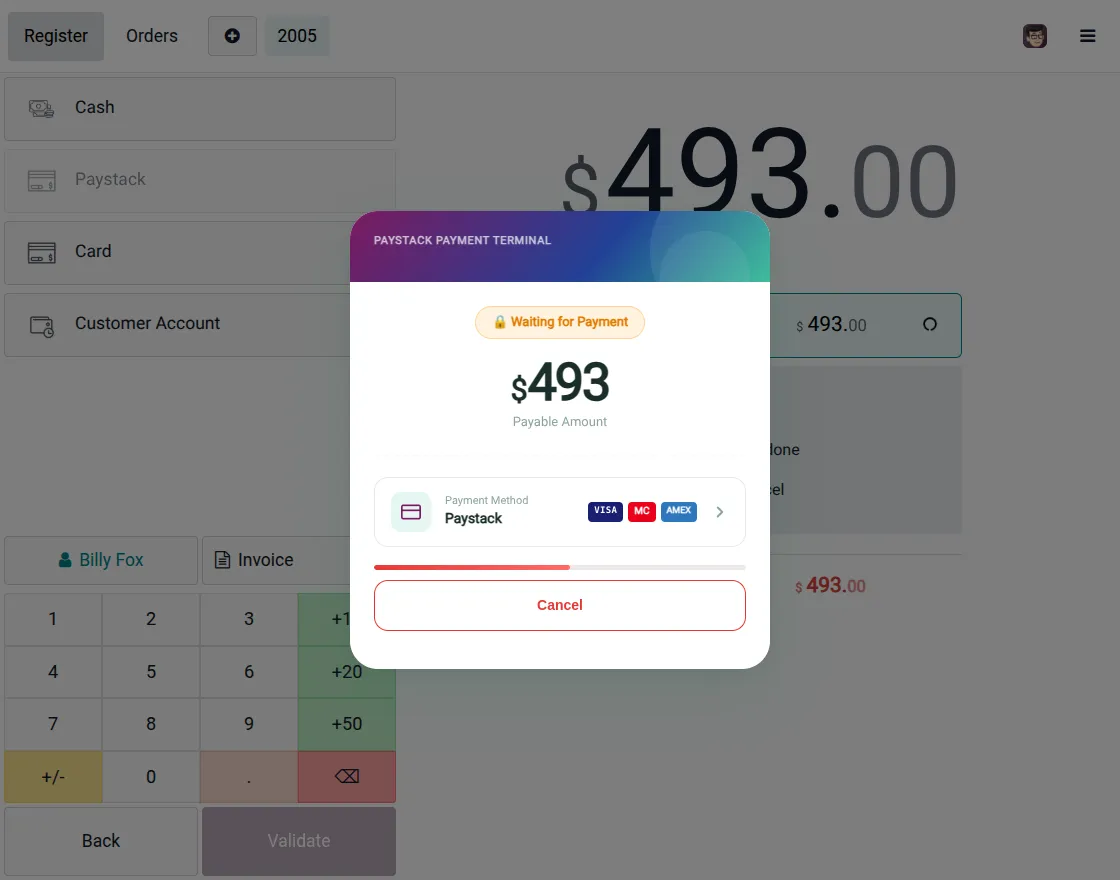
3. After selecting the Paystack payment method, the payment amount is sent to the assigned terminal, where the customer can complete the payment securely.
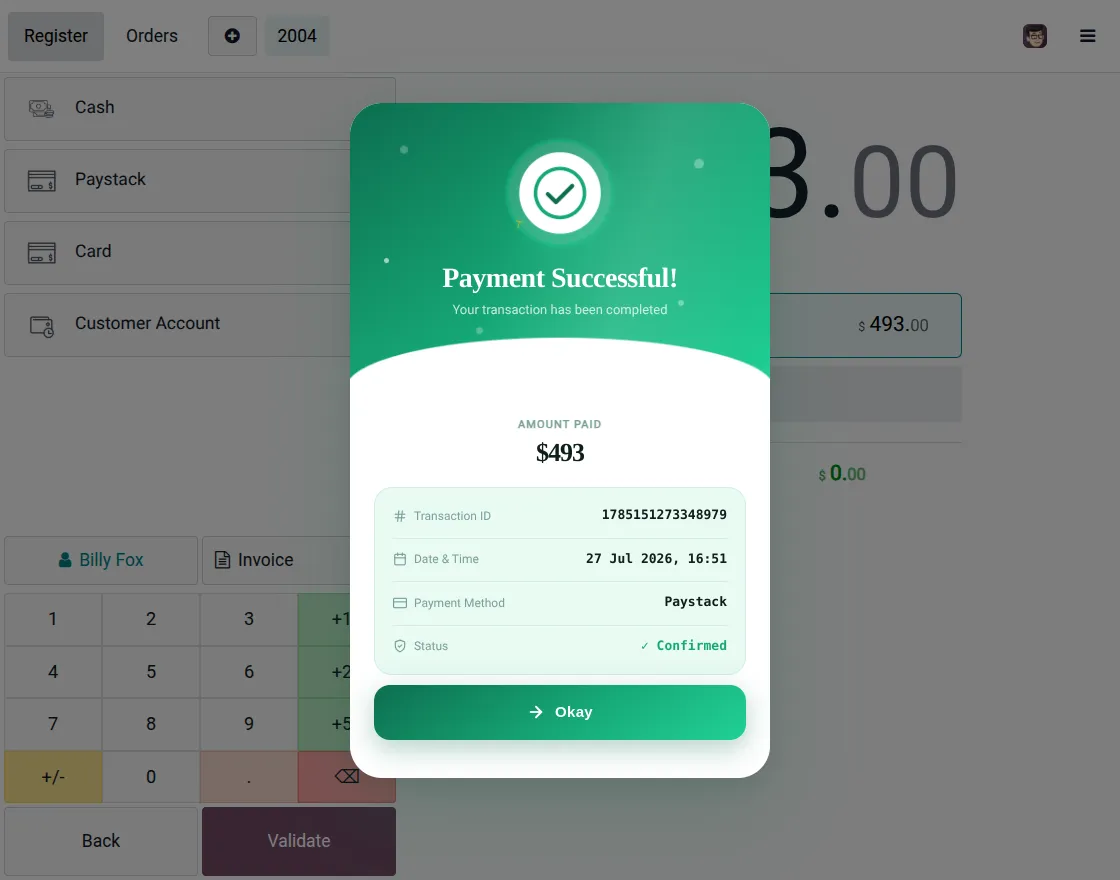
4. After successful payment on the Paystack terminal, Odoo POS receives the confirmation and displays the completed transaction details.
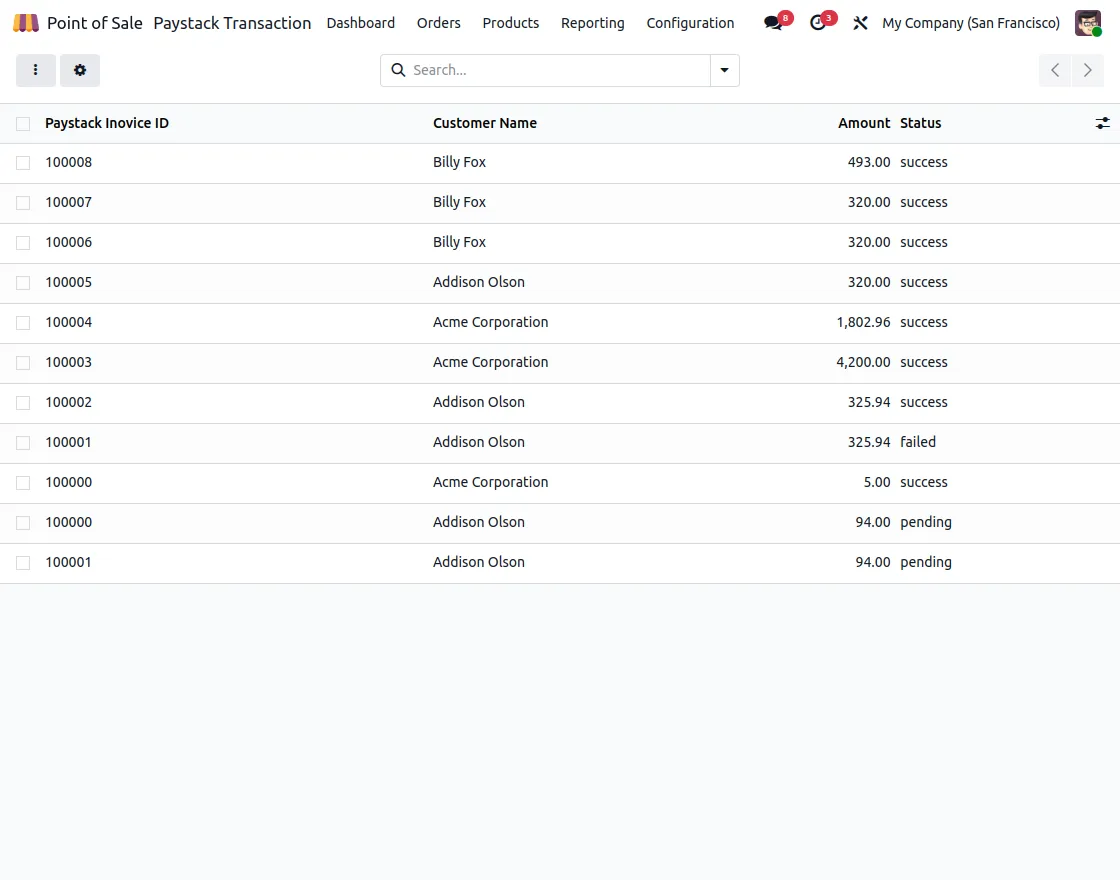
5. View and manage all Paystack transactions directly from the Odoo backend, including transaction IDs, customer names, amounts, and payment status.
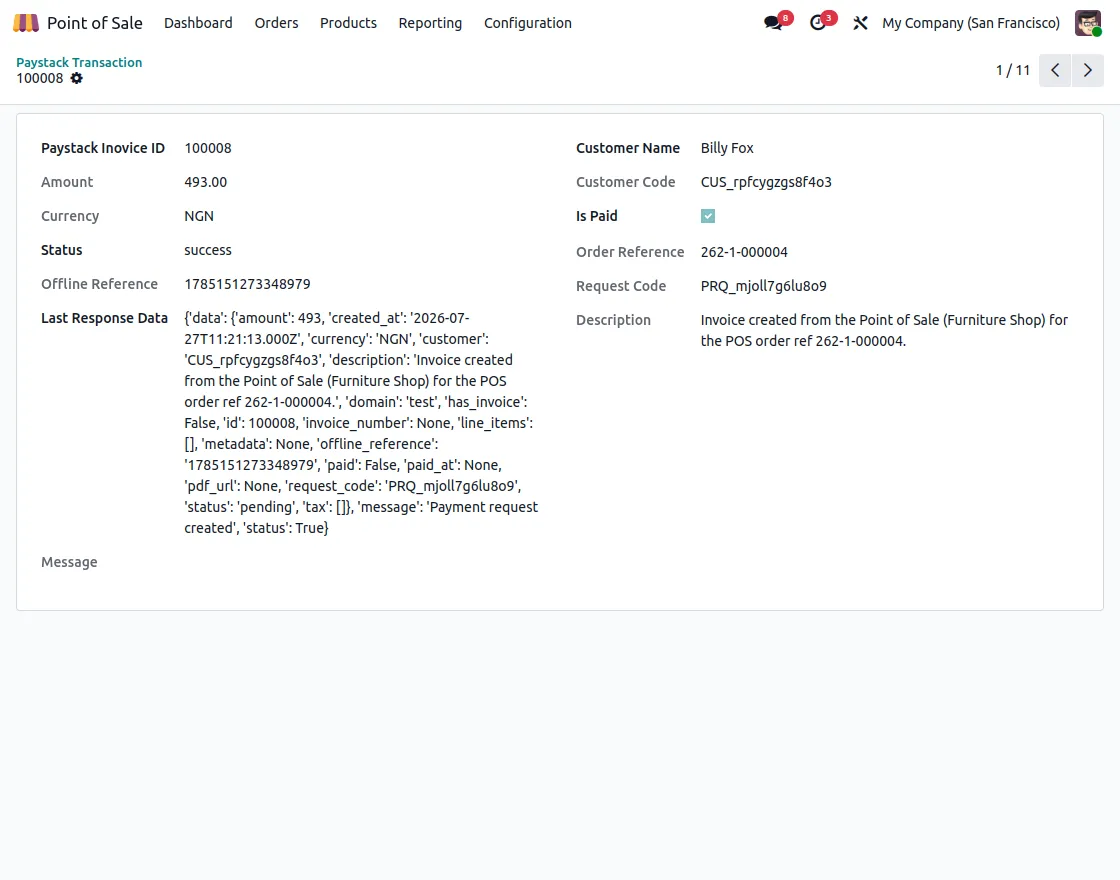
6. View detailed Paystack transaction records and manage payment information directly from the Odoo backend.
Need Help?
Hope you find guide helpful! Please feel free to share your feedback in the comments below.
If you still have any issues/queries, please create a ticket at the UV Desk.
I hope this helps. In case of any further queries, contact us at our support mail.
Thanks for paying attention!!
Current Product Version - 1.0.0
Supported Framework Version - Odoo V19, V18, V17

Be the first to comment.