Here is the solution to allow them to sync their Shopify store products with your Shopify store. “Create an app for your sellers” by enabling the Seller Shopify store Connector feature app.
If your sellers also have Shopify stores, and they want to add products from their respective stores to the Admin Shopify Store
Then you can use the Seller Shopify store connector, a featured app of the Multi-vendor Marketplace app.
You can get this featured app at a monthly subscription of $40 (USD) in addition to your current multivendor app plan.
Features
- Let the marketplace sellers sync their Shopify store products with the admin’s Shopify store.
- Also, the Seller’s Shopify store’s inventory will be synced with the admin Shopify store.
- Further, the seller needs to create a private app on their Shopify store and configure the details in his/her seller panel.
- Order and inventory sync automatically on both the admin and seller Shopify stores.
- Moreover, sellers can now update products in bulk from the “products” section of the seller app.
- The sellers can register webbooks on their own based on their permission.
- Compatible with the Partial Fulfilment feature.
- Smart collections can now be imported from the seller’s Shopify store into the Multi-vendor app via this Seller Shopify store connector add-on. Know About the Collection Sync Process
- Tags can be mapped via a CSV file upload.
Check the video below for the Seller Shopify Store Connector:
Activate the Feature App
To get this feature app, go to the Feature App section & get the “Seller Shopify store connector” feature app.
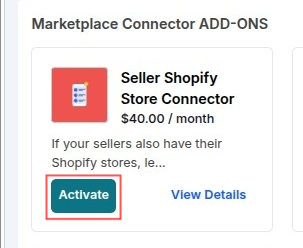
Click the Activate button to activate the Seller Shopify Store Connector feature app.
Approve the charge & get the feature to your marketplace.
Now, as soon as the Seller Shopify Connector feature app is Active, the sellers will get a new menu to the configuration menu of their respective Seller panels.

NEW WORKFLOW
To use the features of the seller Shopify connector app, the seller needs to create a custom app for their Shopify store.
Note – This new workflow is only compatible with the new theme “Zenith”of the multivendor marketplace.
How to create a custom app?
Seller have to log in to their dev dashboard through dev.shopify.com and then log in to the store.

After logging in to the dev dashboard with your store, click on the create app button.

Enter the name and click on the create button.

You will be redirected to the Create a version page, where you have to fill in the necessary details.

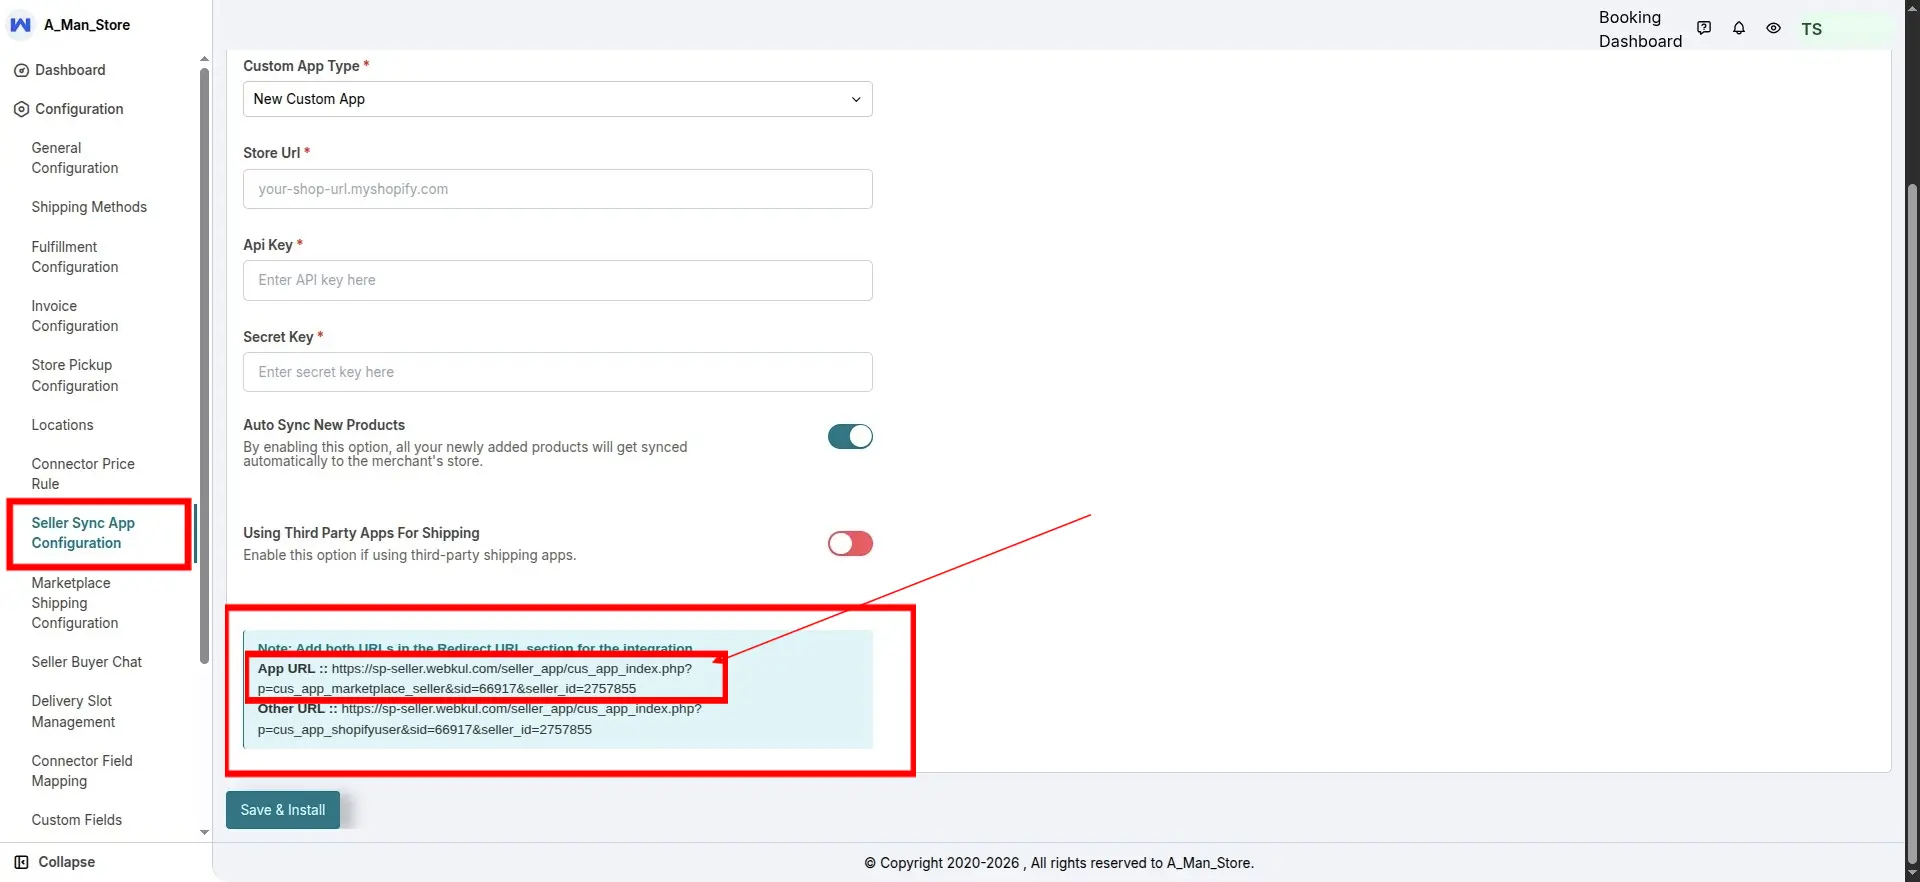
Now, scroll down and fill in the URLs section.
Follow these steps to find the App URL and Preference URL:-
- You have to log in to the multivendor seller portal >> go to the “Seller sync app configuration” inside the Configuration menu >> copy the App URL from there >> paste it into the App URL and Preferences URL block.
And, paste the link here and uncheck the “Embed app in Shopify admin” option.

Note:- Change the Webhook API version to 2026-04.
Now, go back to the “Seller sync app configuration” in the seller portal and copy the “Other URL” under the App URL.
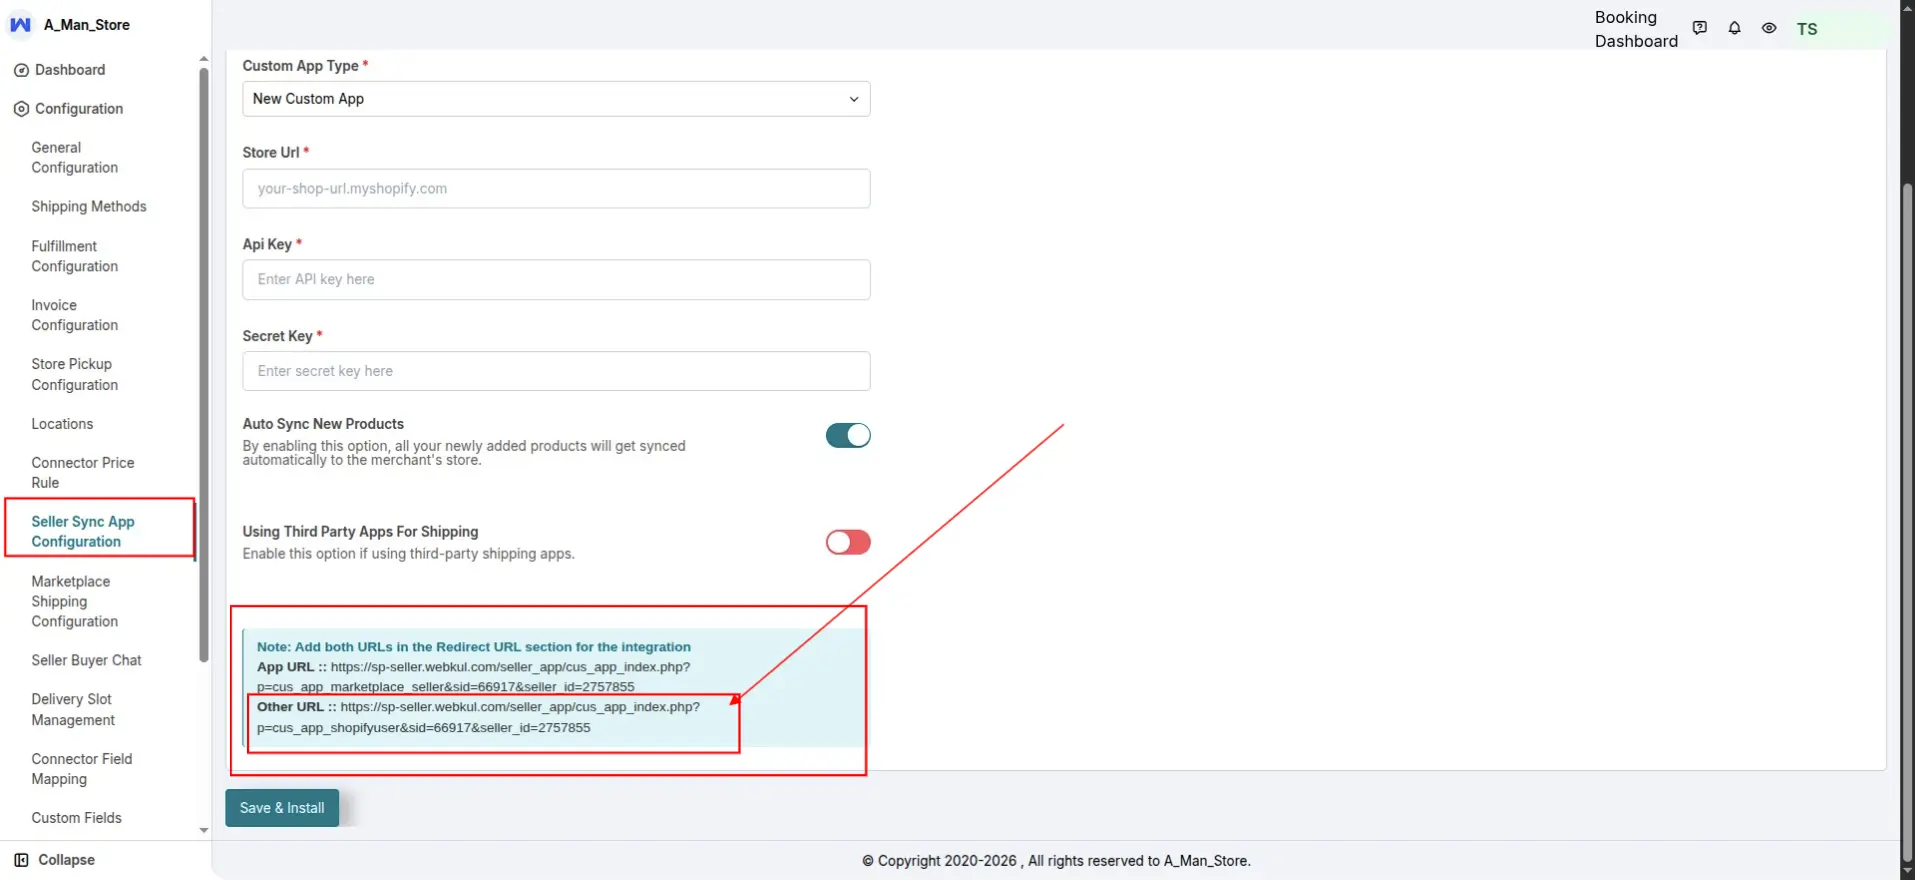
And, paste it here in the Redirect URL along with the App URL. Only use a comma ( , ) to separate them.

REQUIRED PERMISSIONS FOR CUSTOM APP (New Workflow)
Here are the required permissions for the custom seller app:
Assigned fulfilment orders (Read and write)
# write_assigned_fulfillment_orders , read_assigned_fulfillment_orders
Fulfilment services (Read and write)
# read_fulfillments, write_fulfillments
Inventory (Read and write)
# read_inventory, write_inventory
Locations (Read Access)
# read_locations
Order Editing (Read and write)
# read_orders, write_orders
First, allow this permission if you want any edits made on the merchant’s store to be automatically synced with the seller’s store.
As a result, the seller will always see the most up-to-date order details.
Orders (Read and write)
# read_orders, write_orders
Products (Read and write)
# read_products, write_products
Markets
# read_markets_home
Customer permissions
#read_customers,write_customers
Now, copy these required permissions and paste them into the scope block altogether:-
write_assigned_fulfillment_orders,read_assigned_fulfillment_orders,read_fulfillments, write_fulfillments,read_inventory,
write_inventory,read_locations,read_orders, write_orders,read_products, write_products,read_markets_home,read_customers,write_customers

Then, click on Release. A field to enter the version name will appear. You can fill it in or leave it blank; the name will be auto-generated. Click on release.

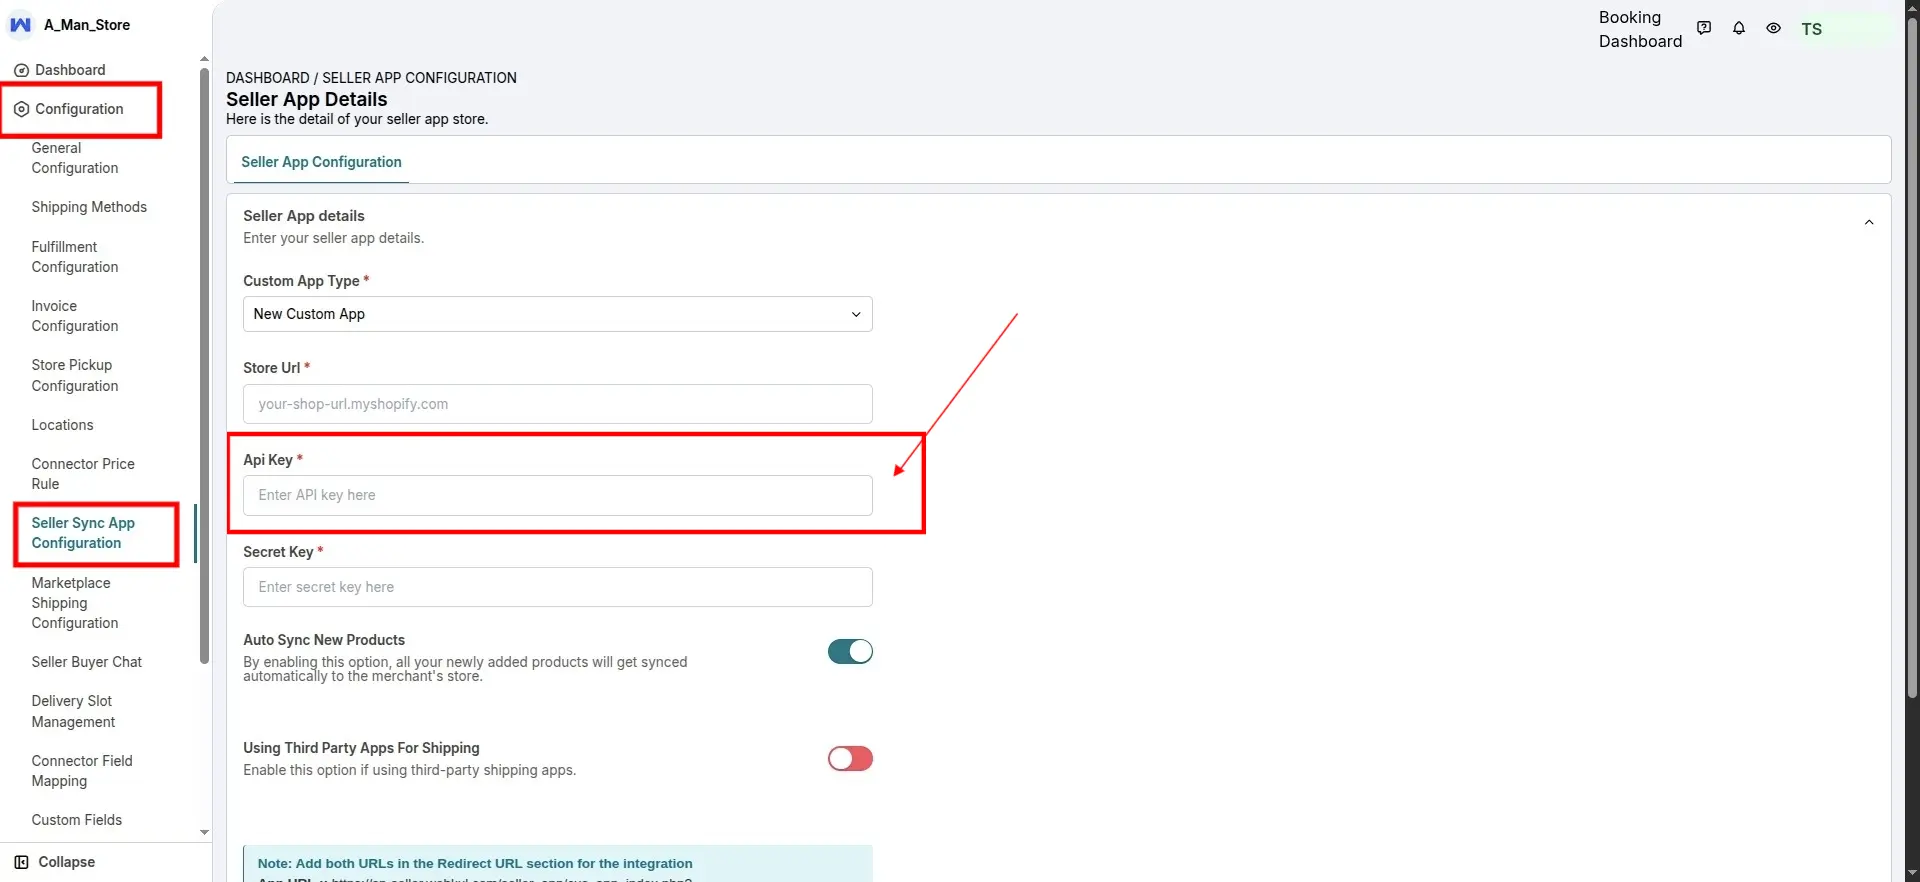
Go back to your dev dashboard, open the app you just created, and navigate to the settings and copy the client ID from the “Credential” section.

Paste the client ID in the “Api key” block in the “Seller sync app configuration” inside the Configuration menu at the seller portal.
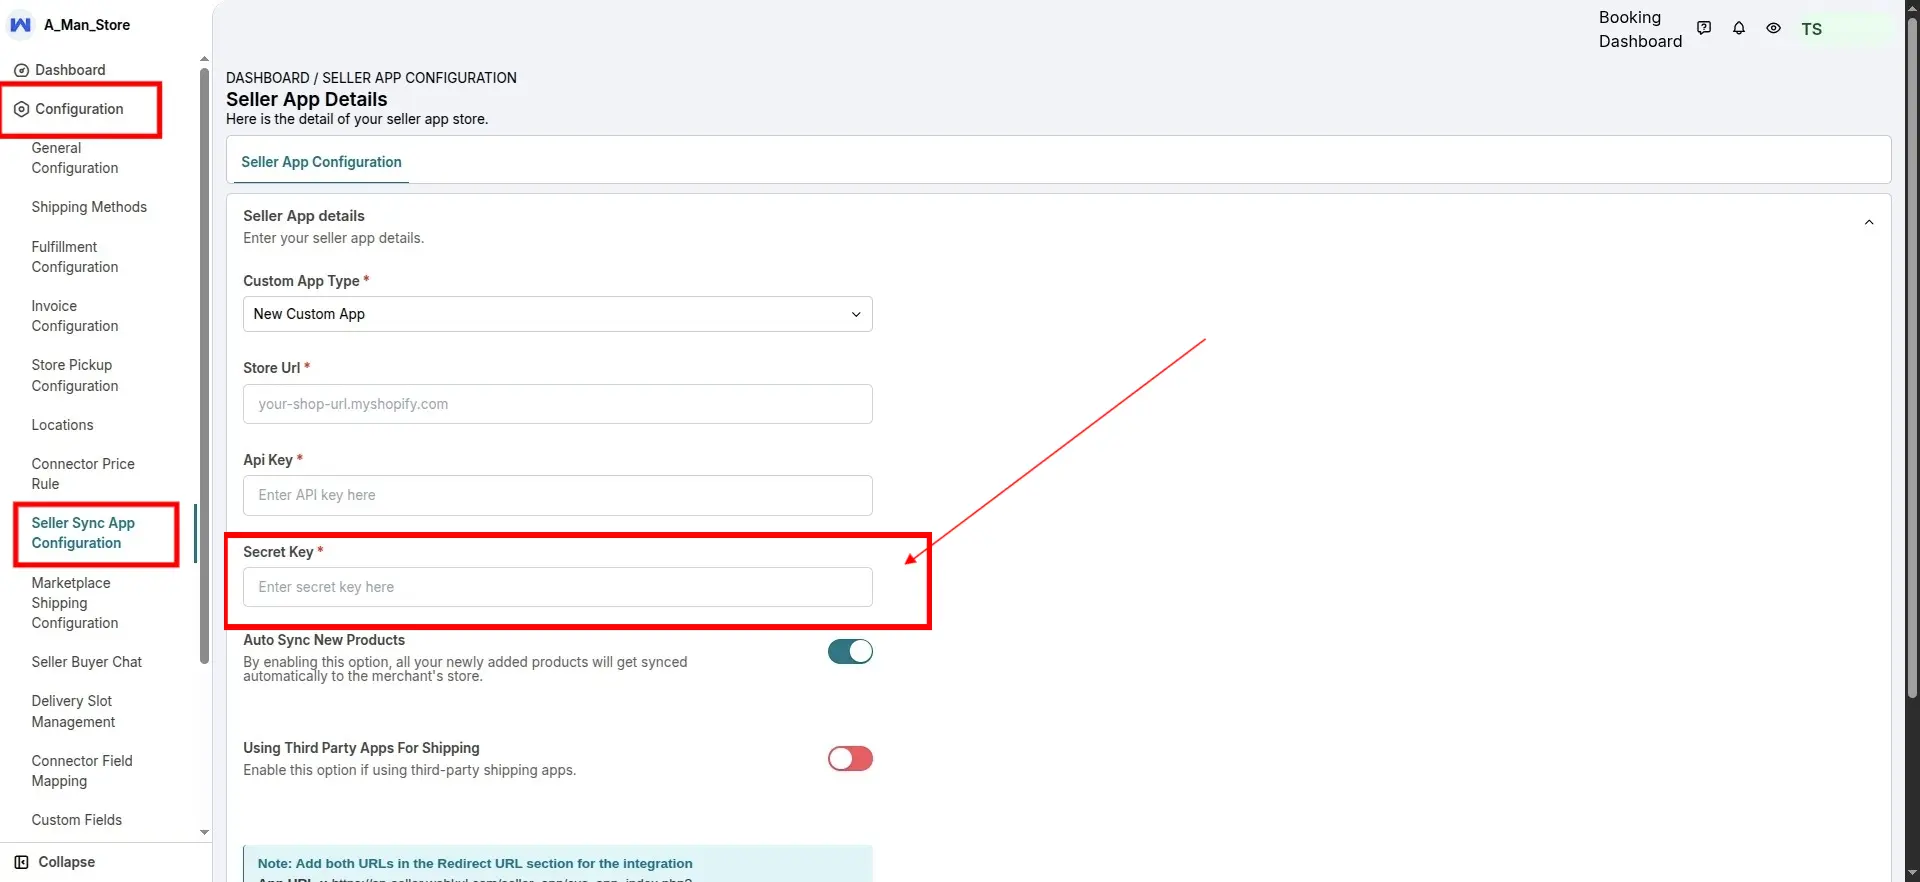
Now, copy the “Secret Key” from the “Credential” section.

Paste it here in the “Secret Key” block.
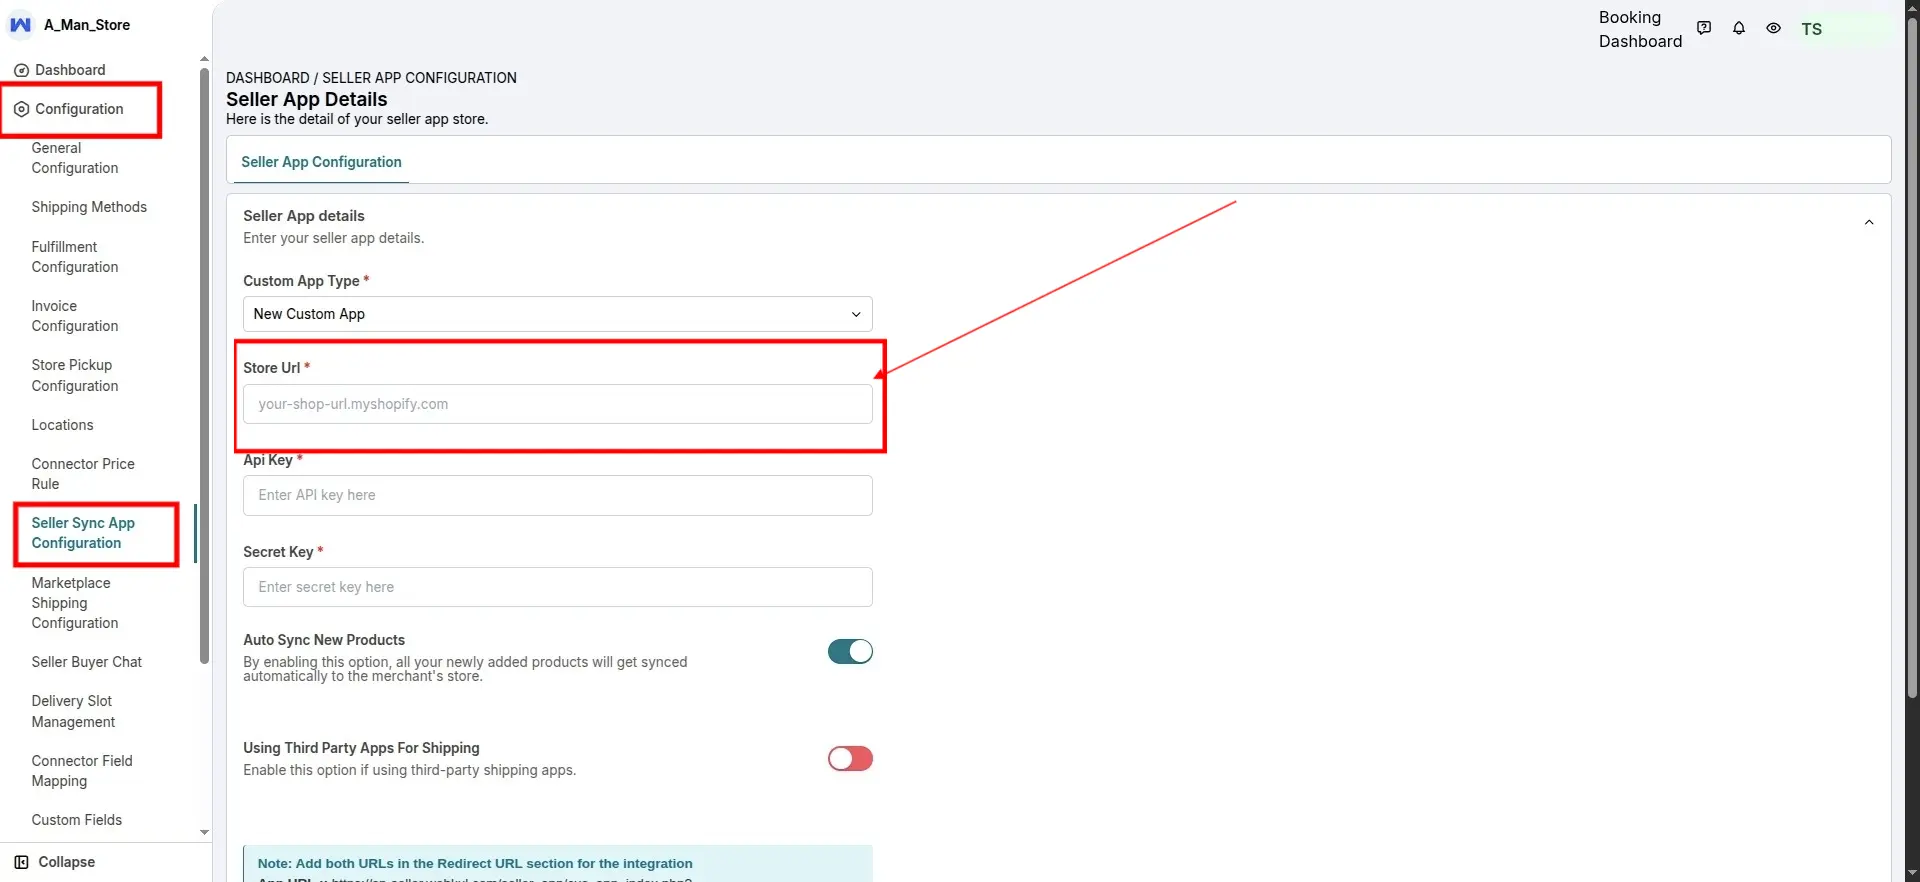
And now paste the seller’s Shopify store URL here.
And, click on the “save and install” button at the bottom.
After clicking on the “save and install” button, you will be redirected to the seller shopify store to install the app.
But, if you get an error message like shown in this image below, then follow the process given below the image.

Follow this process if you get the error shown in the above image:-
Go back to your Shopify partner account >> navigate to “App distribution” >> All apps >> then click on the custom app you created.

Select the “Custom Distribution” option and click Select.

After this, you will be redirected to this page, and you have to ignore this page.

Then, go back to your Multivendor seller panel and navigate to the “Seller sync app configuration” section under the Configuration menu.
After filling in all the required details, click on “Save & Install”.
Once you complete this step, the system redirects you to your Shopify store. Click on the Install button, and the system installs the app successfully.

LEGACY WORKFLOW (Old)
To make the product sync features work, the seller first needs to create a custom app on their Shopify store.
Step 1: The seller needs to log in to their Shopify account and create a custom app from the “apps” section.

Step 2: Click on “create an app” and enter the name of the app.

After entering the name of the app, click on “Create app”.

Step 3: After creating the custom app, the seller needs to configure Admin APIs by clicking on “configure Admin API scopes.

Now, the seller needs to provide the required permission for the custom app.
Mandatory Permission to create custom app as sales channel:

REQUIRED PERMISSIONS FOR CUSTOM APP (LEGACY WORKFLOW)
Here are the required permissions for the custom seller app:
Assigned fulfilment orders (Read and write)
# write_assigned_fulfillment_orders , read_assigned_fulfillment_orders
Fulfilment services (Read and write)
# read_fulfillments, write_fulfillments
Inventory (Read and write)
# read_inventory, write_inventory
Locations (Read Access)
# read_locations
Orders (Read and write)
# read_orders, write_orders
Products (Read and write)
# read_products, write_products
Markets
# read_markets_home
Required Permission for Sales Channel Configuration (LEGACY WORKFLOW)
#write_product_listings, #read_product_listings
Storefront API access scopes:
#unauthenticated_read_product_listings
Note: These permissions are mandatory for Sales Channel Configuration.
After providing the required permission, click on Save.

Once the permissions are saved, the seller will get an option to install the custom app.
The seller needs to install the app by clicking on the “install app” button.

Step 4: After installing the app, the seller will get the access token, API key, and secret key.
Now, the seller needs to copy the access token, API key, and secret key and paste them into the “seller sync app configuration” on their Multi-vendor seller panel

NOTE: Ignore the flow explained below, as the private apps are now deprecated by Shopify. Please skip to the “seller panel” section below
To make the product sync features work, the sellers first need to create a private app on their respective Shopify stores.
Then, the sellers will get all the app details to configure for syncing products with the admin’s store.
How does the Seller Create a Private App? (LEGACY WORKFLOW)
To create a Private App, firstly, the seller needs to visit the “Apps” section of his/her Shopify Store.
Then, scrolling down to the bottom, you will get the “Manage Private Apps” option. Click on it to create a new Private app.

Know how to create a Private App

This way, the seller can create a private app from his/her Shopify store.

Now, the seller will configure all the details from his seller panel.
REQUIRED PERMISSIONS TO CREATE A PRIVATE APP (LEGACY WORKFLOW)
Here is the required Permission for the private seller_app:
Assigned fulfillment orders (Read and write)
# read_orders, write_orders
Fulfillment services (Read and write)
# read_fulfillments, write_fulfillments
Inventory (Read and write)
# read_inventory, write_inventory
Locations (Read Access)
# read_locations
Order Editing (Read and write)
# read_orders, write_orders
Allow this permission if you want to sync the order details with the seller store once edited on the merchant’s store, else don’t allow.
Orders (Read and write)
# read_orders, write_orders
Products (Read and write)
# read_products, write_products


Seller Panel
After installing the custom app on the seller’s Shopify store, the seller has got the access token, API key, and secret key, which he/she needs to paste in the “seller sync app configuration”.
Seller panel >> configuration >> seller sync app configurations

Enter the access token, API key, and secret key >> save.

After saving the details, the seller can now start with importing the products.

Admin Panel: Seller Supported App Configuration
Seller App Configuration
SYNC ORDERS
You will have a Sync Order option. So, enabling this option will let you choose whether you want to sync order with the seller’s store.

SYNC ONLY PAID ORDERS
With this configuration, you can sync only paid orders with the seller’s Shopify store.

Create Orders on Seller Store
You will now have an option to create orders on your seller’s Shopify store.
For this, Go to Orders>>Order Listing>>View Order>>More Action>>Create Order on Seller Store.


Note:- Even, the admin will get a reference order number like below that will be shown order section of seller’s Shopify store.

Manual Sync Orders
In case an order is placed on the admin’s store and is not synced with the seller’s Shopify store then, then seller can sync the order manually from the seller panel.
To sync the order manually, the seller need to visit the Multi-vendor Seller Panel>>Go to Orders>>View Order>>On Order Detail Page-In More Action-Click Sync Order button.

This way, orders can be synced manually with the seller Shopify store connector.
Sync Order Refund
You can now choose to sync orders from the seller store to the admin store and vice versa. For this, you need to visit the admin panel>>Go to Configuration>>Seller Supported App Configuration.
Enable the below tabs:-
ORDERS REFUND FROM SELLER TO ADMIN STORE:- You can choose if you want to sync the seller’s order refunds to your store or not.
ORDER REFUND FROM ADMIN TO SELLER STORE:- You can choose if you want to sync orders from your store to the seller store.

Sync Customer Details
By enabling this tab, you can sync customer details in order with the seller’s store. Let’s understand this feature in detail.
CASE 1: Sync Customer Details tab is ON (enabled):
Once a customer places an order, the customer is there on the seller’s Shopify store with complete shipping and billing details.
Also, the customers will receive an email from the seller’s store regarding the same.
NOTE:- In this case, if you don’t want to send an email to the customer, you can configure a dummy email.

CASE 2: Sync Customer Details tab is OFF (disabled):
In case you disable this tab, you will get multiple options to choose whether you want to sync the customer’s shipping address, billing address, name, and email or not.
You can configure the settings as per the requirements.

Product Details Configuration
In the “Product Details Configuration”, you can enable/disable the options. Thus, auto-update the enable fields when the sellers make any update from their end.

TRACK PRODUCT INVENTORY
If the admin enables this option from their end, the inventory tracking status from the seller’s Shopify store will be synced to the Multivendor Marketplace (MVM).
Configuration>>Seller Support App Feature>>Product Details Configuration>>Track Product Inventory

RESTRICT IMAGE COUNT ON PRODUCTS
Admin can enable restrict image count configuration to restrict the number of Product images between 1 to 20.
So seller can only sync a certain number of images which is set by the Admin.

Import Product Meta Field
You can now import product meta fields from the seller’s Shopify store into your marketplace.
For this, you need to enable the below-given option from the Seller App Configuration>>Product Details Configuration.

Update Product Video
A new option is available that allows you to control whether the product video is updated in the multivendor app when the seller updates the product video in their Shopify store.
For this, you need to enable the below-given option from the Seller App Configuration >> Product Details Configuration.

Manage Product Category
A new configuration option has been added to manage whether product category updates from the seller’s Shopify store are synced with the Multivendor app.
For this, you need to enable the below-given option from the Seller App Configuration >> Product Details Configuration.

Please note that to enable this configuration, you must first enable the Manage Product Taxonomy Category setting. Then only you will be able to enable the above config Product Category.
You can do this by navigating to the Multivendor Admin Panel >> Configuration >> Product Configuration.

Seller Updating Products
If the seller has disabled the Auto Sync New Products Tab:-
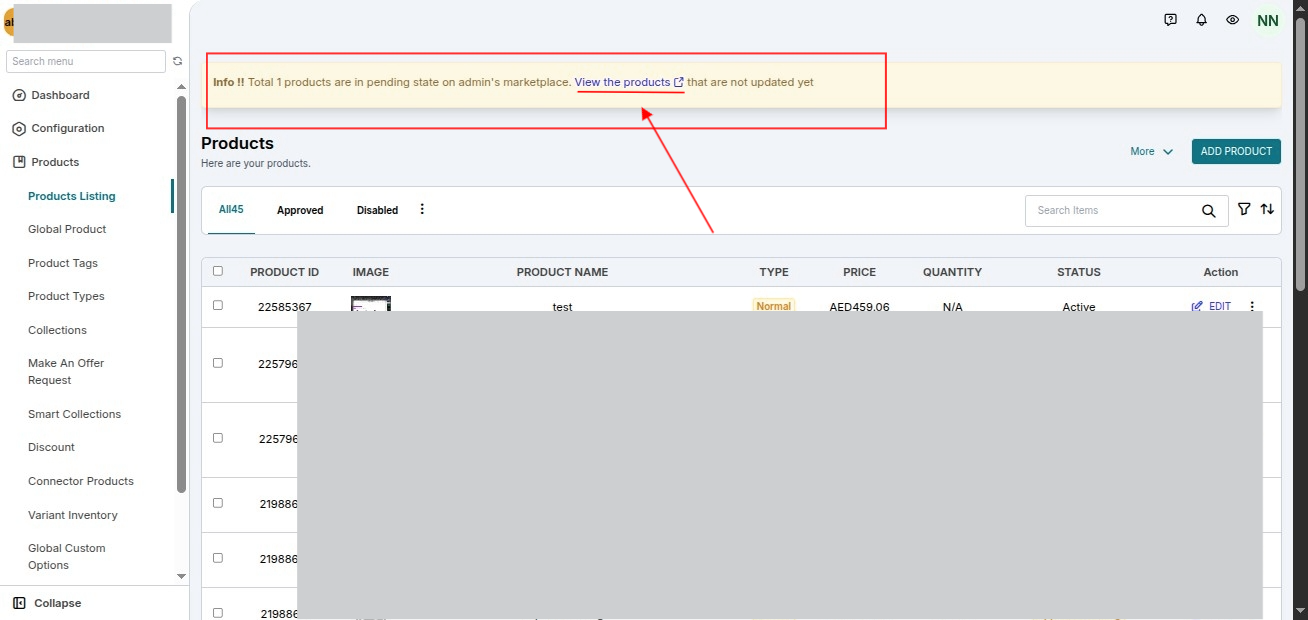
Once the seller makes any changes in the products on his/her Shopify store, he/she will get info on the multi-vendor seller dashboard to update all products.
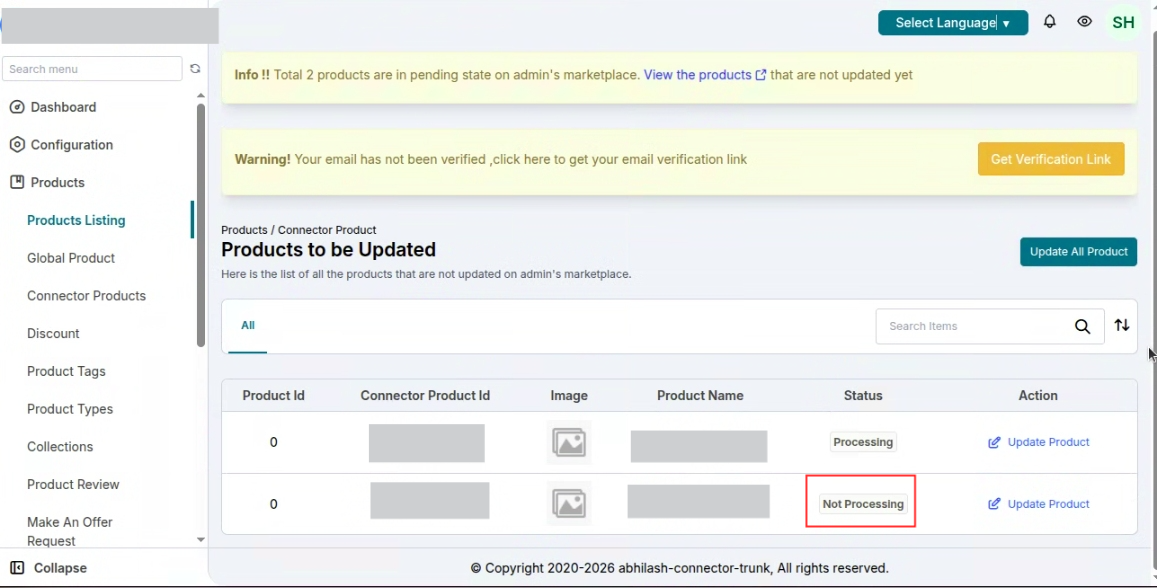
Now, clicking the “View the products” button, redirect your sellers to a page where all the products will be listed that are not yet updated on the admin’s store.
Additionally, the seller can update all the products in a go simply by clicking the“Update all products” button. Additionally, the seller can manually update each product as per his/her choice.
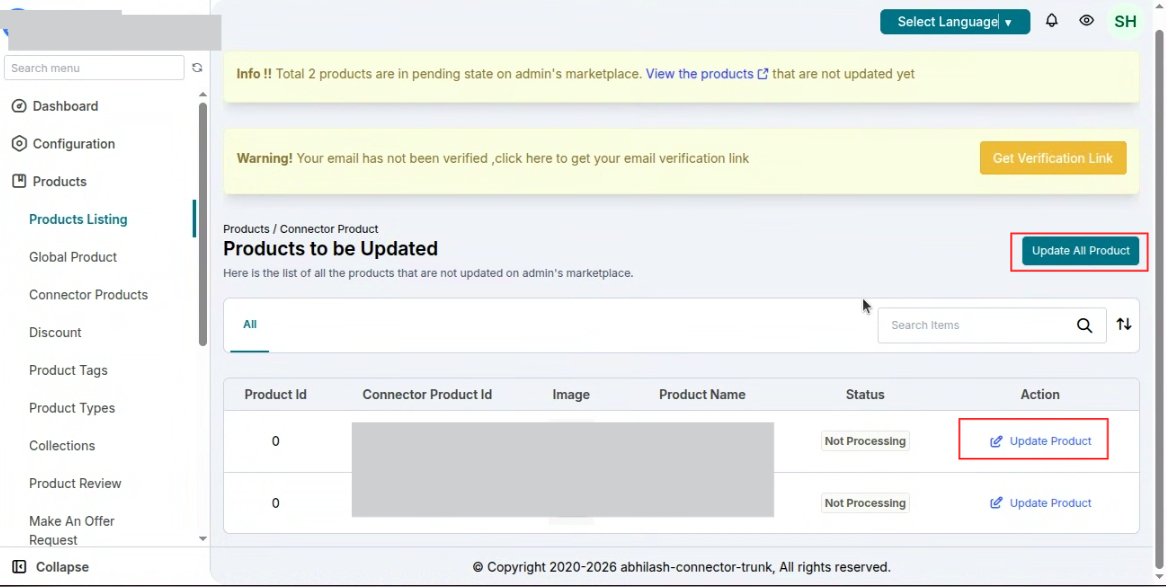
In the manual update, Clicking the “Update Product” button, the product will be in the “Processing” state.
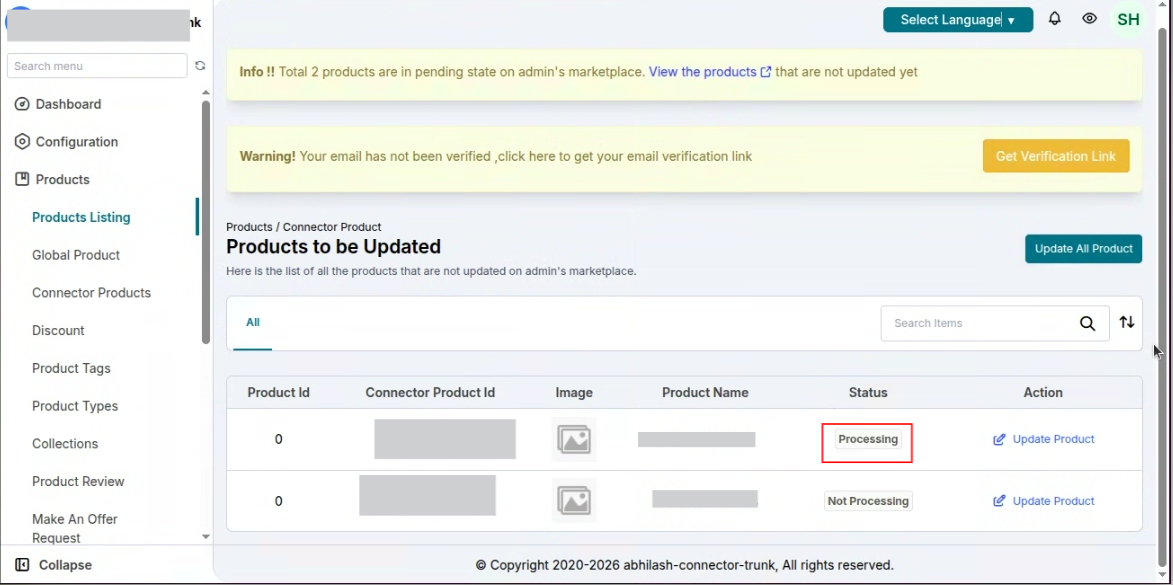
Once processed, the product will get unlisted from this section.
Now, before the sellers start importing products from their respective Shopify stores into the app, please ask your sellers to firstly, Map The Products then, Import Products.
Sales channel configuration : Seller panel
Using this configuration Sellers can import their products by creating a unique sales channel, especially for the Admin Store which is not available on their own online store.
The seller can create a custom app and provide certain permission which you find below that would convert the custom app into a Sales channel that they can select for their product.
Please refer to the images below for a better understanding.
Sellers can add Products only for the Admin marketplace which will only be available on the Sales channel created by the Seller and connected via the seller panel.
Note: Once Seller enables this configuration they won’t be able to disable it.

To Add the product Please make sure the Product is added to the sales channel app that the Seller created as shown below otherwise it won’t be imported or synced.

Required Permission for Sales Channel Configuration
#write_product_listings, #read_product_listings
Storefront API access scopes:
#unauthenticated_read_product_listings
Note: These permissions are mandatory for Sales Channel Configuration.

Map Product Type and Collection
The seller will have the option to map the admin’s store product type & collection with the product type & collection of their Shopify store.
Note:- Make sure that the admin has restricted the product type & collection from the admin panel. Also, add types and collections to the admin’s marketplace.
Now, on the seller panel, here is the option to map product types & collections in the Seller Sync App Configuration menu of the app.

MAP COLLECTION

MAP PRODUCT TYPE
Similarly, sellers can map the product type of their respective stores with the product type of your Shopify store.
Thus, clicking the Map Type, the seller will have the option to choose once product type from the admin’s store and map the same with the product type of his/her Shopify store.


Map Product Tags
You can now allow sellers to map the product tags of their respective stores with the product tag of your Shopify store.

Clicking Tag Mapping, the seller will get the option to map the tag.

The seller can map product tag via CSV file upload.

Seller-wise product tag restriction
Admin needs to enable this configuration from the Admin panel > configuration > restrict configuration > enable the restrict product tags tab.

Once the admin enables this configuration, then the admin can allow or restrict the products tag, seller wise at the edit seller section. as shown below.
Admin panel > seller > seller listing > edit seller.

If the above configuration is enabled then the seller needs to do mapping but if the admin disables this tab,
it means the admin allows the seller to import the product along with their product tag.
The seller will not be able to see the tag mapping option at the time of importing the products if the above tab is disabled.
Import Products from Seller’s Shopify Store
Now, by clicking on the Import Products button, the seller can import products from his/her Shopify store to the admin’s Shopify store.
Seller will have three methods to import products:-
Method 1:- Choose a Date Range & import products.

2nd Method:- Import products by comma-separated product IDs.

Method 3:- Import products by product handle.

This way, sellers can import products to the admin’s store.
Thus, all the products imported by the seller will be visible in the “Product Listing” section of his/her seller panel.

Now, the admin can view a new menu added under the Configuration menu of the admin panel i.e. Seller Supported App Configuration.
Inventory Update on Order: Points to be Noted!
ORDER CREATION ON ADMIN’S STORE
Case 1: Sync Order tab is OFF
When the order is placed on the admin’s store and Sync Order Tab is disabled then, Order will not create on the seller’s Shopify store. However inventory will be managed on the seller’s store.
Case 2: Sync Order tab is ON
Once an order is placed on the admin’s store and Sync Order Tab is ON then, the same order will be created on the seller’s Shopify store too.
Thus, update inventory and manage product quantity accordingly on the seller’s store.
Merchants don’t need to update the inventory each time when an order is placed on the admin’s Shopify store.
ORDER CREATION ON SELLER’S STORE
Once an order is placed on the seller’s Shopify store, only product inventory will be managed on the admin end i.e. product quantity gets updated on the admin’s store.
In case any seller’s product (listed on the admin’s store) is not synced with the seller’s store then,
both the admin and the seller can sync products manually from the Product Listing section of their respective panels.
Admin End

Seller End

Third-Party App for Drop Shipping
In case any of your sellers are using a third-party app, Oberlo for drop shipping then,
products synced from Oberlo to seller’s Shopify store can easily be synced with the admin’s store at his store’s primary location.

To import products from Oberlo to the seller app, the seller needs to enable the “Third-Party App for Drop Shipping” option from the Configuration menu.
Moreover, once enable, import products to the seller app.

Get the list of all imported products in the Products section of the seller app (sync with the admin’s store).
This way, products will update on the admin’s marketplace.
Connector Price Rule & Currency Conversion
Seller will select the Seller Sync App from the drop-down menu for currency conversion & price rule:

CURRENCY CONVERSION
If the currency of your seller’s store is different from the currency you set on your marketplace, then, the sellers can specify their currency rate with respect to your currency rate.
Accordingly, your seller’s product price calculates once a customer places an order

PRICE RULE
In the price rule menu, the seller can create a price rule to manage the price of the product on your Shopify store. The seller has to set the price rule:
- The seller has to enable or disable the price rule status to configure the settings.
- Select the price rule, either to increase or decrease.
- Select the Price change, either fixed or percentage.
Enter the amount of how much the sellers want to increase or decrease the price.

Allow Sellers to Register Webhook
PURPOSE:- The seller requires certain permission to create a private app to make the sync process work.
In case the seller has missed enabling any permission and created the private app, still, he/she will have the option to register webhooks from his/her seller panel.
The seller can visit the Seller Sync App Configuration where there is a list of all the webhooks. Just register/unregister webhooks as per the requirement.
Using the seller store connector, the admin can now allow sellers to view/register webhooks from the seller panels based on the permission provided.
Seller Panel>>Seller Sync App Configuration>>Click Shopify Webhooks

List of all webhooks. The seller can anytime unregister webhooks from the listing.

The seller can unregister/delete webhook and can anytime register it again.

Map Product With Connected Stores
Sellers can now map products with their connected Shopify stores.
In case a seller wants to map a product with a specific product of his/her Shopify store, then the variant will be mapped automatically.
Now, the seller can map the products from the Product Listing>>Edit product>>Map Product button.
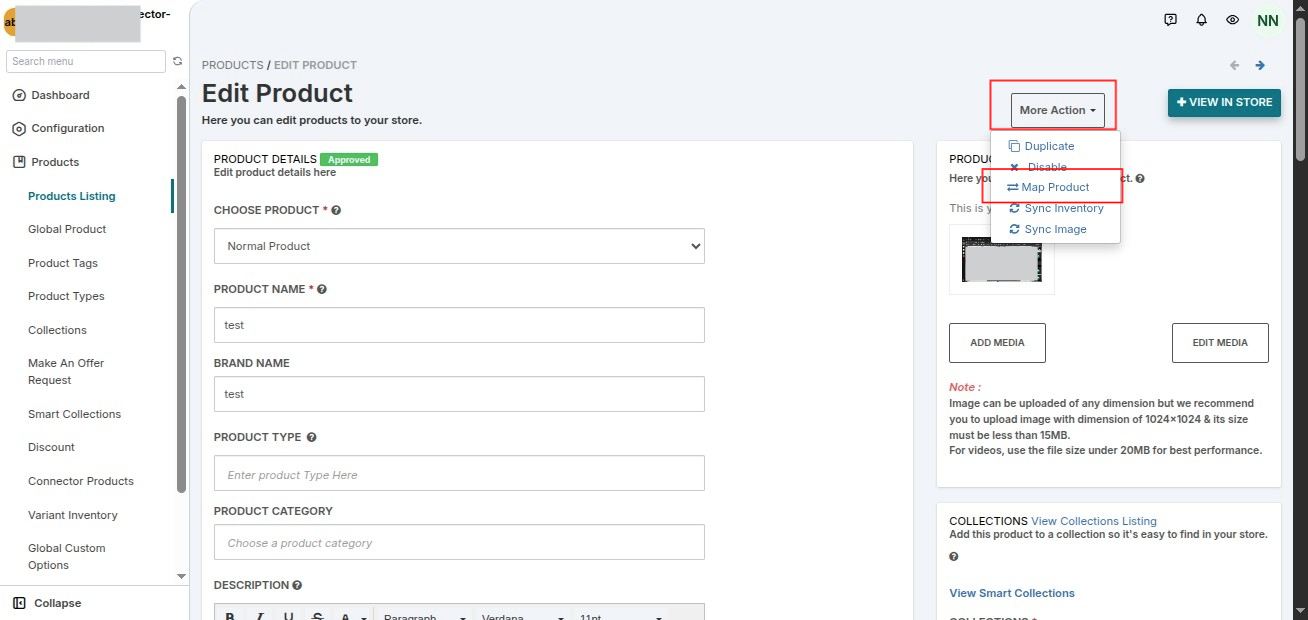
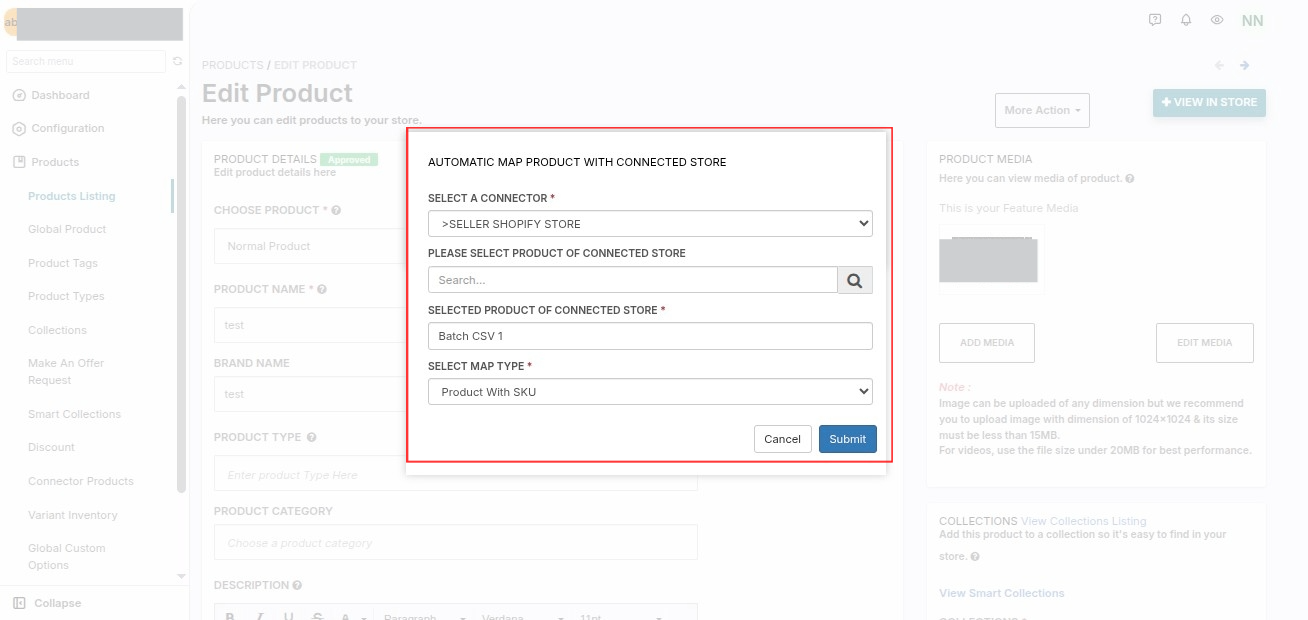
Clicking the Map Product button, the seller can choose whether to map the products manually or auto-map with any specific product with same SKU or Option Name.
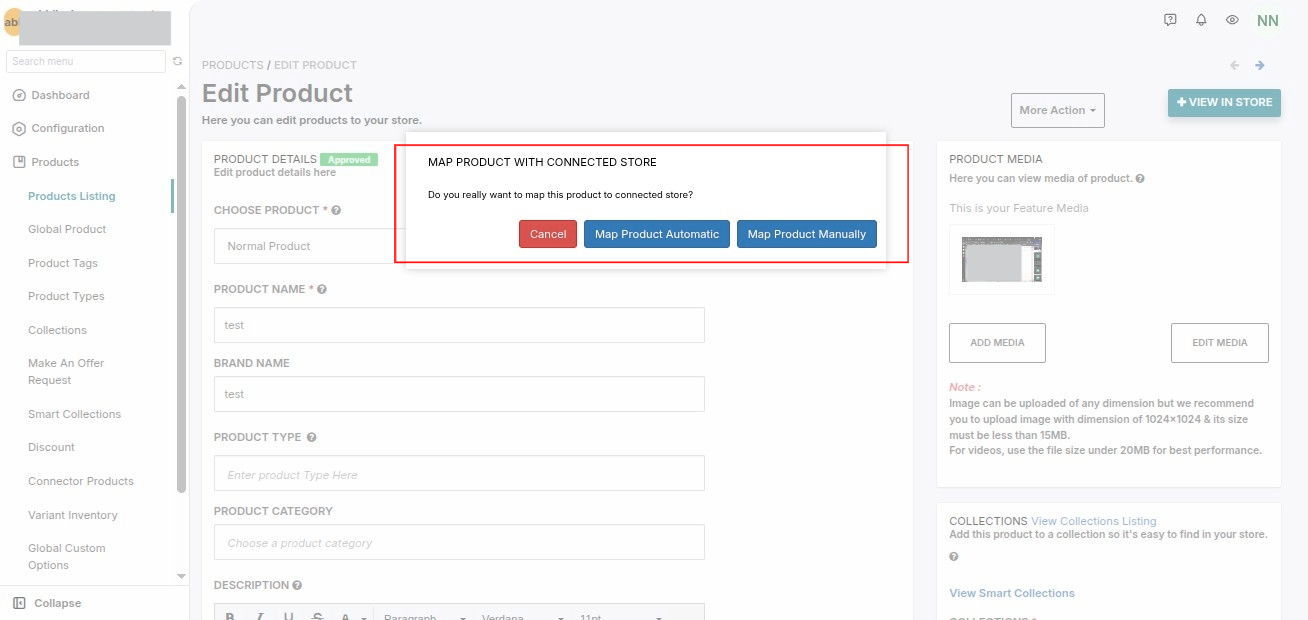
On selecting the “Map Product Automatic” option:- The seller needs to choose a product from his/her Shopify store and then, choose the Map Type as “Map with SKUs” or “Map with Option Name”.
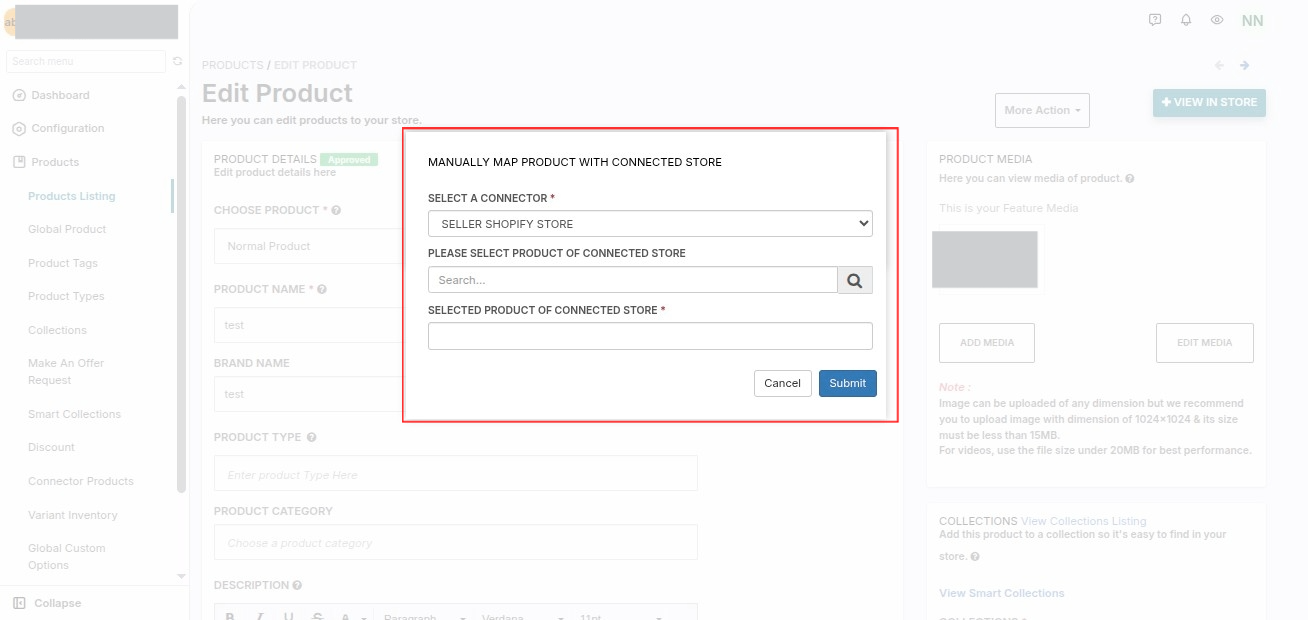
On selecting “Map Product Manually” option:-
Once you choose this option, the seller simply needs to select his/her Shopify store product with which you need to map the seller’s marketplace product.click the Submit button.
Sync Order On Seller Shopify Store
In case the order created in the app, not synced with the seller’s Shopify store then, the seller can manually create an order on his/her Shopify store.
For this, the seller will visit the seller panel>>Order>>Edit Order>>Click the “Sync Order” button in the More Action menu.

Update Marketplace Shipping Labels
You can now allow sellers to change the marketplace shipping labels to their respective Shopify store’s shipping labels.
For this, visit the Seller Supported App Configuration & enable the tab.

SELLER PANEL
The seller can enable the option from the Seller Sync App Configuration menu:

Multi-location Inventory Sync
In case you are using the Multi-location Inventory feature app along with this connector add-on:-
You can provide an option to let sellers choose the location of which they want to sync the product quantity with your Shopify store.
There will be a list of the seller’s Shopify store locations (seller’s Shopify-admin) once you enable the tab.
For this, Go to Multi-vendor Seller Panel>>Configuration>>Seller Sync App Configuration.
Now, sellers can enable the location on the seller panel and sync the product’s quantity with the admin’s marketplace.

Inventory Policy Sync
With this option, you can now verify the “Continue Selling Out of Stock” option on Shopify and allow customers to purchase the items accordingly.

Now, to enable this tab, go to admin panel>>Configuration>>Seller Supported App Configuration.

That’s all about this feature app.
Furthermore, if you need any kind of support/Consultancy, then please raise a ticket at http://webkul.uvdesk.com/ or drop an email at [email protected].
Thanks for reading this blog!!!

2 comments
We have created ticket on your behalf and our team will connect you soon regarding your queries.
Thanks and Regards,
Team Webkul