Introduction
Odoo Squarespace Connector links your Squarespace store with Odoo. As a result, you manage products, customers, orders and stock from one Odoo backend.
The app works as a channel of Odoo Multichannel Sale. So you connect the store once with an API key, and then you import, export and sync data in a few clicks.
In this user guide, you will learn how to install the module, connect your store, import data, export products and set up automatic crons.
How the Odoo Squarespace Connector Works
First, you create an API key in your Squarespace site. Then you paste the key into a Squarespace channel in Odoo and test the connection.
After that, the connector calls the Squarespace Commerce API. It pulls products, customer profiles and orders into Odoo feeds, and then Odoo creates or updates the records.
In addition, the connector pushes changes back. It exports Odoo products, updates stock quantities in real time and sends shipment details when you validate a delivery.
Key Features of the Squarespace Connector
- First, import products with their variants, SKUs, prices, stock and main image.
- Also, import customers and orders from your Squarespace store.
- Next, filter imports by All, specific IDs or a date range.
- In addition, import orders by state: Pending, Fulfilled or Canceled.
- Then, export and update Odoo products, including variants and images, on Squarespace.
- After that, sync stock quantities from Odoo to Squarespace in real time.
- Moreover, send carrier and tracking details to Squarespace when a delivery is done.
- Finally, run scheduled crons that import new orders, products and customers.
Prerequisites for using Odoo Squarespace Connector
Before you start, check the points below.
| Requirement | Details |
|---|---|
| Odoo version | Odoo 18,19,10 (Community or Enterprise). The module refuses to install on other versions. |
| Dependency | Odoo Multichannel Sale (odoo_multi_channel_sale) by Webkul. |
| Squarespace plan | A Squarespace site with Commerce, so that the store has products and orders. |
| API key | A Squarespace developer API key with access to products, inventory, orders and profiles. |
You can get the base module from the Odoo Multichannel Sale store page. Also, read the Odoo Multichannel Sale user guide for the shared settings.
Installation
First, download the module from the Odoo Squarespace Connector store page. Then copy both folders into your custom addons path.
cp -r odoo_multi_channel_sale squarespace_odoo_connector /opt/odoo/custom-addons/
sudo systemctl restart odoo
- First, restart the Odoo server so that it reads the new modules.
- Next, turn on developer mode, open Apps and click Update Apps List.
- Then, remove the Apps filter and search for “Squarespace”.
- Finally, click Activate. Odoo also installs Multichannel Sale for you.
For more details, see the Odoo documentation on installing apps and modules.
Workflow
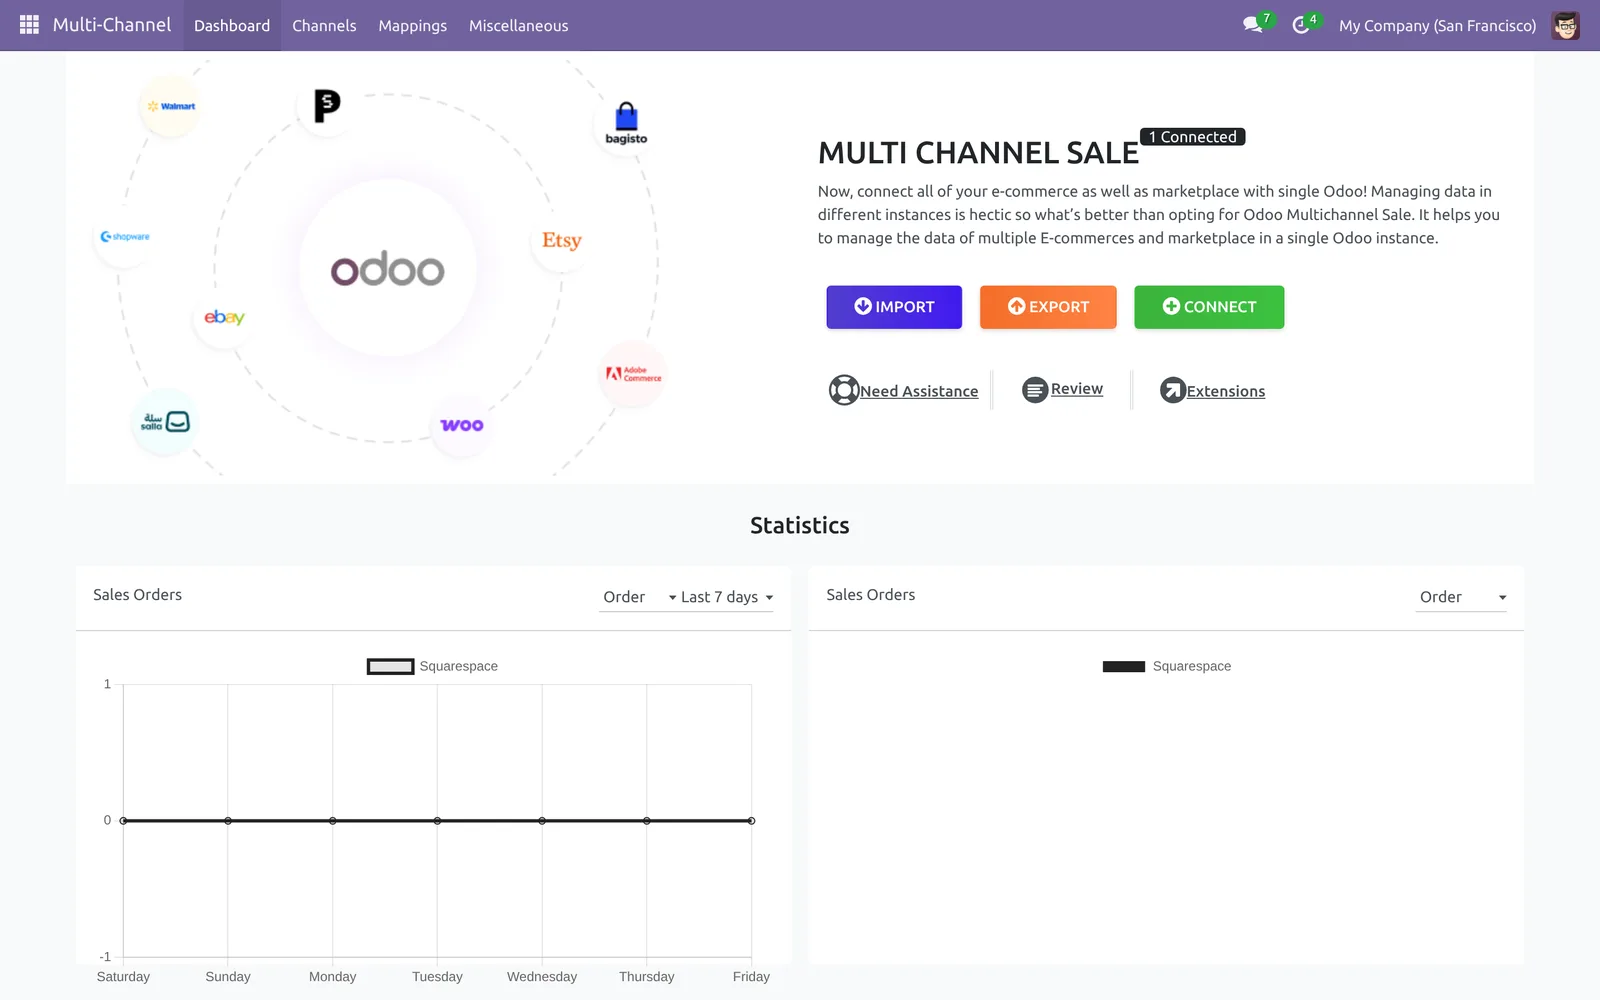
After the install, open the Multi-Channel app. The dashboard shows your connected channels and quick Import, Export and Connect buttons.
Create a Squarespace API Key
Before you connect Odoo, you need an API key from Squarespace. Only a site owner or admin can create one.
- First, log in to Squarespace and open your site dashboard.
- Next, go to Settings, then Advanced, then Developer API Keys.
- Then, click Generate Key and enter a name, such as “Odoo”.
- After that, give the key access to Products, Inventory, Orders and Profiles.
- Finally, copy the key and keep it safe, because Squarespace shows it only once.
For more details, read the Squarespace guide to developer API keys.
Connect Squarespace to Odoo
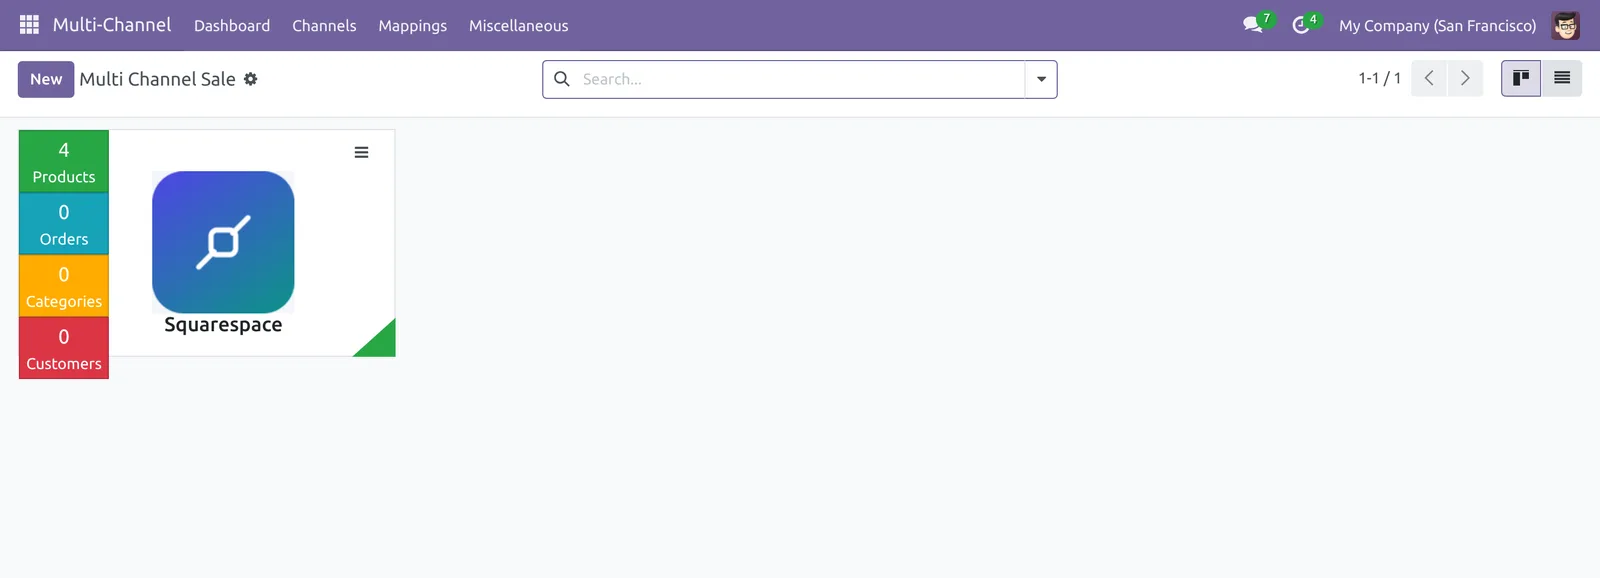
The module adds a Squarespace channel for you. Go to Multi-Channel, then Channels, and open the Squarespace card. You can also click New and set the Channel Type to Squarespace.
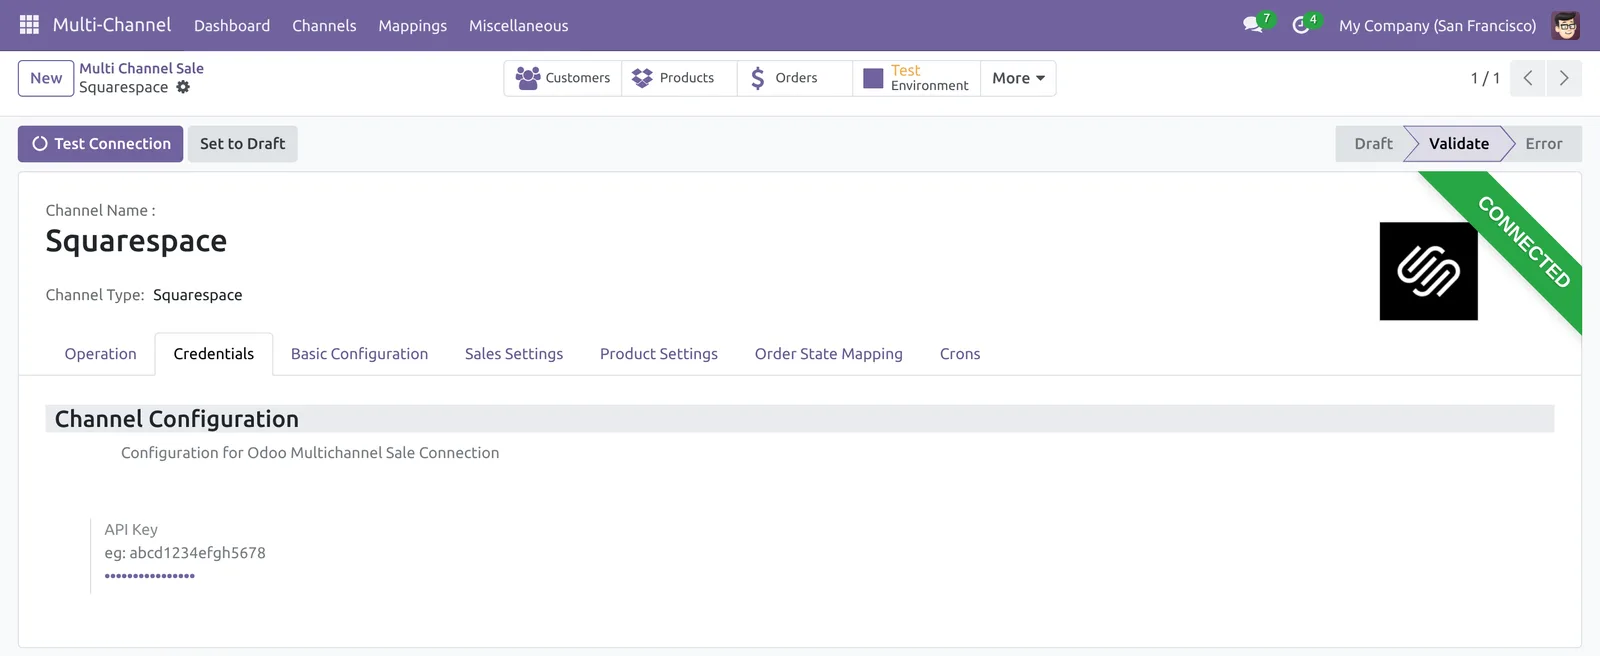
Next, open the Credentials tab. Then paste your key into the API Key field.
After that, save the record and click Test Connection. If the key works, Odoo shows “Credentials successfully validated.” and sets the channel to Validate.
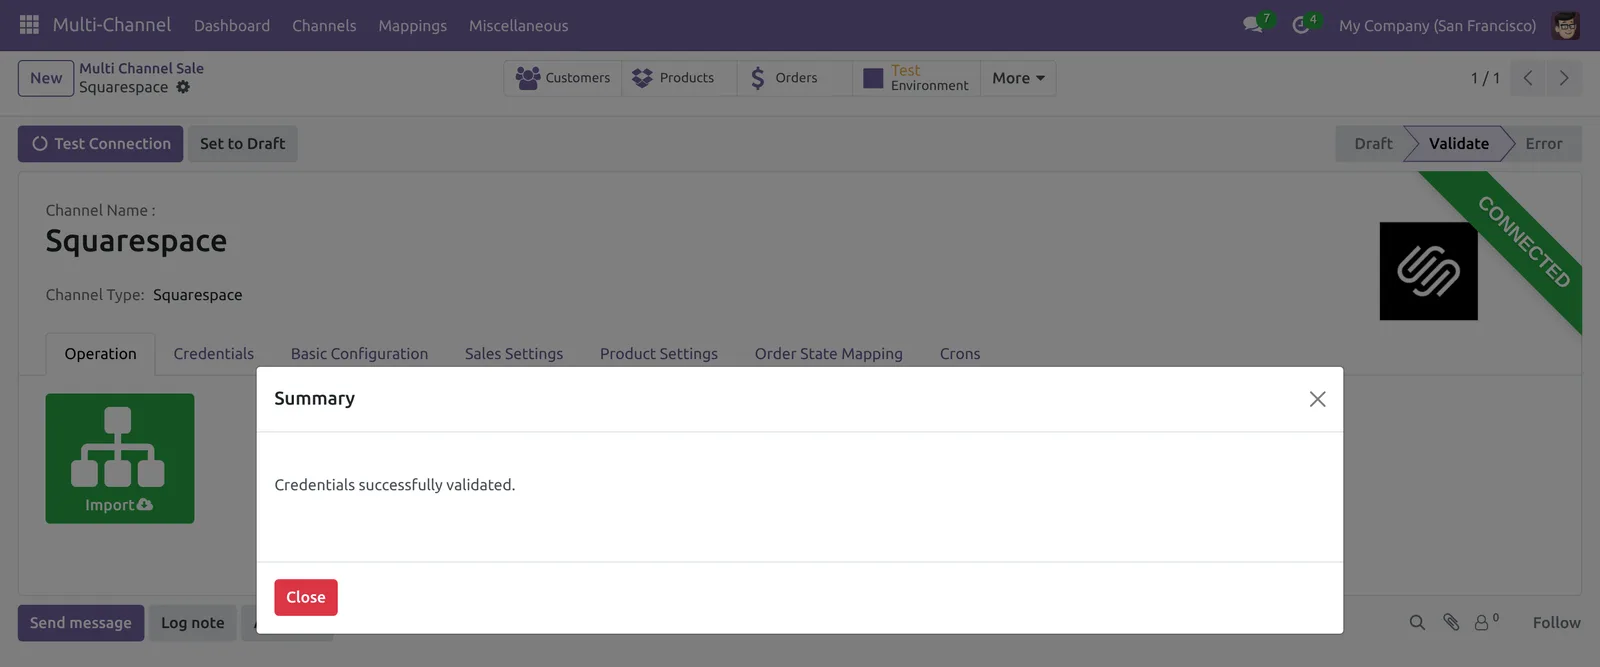
When the channel is validated, Odoo locks the API key. To change it, click Set to Draft, update the key and test the connection again.
Configure the Squarespace Channel in Odoo
Next, review the shared Multichannel tabs. Basic Configuration, Sales Settings and Product Settings hold the company, pricelist, warehouse and stock options.
For example, Auto Stock controls the real-time stock sync. The Pricelist sets the price that the connector exports to Squarespace.
Then, open the Order State Mapping tab. It maps each Squarespace order state to an Odoo order state.
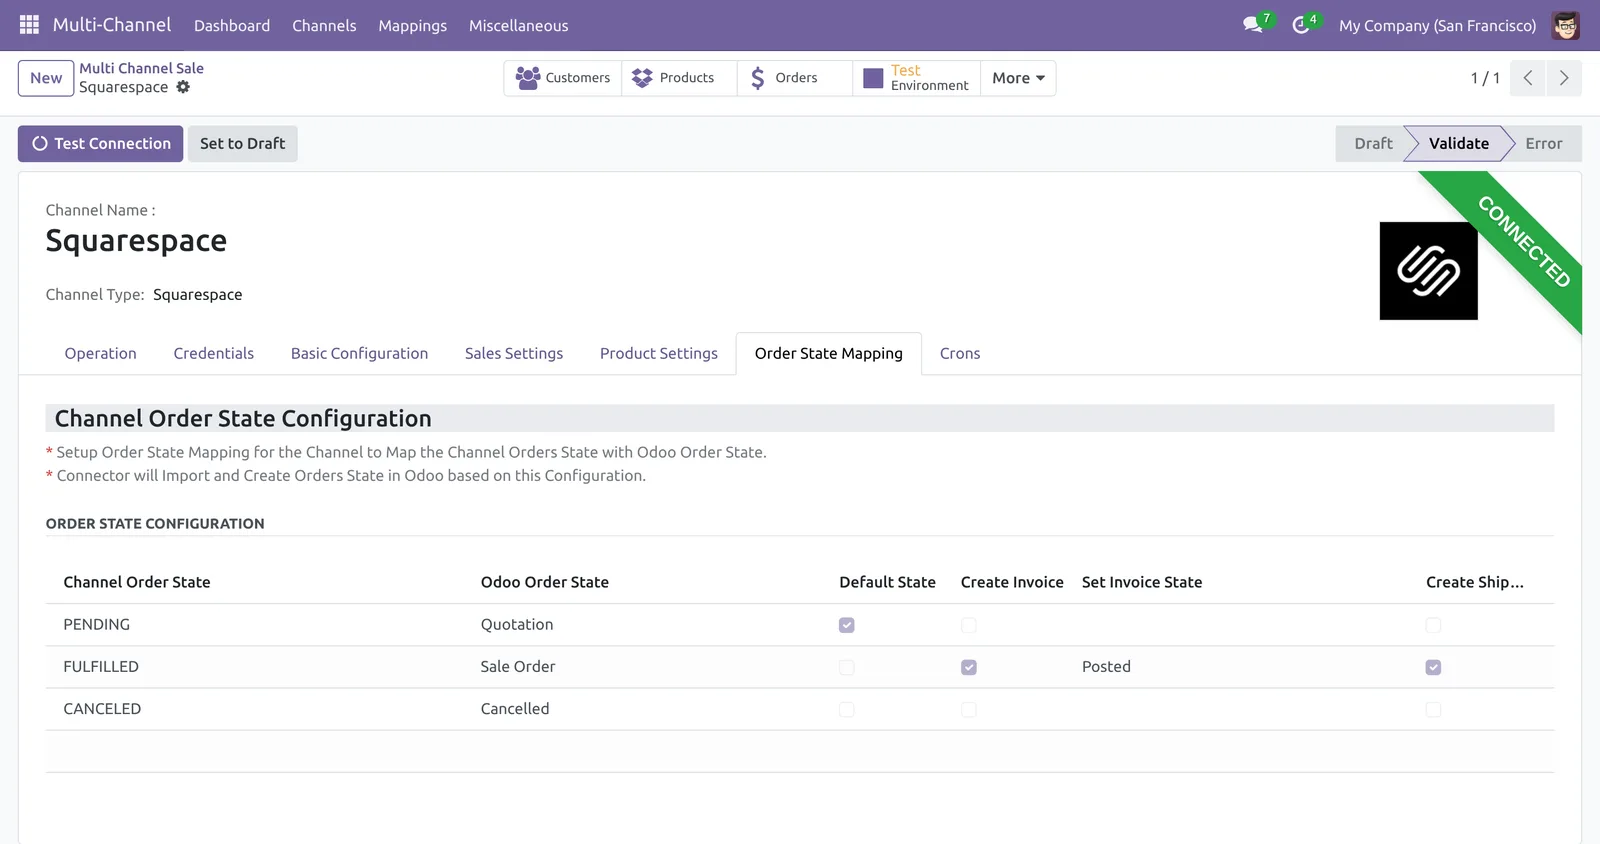
| Squarespace state | Odoo result |
|---|---|
| PENDING | Quotation. This is also the default state. |
| FULFILLED | Sale order with a posted invoice and a done delivery. |
| CANCELED | Cancelled sale order. |
Import Squarespace Data into Odoo
Open the Operation tab of the channel. It shows two big buttons: Import and Export.
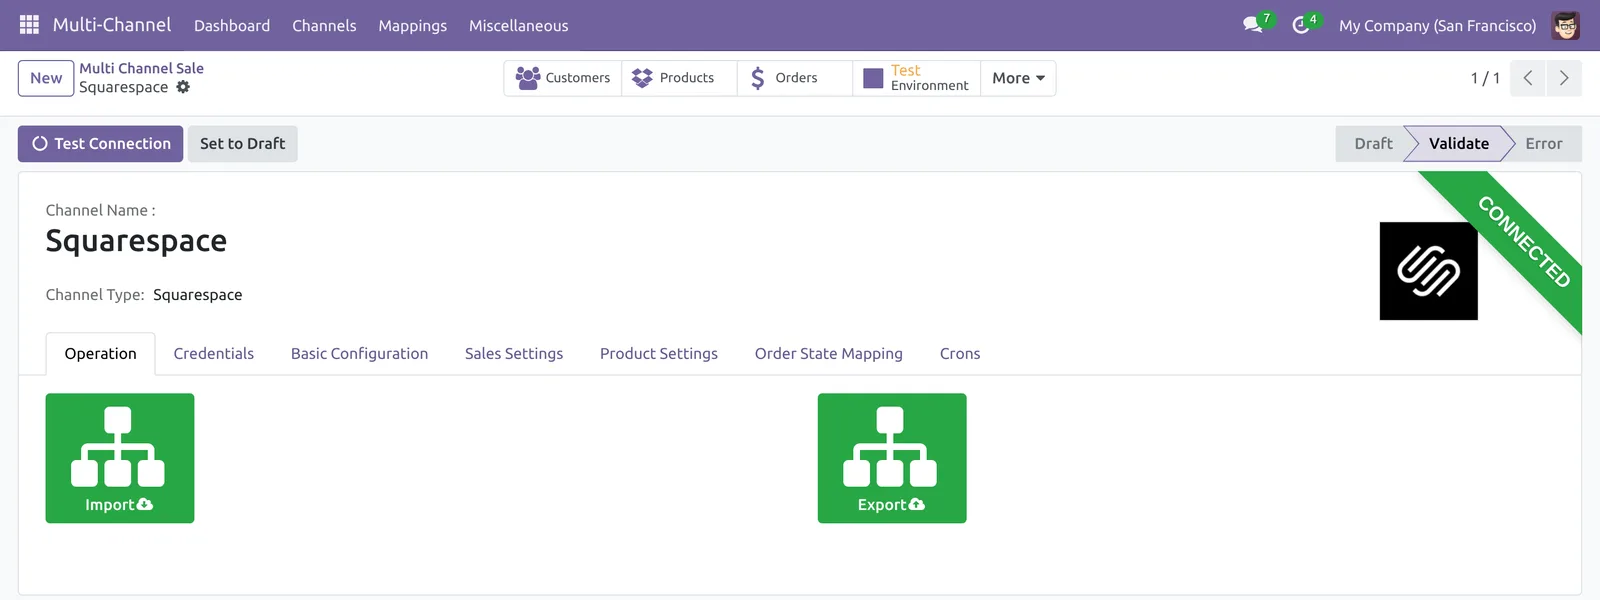
Click Import to open the Import Wizard. Then pick the Object and a filter, and click Confirm Import.
Import Products
First, set Object to Product. Then choose a Product Filter:
- All imports every product in the store.
- Product IDs imports only the Squarespace product IDs that you enter, separated by commas.
- Date Range imports products modified between From Date and To Date.
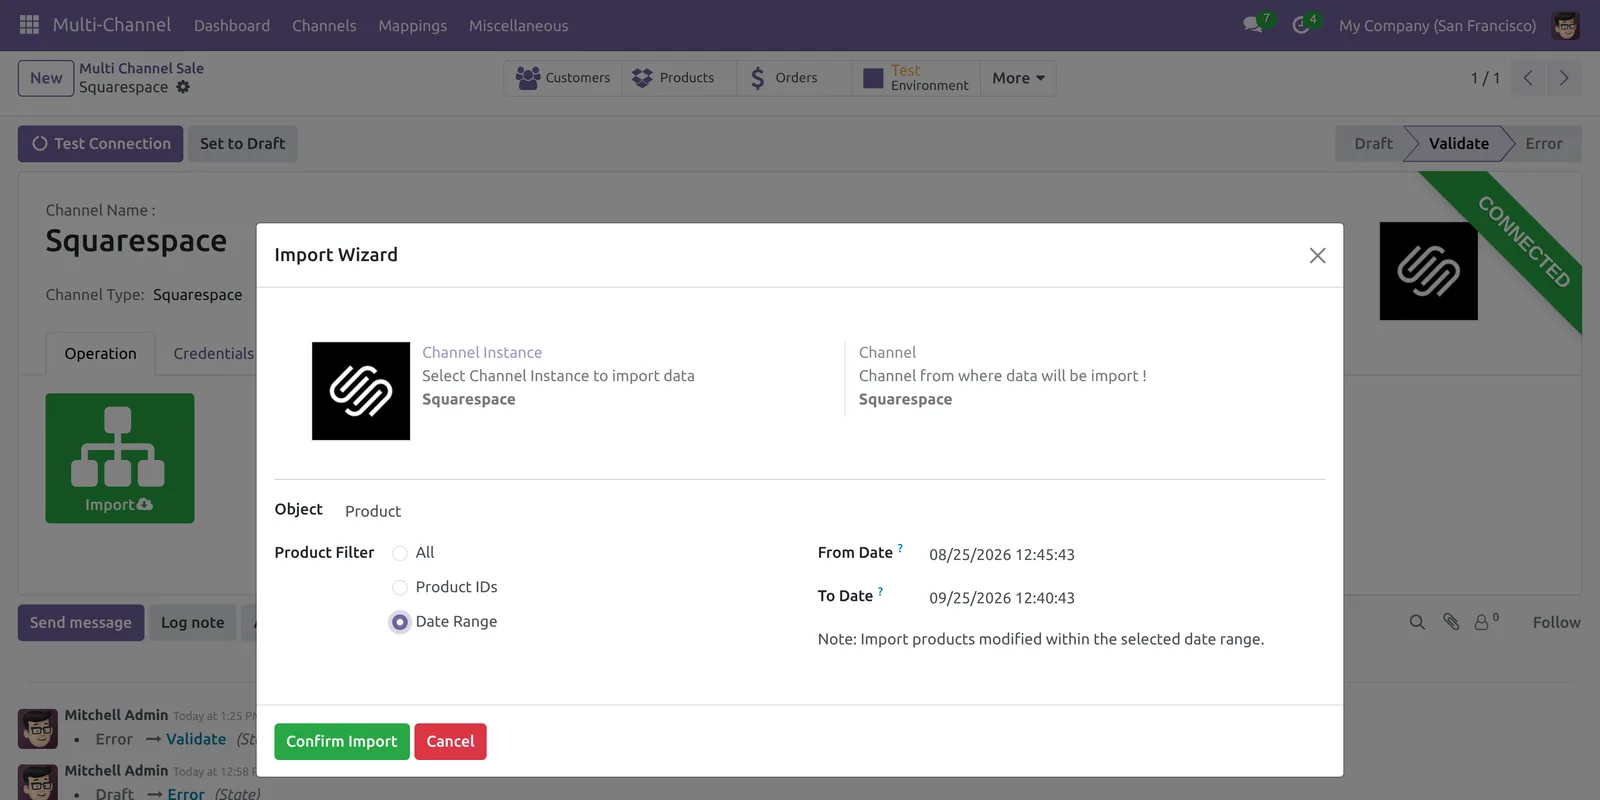
The connector imports the name, description, type, SKU, price, stock and main image. It also creates Odoo variants from the Squarespace variant attributes.
Import Customers
Next, set Object to Customer. The Customer Filter offers All, Customer IDs and Date Range.
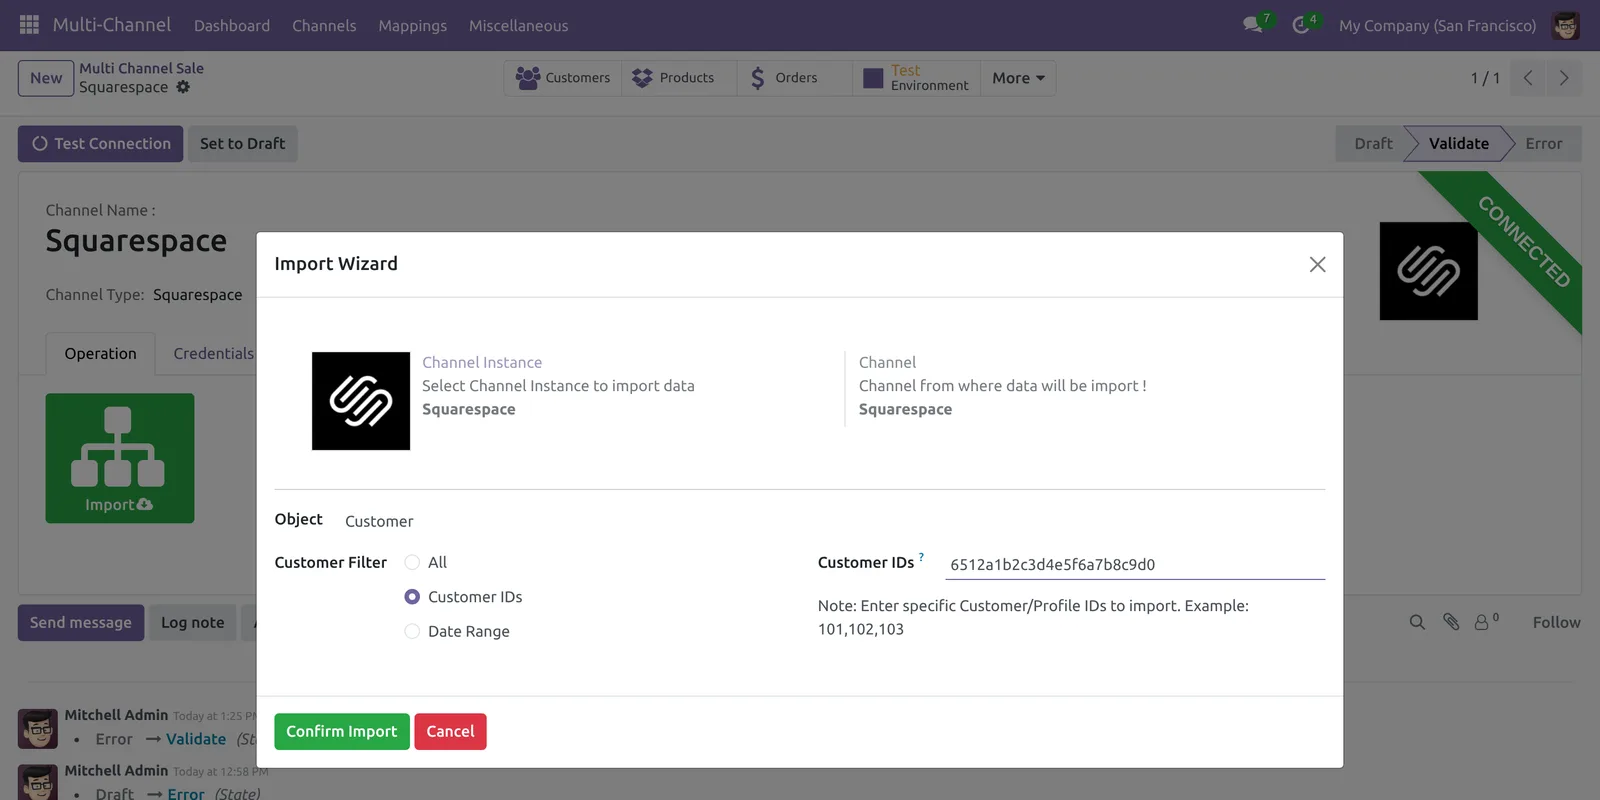
With Date Range, the connector checks the profile creation date. So it imports customers who signed up within the dates you set.
Import Orders
Then, set Object to Order. The Order Filter offers All, Order IDs, Date Range and Order State.
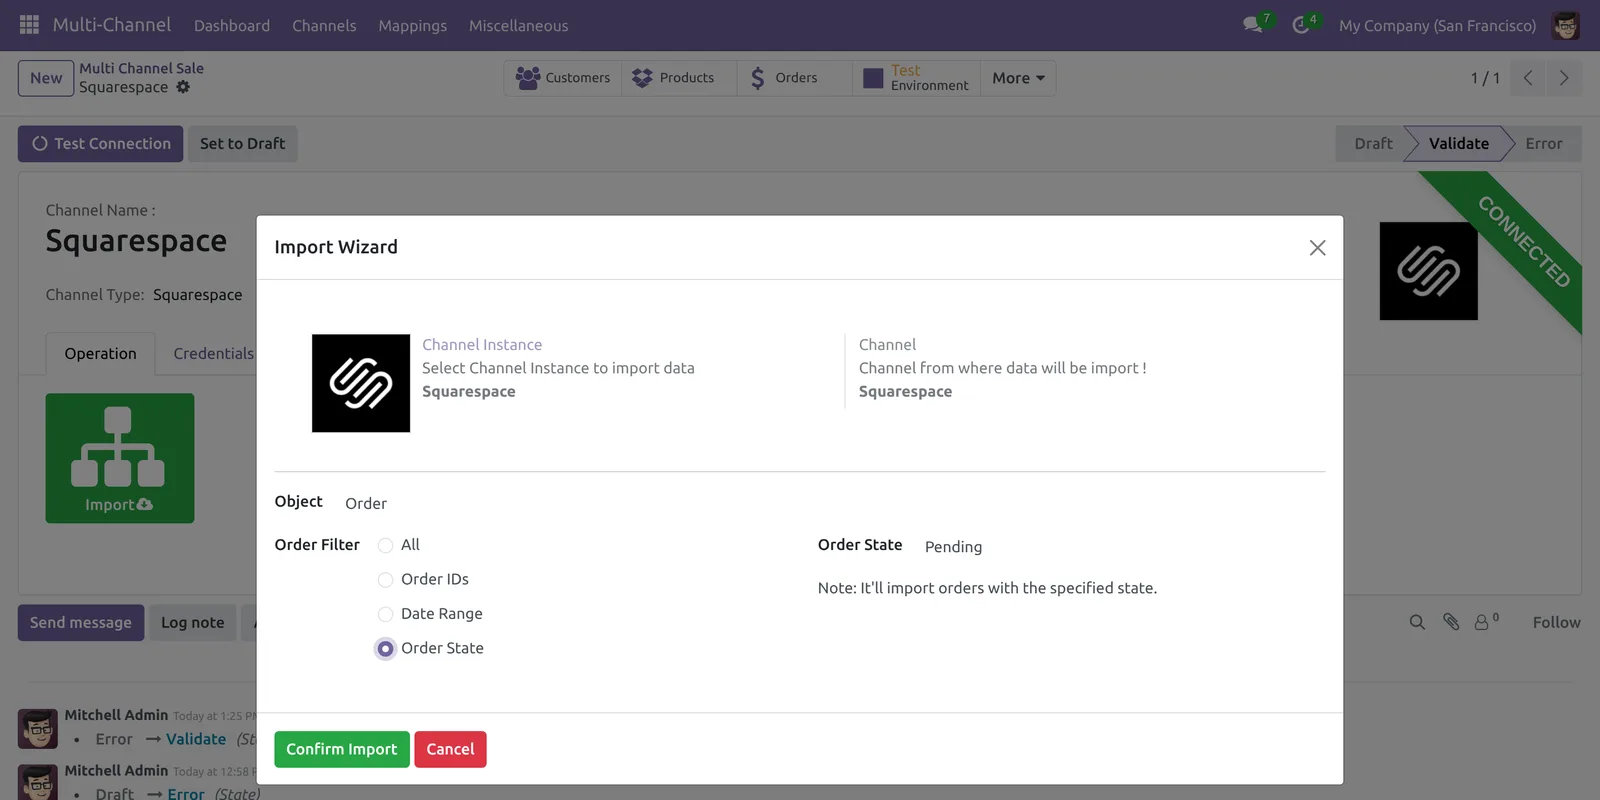
With Order State, choose Pending, Fulfilled or Canceled. After the import, Odoo applies your Order State Mapping to each order.
Squarespace has no product categories, and its API offers no shipping methods. So the wizard hides the import button for Category and Shipping Method and shows a note instead.
Export Odoo Products to Squarespace
Click Export on the Operation tab. The Export Wizard opens with the Object set to Product Template.
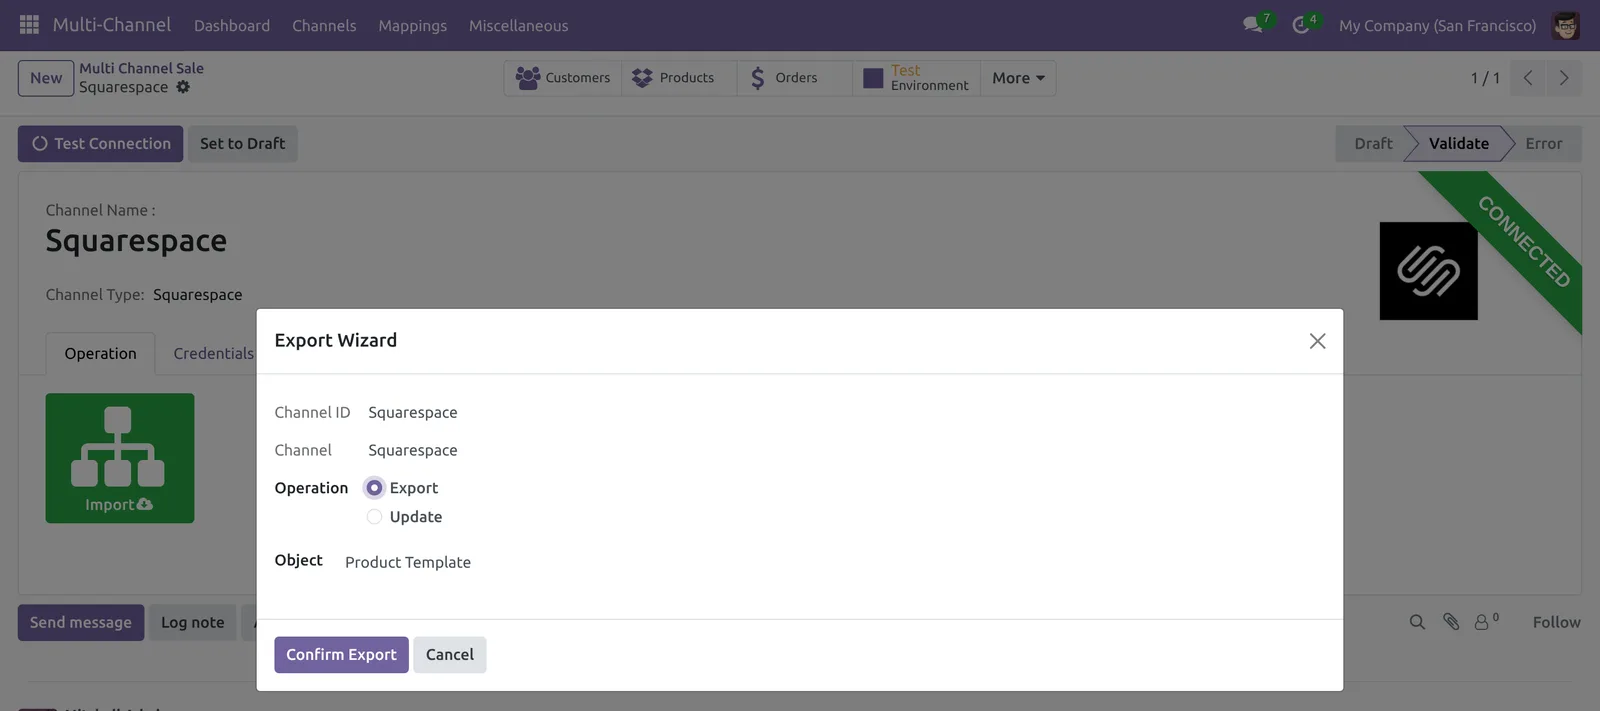
- Export creates new products on Squarespace from Odoo products.
- Update sends changes for products that already have a mapping.
The connector sends the name, sales description, type, price, SKU, stock and variants. After that, it uploads the product image and adds the product to your first store page.
Real-Time Stock and Shipment Sync
When stock changes in Odoo, the connector updates the variant quantity on Squarespace. Therefore, your store never sells items that you do not have.
When you validate a delivery for a Squarespace order, the connector creates a fulfillment on Squarespace. It sends the carrier, the tracking number and the tracking link.
Squarespace then emails the shipment details to the customer. However, the Squarespace API cannot cancel orders, so cancel those in the Squarespace dashboard.
Schedule Squarespace Imports with Odoo Crons
Open the Crons tab of the validated channel. Then enable the Order, Product or Customer cron.
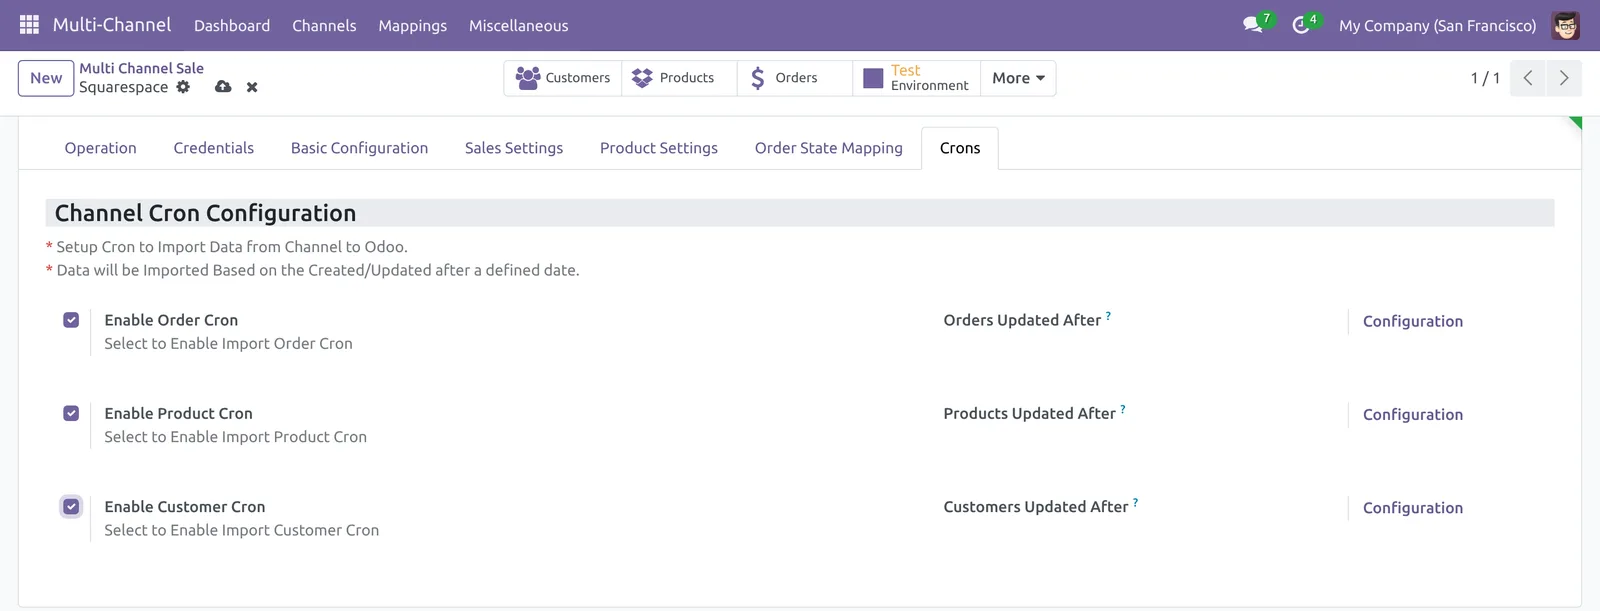
Each cron imports records updated after the date you set. Next, click Configuration to set how often the scheduled action runs.
Learn more about sales orders in Odoo to see how imported orders fit your sales flow.
Track Mappings and Sync History
Every import and export creates a mapping between the Odoo record and the Squarespace record. Go to Multi-Channel, then Mappings, and open Product Template.
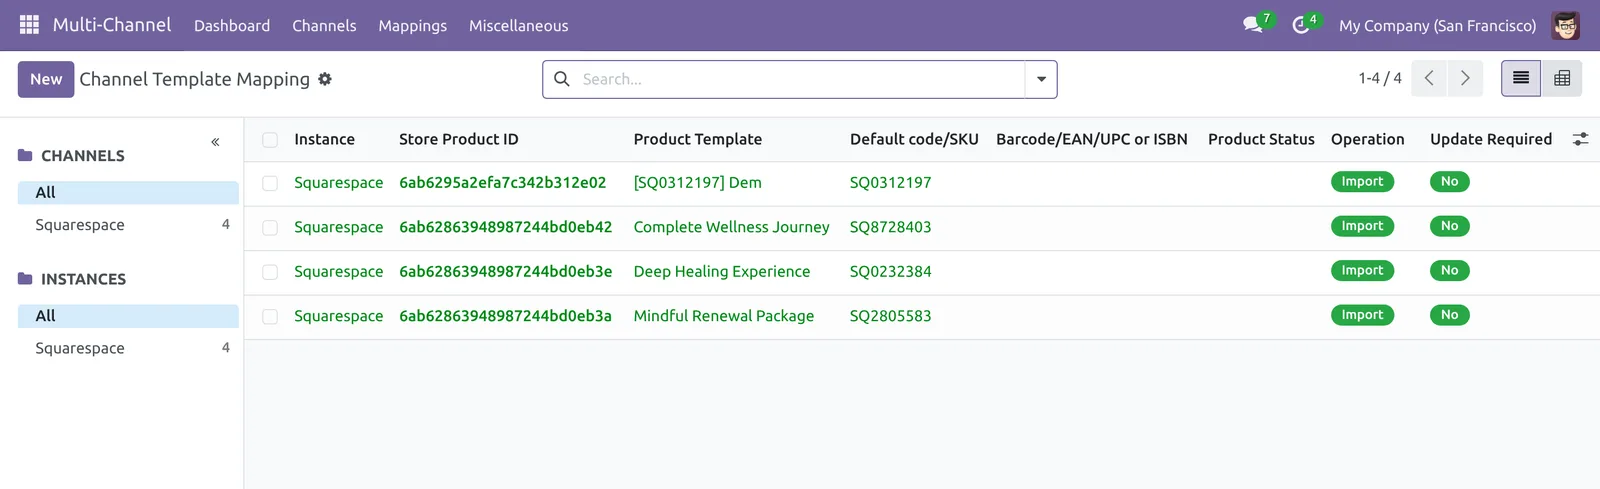
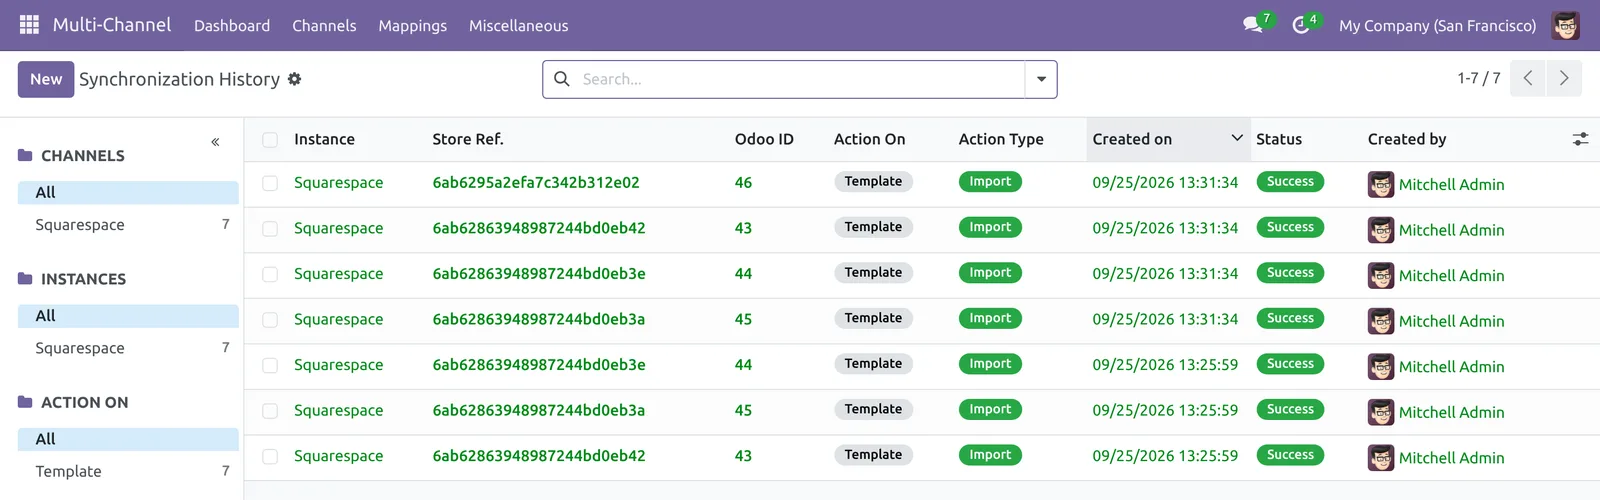
Then, open Miscellaneous and Synchronization History. It logs each record with its action, status and user.
User Access
Only users in the Multichannel administrator group see the Credentials tab. So other users cannot read or change the API key.
Troubleshooting the Squarespace Connector
- “Credentials failed to validate”: check the key, its permissions and that it is still active.
- “Error: API Connection”: the channel is not validated. Click Test Connection first.
- An export fails: make sure your Squarespace site has a store page, because new products go there.
- Stock does not sync: turn on Auto Stock and check that the product has a variant mapping.
- A cron imports nothing: check the “Updated After” date and the scheduled action.
For API limits and fields, see the Squarespace Commerce APIs overview.
Related Odoo Apps
- Odoo Zid Connector user guide
- Odoo MerchantPro Connector user guide
- Integrate your store with Odoo using SaaS connectors
- All Webkul Odoo apps
Need Help?
Hope you find the guide helpful! Please feel free to share your feedback in the comments below.
If you still have any issues/queries, please create a ticket at the UV Desk.
I hope this helps. In case of any further queries, contact us at our support mail.
Thanks for paying attention!!
Current Product Version - Odoo v 18,19,20
Supported Framework Version - 1.0.0

Be the first to comment.