INTRODUCTION
Efficiency increases profitability of a business!
Increasing efficiency always helps you to save time and money. Therefore, you need to increase efficiency to make your businesses more profitable.
It improves the overall performance of your business and helps you to achieve the expected result. The efficiency claims to reduce the number of unnecessary resources handled to deliver a given output including personal participation and energy.
By the way, what are you doing to improve efficiency in your business?
Now, increase your business efficiency and effectiveness by using our “Odoo POS Gen X” module. The module provides the POS user the fully restructured and redesigned layout of the Odoo POS shop. It allows you to effortlessly navigate through the POS Shop screen. Moreover, The module facilitates you to quick access, to all the elements such as customers, products, and other important tabs.
FEATURES
Here is the concise list of the features. Visit the Store Page to know the detailed features of Odoo POS Gen X
1. The Odoo POS Gen X offers you a better and helpful POS home page UI.
2. Facilitates quick access to all the elements such as customers, products, and other important tabs.
3. It provides a POS user the easily legible labels of the tabs and buttons.
5. The module introduces you to a new POS checkout screen.
6. New pop-up added for POS cart products management
7. The POS user can select from the multiple custom created receipts to be shown in the POS.
INSTALLATION
1.) Once you purchase the Odoo POS Gen X module From Webkul store, you will receive the link to download the zip file of the module.
2.) Extract the file on your system after the download finishes. You will be able to see a folder named- “pos_redesign”.
3.) Copy and paste this folder inside your Odoo Add-Ons path.
4.) Now, open the Odoo App and click on the Settings menu. Here, click on Activate the Developer Mode.
5.) Then, open on the Apps menu and click on the ‘Update Modules List’.
6.) In the search bar, remove all the filters and search “pos_redesign”.
7.) Now you will be able to see the module in the search result. Click on ‘Install’ to install it.
WORKFLOW
Back-end
1. Initially login to your Odoo and then navigate to the Poing of Sale app.

2. Now navigate POS session settings by clicking on to the ellipsis.
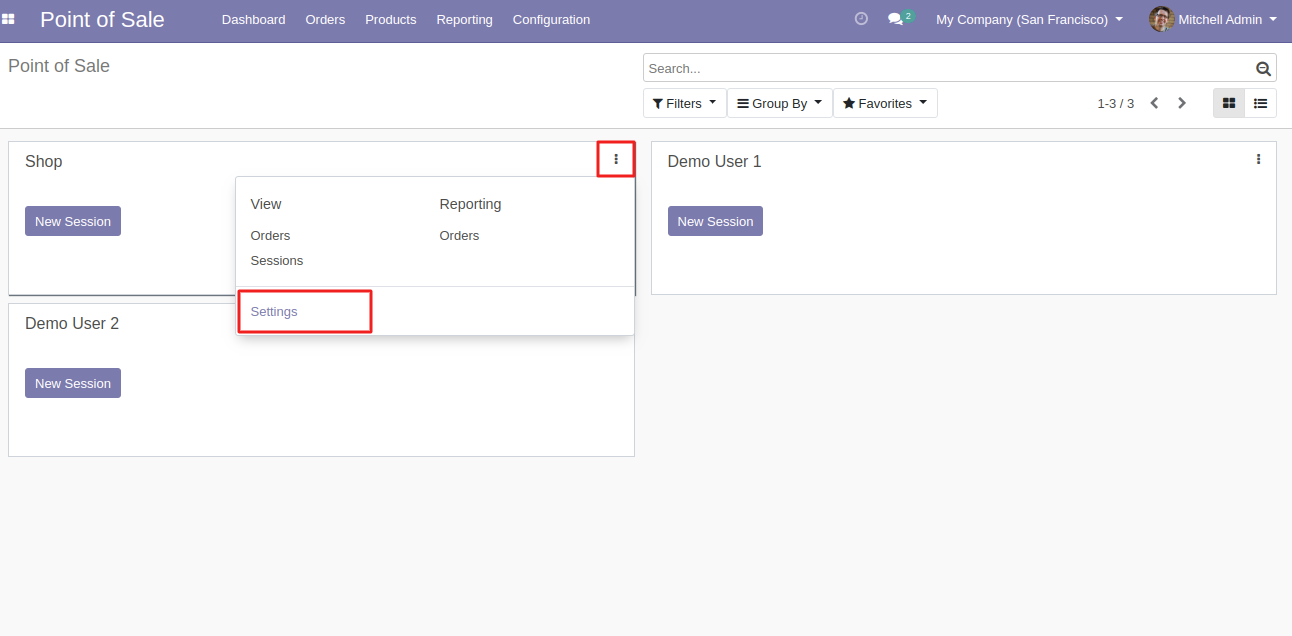
3. Scroll down to the “POS Redesign” section and mark Apply theme option true tick the Use custom receipt and select the custom receipt design for POS, you can select any receipt design and can create a new receipt design if you want. Additionally, there’s one more feature named Keep drawer closed this will help to keep the drawer closed when you open the POS session.

4. By clicking on Create and Edit button you can navigate to create a new receipt design. Add the Name of receipt design and receipt XML code.

Front-end
5. This is the “Home Page” view of the POS shop after applying the POS Redesign theme.
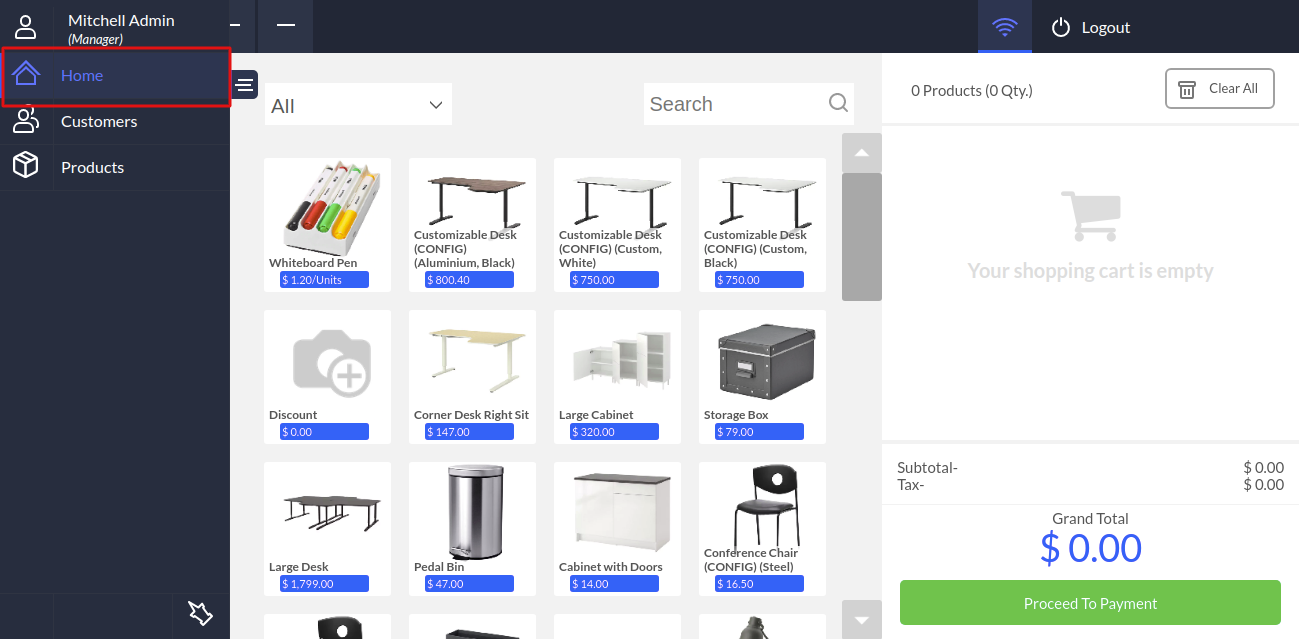
6. By clicking on the drawer logo you can hide the appearance of the home, customers and product tabs in a big view can make it smaller and can larger the screen.

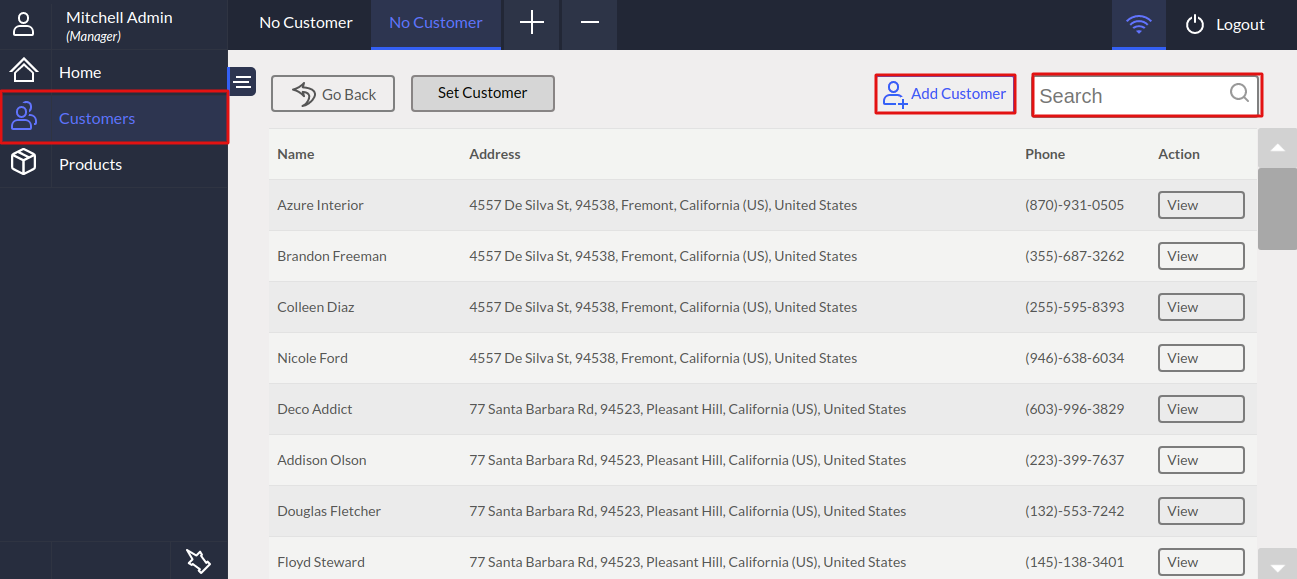
7. Clicking on customers tab, you can add a new customer and search any of the customers out of the list.
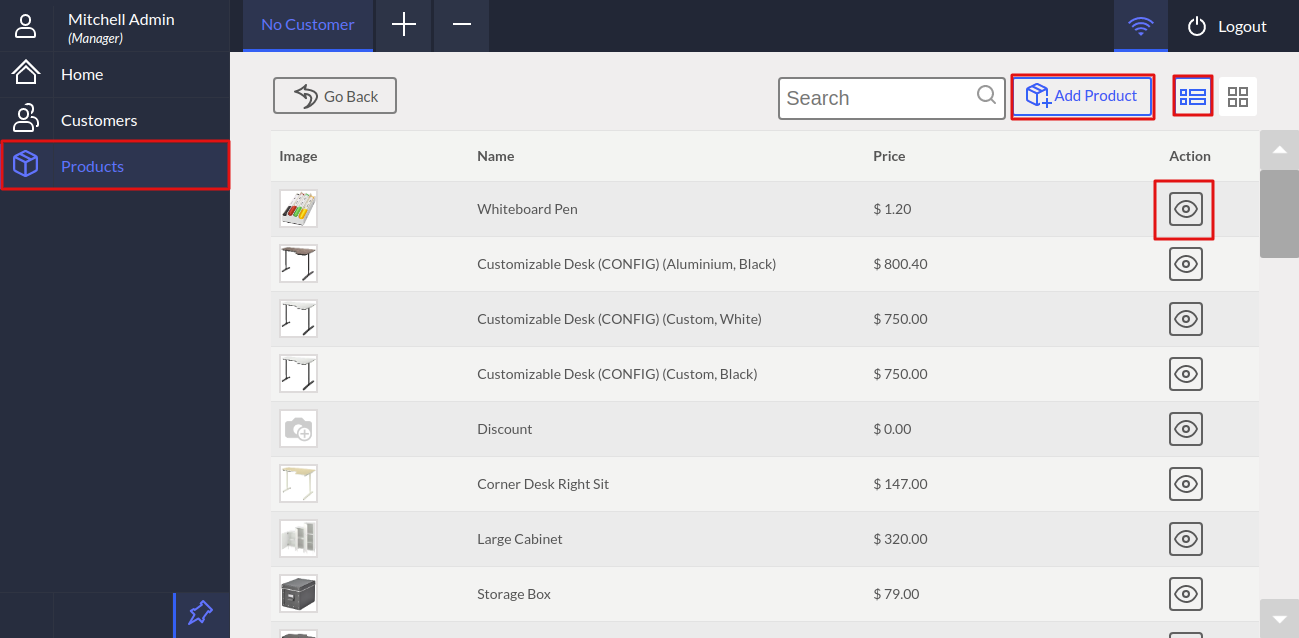
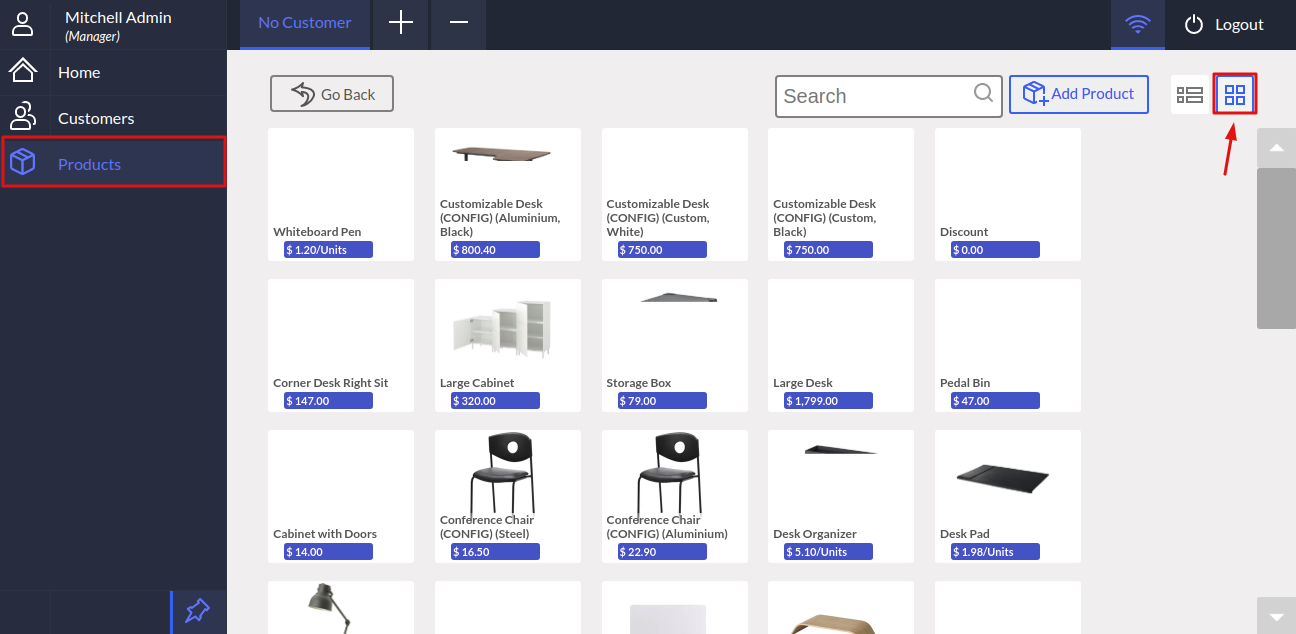
8. Navigate to the Products tab, you can create new products from the running POS session. Here the products are appearing in list view. Additionally, you can also see more details of the products by clicking on “Eye icon”.
9. After clicking on the Eye icon the new page will appear containing entire product’s information.

10. You can also view the products in kanban view, just needs to click on the kanban view sign. Moreover, you can see products images in this view.
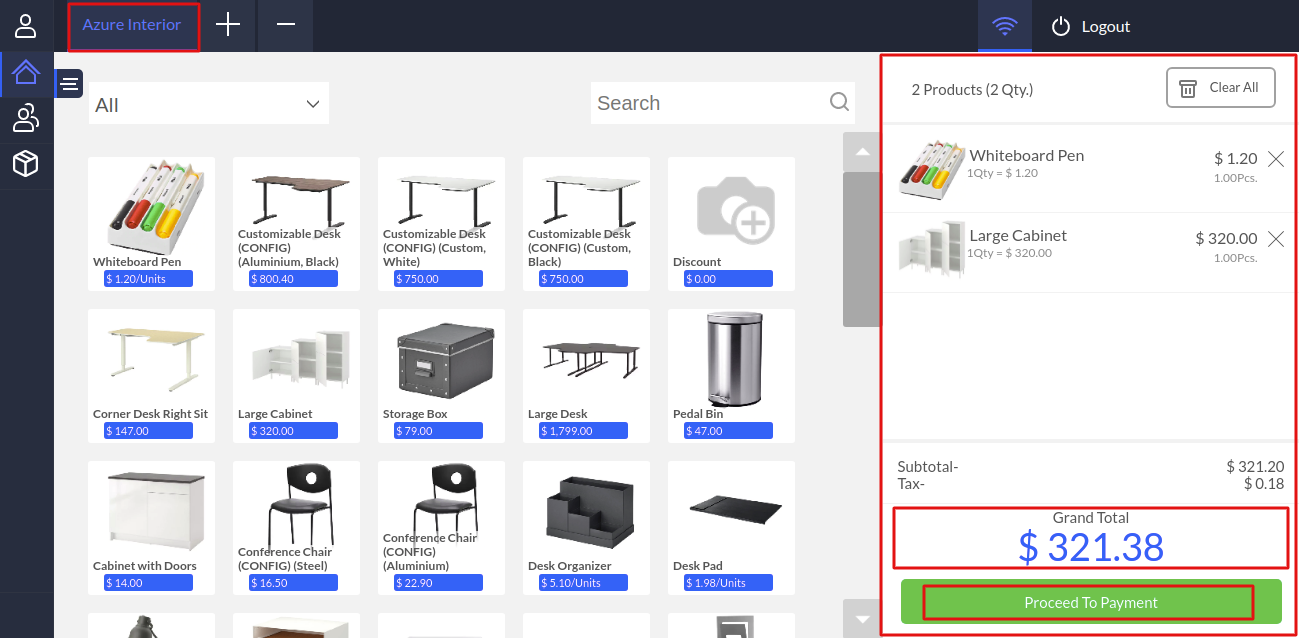
11. This is the advanced view of the POS cart screen, in the Bottom right side you have the validating button as Proceed to payment and just a bit higher you have the Grand total view. The selected customer will be shown at the Top right corner.
12. This is the new check -out page of the POS now, you will be able to see your cart products as well and can generate an invoice, click on the dropdown arrow to select the payment method, can then simply click on complete order to proceed.

13. This is the receipt view, which can be customized from the back-end with the help of Use custom receipt feature.

Also Read The User Guides For The Other Modules
NEED HELP?
Was this guide helpful? Please share your feedback in the comments below.
If you have any issues/queries regarding the module please raise a ticket at https://webkul.uvdesk.com/en/customer/create-ticket/
For any doubt contact us at [email protected].
Thanks for reading!!
Current Product Version - 1.0.0
Supported Framework Version - Odoo V13, V12

Be the first to comment.