Introduction
Odoo Stripe Terminal Integration connects your Odoo system with Stripe card readers to accept secure in-person payments.
You can send payment requests directly from Odoo to the Stripe without switching between systems. This setup keeps your checkout process simple and fast.
It processes payments in real time using Stripe Terminal. It reduces manual work, lowers errors, and updates records instantly.
Retail stores and other businesses that accept card payments can use it to improve the customer checkout experience.
Features
- Accept card and contactless payments directly through Stripe Terminal connected with Odoo.
- Connect Odoo with Stripe using secure API keys to ensure safe and reliable payment communication.
- Receive payment approval instantly in Odoo after the customer completes the transaction on the device.
- Odoo stripe terminal integration registers and manage multiple Stripe readers across different stores and counters.
- Pair the Stripe terminal with your Stripe account easily using the device registration process.
- View live payment status in Odoo, including success, failure, or pending transactions.
- Display clear error messages in Odoo to help users take quick action during payment issues.
- Link Stripe payments directly with Odoo invoices and update records immediately after payment.
Installation
- Once you purchase the App from Webkul store, you will receive a link to download the Module’s zip file.
- Extract the file on your system after the download finishes. As a result, you will be able to see a folder named- wk_stripe_terminal_integration
- Copy and paste this folder inside your Odoo Add-Ons path.
- Now, open Odoo App and click on the Settings menu. Here, click on Activate Developer Mode.
- Then, open the Apps menu and click on ‘Update Modules List.’
- In the search bar, remove all the filters and search ‘wk_stripe_terminal_integration’
- You will be able to see the module in the search results. Click on ‘Activate’ to install it.
Workflow
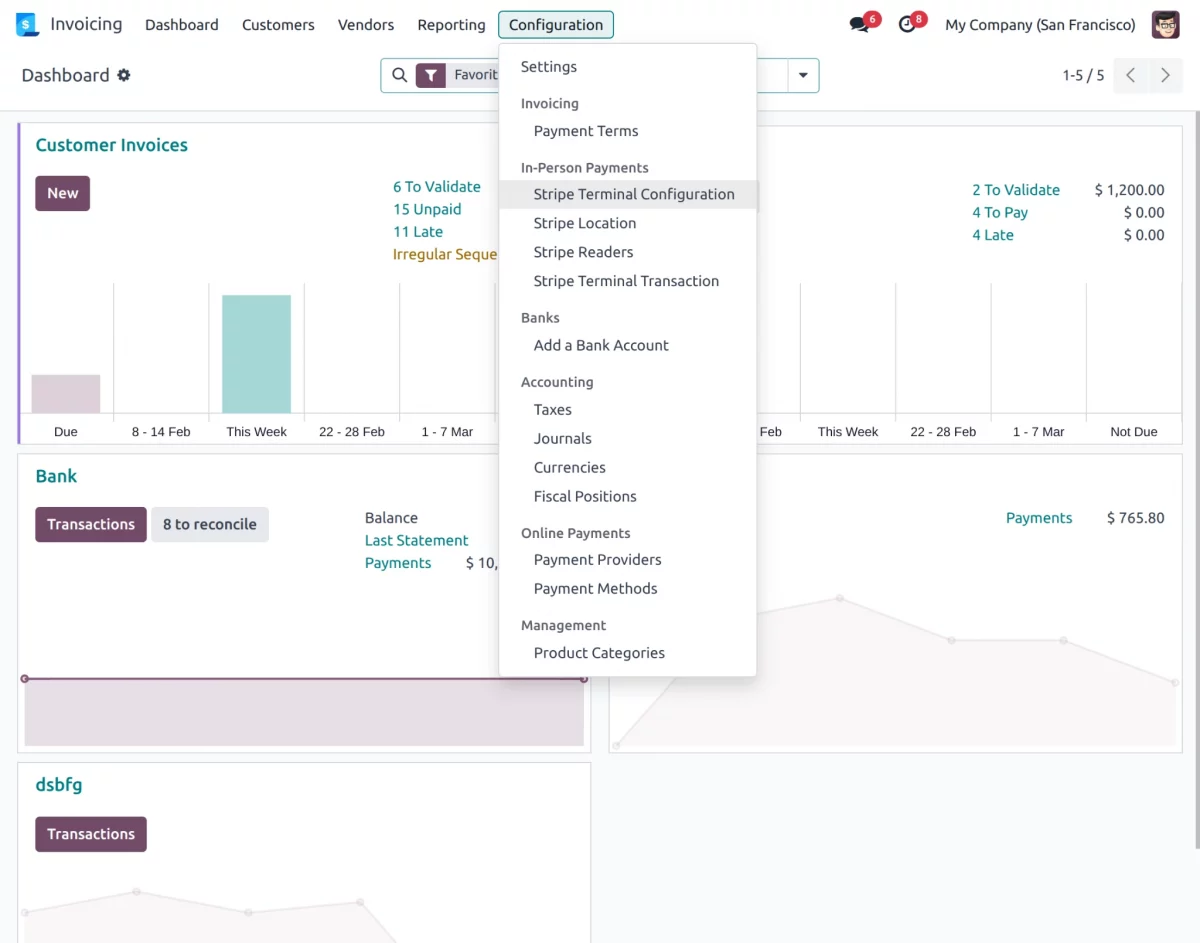
1. After installing Odoo Stripe Payment Terminal, go to the Stripe terminal configuration menu in the Odoo backend to set up your Odoo Stripe Payment Terminal.
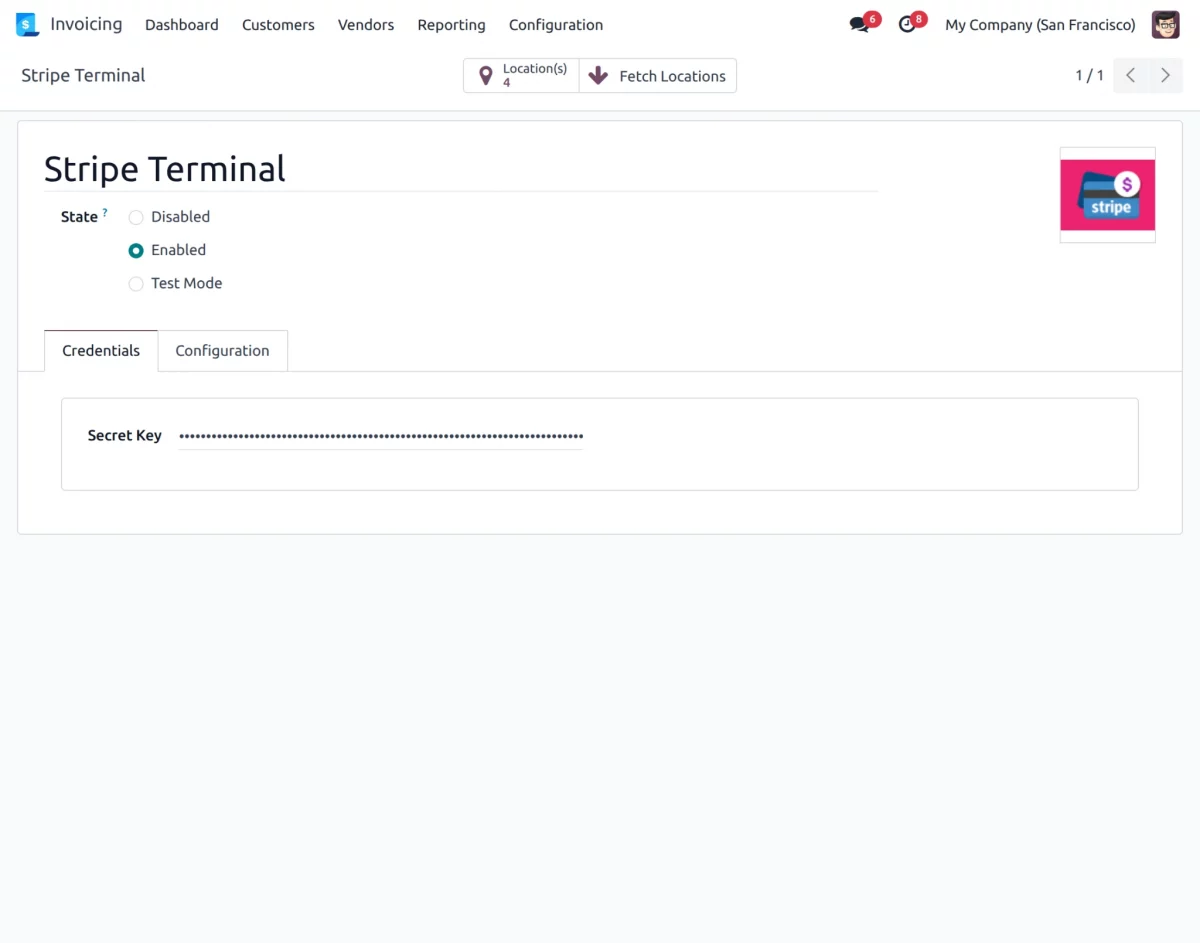
2. Enter your Stripe Secret Key and other required configuration in the Stripe Payment Provider settings. Save the configuration to connect Odoo with your Stripe account securely.
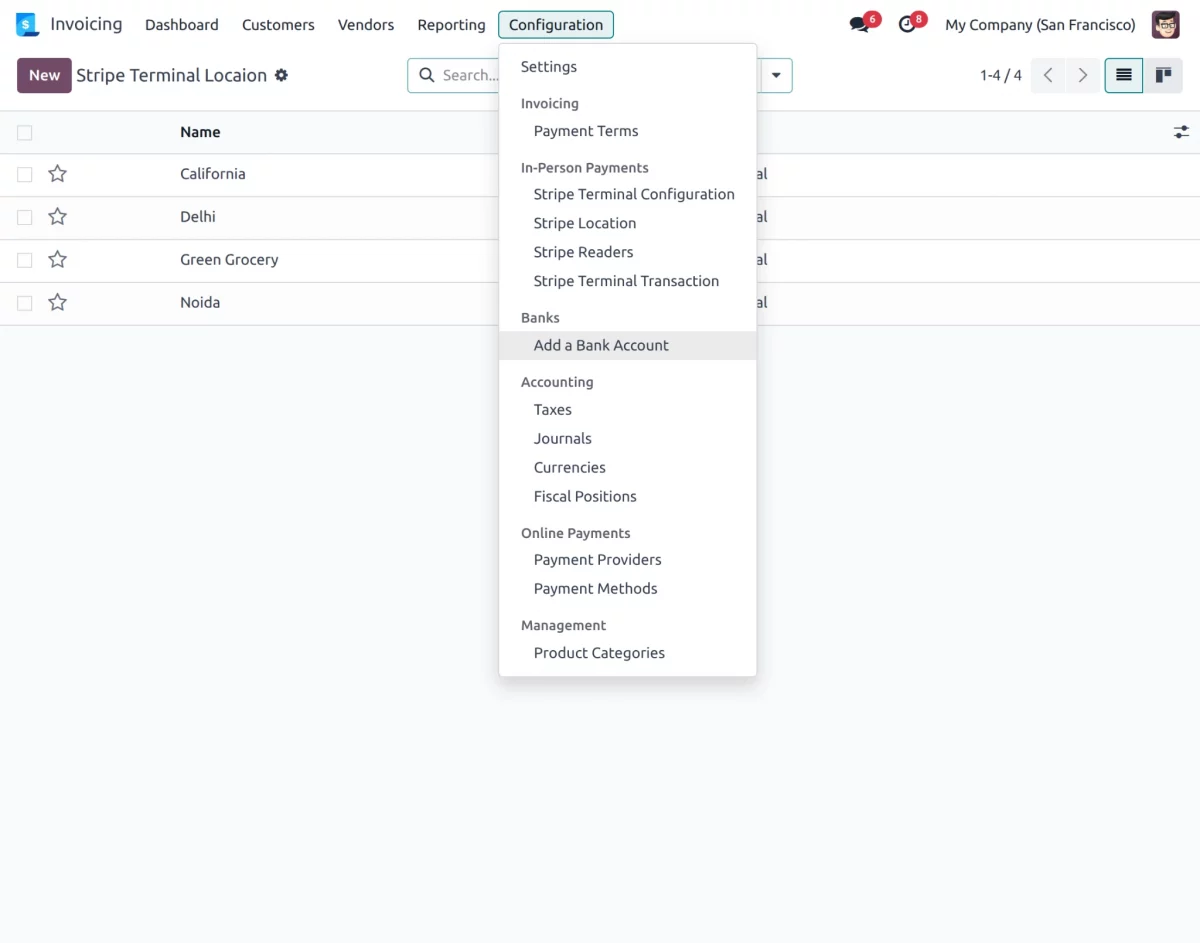
3. After saving the credentials, open Stripe Terminal settings and go to the Locations section. Enter the details and click Generate Location to create the Stripe location.
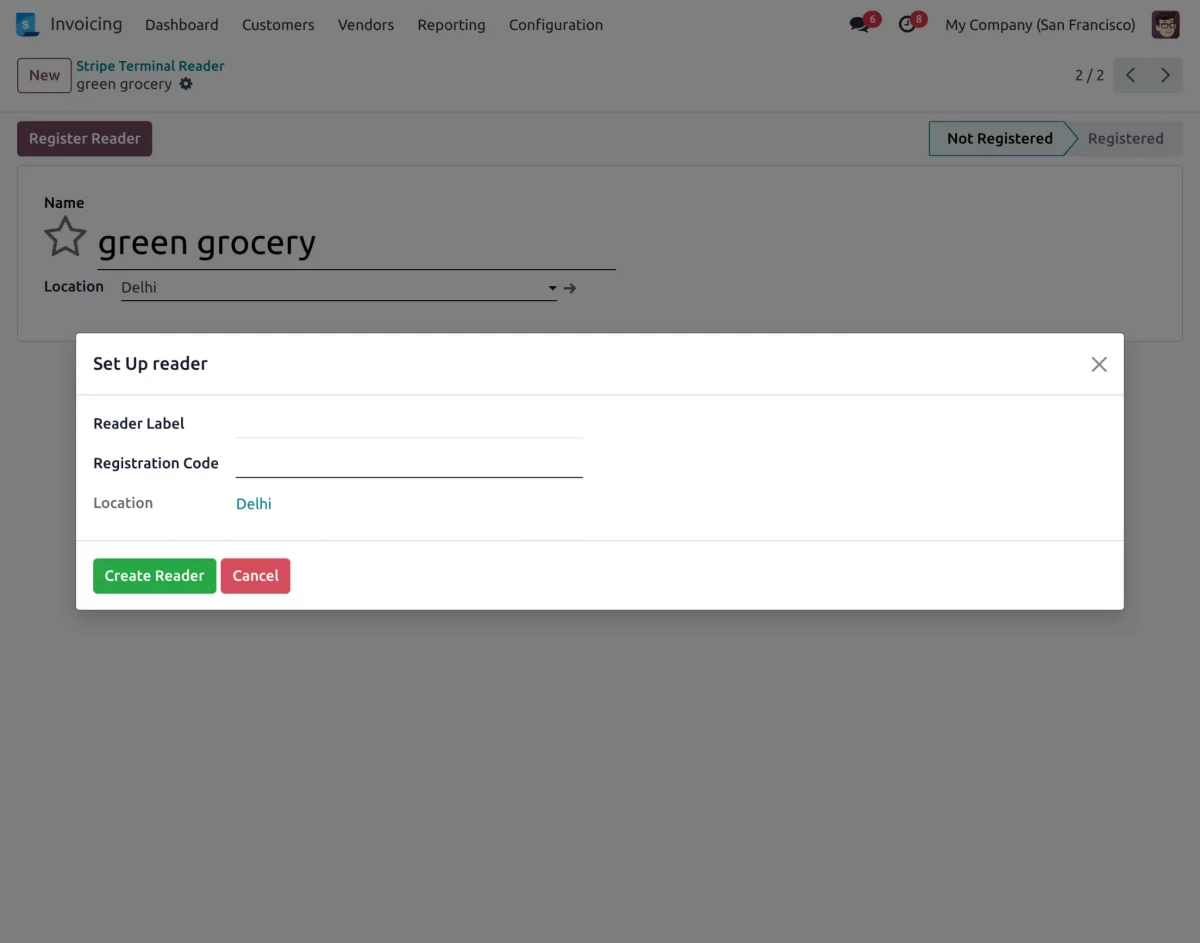
4. Now go to the Stripe Readers section. Click on Register Reader. Enter the registration code & other credentials to confirm & complete the registration.
5. Next, go to Invoicing → Customers → Invoices and open an existing invoice or create a new Draft and Confirm. After confirming the invoice, click on Pay to make the payment.
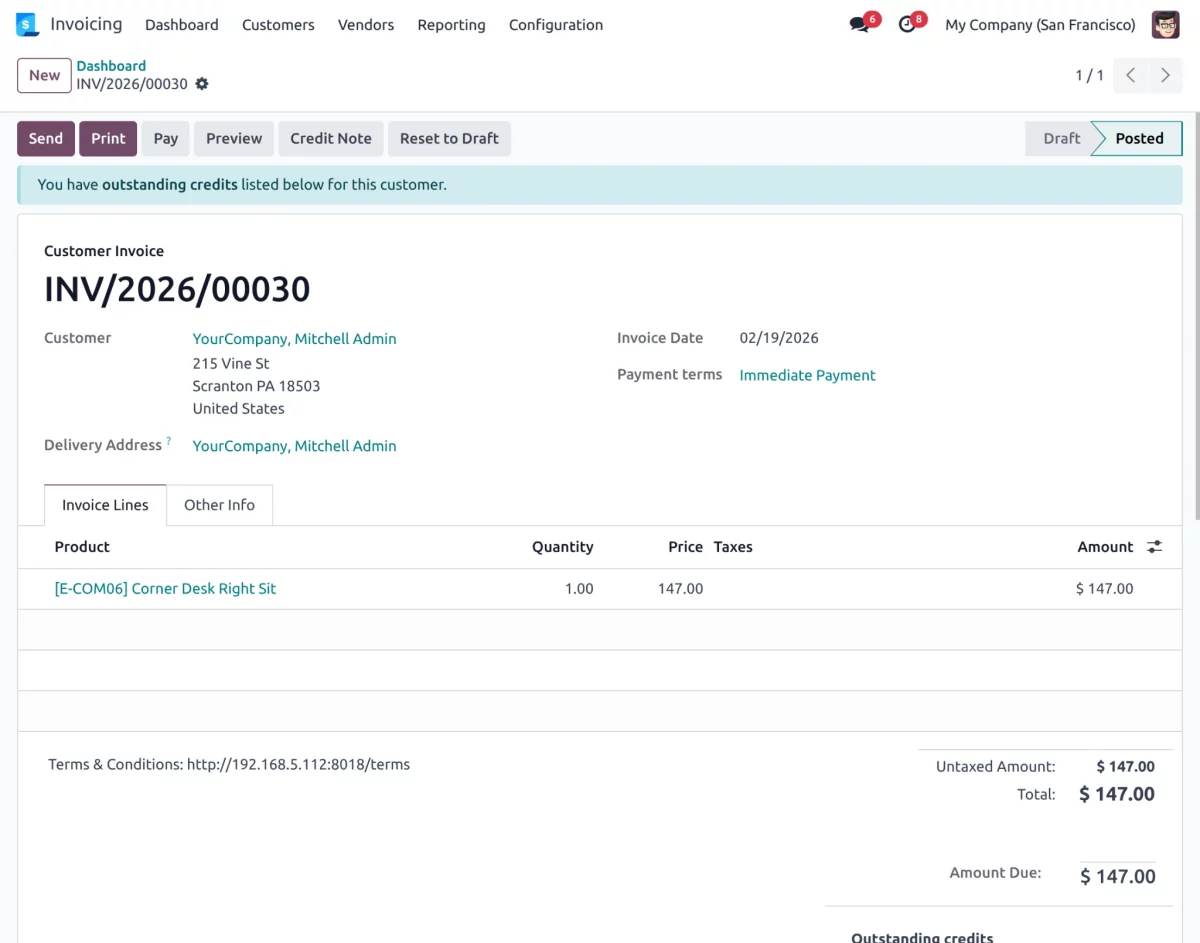
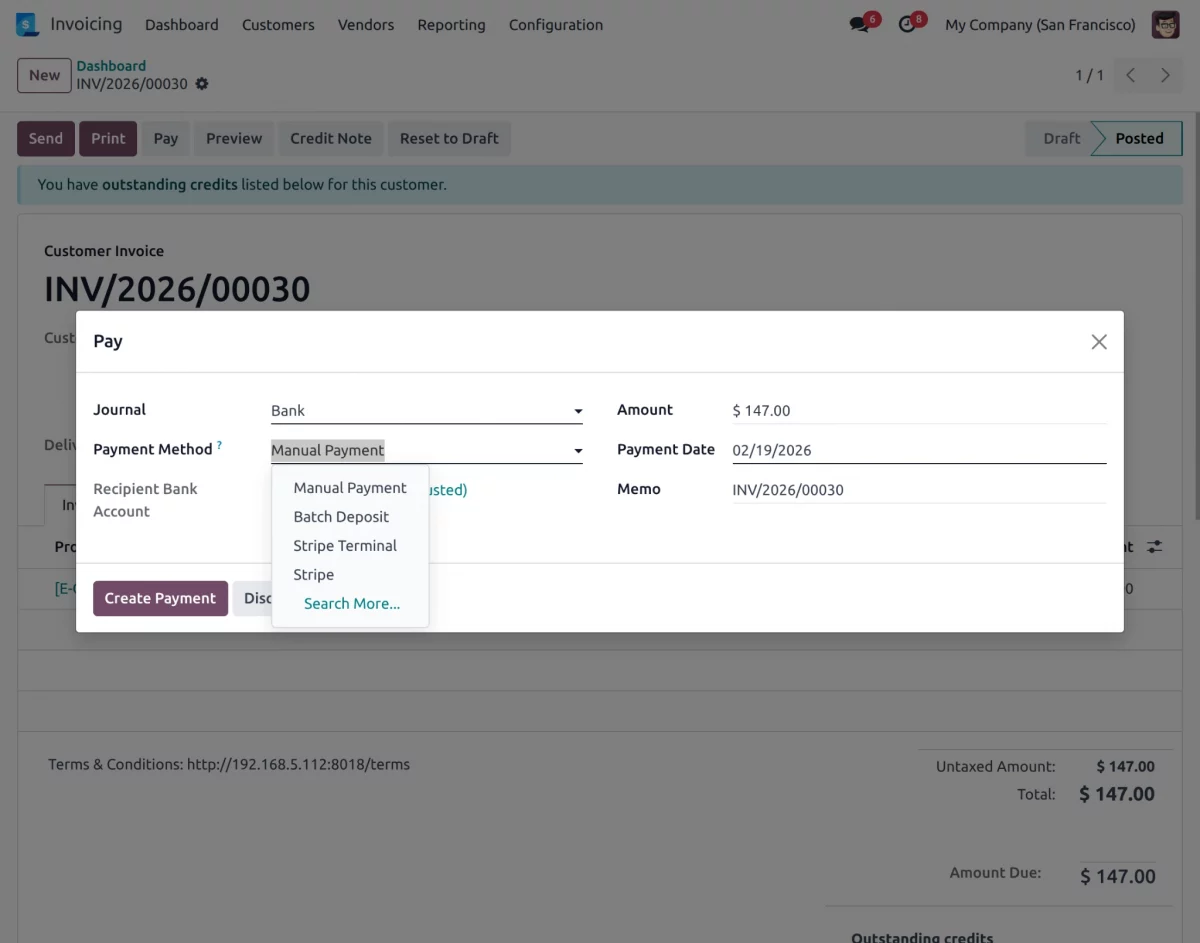
6. Choose Stripe Terminal as the Payment Method and select the Terminal to proceed with the payment. Then, click on Create Payment.
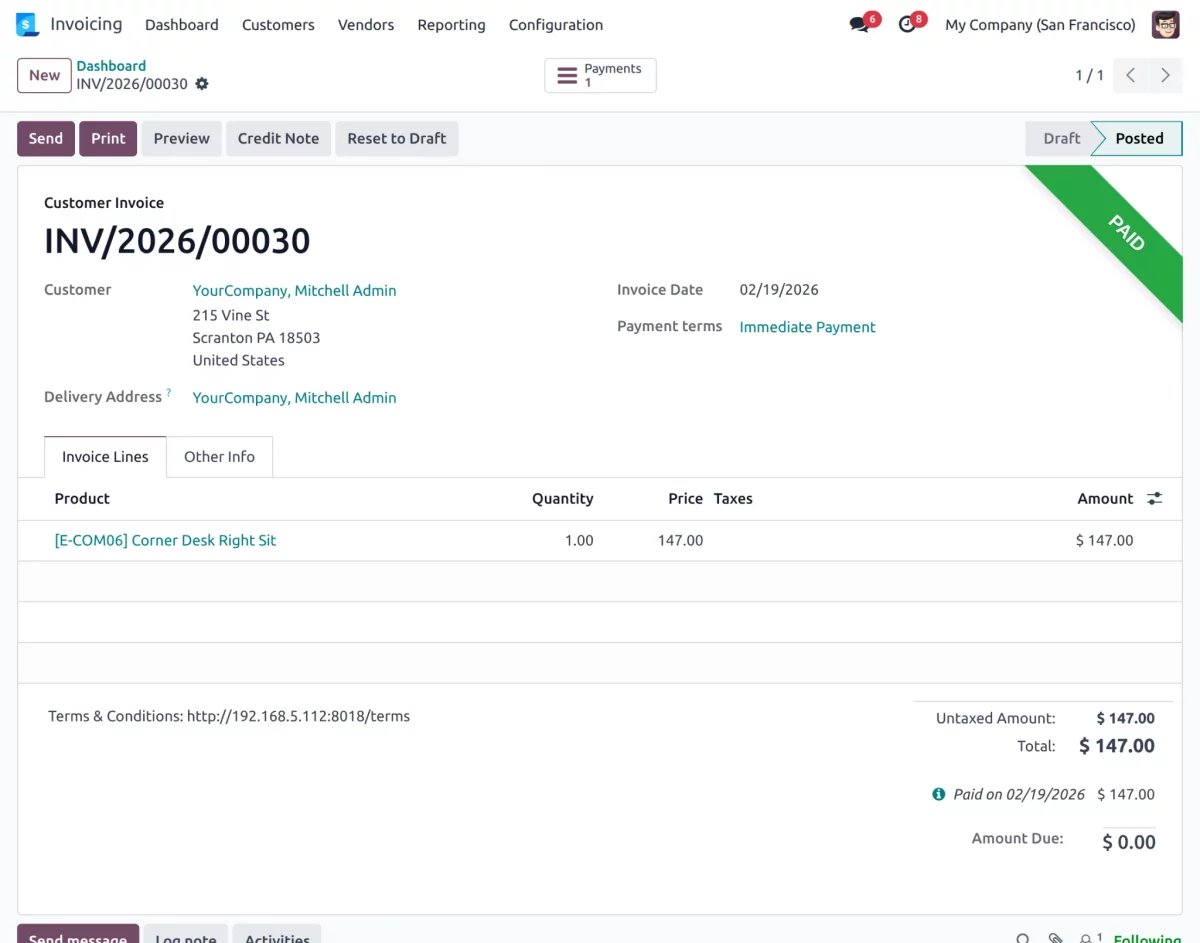
7. The payment request is sent to the Stripe terminal. Meanwhile, you can see the live payment status on Odoo screen. After that, you will see that the invoice has been labelled as Paid.
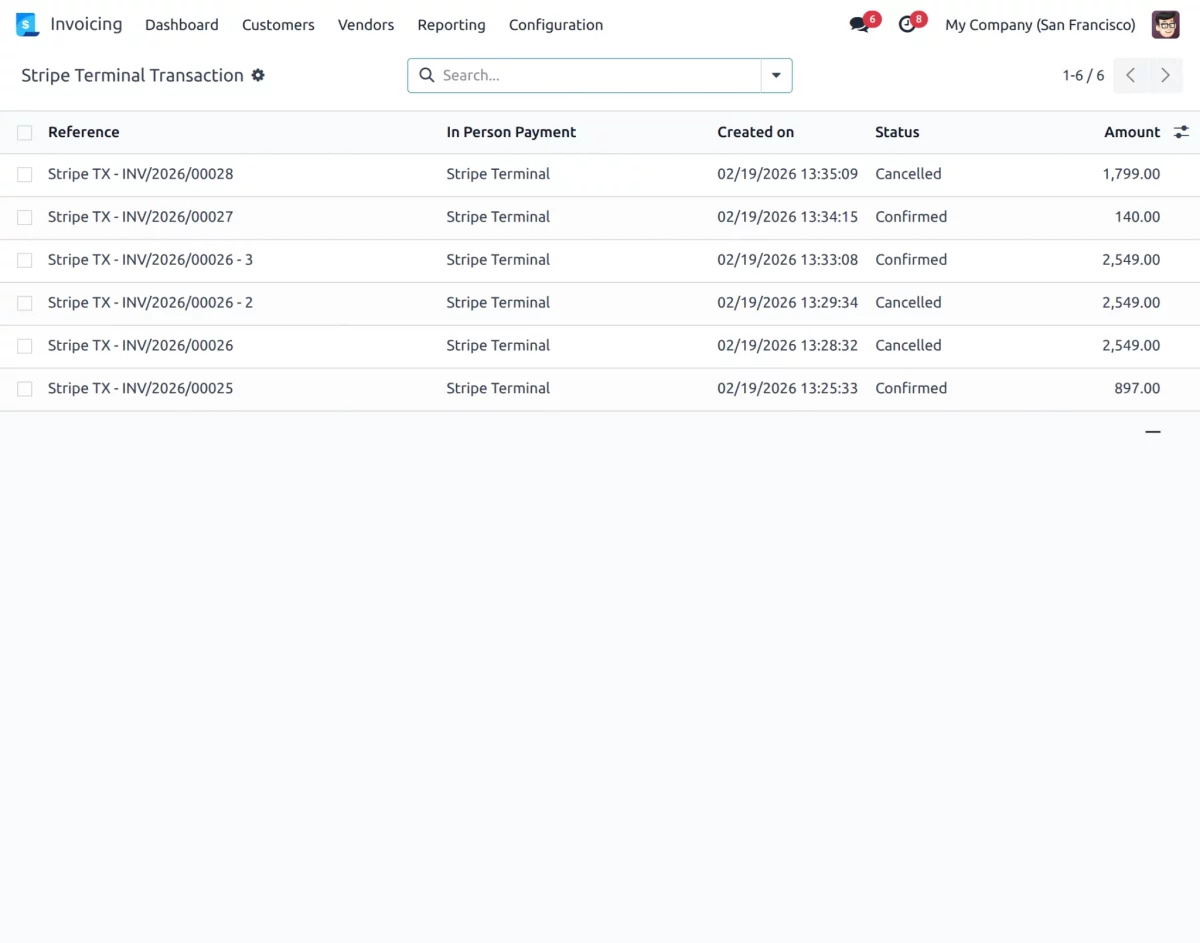
8. Go to Configuration→Stripe Terminal Transaction. Finally, the admin can review all terminal transactions from the backend, including payment amount, status, and linked invoices.
Need Help?
Hope you find guide helpful! Please feel free to share your feedback in the comments below.
If you still have any issues/queries, please create a ticket at the UV Desk.
I hope this helps. In case of any further queries, contact us at our support mail.
Thanks for paying attention!!
Current Product Version - 1.0.0
Supported Framework Version - Odoo 19,18

Be the first to comment.