Introduction
Odoo MCP Server Integration enables secure AI-powered interaction with Odoo ERP using the Model Context Protocol (MCP).
The module allows Odoo to act as an MCP client while connecting to an external MCP Server for controlled AI operations.
With Odoo MCP Server Integration, AI assistants such as VS Code AI extensions and GitHub Copilot (MCP-enabled environments) can interact with ERP data securely, without direct database access.
Features
- Safely connects AI tools with Odoo ERP without allowing direct database access.
- Uses an external MCP Server to manage authentication, API keys, and approved AI actions.
- Our Odoo MCP Server Integration allows Odoo to work as an MCP client through the Discuss module.
- Enables AI chatbot interaction directly inside Odoo Discuss.
- Supports multiple AI clients such as Odoo, VS Code AI extensions, and GitHub Copilot(MCP-enabled environments).
- Allows configuration of LLM providers OpenAI, Google Gemini, and Groq.
- Controls which Odoo models AI can access for automation.
- Restricts Create, Read, Update, and Delete operations based on permissions.
Installation
- Once you purchase the App from Webkul store, you will receive a link to download module’s zip file.
- Extract the file on your system after download finishes. As a result, you will be able to see a folder named- ‘odoo_mcp_server’
- Copy and paste this folder inside your Odoo Add-Ons path.
- Now, open Odoo App and click on the Settings menu. Here, click on Activate Developer Mode.
- Then, open Apps menu and click on ‘Update Modules List.’
- In the search bar, remove all the filters and search ‘‘odoo_mcp_server’’
- You will be able to see module in the search results. Click on ‘Install’ to install it.
MCP Server Deployment & Installation
1. MCP Server Deployment Overview
The MCP Server runs as a separate service outside the Odoo environment. Odoo does not host or run the MCP Server; instead, it connects to the server only as an MCP client.
The MCP Server supports multiple MCP-compatible AI clients, including Odoo and other supported platforms.
If setup assistance is required after purchasing the module, users may be asked to share the necessary server access details to complete the configuration.
2. MCP Server Installation & Responsibility
You may choose one of the following installation approaches based on your preference and technical capability:
Option A: Self-Managed Setup
- MCP Server source code is provided after purchase.
- Installation and configuration documentation is shared.
- Users can independently install, configure, and manage the MCP Server.
Option B: Setup with Implementation Support
- User will provide the required server access details.
- MCP Server installation and configuration is handled by our technical team.
Once the MCP Server setup is completed, Odoo requires only the following details: - MCP Server URL.
- MCP authentication credentials (API key).
- No additional deployment or configuration is required within the Odoo environment.
3. System Requirements for MCP Server
To ensure stable operation and optimal performance, the following minimum server specifications are recommended:
- Operating System: Ubuntu 22.04 or later (Debian-based Linux)
- Python Version: 3.10 or 3.11
- CPU: Minimum 2 cores
- RAM: Minimum: 4 GB, Recommended: 8GB
Workflow
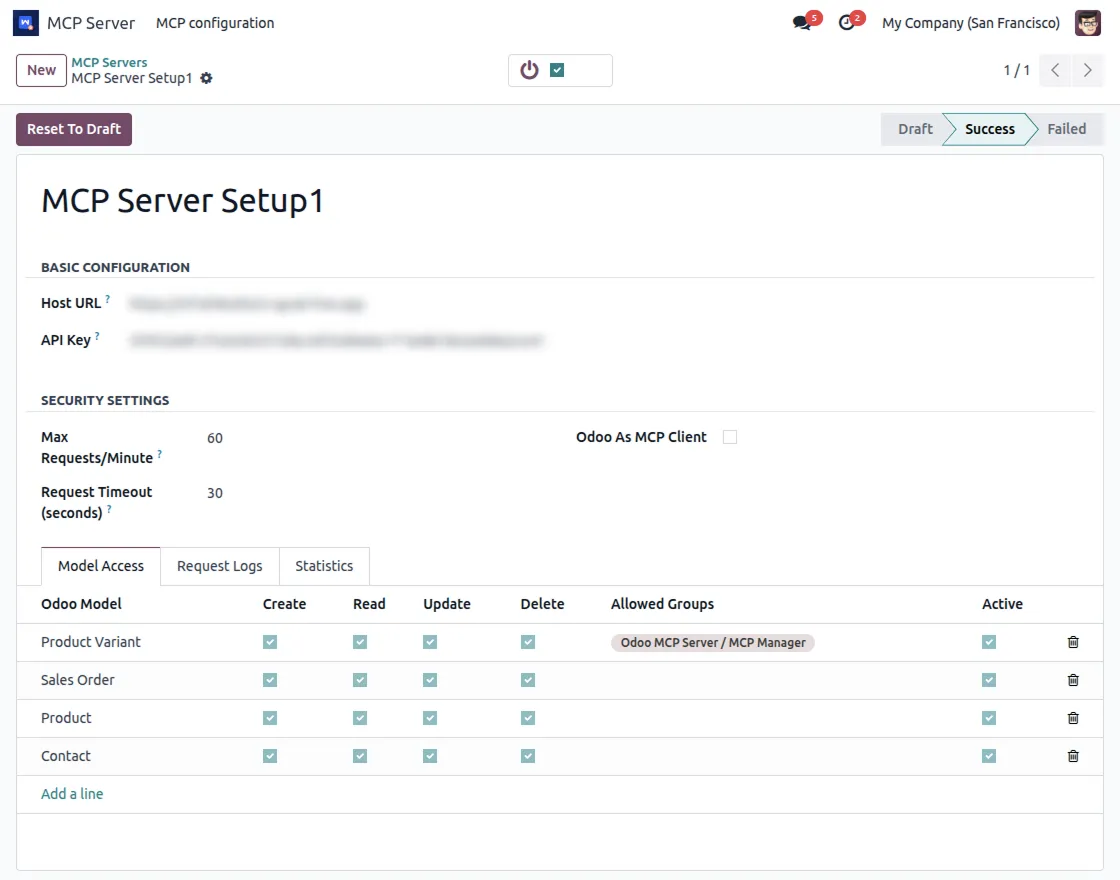
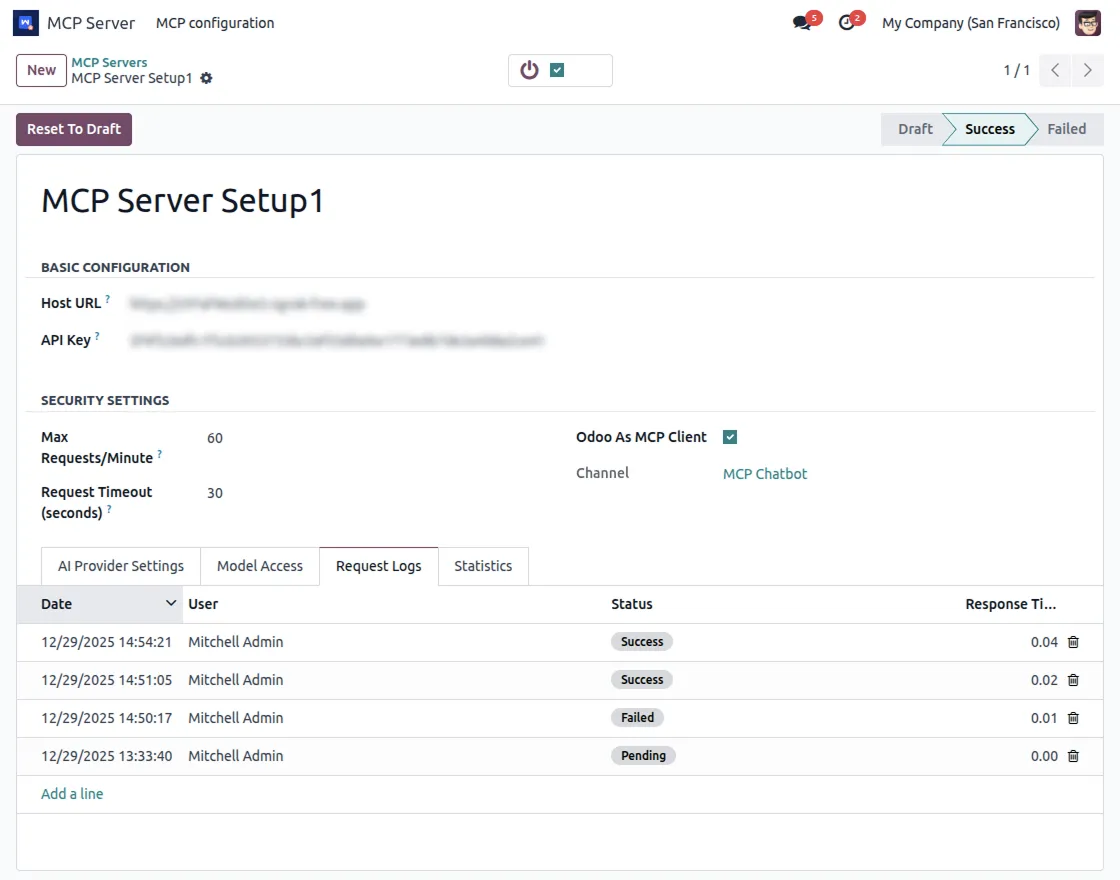
- After installing Odoo MCP Server Integration module, navigate to the MCP Server app.

2. Configure the MCP Server Host URL and API Key.
In the Model Access section, select the Odoo models and define allowed operations such as Create, Read, Update, and Delete, with optional restrictions based on user groups.
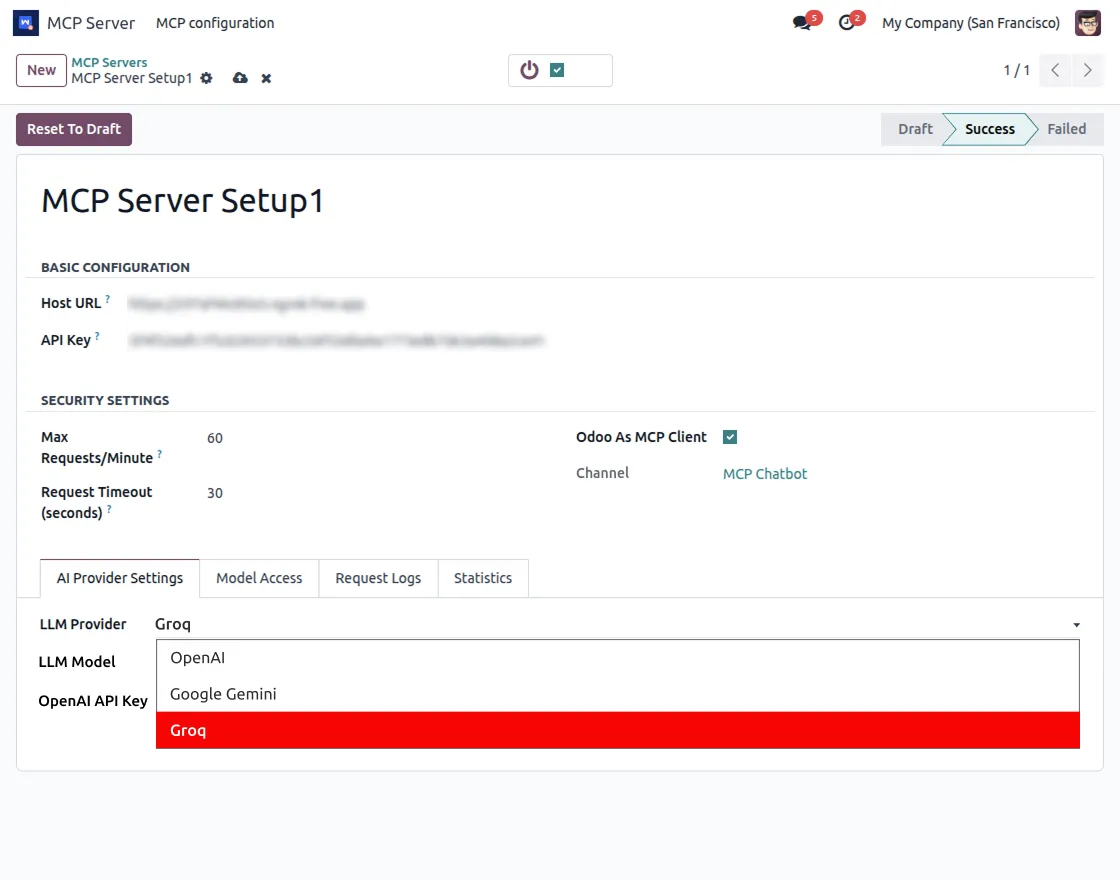
3. Enable Odoo as an MCP Client and configure the required LLM provider (OpenAI, Google Gemini, or Groq).
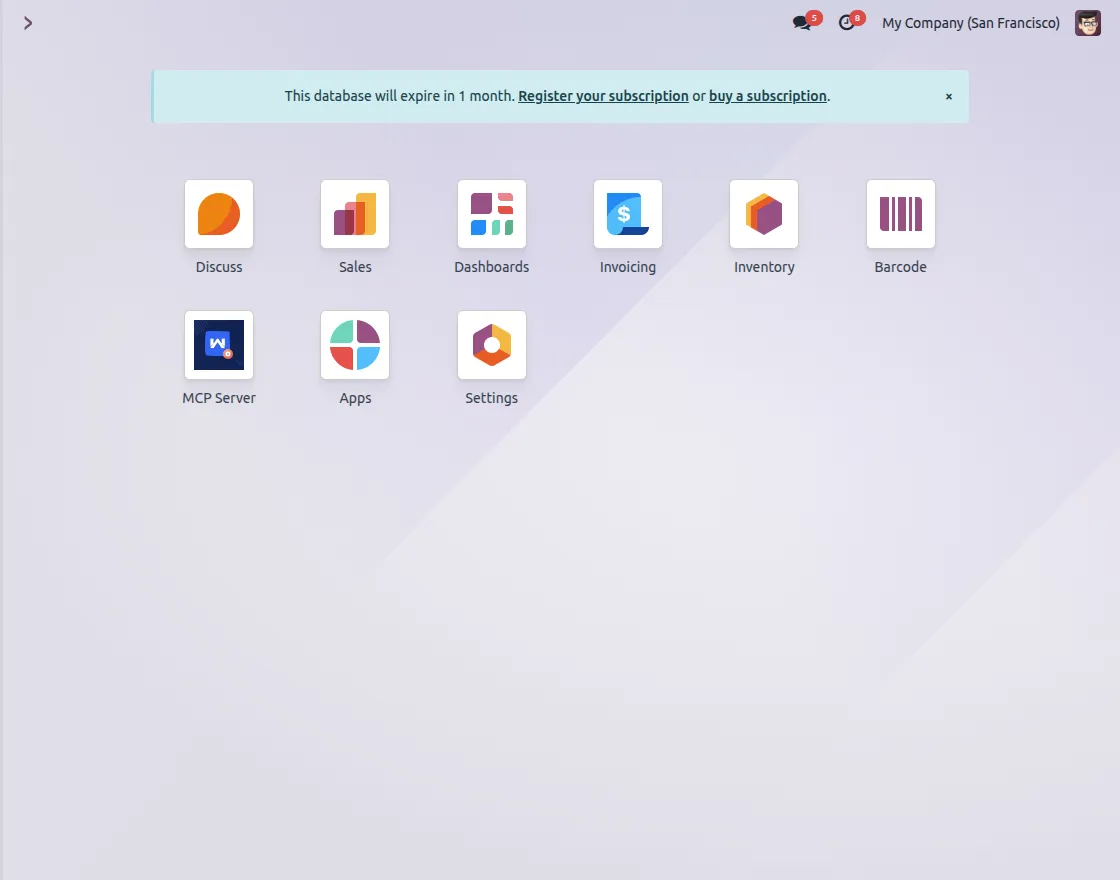
4.Once the configuration is complete, navigate to the Discuss module.
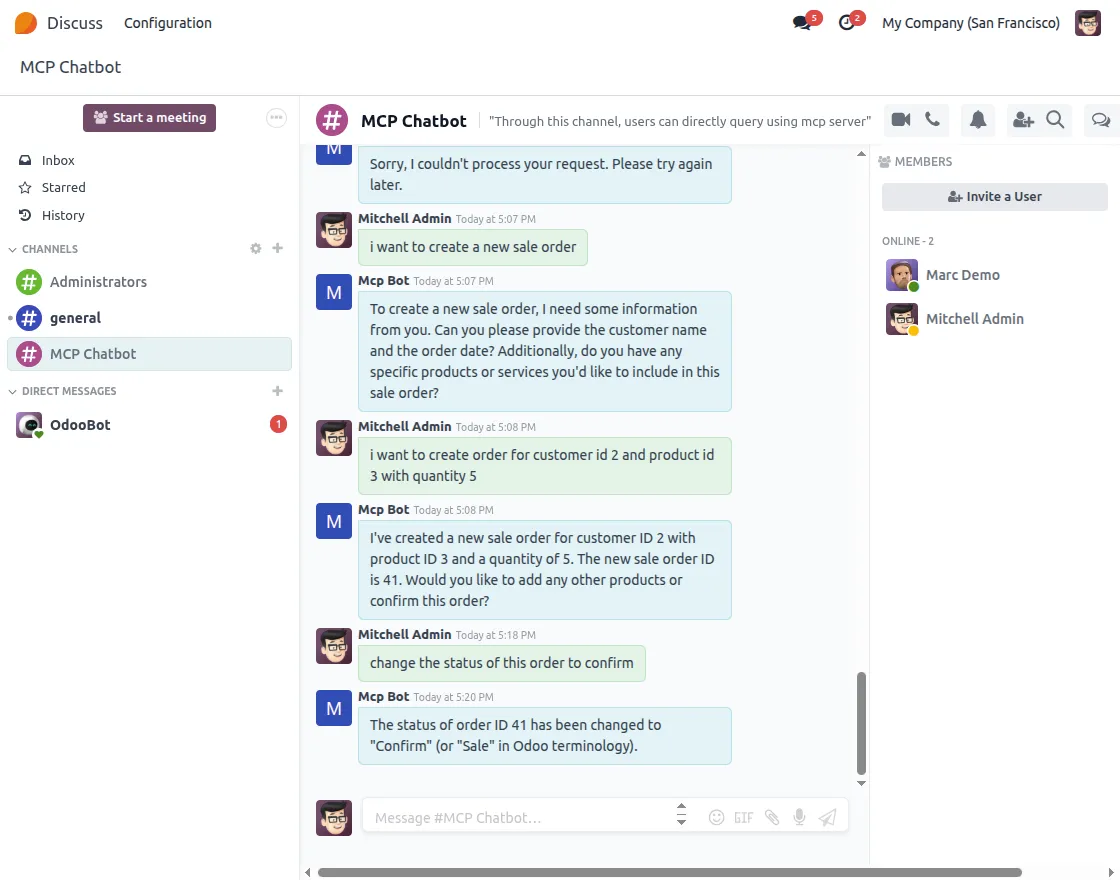
5. Start interacting with the AI chatbot directly inside the Discuss channel.
6.You can review all responses from the Request Logs section.
Need Help?
Hope you find the guide helpful! Please feel free to share your feedback in the comments below.
If you still have any issues/queries, please create a ticket at the UV Desk.
I hope this helps. In case of any further queries, contact us at our support mail.
Thanks for paying attention!!
Current Product Version - 1.0.0
Supported Framework Version - Odoo 18, Odoo 19

2 comments
We have created a ticket on your behalf and our team will connect with you soon regarding your queries.
Thanks and Regards,
Team Webkul