The Laravel Marketplace Mercado Pago Payment Gateway lets your customers pay with Mercado Pago on your Bagisto marketplace. Mercado Pago is a trusted payment service. It is very popular across Latin America.
This module is built for multi-vendor stores. Each payment reaches the seller’s own Mercado Pago account. The admin commission travels with the same payment as a marketplace fee. You do not have to split it by hand. Do you run a single-store site instead? Then read our Bagisto Mercado Pago Payment Gateway guide.
NOTE: Before you buy this module, please check Mercado Pago first. Visit mercadopago.com. Make sure the gateway works in your country.
Also, this module is an add-on. It works with the “Laravel Multi-Vendor Marketplace” extension. You must install that extension first. Our Laravel Multi Vendor Marketplace guide walks you through it. The add-on runs only on a marketplace based website.
Here is what the module can do:
- The admin can turn the module on or off from the admin panel.
- It sends each payment to the seller and keeps the admin commission as a marketplace fee.
- It accepts the credit and debit cards that Mercado Pago supports, and buyers can pay in installments.
- It lets sellers link their own Mercado Pago account in one click.
- It gives two checkout modes: Checkout Pro and Custom Checkout.
- Buyers can pay on a hosted page or right on your store.
- It lists every Mercado Pago payout made to your sellers in the admin panel.
- It sends admin refunds straight to Mercado Pago.
- It invoices the order as soon as Mercado Pago approves the payment.
- It updates the order status when Mercado Pago reports a change.
- It keeps your store safe with secure online payments.
Installation
Bagisto Version: v2.4.10
Marketplace Version: v2.4.10.0
Step 1: Extract Package
Unzip the extension package and merge the packages folder into your project root.
Step 2: Register Service Provider
- Goto bootstrap/providers.php file and add the following line under ‘providers’
Webkul\MarketplaceMercadoPago\Providers\MarketplaceMercadoPagoServiceProvider::class,
- Goto composer.json file and add following line under ‘psr-4’
"Webkul\\MarketplaceMercadoPago\\": "packages/Webkul/MarketplaceMercadoPago/src"
- Goto config/concord.php file and add following line under ‘modules’
Webkul\MarketplaceMercadoPago\Providers\ModuleServiceProvider::class,
- Run these commands below to complete the setup
composer require mercadopago/dx-php --with-all-dependencies
composer dump-autoload
php artisan marketplace-mercadopago:install
That is it. Now open the project on your domain.
Laravel Marketplace Mercado Pago Payment Gateway Configuration
After you install the Laravel Marketplace Mercado Pago Payment Gateway, you can set it up. The admin does this from the admin panel.
Go to Configure > Sales > Payment Methods. You will see “Mercado Pago” there.
Here are the settings you can change:
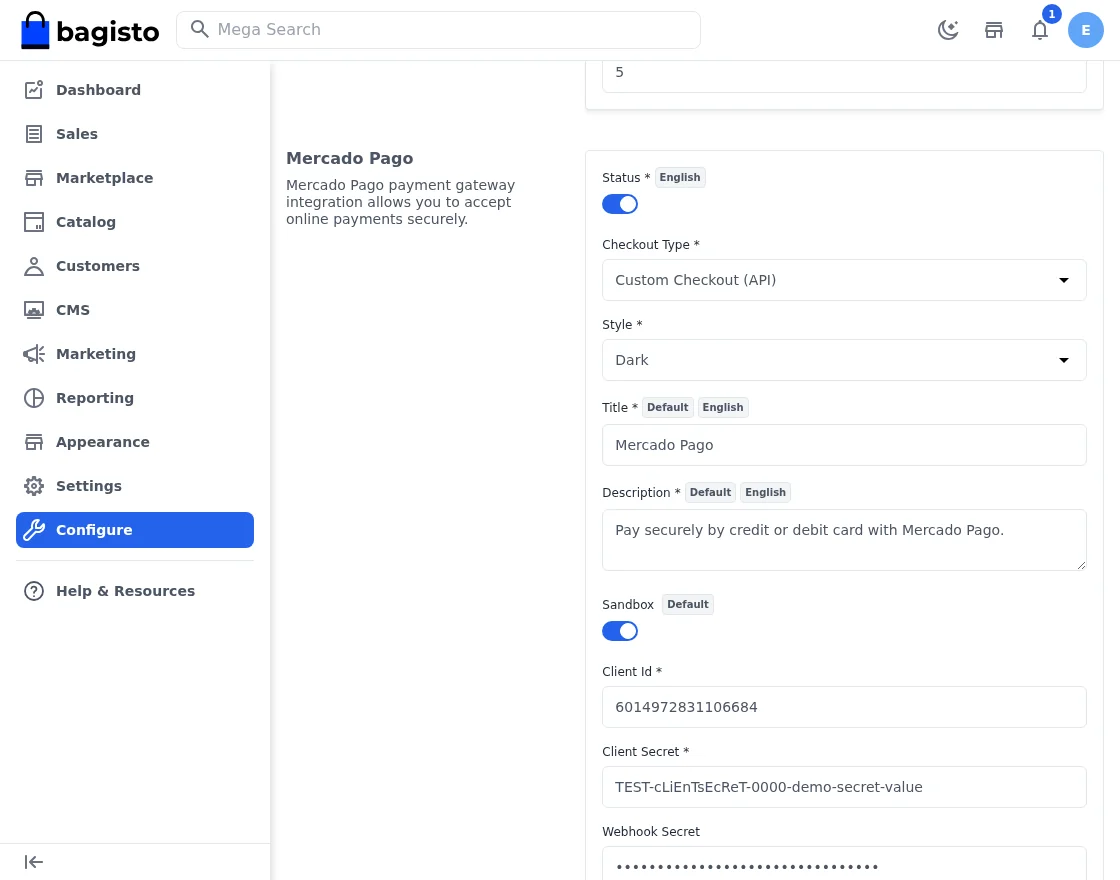
- Status: Turn the module on or off.
- Checkout Type: Pick how buyers pay.
- Choose “Checkout Pro” for a hosted page.
- Choose “Custom Checkout (API)” to pay on your store.
- Style: Pick a look for the card form shown on your store. You can choose Dark, Bootstrap, or Flat.
- Title: Set the name shown to buyers on the store.
- Description: Add the text shown on the checkout page.
- Sandbox: Turn test mode on or off. When it is on, the module uses your test keys.
- Client Id: Add the Client Id from Mercado Pago. It lets sellers link their account.
- Client Secret: Add the Client Secret from Mercado Pago.
- Webhook Secret: Add the secret from your Mercado Pago webhook. The module uses it to check that a notification really came from Mercado Pago.
- Public Key: Add the live public key. Use this in production mode.
- Access Token: Add the live access token. Use this in production mode.
- Test Public Key: Add the test public key. Use this while you test.
- Test Access Token: Add the test access token for testing.
- Logo: Upload a logo for the payment method.
- Sort Order: Set the order. It decides where the method shows
on the payment page.
Mercado Pago Payouts | Admin
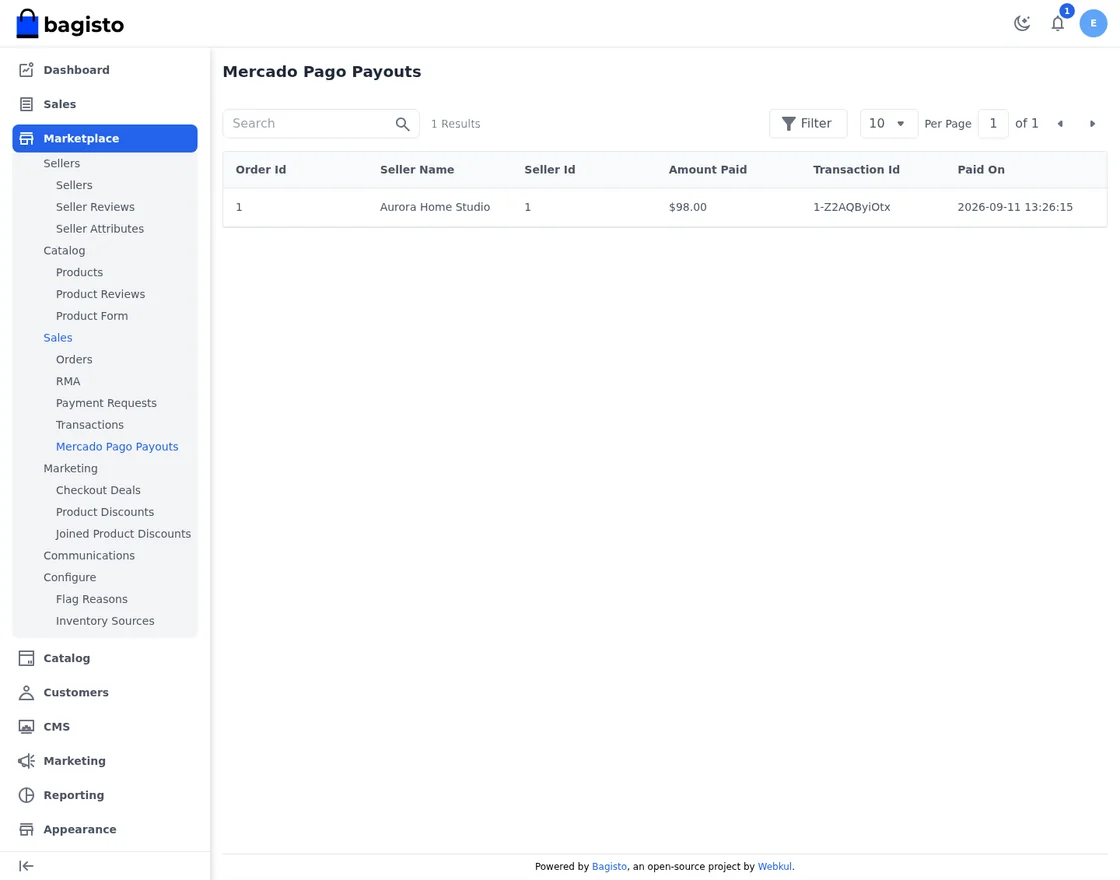
The Laravel Marketplace Mercado Pago Payment Gateway records every payout that went to a seller. The admin can see the full list. Just go to Marketplace > Sales > Mercado Pago Payouts.
This page lists the order id, the seller name, the seller id, the amount paid, the transaction id and the payout date. The admin can search by order id, seller name or transaction id, sort the list, and filter it by order id, seller name or payout date.
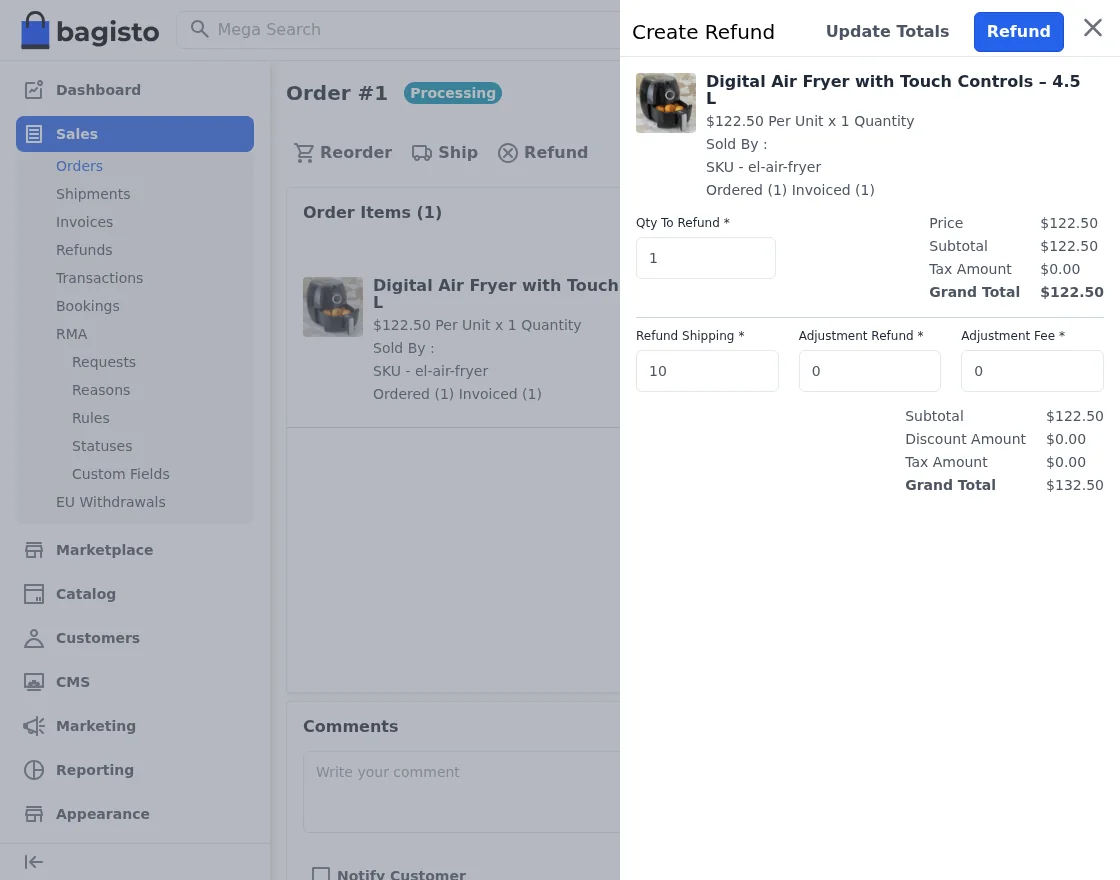
The admin can also refund a Mercado Pago order from the same panel. Open the order and click Refund. The module sends the refund to Mercado Pago first. It records the refund in Bagisto only after Mercado Pago approves it.
Laravel Marketplace Mercado Pago Payment Gateway | Seller Panel
After the install, sellers get a new page. Open Settings > Mercado Pago Configuration in the seller panel.
When the seller clicks Allow for Mercado Pago Payment, Mercado Pago opens in a new tab. There they sign in and grant access to their own account.
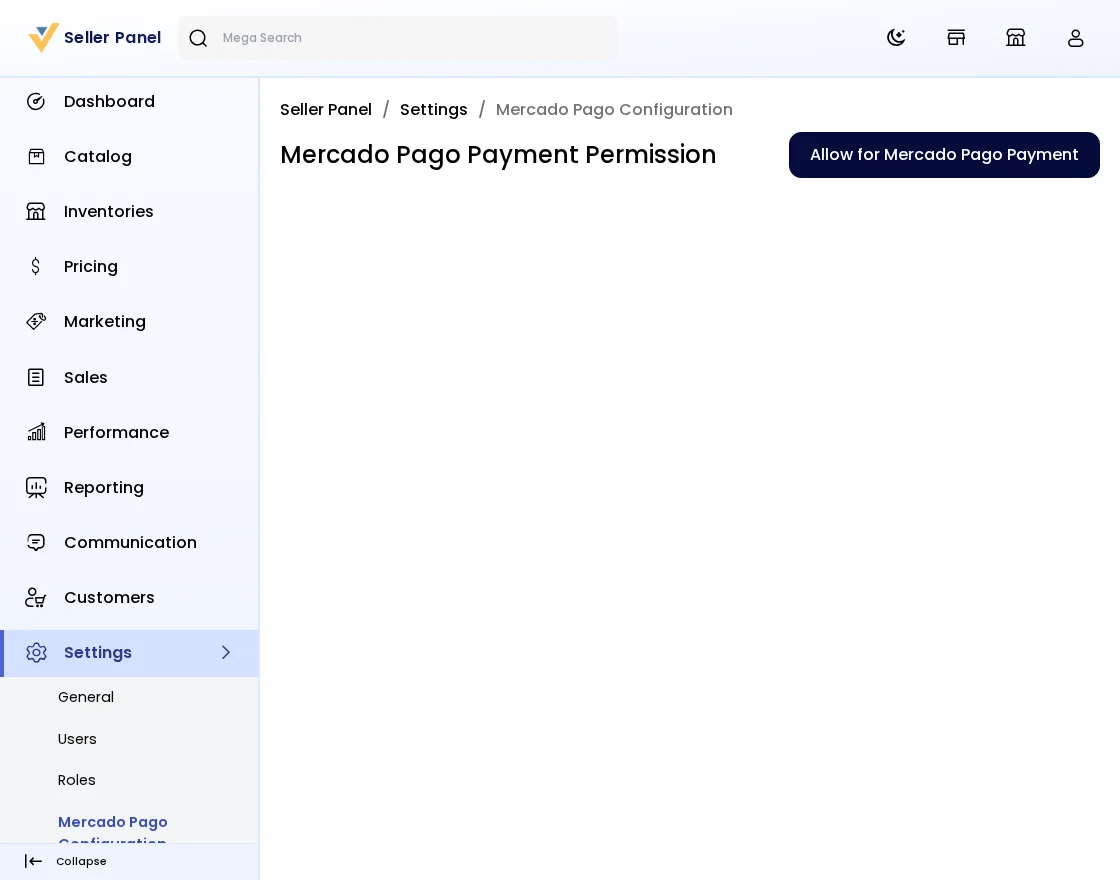
Once the seller grants access, Mercado Pago sends them back to the same page. The module stores the connection and shows a success message.
From now on the seller is ready to receive payments. Buyers cannot pay a seller with Mercado Pago until that seller links an account.
Customer Checkout With Laravel Marketplace Mercado Pago Payment Gateway
The buyer picks Mercado Pago at checkout. Then they place the order.
With Checkout Pro, the buyer goes to the Mercado Pago page. There they pay in a safe way. Mercado Pago then brings them back to your store.
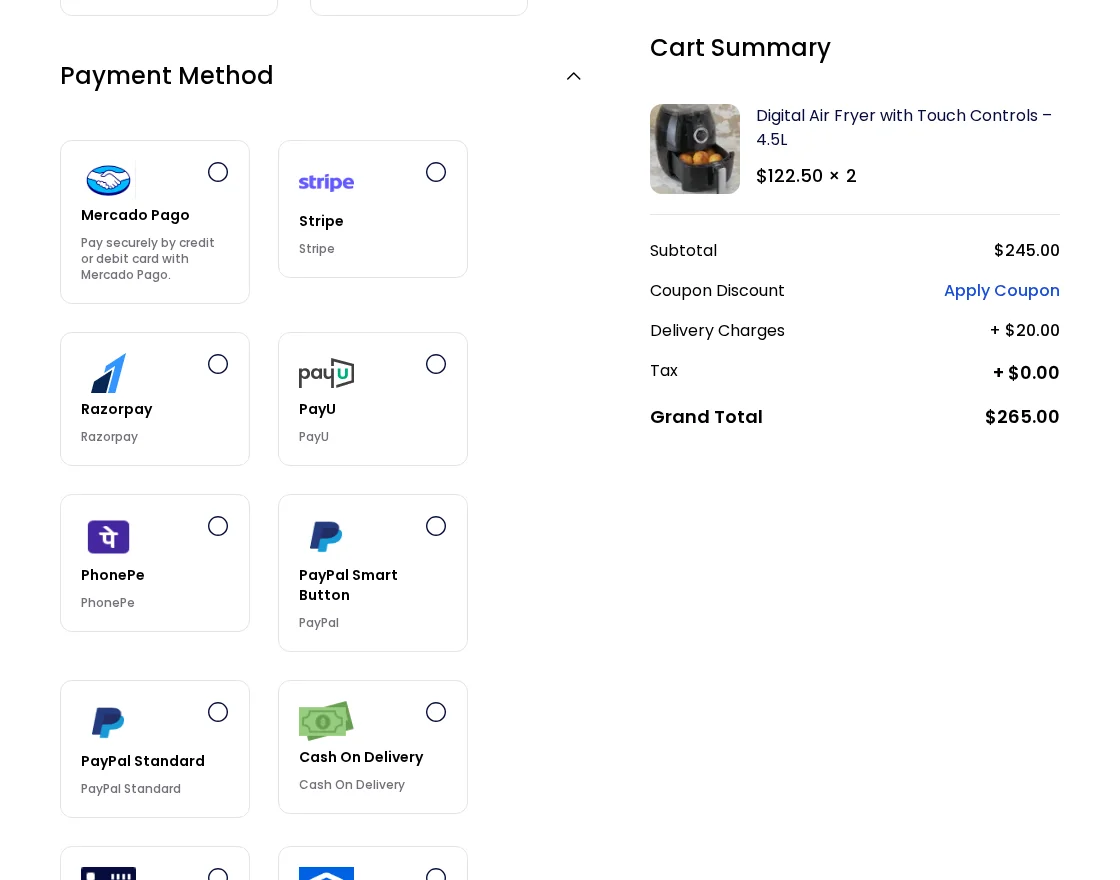
With Custom Checkout, the buyer pays right on your store. They fill in the card form, pick the number of installments, and click Pay.
Please note that a cart can hold products from one seller only. If the buyer mixes sellers and picks Mercado Pago, the store shows a warning and asks them to review the cart.
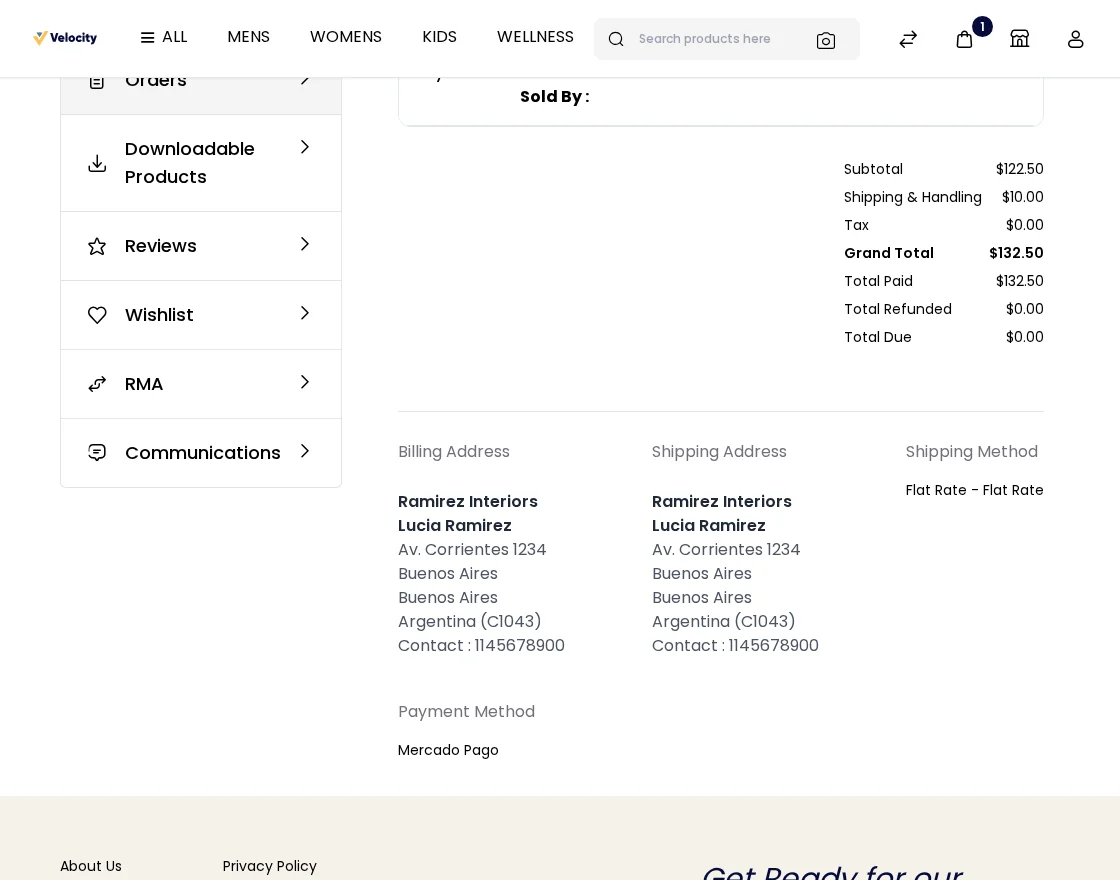
After a good payment, the buyer gets an order ID. The module also raises the invoice at once. They can see the order status and details in their order history.
Seller Order Details
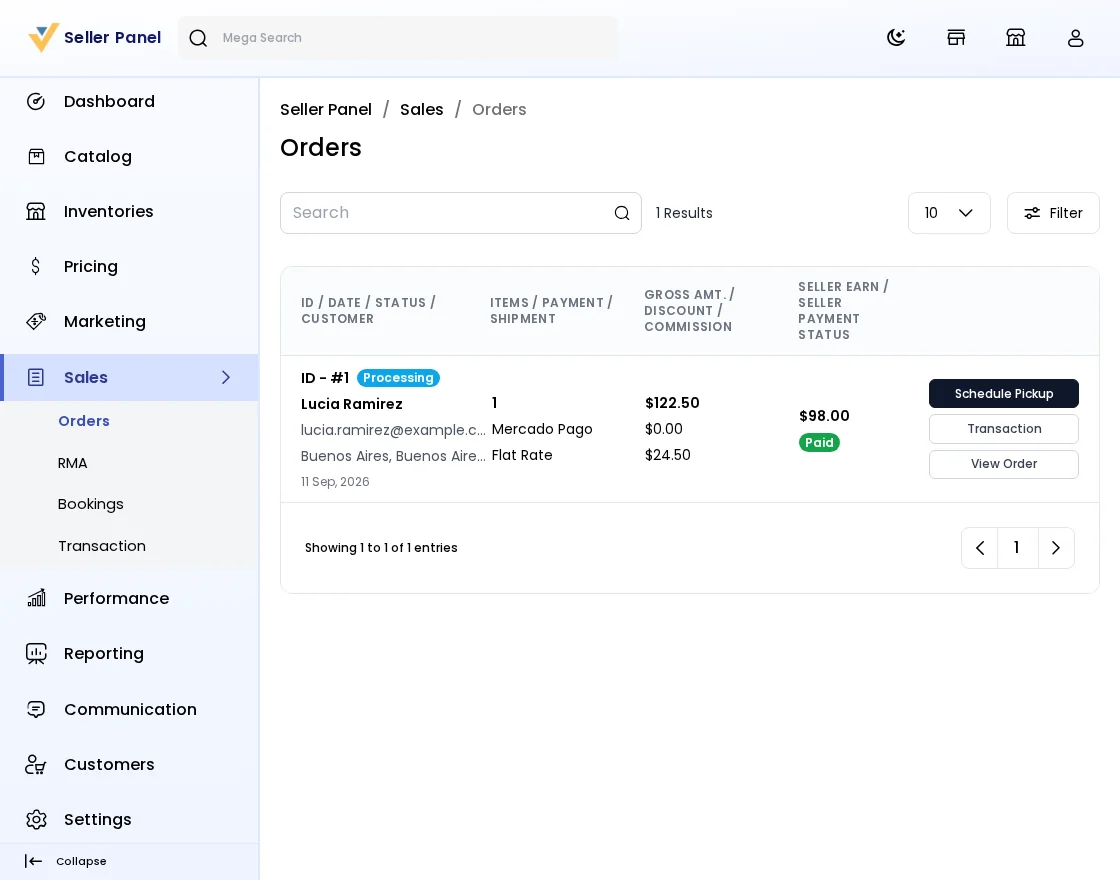
After a sale through the Laravel Marketplace Mercado Pago Payment Gateway, the seller can view the order details. The list shows Mercado Pago as the payment method, the gross amount, the admin commission, the seller earning and the payment status.
This helps the seller track and manage orders with ease.
Need Help?
We hope this guide helps you set up the Laravel Marketplace Mercado Pago Payment Gateway. Do you want another split-payment option for your sellers? Then compare it with our Laravel Marketplace MangoPay Payment Gateway. Do you still have a question? Feel free to raise a ticket. Just visit: https://bagisto.uvdesk.com/en
Current Product Version - 2.4.10.0
Supported Framework Version - 2.4.10.0

Be the first to comment.