INTRODUCTION
Odoo Website Cookie Consent to stash user information!!
Data security is one of the things that users are most concerned about over the internet. Typically, users don’t want to share their details on any website because it could cause their details to leak or be misused.
The EU laid down some guidelines to assure user data safety and security over the web. These guidelines help protect data and ask permission from users to store their details on any website.
Odoo website Cookie Consent allows you to ask permission from users to store their details. In addition, the module obeys GDPR law. Further, the cookie consent banner asks for user permission to collect information.
NOTE: Odoo Website Cookie Consent Module works in conjunction with the following module:
You would require to install the above module first for Odoo Website Cookie Consent to work perfectly.
FEATURES
- The module adds a cookie consent banner on the Odoo website.
- You can enable or disable the feature from the Odoo backend.
- The cookie consent banner is displayed on every page of the website.
- Customers can accept and close the cookie banner from the website.
- You can add the details of the privacy policy and cookie policy in the cookie consent banner.
- Also, customers can request to delete or download their data.
- You can customize the messages in the backend.
- Create a template for GDPR data.
INSTALLATION
- Once you purchase the App from Webkul store, you will receive the link to download the zip file of the module.
- Extract the file on your system after the download finishes. You will be able to see a folder named- ‘wk_website_cookie_consent.’
- Copy and paste this folder inside your Odoo Add-Ons path.
- Now, open the Odoo App and click on the Settings menu. Here, click on Activate the Developer Mode.
- Then, open the Apps menu and click on ‘Update Modules List.’
- In the search bar, remove all the filters and search ‘wk_website_cookie_consent.’
- You will be able to see the module in the search result. Click on ‘Install’ to install it.
WORKFLOW CONFIGURATION
1. Firstly, go to ‘Settings> Website> GDPR Configuration.’

2. Now configure GDPR settings. Also, you can enable the GDPR message. Further, you can use the default GDPR message or write your new message.

3. In the ‘Data Removal Messages’ tab, type the message to show to users or use the default message.

4. Next, click the ‘Cookie Settings’ tab and ‘Enable Cookie.’ You can write the message to display with the cookie banner or use the default message.

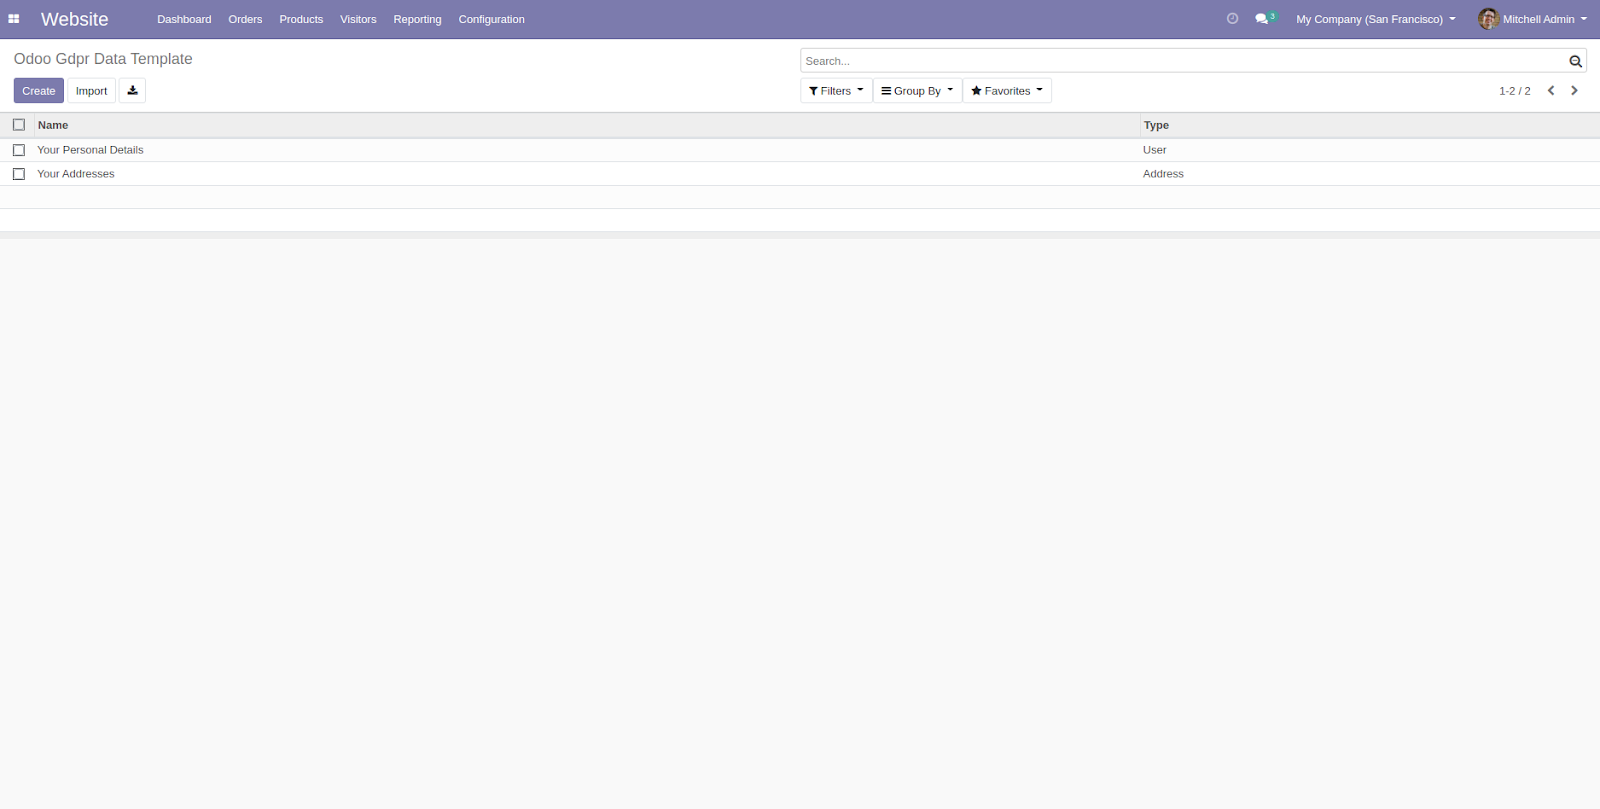
5. After that, click on the ‘Website> Configuration> GDPR Date Template’ to view all templates.

6. On the next page, you can view every GDPR template. Click on any template to view it or click the ‘Create’ button to create a new template.
7. Fill in the details and click the ‘Save’ button.

8. Now, go to ‘Configuration> GDPR Request.’
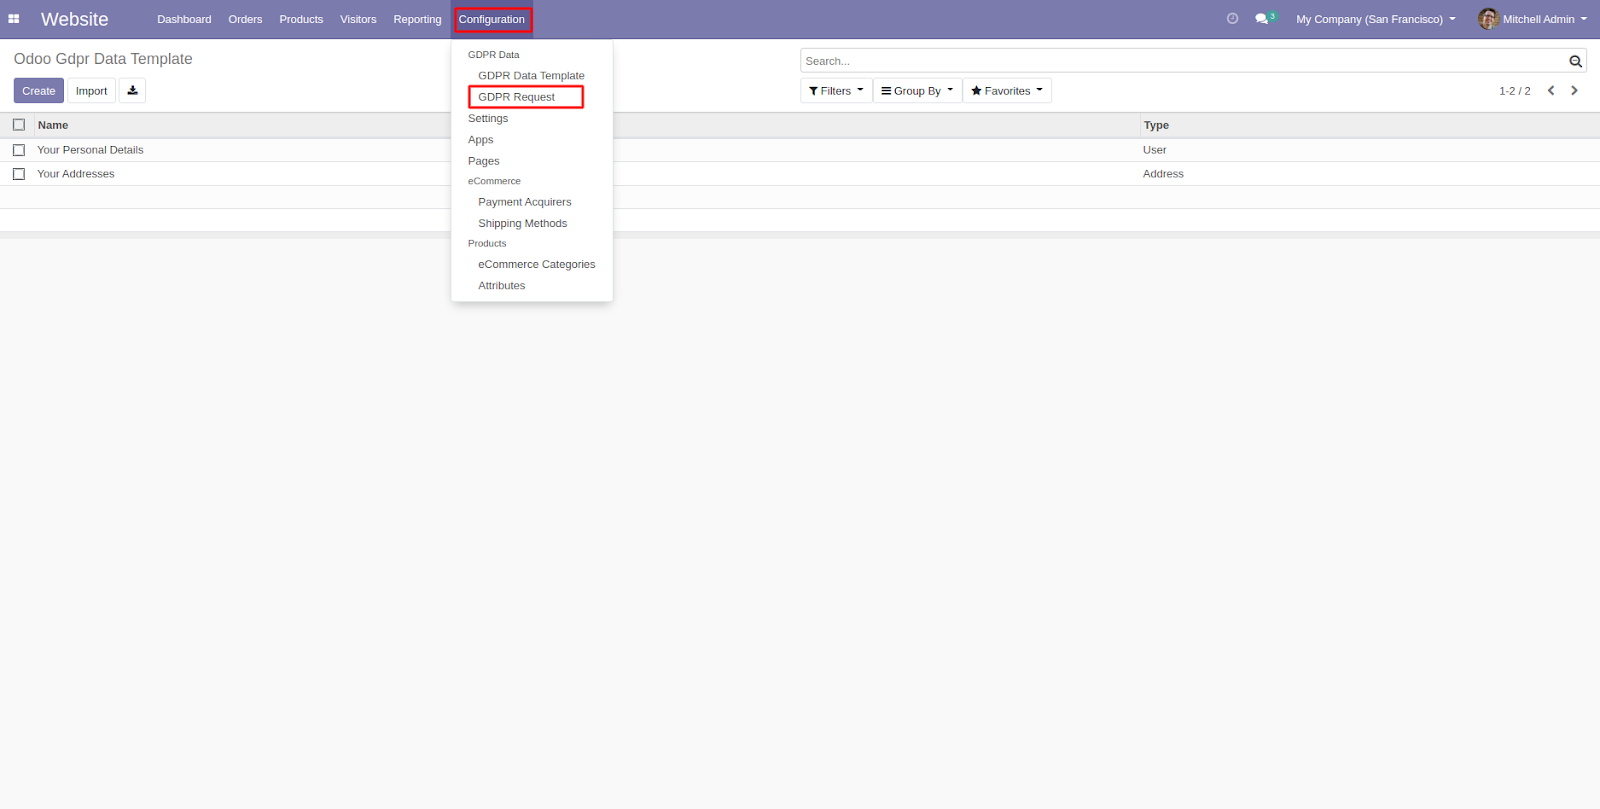
9. On the new page, you can view every ‘Download’ and ‘Delete’ request by the user.

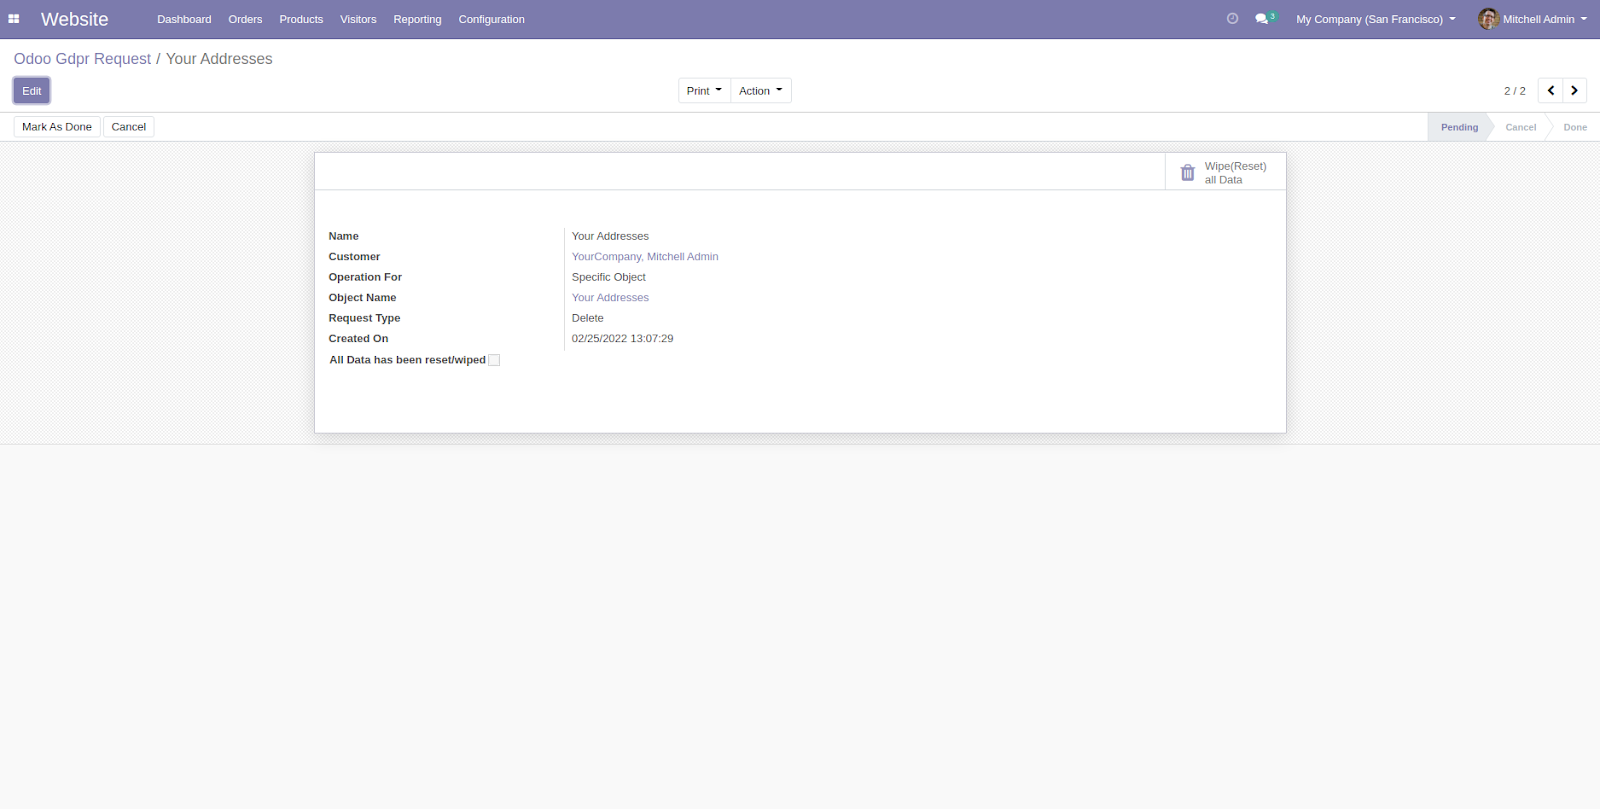
10. Click on any download or delete request to view its information, as shown below.
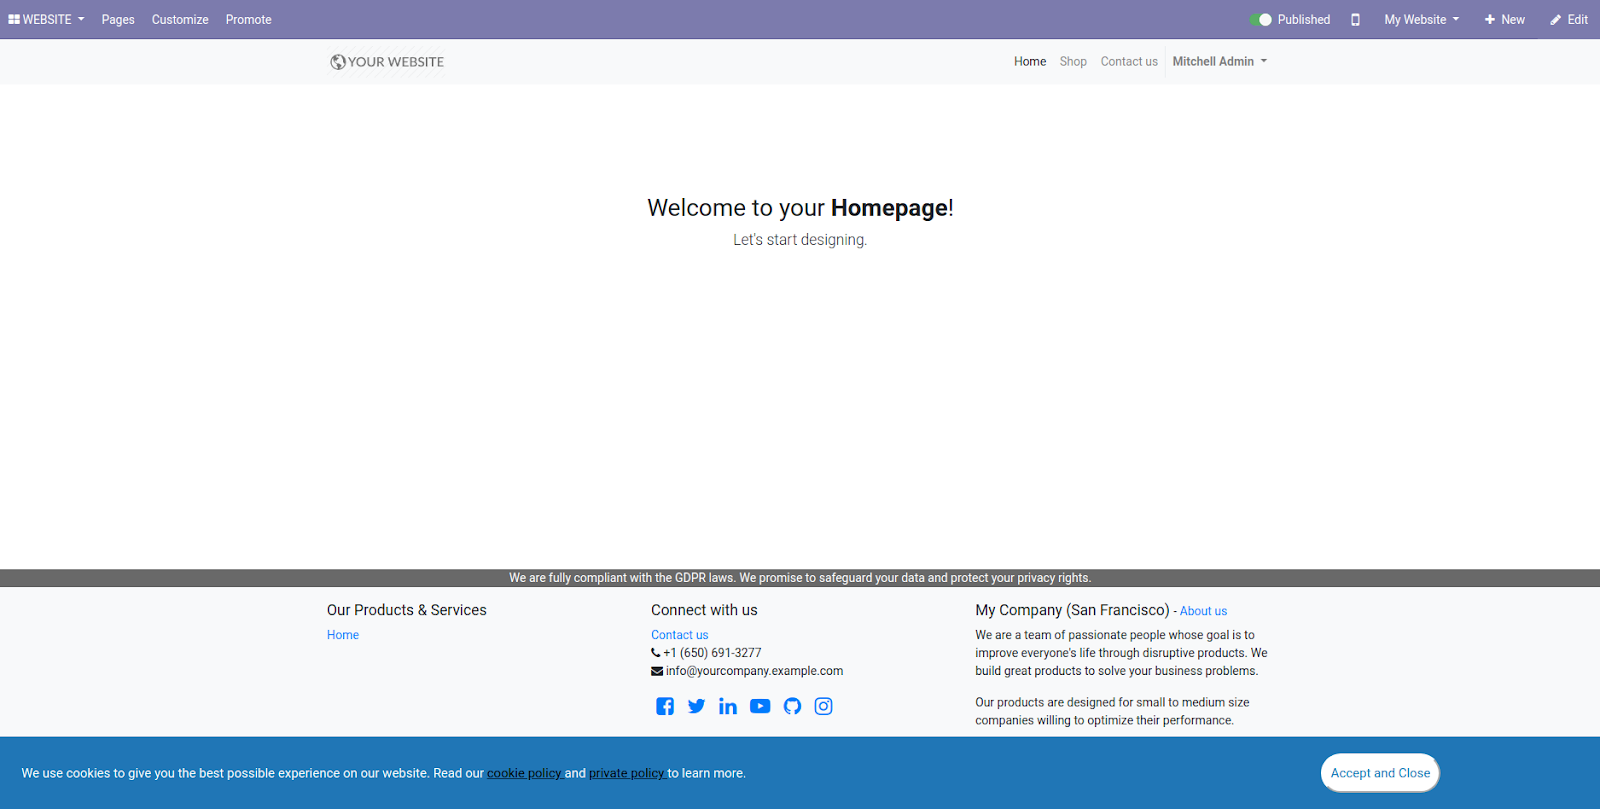
11. Now, go to your website, you can view the cookie consent banner at the bottom of the page.
12. After that, go to ‘My Account> Manage Your Personal Data.’

13. On the next page, you can select ‘Your Personal Details’ or ‘Your Addresses,’ Click on ‘Remove all Data’ or ‘Download all Data.’

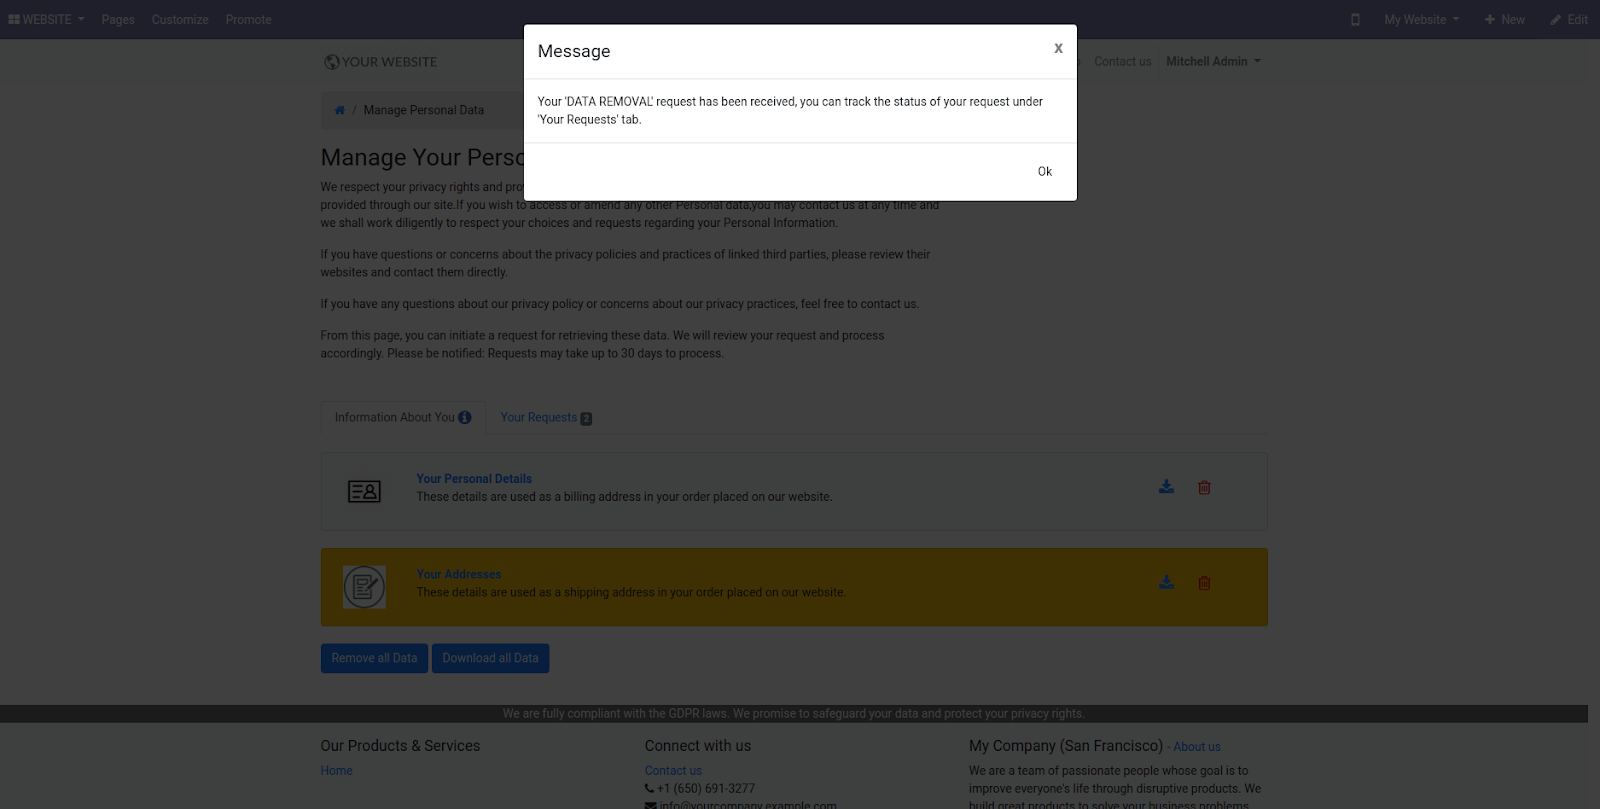
14. On clicking ‘Remove all Data,’ a popup will appear and ask for confirmation, and once confirmed, click ‘Remove.’ After that, you will see a request submission message.

15. When you click ‘Download all Data,’ a popup will appear telling you about the successful request submission.

16. On clicking the ‘Your Requests’ tab, you can view every download and delete request.

OTHER ODOO MODULES
- Website Customer Address Book
- Odoo Booking & Reservation Management
- Odoo eLearning Video Uploader
- Website Image Hotspots
- Odoo Website Auction
NEED HELP?
Hope you find the guide helpful! Please feel free to share your feedback in the comments below.
If you still have any issues/queries regarding the module, please raise a ticket at https://webkul.uvdesk.com/en/customer/create-ticket/.
Also, please explore our Odoo development services & an extensive range of quality Odoo Apps.
For any doubt, contact us at [email protected].
Thanks for paying attention!!
Current Product Version - 1.0.0
Supported Framework Version - V13, V12

Be the first to comment.