Prestashop Marketplace Directory Listing will add the directory feature to the site.
That is the site will list the search results not based on the keywords but based on the categories and the sub-categories.
The searching is not done for the individual page but for all the pages for the category. The search category in this module is by products, shop, seller and location of the shop.
The sellers will register themselves and can add their products. But it’s up to the admin whether the admin wants the seller products price and add to cart button to display or not.
The list of the sellers on the site will also be available at a single place.
Admin can charge membership fees from the sellers for adding products to the store.
Features
- Merchant eCommerce store converted to a marketplace.
- Add as many number of sellers as you want.
- Admin can set global as well as individual commission.
- Separate seller shop and collection for each seller.
- Enhanced search based on the product, seller, shop name and location of the shop.
- Admin can enable/disable the “add to cart” button and the “price display” for the seller products.
- Admin can charge membership fees from the sellers for adding products to the store.
- List of all the sellers is available on the store.
- User can search the seller list by seller name, shop name or location of the shop.
- User can also search the seller list alphabetically.
Installation
Install all the modules available in the package in the following way:
- Go to Module Manager in Back office and click on ‘upload a module’.
- Now, Drag and drop the module file or select the file from the system.
- In this way, the module installation will be successful.


How to configure the module
As there are various modules in the package. Hence, we will see the configuration & workflow of the modules one by one.
The modules available in the directory listing are as follows:
- Prestashop Advanced Multi-Vendor Marketplace
- Prestashop Marketplace Seller List
- Prestashop Marketplace Advance Search Box
- Prestashop Marketplace Product Management
- Prestashop Marketplace Membership
Firstly, let’s see the basic features of the marketplace module.
To become a seller, click on ‘Become a Seller’ option to submit the form.
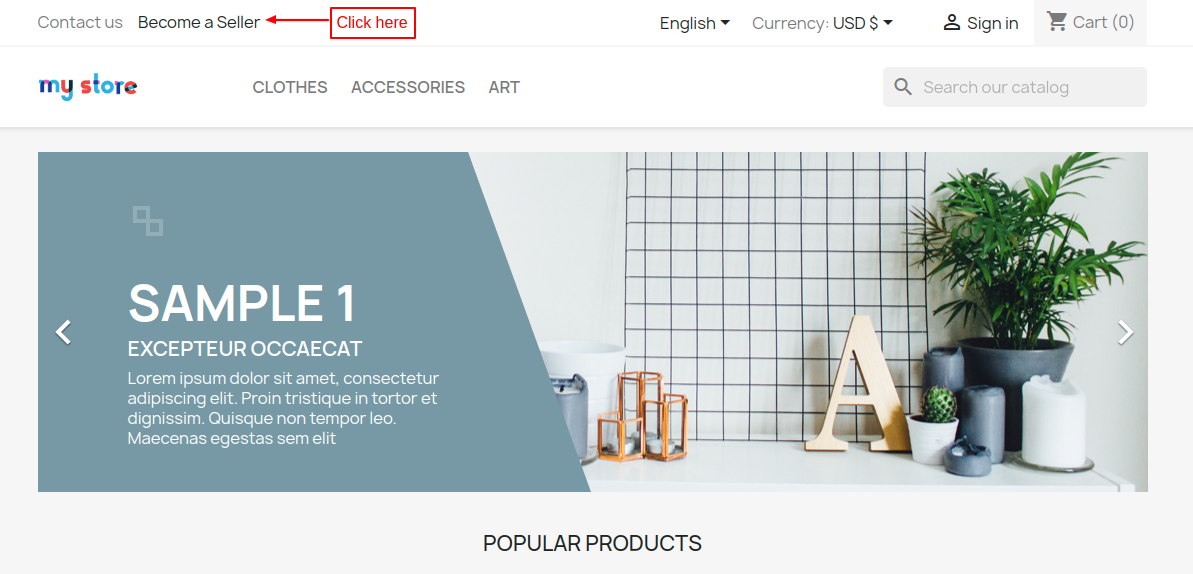
On clicking the option, a user gets redirected to a seller login pae where he can fill seller registration form.


After the successful submission of the form, the request goes to admin. Admin can now choose to approve or reject the request placed by the seller.

After the approval of the admin, sellers can create their own products. Click on the ‘add product’ button.
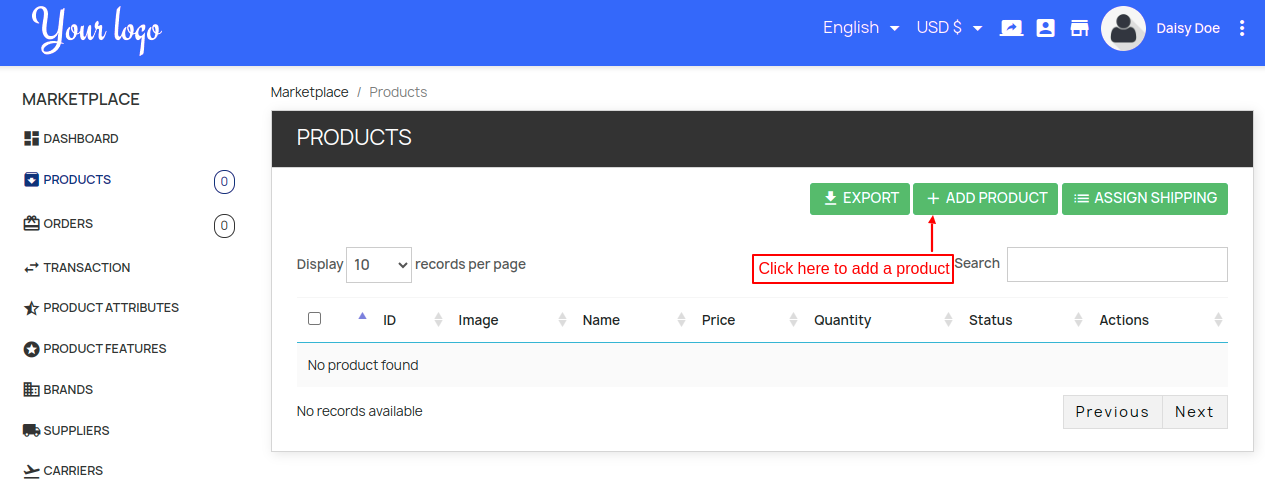
Fill in the required details to create a new product.


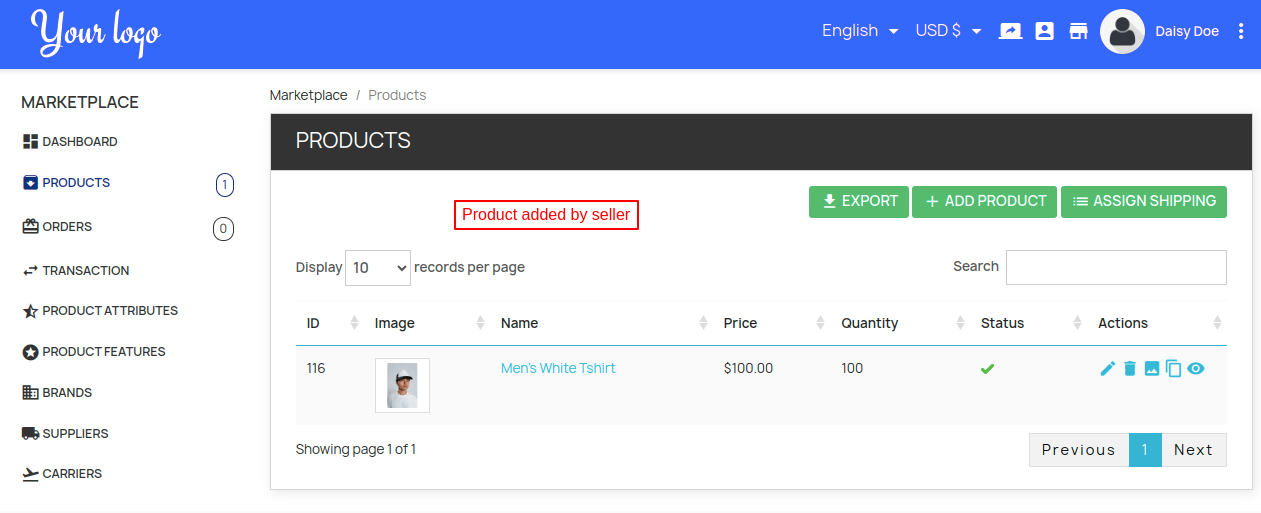
Once added, the seller can view it under ‘PRODUCTS’ tab.
To know more about PrestaShop Advanced Multi-Vendor marketplace module & its workflow, pleas visit the link.
Marketplace Seller List
Another module in the package is marketplace seller list. It helps to display a list of all the sellers registered on the store.
Enter the message to show on the seller list page to successfully configure the module.

The description added in the configuration settings will be visible to the sellers on the seller list page.
Additionally, a section to show the latest products in the shop is also available on the page.

To know more about the PrestaShop Marketplace Seller List & its workflow: https://webkul.com/blog/prestashop-marketplace-seller-list/
Prestashop Marketplace Advance Search Box
Advance search box module makes the search easier on the shop. Dedicated filters to narrow the search results are available in the search box.

You can also view all the search results fetched from the searched word on the search result page.

To know more about the PrestaShop Marketplace Advance Search Box & its workflow: https://webkul.com/blog/prestashop-marketplace-advance-search-box/
Prestashop Marketplace Product Management
This module helps admin in managing the seller product efficiently.
To configure the product management settings of sellers, click on the edit button to proceed.

Under product management settings, you can choose to show/hide ‘add to cart’ button on the product page.

Add to cart button is inactive & the display of the price of the product is also inactive.

Now, the display of the ‘add to cart’ button is inactive. The display of the price of the product is active.

Now, customers can see the price but they can’t order the product.

To know more about the PrestaShop Marketplace Product Management & its workflow: https://webkul.com/blog/prestashop-marketplace-product-management/
Prestashop Marketplace Membership
The package also contains the marketplace membership module. Configure the module to create membership plans for the sellers.


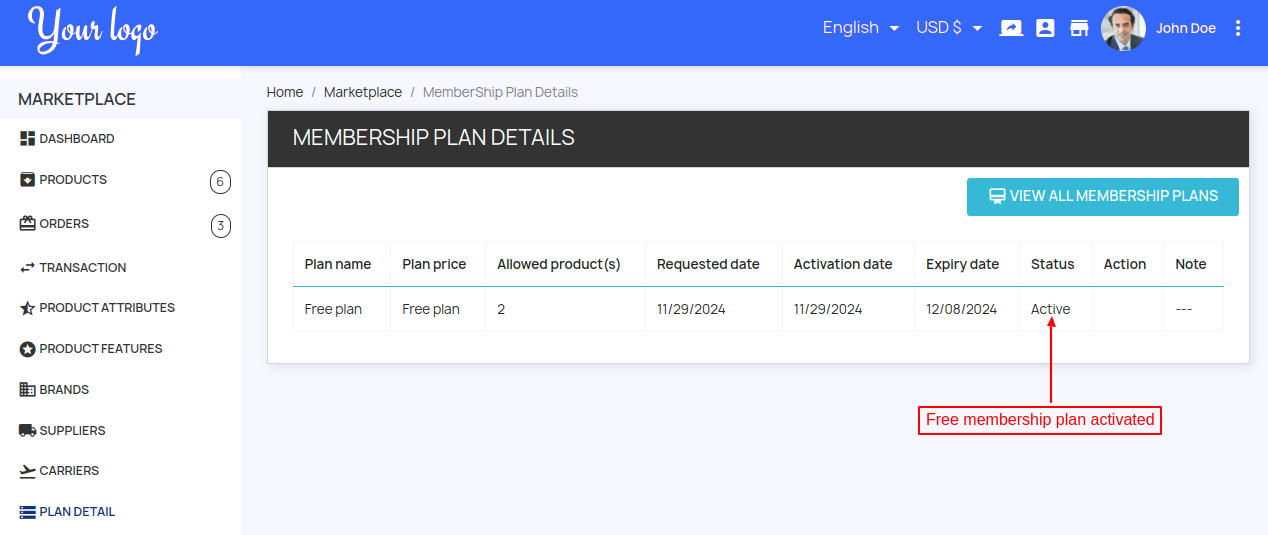
You can also choose to provide free membership plan to sellers.
Note:
Note: Sellers can buy the free membership plan only once. Let’s say, if the seller has purchased a free membership plan, then they can not see an option to buy free plan again in the future.

If Seller request for the Free Membership plan, then it will be automatically activated and will appear at the sellers end like the way shown in the picture below.
Admin-End
After installing membership module, two tabs ‘Membership Plans’ and ‘Seller’s Plan Detail’ will add under Marketplace.
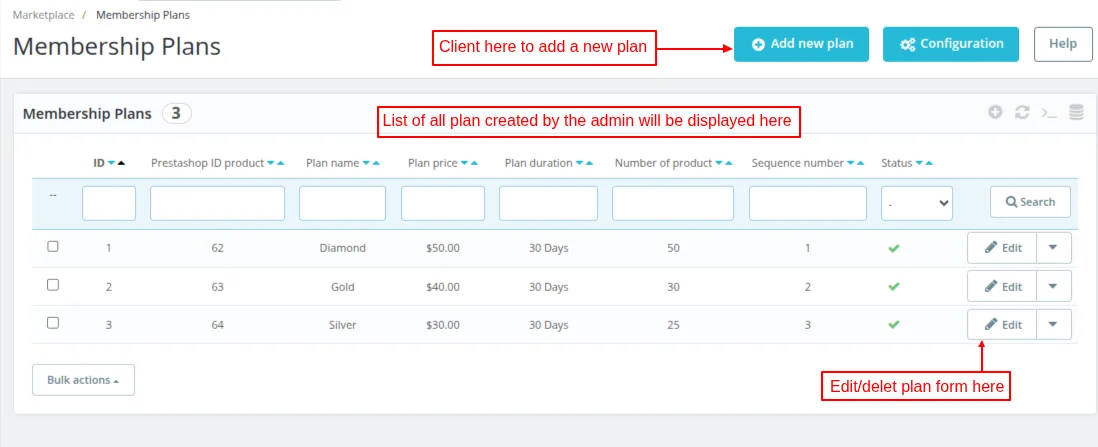
Membership Plans
Under this tab, list of all the plans that admin has created for the sellers will display with an option to either edit or delete plan.
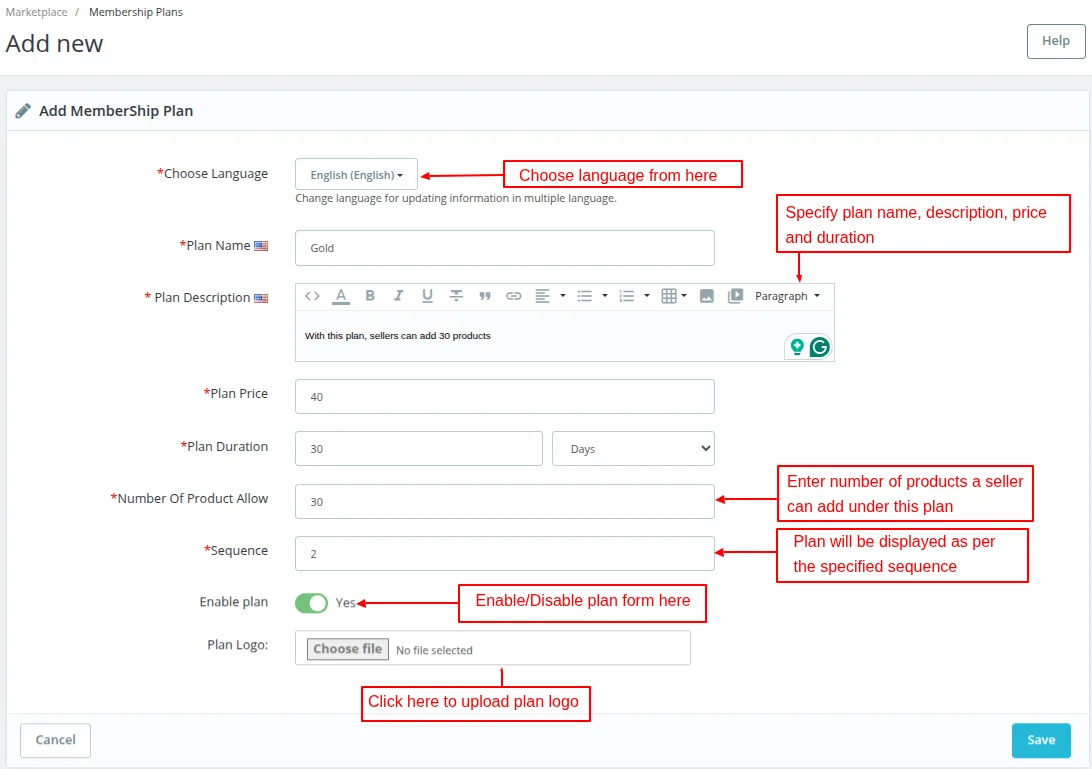
Admin can create a new membership plan by clicking on “Add new plan button” or by clicking on the symbol “+”
After clicking on the “add new plan” button, fill in all the details like Plan name, Plan price etc. and click on Save.
Go to Marketplace Management-> Seller’s Plan Detail
Seller requested plans will be shown at admin end.
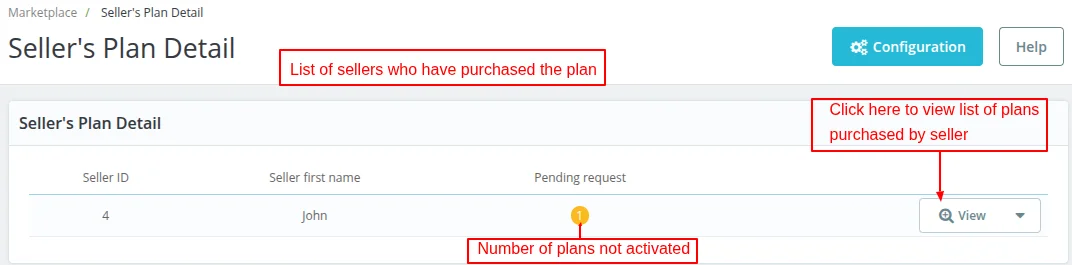
Note: Pending request will set to zero if all the requested plans of a particular seller are activated by the admin.
To know more about the PrestaShop Marketplace Membership & its workflow: http://webkul.com/blog/prestashop-marketplace-membership-addon/
This was all about the Prestashop Marketplace Directory Listing & the workflow of each of the module that it contains.
Support
For any kind of technical assistance or query, please raise a ticket or send us a mail at [email protected]
Also, please explore our Prestashop development services and vast range of quality Prestashop addons.
Current Product Version - 7.0.5
Supported Framework Version - 9.x.x, 8.x.x, 1.7.x.x

3 comments
Price of this module is 449$ and for license plsc check this link https://store.webkul.com/license.html.You can buy this module from our store here is the link https://store.webkul.com/Prestashop-Directory-Listing.html or just click on the “Buy Now from Store” button at the top right of this page.
Thanks
Ajay Sarwara