Shopware UnoPim Connector is designed to simplify the management of product data between UnoPim and Shopware.
While UnoPim helps in organizing and enriching product information, Shopware delivers a robust eCommerce experience, and keeping both systems in sync manually can be challenging.
This plugin enables seamless integration by allowing automatic and manual synchronization of product data, inventory, images, and more.
It ensures that your Shopware store always stays updated with accurate and consistent information from UnoPim.
Additionally, you can also use the CS-Cart Shopify Connector to integrate CS-Cart with Shopify for seamless product and order synchronization.
Basic Requirement
The Shopware–UnoPim Connector is compatible with Shopware 6.7.9.1.
Feature:-
- Seamless integration between Shopware and UnoPim
- Secure API-based connection with credential authentication
- Bidirectional data synchronization (Import and Export)
- Webhook support for real-time updates
- Locale mapping for multilingual data synchronization
- Flexible attribute mapping with profile management
- Sales channel mapping with locale, currency, and visibility configuration
- Customizable sync operations with multiple profiles
- Advanced filtering options for controlled data sync
- Bulk and selective product synchronization
- Media import support for product assets
- Performance control with configurable pagination
- Dedicated sync logs for monitoring and troubleshooting
What is UnoPim?
UnoPim is an open-source Product Information Management (PIM) system designed to help businesses organize and manage product information from one centralized platform.
Businesses can use UnoPim to:
- Manage large product catalogs
- Organize product attributes
- Handle multi-language product data
- Maintain consistent product information
- Improve product data quality
By integrating UnoPim with Shopware, businesses can simplify product management and automate synchronization workflows.
Shopware UnoPIM Connector Installation Process
There are two ways to install the Shopware UnoPim Connector on the server:
- Installation by command line
- Manual installation from Plugin Manager
Installation of Shopware UnoPIM Connector by Command
1 – Extract the Zip File
After purchasing the module, you will receive a zip file for the Shopware UnoPim Connector.
Extract the zip file on your system. Inside the extracted folder, you will find the plugin directory.

2 – Upload Plugin to Shopware Directory
Upload the plugin folder into the following directory of your Shopware setup:
custom/plugins/
3 – Install the Plugin
Go to your Shopware root directory and run the following command:
bin/console plugin:refresh
After refreshing the plugin list, run the installation command:
bin/console plugin:install WebkulUnoPimConnector
4 – Activate the Plugin
To activate the plugin, run the following command:
bin/console plugin:activate WebkulUnoPimConnector
Manual Installation from Plugin Manager
1 – Go to Plugin Manager
Navigate to:
Shopware Backend → Extensions → My Extensions
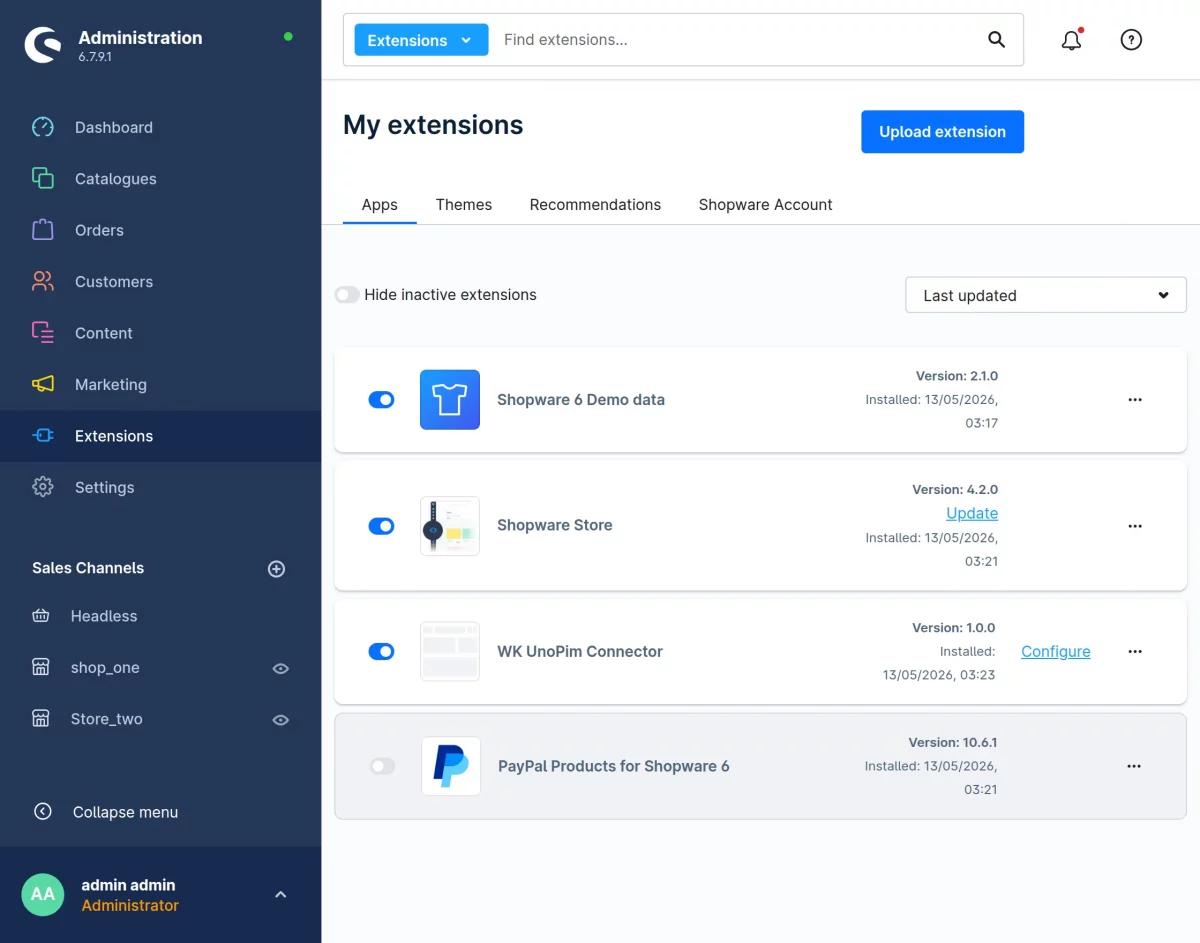
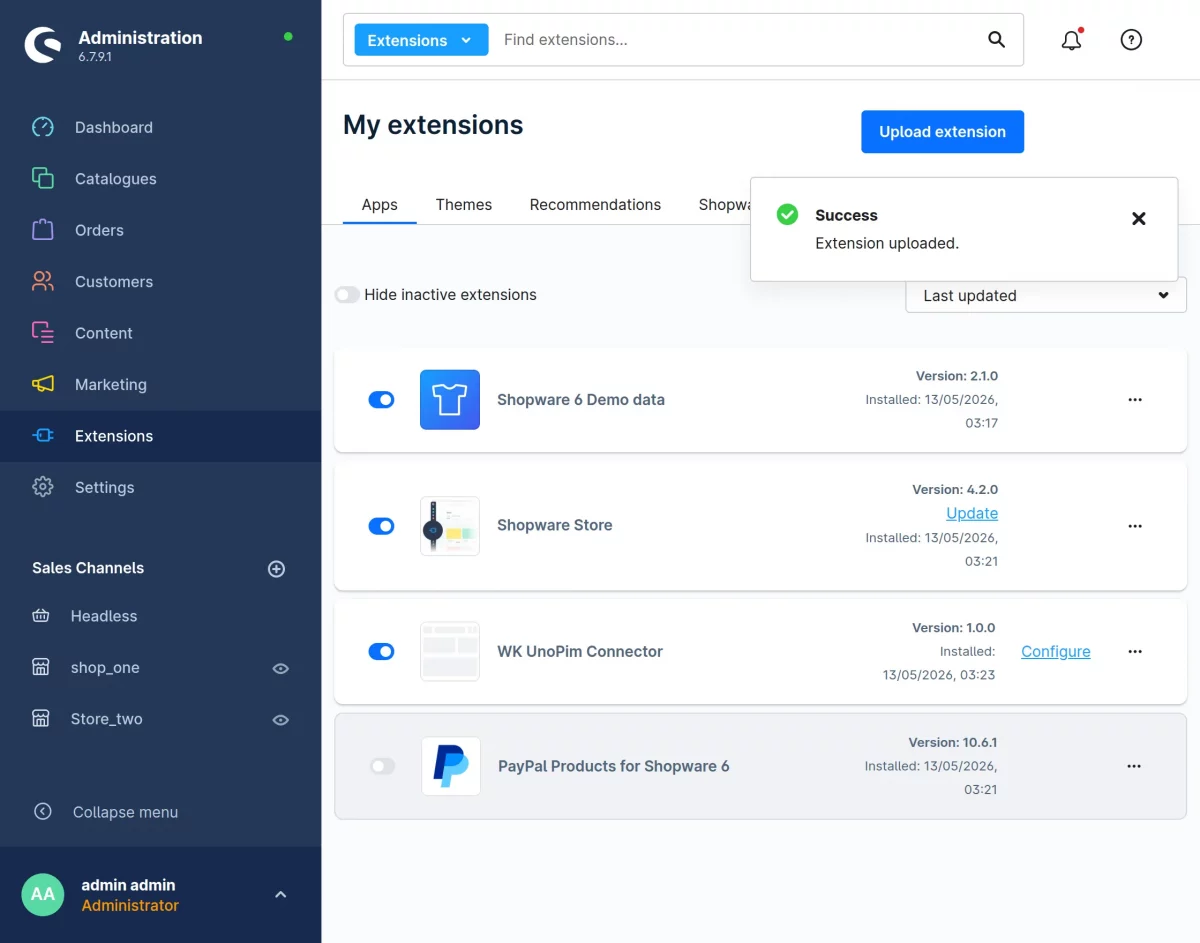
2 – Upload the Plugin
Click on Upload Plugin and upload the Shopware UnoPim Connector zip file.
3 – Install the Plugin
After uploading the plugin, locate the Shopware UnoPim Connector in the extension list.
Click on the Install button.
4 – Activate the Plugin
After successful installation, click on Activate to enable the module.
Note:
1 – After the installation process and plugin configuration if the marketplace icon will not visible at front-end then run this command to clear the cache:
./bin/console sw:cache:clear –env=prod
Create a User in UnoPim
To begin, create a user account that will be linked to the integration.
- Navigate to: Settings → Users

Create a New User
- Click on the Create button.
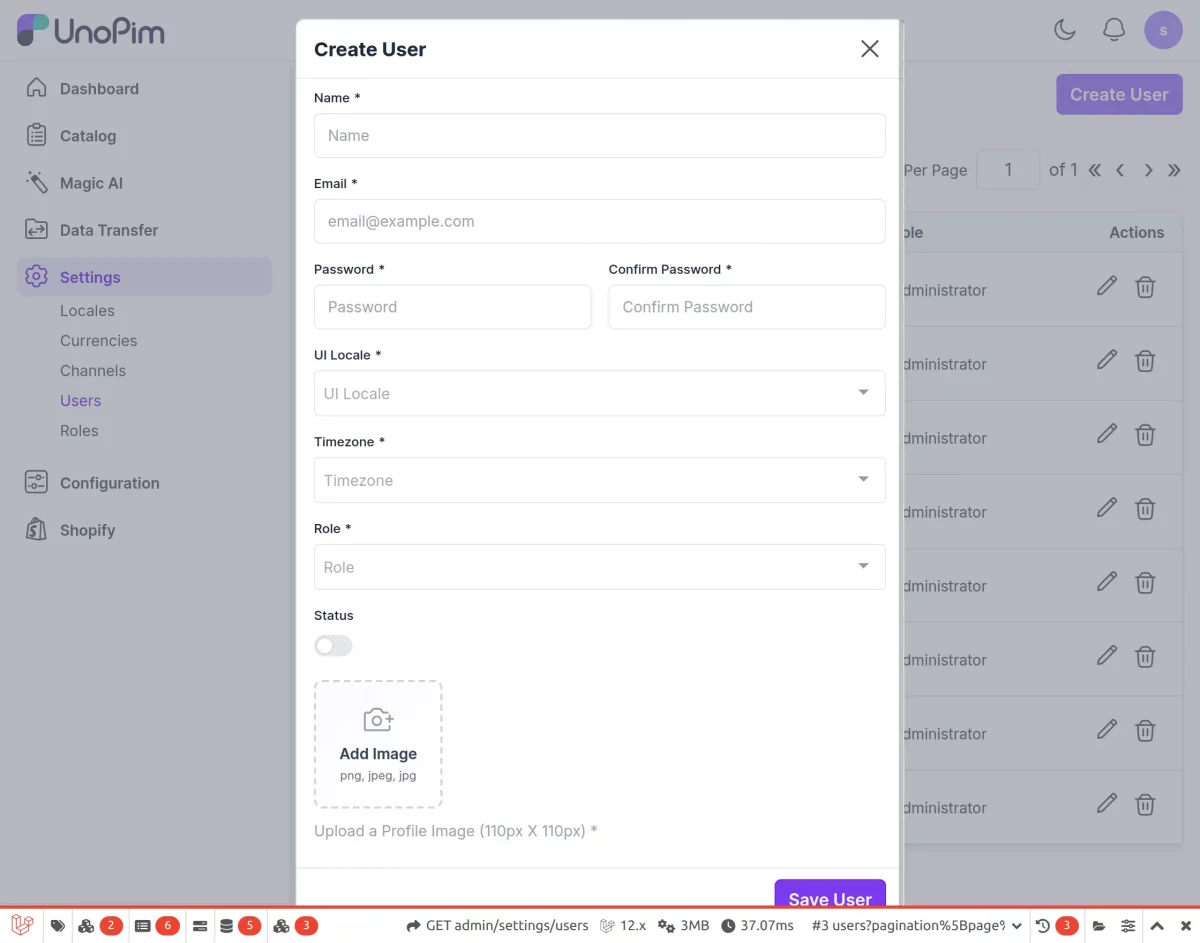
- Fill in the required details:
- Name
- Password
- Role
- Locale
- Timezone
- Profile Image (if required)
- Save the user after entering all the necessary information.
Assign User to Integration
After creating the user:
- Use this user while configuring the integration.
- The selected user will define the permissions and access scope for the integration.
Create an Integration Account
Now, proceed to create an integration account in UnoPim.
- Navigate to: Configuration → Integration
Configure Integration Details
- Click on Create Integration.
- Enter the required details:
- Integration Name
- Permissions (as required)
- Select the previously created user
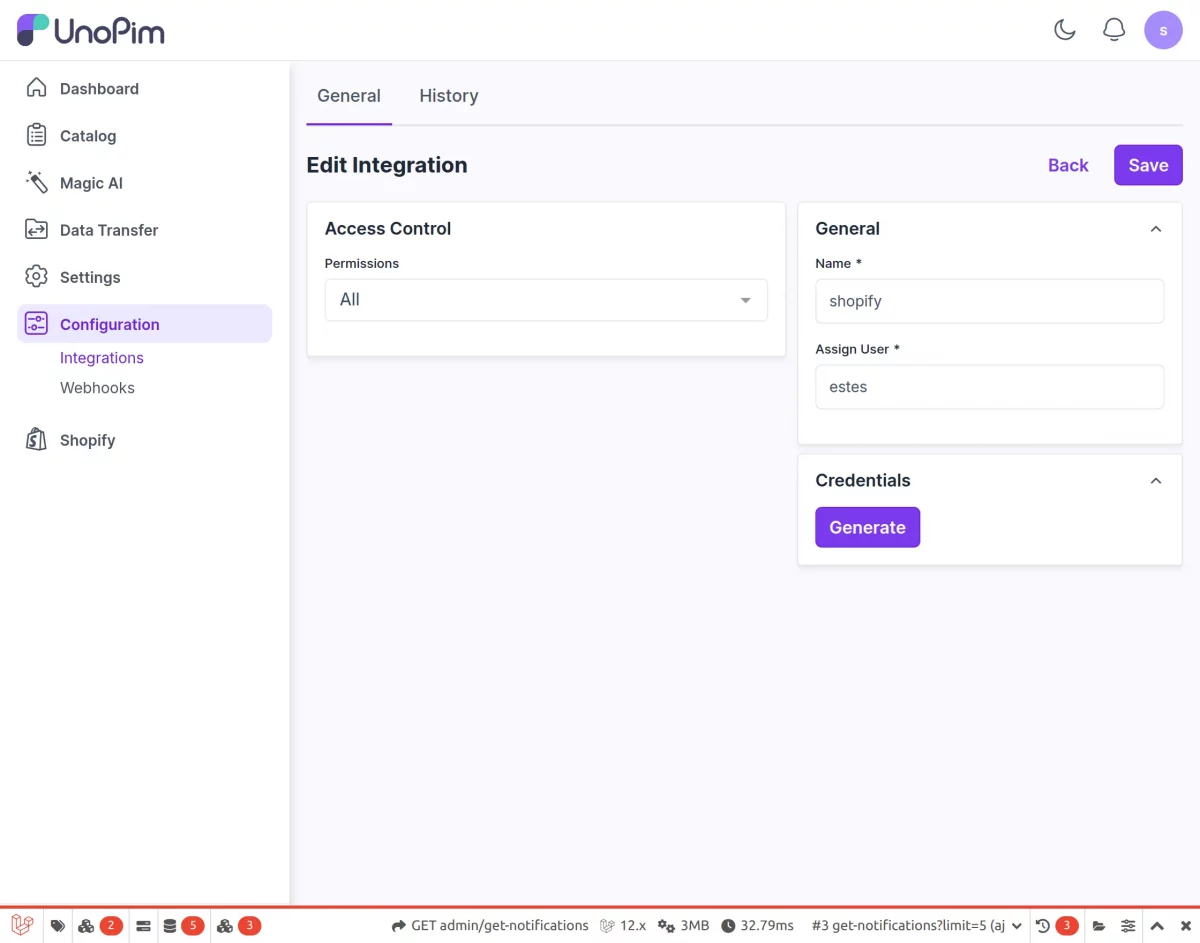
Generate API Credentials
- Click on the Generate button to create authentication credentials.
Save and Retrieve Credentials
- After saving the integration:
- Client ID and Client Secret will be generated automatically.
These credentials are essential for connecting UnoPim with Shopware securely.
Webhook Configuration
To enable real-time data synchronization between UnoPim and Shopware, configure the webhook settings.
Navigate to Webhook Settings
- Go to: Configuration → Webhook
Set Shopware Instance URL
- Enter your Shopware Instance URL in the provided field.
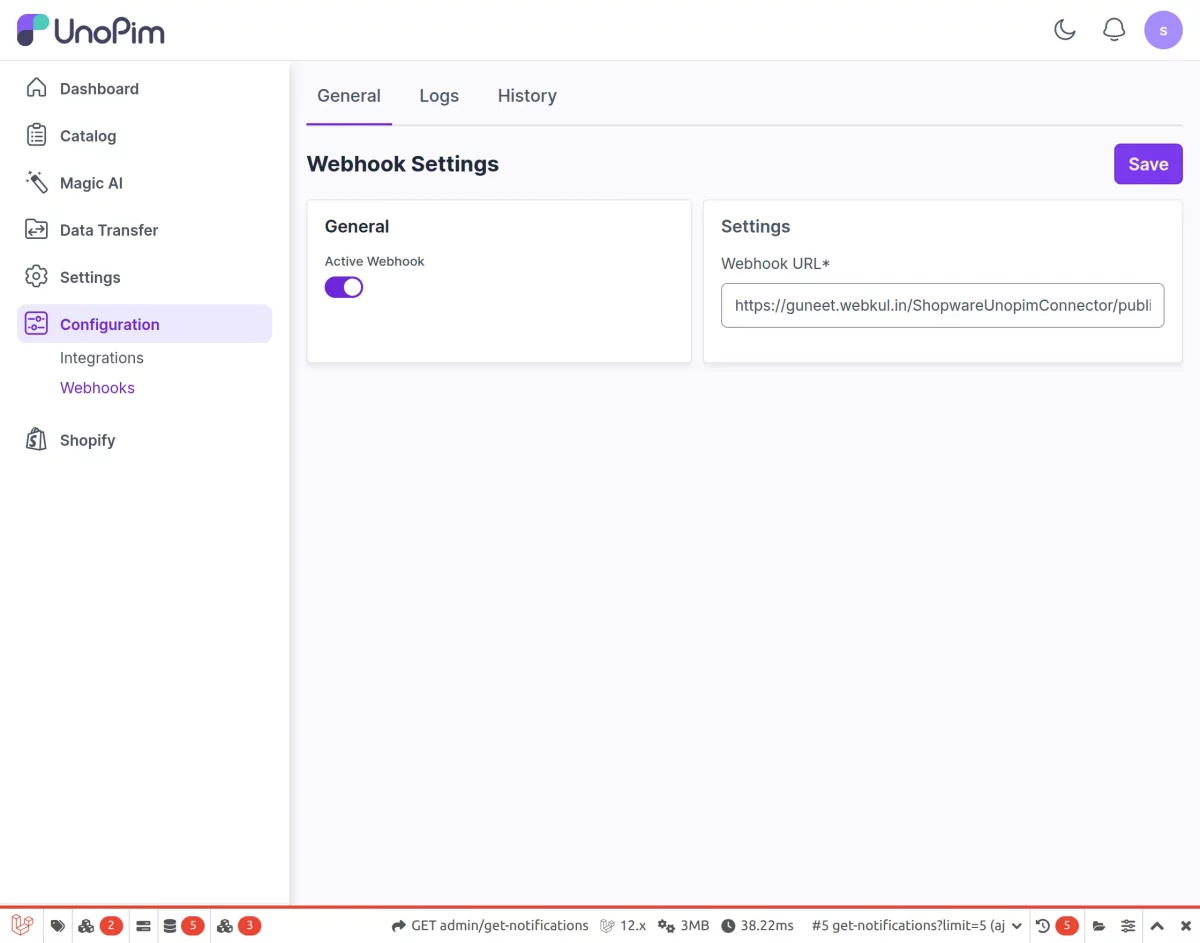
Save Configuration
- Click on Save to apply the webhook configuration.
UnoPim Shopware Connector Configuration
After successfully installing the UnoPim Shopware Connector plugin, you need to configure it within your Shopware admin panel to establish communication with UnoPim.
Access the Connector Settings
- Navigate to: Settings → Extensions → WKUnoPim Connector
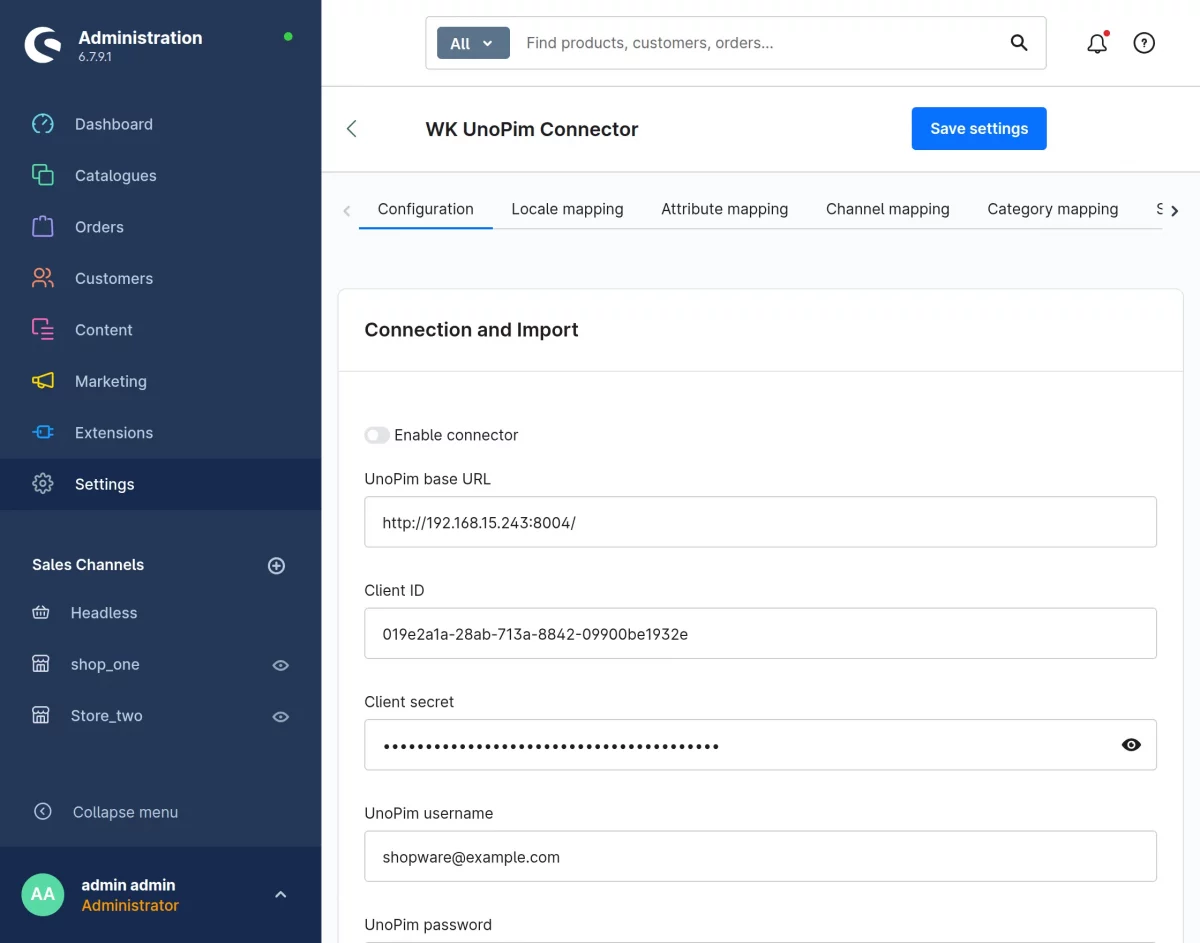
This will open the connector configuration panel where all required settings can be managed.
Configure Connection Details
On the configuration page, provide the following details:
- UnoPim Base URL
- Client ID
- Client Secret
- Username
- Password
These credentials are generated from the UnoPim integration setup and are required to authenticate the connection.
Test the Connection
- Click on the Test Connection button to verify the provided credentials.
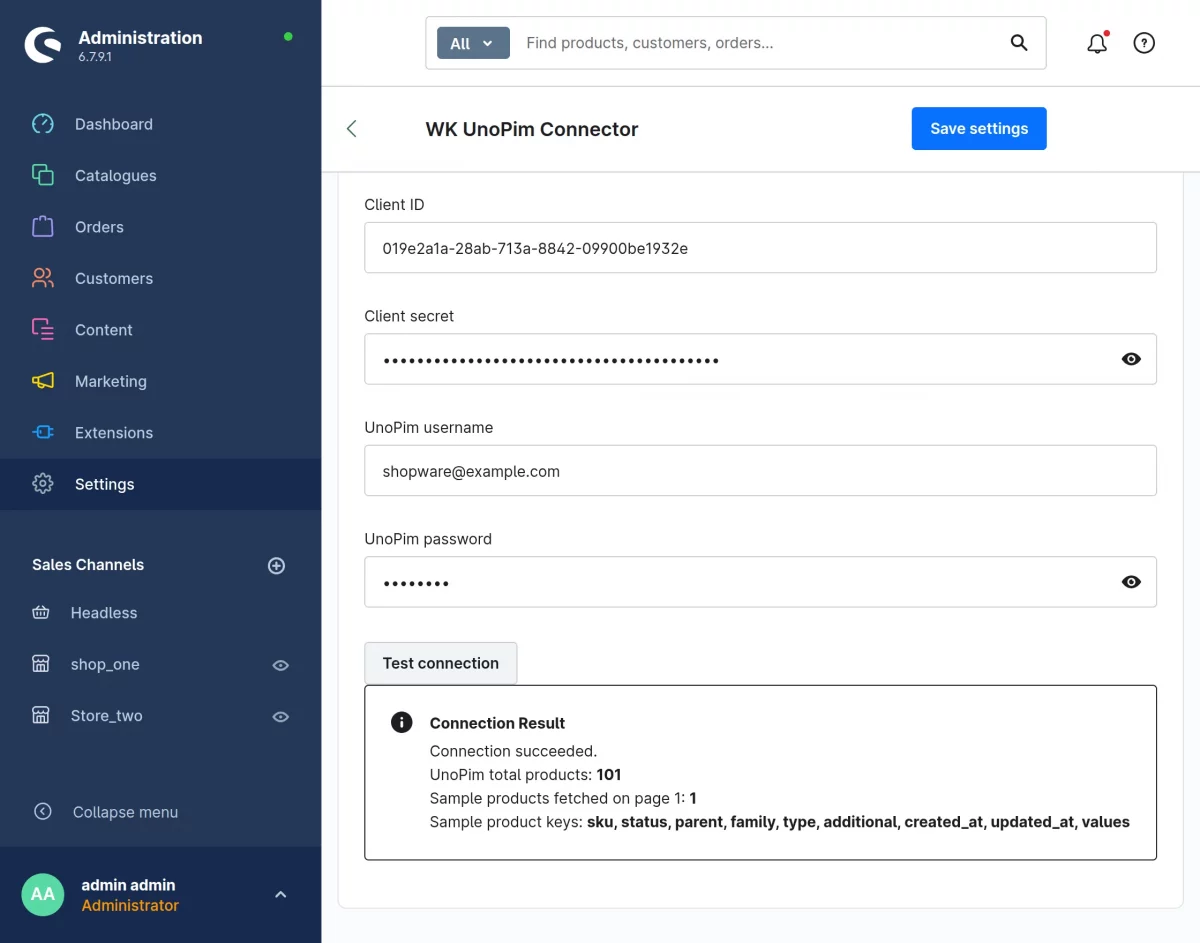
- A successful response confirms that Shopware and UnoPim are properly connected.
Set Sync Direction
Define how data should flow between the two systems:
- Shopware to UnoPim
- UnoPim to Shopware
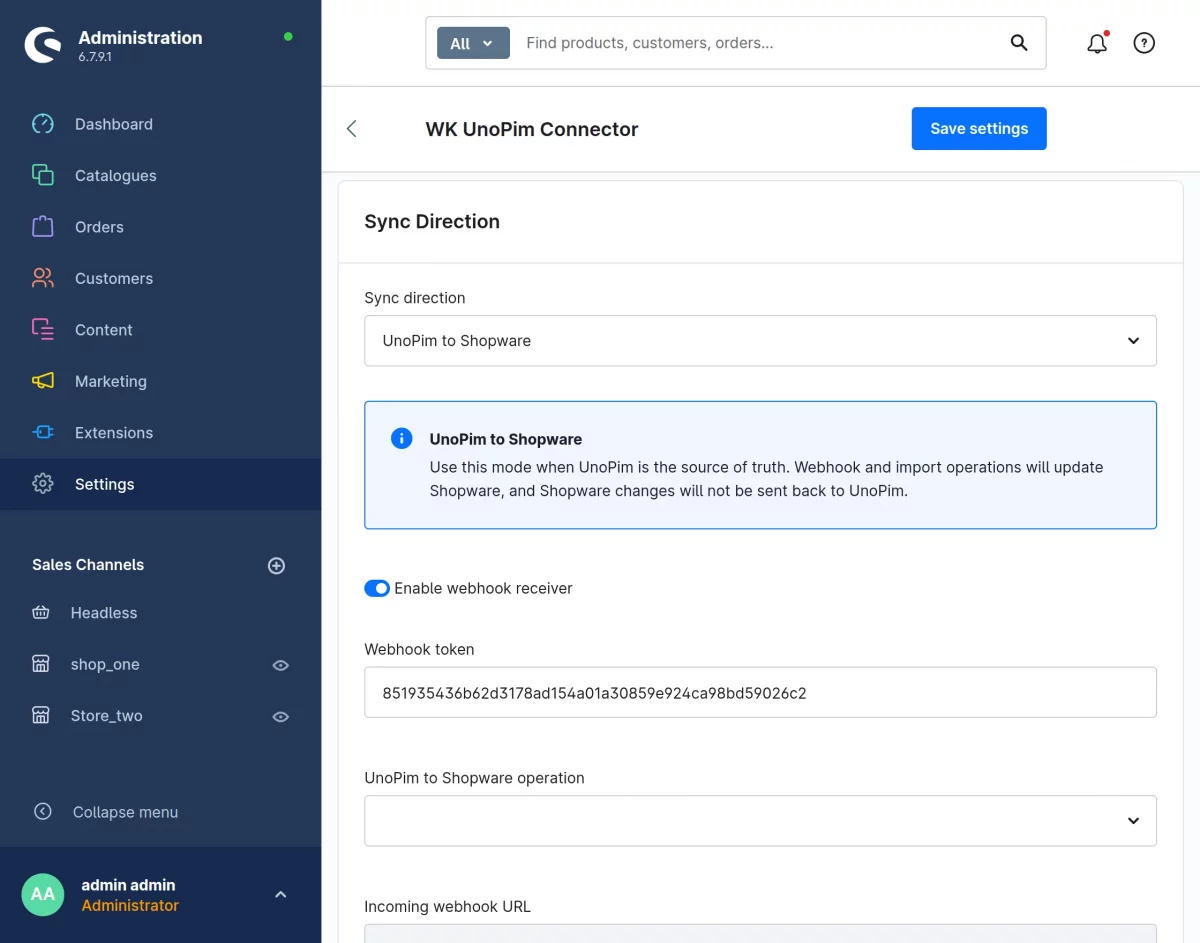
Choose the direction based on your use case and data ownership preference.
Select Sync Operation
- Choose the required operation from the Sync Operation dropdown.
This determines what type of data (such as products or categories) will be synchronized.
Configure Sync Settings
Product Per Page
- Define the number of products to be processed per page during synchronization.
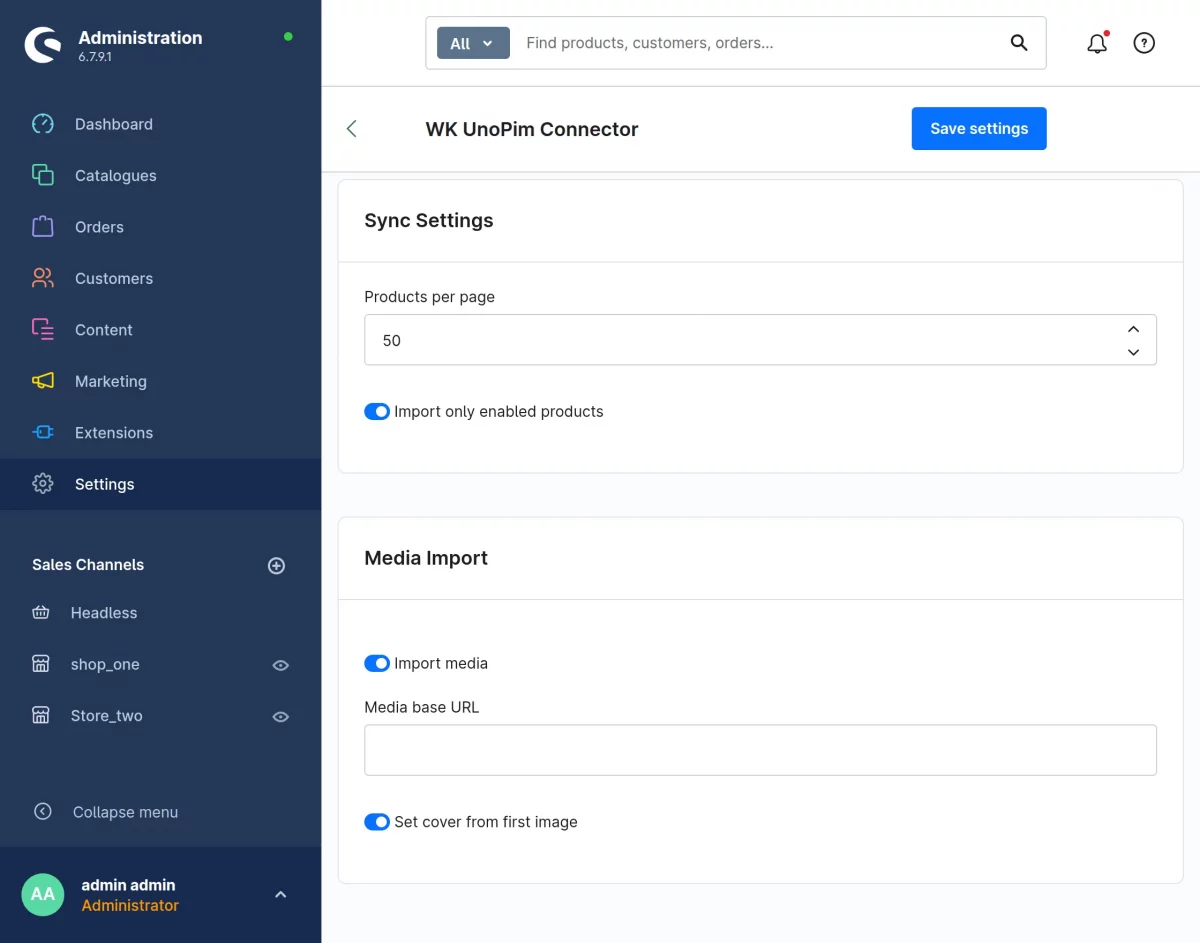
This helps manage performance and control data load during sync operations.
Media Import Configuration
Media Base URL
- Enter the Media Base URL to ensure product images and media files are imported correctly.
UnoPim Locale to Shopware Locale Mapping
UnoPim Locale to Shopware Locale Mapping
To ensure proper data synchronization across different languages, the connector provides a locale mapping feature between UnoPim and Shopware.
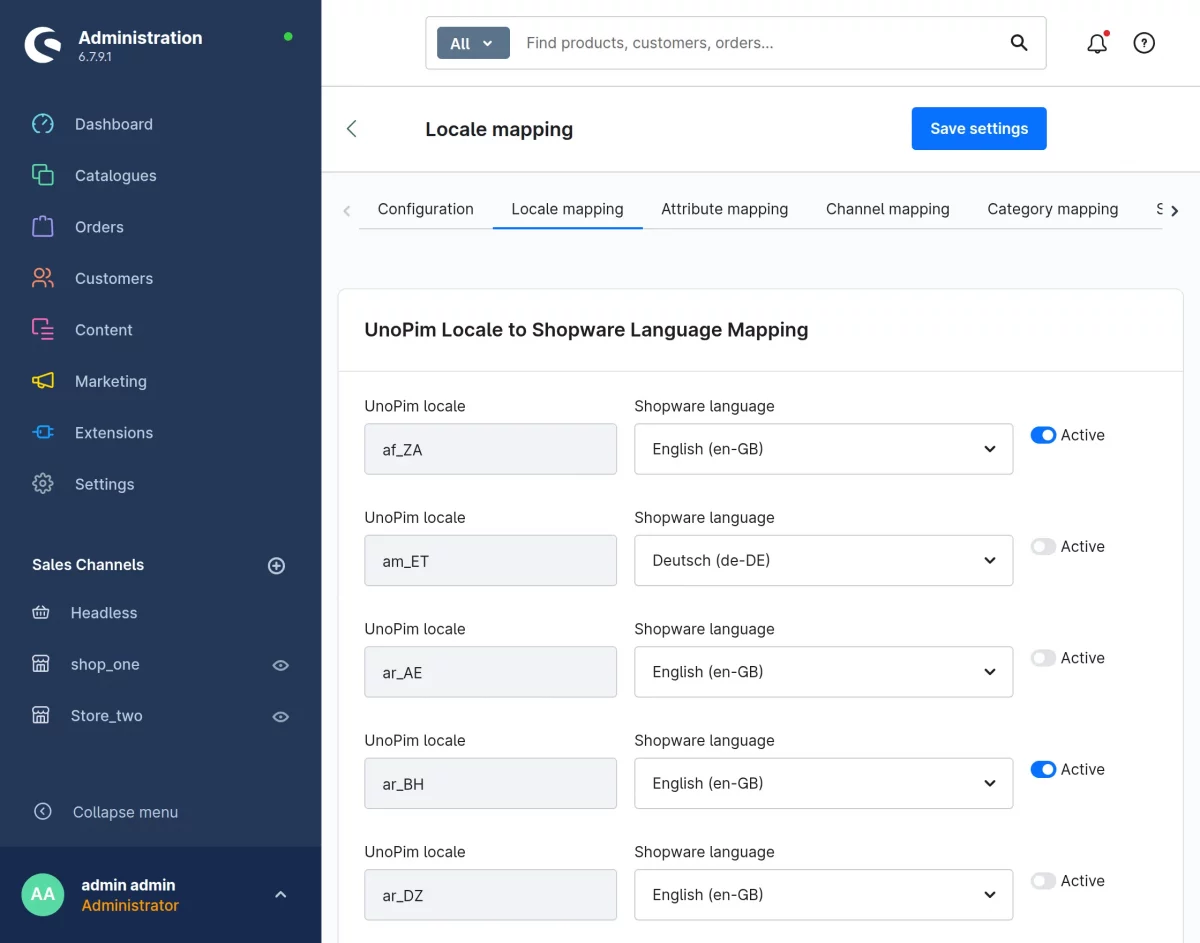
- All the locales configured in UnoPim will be automatically listed in this section.
This allows the admin to easily identify which locales are available for mapping.
- For each UnoPim locale, select the corresponding Shopware locale from the available options.
This mapping ensures that product data, translations, and attributes are synced correctly between both platforms.
- Admins have the option to enable or disable locale mapping as needed.
Disabling a locale will prevent its data from being synchronized.
Attribute Mapping Between Shopware and UnoPim
Attribute mapping allows you to align Shopware attributes with corresponding UnoPim attributes, ensuring accurate and structured data synchronization between both systems.
Create and Manage Mapping Profiles
- Admins can create multiple mapping profiles based on different use cases or data requirements.
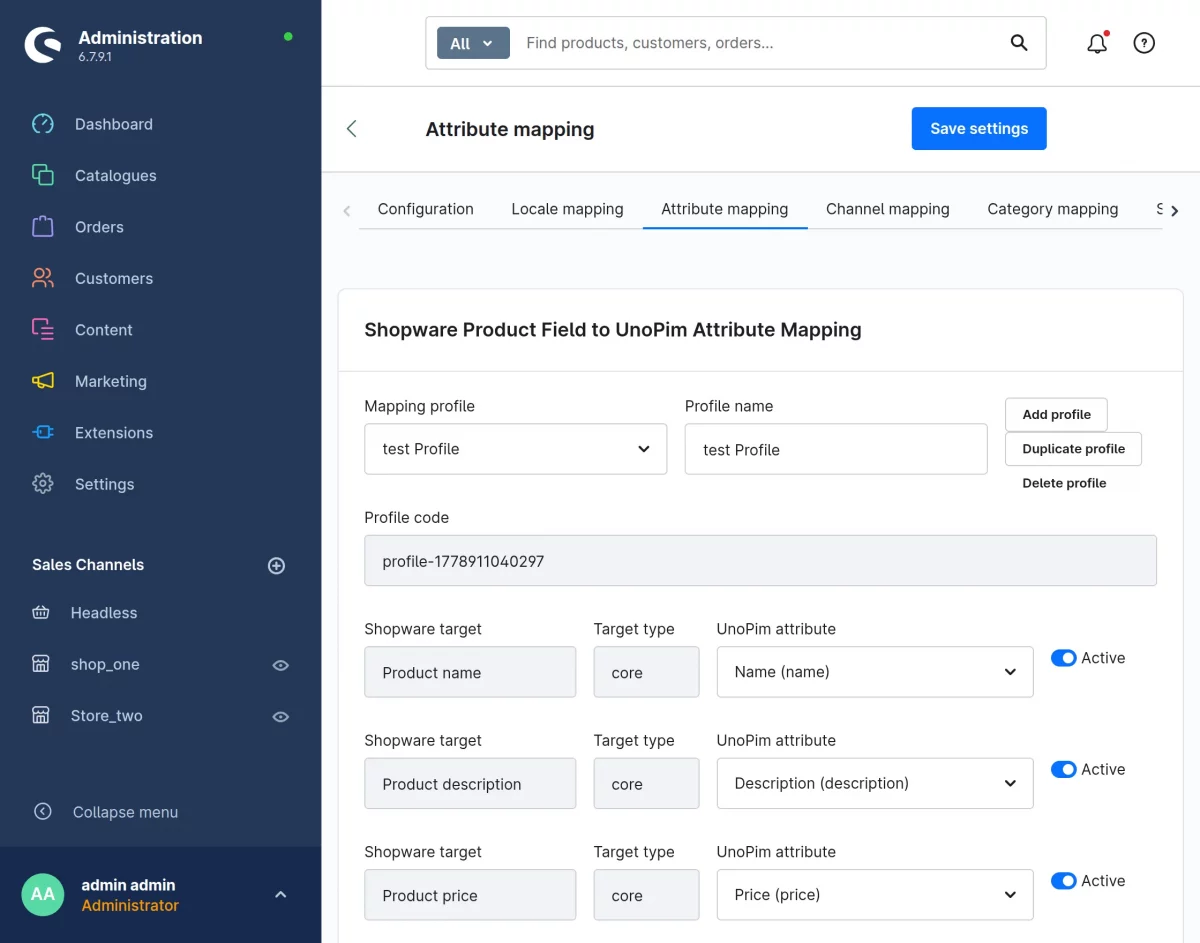
This makes it easier to reuse or modify existing configurations without starting from scratch.
Map Attributes Between Shopware and UnoPim
- For each profile:
- Shopware attributes will be listed.
- Admin can assign corresponding UnoPim attributes for each field.
This ensures that the correct data fields are synchronized between both platforms.
Enable or Disable Attribute Mapping
- Admins can enable or disable attribute mapping as needed.
Shopware Sales Channel Mapping with UnoPim Channel
Sales channel mapping allows you to connect Shopware sales channels with corresponding UnoPim channels, ensuring that product data is correctly distributed across the intended storefronts.
Map Shopware Sales Channels to UnoPim Channels
- Admin can map each Shopware Sales Channel with a corresponding UnoPim Channel.
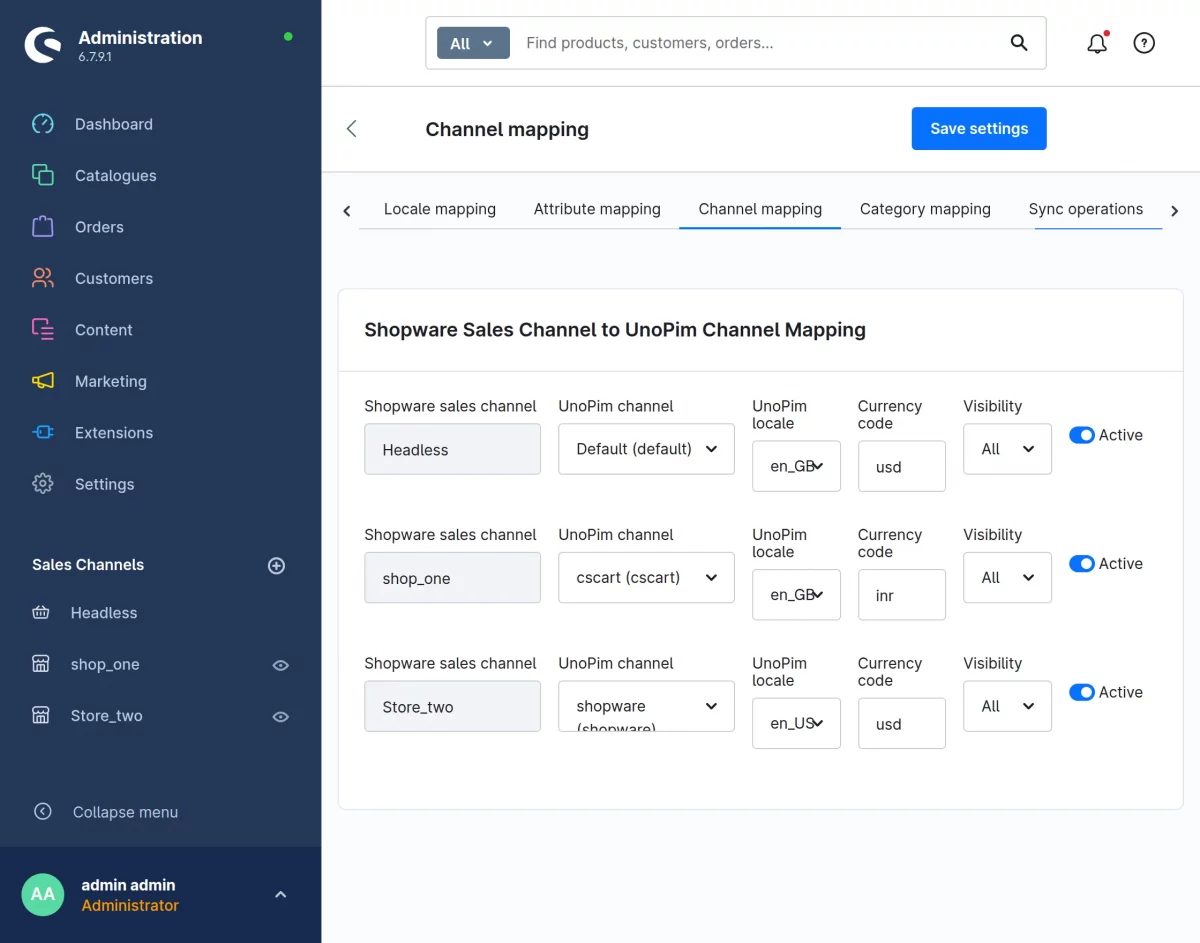
Configure Channel Details
While mapping the channels, the admin needs to configure the following details:
- UnoPim Channel
- UnoPim Locale
- Currency Code
These settings ensure that the correct language and currency are applied during data synchronization.
Set Visibility Level
- Admin can define the product visibility for the selected channel:
- All
- Link
- Search
This controls how products appear within the Shopware storefront.
Enable or Disable Channel Mapping
- Admin has the option to enable or disable the channel mapping as needed.
- Disabling the mapping will stop synchronization for that specific sales channel.
Sync operations
Sync operations allow admins to control how data flows between Shopware and UnoPim. Multiple sync profiles can be created to handle different synchronization needs with flexibility and precision.
- Admin can create multiple sync operation profiles
- Admin can enable or disable each sync operation
- Admin can also duplicate or delete existing sync profiles
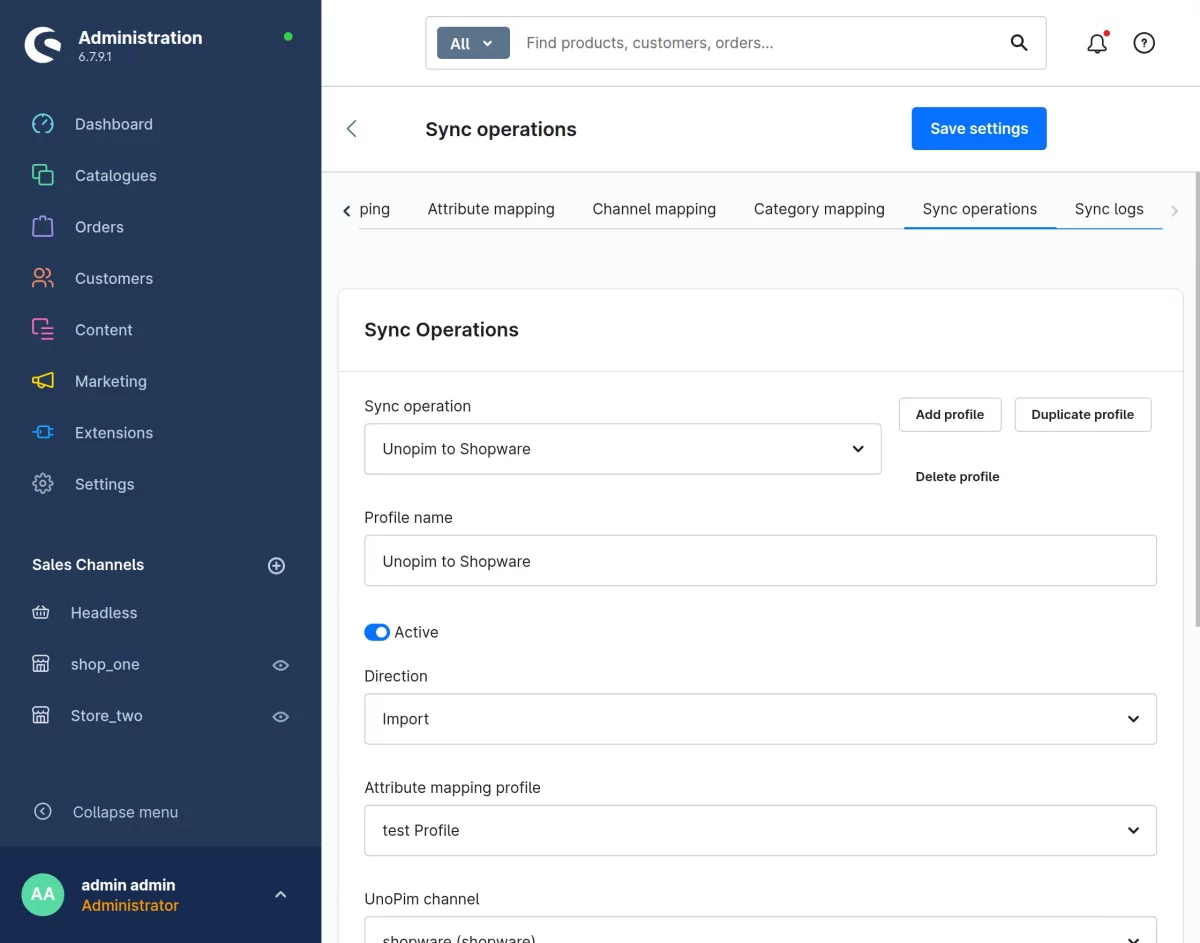
While creating a sync operation, the admin needs to configure:
- Name
- Direction (Import or Export)
- Attribute Mapping Profile
- UnoPim Channel
- Filters (based on sync type)
Import Operations (UnoPim → Shopware)
Data can be synchronized from UnoPim into Shopware using dedicated synchronization operations.
- Select Import as the sync direction
- Choose:
- Attribute Mapping Profile
- UnoPim Channel
- Apply filters to control imported data:
- SKU Filter
- Category Filter
- Parent Filter
- Family Filter
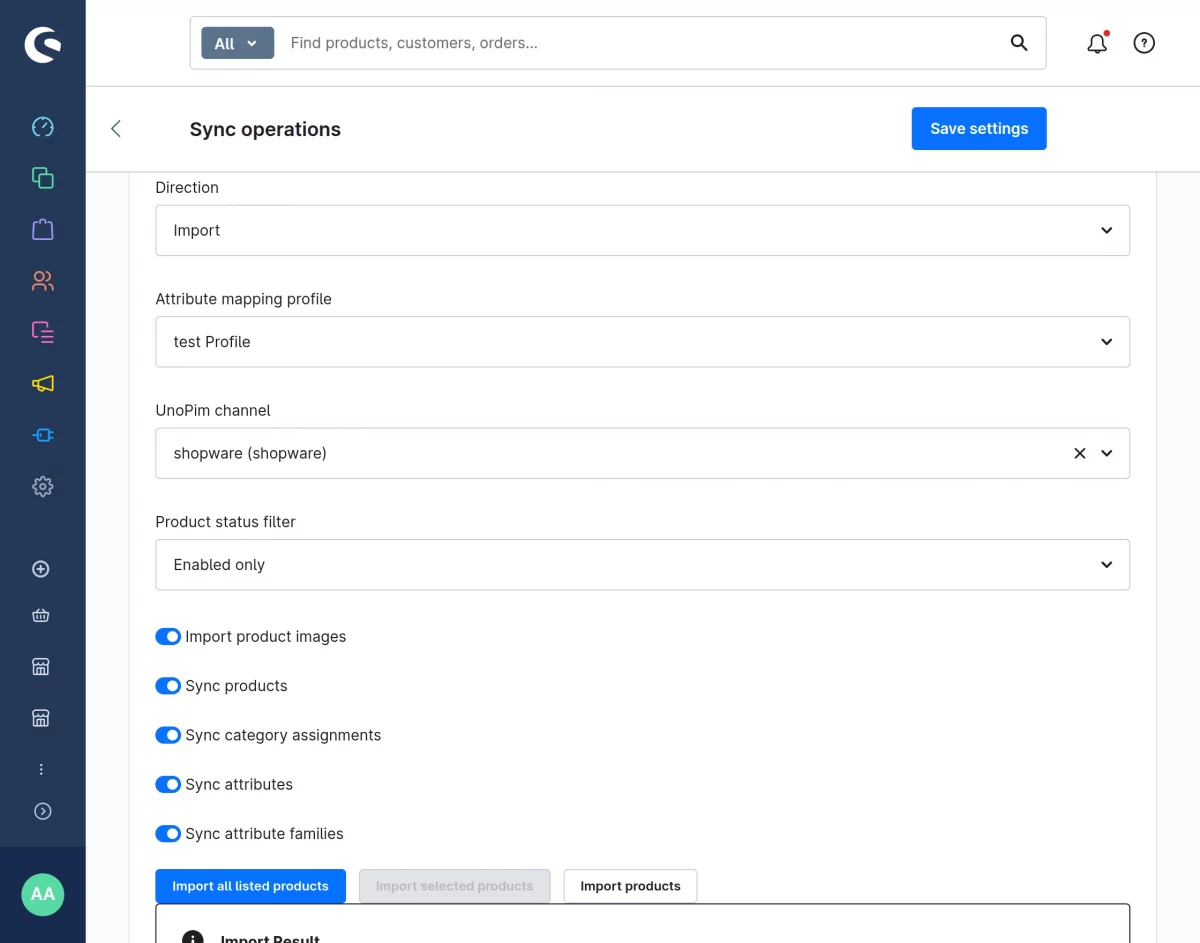
Import in Action
- Admin has multiple ways to perform import:
- Import all products at once
- Import a selected list of products
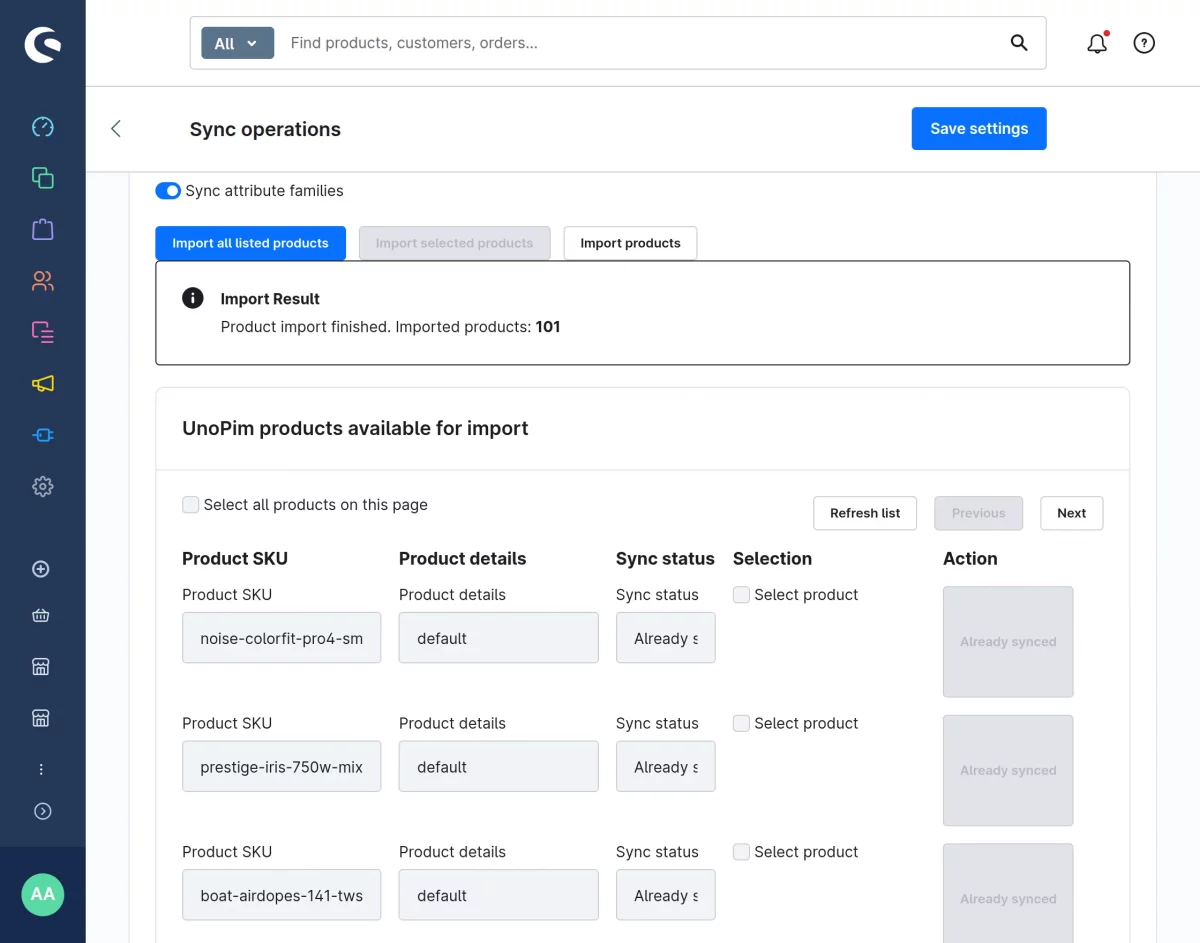
This gives flexibility to either perform bulk operations or selectively sync specific products.
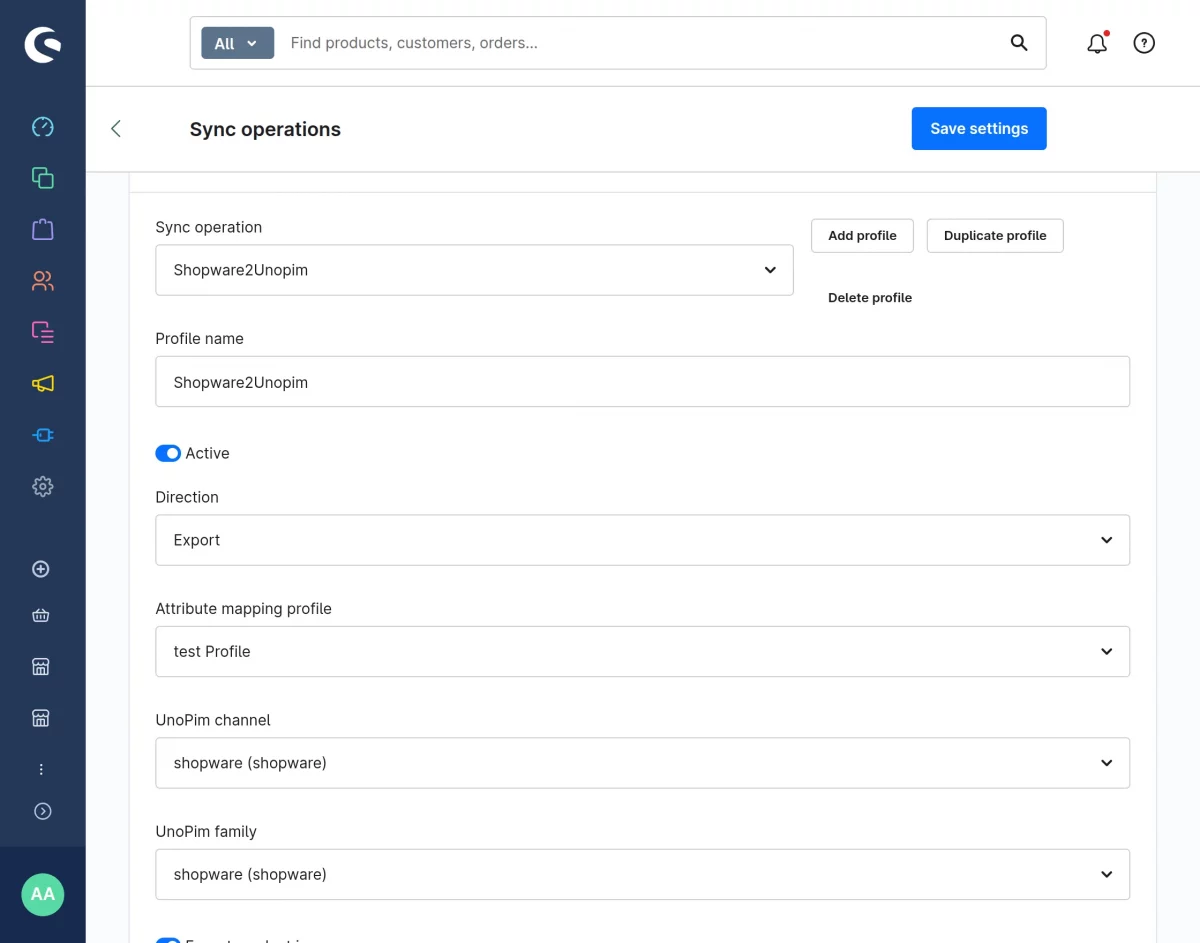
Export Operations (Shopware → UnoPim)
Data can be synchronized from Shopware to UnoPim using dedicated synchronization operations.
- Select Export as the sync direction
- Choose:
- Attribute Mapping Profile
- UnoPim Channel
- UnoPim Family
- Apply filters to control exported data:
- SKU Filter
- Category Filter
Export in Action
- Admin can perform export in two ways:
- Export all products at once
- Export a selected list of products
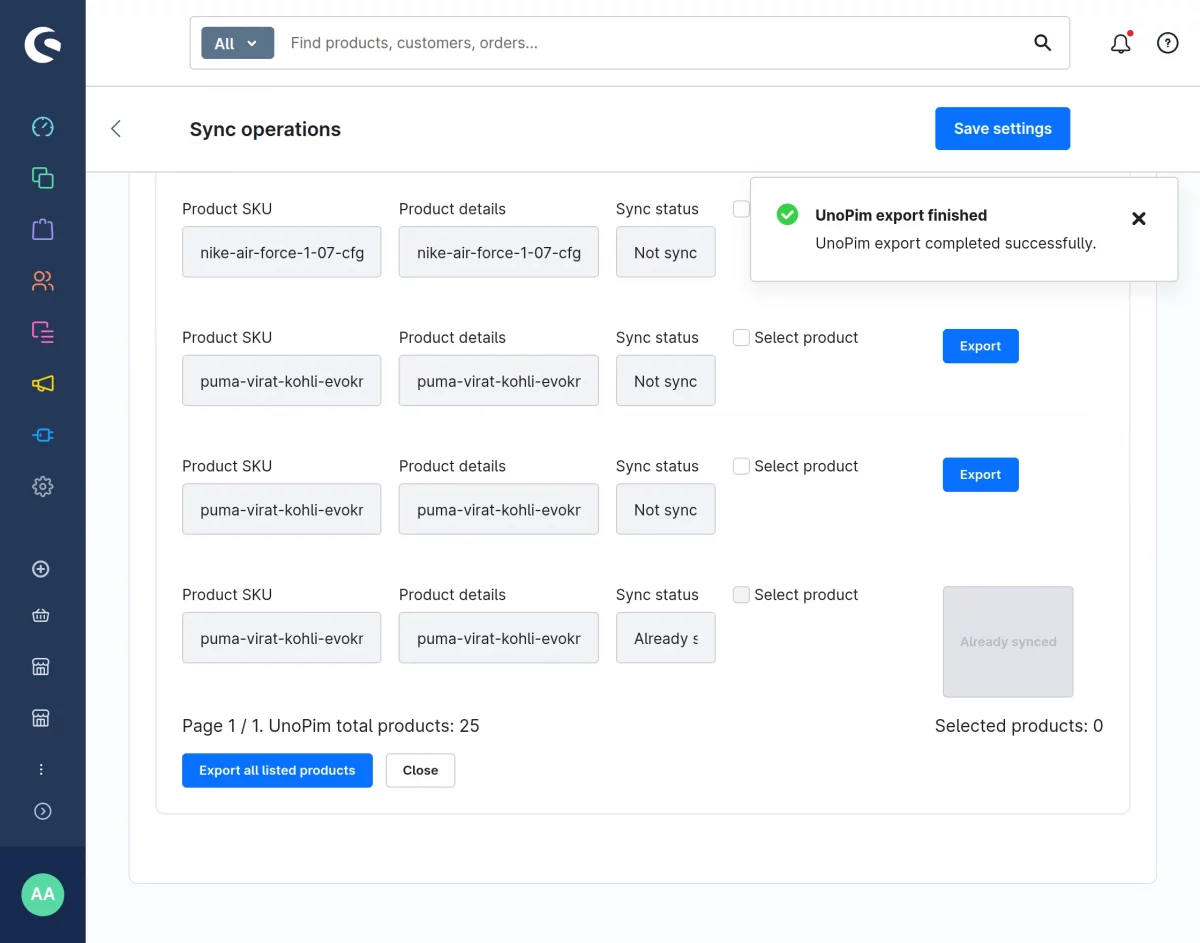
This ensures complete control over what data is pushed to UnoPim.
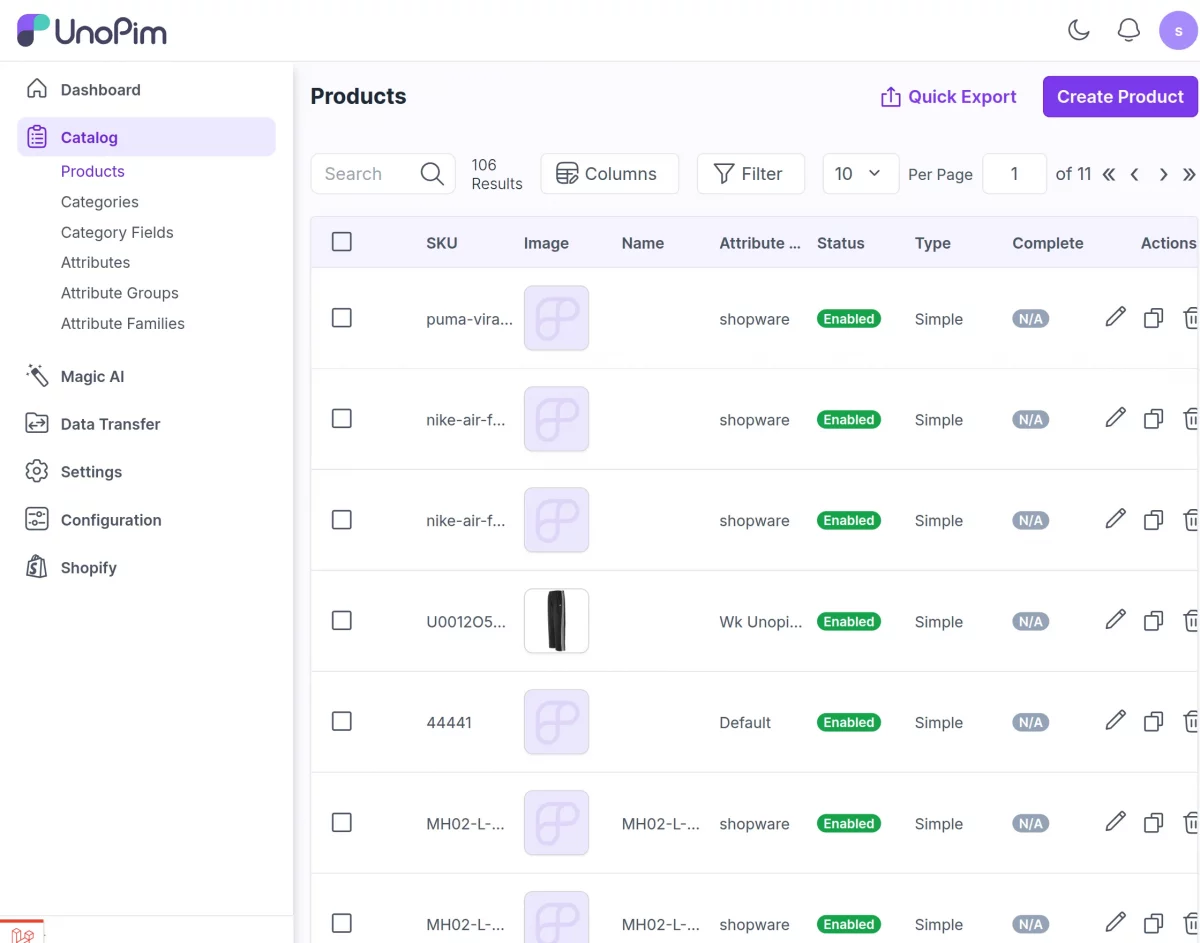
Exported products get listed on the Unopim
Sync Logs Management
To keep track of all synchronization activities, a dedicated sync logs section is provided in the connector.
View Sync Logs
- Admin can access a separate section to monitor all sync operations.
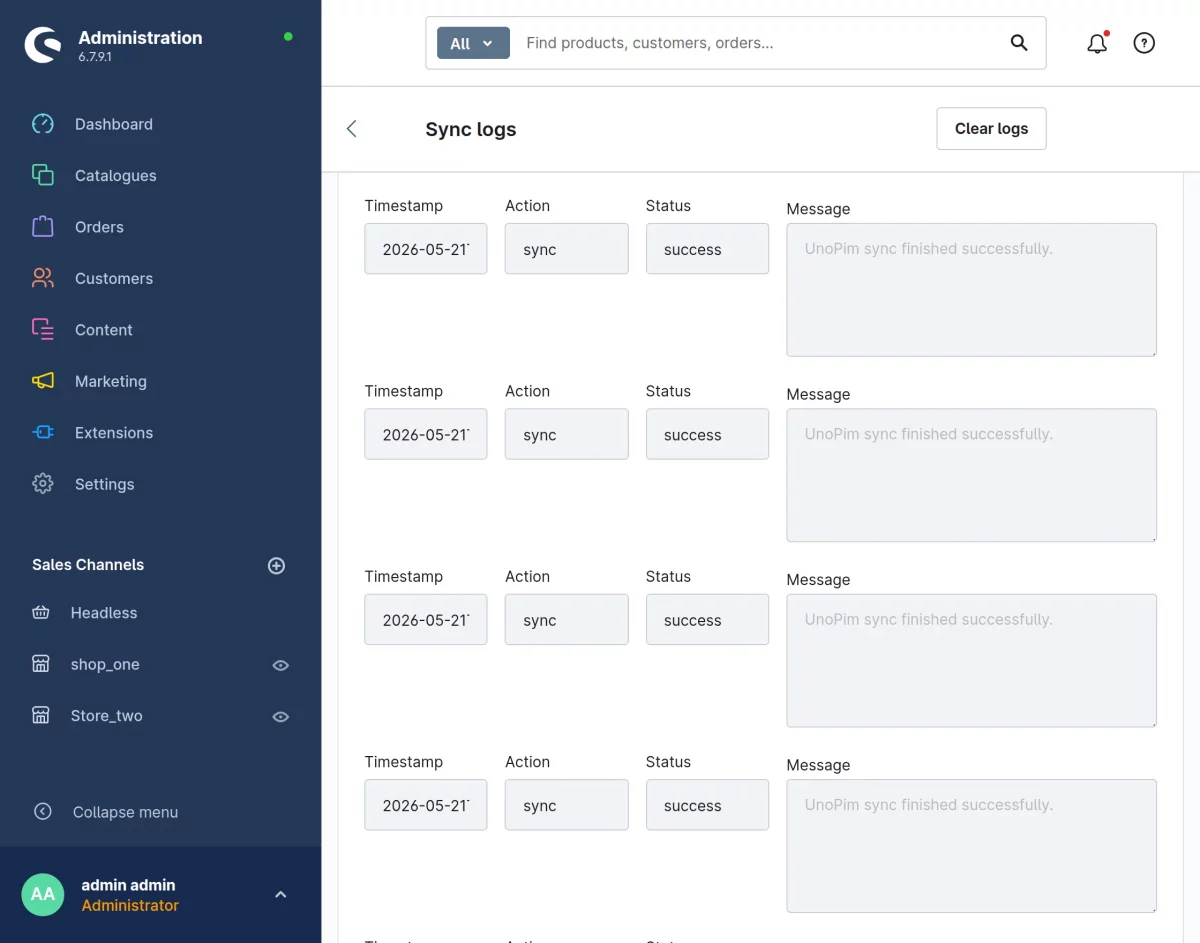
- The logs provide detailed insights for each operation, including:
- Date and Time of execution
- Type of Sync (Import or Export)
- Status (Success or Failed)
- Corresponding Message
Monitor and Troubleshoot
- These logs help admins:
- Track sync history
- Identify failed operations
- Understand error messages and take corrective actions
Support
If you have any questions, suggestions, or customization requests, feel free to contact us at [email protected] or submit a ticket at webkul.uvdesk.com.
Explore our premium-quality CS Cart Shopware Plugin to enhance your store functionality.
Please explore our shopware development services and Quality shopware extensions.
Current Product Version - 1.0
Supported Framework Version - 6.7.9.1

Be the first to comment.