INTRODUCTION
Since this is an absolute fact in this era, the customers don’t like to wait and no merchant wants to lose the customers.
Now, this is where the process/customer experience at your store matters. In case you want to increase your customer base, sales, & revenue, you not only need to provide a satisfactory product but also need to enhance the process at your shop or the restaurant.
Therefore, we are here to help you with the same scenario. As we have come up with the Odoo POS Order Sync module. Which helps you to synchronize the multiple live POS sessions and helps to divert some load towards other POS machines.
The POS user can send POS quotations from his POS session to any other POS session.
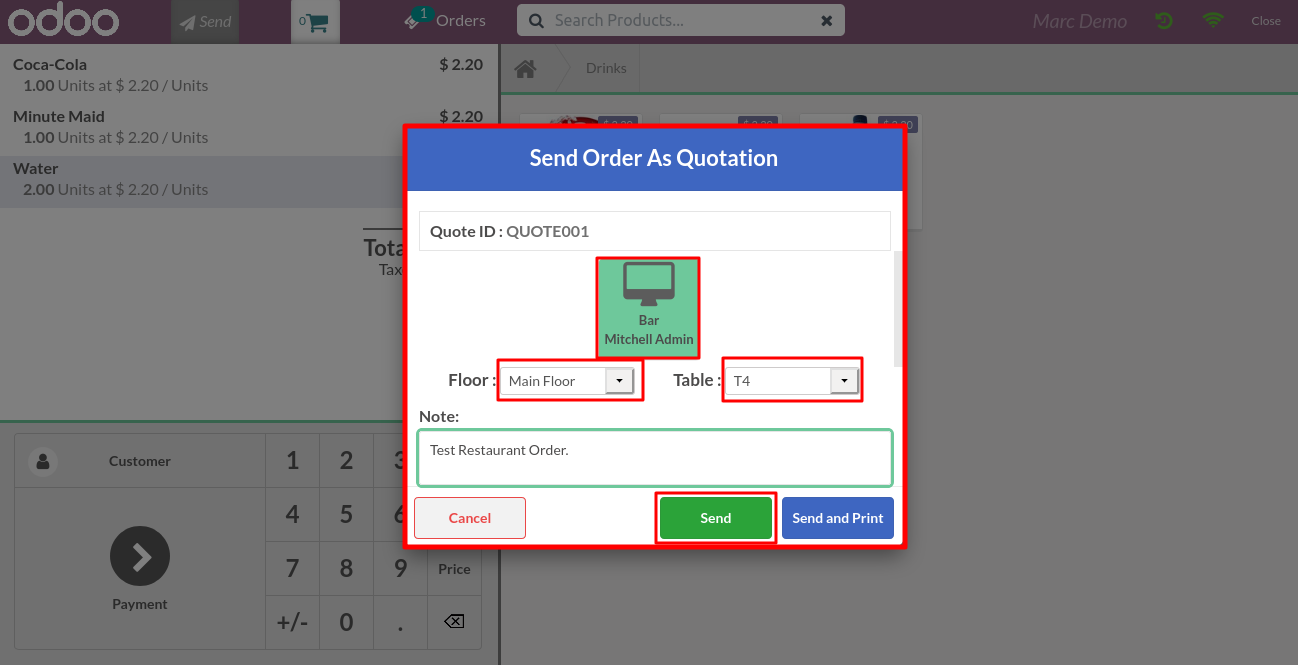
Moreover, it works accurately in the case of the POS restaurant as well. If a user wants to send the order quotation to another user by specifying the floor & the tables for the order. The user can also add some internal notes if he wishes.
FEATURES
1. The Odoo POS Order Syncmodule facilitates you to synchronize the multiple live POS sessions and helps to divert some load towards other POS machines.
2. It allows the POS user to send a POS sales quotation from one POS session to another during a running POS session.
3. The recipient can view the sent quotation and continue with the order from his POS.
4. The status of the sent quotations can also be checked by the sender from his POS session.
5. Any useful internal notes can also be added to the quotations before sending it.
6. The quotations generated in the Odoo backend show the details for the POS session of the sender and the recipient.
You can also check Odoo Customer Address Autocomplete module helps quickly fill in customer addresses using Google’s address database, saving time and reducing errors.
INSTALLATION
1.) Once you purchase the Odoo POS Order Sync module From Webkul store, you will receive the link to download the zip file of the module.
2.) Extract the file on your system after the download finishes. You will be able to see a folder named- “pos_order_sync”.
3.) Copy and paste this folder inside your Odoo Add-Ons path.
4.) Now, open the Odoo App and click on the Settings menu. Here, click on Activate the Developer Mode.
5.) Then, open on the Apps menu and click on ‘Update Modules List’.
6.) In the search bar, remove all the filters and search “pos_order_sync”.
7.) Now you will be able to see the module in the search result. Click on ‘Install’ to install it.
WORKFLOW
Back-end
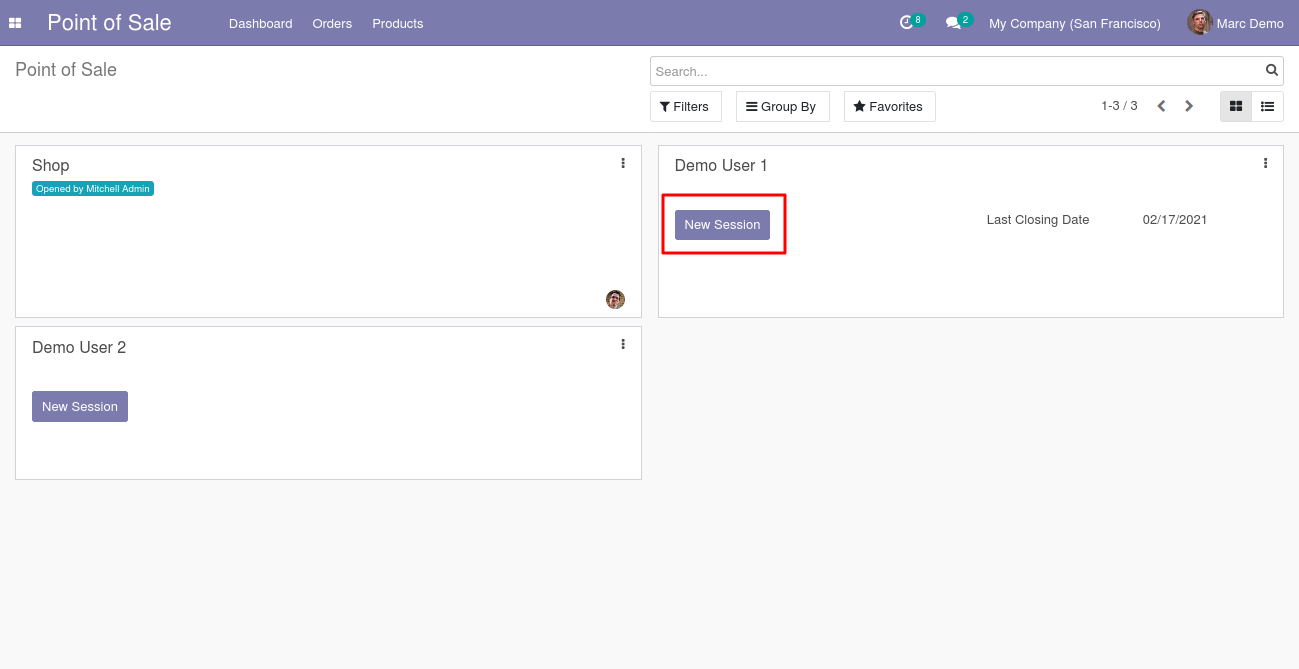
1. Login to your Odoo database, and navigate to the Point Of Sale application.

POS Shop:
2. Here, we have two users i.e, 1. Is the ‘Admin user’ and another is ‘Demo user’
First, we are starting the POS session of the Admin in the below image.

3. On the other hand, we are opening the Demo user’s POS session.
Front-end
4. Now, the demo user has created a quotation containing several products added in the cart. Now, if wants to send this order to any other POS session, he needs to click on the ‘Send’ button appearing on the top.
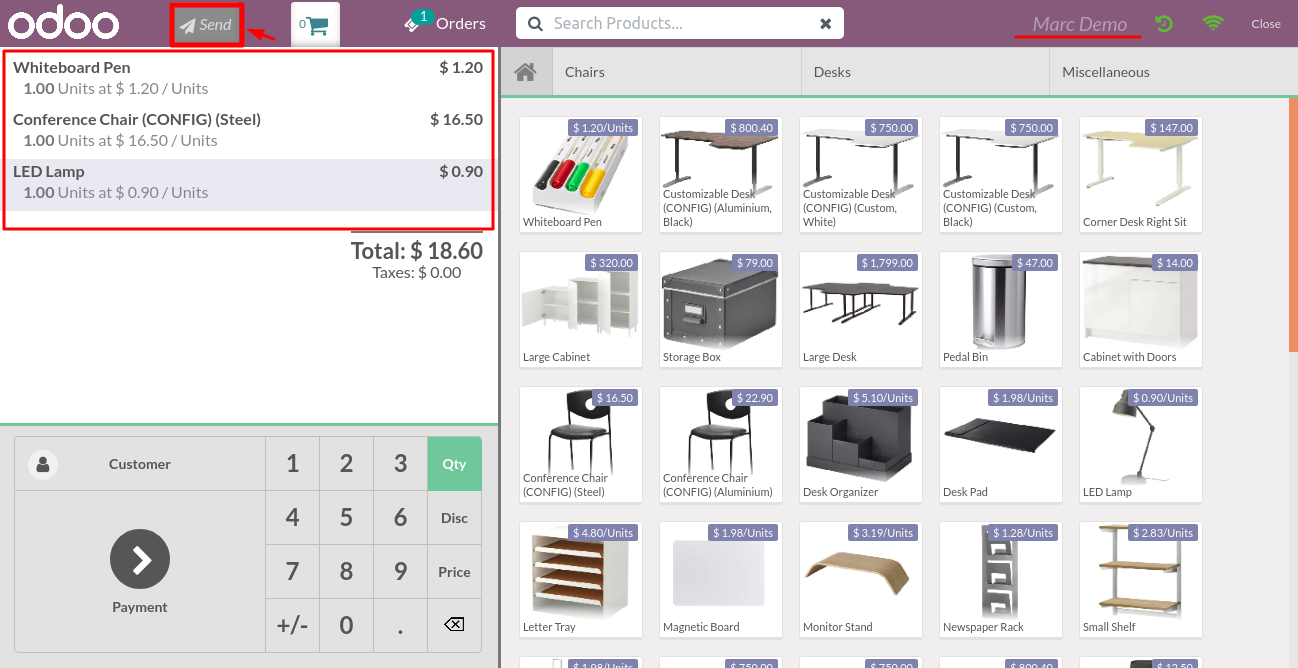
5. Here, all the available POS sessions will be visible, out of which the user can select where he wants to send this order.
Moreover, the user can also add the internal notes to the order.

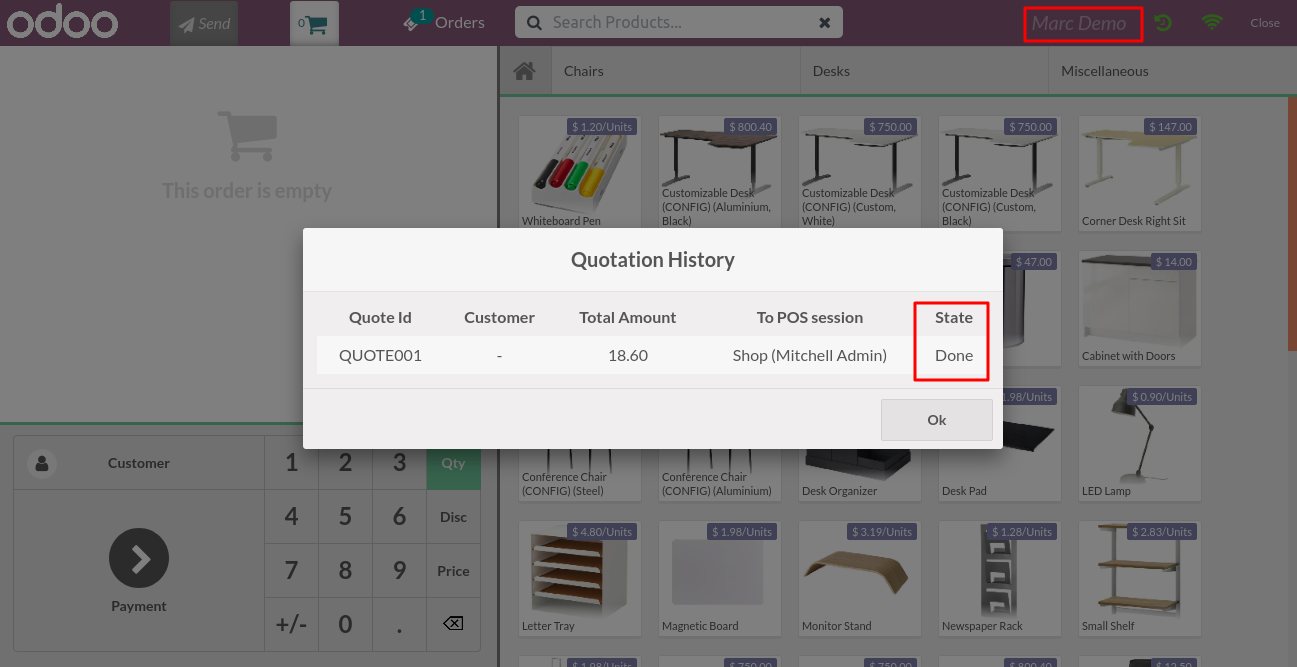
6. Since, the order has been sent from the side of Demo user. Hence, the cart is now empty.

7. By clicking on the ‘Clock icon’, the status of the sent order can be seen by the sender also. Moreover, he can see whom the order was sent to.

8. Now, we are at the Admin user’s POS session whom the order was sent to. In order to get the new order, the receiver just need to click on the ‘Cart icon’.

9. As the receiver/Admin has clicked on the ‘Cart icon’ hence the order has been loaded into his cart. Now, after serving this order, Admin can validate this order.

10. This is the Demo user’s session, as the sent order has been validated, now the status of that order has been changed from ‘Draft’ to ‘Done’.
Back-end
11. If you go to the back-end, in orders, and open that particular quotation, you can see the items it contained.
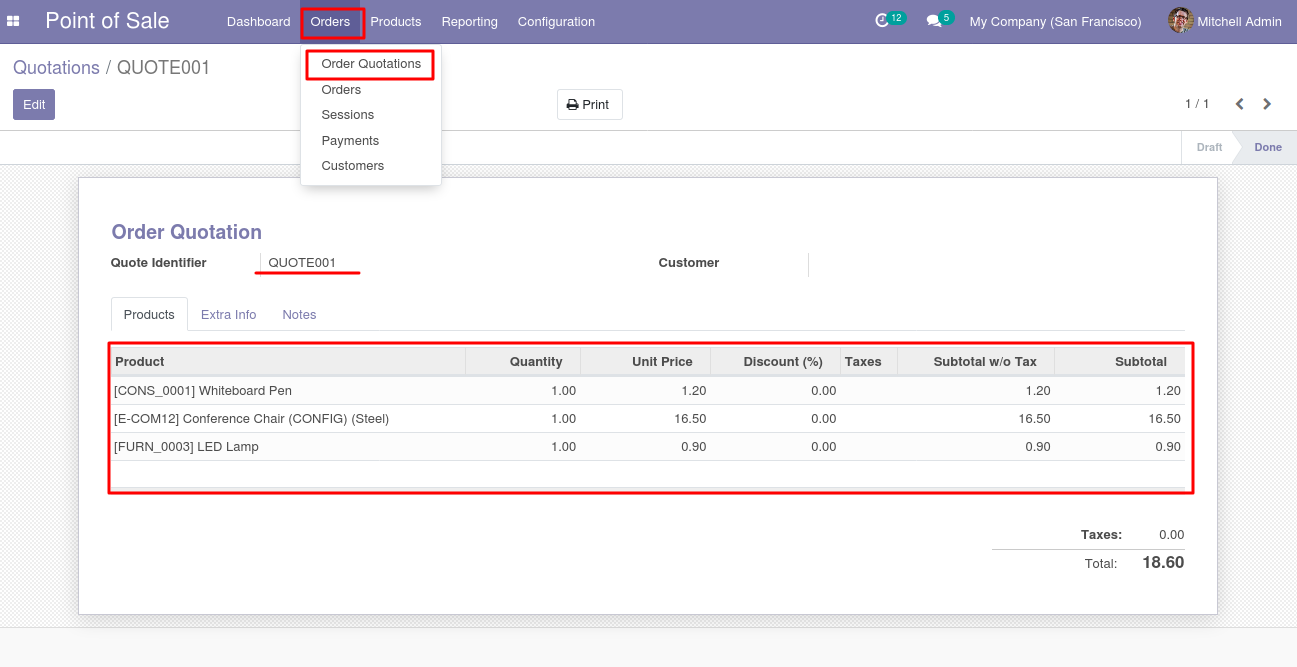
12. In the ‘Extra Info’ tab, you can see the sender & receiver of this order.

13. Moreover, to view the internal notes that we added while sending this order, go to the ‘Notes’.

POS Restaurant
14. As you can see this session is checked as ‘Bar/Restaurant’ and the ‘Floors & Tables’ are also enabled & selected for this session.

POS Front-end
15. Now, the Demo user is again sending a new order to the admin, and as the admin’s session now has floor & tables, the sender can also select the corresponding floor & table to send this order for.
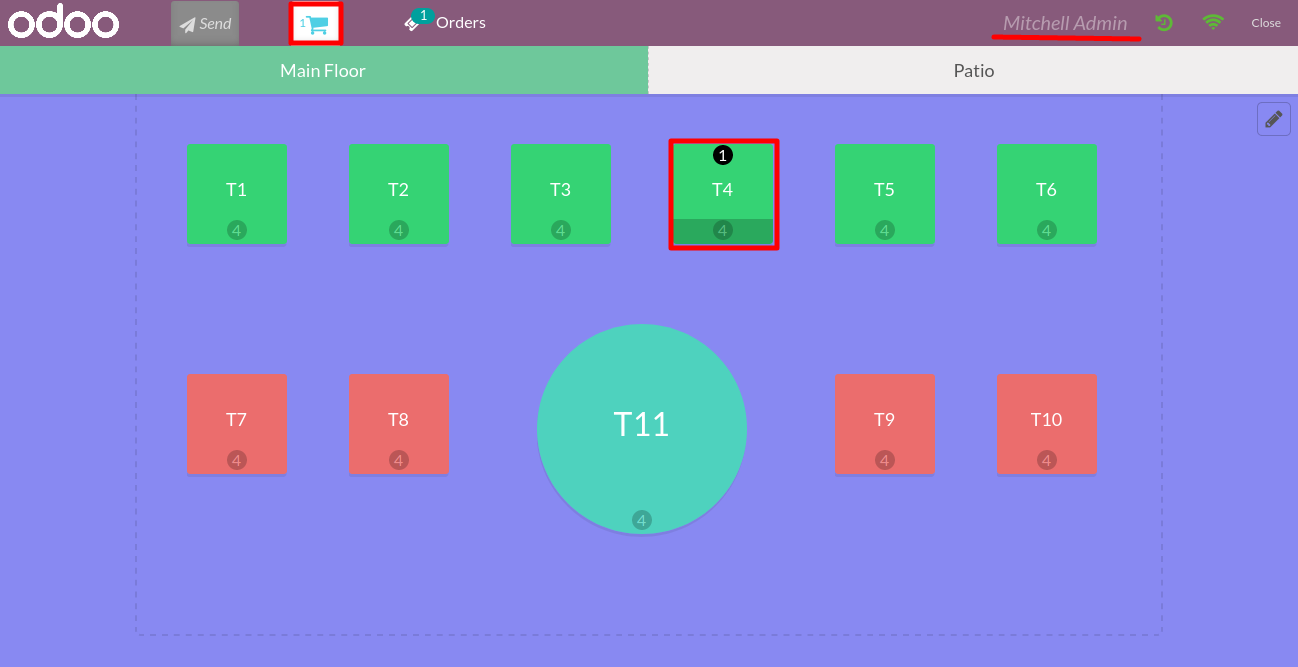
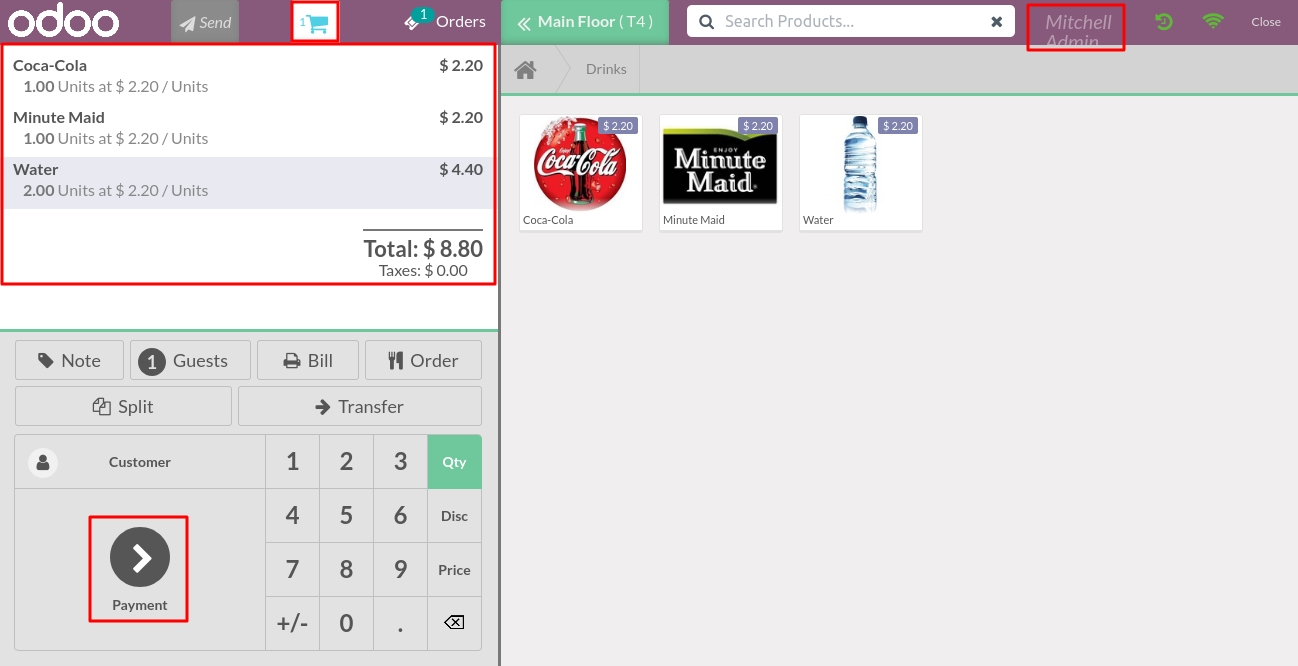
16. The receiver has already clicked on the ‘Cart icon’ button. Therefore, the order has been arrived and appearing on cart icon as well as in the corresponding table.
17. Now, the order has been loaded into cart & the receiver now can validate this order as per the requirement.
Also Read The User Guides For The Other Modules
Odoo Restrict User To Default POS
NEED HELP?
Was this guide helpful? Please share your feedback in the comments below.
If you have any issues/queries regarding the module please raise a ticket at https://webkul.uvdesk.com/en/customer/create-ticket/
For any doubt contact us at [email protected].
Thanks for reading!!
Current Product Version - 1.0
Supported Framework Version - Odoo V14, V13 V12, V11, V10, V9, V8

2 comments
Regarding your query, I would like to tell you that in standard Odoo you are restricted to close a POS session if there are any draft orders in it. But this only restricts you in the case of Restaurant/Bar.
Ref: https://prnt.sc/NXcmXxsTm26n
However, if you want that you need such restrictions in the normal POS shop-type session as well, then please create a ticket, our team will surely assist you and provide the best possible solution to your requirement.
Thanks & Regards,
Mohd. Razdar Hasan