The PrestaShop Tap Payment Gateway Module integrates Tap’s secure card checkout into your PrestaShop store, ensuring a safe, efficient, and highly dependable transaction experience for global buyers.
This module supports card payments in multiple GCC and global currencies like SAR, AED, KWD, USD, and EUR. It features 3D Secure authentication and automatic order synchronization.
This guide details the full setup process, including module installation, Tap API key retrieval, sandbox and live mode configuration, refund processing, and the customer checkout journey.
NOTE: PrestaShop Tap Payment Gateway is compatible with the PrestaShop Multi-store feature.
Features of PrestaShop Tap Payment Gateway
- Add Tap Payment as a checkout option for your customers.
- 3D Secure is enabled by default.
- Sandbox and Live mode toggle with mode-specific secret API keys.
- Tap-hosted payment page or on-site payment page (HPP) before redirect.
- Admin Transactions index with charge ID, order link, customer, amount, refunds, status, and date.
- Direct order ID link from the transactions list to the PrestaShop order.
- Full refund and partial refund processing from the transaction detail view.
- Refund status and history tracking against the original transaction.
- Tap webhook listener with a dedicated module front controller.
- Custom “Awaiting tap payment” PrestaShop order status installed at module install.
- Multi-currency support: SAR, AED, KWD, BHD, QAR, OMR, USD, EUR, and GBP.
- Enhanced transaction protection with integrated 3D Secure authentication.
How to Install PrestaShop Tap Payment Gateway
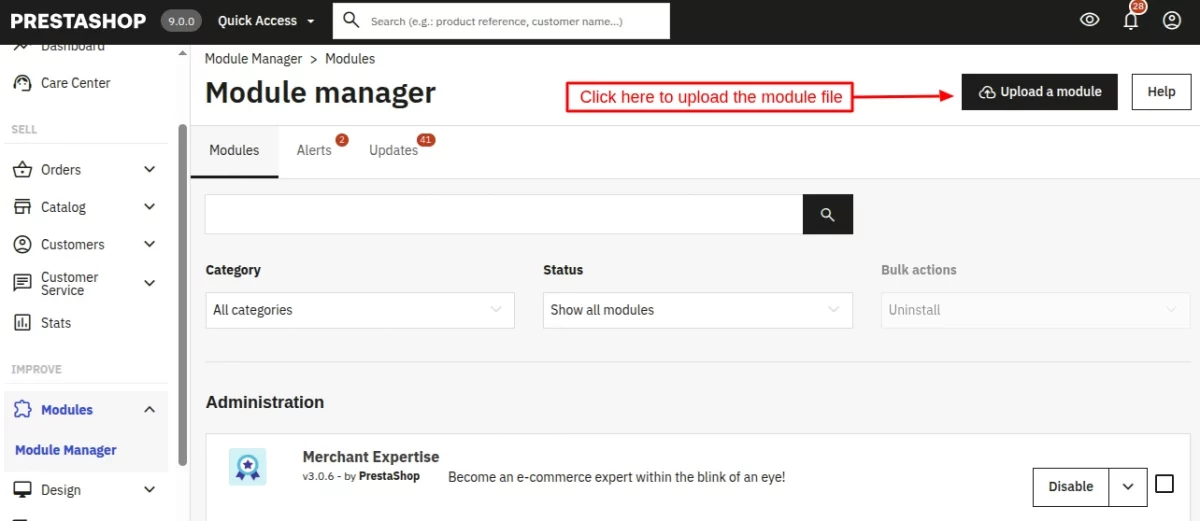
- Firstly, go to the module manager in the back office and click on ‘upload a module’.
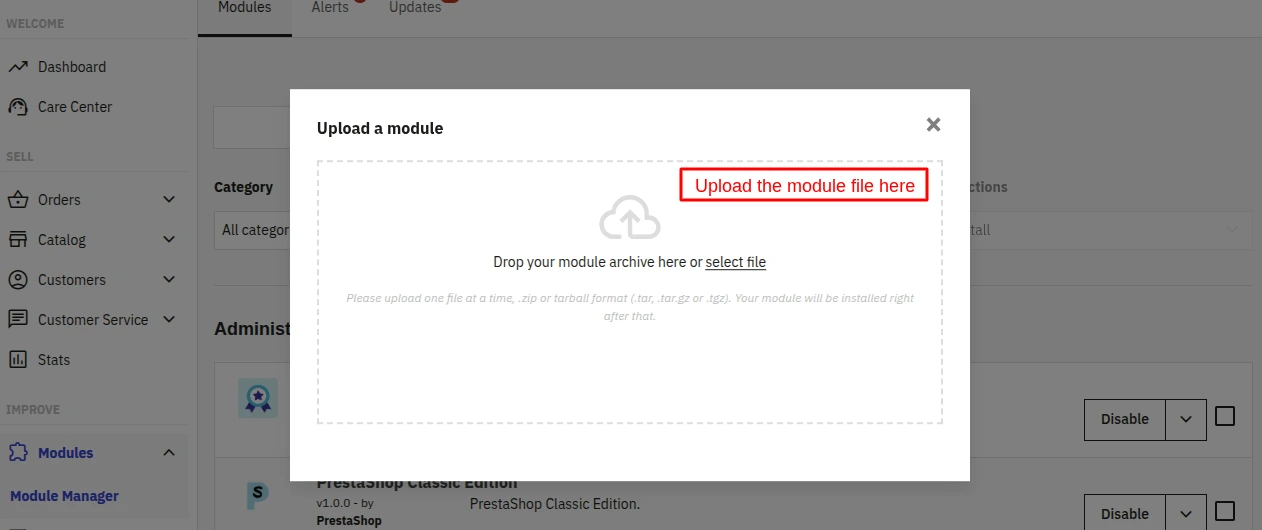
- After that, drag and drop the module file or select the file from the system.
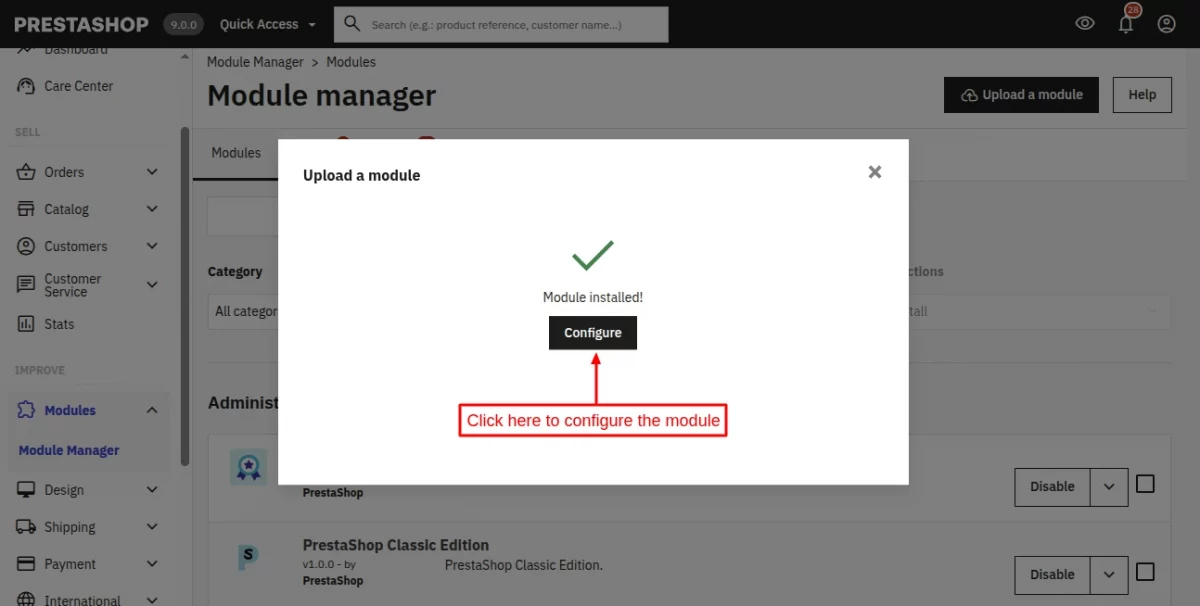
- In this way, the module installation will be successful.
How to get the API keys for Tap Payment Gateway
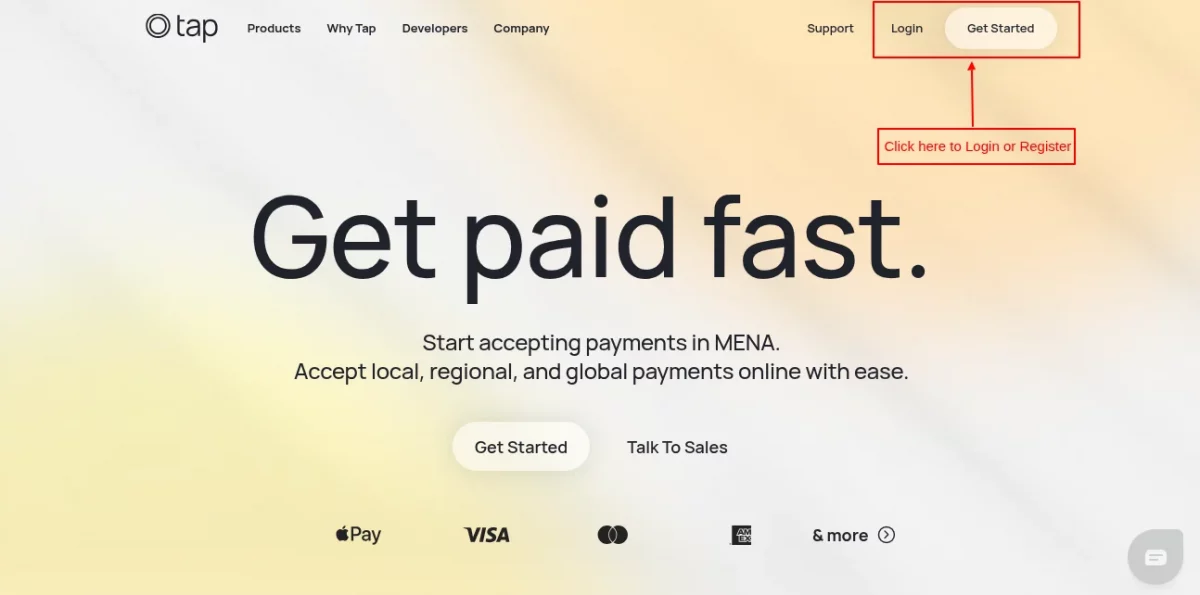
- Step 1 — Create a Tap Account
Tap Payments offers merchant accounts for businesses operating in Saudi Arabia, the UAE, Kuwait, Bahrain, Qatar, Oman and Egypt, plus international merchants on request.
Sign up at: https://www.tap.company
Complete the merchant onboarding form with your business details, upload the requested KYC documents (commercial registration, ID, bank details), and wait for approval.
Once your account is approved, you can log in to the Tap Payments merchant dashboard.
- Step 2 — Find Your API Credentials
After logging in to the Tap merchant dashboard, navigate to the API or Developers section to locate your API keys.
Tap provides two separate sets of keys — one for the Sandbox (test) environment and one for the Live environment.
Tap Payment Gateway Module Configuration
Connect the module to your Tap Payments account and choose how the payment page is displayed to customers through the module configuration.
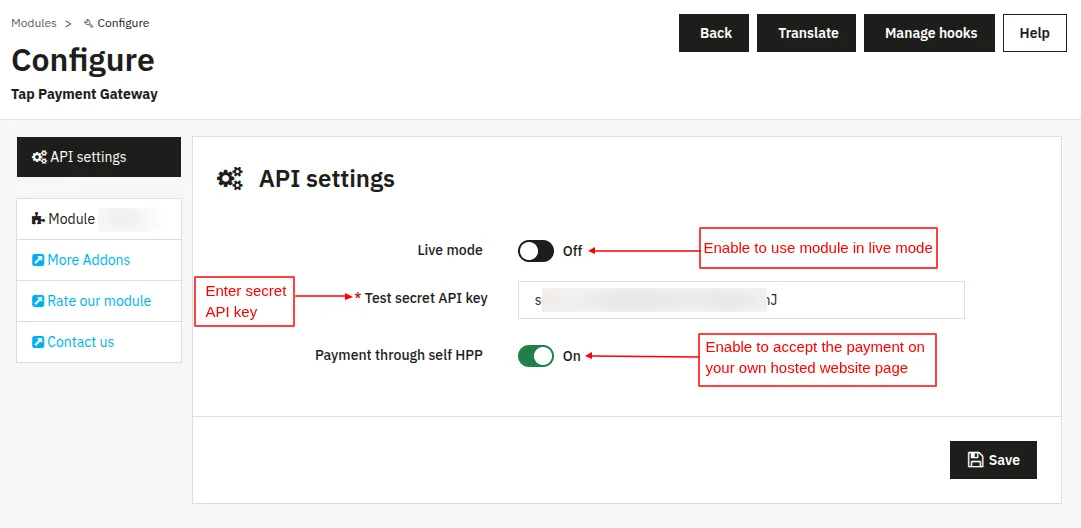
- Live mode: When enabled, the module uses the Live secret API key for real payments. When disabled, the module uses the Test secret API key for sandbox payments.
- Live secret API key: Secret key from your Tap merchant dashboard for the Live environment. This field is required when Live mode is enabled.
- Test secret API key: Secret key from your Tap merchant dashboard for the Sandbox environment. This field is required when Live mode is off.
- Payment through self HPP: When disabled, the module redirects customers straight to a Tap-hosted payment page. When enabled, the module renders a payment form on your Front Office first and then redirects to Tap to complete the payment.
Managing the Tap Payment Gateway Module from the Admin Panel
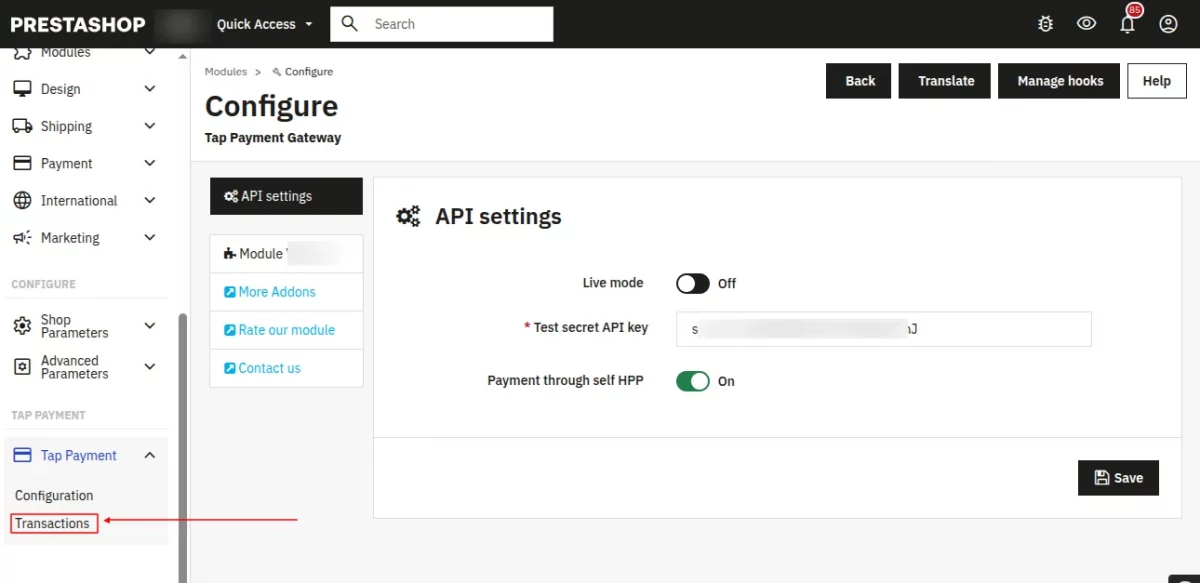
After installation, a new “Transactions” tab appears in the PrestaShop admin sidebar.
The Transactions tab stores every Tap Payments charge processed through the store and lets you issue refunds.
In this tab, the admin can initially view a listing of all the Transactions done using the PrestaShop Tap Payment Gateway module.
The listing displays the ID, Transaction ID, Order ID, Cart ID, Customer name, Total amount, Total refunded, Status, and Transaction date.
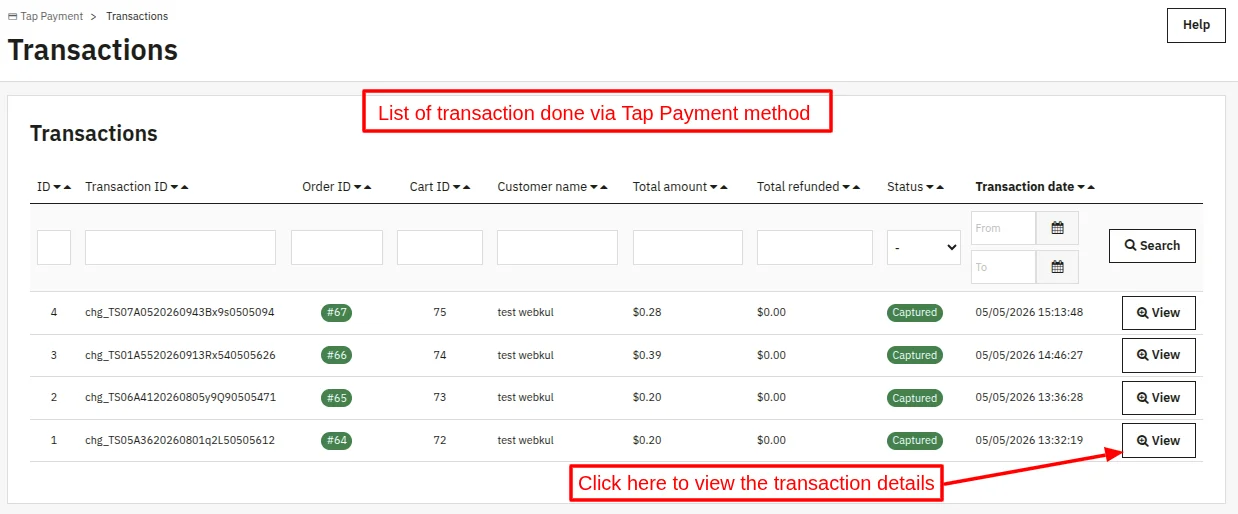
View a transaction
Click the View action on any row to open the detailed transaction view.
The detail view shows the transaction ID, customer name and email, order link, currency, total amount, refunded amount, current status, and transaction date.
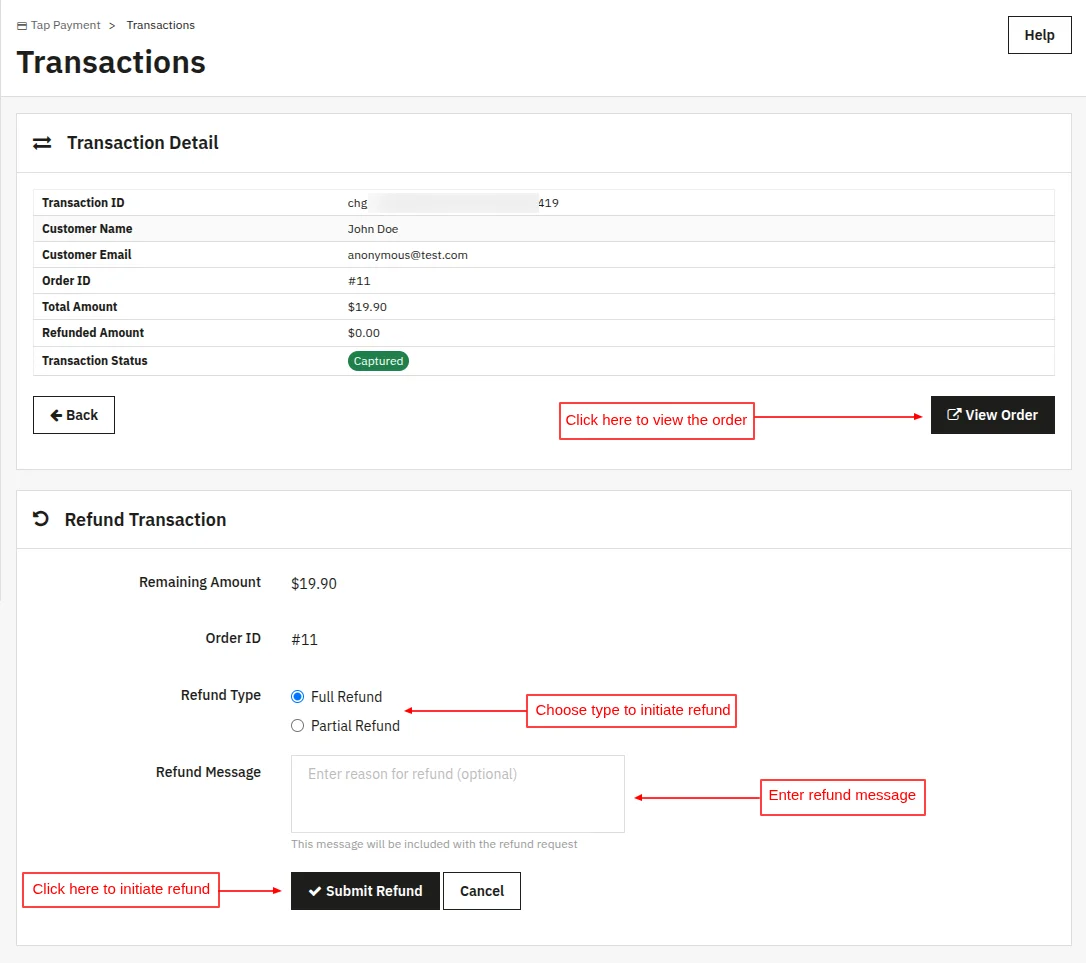
Issue a refund
- Open the transaction detail view.
- Choose Full refund to refund the entire captured amount, or Partial refund to enter a custom amount.
- Submit the refund.
- On success, the refunded amount and refund status update on the same view, and the refund is logged against the original transaction.
Refund history is preserved per transaction, so that the admin always has an audit trail of partial refunds.

Front End Workflow
On the checkout page, “Pay by Tap payment” appears as a payment option (if the cart currency is supported and the module is configured correctly).
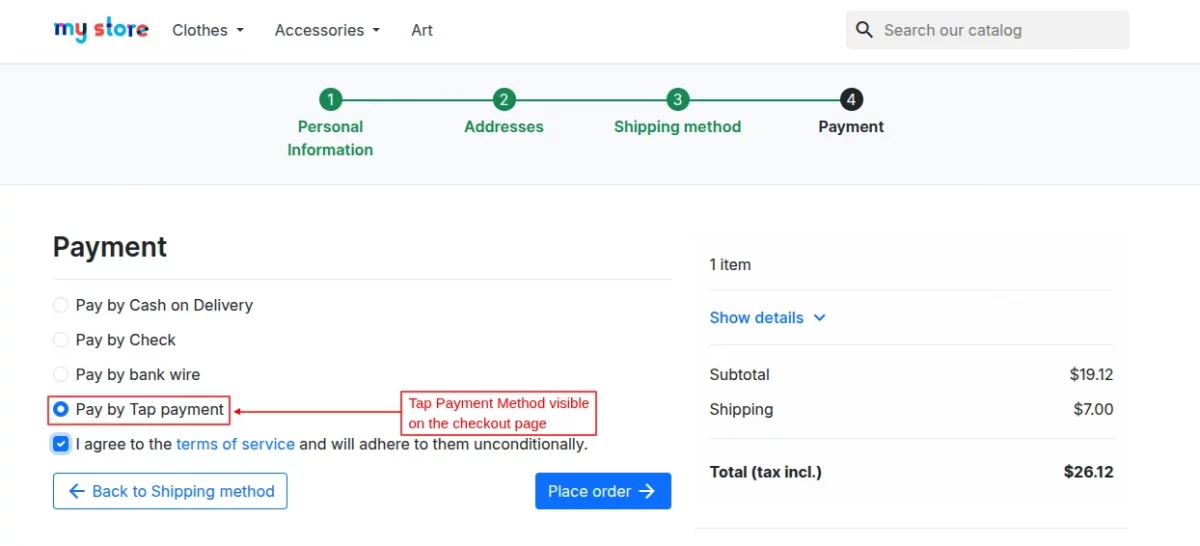
When the customer selects ‘Pay by Tap payment’ as the payment method and confirms the order, the module then initiates the payment flow.
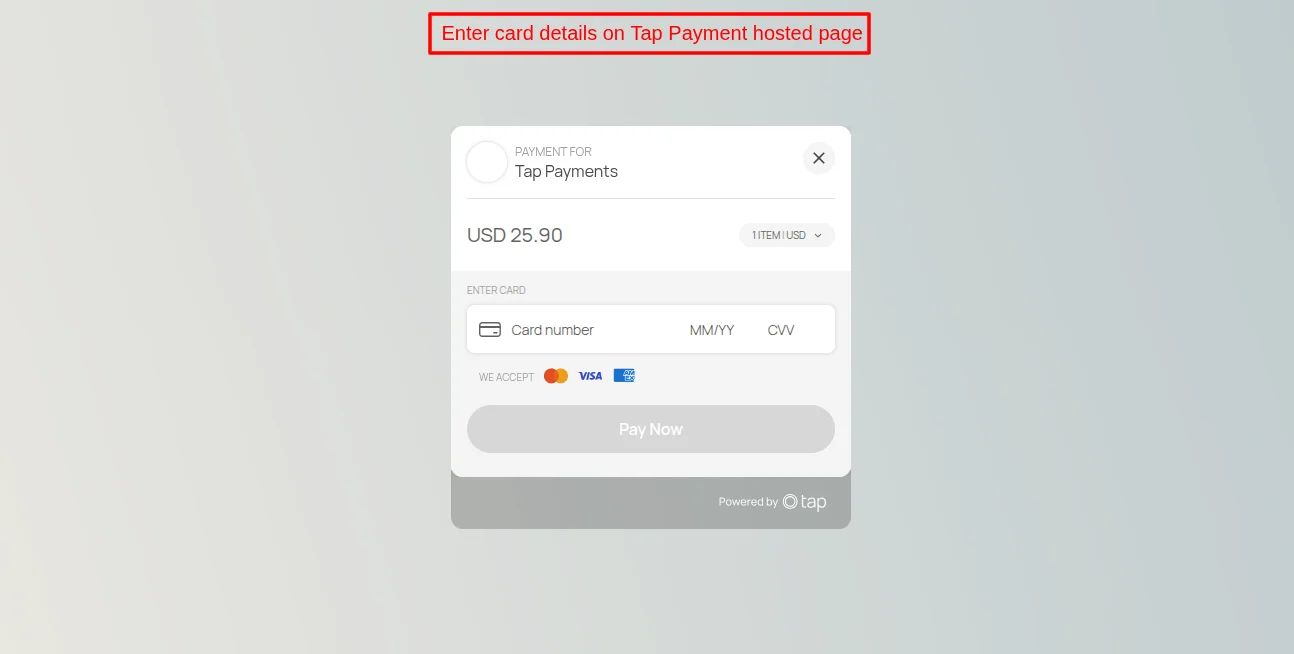
If ‘Payment through self HPP’ is disabled, customers are redirected to Tap’s secure hosted payment page to enter card details, complete 3D Secure authentication, and finish payment.
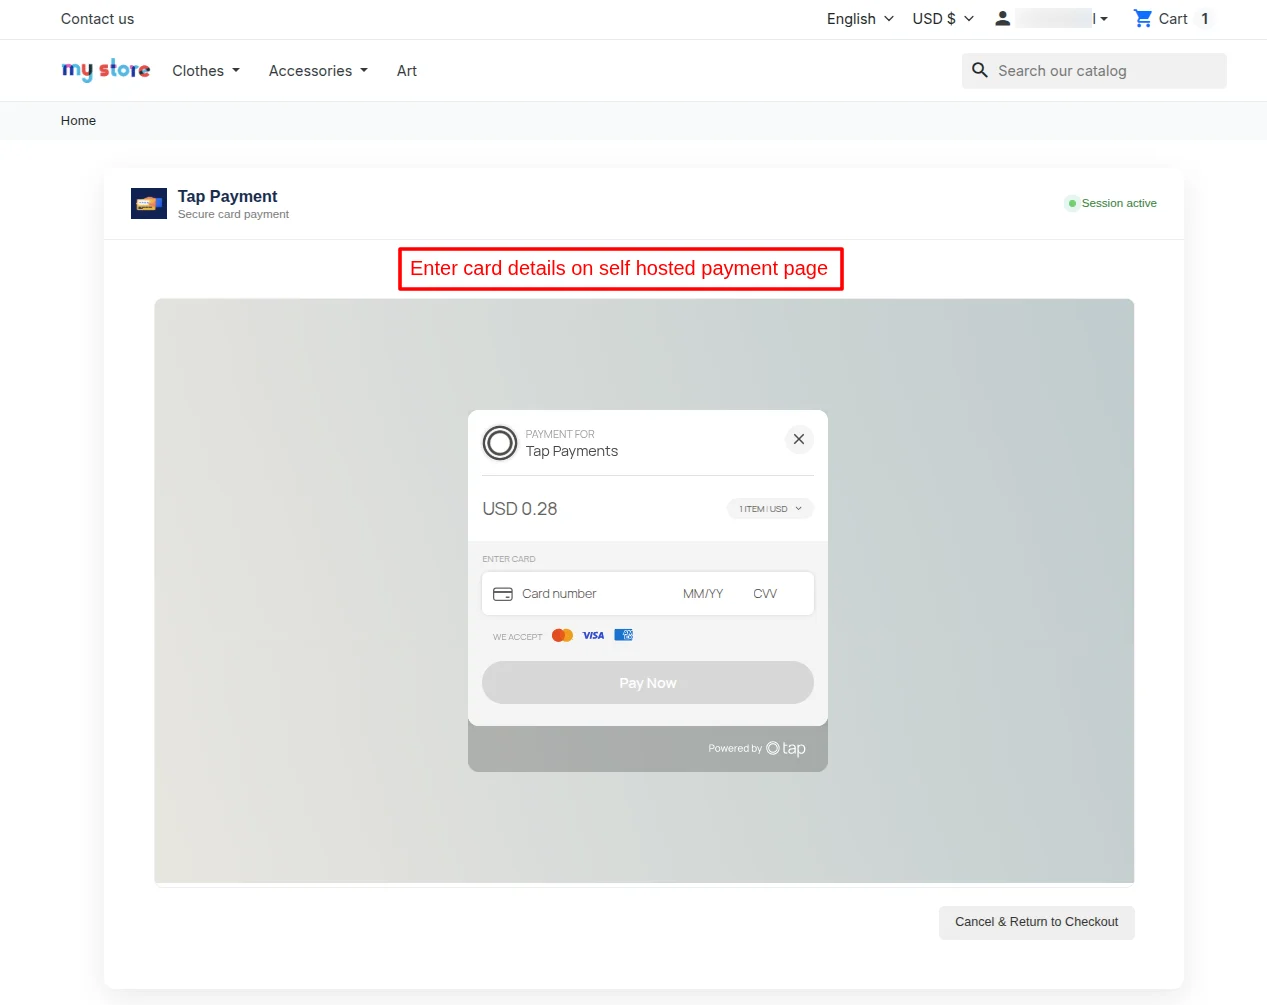
If you enable “Payment through self HPP,” your store embeds a payment form on the confirmation page.
The customer enters card details directly without leaving your domain, after which Tap processes the payment and returns to your order confirmation page.
In both flows, Tap Payments sends a webhook to your store’s endpoint. The module then:
- Validates the signature
- Creates or updates the PrestaShop order
- Sets the order status to “Payment accepted” for captured payments or “Awaiting Tap payment” for pending or authorized payments
- Records the charge in the Transactions grid
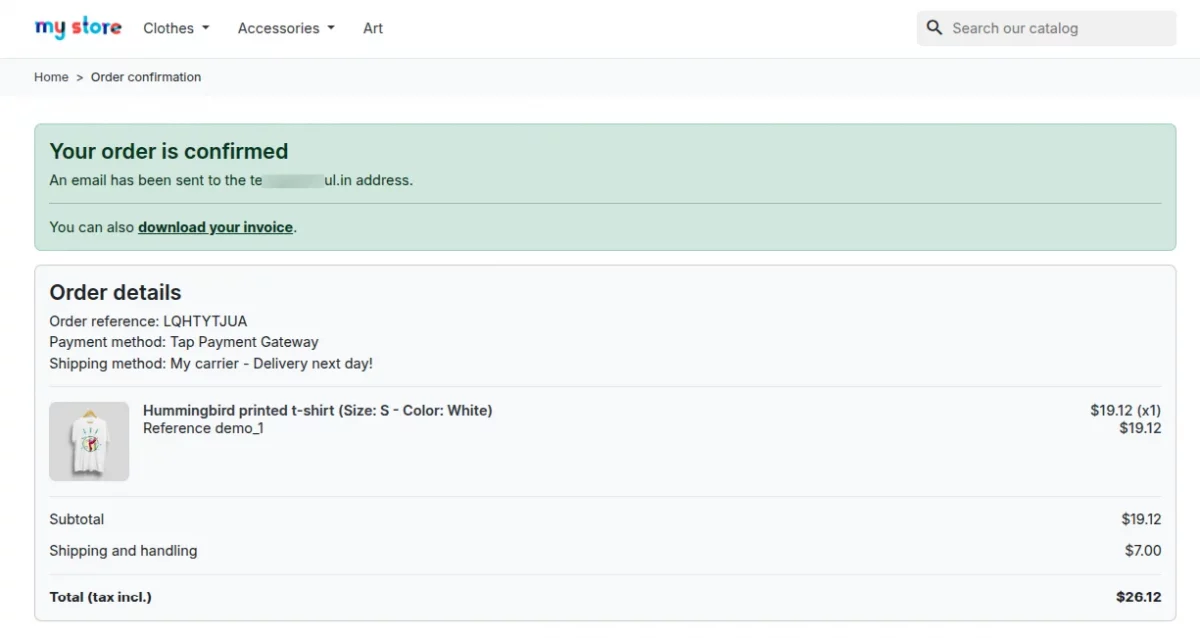
Once the payment is successful, the system redirects the customer to the order confirmation page.
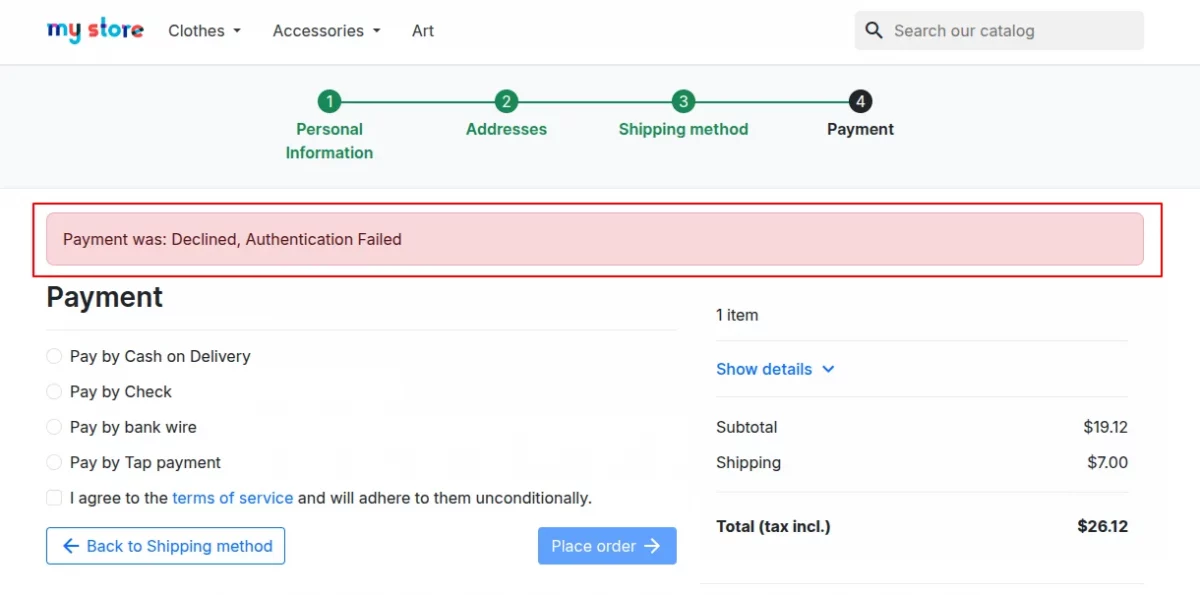
If the payment fails or the customer cancels it, the checkout page displays an error message allowing the customer to retry the payment or choose another payment method.
This was all about the PrestaShop Tap Payment Gateway Module. I hope this document will help you in checking the functionality of the module in a better way.
Also, do let us know about your views in the comments.
Support
For any kind of technical assistance or query, please raise a ticket or send us an email at [email protected]
Also, please explore our Prestashop development services and vast range of quality Prestashop addons.
Current Product Version - 1.0.0
Supported Framework Version - 9.x.x, 8.x.x, 1.7.x.x

Be the first to comment.