INTRODUCTION
Odoo POS Network Printer permits you to print via a network printer!!
Printing receipts in POS becomes difficult without a POS box. In addition, the POS box is slow and processes the payment a little slow.
You can overcome this problem with a network printer that prints receipts and invoices without a POS box. Moreover, it will eliminate the need for a conventional printer, and you can print all the invoices conveniently.
Still, how will you connect the network printer with your POS? For this, we have Odoo POS Network Printer, which lets you connect the POS with the network printer and let you print invoices.
Note: This module uses the QZ Tray client for sending direct print commands to the ESC/POS printer:
Installation Link: (https://qz.io/download/)
Demo Link: (https://demo.qz.io/)
FEATURES
- The module allows the POS user to print POS order receipts without using POS Box.
- The POS user can configure the ESC/POS Network Printer with Odoo POS.
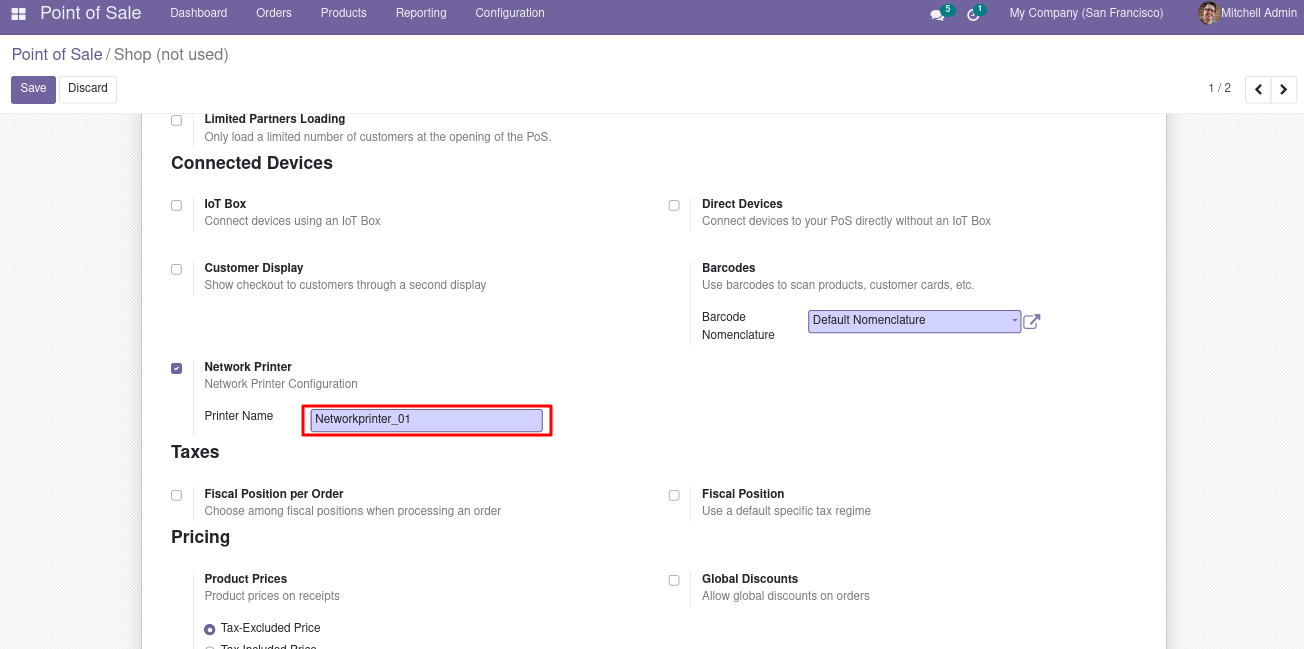
- In the Odoo POS configuration settings, you can set the printer name. Moreover, the printer name entered in the settings should be the same as the name of the ESC/POS Network Printer.
- The POS user needs to install the QZ Tray Client to send the printing command to the Odoo POS.
- The Odoo POS session also shows the connection status of the Network Printer to the POS user.
INSTALLATION
- Once you purchase the Module from Webkul store, you will receive a link to download the zip file of the module.
- Extract the file on your system after the download finishes. You will be able to see a folder named- ‘odoo_pos_network_printer’.
- Copy and paste this folder inside your Odoo Add-Ons path.
- Now, open the Odoo and click on the Settings menu. Here, click on Activate the Developer Mode. One can also activate the developer mode by typing ‘debug’ after ‘web?’ in the URL.
- Then, open on the Apps menu and click on ‘Update Modules List’.
- In the search bar, remove all the filters and search ‘odoo_pos_network_printer’.
- You will be able to see the module in the search result. Click on ‘Install’ to install it.
WORKFLOW CONFIGURATION
1. Firstly, log in to your Odoo backend, go to ‘Point of Sale’ and click the ‘three-dot’ option to open ‘Settings.’

2. On the setting page, Click ‘IoTBox/ Hardware Proxy or Connected Device’ and tick the box next to ‘Network Printer.’ It will open a pop that will show all the available network printers choose any and click the ‘Save’ button.
3. After setting the network printer, open the POS and allow permission to connect the network printer, as shown in the video.
4. After that, open the POS in the top-right you can see the Network Printer option. Moreover, the different color of the ‘Print’ icon has a different meaning as follows:
Green Color: This means that the POS has successfully established the connection with the configured printer via the QZ Tray Client. Now, you can use the network printer to print POS bills.
Yellow Color: It means that the POS has established a connection to the QZ Tray client on your system and now needs to connect to the configured ESC/POS printer.
Red Color: It means the POS is unable to establish a connection with the specified printer. Make sure that the QZ Tray client is set up and running.
However, On opening the POS the configured network printer will connect automatically. There is a connection notification icon that the user can check for the connection status. POS User can also click on the connection notification icon if he wishes to refresh the connection.


5. After validating the invoice, you can print the invoice by network printer by clicking ‘Print via n/w Printer.’

6. When validating the order, the system will automatically ask permission to print the receipt using a network printer.
OTHER ODOO MODULES
- Odoo Affiliate FAQs Extension
- Marketplace Whatsapp Live Chat
- Odoo POS Loyalty Management
- Odoo POS Register Invoice Payments
- POS Membership Cards
- Odoo POS Partial Payment
NEED HELP?
Hope you find the guide helpful! Please feel free to share your feedback in the comments below.
If you still have any issues/queries regarding the module, please raise a ticket at https://webkul.uvdesk.com/en/customer/create-ticket/.
Also, please explore our Odoo development services & an extensive range of quality Odoo Apps.
For any doubt, contact us at [email protected].
Thanks for paying attention!!
Current Product Version - 1.0
Supported Framework Version - V15, V14, V13, V12

I like to use POS with two network printer. One for order print to kitchen and one for receipt print in restaurant. Can I use two network printer with your module?