INTRODUCTION
The Multi-Channel Magento 2.x Odoo Bridge integrates Magento 2 with Odoo, allowing businesses to manage store data efficiently from the Odoo backend.
It supports the import and export of products, categories, customers, orders, and attributes, along with manual, real-time, and scheduled synchronization.
The connector also provides order, invoice, shipment, cancellation, and inventory synchronization, including Magento MSI and status mapping.
A dynamic dashboard helps monitor Magento data through charts, graphs, tabs, and clickable data cards, reducing manual efforts and improving management.
NOTE: Odoo Multi-Channel Magento 2.x OdooBridge is a dependent module on the Odoo Multi-channel Sale Module.
Install the base module first for Odoo Multi-Channel Magento 2.x OdooBridge to work properly.
Check the User Guide for Multi-Channel Sale for the installation, features, and complete Workflow of the module.
FEATURES
- Odoo Multichannel Magento 2x Connector allows you to import products, categories, customers, orders, and attribute sets into Odoo.
- The connector supports bulk data import with filters based on date, ID, category, email, and order state.
- Multi Channel Magento 2.x Odoo Bridge allows you to export products, categories, and attributes from Odoo to Magento 2 in bulk or by selection.
- The connector synchronizes order, shipment, invoice, cancellation, and inventory updates between Magento 2 and Odoo
- Odoo Multichannel Magento 2x Connector supports full and partial invoice and delivery synchronization between both platforms.
- The connector allows you to map Magento 2 order statuses with their matching Odoo order statuses.
- It supports Magento Multi-Source Inventory and allows you to map Magento sources with Odoo warehouses.
- The connector provides cron jobs for scheduled product, category, customer, and order imports.
- The dynamic dashboard lets you track Magento 2 data using charts, graphs, tabs, and clickable data cards.
INSTALLATION
- Once you purchase the Multi Channel Magento 2.x Odoo Bridge from the Webkul store, you will receive the link to download the zip file of the module.
- Extract the file on your system after the download finishes. You will be able to see a folder named- ‘magento2x_odoo_bridge.’
- Copy and paste this folder inside your Odoo Add-Ons path.
- Now, open the Odoo App and click on the Settings menu. Here, click on Activate Developer Mode.
- Then, open the Apps menu and click ‘Update Modules List.’
- In the search bar, remove all the filters and search for ‘magento2x_odoo_bridge.’
- You will be able to see the module in the search results. Click on ‘Install’ to install it.
Before moving further, explore our Odoo development services & an extensive range of quality Odoo Apps.
WORKFLOW
- 1. Configure Magento 2 Channel
- Log in to your Odoo database and open the Odoo Multichannel Magento 2x Connector.
- Go to the Channel section and create a new Magento 2 channel.
- Enter the required Magento 2 connection details and save the configuration.
- Use the connection settings to link your Magento 2 store with Odoo.
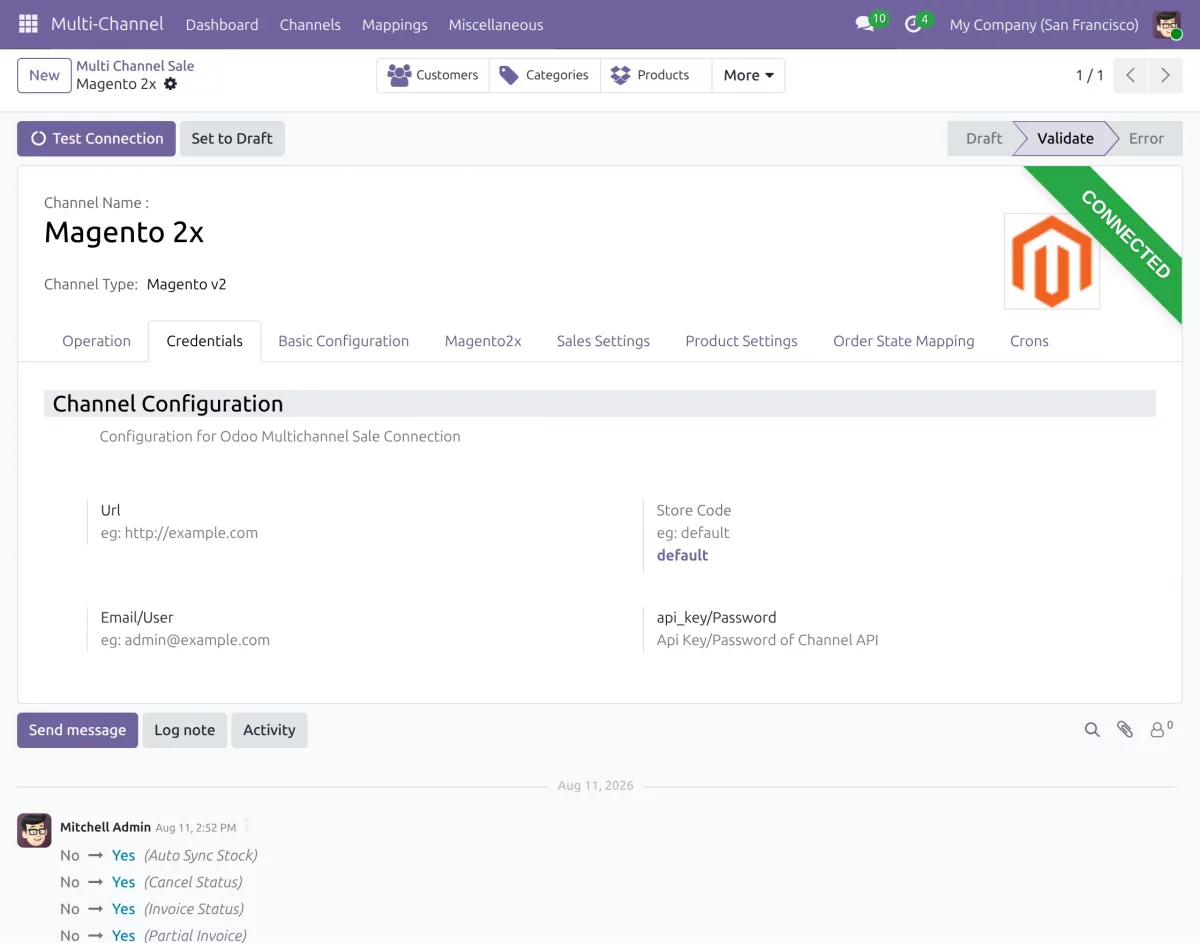
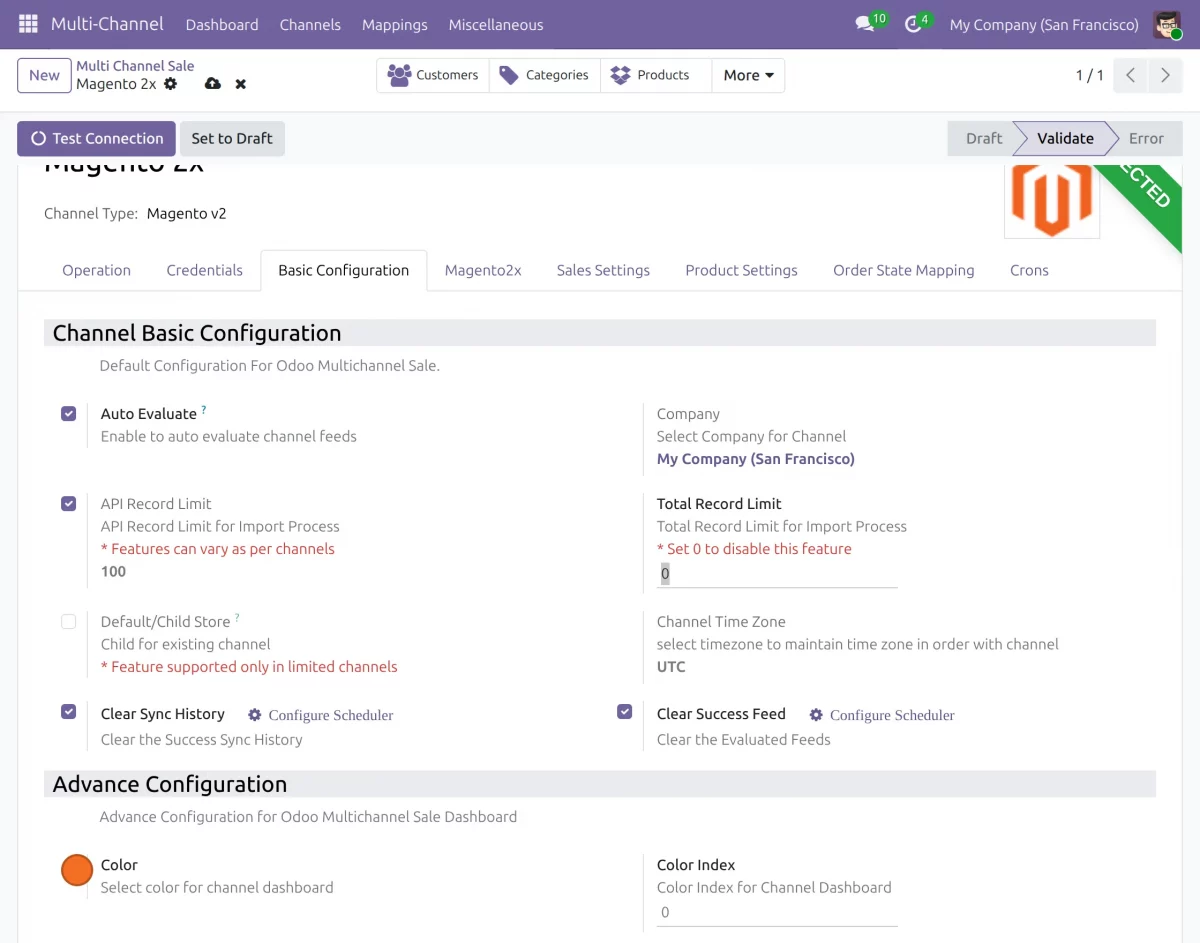
Configure Channel Settings
- Open the Magento 2 channel and configure the required settings.
- Set the options for product, order, inventory, and data synchronization.
- Save the configuration after entering the required details.
Note: To get the Magento 2 credentials, Navigate to Magento 2.
Configuration at Magento 2 end
- Click on “All Users”, which is available in the top right section of the panel under the System tab.

- Click “Add New User” in the top-right corner and enter the required details, including User Name, First Name, Last Name, Email, Password, Confirm Password, and Interface Locale.
- Enter the Admin Password to verify your identity, then enable the Active option to activate the user account.
- Under the User Information section, click User Role, select the desired role using the radio button, and click Save to apply the changes.

Import Attribute Sets into Odoo
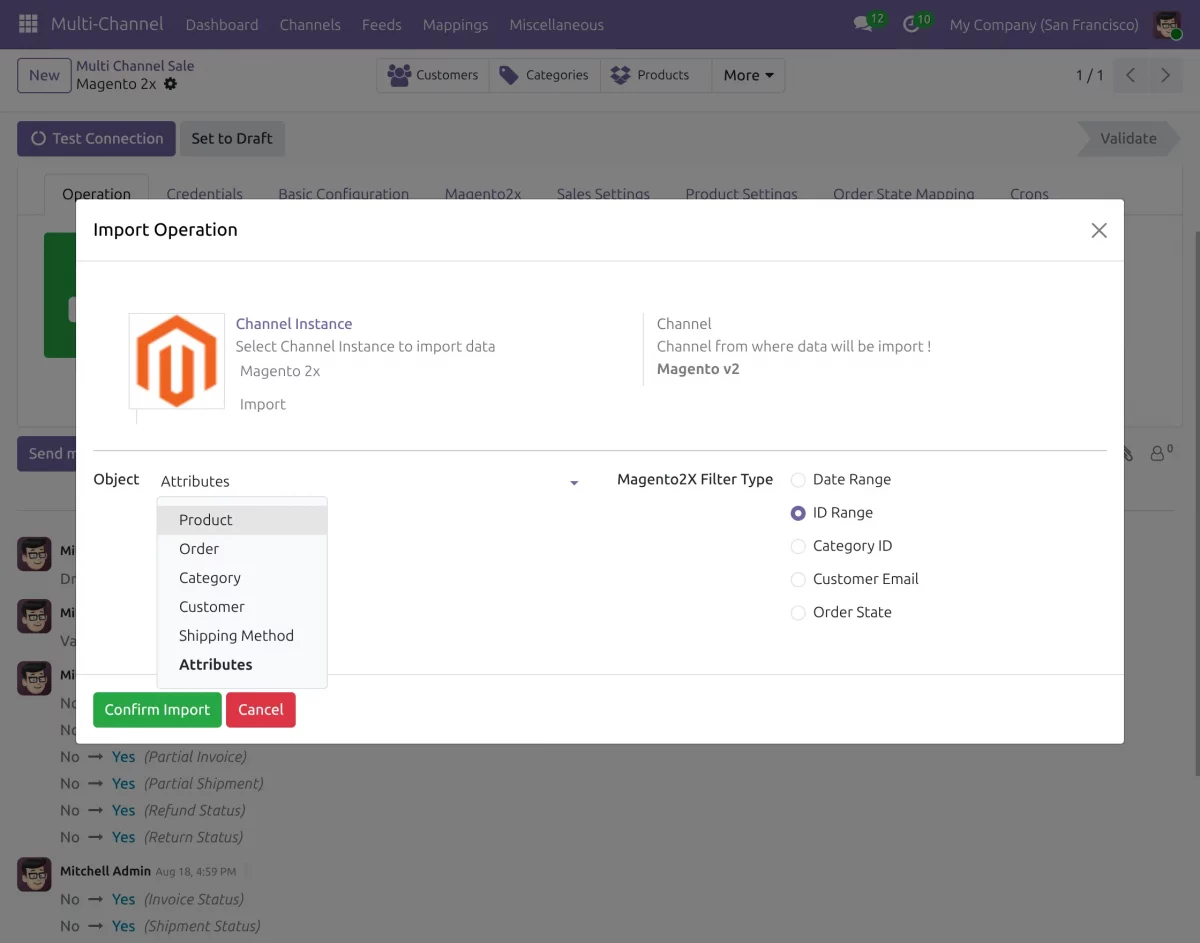
The Attribute Sets can be imported into Odoo through the Import Wizard.
- Navigate to Operation > Import in the Odoo Multichannel Magento 2x Connector.
- Select Attributes as the object to import.
- Initiate the import process.
- The import synchronizes both Attributes and their corresponding Attribute Sets from Magento 2 to Odoo.
- You can import attribute sets on demand through the Import Wizard.
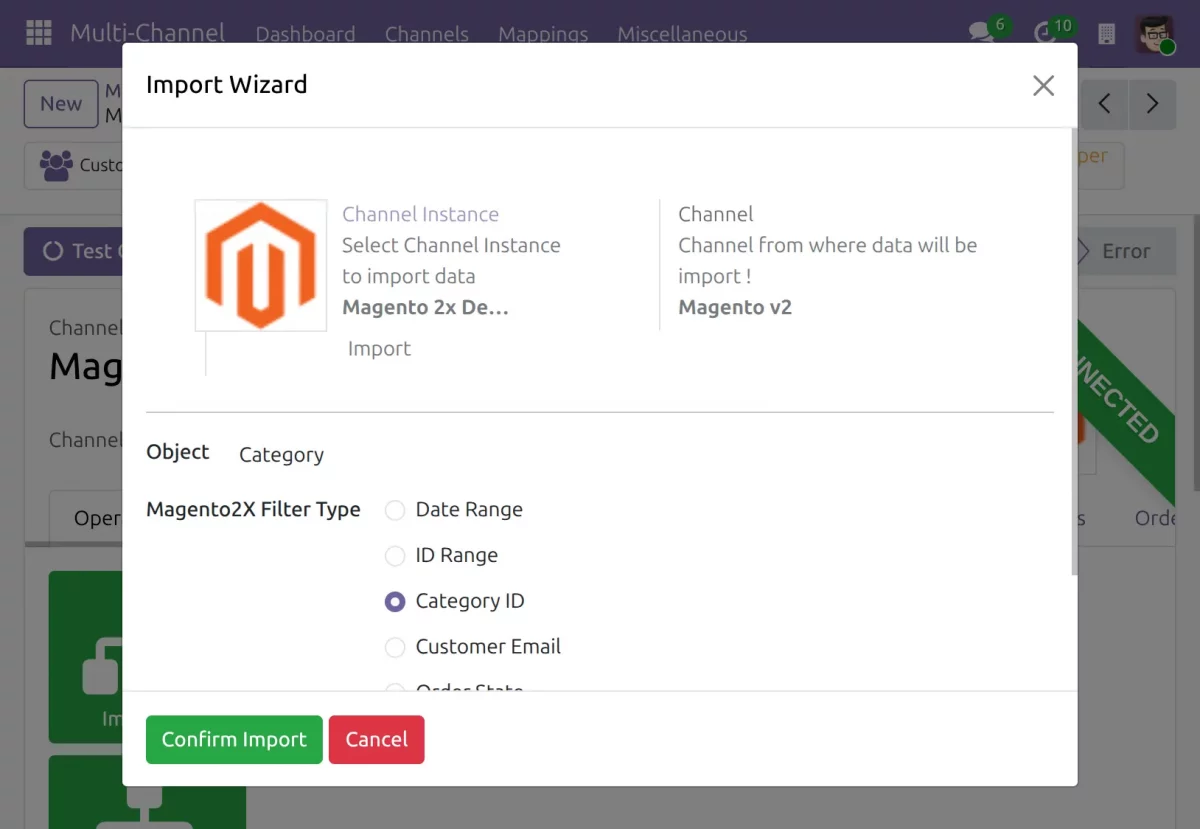
4. Import Product Categories into Odoo
- Go to the Product Categories section.
- Select the Magento 2 channel and choose the categories you want to import.
- You can import categories in bulk from Magento 2 to Odoo.
- The imported categories can then be used with Odoo products.
5. Import Products into Odoo
- Open the Products section from the connector.
- Select the Magento 2 channel and choose the required import option.
- You can import products in bulk or filter the records before importing them.
- Product details such as categories, attributes, attribute sets, and attribute values are imported with the products.
- You can also schedule product imports using cron jobs.
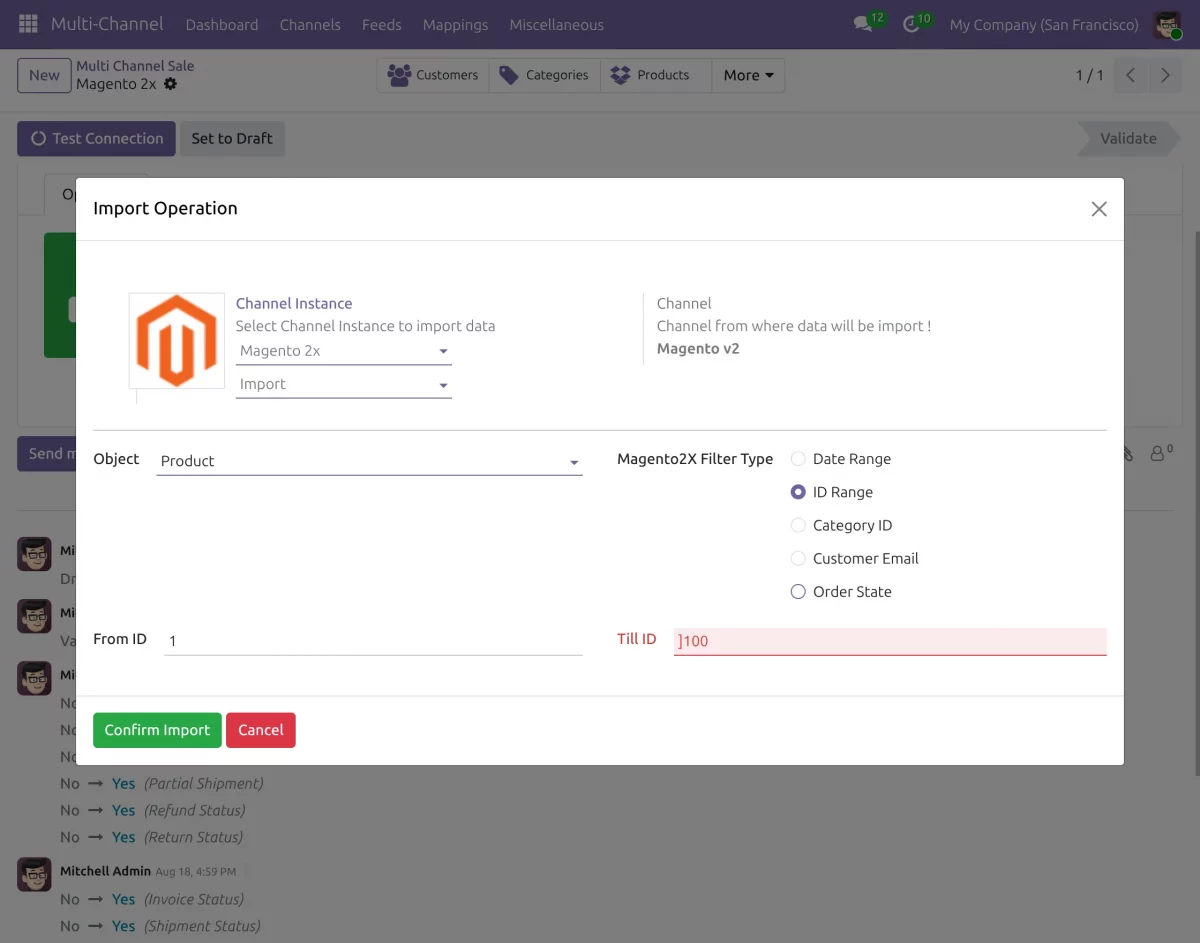
6. Import Customers into Odoo
- Open the Customers section.
- Select the Magento 2 channel and start the customer import.
- You can import customers in bulk from Magento 2 to Odoo.
- Customer details, including their addresses, are imported along with the customer records.
- Customer imports can also be automated using cron jobs.
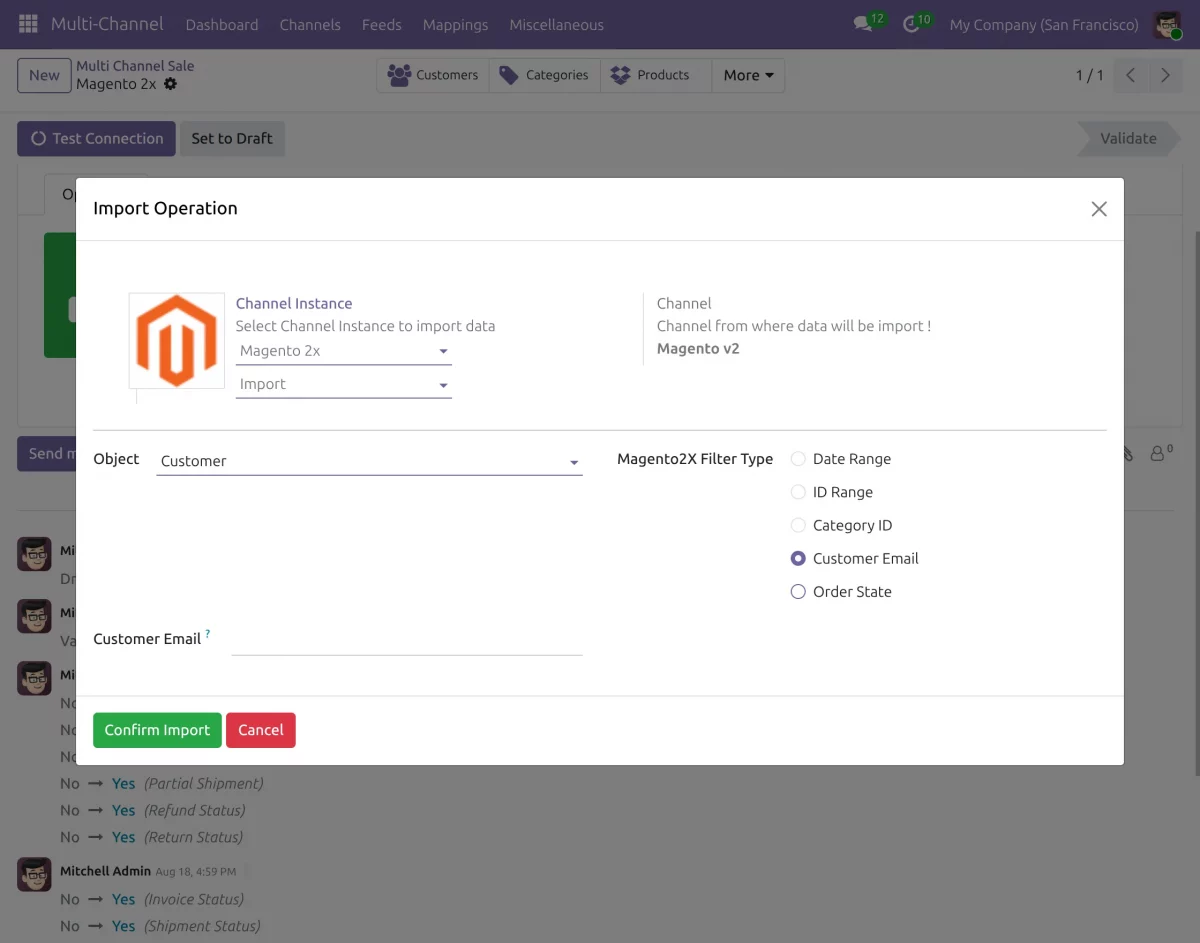
7. Import Orders into Odoo
- Go to the Orders section from the Odoo Multichannel Magento 2x Connector.
- Select the Magento 2 channel and choose the required orders.
- You can import orders in bulk or filter them by date, ID, email, or order state.
- Order details such as customers, addresses, taxes, delivery methods, payment methods, and currency are imported with the orders.
- Order status details are also imported with the order data.
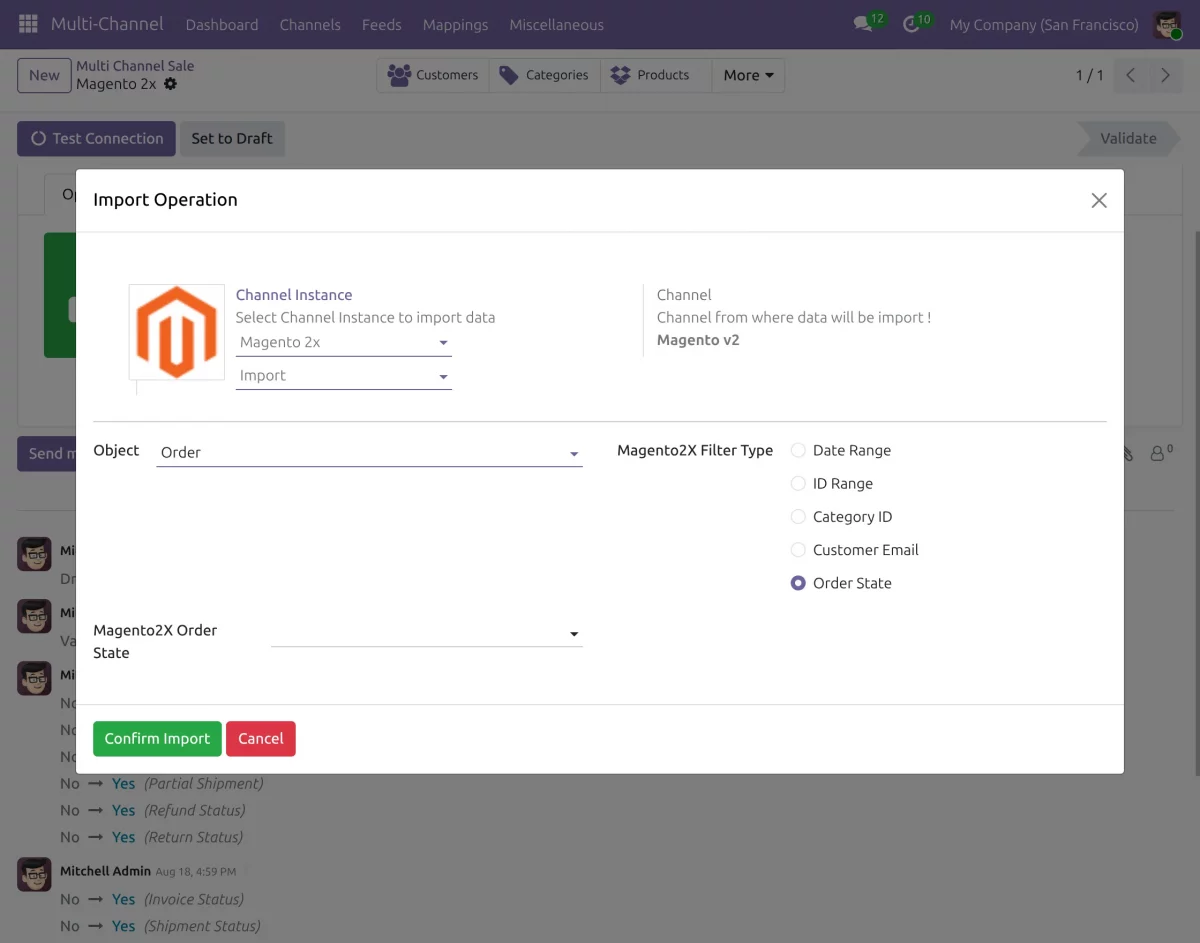
Configure Order State Mapping
- Map Magento order states with the corresponding Odoo order states for seamless order status synchronization.
- Configure invoice and shipment statuses to automatically create invoices and update shipment information based on the selected order state.
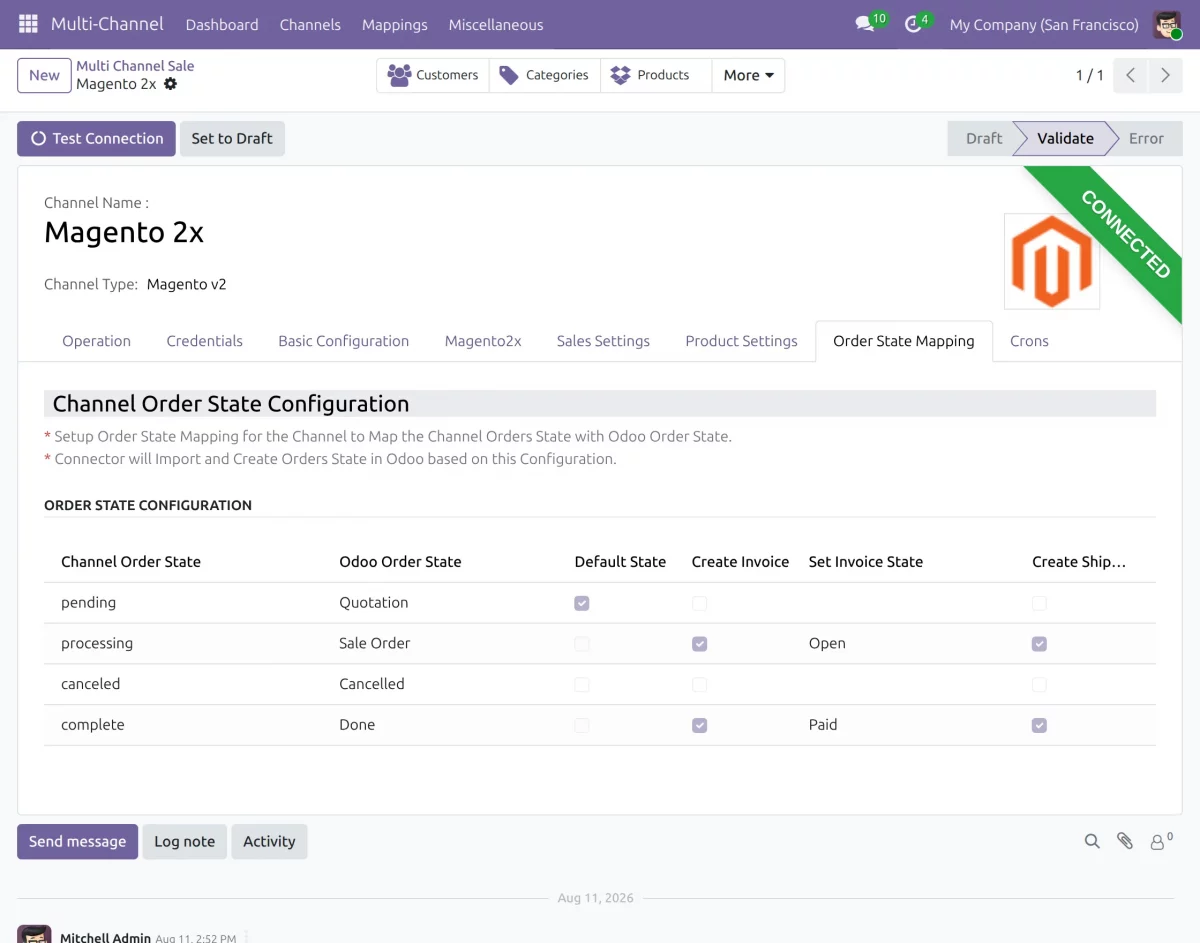
Export Attributes from Odoo
- Open the Attributes section.
- Select the attributes you want to export to Magento 2.
- You can export attributes in bulk or select specific attributes.
- The selected attributes are sent from Odoo to Magento 2.
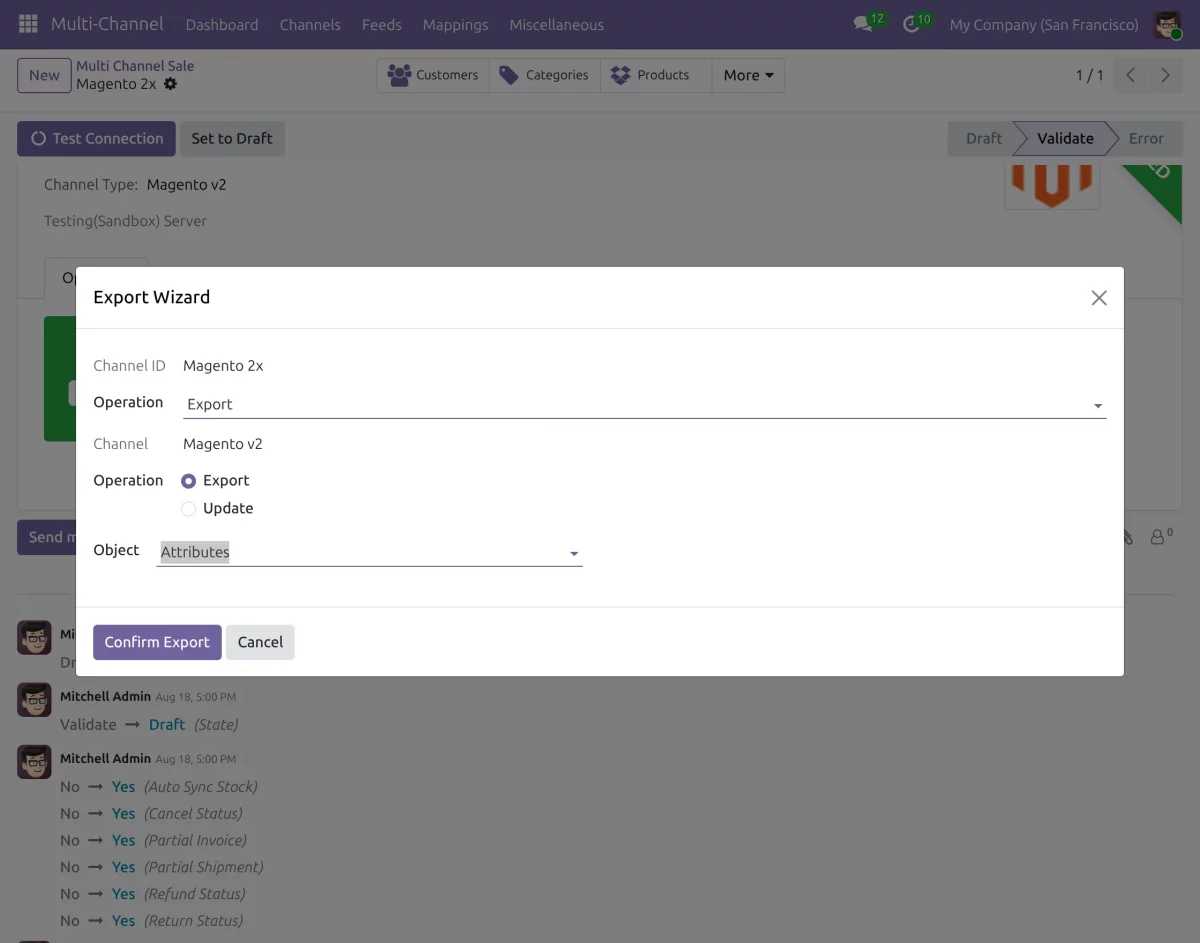
10. Export Categories from Odoo
- Go to the Categories section.
- Select the categories you want to send to Magento 2.
- You can export categories in bulk or select specific categories.
- The selected Odoo categories are then synchronized with Magento 2.
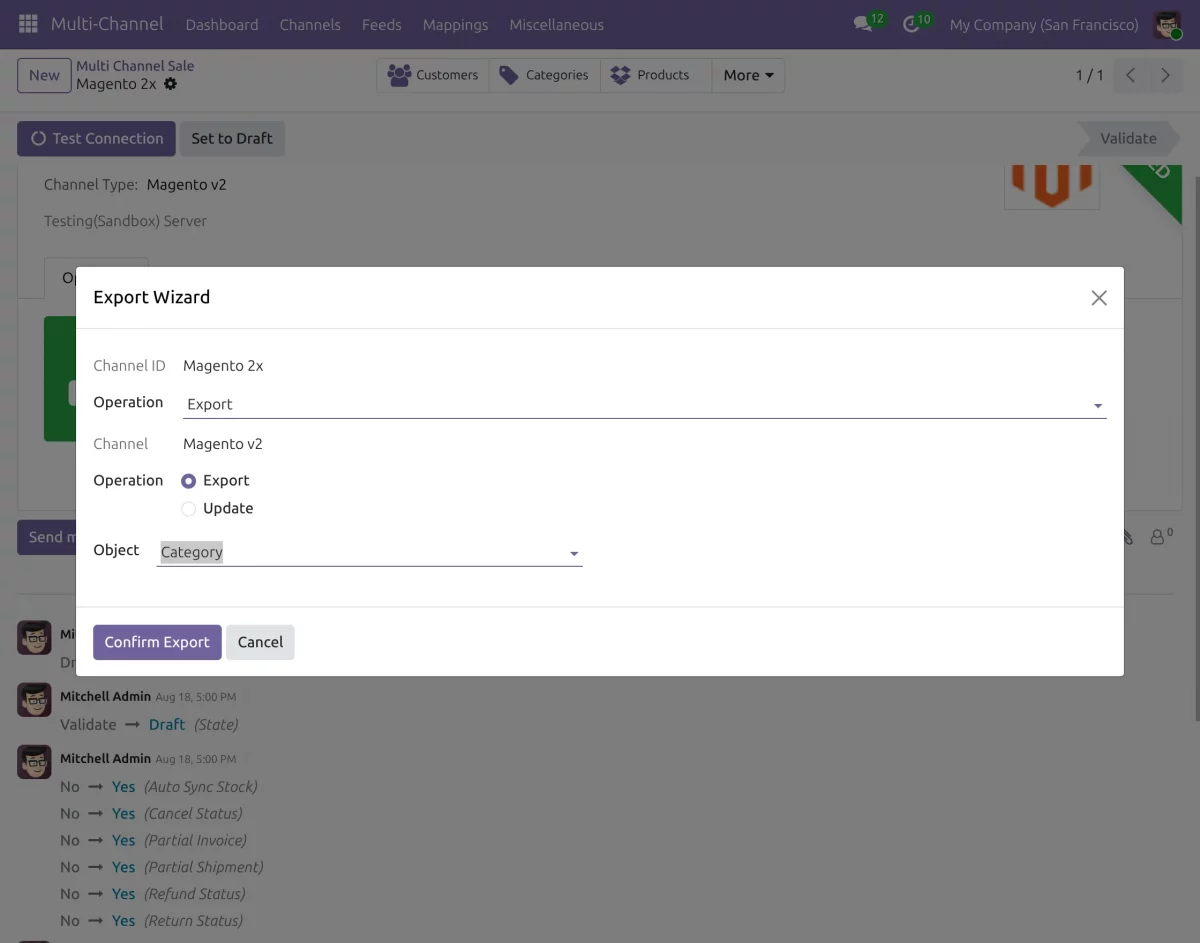
11. Export Products Template from Odoo
- Open the Products section.
- Select the products you want to export to Magento 2.
- You can export products in bulk or select specific products.
- Use the available export or update option to send the product data to Magento 2.
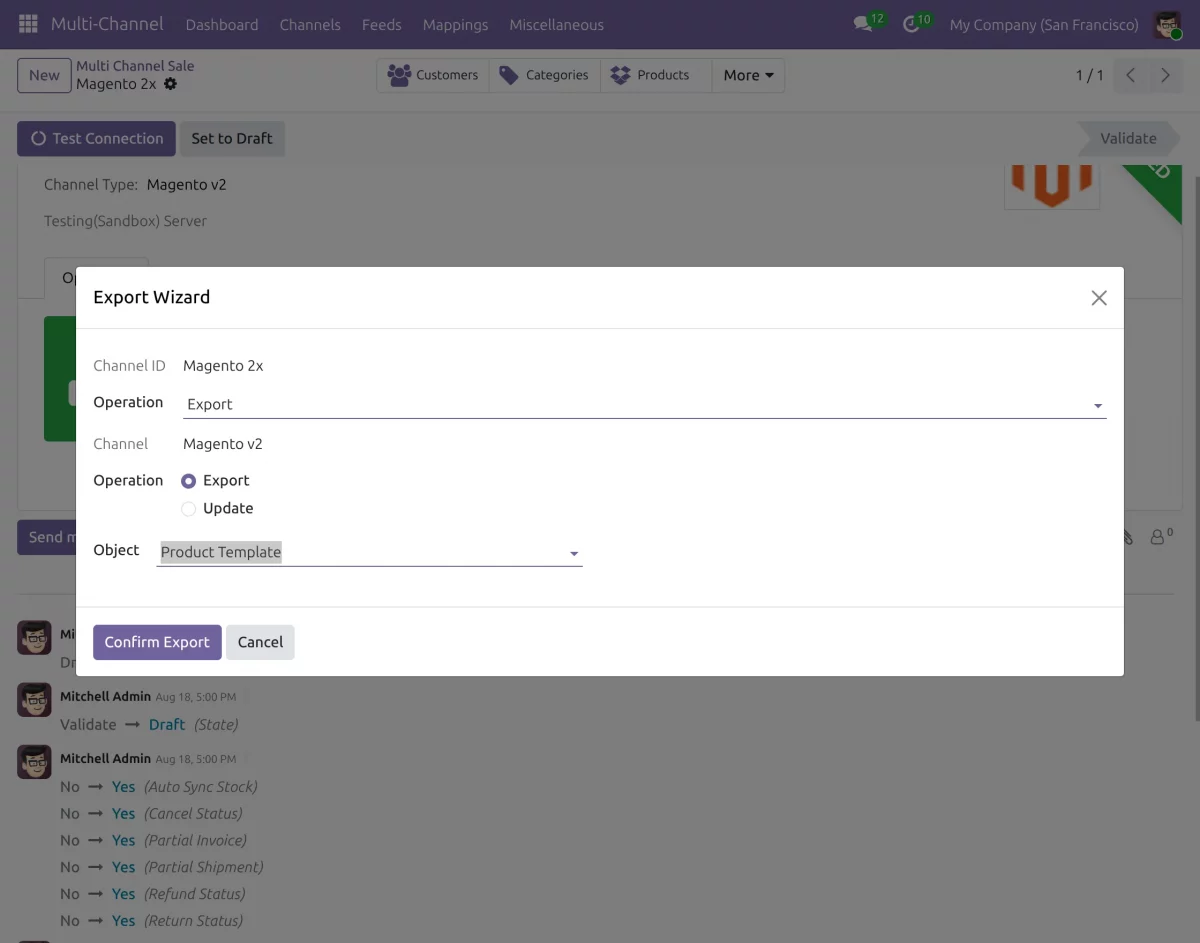
12. Configure Manual Mapping
- The connector provides mapping options to connect matching records between Magento 2 and Odoo.
- You can map products, categories, attributes, and other required records.
- You can also map taxes, currencies, payment methods, and delivery methods.
- Open the required mapping section, select the matching Magento 2 and Odoo records, and save the mapping.
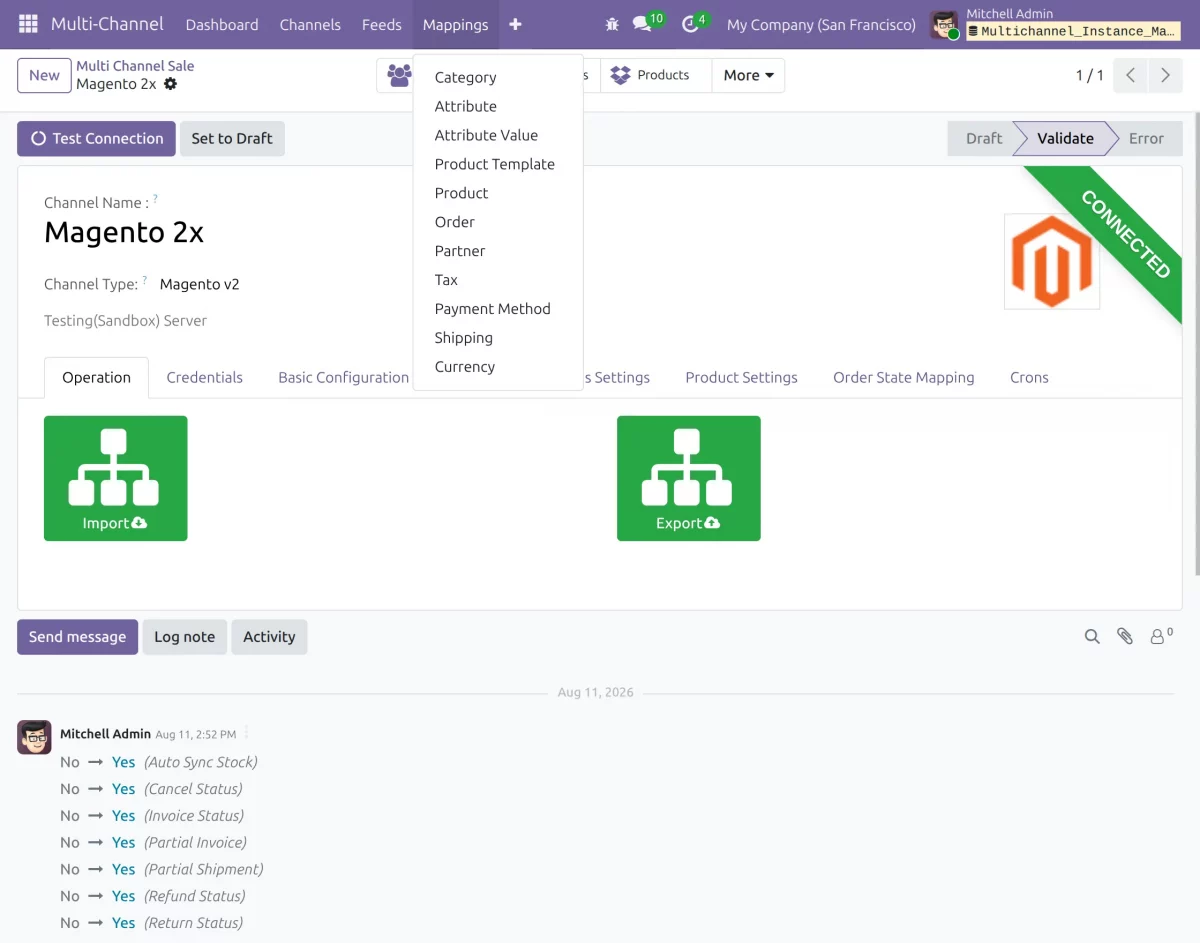
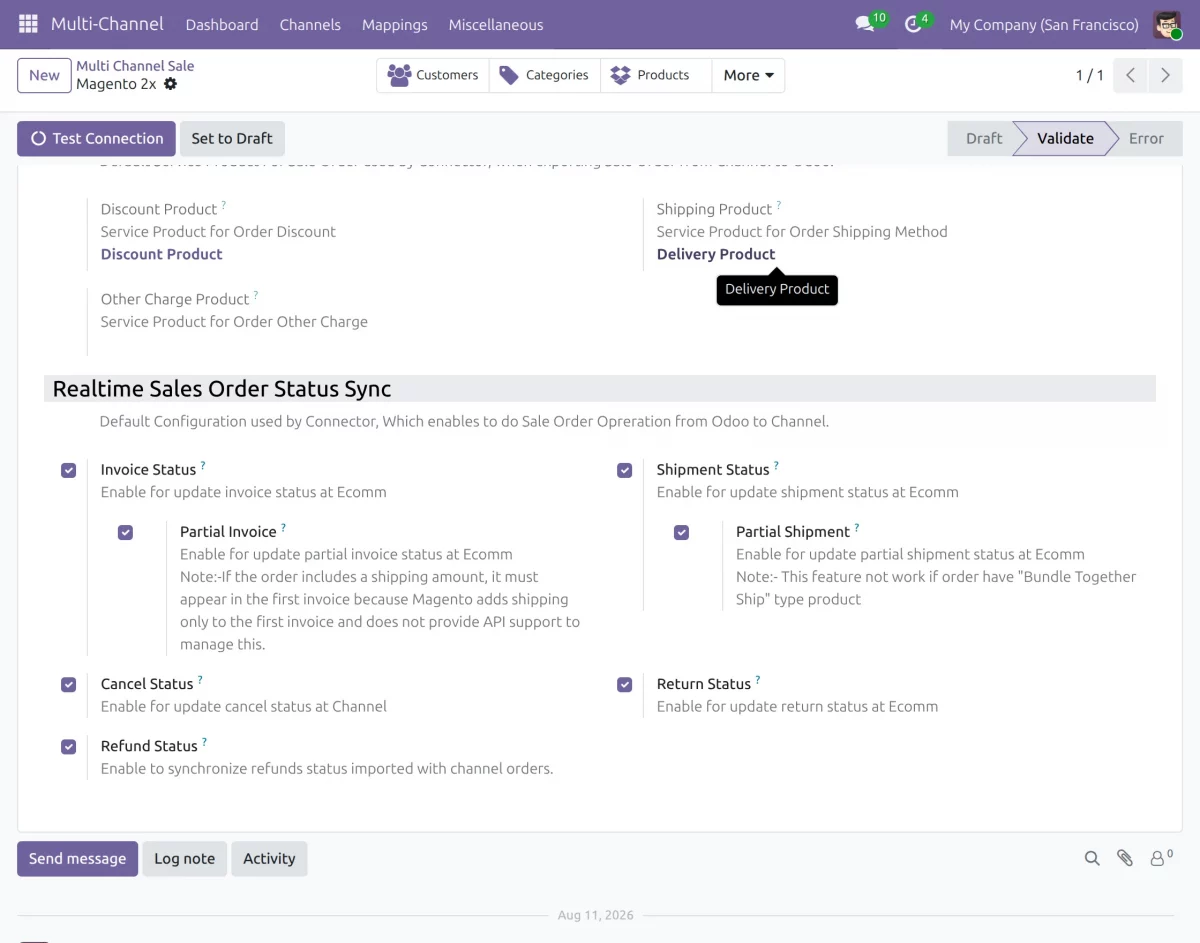
13. Configure Real-Time Synchronization
- The Real-Time Sync feature keeps important data updated between Magento 2 and Odoo.
- You can synchronize order status, shipment, invoice, cancellation, and inventory updates.
- The connector also supports full and partial invoice synchronization.
- It supports full and partial delivery synchronization as well.
14. Configure Multi-Source Inventory
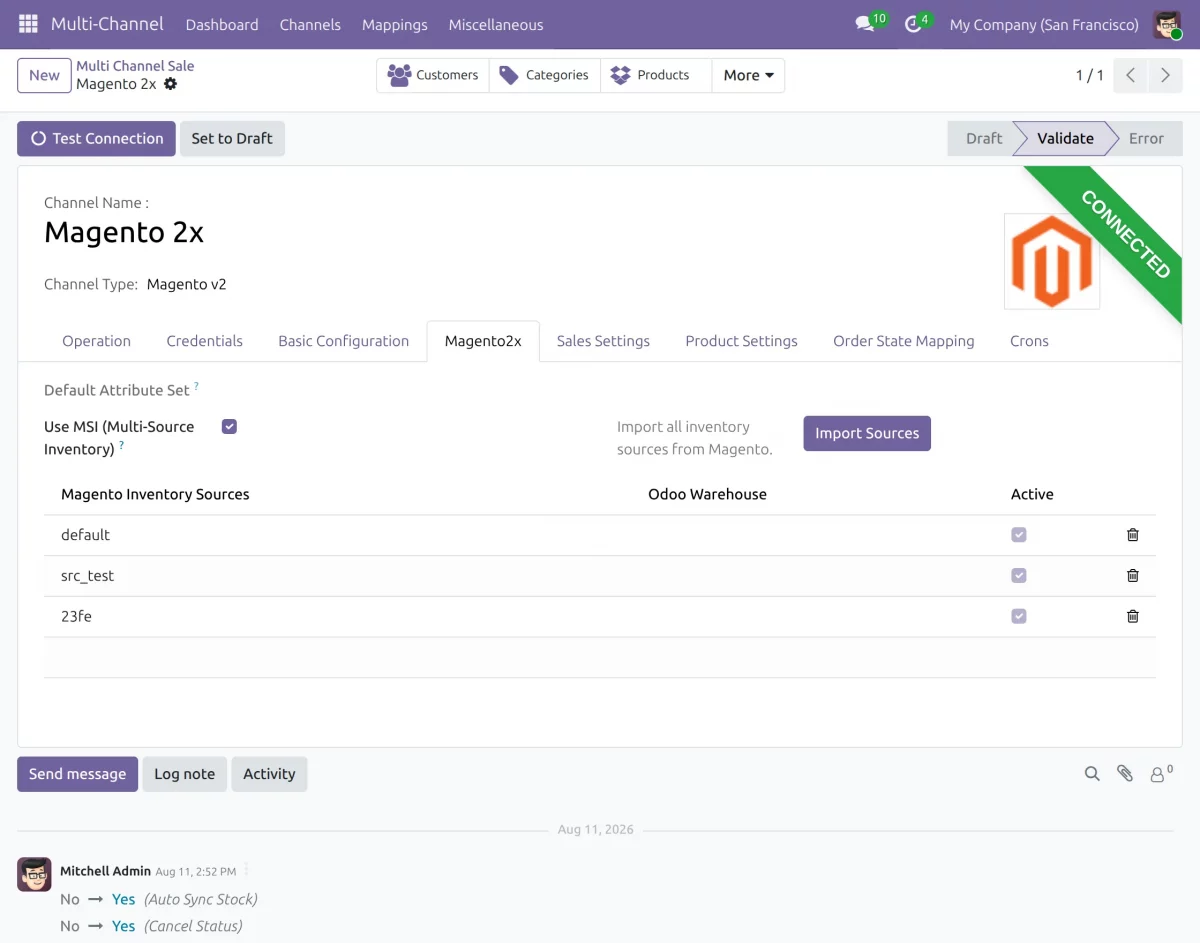
- The Odoo Multichannel Magento 2x Connector supports Multi-Source Inventory (MSI).
- Enable Magento MSI to manage inventory across multiple sources.
- Import Magento 2 inventory sources into Odoo.
- Map each Magento source with the required Odoo warehouse.
- The connector then synchronizes inventory for each mapped source.
15. Configure Automated Cron Jobs
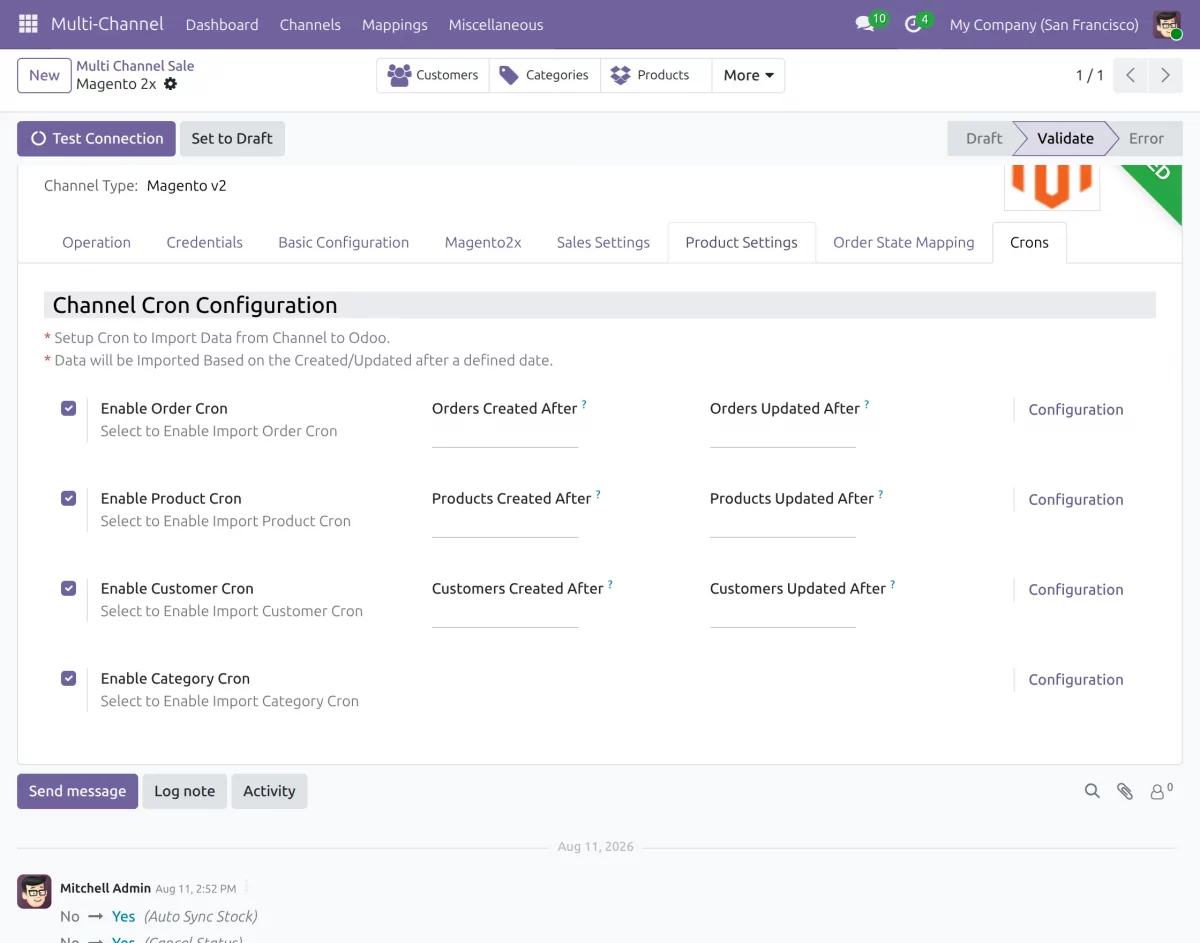
- Open the Cron Configuration section.
- Create cron jobs to automate regular data imports.
- You can schedule imports for products, categories, customers, and orders.
- Set the created and updated date filters to control which records are imported.
16. Use the Dynamic Dashboard
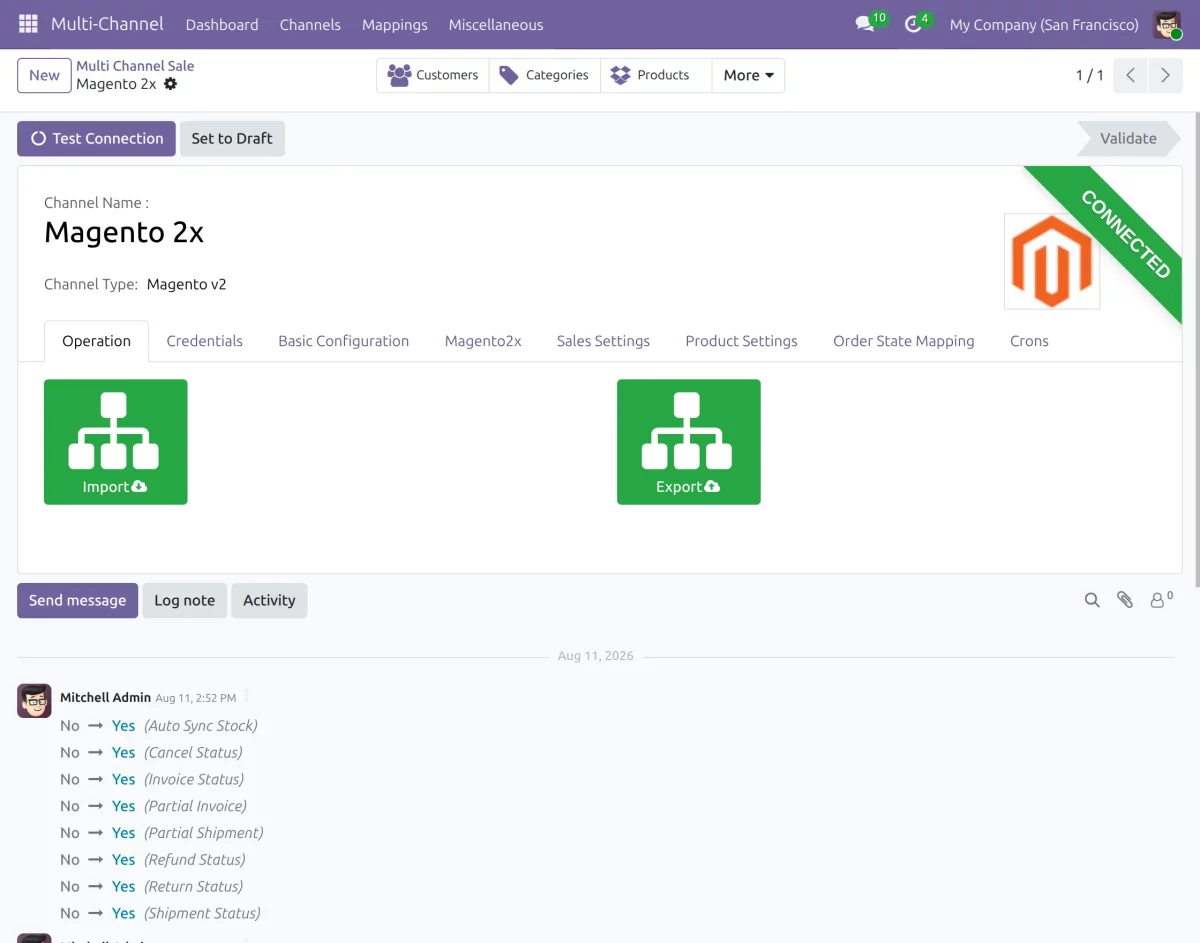
- Open the Sync Dashboard from the Odoo Multichannel Magento 2x Connector.
- The dashboard provides a quick view of your Magento 2 data.
- You can view data through charts, graphs, tabs, and clickable data cards.
- The dashboard also provides a Donut Chart and Line Graph for data analysis.
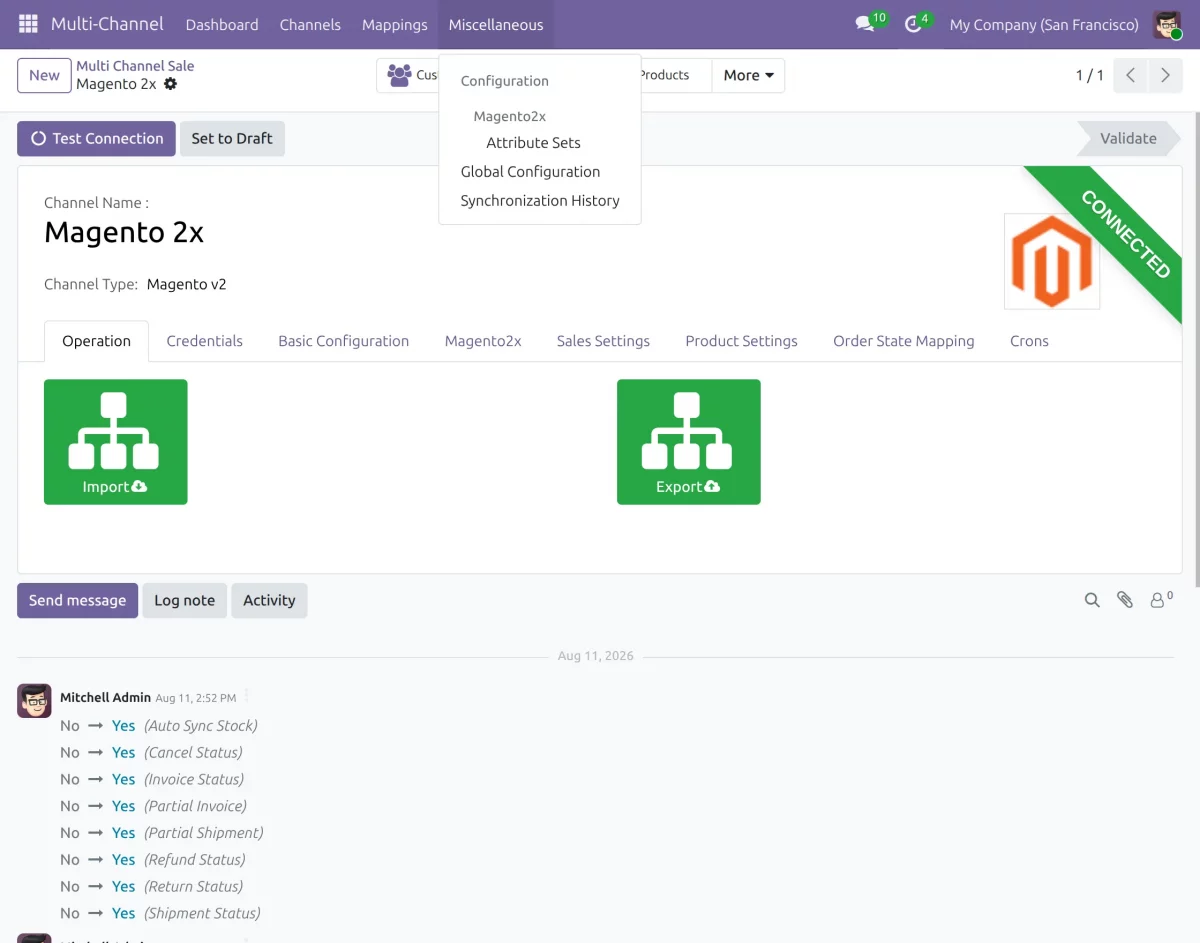
17. Check Synchronization History
- Open the Synchronization History section.
- Here, you can view the history of data synchronization between Magento 2 and Odoo.
- Check imported, exported, and synchronized records from the Odoo backend.
- Use the history to review previous synchronization activity.
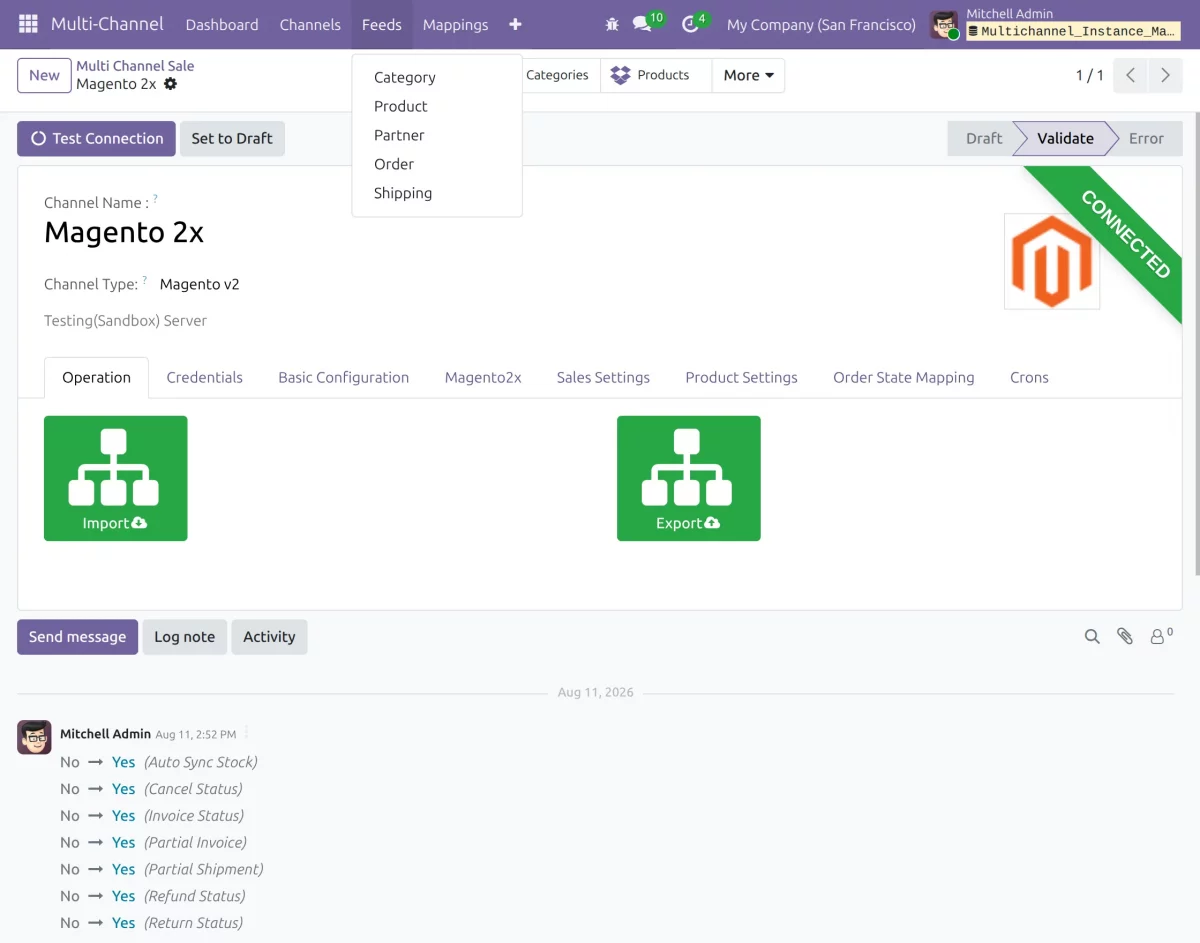
18.Check Feeds
Open the Feeds section to review synchronization records between Magento 2 and Odoo. You can track the data exchanged and monitor the status of synchronization operations.
NEED HELP
I hope you find the guide helpful! Please feel free to share your feedback in the comments below.
If you still have any issues/queries regarding the same, please raise a ticket at the UV Desk.
For any doubts, contact us at our support mail.
Thanks for paying attention!!
Current Product Version - 2.1.2
Supported Framework Version - Magento 2.0.x, 2.1.x, 2.2.x,2.3.x, 2.4.x

Be the first to comment.