


















Introduction
Odoo Law Management brings cases, trials, evidence, courts, judges, clients and lawyers into one Odoo app.
In this guide, you will install the module, set up lawyers and clients, and then run a case from filing to verdict.
Along the way, you will also bill trial fees, track evidence and read the legal dashboard.
How Odoo Law Management Works
Everything starts with a case. First, you file it for a client, then you assign a lawyer and a court.
Each case then holds one or more trials. Every trial carries its own evidence, invoice and verdict.
Finally, you close the case as Won or Lost once its last trial ends. Meanwhile, the dashboard sums all of this up for you.
Key Features of Odoo Law Management
- A legal dashboard with case, trial, lawyer and client counts, charts, and trial reminders.
- Case tracking with statuses, priorities, tags, acts and articles, and opposition details.
- Trials with automatic numbering, evidence lists, verdicts and one-click invoices.
- Court and judge records that count each one’s total, active and pending cases.
- Client, opposition client and opposition lawyer flags on ordinary Odoo contacts.
- Lawyer profiles on employees, with a trial fee and areas of practice.
- Two access levels: Lawyer and Administrator.
Odoo Law Management Requirements
-
Supported Odoo Versions: Odoo 17.0, 18.0, 19.0, and 20.0, Community and Enterprise editions, subject to compatibility testing.
-
Version Compatibility: The installer must verify the Odoo version and stop installation with a clear error message if the version is not supported.
-
Required Applications: Employees, Contacts, and Invoicing. Odoo should automatically install the required applications and their dependencies.
-
Compatibility: The module must support the APIs, models, views, security rules, and other framework changes applicable to each supported Odoo version.
Install Odoo Law Management
- First, buy the app from the Webkul Store and download the module’s zip file.
- Next, extract the zip. As a result, you get a folder named
wk_law_management. - Then, copy that folder into your Odoo add-ons path and restart the Odoo server.
- After that, turn on developer mode and click Update Apps List in the Apps menu.
- Finally, remove the Apps filter, search for
wk_law_managementand click Install.
For more detail on these steps, see the official guide to installing Odoo apps.
Set Up Lawyers, Clients and Courts in Odoo Law
Mark Employees as Lawyers
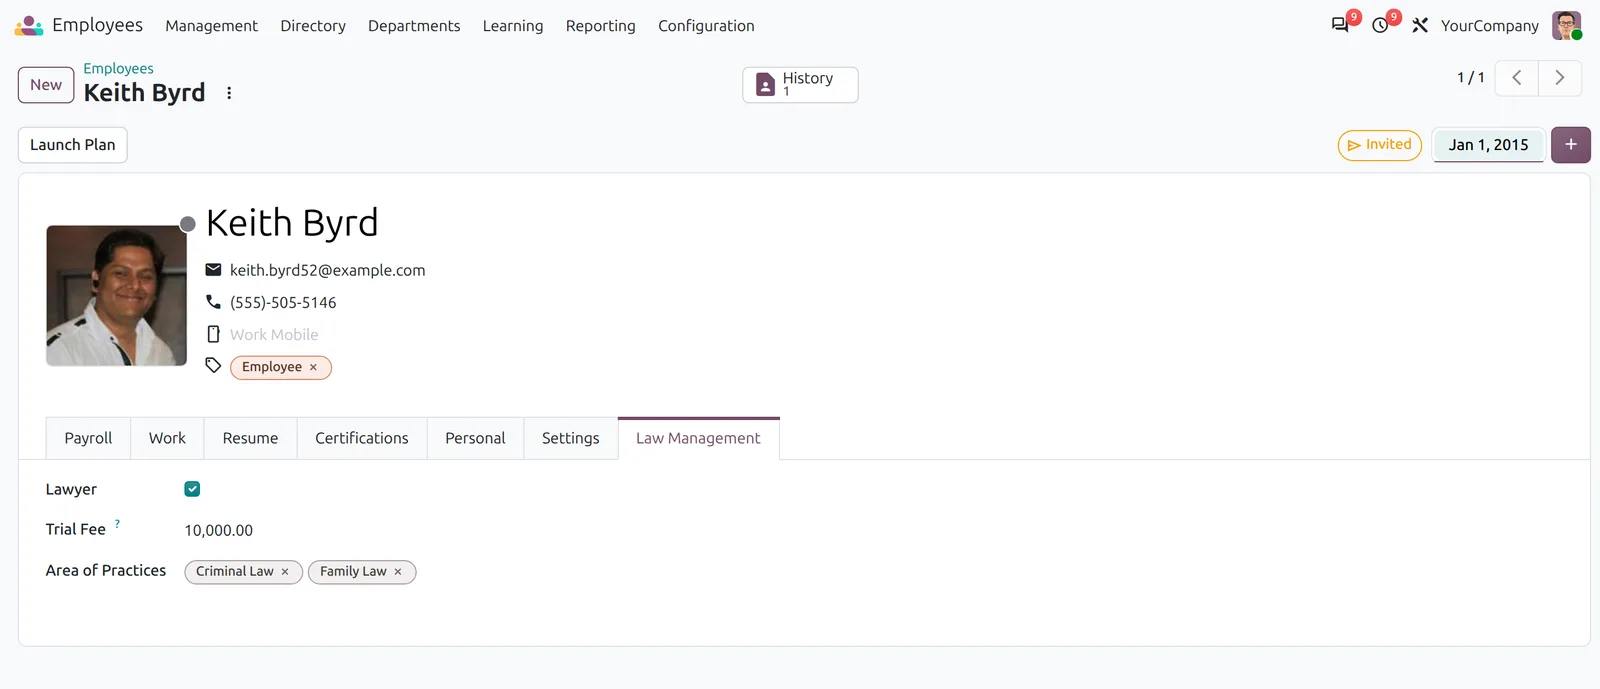
Open an employee in the Employees app, then go to the new Law Management tab.
Next, tick Lawyer and enter the Trial Fee. In addition, pick their Area of Practices.
Ticking Lawyer also adds the employee’s user to the Lawyer group, so they can open the app straight away.
The Odoo Employees documentation explains how to create the employee record itself.
Flag Clients and Opposition Parties
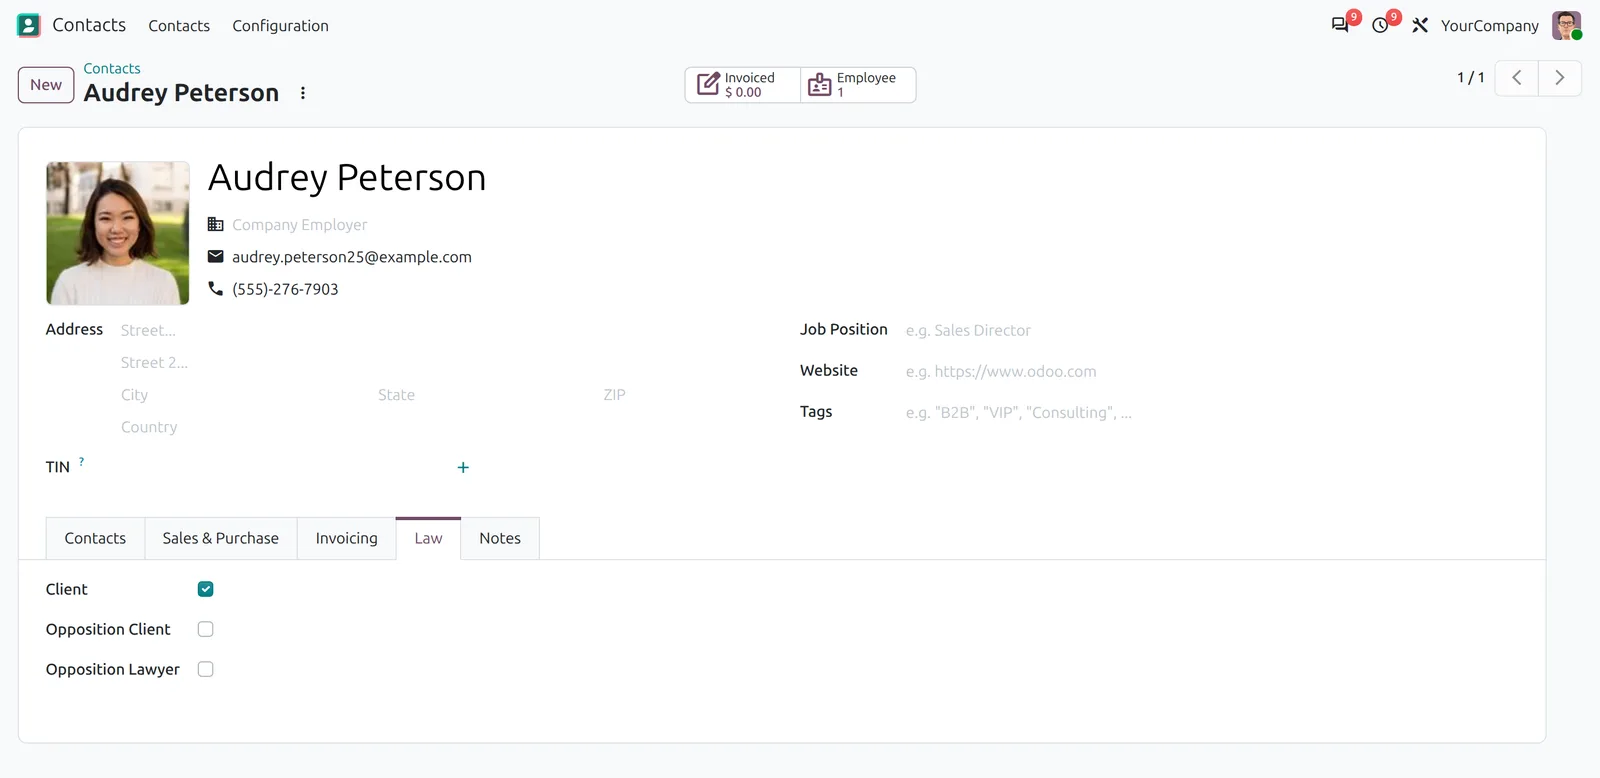
Open any contact and go to the Law tab. Then tick Client, Opposition Client or Opposition Lawyer.
After that, the contact shows up under Clients or Lawyers in the app and in the case form’s drop-downs.

Add Courts and Judges
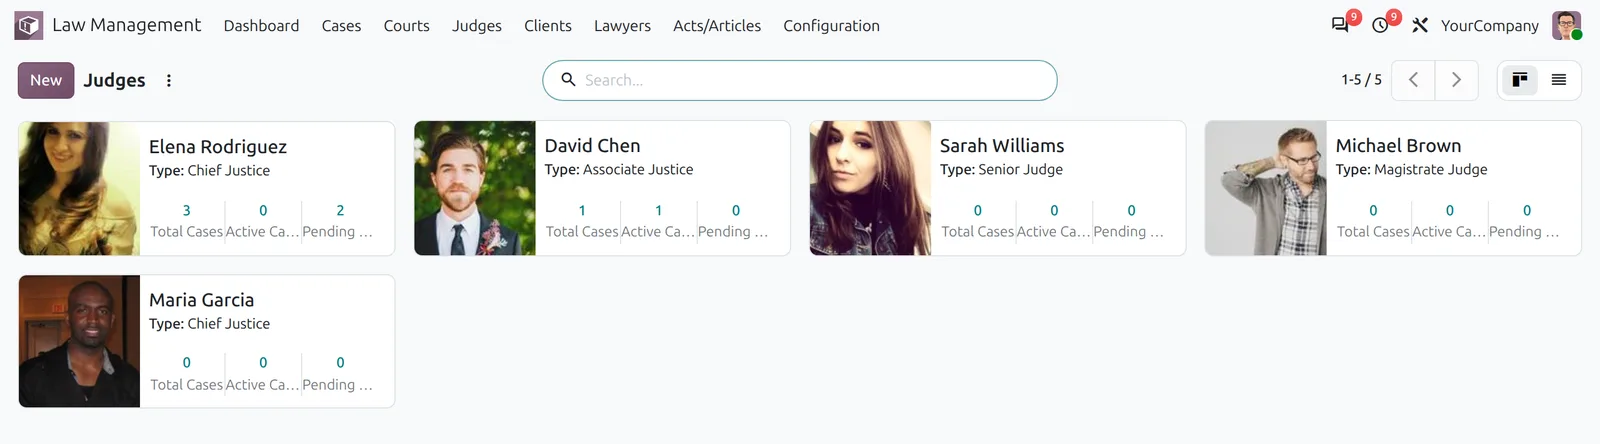
Go to Law Management > Judges and create each judge with a judge type and contact number.
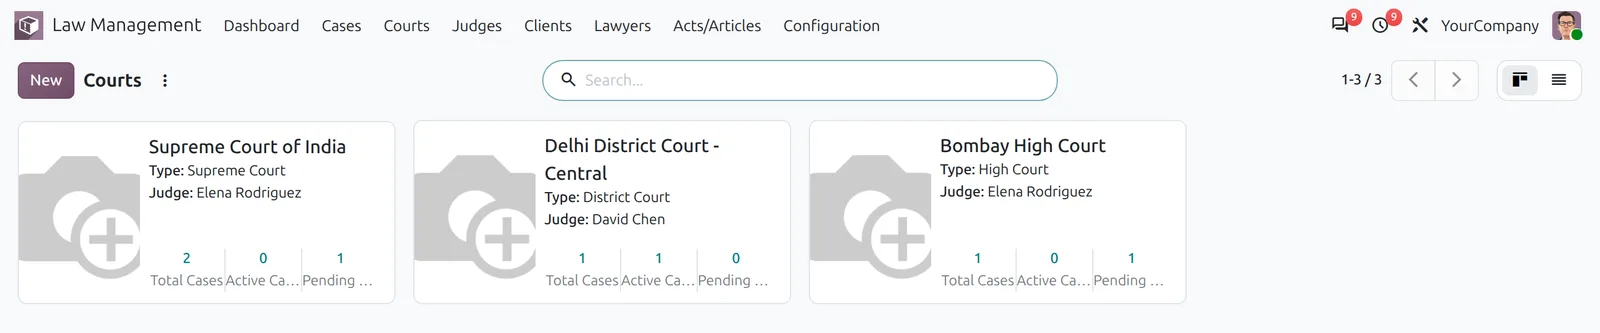
Then open Courts, add each court with its address and court type, and link its judge.
Each card then counts that court’s or judge’s total, active and pending cases. Click a count to open those cases.
Add Acts, Articles and Sections
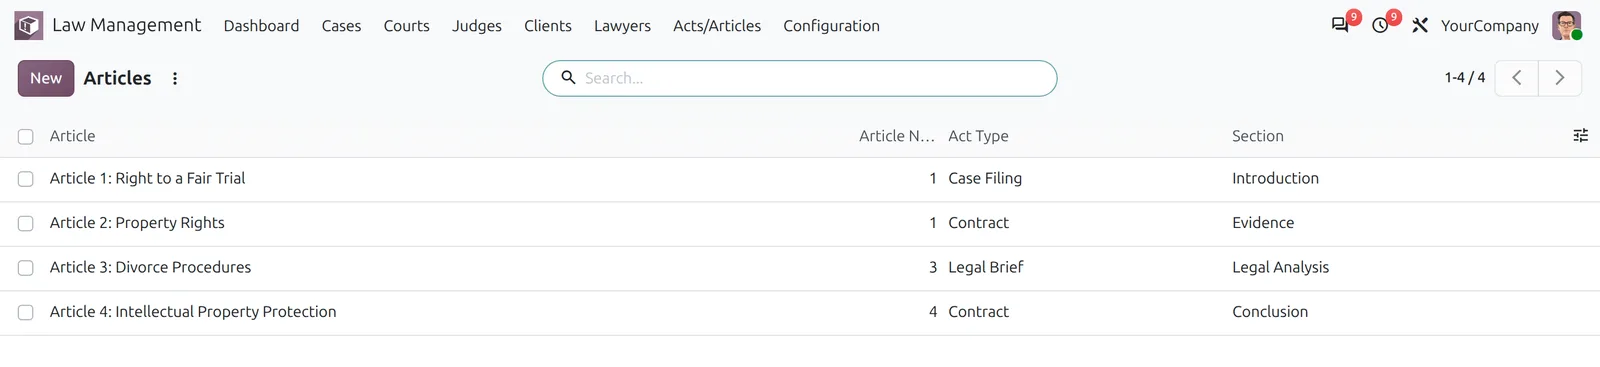
Under Acts/Articles, keep a library of articles, each with an article number, act type and section.
Later, you can attach these articles to any case. Similarly, Configuration holds case types, tags, evidence types and more.
Manage a Case in Odoo Law Management
Step 1: Create a Case in Odoo Law
First, open Cases > Cases and click New.
Next, enter the title, client, case type, court, filing date and lawyer. The judge then fills in from the court.
Optionally, set the priority stars, add tags, and fill the Opposition and Act and Articles tabs.
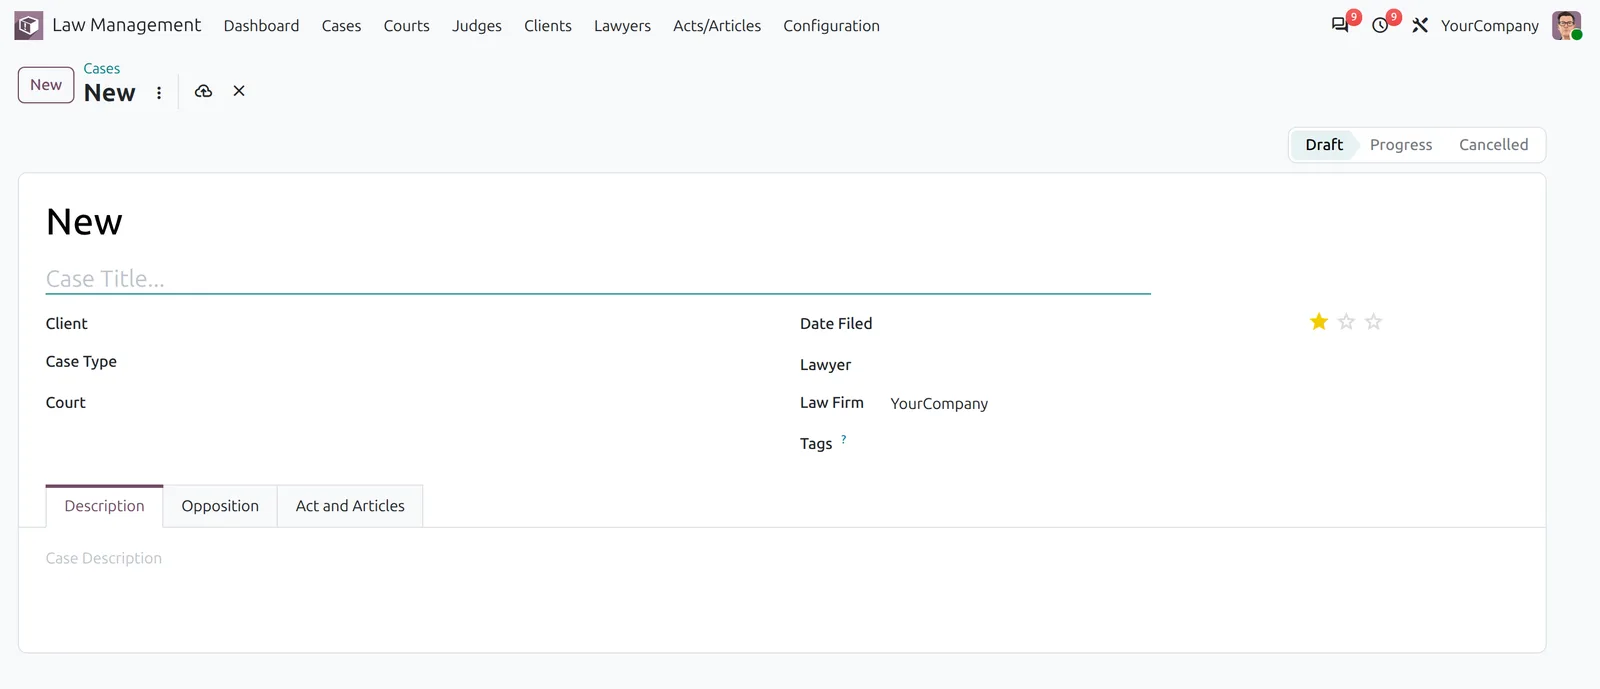
When you save, Odoo gives the case a number such as CS/002. The case starts in Draft.
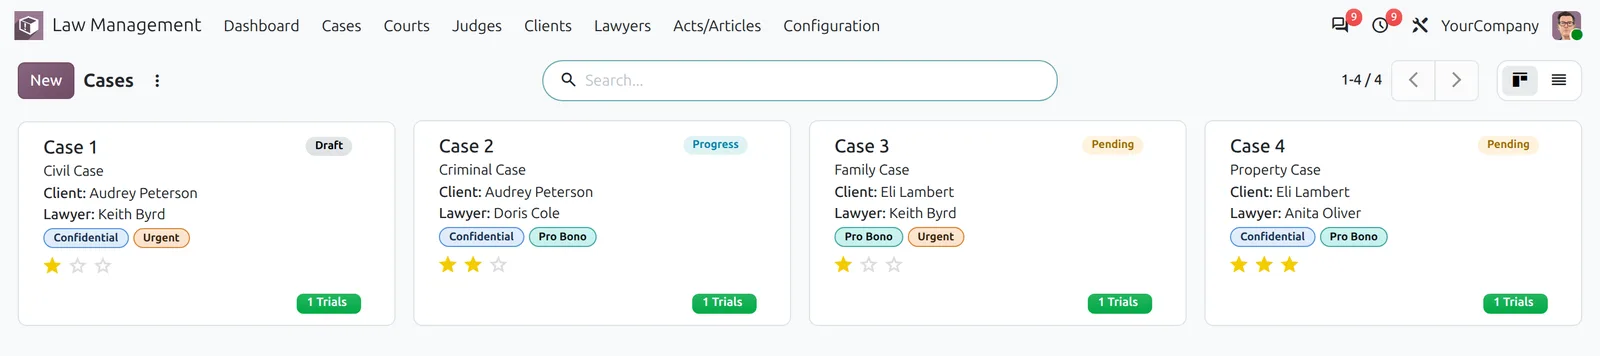
Step 2: Move the Case Forward
Then click Mark Active to start work. Later, you can use Mark Pending when the matter stalls.
Once the case is active, the Trials, Evidences and Invoiced smart buttons appear at the top.
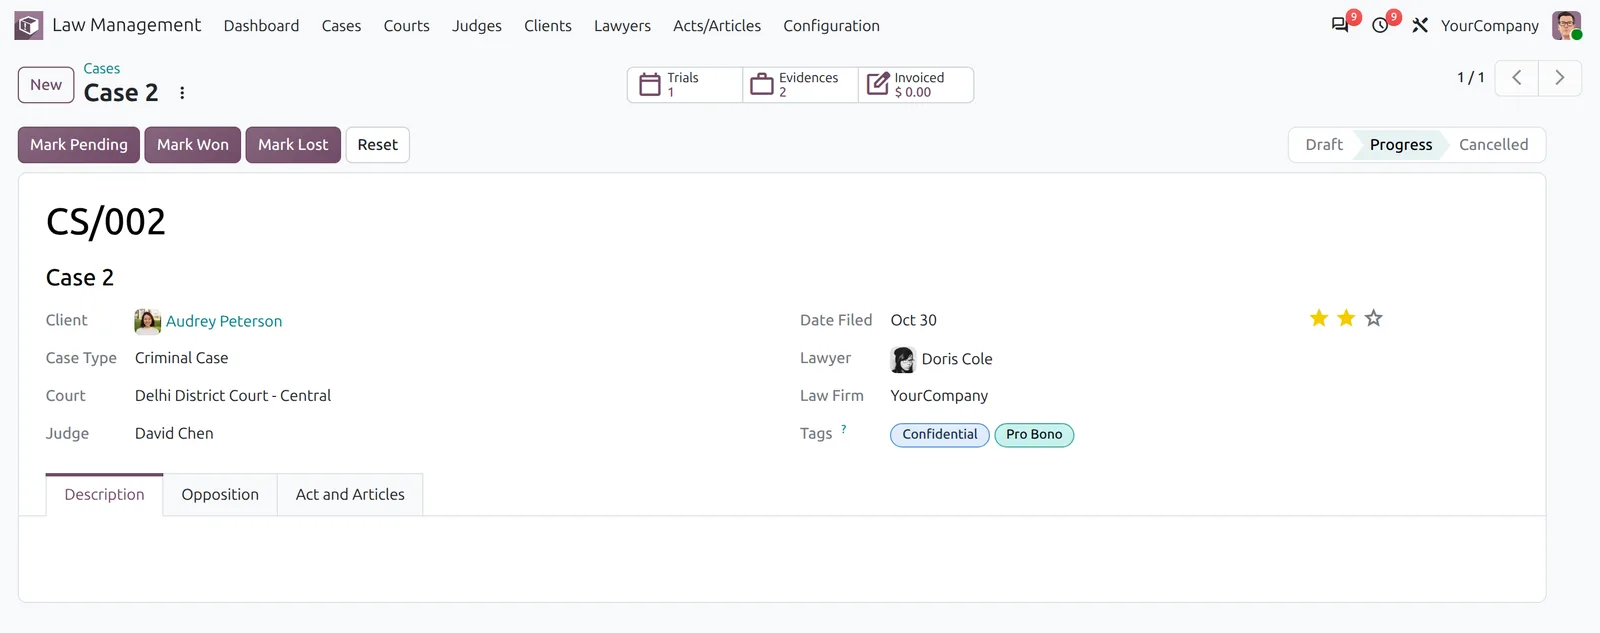
Step 3: Schedule a Trial
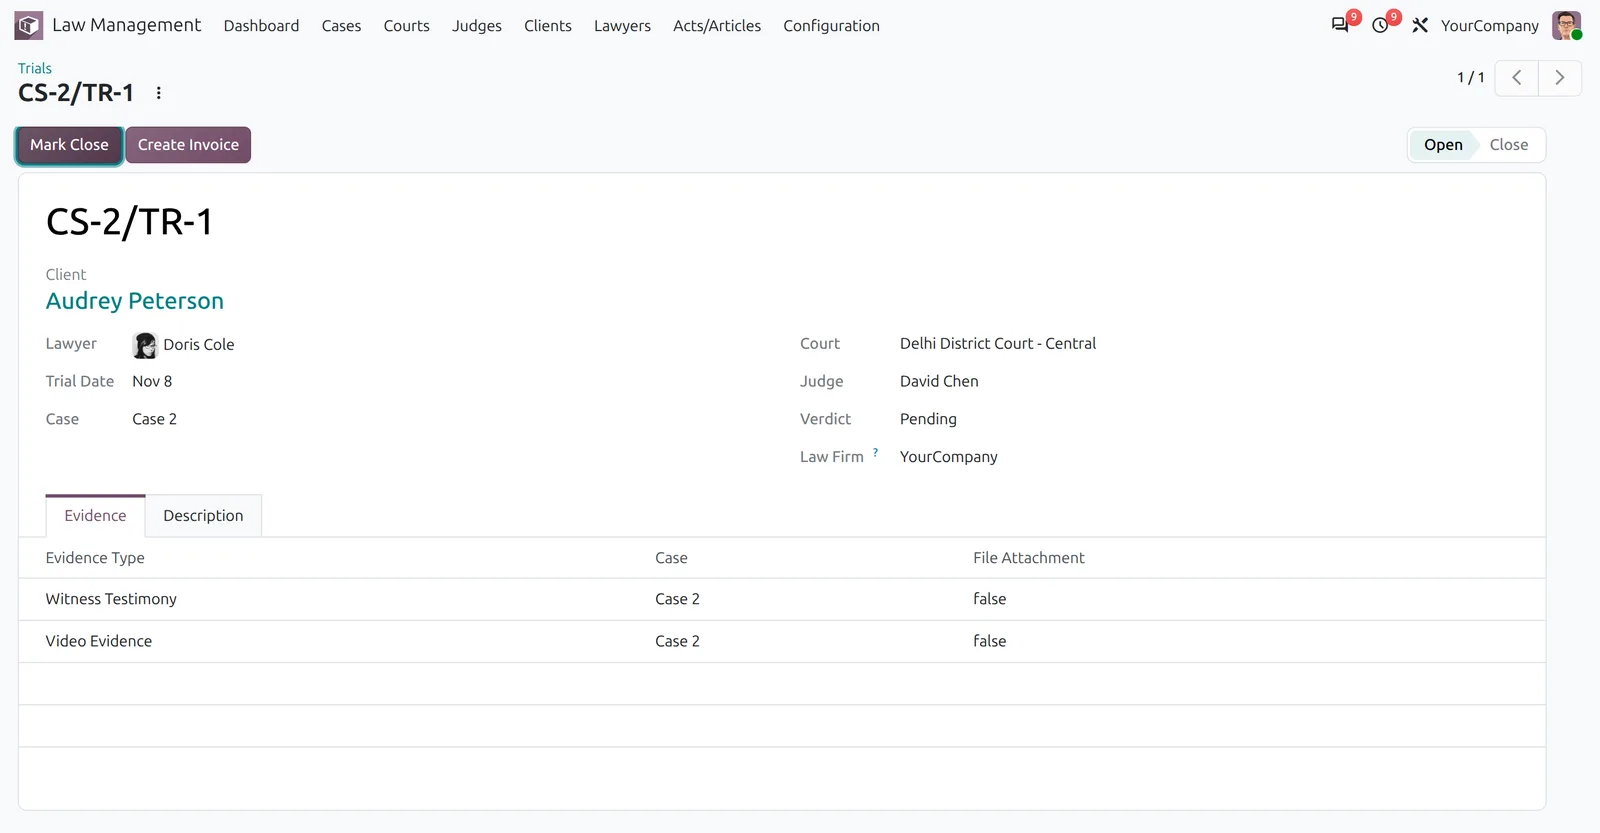
Next, click Trials on the case and create a trial. Odoo names it from the case, for example CS-2/TR-1.
The trial copies the client, lawyer and court from the case. Then, set the trial date.
A case can have only one open trial at a time. Also, each new trial must be dated after the earlier ones.
Step 4: Record Evidence
After that, add evidence on the trial’s Evidence tab. Give each item a type, a file and a description.
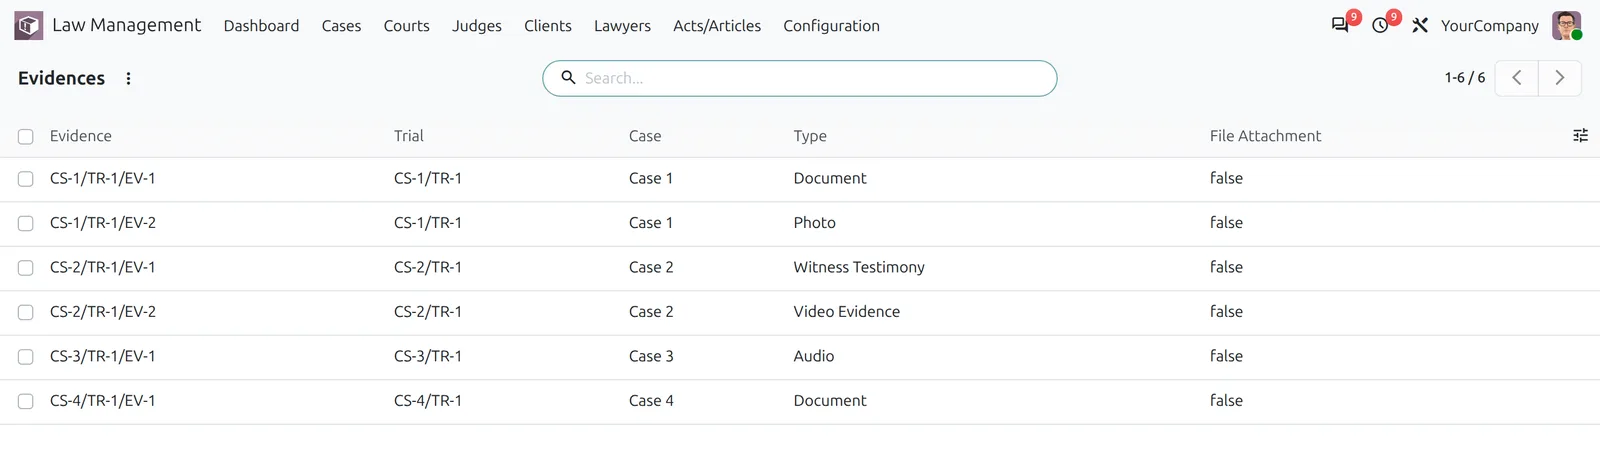
Every item gets a number such as CS-2/TR-1/EV-1. Moreover, Cases > Evidences lists all of them together.
Step 5: Bill the Trial Fee
Then click Create Invoice on the trial. Odoo drafts a customer invoice for the client at the lawyer’s trial fee.
Next, confirm the invoice and register the payment as usual. The case’s Invoiced button adds up every trial invoice.
To learn more about posting and paying invoices, read the Odoo guide to customer invoices.
Step 6: Close the Trial with a Verdict
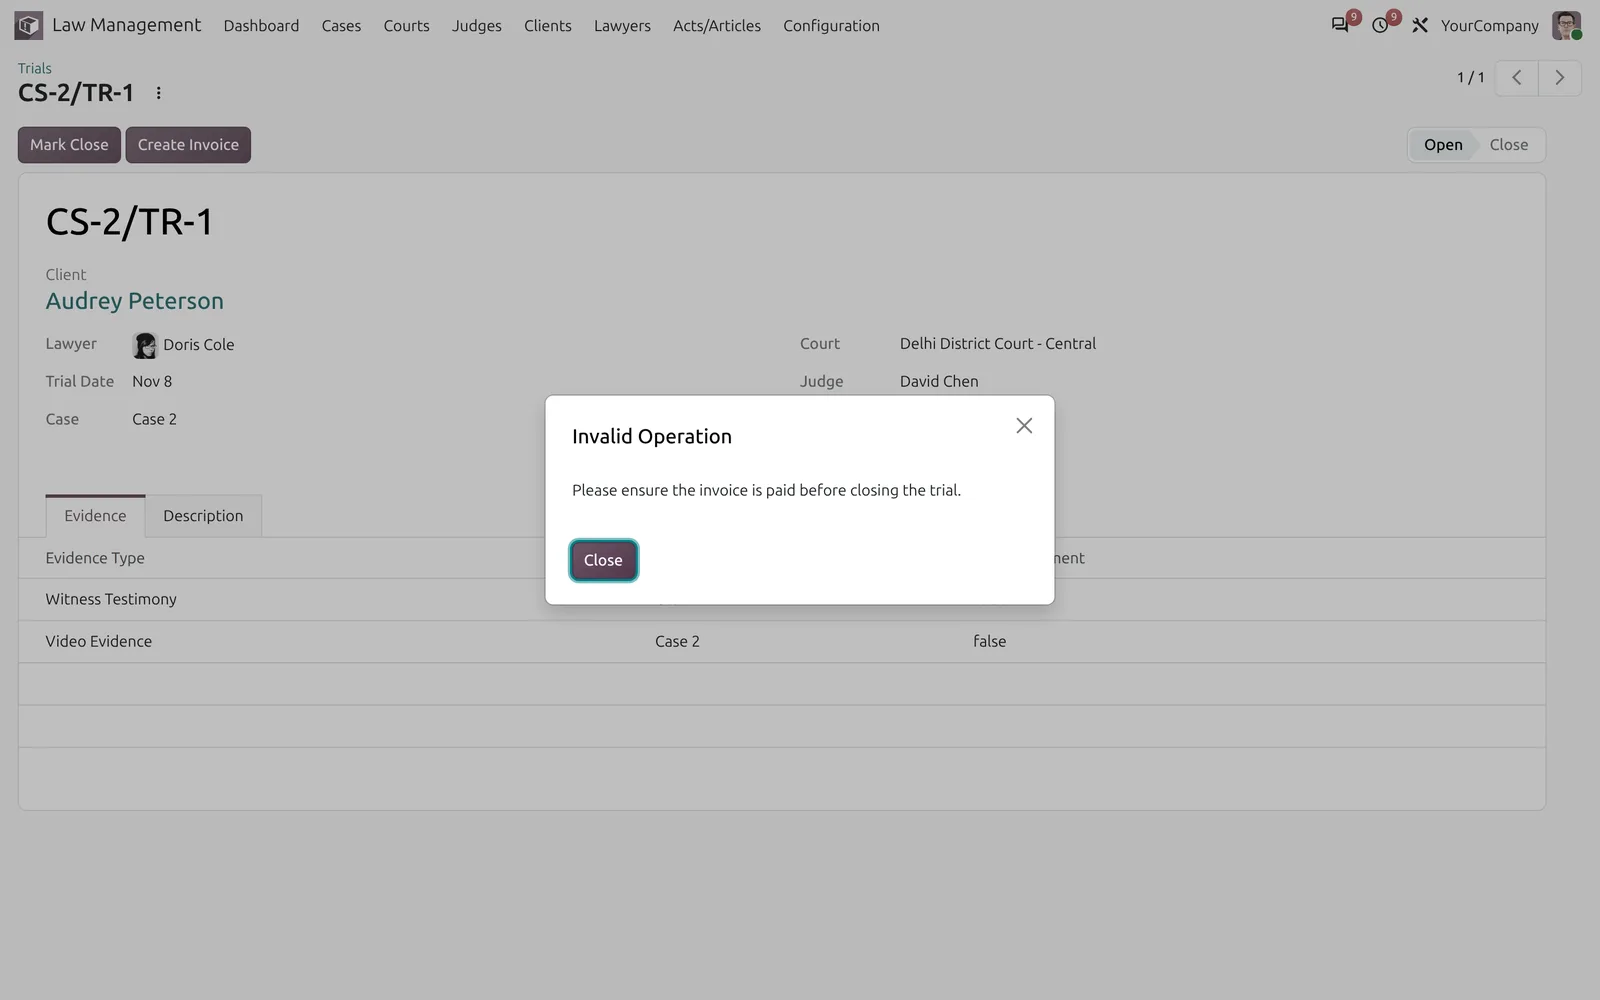
Once the invoice is paid, click Mark Close. The Add Verdict window then asks for Guilty, Not Guilty or Pending.
Next, choose Close Trial to end only this trial. Odoo then offers to create the next trial with the same details.
Alternatively, choose Close Case and then mark the case Won or Lost. This also sets the closed date.
Read the Odoo Law Management Dashboard
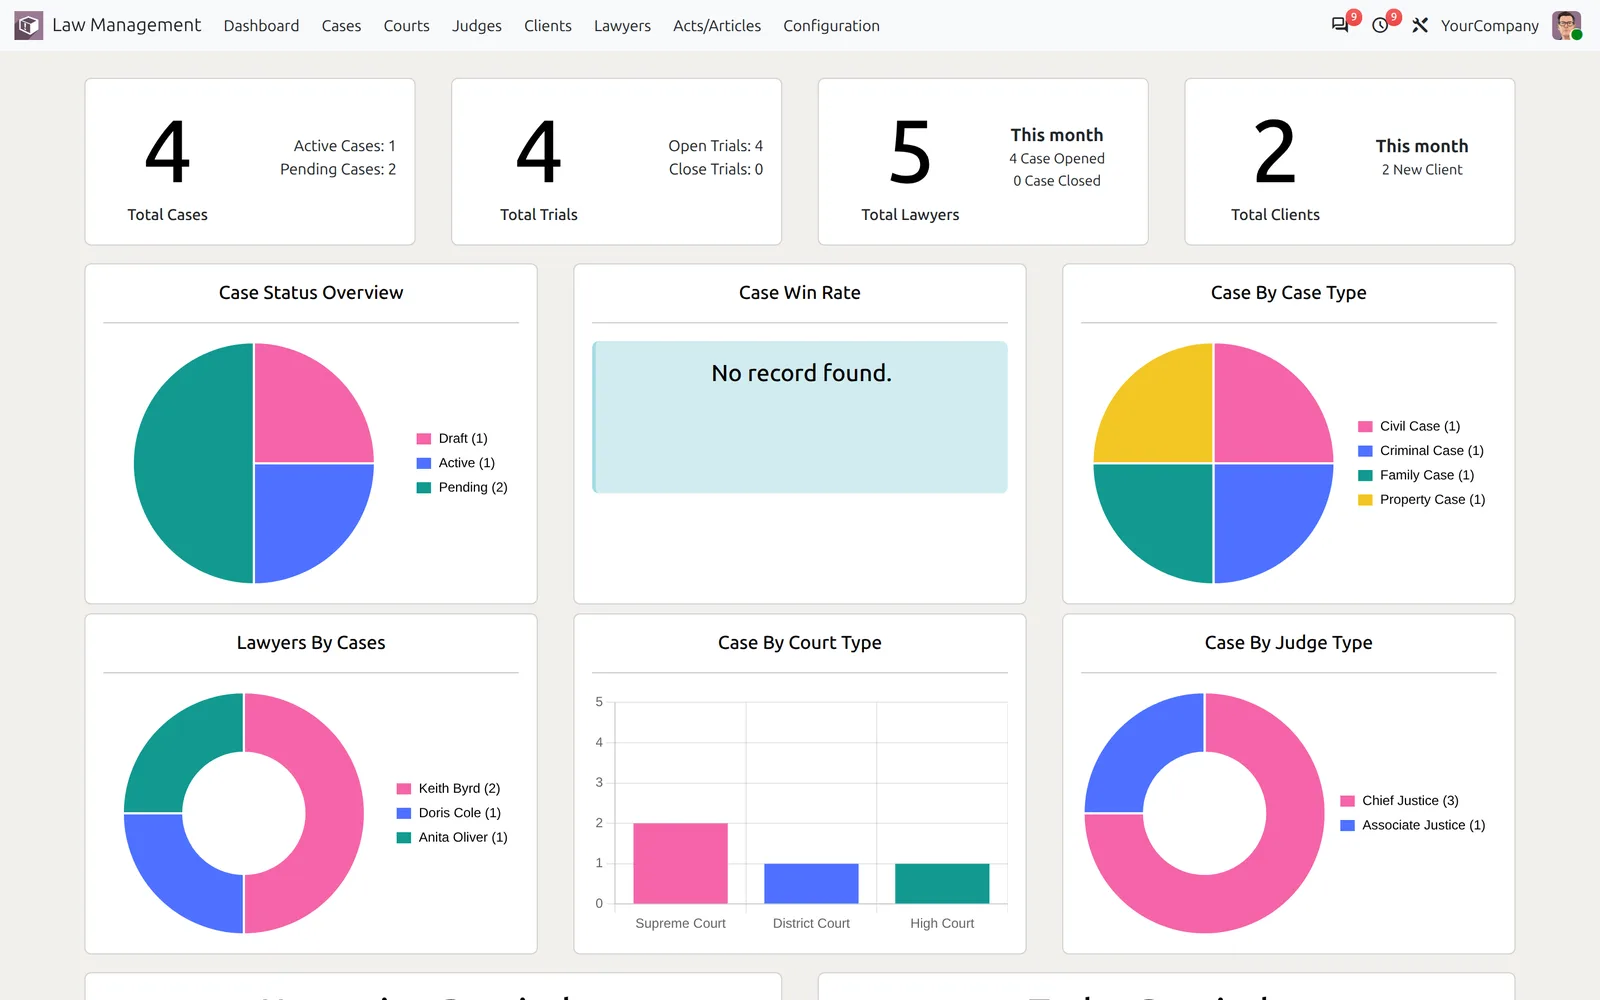
Open Dashboard to see total cases, trials, lawyers and clients, along with this month’s new cases and clients.
Below that, charts break cases down by status, case type, court type, judge type and lawyer. Case Win Rate tracks closed cases monthly.
In addition, Upcoming Reminder and Today Reminder list open trials for this month and for today.
Law Management User Roles and Access
| Group | What it can do |
|---|---|
| Lawyer | Sees Dashboard, Cases, Clients and Opposition Lawyers. Creates and edits their own cases, trials and evidence, but cannot delete them. |
| Administrator | Full access, including Courts, Judges, Lawyers, Acts/Articles, Configuration and every lawyer’s records. |
Lawyers also see a lighter dashboard without the lawyer charts. To assign groups, see Odoo’s access rights guide.
Troubleshooting Odoo Law Management
| Message | What to do |
|---|---|
| Please ensure the invoice is paid before closing the trial. | Create the trial invoice, post it and register the payment. Then click Mark Close again. |
| A trial for this case is already open. | Close the current trial first, then create the next one. |
| Trial date cannot be earlier or same than existing trial dates for this case. | Pick a date after the case’s last trial. |
| The date filed cannot be in the past. | Set the filing date to today or a later date. |
| This case cannot be closed because it does not have any trials. | Add and close at least one trial before marking the case Won or Lost. |
| Only cases in ‘Draft’ or ‘Cancelled’ state can be deleted. | Cancel or reset the case first. Note that deleting it also removes its trials and evidence. |
Related Resources
- See what changed in the latest release in Odoo 20: What’s New.
- Keep client passwords safe with the Odoo Password Manager.
- Browse more apps in the Webkul Odoo Store and more guides on the Odoo blog.
- Need a custom feature? Talk to our Odoo development team.
Conclusion
With Odoo Law Management, your firm runs cases, trials, evidence and trial billing in one place, while the dashboard keeps everyone current.
You can try the app on the Webkul Store page before you buy.
Need Help?
We hope this guide helps. Please share your feedback in the comments below.
If you still have questions, please raise a ticket or email us at [email protected].
Current Product Version - 1.0.0
Supported Framework Version - Version 20, Version 19, Version 18, Version 17.

Be the first to comment.