Multi-vendor Marketplace App helps you to convert your store into a multi-functional marketplace.
You can register multiple sellers & allow them to publish their products on your store.
The app is loaded with tons of features and recently introduced a new one “Minimum Purchase Amount for Orders“.
With this feature, You can allow your sellers to set a Minimum Purchase Amount for Orders. Thus, sellers can restrict the purchase of the customers by setting up a minimum order value.
Now, once the customer adds a product to the cart, he/she can proceed to checkout only if the checkout condition satisfies i.e.
The validated cart amount should be greater than or equal to the minimum purchase amount set by the seller. Else, the customer will not be able to proceed to check out.
Check the below video of Minimum Purchase Amount:
Let’s understand it with an example:-
Price of Product A: $500, Price of Product B: $1000
Minimum Purchase Amount for orders: $600
Customer A adds Product A to Cart worth $500 i.e. Total Order Amount=$500:
FAILED TO CHECK OUT (as the Total Order Amount $500 < Minimum Purchase Amount $600)
Customer B adds Product B to Cart worth $1000 i.e. Total Order Amount=$1000:
CHECK OUT SUCCESSFULLY (as Total Order Amount ($1000) > Minimum Purchase Amount ($600)
One Limitation:-
Please Note:- Discount codes can be applied on check out page i,e.
If the checkout condition satisfies (i.e. the cart amount exceeds the minimum purchase amount), the customer will proceed to checkout.
But further, the customer can apply a discount on the order that may result in the final order amount lesser than the minimum purchase amount.
Thus, the order amount can be less than the minimum purchase amount set by the seller once the discount applied.
Let’s understand it in detail.
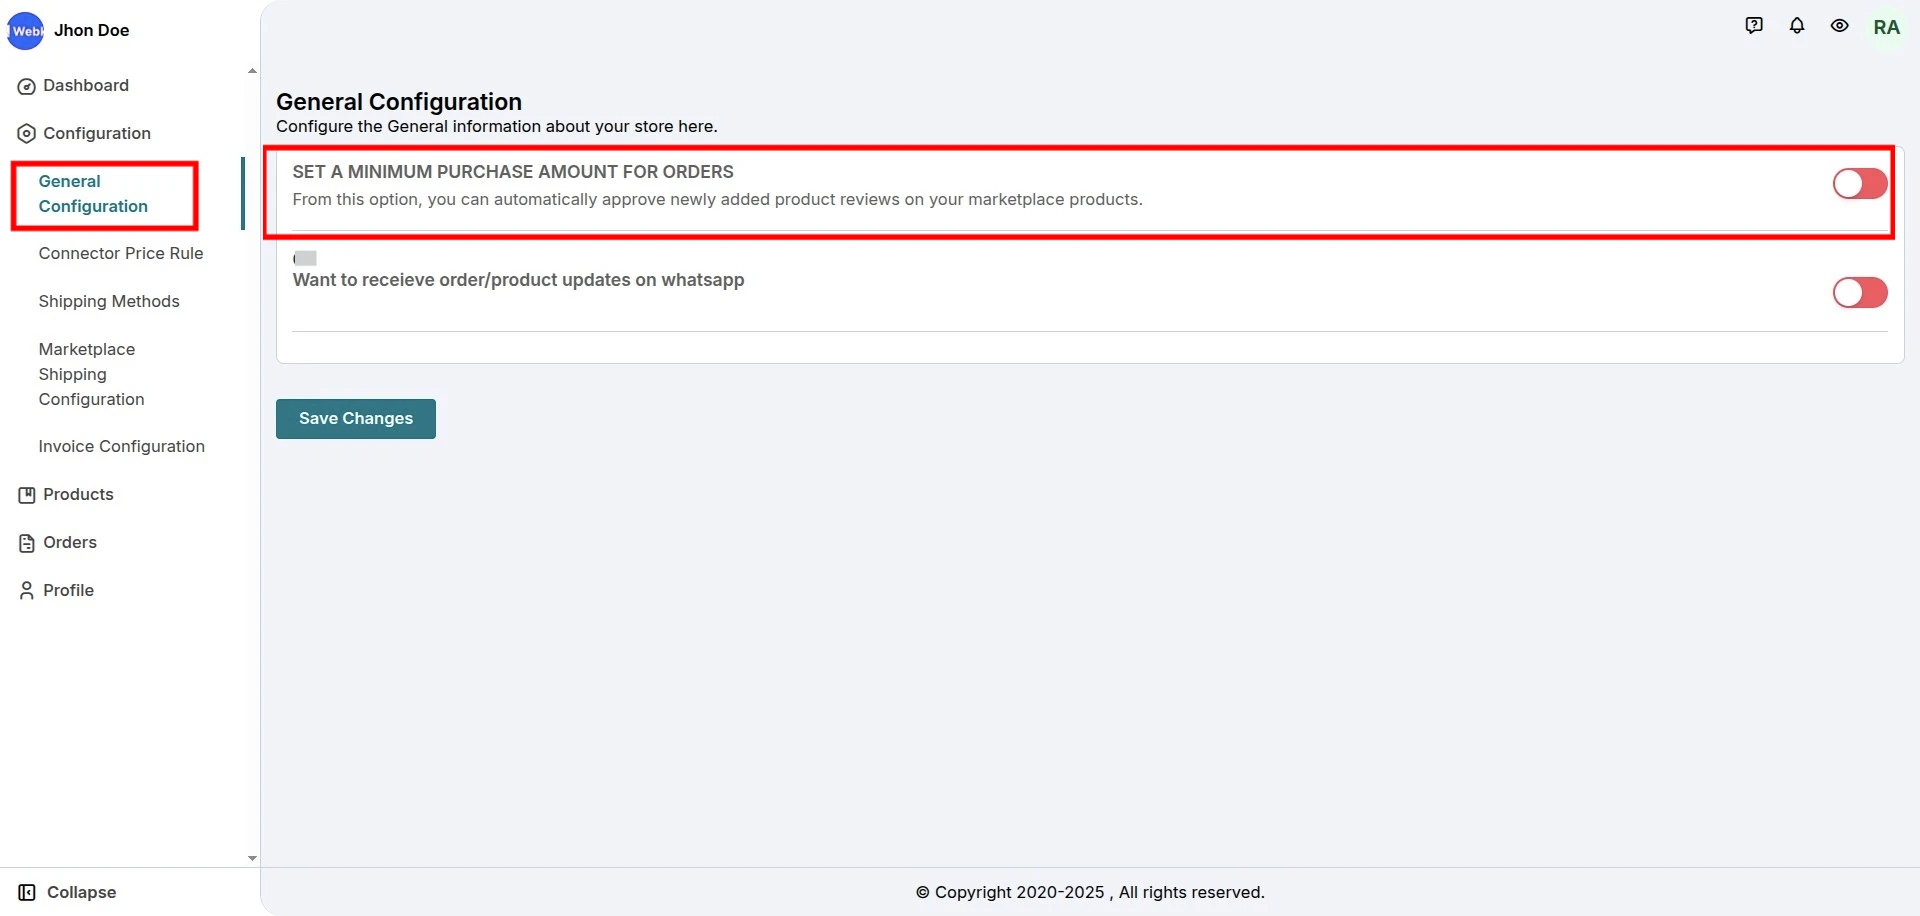
Configuration-ADMIN END
In order to make this feature work for your sellers, first, you need to enable this tab from your admin panel. Here are some simple steps:-
- Go to the Multi-vendor admin panel.
- Visit the Configuration menu.
- Click the General Configuration submenu.

- In the General Configuration, scroll down to get the “Minimum Purchase Amount for Orders” tab.
- Enable the tab and click the Save Changes button.

As soon as you enable this tab, the same will start getting reflected at the seller side.
Introduced a new sub-menu “General Configuration” at the seller side. Now, sellers will get the option “Minimum Purchase Amount for Orders” in the General Configuration menu of the app.
Let’s understand this in detail.
General Configuration: SELLER END
Once the “Minimum Purchase Amount for Orders” tab is enabled by the merchant, the same will reflect in the General Configuration menu of the seller panel.

Clicking the General Configuration menu, the seller will get the following options:
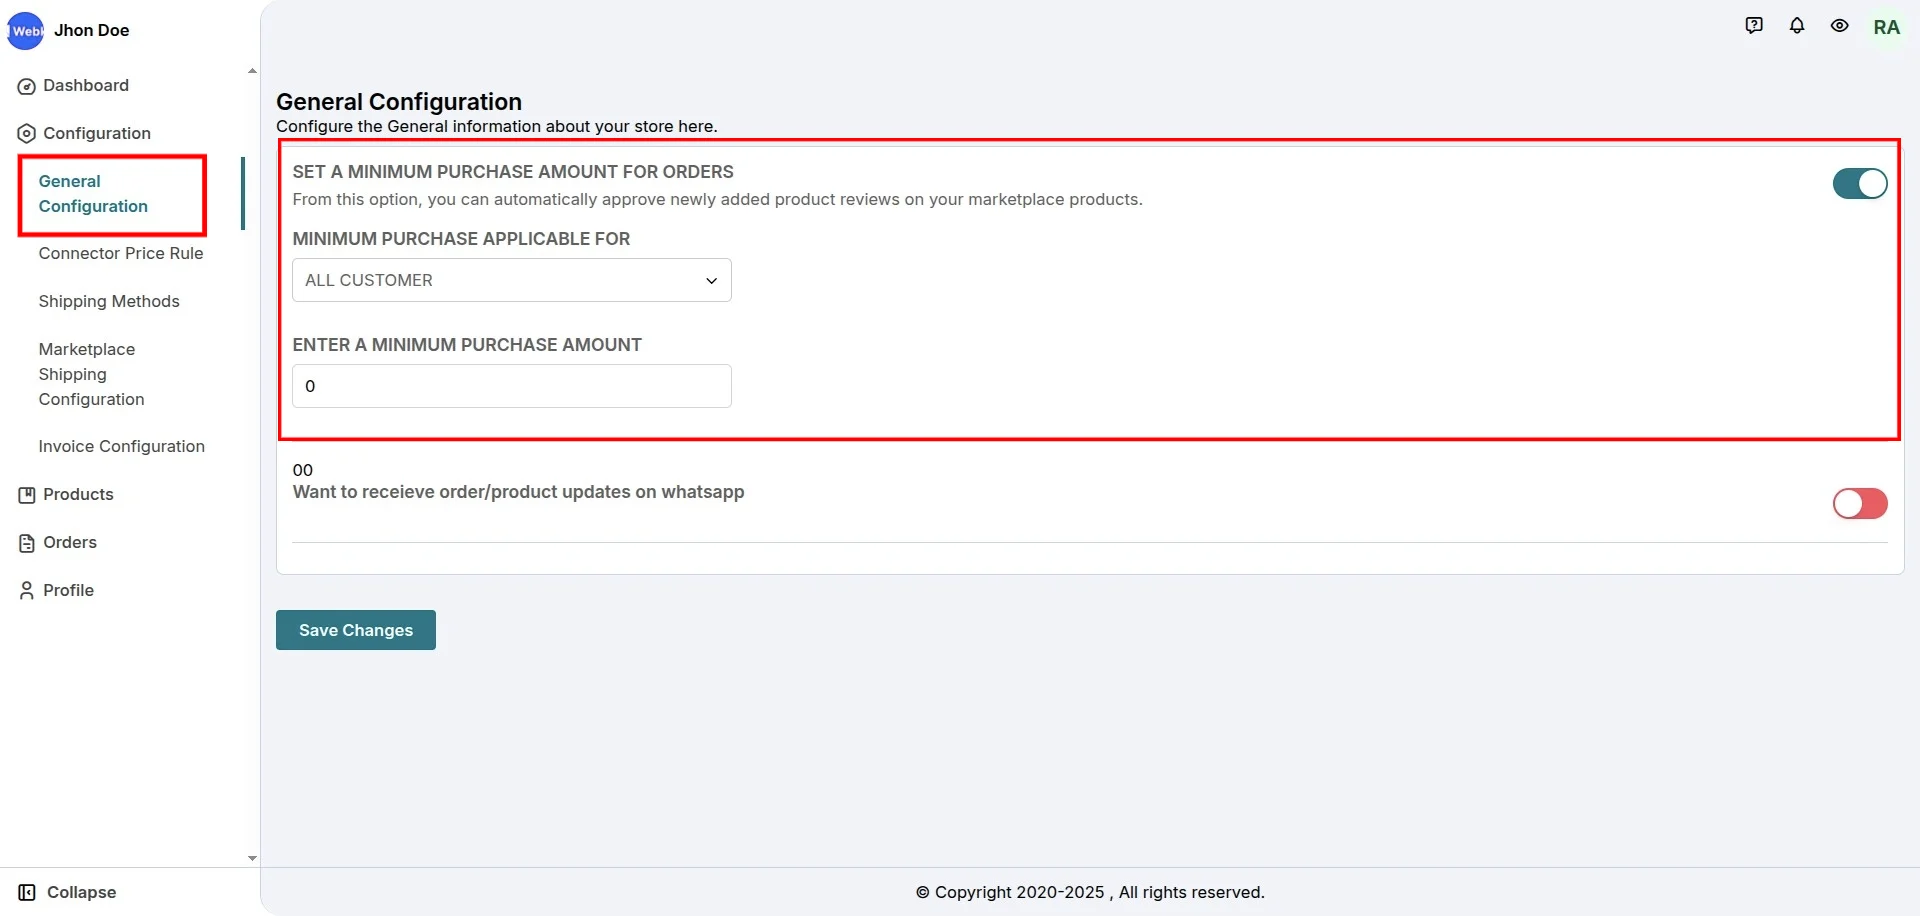
Firstly, Seller needs to enable the “Minimum Purchase Amount for Orders” tab.
Once the tab gets enabled, the seller will get all the options to set the purchase amount for the customers.
By default, the Purchase amount will be applicable to all the customers. In this case, the seller needs to set a fixed purchase amount that will be applicable to all the customers.
SLOT PRICING CASE
This functionality is also compatible with Slot Pricing feature app.
Where the seller will be able to choose whether he wants to apply “minimum purchase” for “All Customers” or “Specific Tagged Customers“.
In case, You have enabled the Slot Pricing feature on your end, the sellers will get the option to set a different minimum purchase amount for each customer based on the tags assigned to them.
In this case, the seller will get the option to set different purchase amounts for each customer tag.
The seller needs to select if the minimum purchase amount for orders will be applicable for all the customers or only for some specific tag customers
Now, the purchase amount required for each customer will be different based on the tags assigned to them.

That is how sellers can set a minimum purchase amount for orders from their respective seller panels of the multi-vendor app.
How to Configure Front End
Now, once the customers purchase products from your store, the checkout condition appears on the cart page after adding the codes into liquid files.
In order to display the checkout conditions on the Cart page, you need to add the codes to the suggested liquid files (as shown in the screenshot).
- Go to the Multi-vendor Admin Panel.
- Visit Configuration
- Click the Instruction for Marketplace menu.

- Scroll down to get the codes for “Seller’s Minimum Purchase Amount for Orders”.
- Copy the code from there & add it to the instructed liquid files.

Display checkout conditions on cart page:-
<div class="" id="wk_minimum_purchase_div" style="display:none;"></div>
Code to hide checkout button if the condition fails:-
style="display:none;"
TO DISPLAY TRANSLATED LABELS ON FRONTEND
Copy the below-given code & paste it to theme.liquid just above </body> tag:
{% render 'wk-mvm-variables' %}
To add the codes to the liquid file, please follow below-given steps:-
- Go to the Shopify store back end.
- Click the Online Store menu in the sales channel section.
- Click the Themes & select the Edit Code Option from the drop-down menu.
- Get the template files & add the codes as instructed in the app.

Once the codes are added let’s see how it appears on the front end.
Show minimum purchase amount on the seller profile page
{% assign selected_tag = customer.tags[0] %}<script>var wk_selected_tag = "{{ selected_tag }}";</script>
Front End View
If the cart amount is lesser than that minimum purchase amount, the check out condition gets failed & customer will not be able to proceed to check out.

If the cart amount is equal or greater than the minimum purchase amount, customer can proceed for checkout.

This is all about the Minimum Purchase Amount feature of the Multi-vendor Marketplace app for Shopify.
Minimum Purchase Amount On Seller Pages
In case, you are using Theme 4 of the seller profile page then, you can display the minimum purchase amount on the seller listing as well as on the seller profile page.
On the Seller Listing Page

On the Seller Profile Page
Similarly, on the seller profile page, you can view the minimum purchase amount set by this seller.

NOTE:- Currently, this feature is available in Theme 4 only, but in case you want this for other seller profile page themes as well, do send us a request to [email protected].
Minimum Purchase Amount on Product Page
You can now show the minimum purchase amount on the product description page of your store.
All you need to do is just go to the “Instruction for Marketplace” menu under the “Configuration” menu and add the code to the product.liquid template file.
Copy the below-given code and add it to the product.liquid (or product-template.liquid):
<div id="wk_product_mpa" data-product_id="{{ product.id }}" data-selected_tag="{{ customer.tags[0] }}"></div>
After adding the code, that is how the minimum purchase amount will appear on the product page of your store. Have a look:

Demo
Check the Demo of Multi-vendor Marketplace app for Shopify: https://multivendor-marketplace-5.myshopify.com
Need Help?
In case of any query, feel free to create a ticket at http://webkul.uvdesk.com/ or drop a mail at [email protected].
Thanks for Reading!

Be the first to comment.