Introduction
Odoo Watermark Removal helps you detect and clean watermarks from images right inside Odoo. It uses advanced mask detection and inpainting, so you do not need any external tool.
The module gives you a dedicated workspace to manage all your cleanup jobs. Moreover, each record keeps the source image, generated mask, output image, and current processing status in one place.
A magic icon shows up when you hover over any image field across all Odoo form views. Then, click it to open the watermark wizard, where the source image and field are already loaded for you.
Features
- Advanced watermark detection with auto mask generation
- One-click image processing with built-in inpainting engine
- Two-step flow: detect region first, then confirm and process
- Drag-select ROI to target the exact watermark area precisely
- Magic icon overlay on all Odoo image fields across every model
- Modal replace flow to write the cleaned image back to source field
- Auto-delete scheduler with configurable retention days setting
- Bulk ZIP download for all processed images from the list view
- Works across all three cleanup modes: Auto, Text/Logo, Object/Inpaint
Installation
- Once you purchase the App from Webkul store, you will receive a link to download module’s zip file.
- Extract the file on your system after download finishes. As a result, you will be able to see a folder named- ‘odoo_watermark_removal’
- Copy and paste this folder inside your Odoo Add-Ons path.
- Now, open Odoo App and click on the Settings menu. Here, click on Activate Developer Mode.
- Then, open Apps menu and click on ‘Update Modules List.’
- In the search bar, remove all the filters and search ‘odoo_watermark_removal.’
- You will be able to see module in the search results. Click on ‘Activate’ to install it.
Check the video mentioned below for an overview of the workflow of this Module:
Workflow
1. Configure Global Settings
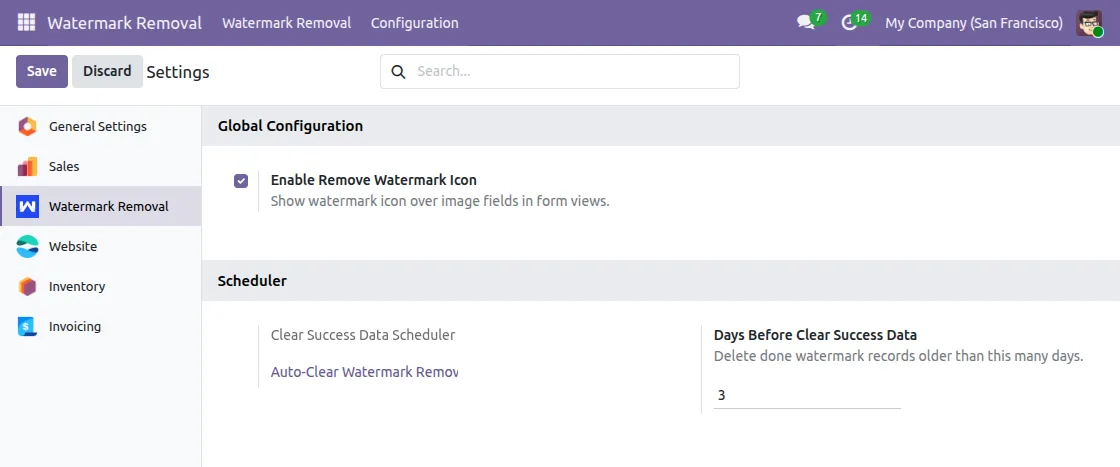
After installing Odoo Watermark Removal module, Go to Watermark Removal → Configuration → Settings.
At first, enable the “Enable Remove Watermark Icon” checkbox to show the magic icon on all image fields. Then, set retention days under Scheduler section to configure auto-deletion of completed records.
2. Access the Watermark Removal Workspace
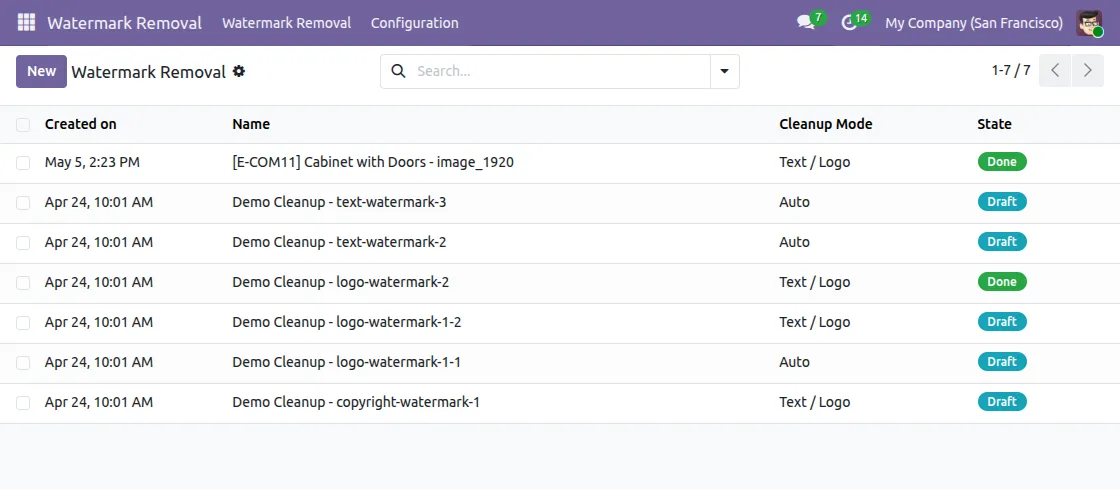
After that, Go to Watermark Removal → Watermark Removal from the top navigation menu. Then, you will see a list of all watermark removal jobs with their name, cleanup mode, and current state.
3. Create a New Watermark Removal Record
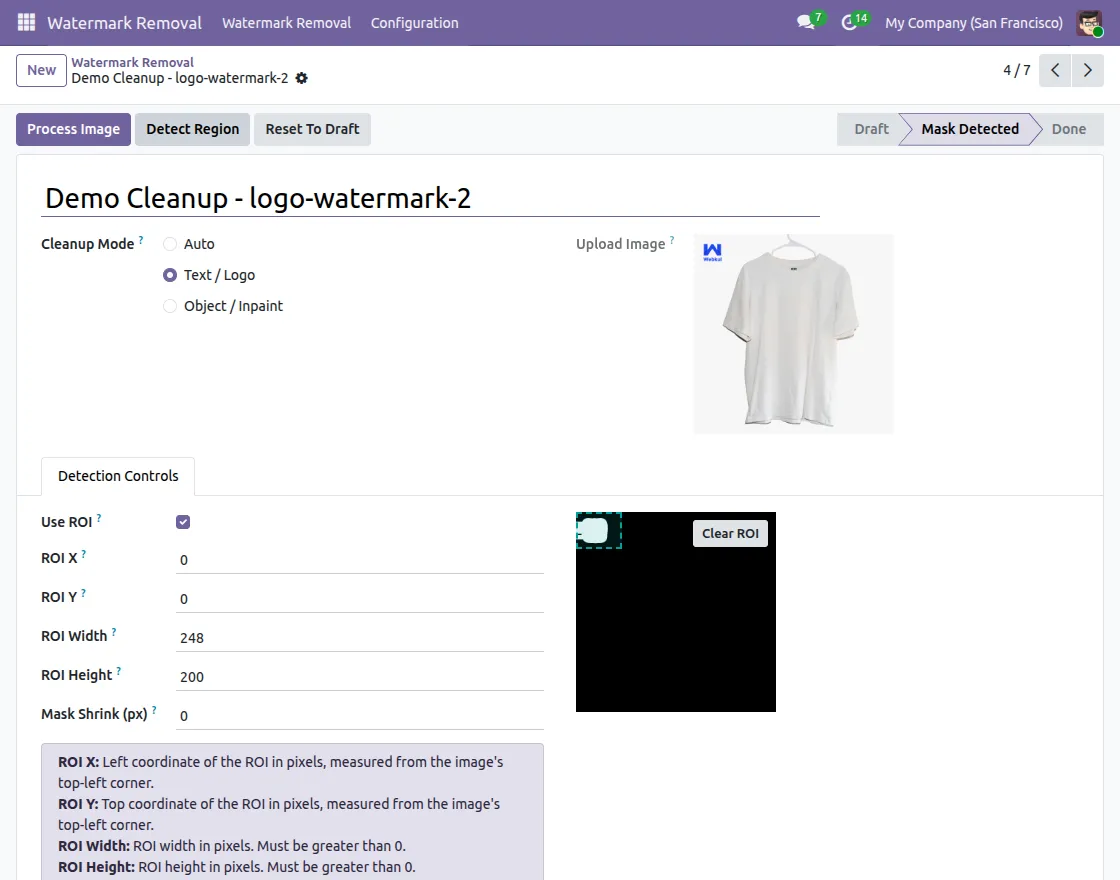
Now, click New button on the list view to create a new record. Then, enter a name, select a Cleanup Mode (Auto, Text/Logo, or Object/Inpaint), and upload the image you want to clean.
4. Use Magic Icon from Any Odoo Form View
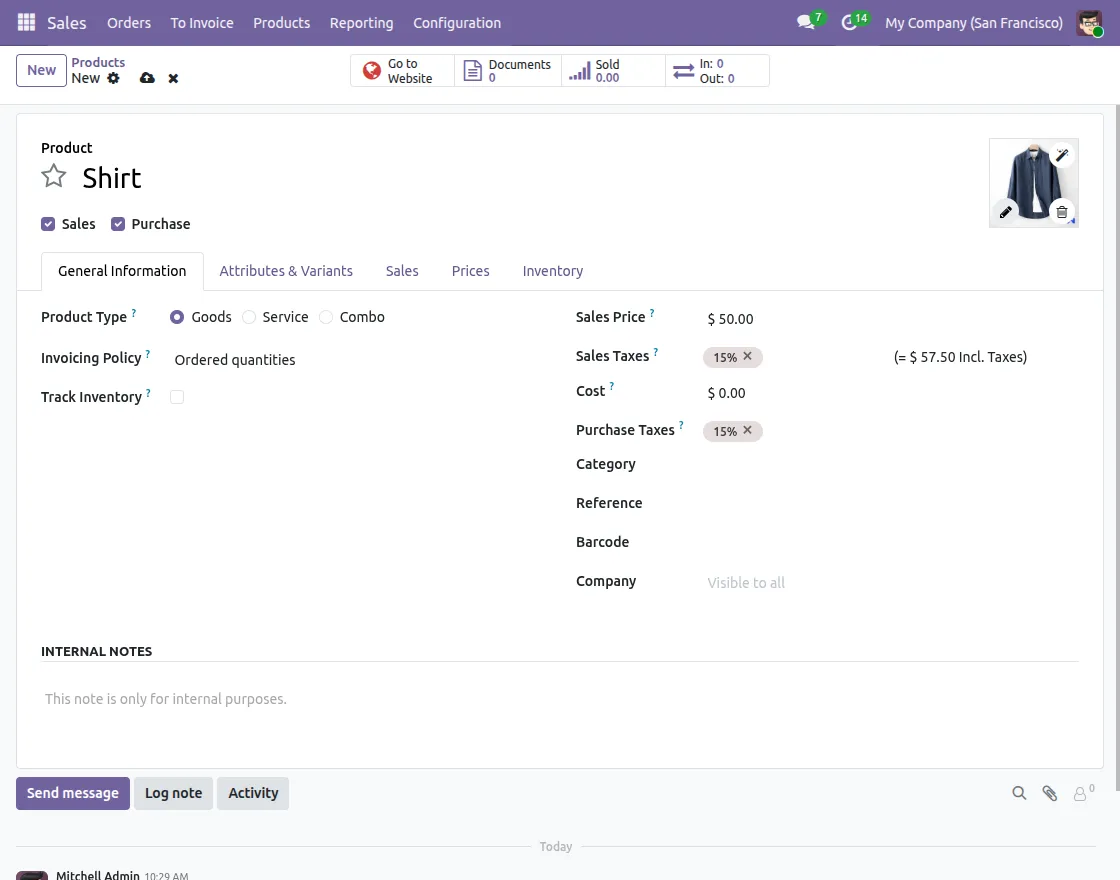
Open any Odoo form view that has an image field, such as a product form. Then, hover over the image field to reveal the magic icon in the top-right corner of the image.
Click it to open watermark removal wizard with source image already pre-loaded.
5. Detect the Watermark Region
Inside watermark wizard, click “Detect Region” button to run detection. As a result, the module will scan the image and generate a mask over the detected watermark region. The status will then move from Draft to Mask Detected.
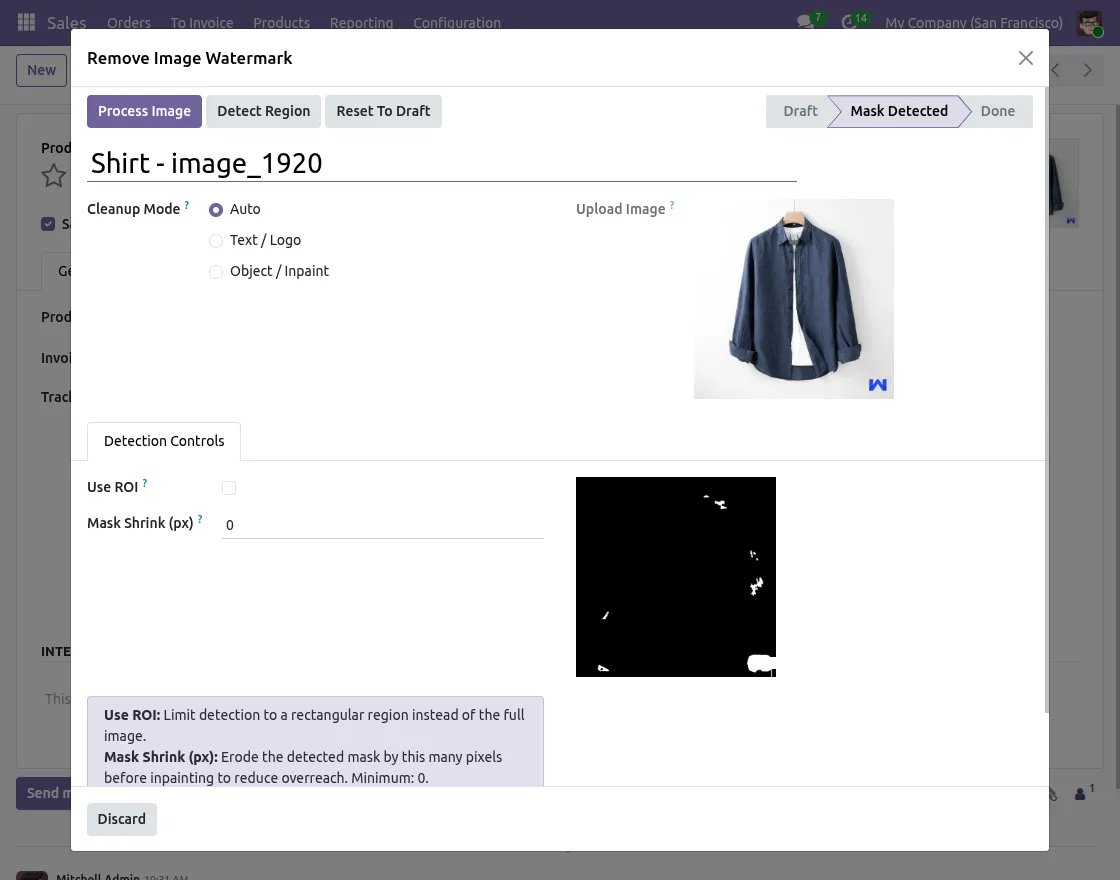
6. Adjust ROI and Detection Controls
Open Detection Controls tab to fine-tune the detection. Then, enable the Use ROI checkbox and drag-select the watermark area directly on the image using your mouse. The ROI values will be filled in automatically based on your selection.
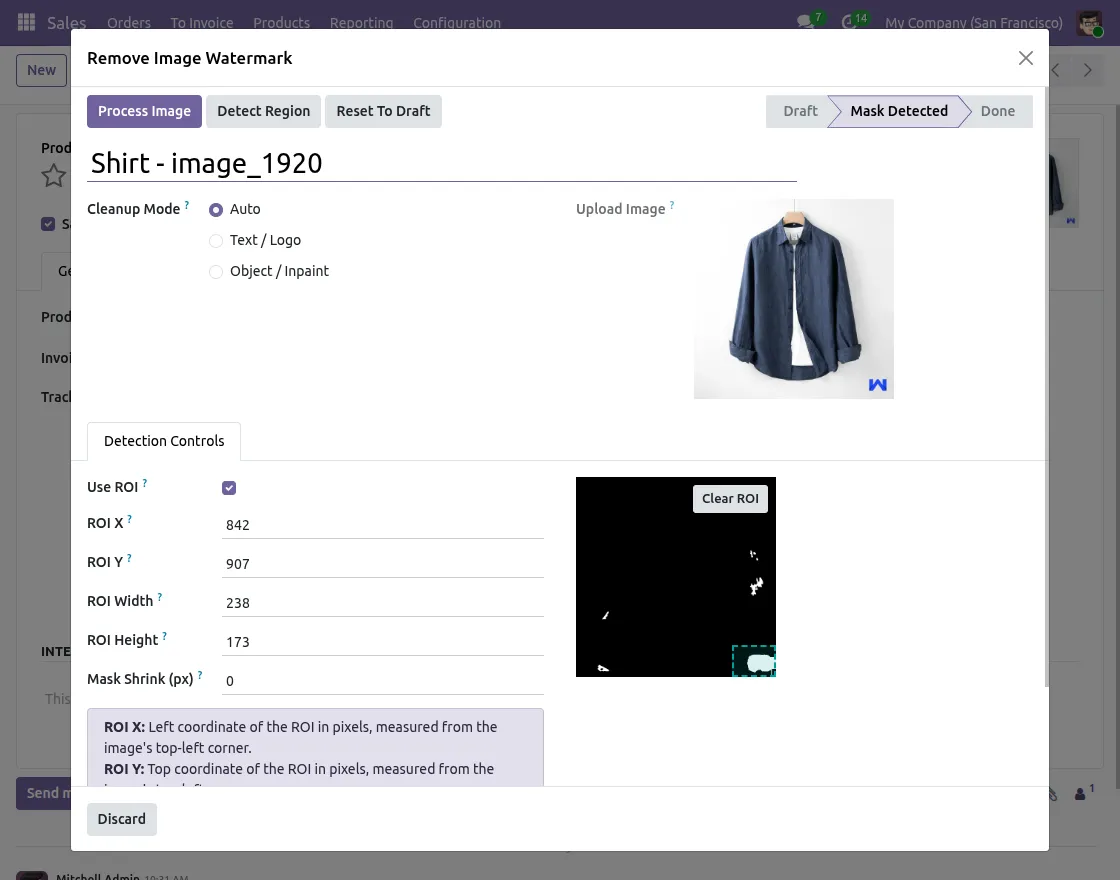
7. Process and Replace Image
Click “Process Image” button to run the full inpainting on the detected mask region. The cleaned output will appear under Processed Image tab once the status moves to Done.
Finally, click “Replace Image” button at the bottom of wizard to send the result back to original Odoo field. The original image will not be changed unless you confirm the action.
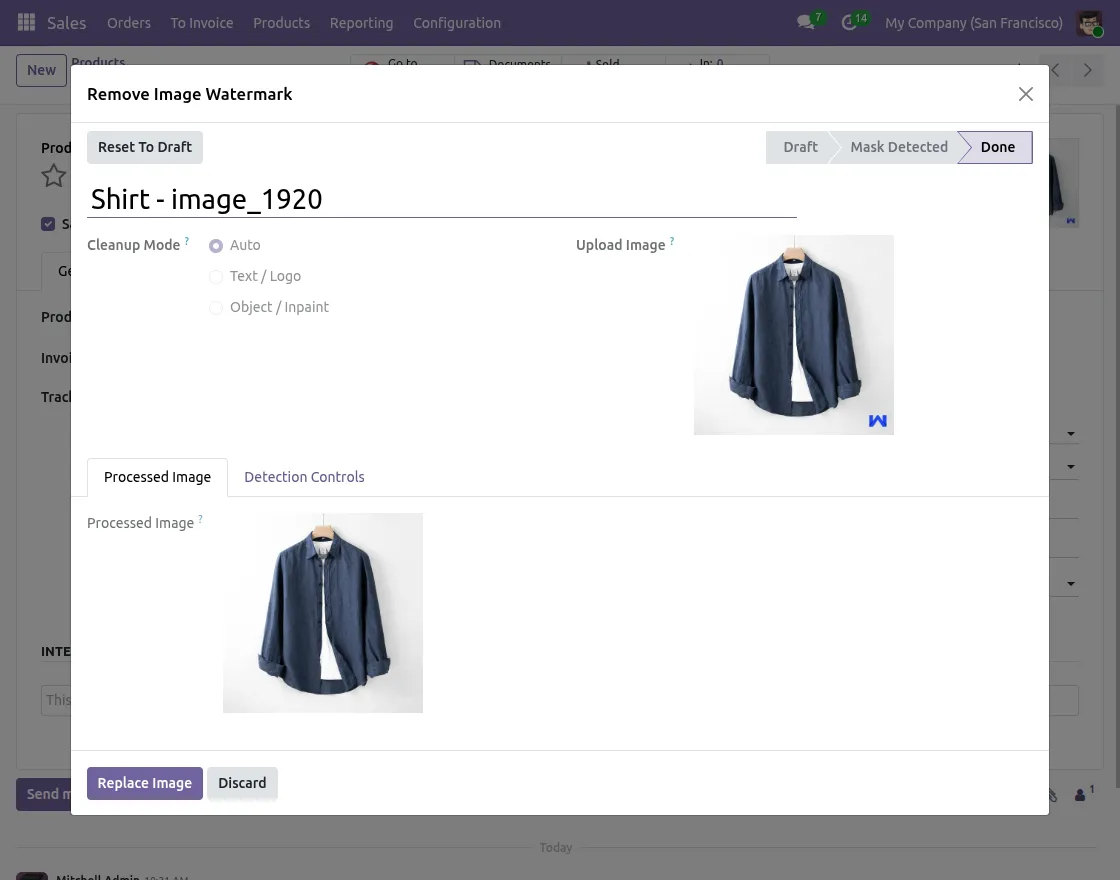
8. Download Processed Images as ZIP
Go to the Watermark Removal list view and select the completed records you want to download. Then, open Action menu and click “Download ZIP” to export all processed images in one archive file.
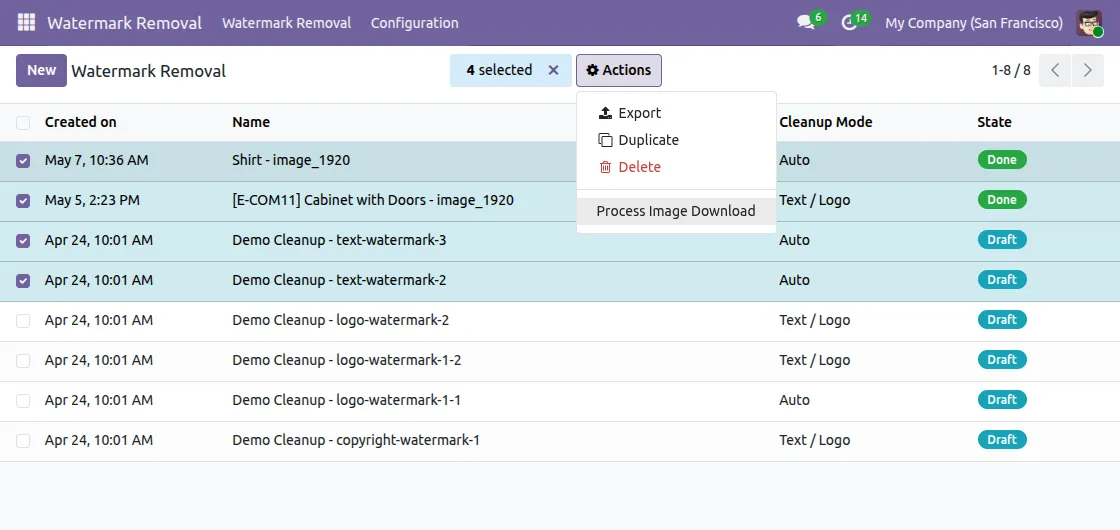
9. Auto-Clear Old Records with Scheduler
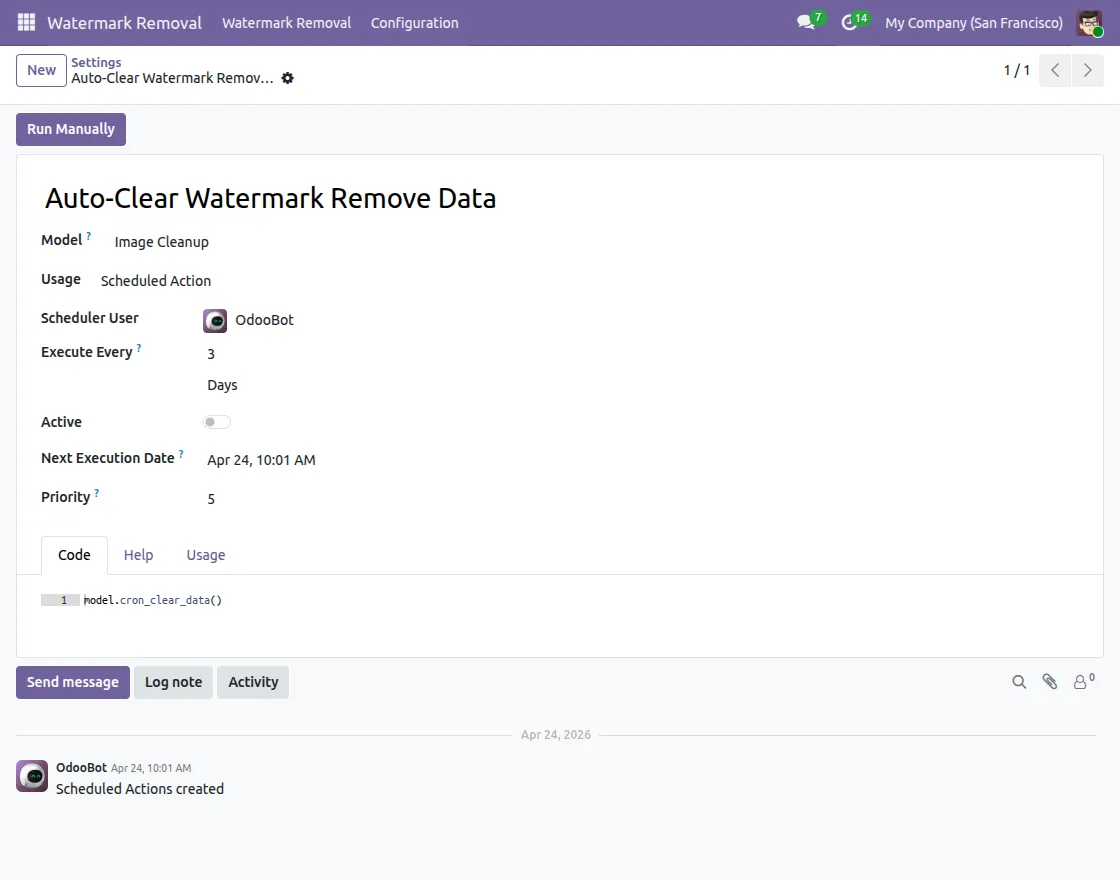
Go to Watermark Removal → Configuration → Settings and open Scheduler section. After that, enable the Auto-Clear Watermark Remove Data scheduler and set the number of retention days.
Then, Scheduler will automatically remove completed records older than the configured days.
Need Help?
Hope you find guide helpful! Please feel free to share your feedback in the comments below.
If you still have any issues/queries, please create a ticket at the UV Desk.
I hope this helps. In case of any further queries, contact us at our support mail.
Thanks for paying attention!!
Current Product Version - 1.0.0
Supported Framework Version - Odoo V17, V18, V19

Be the first to comment.