Introduction
ERPNext Website Store Locator helps businesses display and manage their store locations directly from ERPNext.
It allows businesses to add store details such as address, contact information, website links, images, and opening hours.
Each store can be pinned on a map using latitude and longitude coordinates, making it easy for customers to find the correct location.
Published stores are displayed on a public store locator page where customers can browse and search for stores.
The module also provides search filters, category tags, directions links, and map settings to improve the store-finding experience.
This helps businesses keep all store information organized and easy to access from one place.
Features
- Create and manage multiple store locations from ERPNext.
- Add store details such as address, contact information, website links, and images.
- Set store locations on a map using latitude and longitude coordinates.
- Display published stores on a public Google Maps locator page.
- Allow customers to search stores using keywords.
- Organize stores using tags and categories for easy filtering.
- Show store opening and closing hours on the website.
- Provide direct directions links to help customers reach stores easily.
- Configure map centre, zoom level, and map display settings.
- Control which stores are visible to website visitors through publishing options.
Installation
1. After purchasing the app from the Webkul store, you will receive a link to download the module ZIP file.
2. Extract the downloaded ZIP file, and you will see a folder named ‘website_store_locator’.
3. Set up the module in your Git repository.
4. If the app is hosted on GitHub, fetch it using the command:
bench get-app --branch v_16
https://git.webkul.com/erpnext-apps/store-locator/-/tree/v_16
(Replace “main” with your branch name and replace the “HTTPs URL” with your HTTPS clone URL.)
5. Install the app on your site using the command:
bench --site <your-site_name> install-app store_locator
6. Finally, run the “bench migrate” command to complete the installation.
Workflow
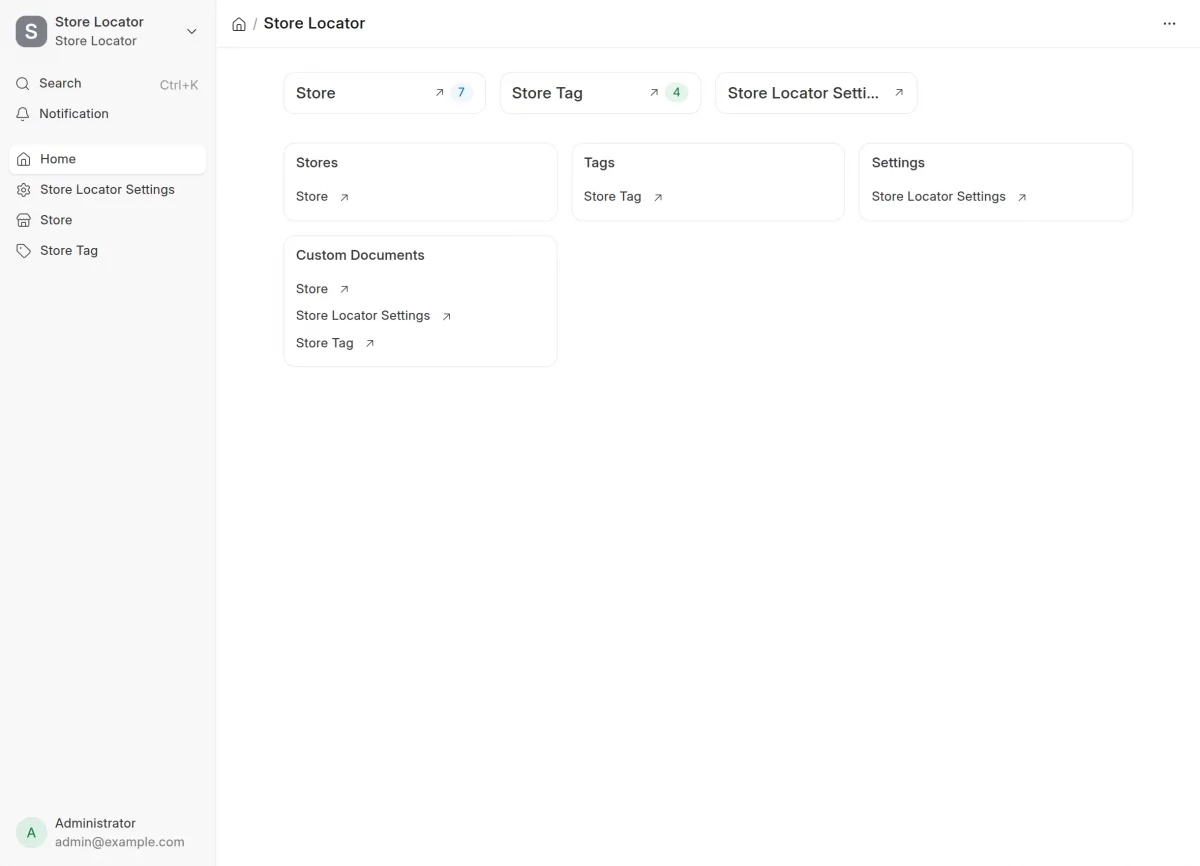
1. First, click on Store Locator from the ERPNext backend to access the ERPNext Website Store Locator module.
This will open the main dashboard, where you can manage store locations, store tags, and Store Locator settings.
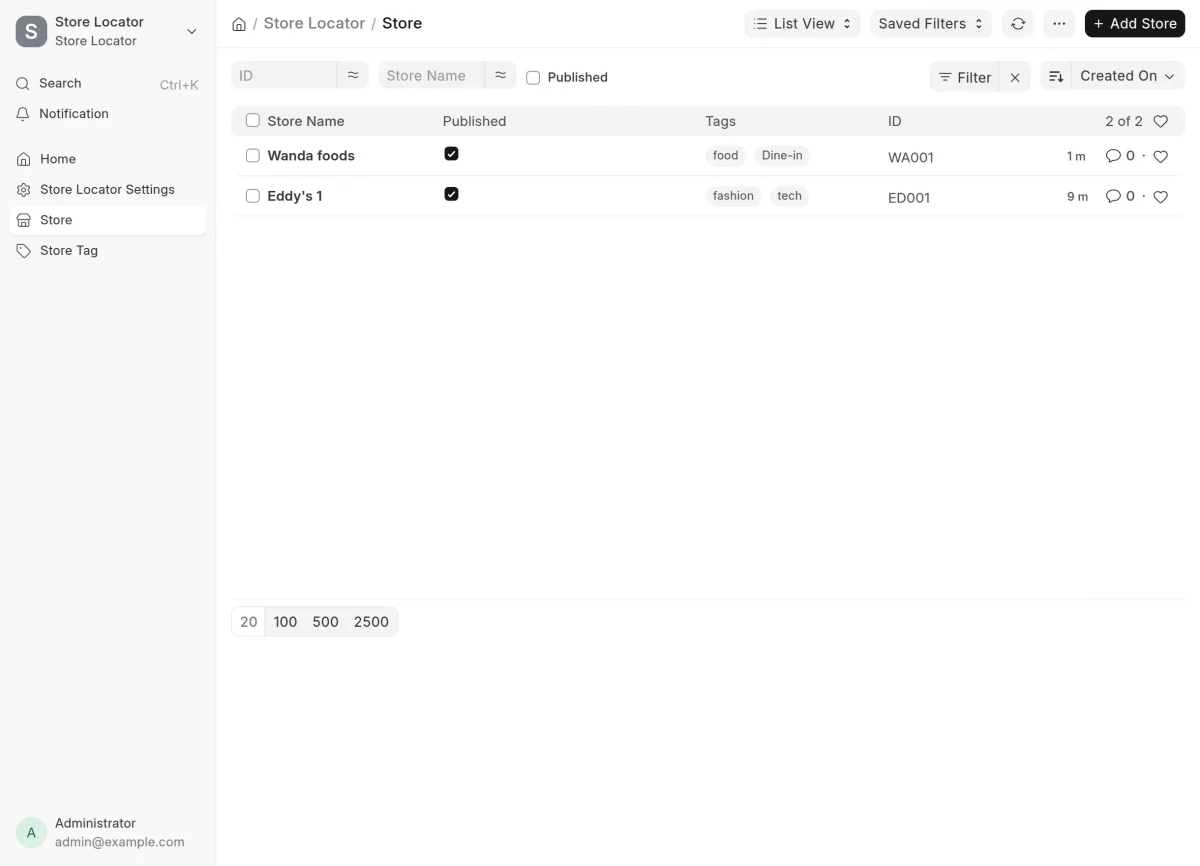
2. Next, click on Store to view all the existing stores.
The Store List page will open, where you can view store details, manage existing stores, or click Add Store to create a new store.
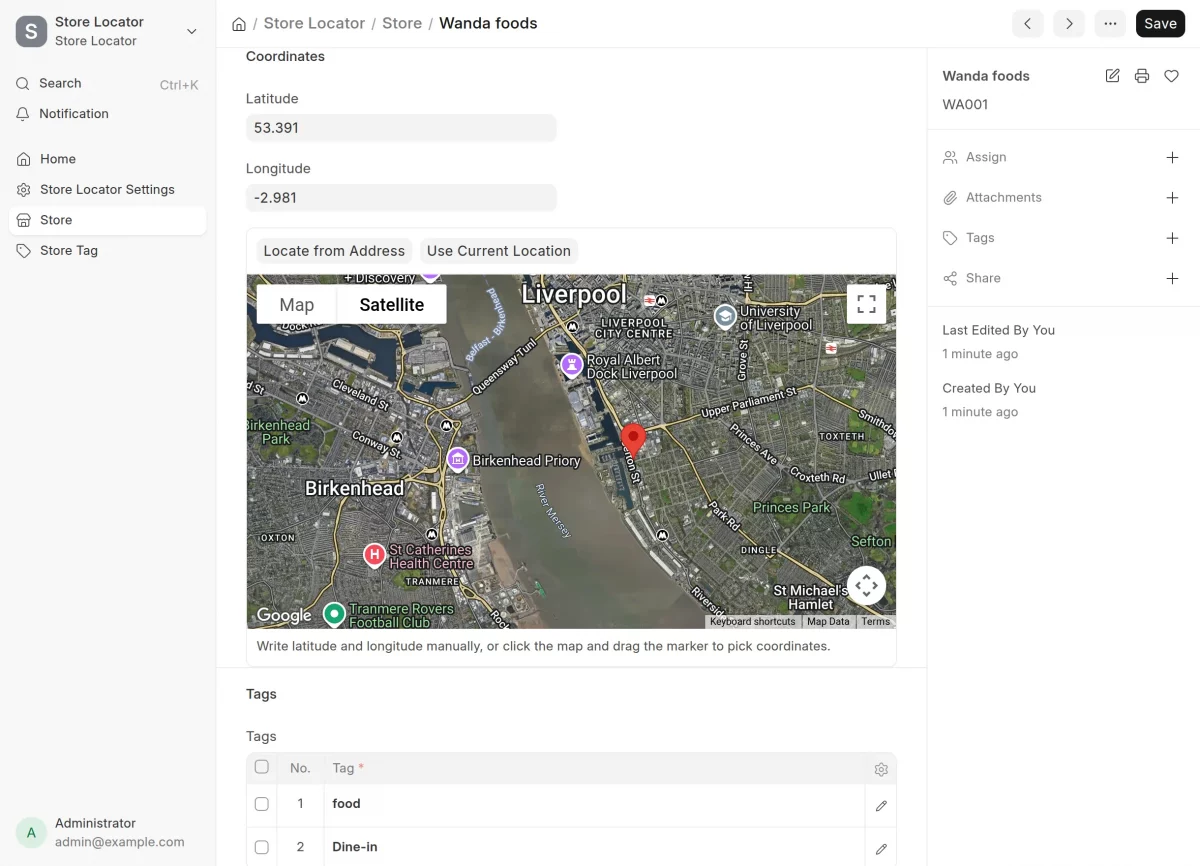
3. To view the details, click on any store from the Store List.
The store details page will open, where you can view, edit, and update the store information.
After making the required changes, click Save to update the store details.
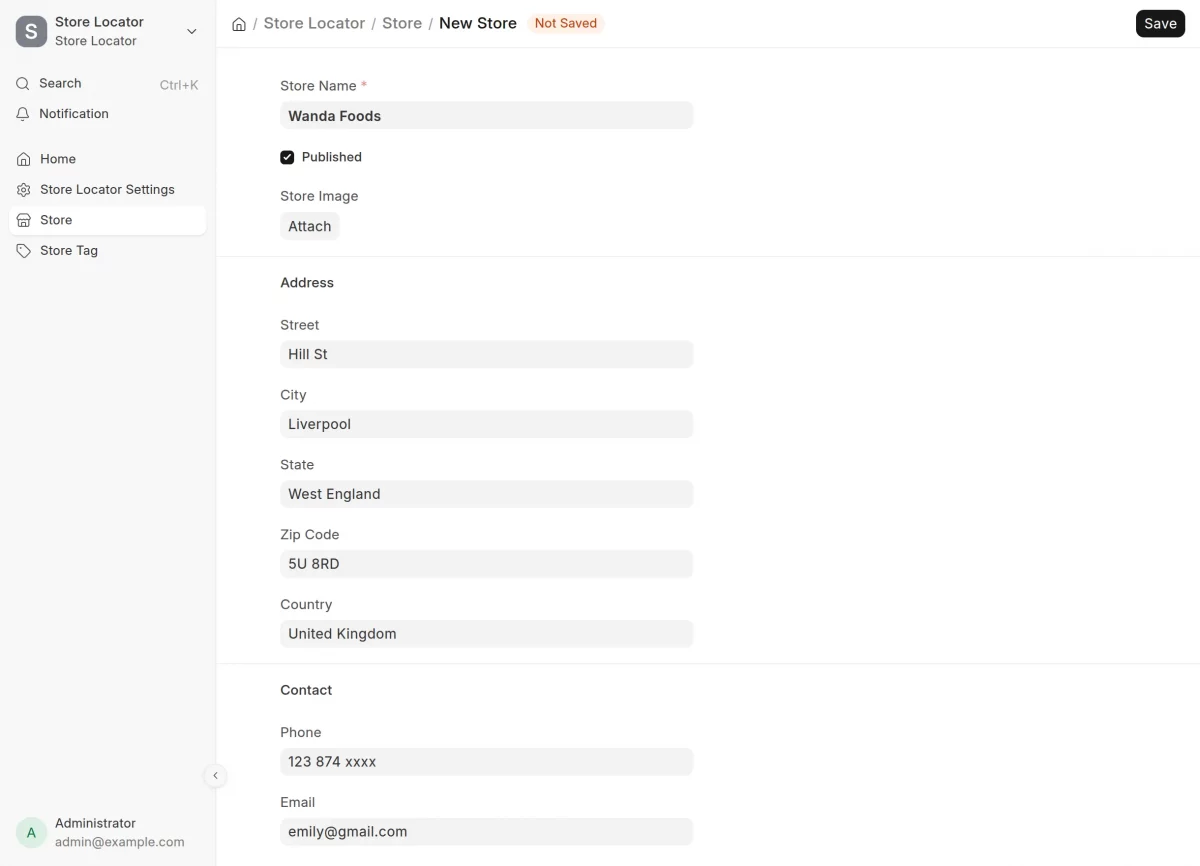
4. To create a new store, click on Add Store from the Store List page.
A new form will open where you need to enter the required store details.
Add the Store Name and upload store images.
Then, enter the detailed Address, followed by the store’s Contact Details, such as the Phone Number and Email Address.
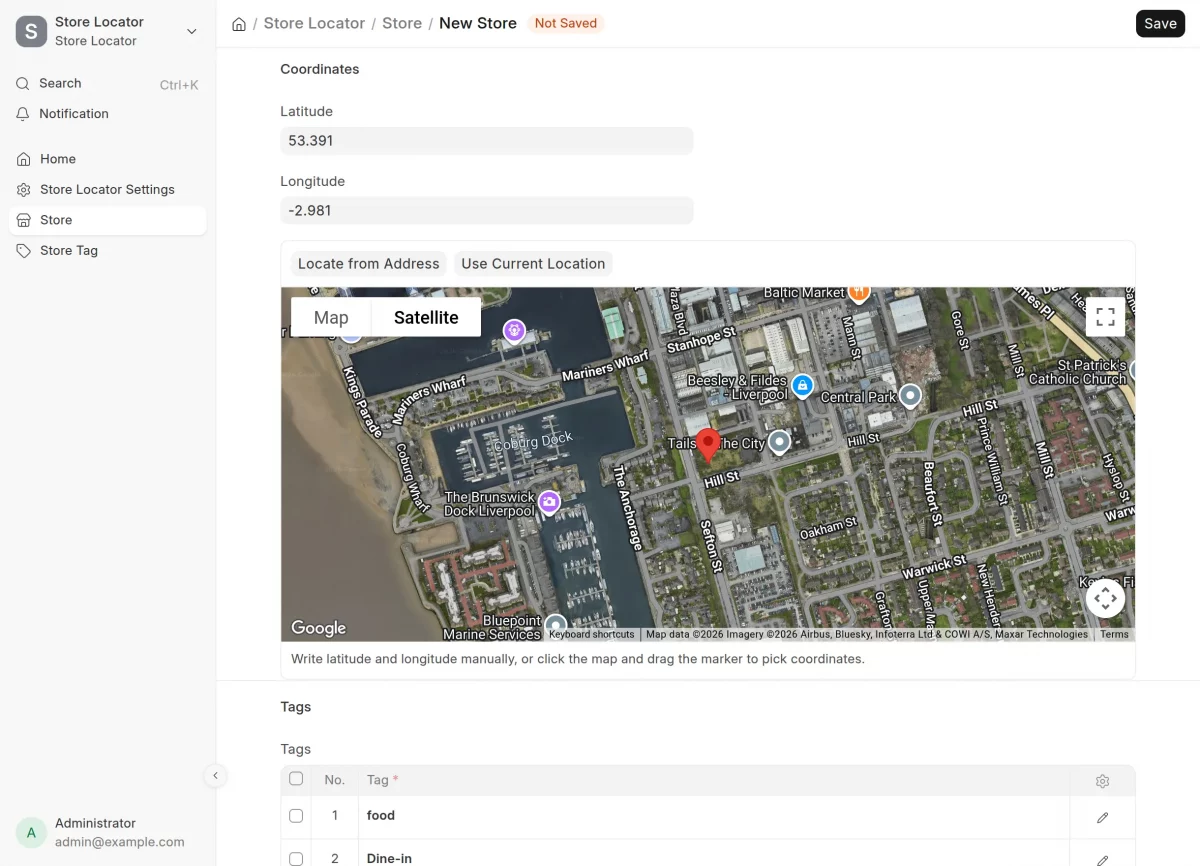
5. Next, add the Store Location by entering location coordinates.
You can also use the Current Location option to automatically select the location.
After that, assign Tags to the store and make it easier for customers to find using the store search and filters.
6. Now, click on Store Tag from the main dashboard to open the Store Tag List.
Here, you can view all existing store tags or create a new one to suit your requirements.

7. To create a new tag, click on Add Store Tag. A new form will open where you can enter the Tag Name and choose a Tag Colour.
After filling in the required details, click Save to create the tag.

Store Locator Configuration
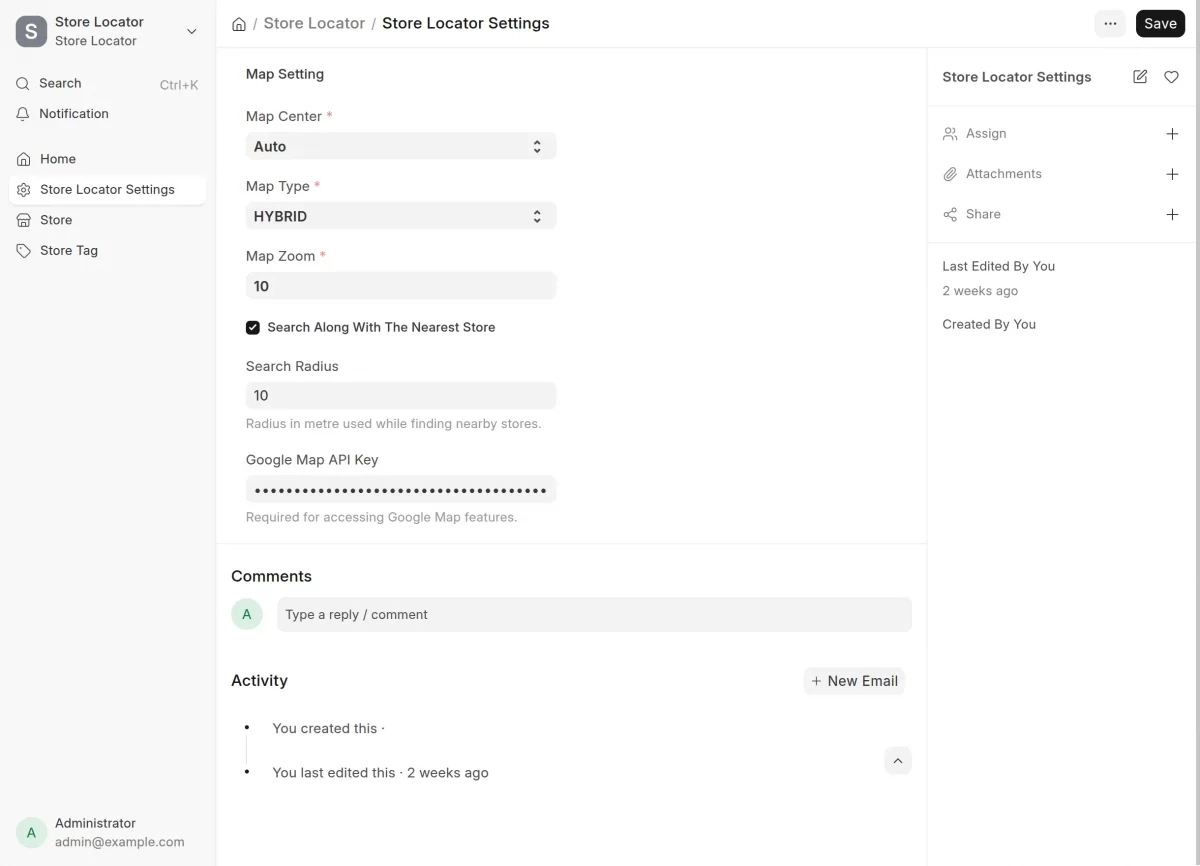
To configure the ERPNext Website Store Locator, click on Store Locator Settings from the main dashboard.
Here, you can configure the Map Center manually or automatically.
Choose the Map Type, set the Map Zoom Level and Search Radius.
Add a Google Maps API Key to enable map display and location-based features.
You can visit here for Google Map API Key.
Customer View-Level
After completing the setup, customers can easily find store locations on the website using the Store Locator.
Users can search for stores using keywords, apply category and tag filters, and view store details.

Need Help?
Hope you find guide helpful! Please feel free to share your feedback in the comments below.
If you still have any issues/queries, please create a ticket at the UV Desk.
I hope this helps. In case of any further queries, contact us at our support mail.
Thanks for paying attention!!
Current Product Version - 0.0.1
Supported Framework Version - ERPNext V16

Be the first to comment.