CS-Cart Multi-Vendor Seller Ads Booking:- Allow your sellers to advertise their own store or products by CS-Cart Multi-Vendor Seller Ads Booking addon.
Sellers can pay for a specific time period and add their advertising banners on the website.
Admin can create two different types of ads with Text Banner and Graphics Banner accordingly set the price for a vendor. Admin can add numerous ads for booking & make them available for the vendors.
Functionality to add redirecting URLs to the banners makes the seller’s advertisement more effective.
Check a brief overview of the plugin –
CS-Cart MultiVendor Seller Ads Booking Features
- Advanced back-end options for admin to create an advertisement for any desired time period with suitable price.
- Admin has complete control of the system for setting ads anywhere on the storefront.
- Admin can set subscription for any ads for automatic booking in future.
- Functionality to add text banners and graphic banner.
- Option to set auto-approval for the renewal of purchased banner at admin end.
- Option to set auto-approval for buying and updating the banner at admin end.
- Works well with new email template. Email Notifications to admin/vendor for every add/edit/update/renew the advertisement.
- Functionality to enable multi-language text and URL for the banner.
- Easy to use and maintain for admin like banners where text, as well as a graphic advertisement, can be created.
- Any vendor can accept the subscription for future automatic booking.
Note: For expiry and renewing feature, it will totally depend on cron.
For cron admin have to use <store_url>?dispatch=wk_seller_ads_booking.seller_ads_cron.
You can also check out the CS-Cart Product Recommendation System add-on that shows smart product suggestions using AI and offers real-time recommendations.
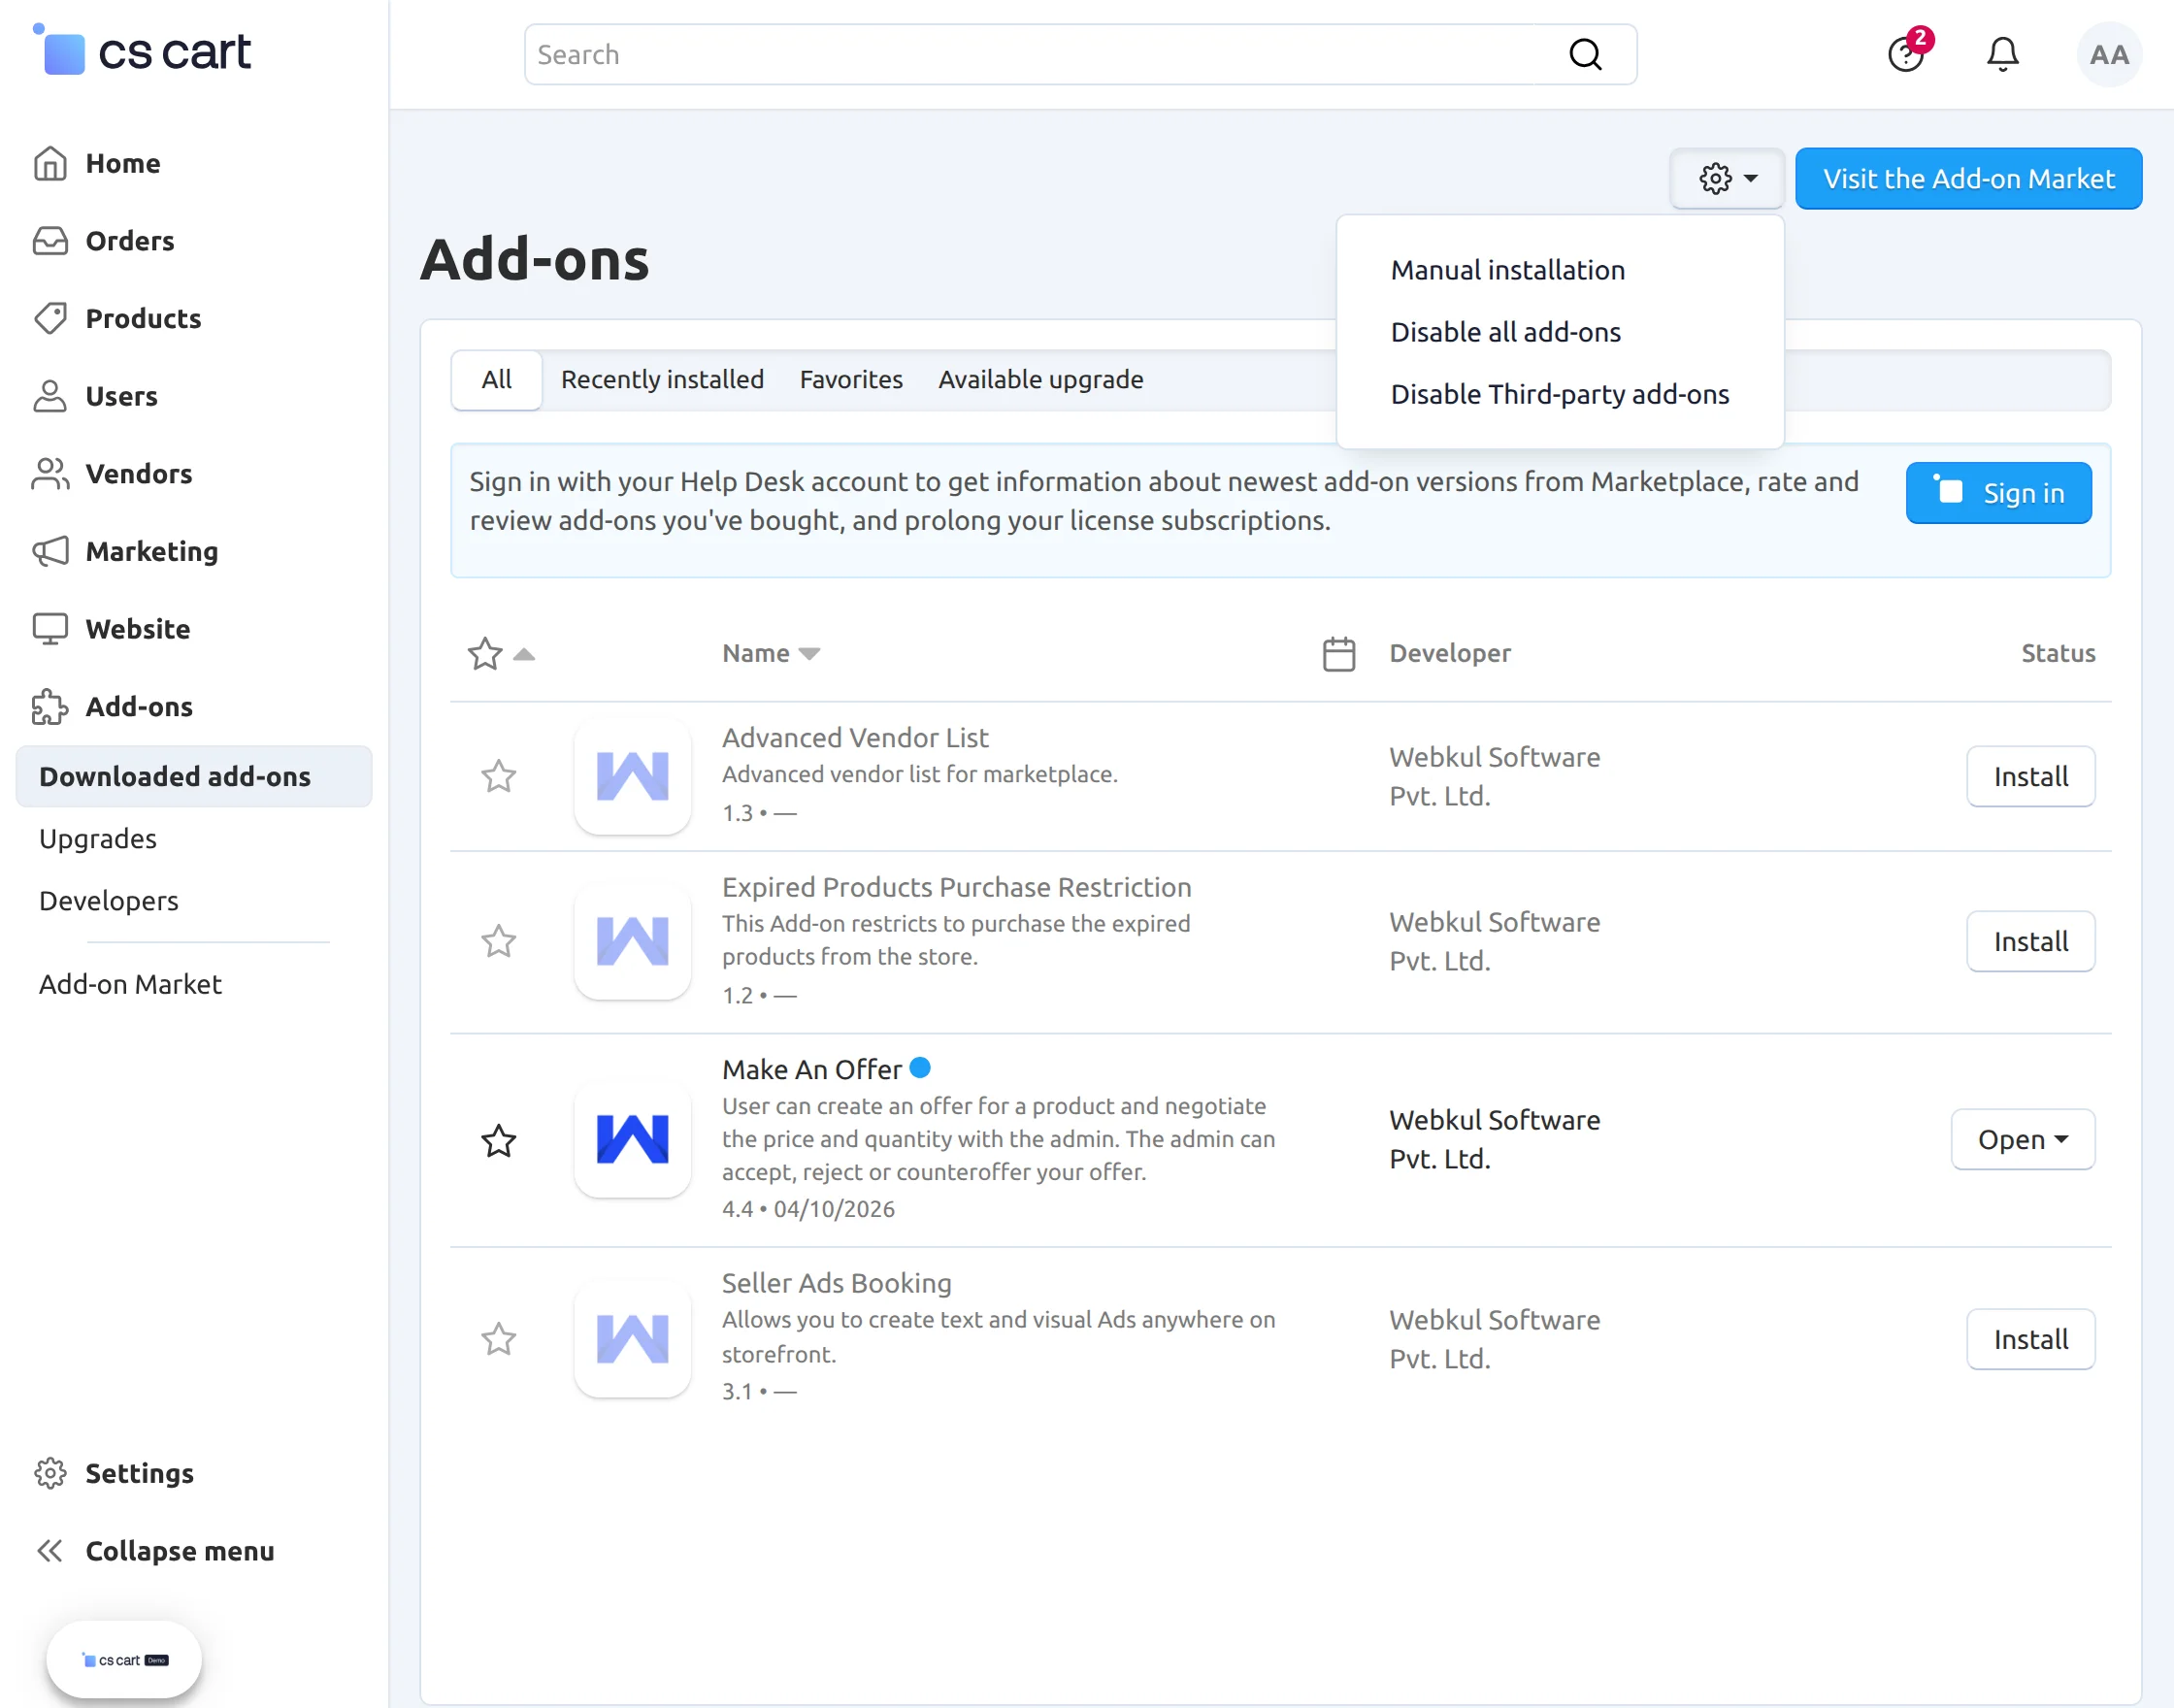
How To Upload And Install
Click on “Local” to browse the zip file and then click on “Upload & Install” as shown below in snapshot.
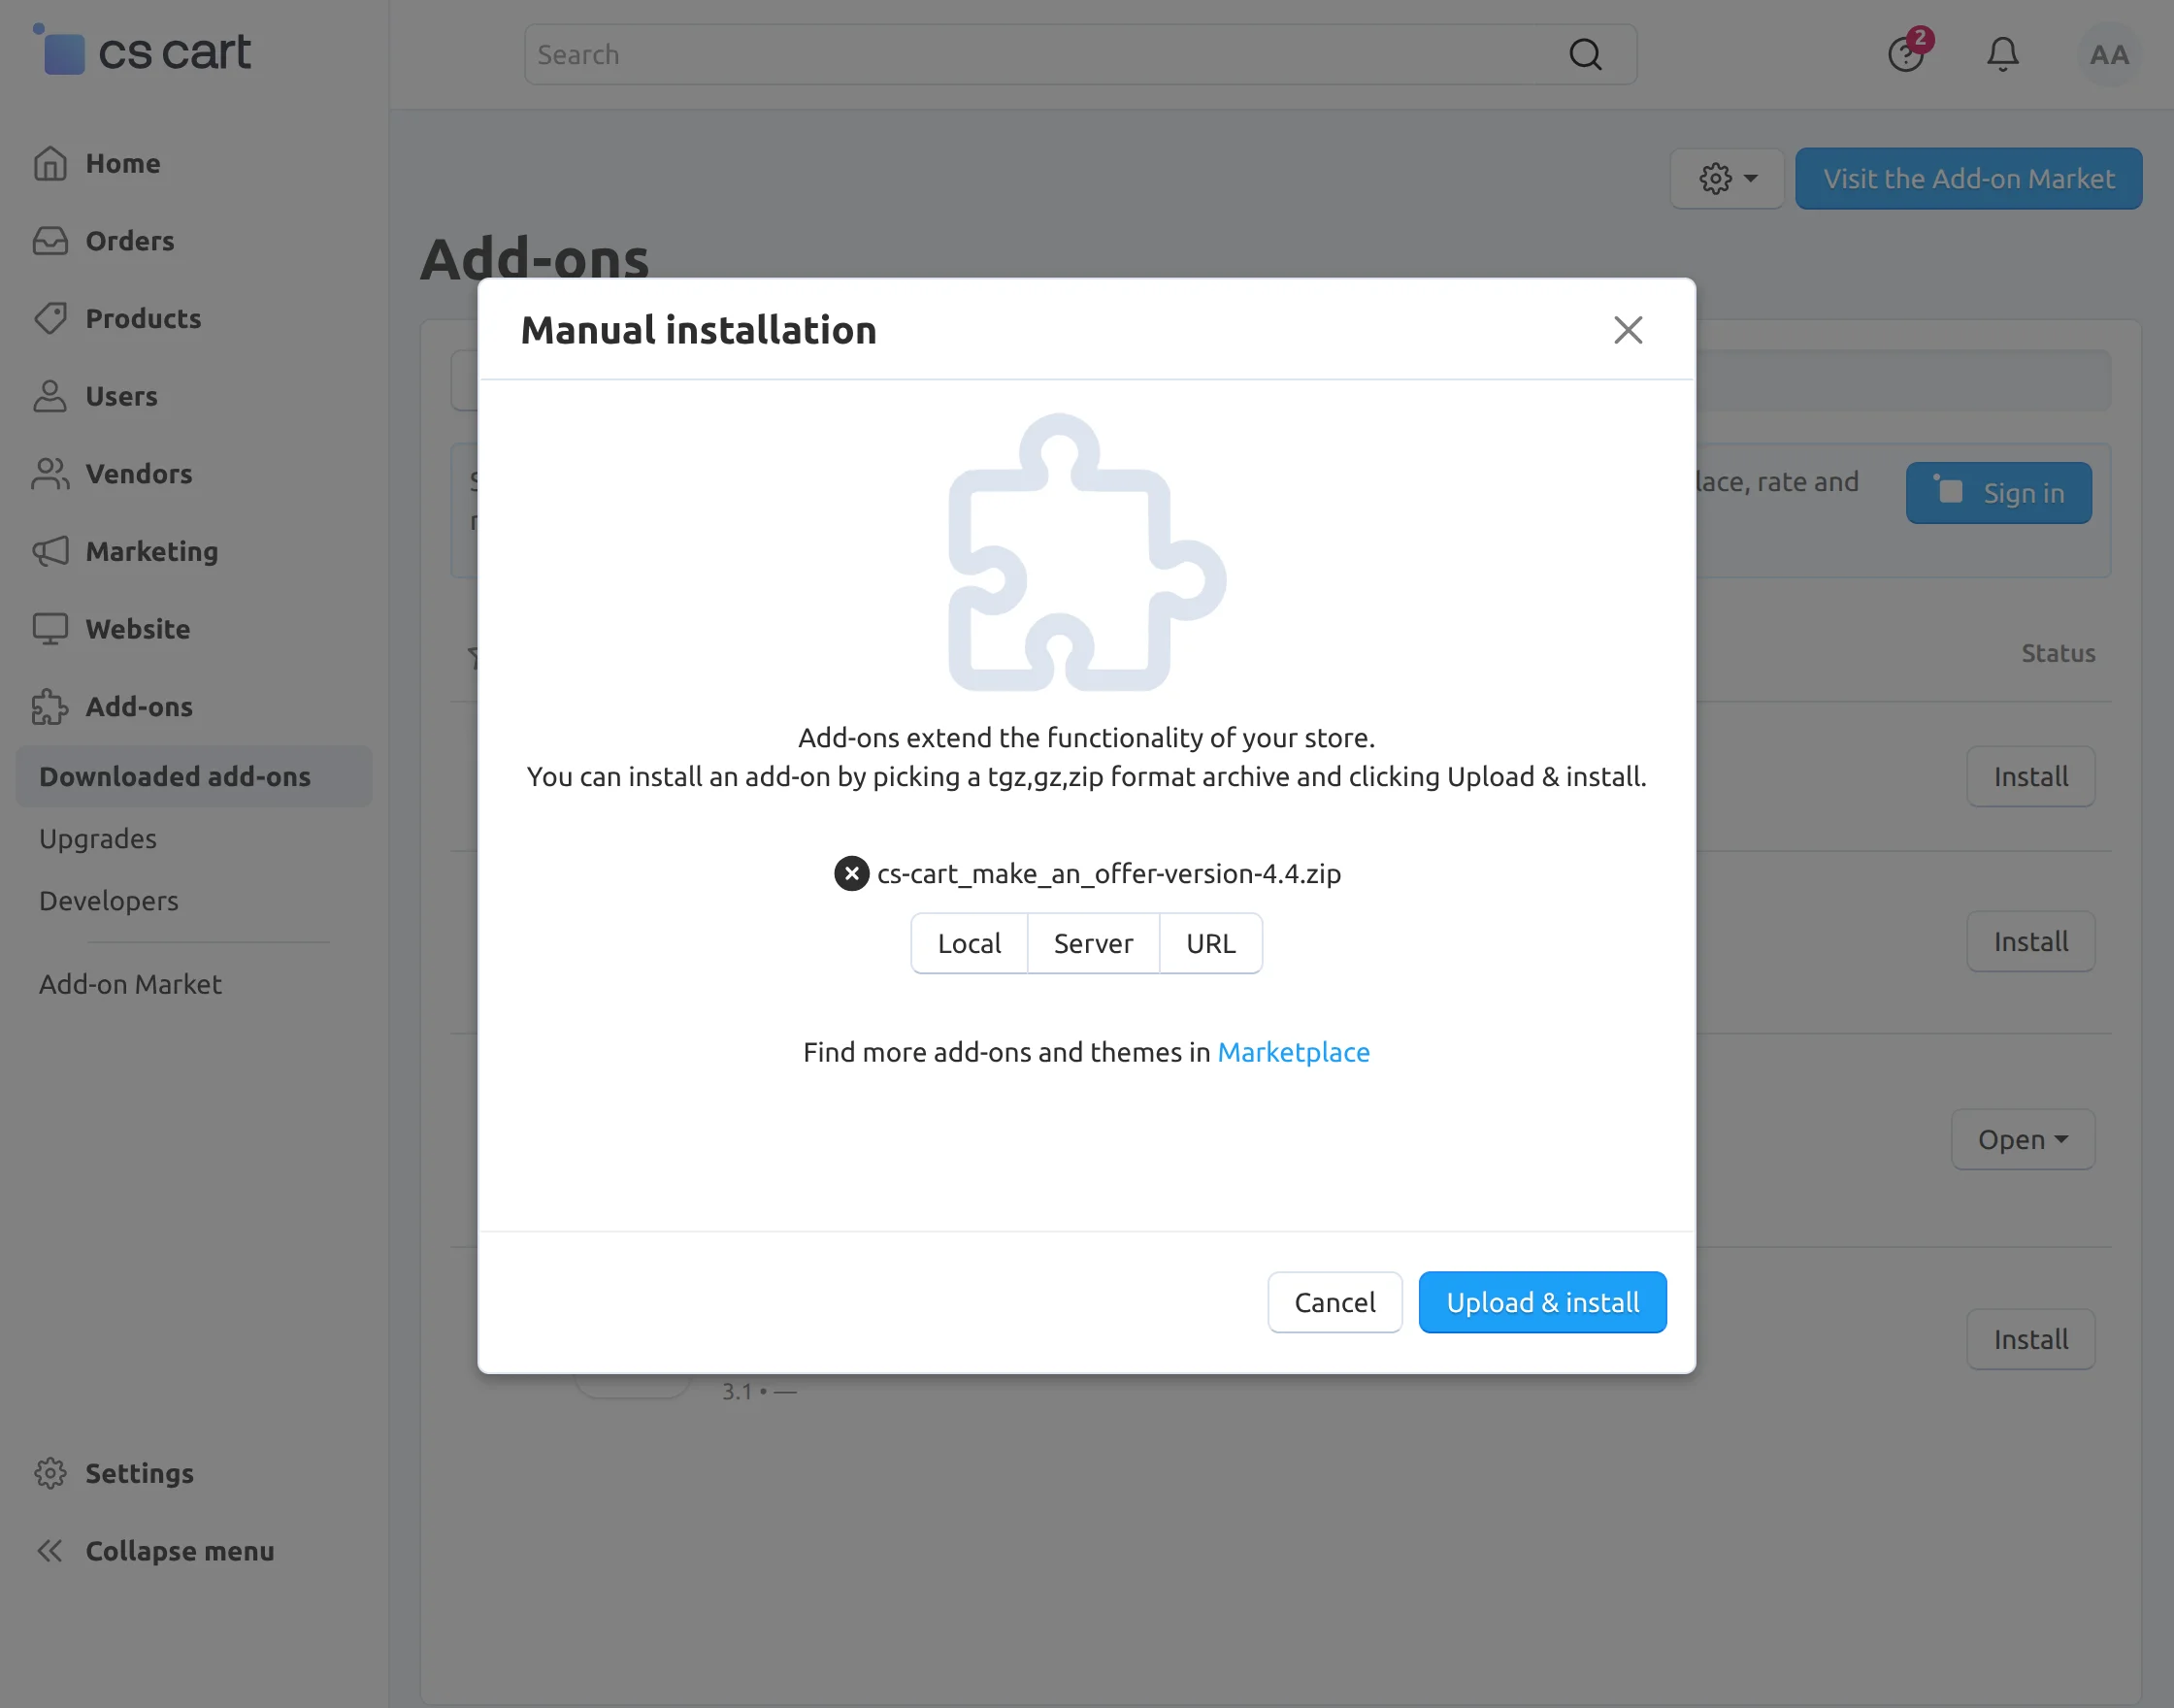
The add-on will be installed successfully with a notice to get the User Guide manual link.
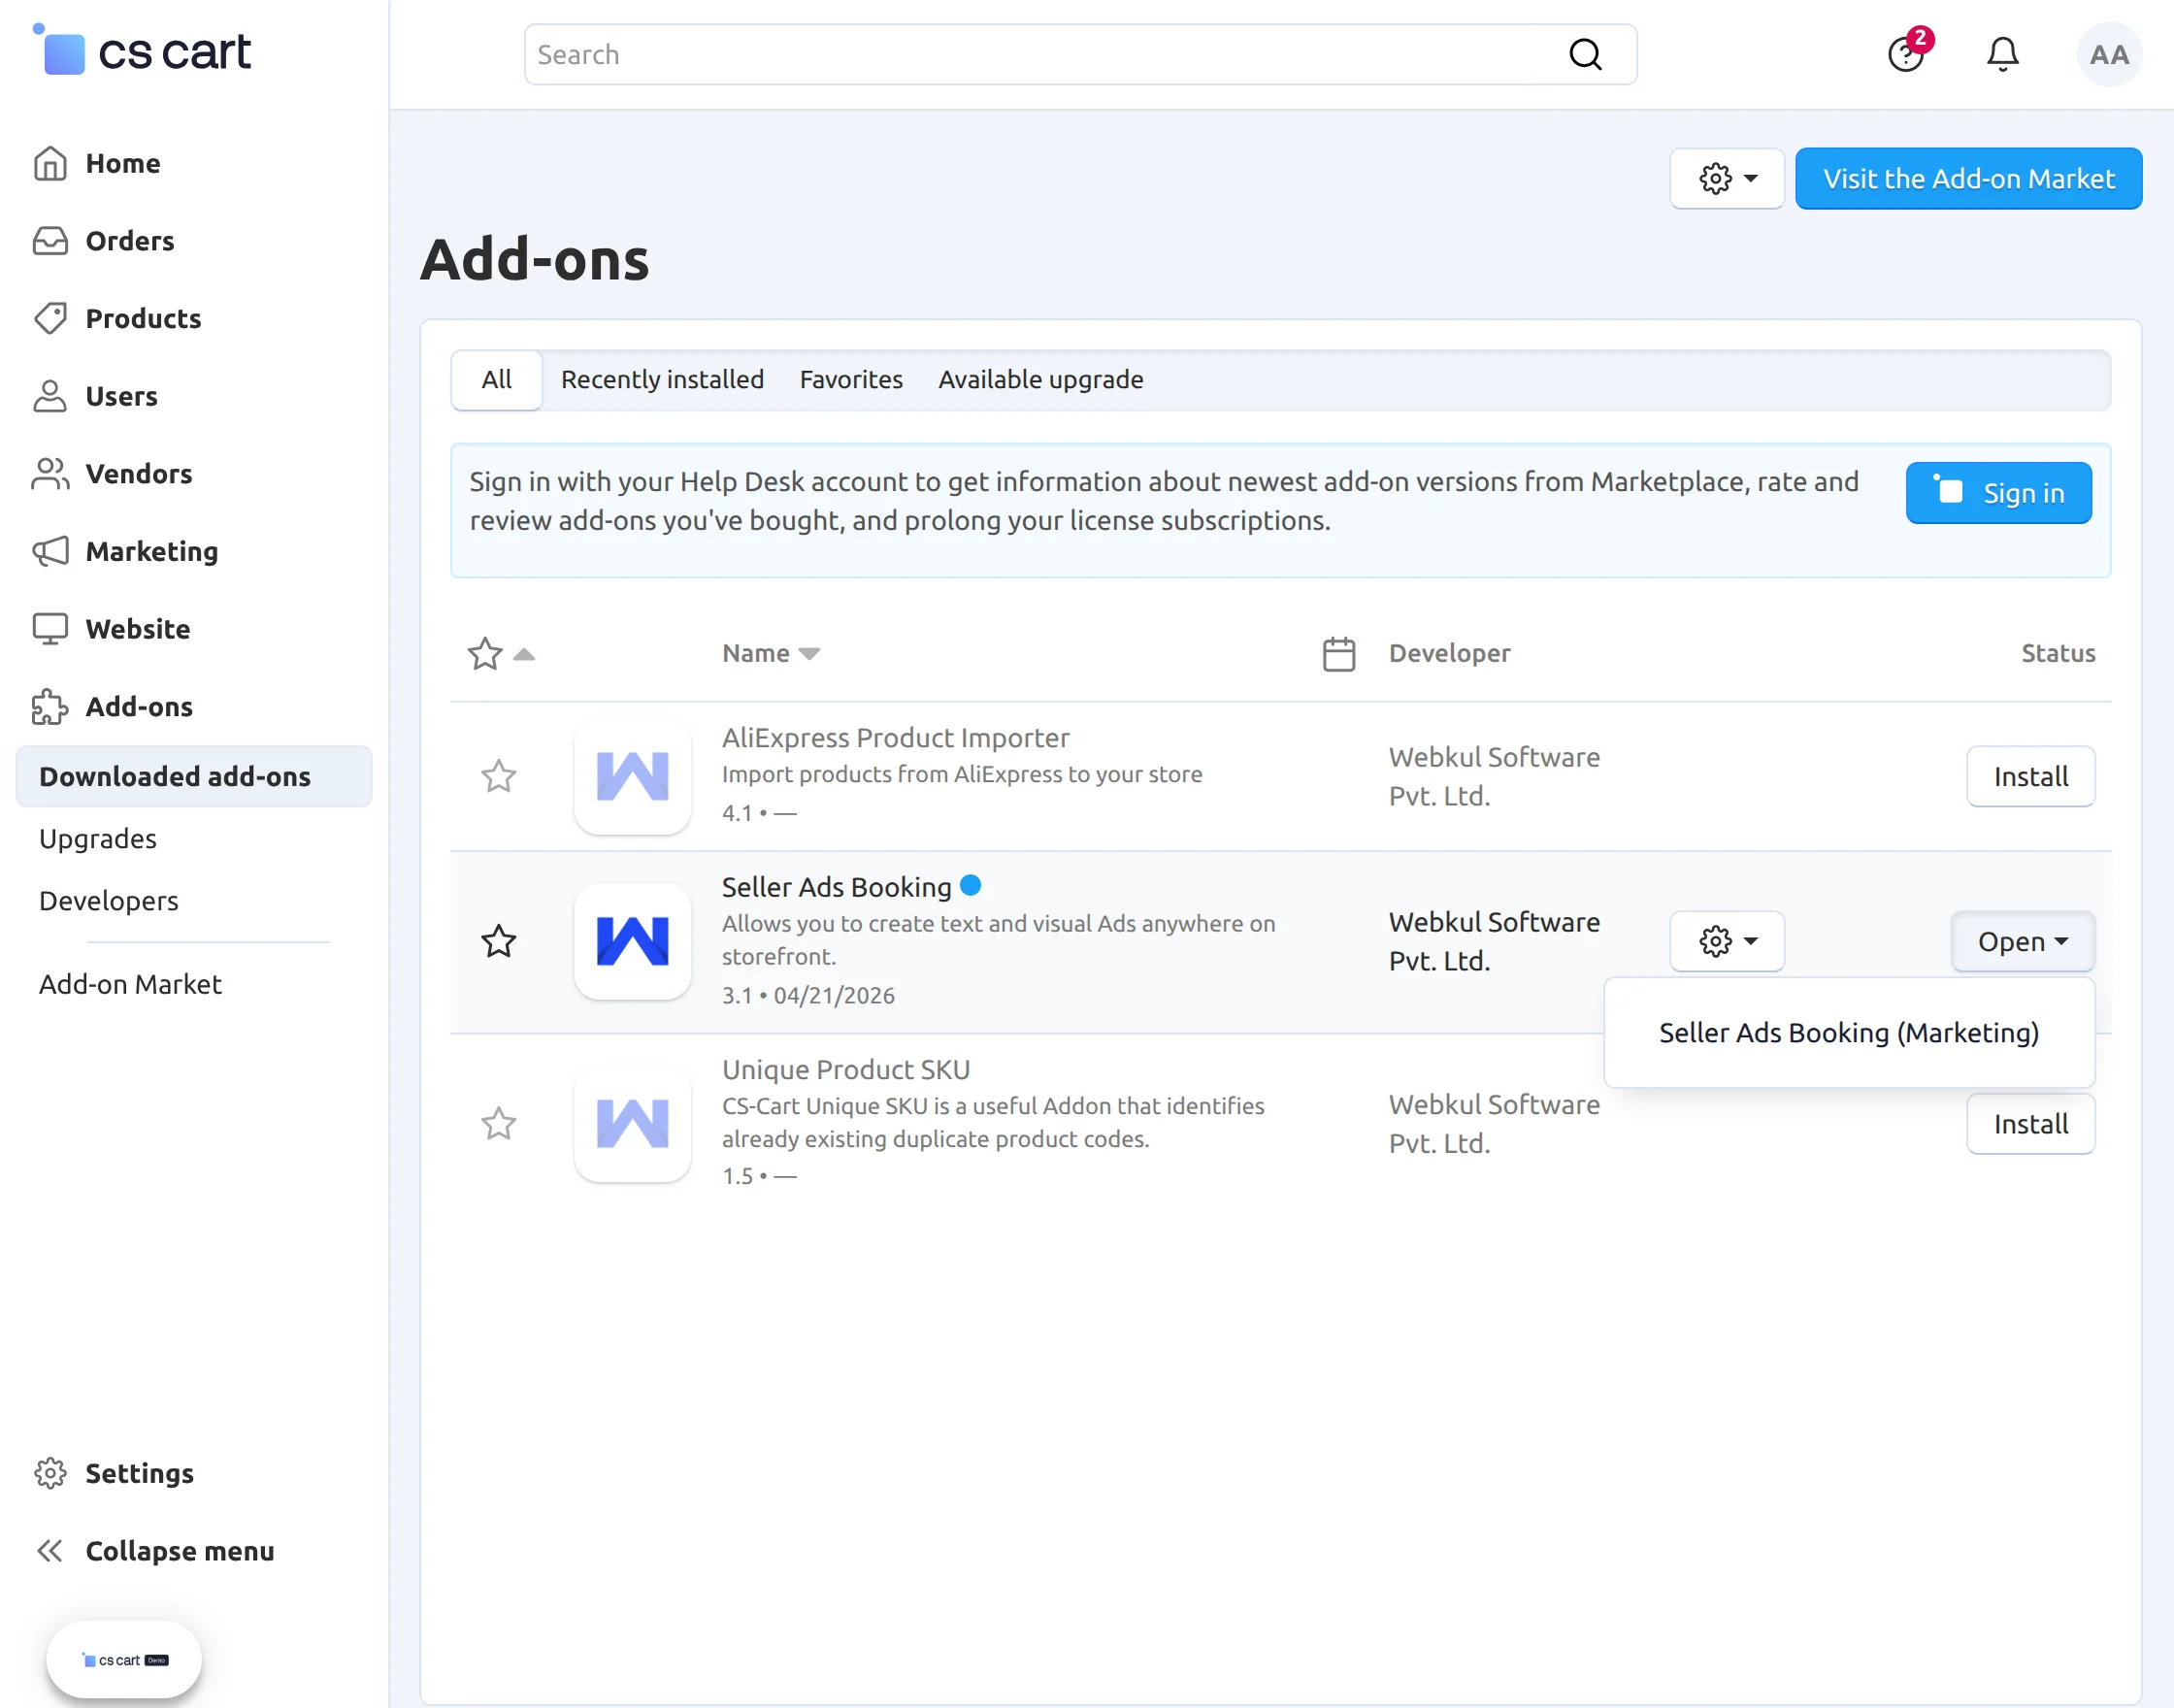
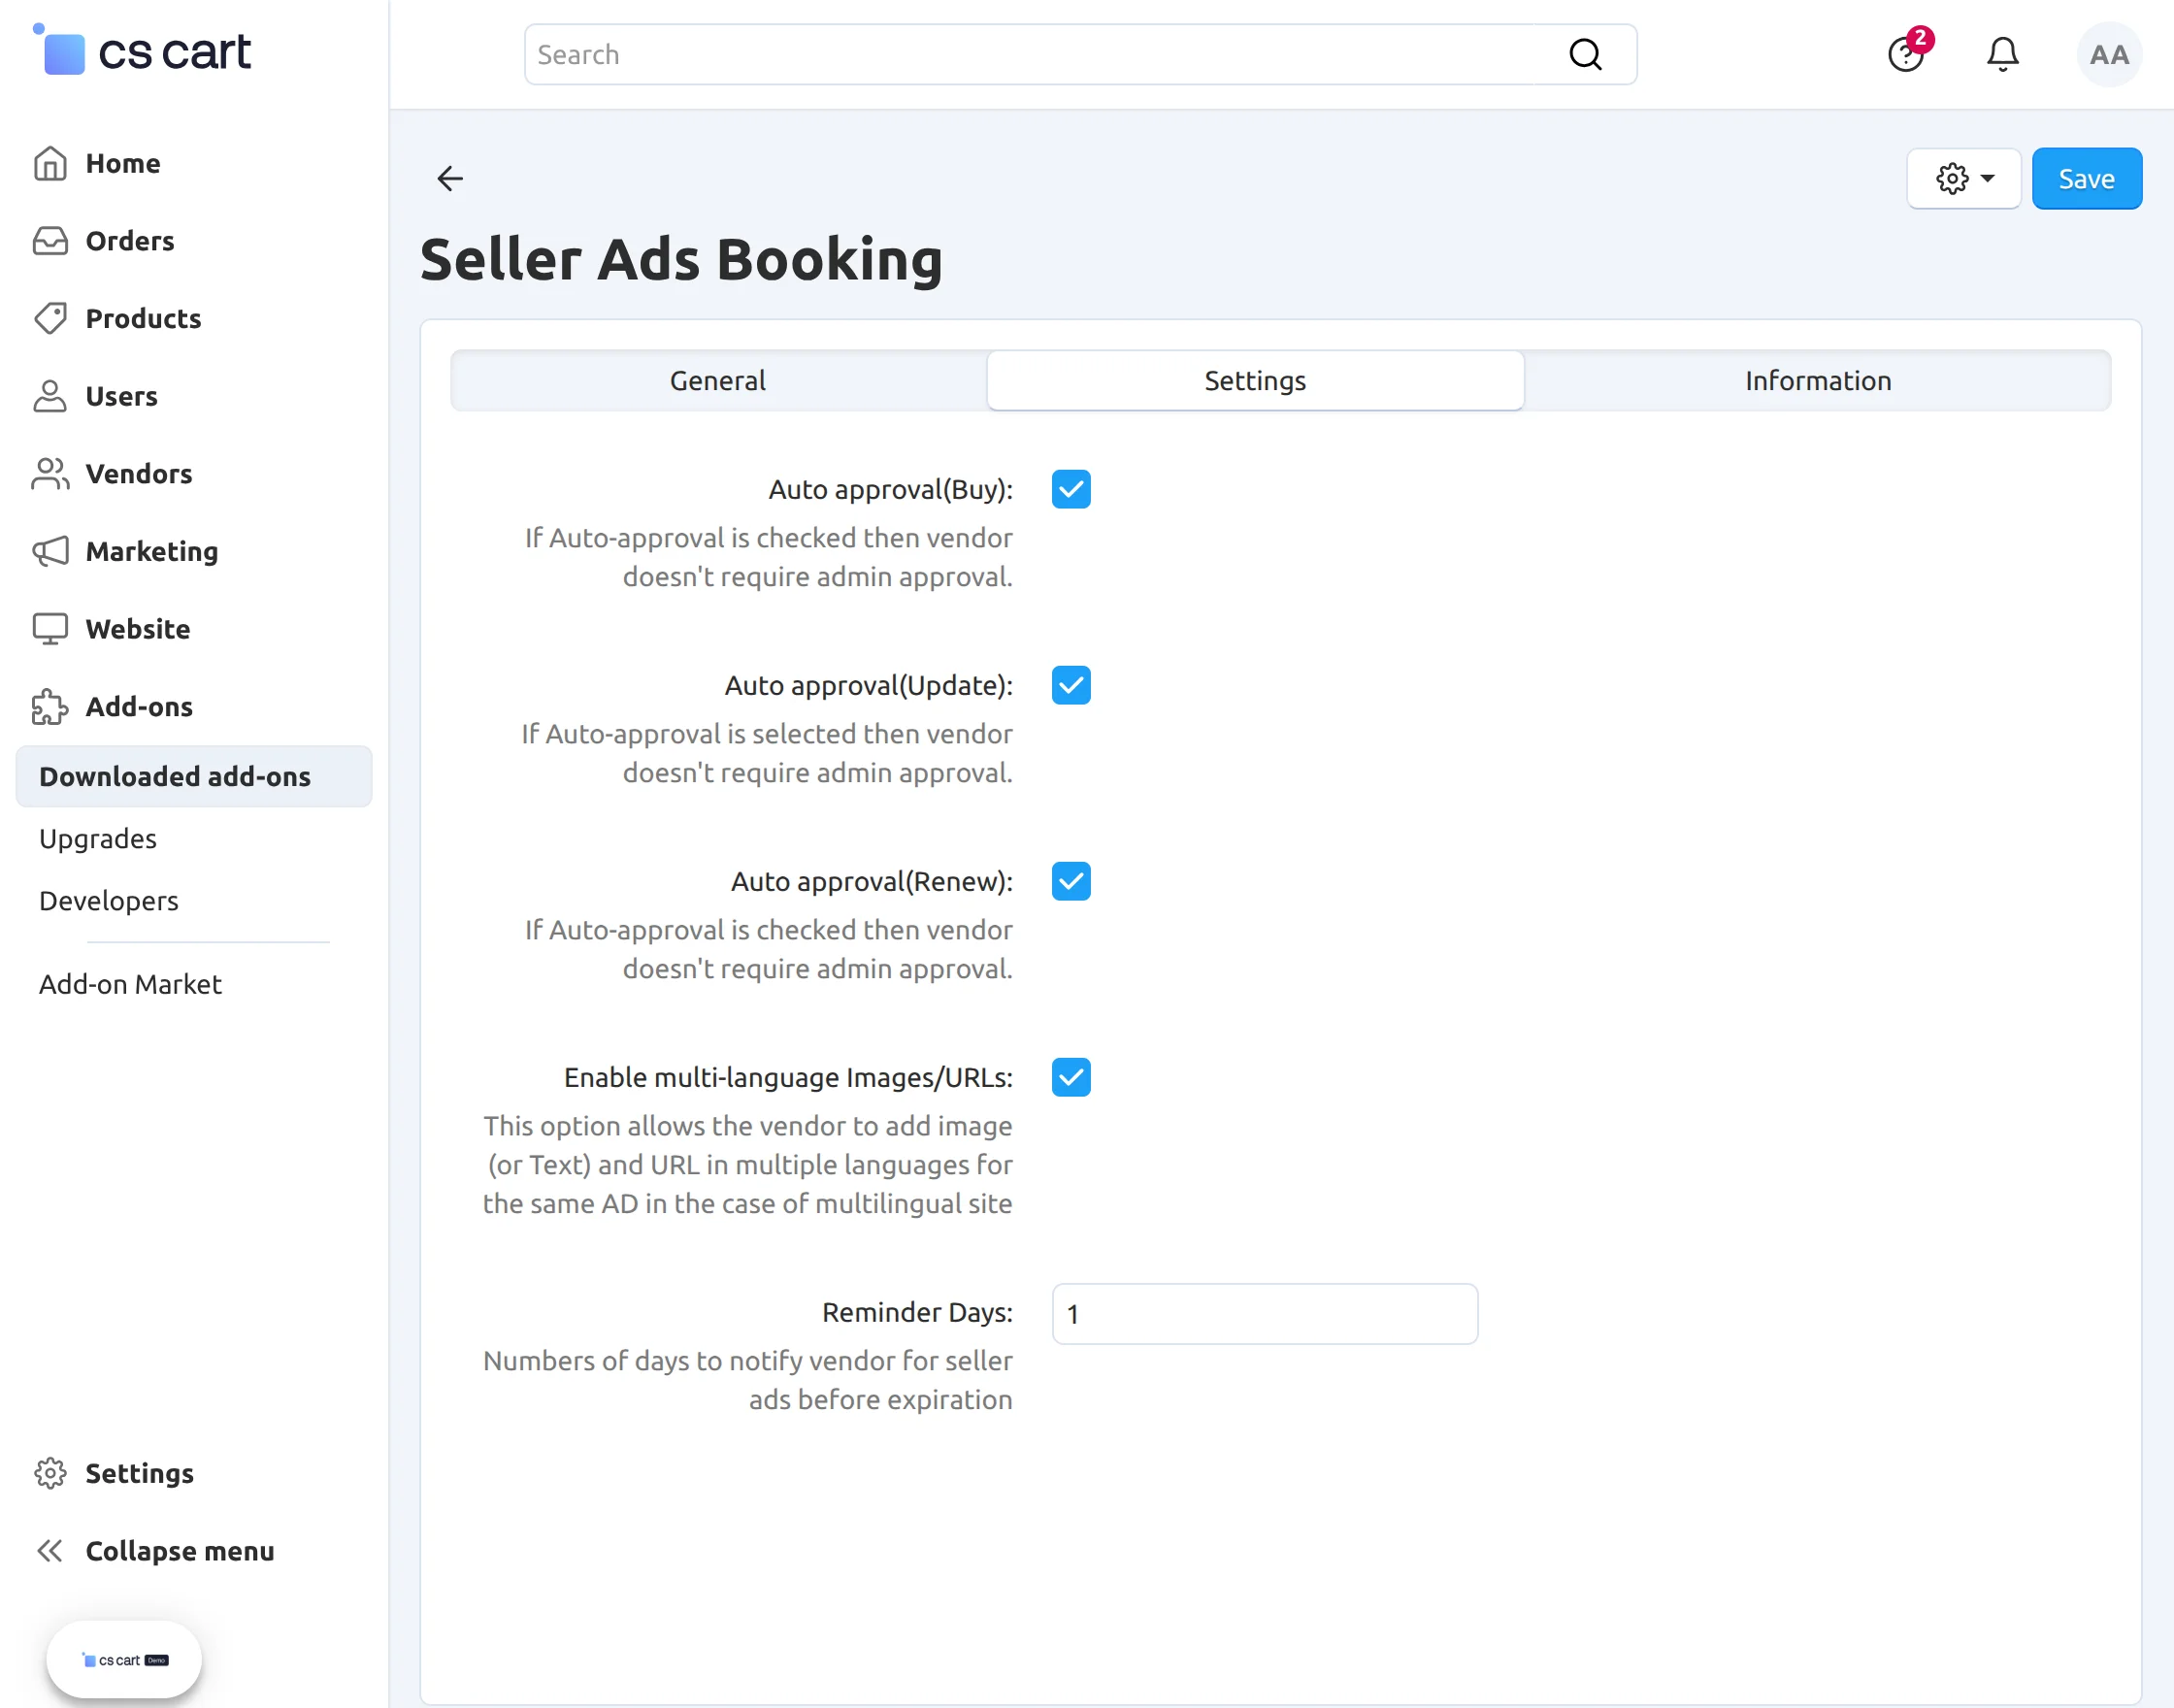
Add-on Configuration
After add-on installation, we need to configure the settings.
Make the necessary settings as per the below snapshot.
- If Auto-approval options are checked then vendor doesn’t require admin approval to buy, update and renew the booking.
- Next option is to allow the vendor to add image (or Text) and URL in multiple languages in the case of multilingual site
- Reminder Days are the numbers of days to notify vendor for seller ads before expiration.
Admin-View
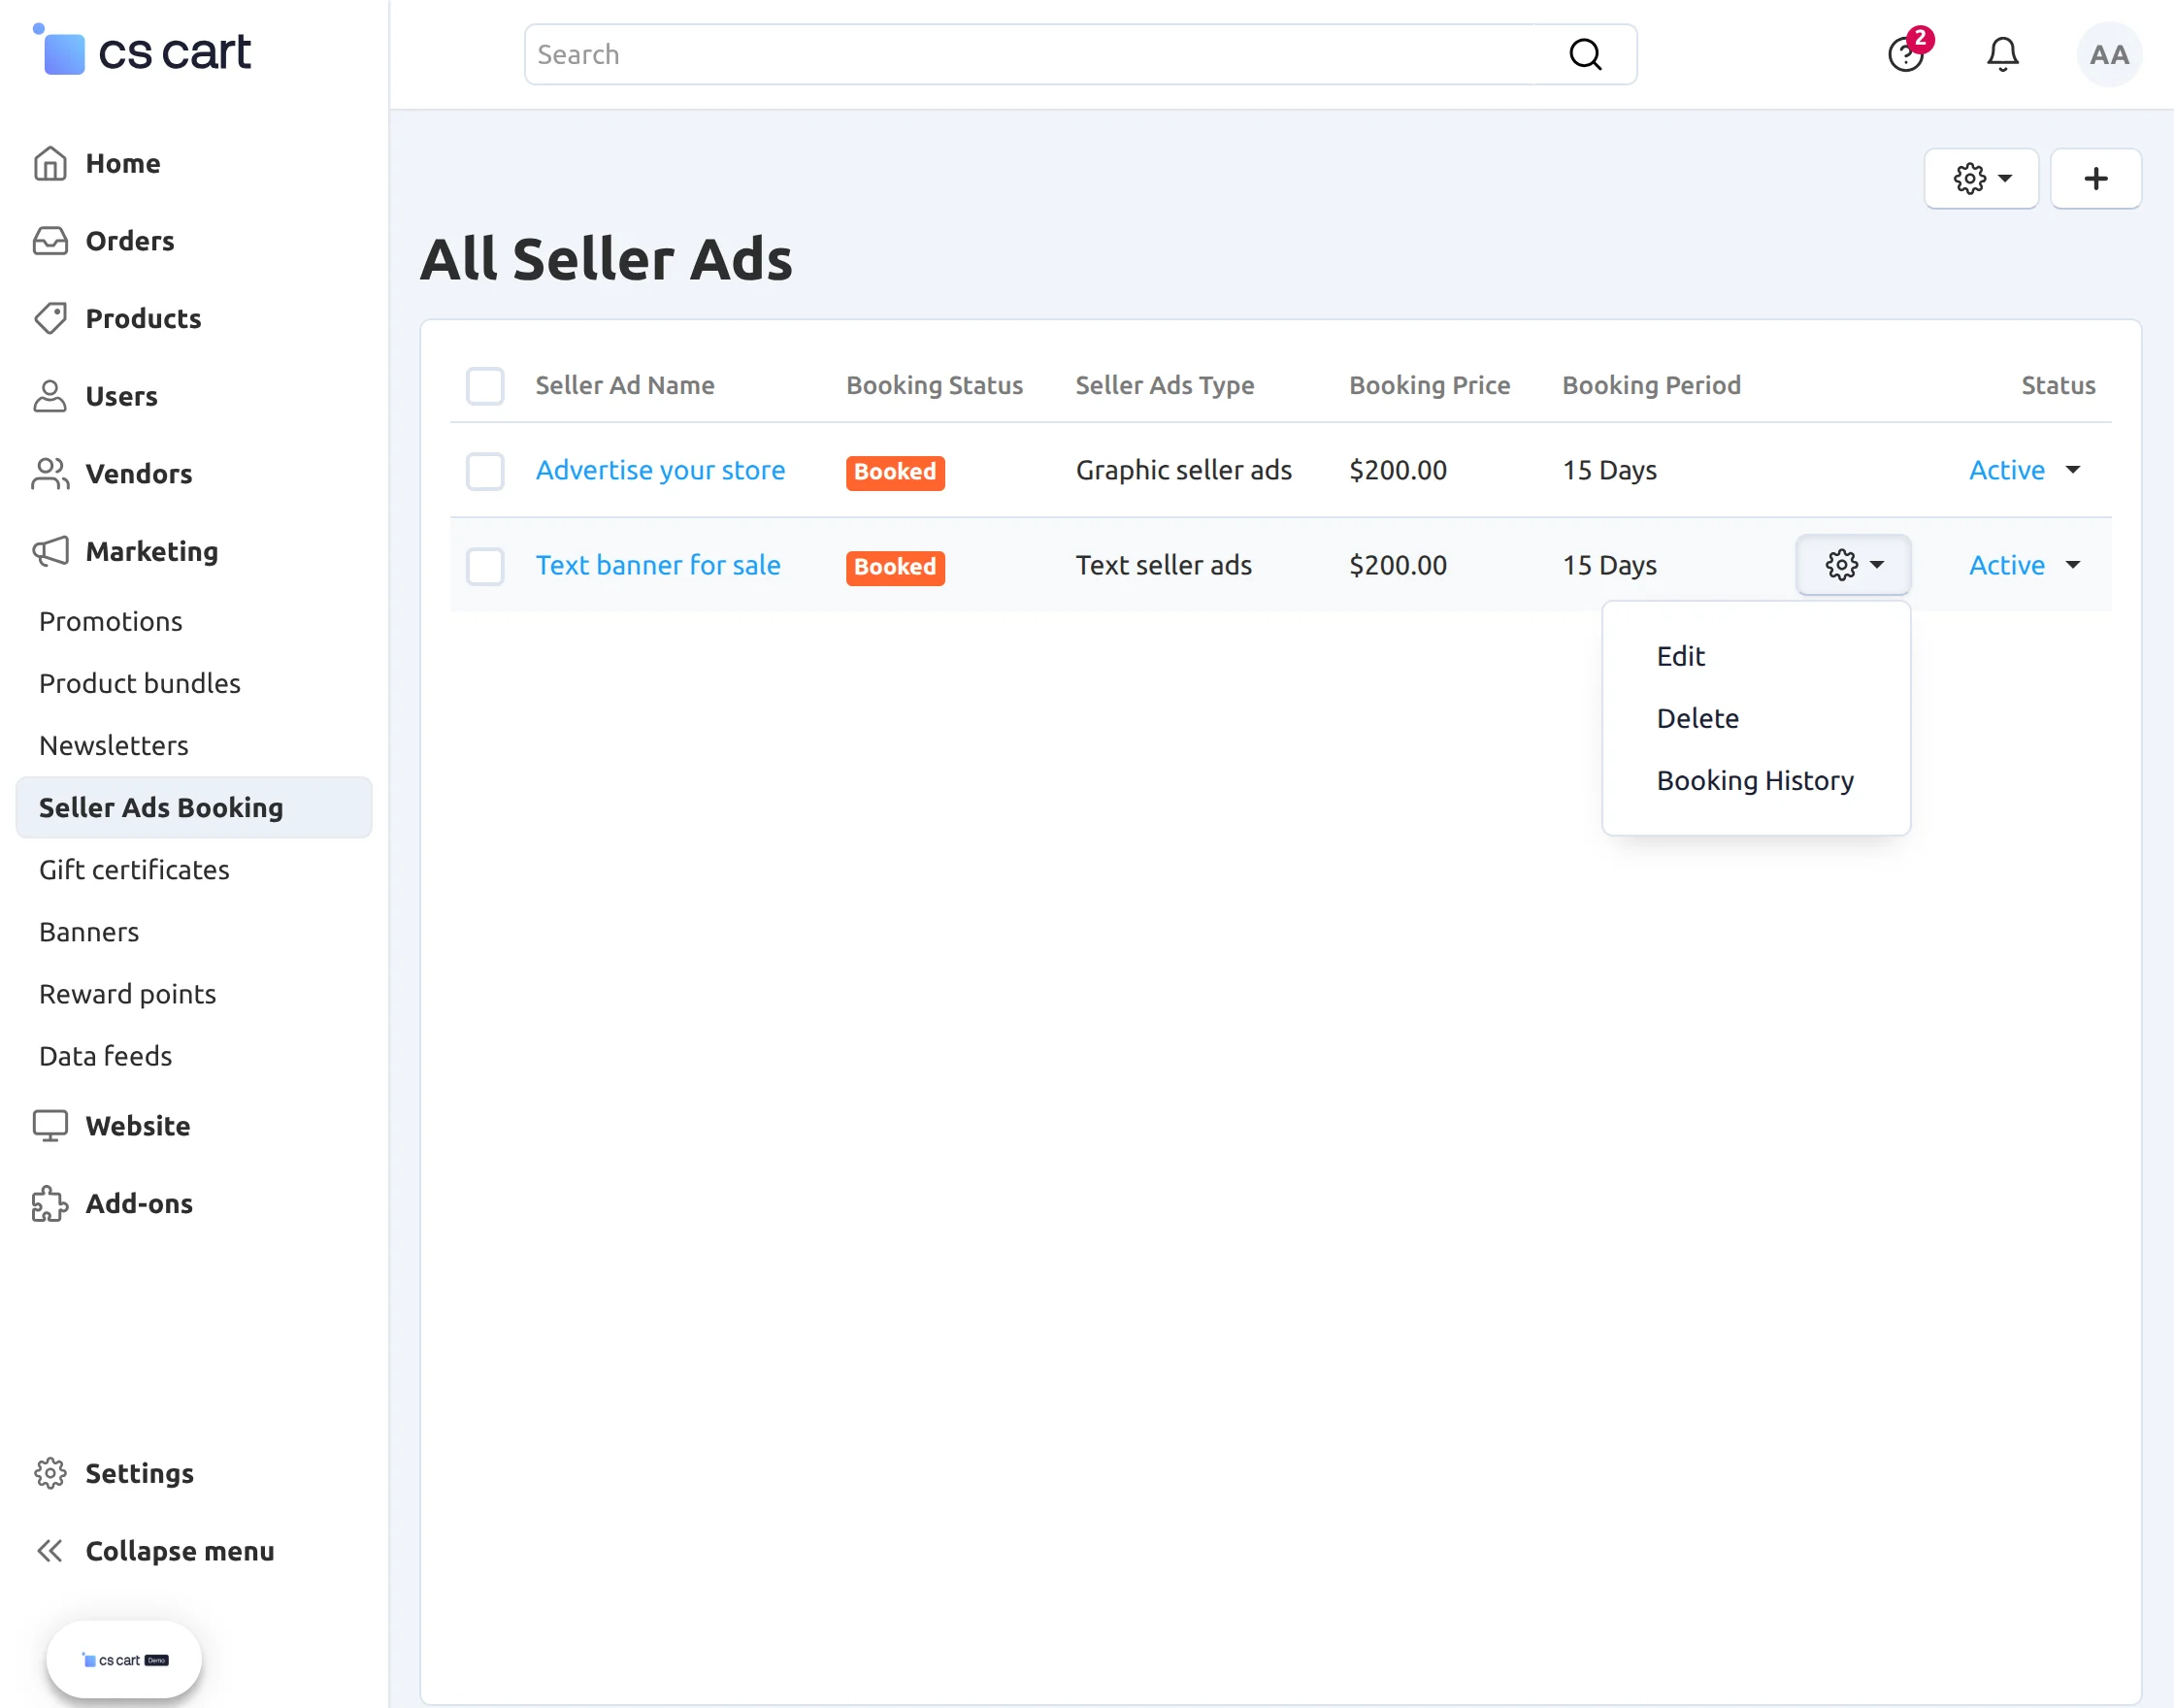
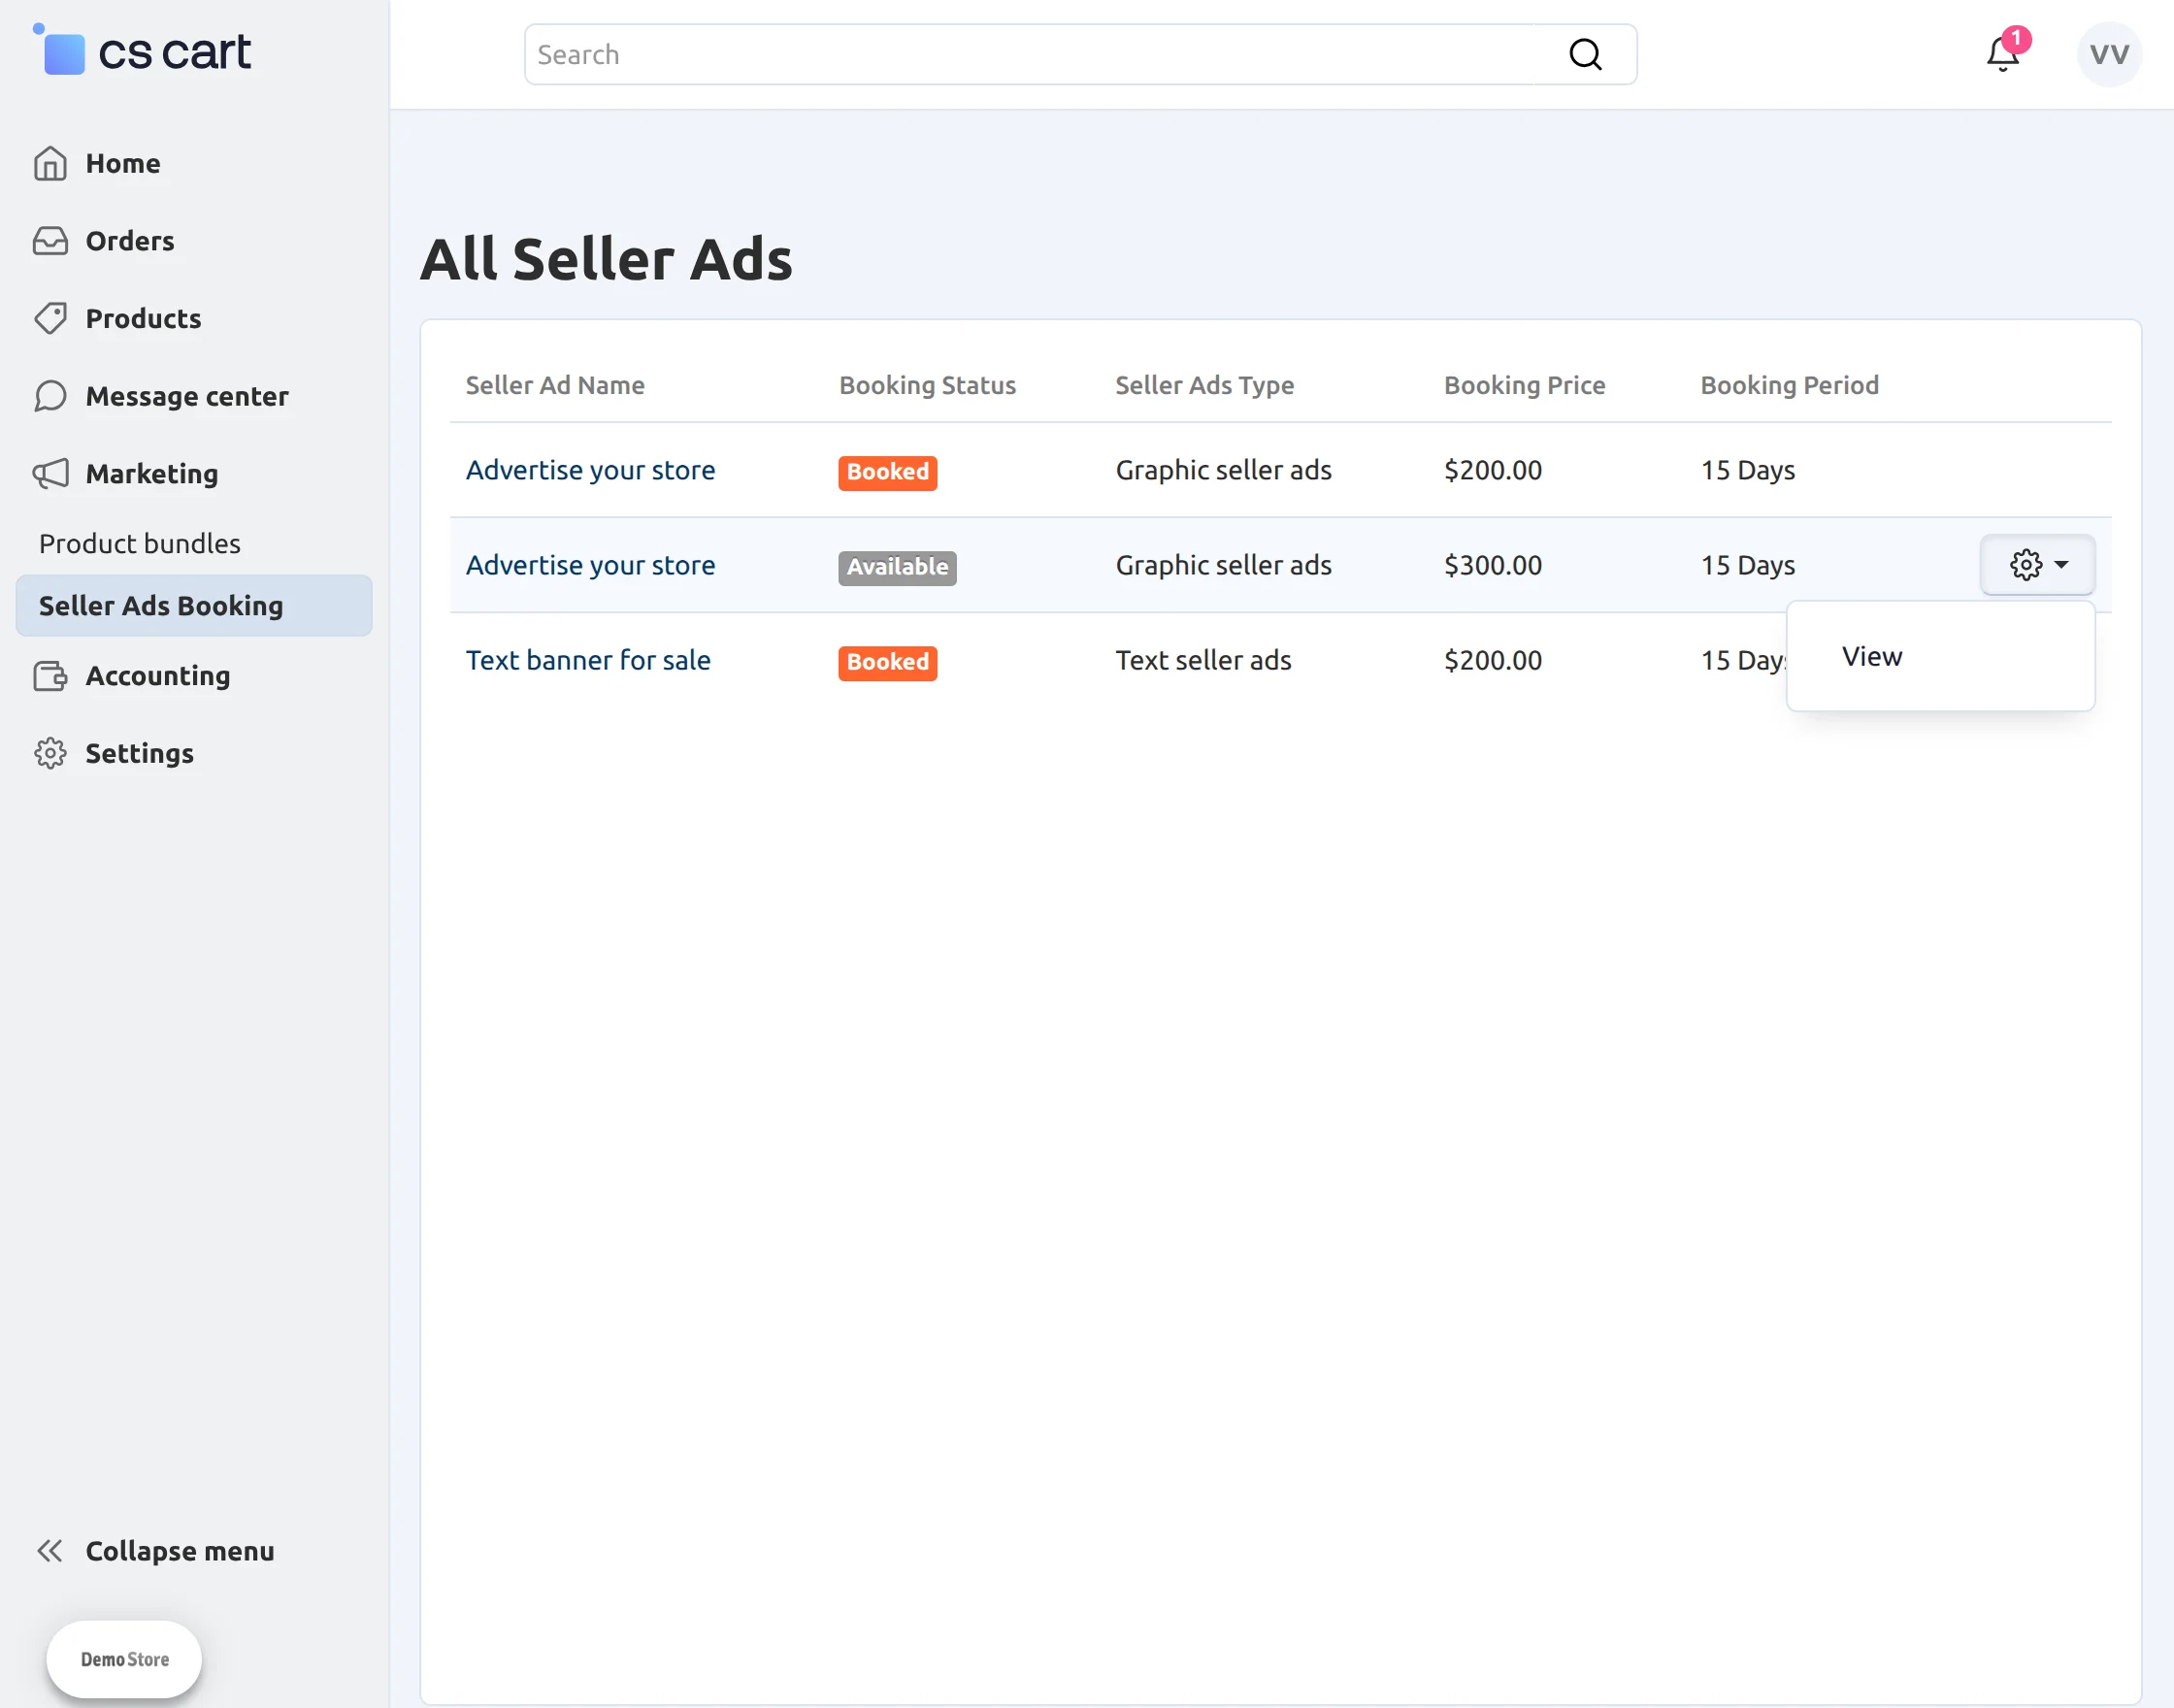
Go To Marketing -> Seller Ads Bookings.
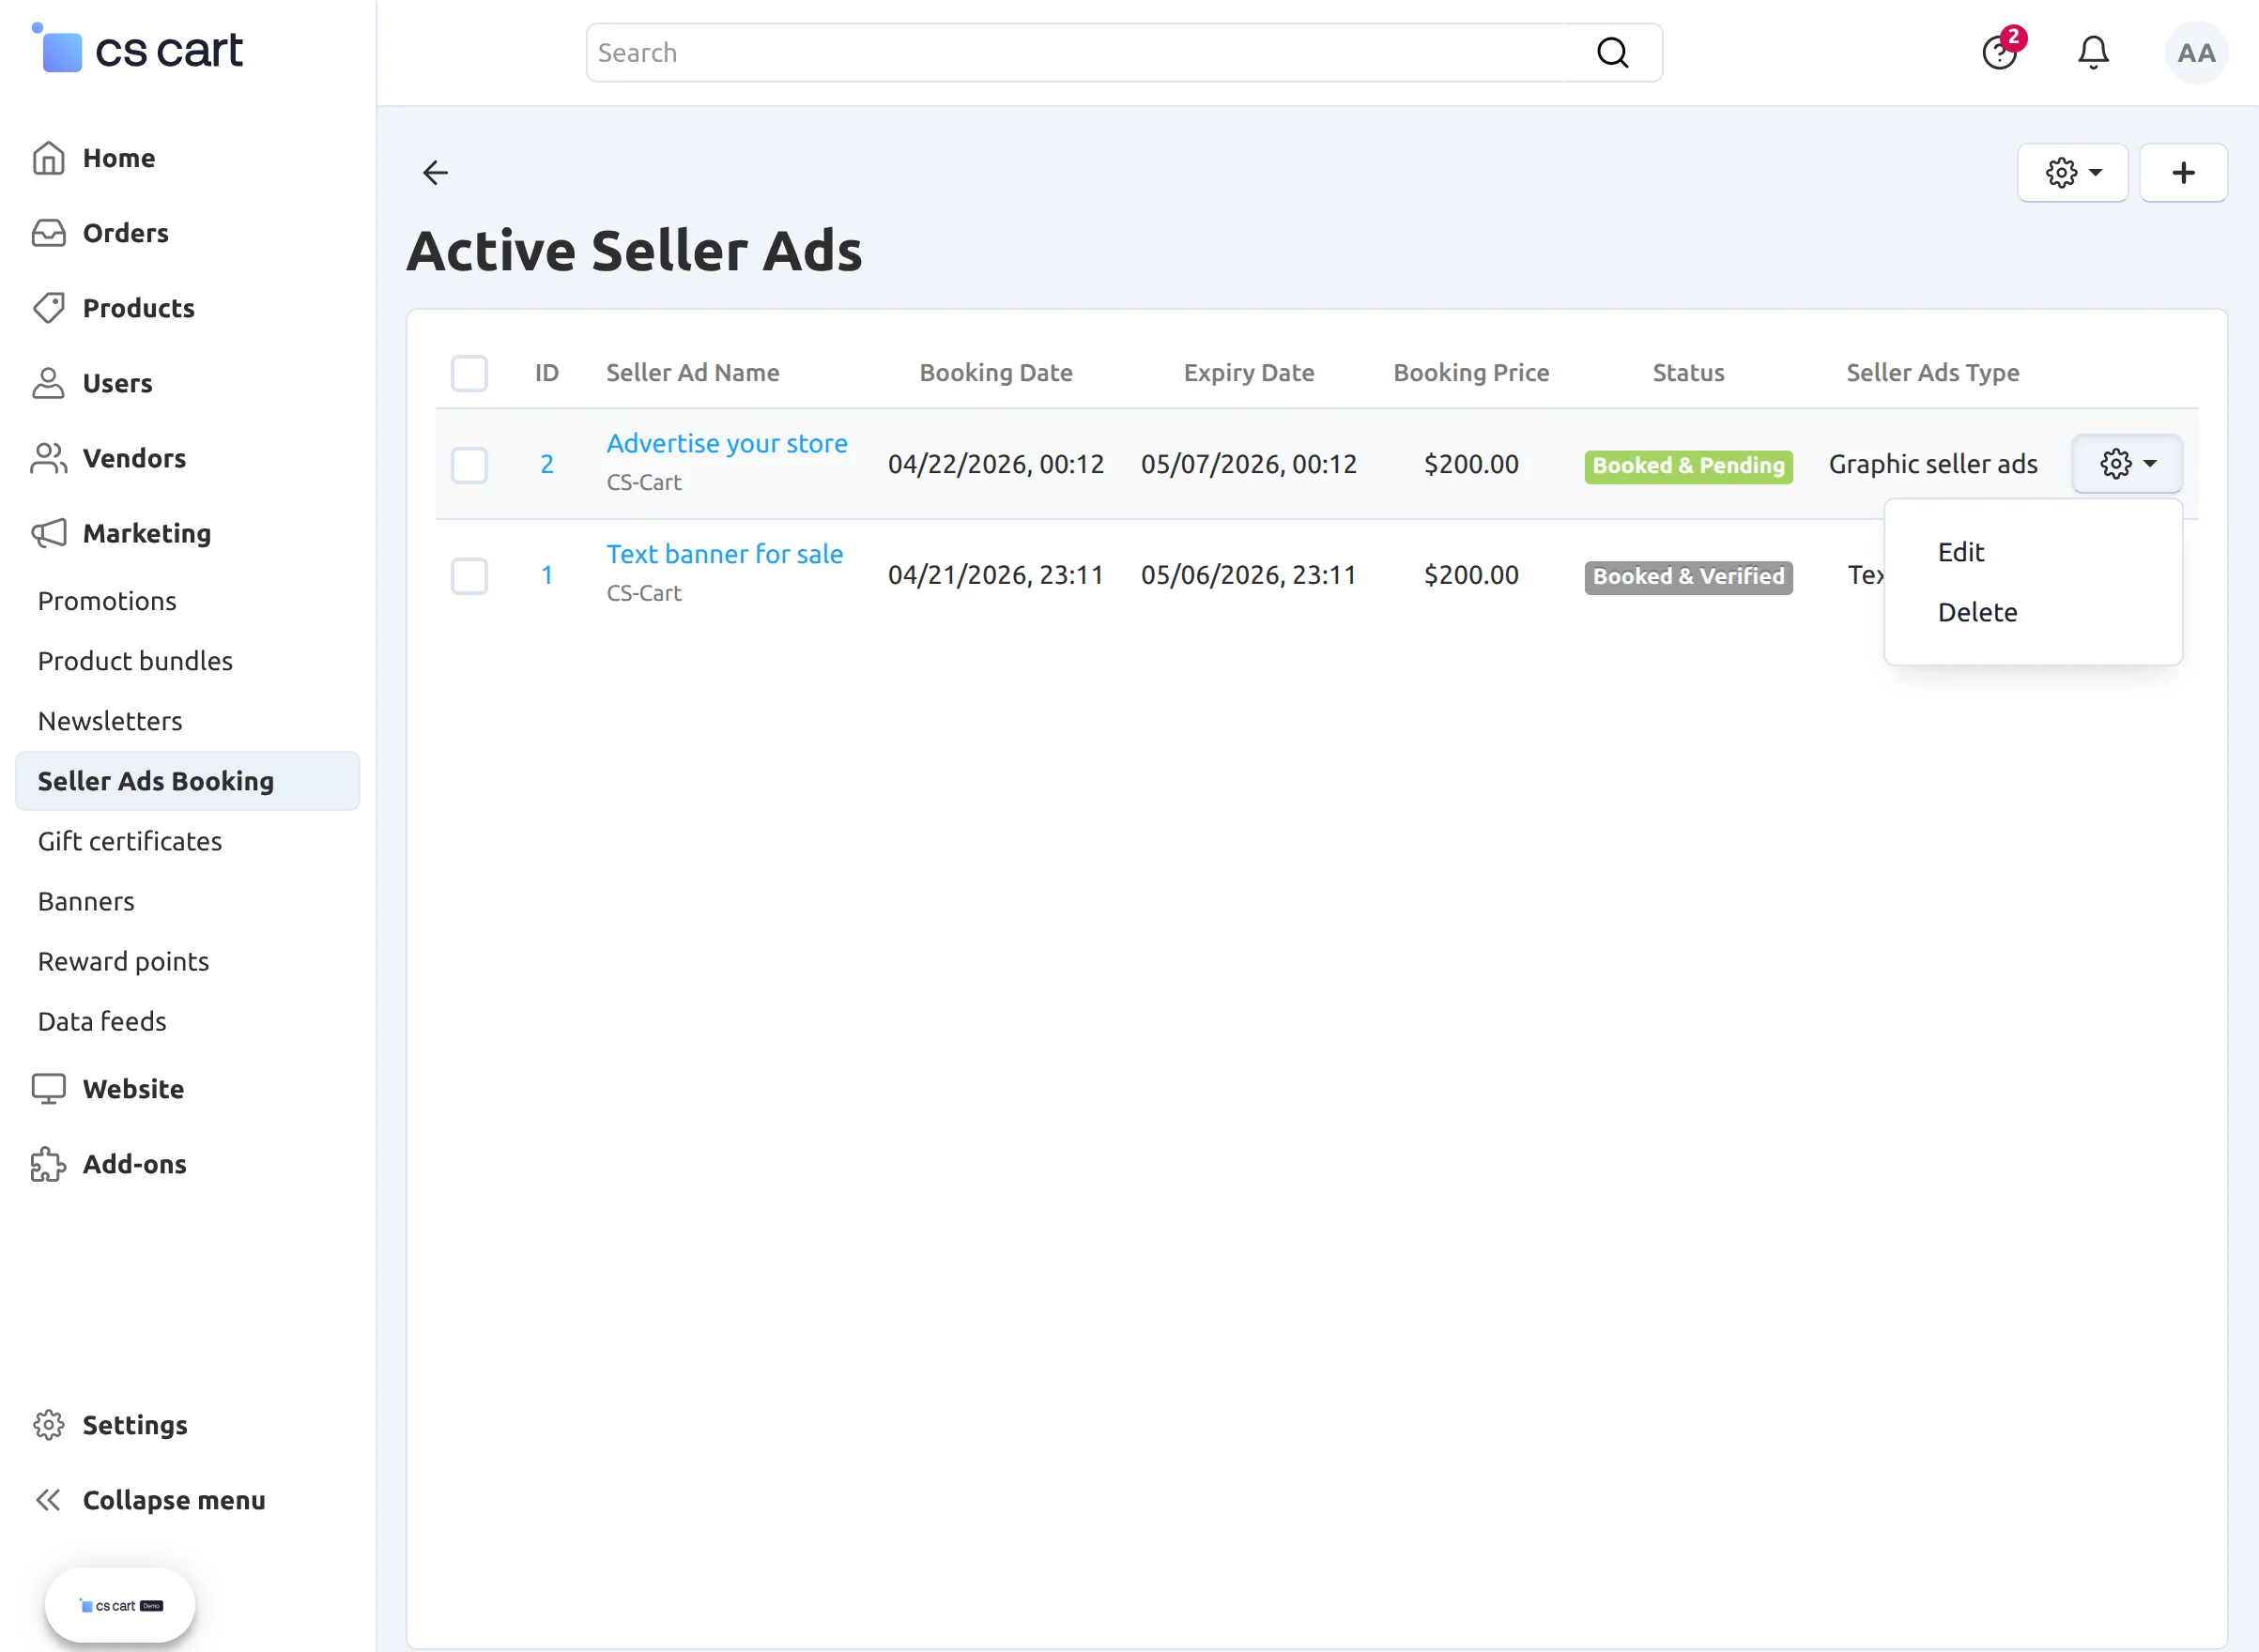
Here the admin can create graphic and text seller ads that can then be made available for vendors to book.
All the seller ads will be listed here along with the booking status which can further be edited or deleted.
A separate option has been provided to view only the active ads which are booked and verified.
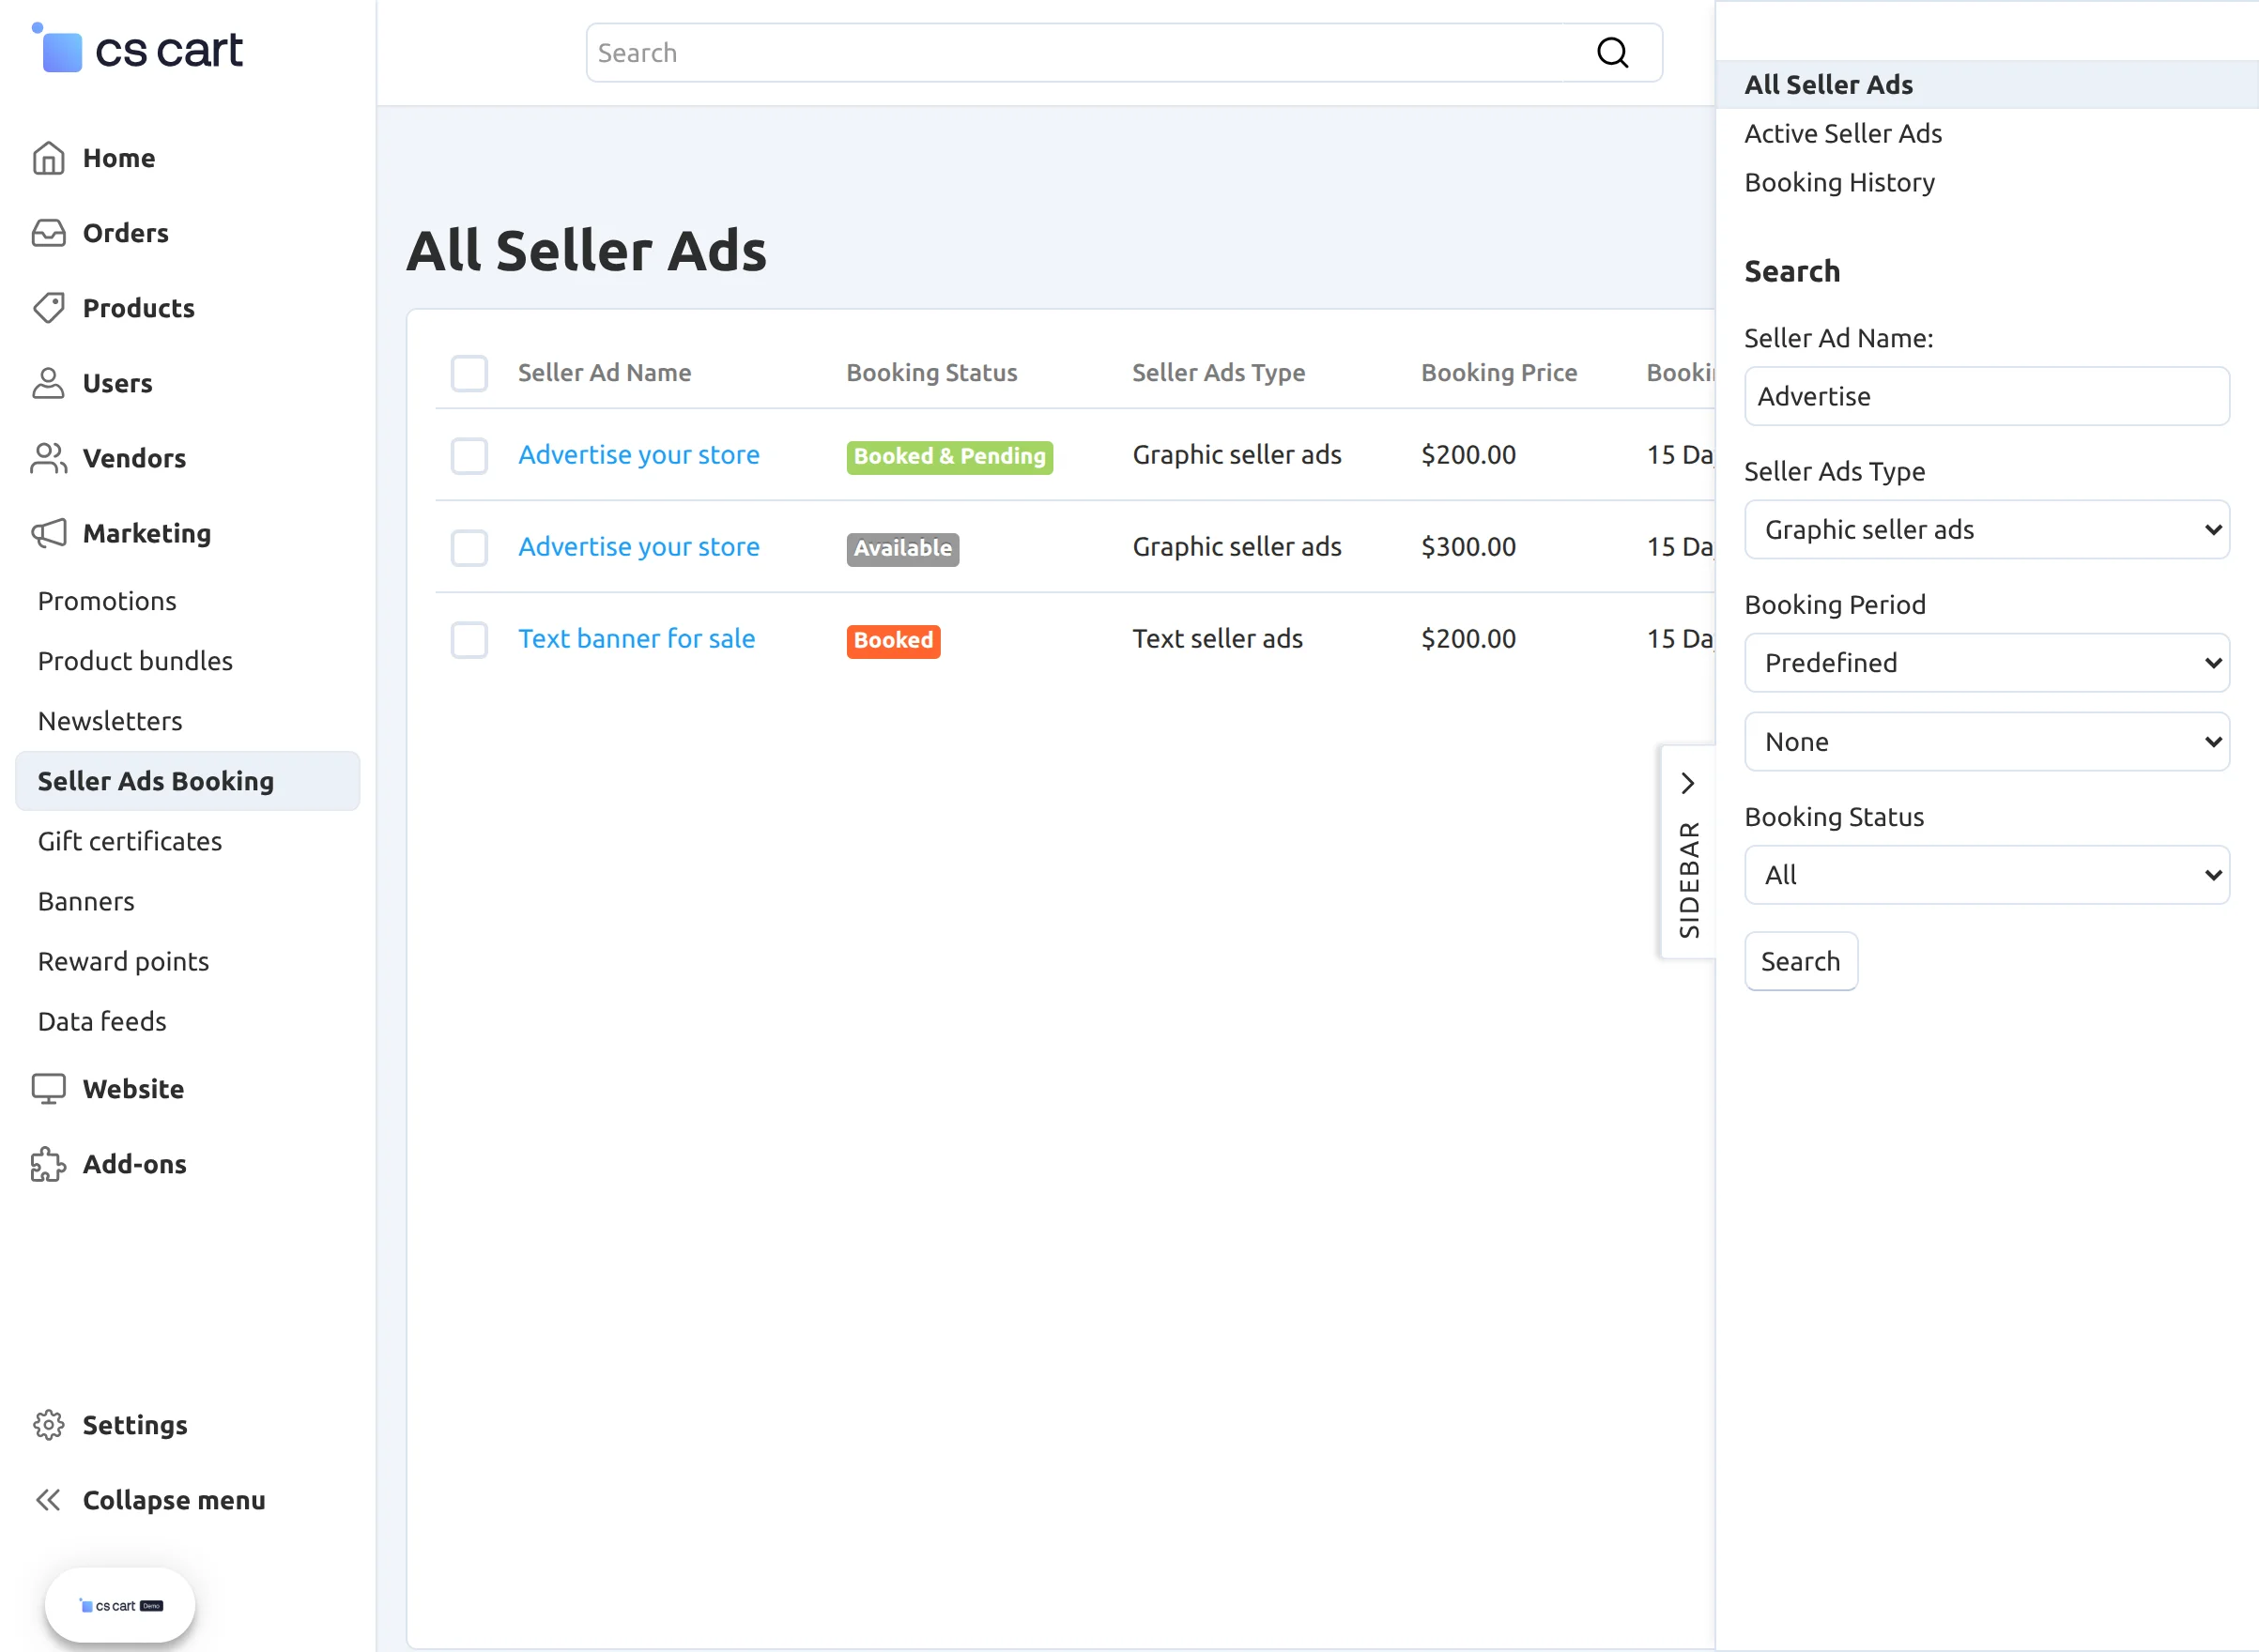
Active Seller Ads-
Booking History-
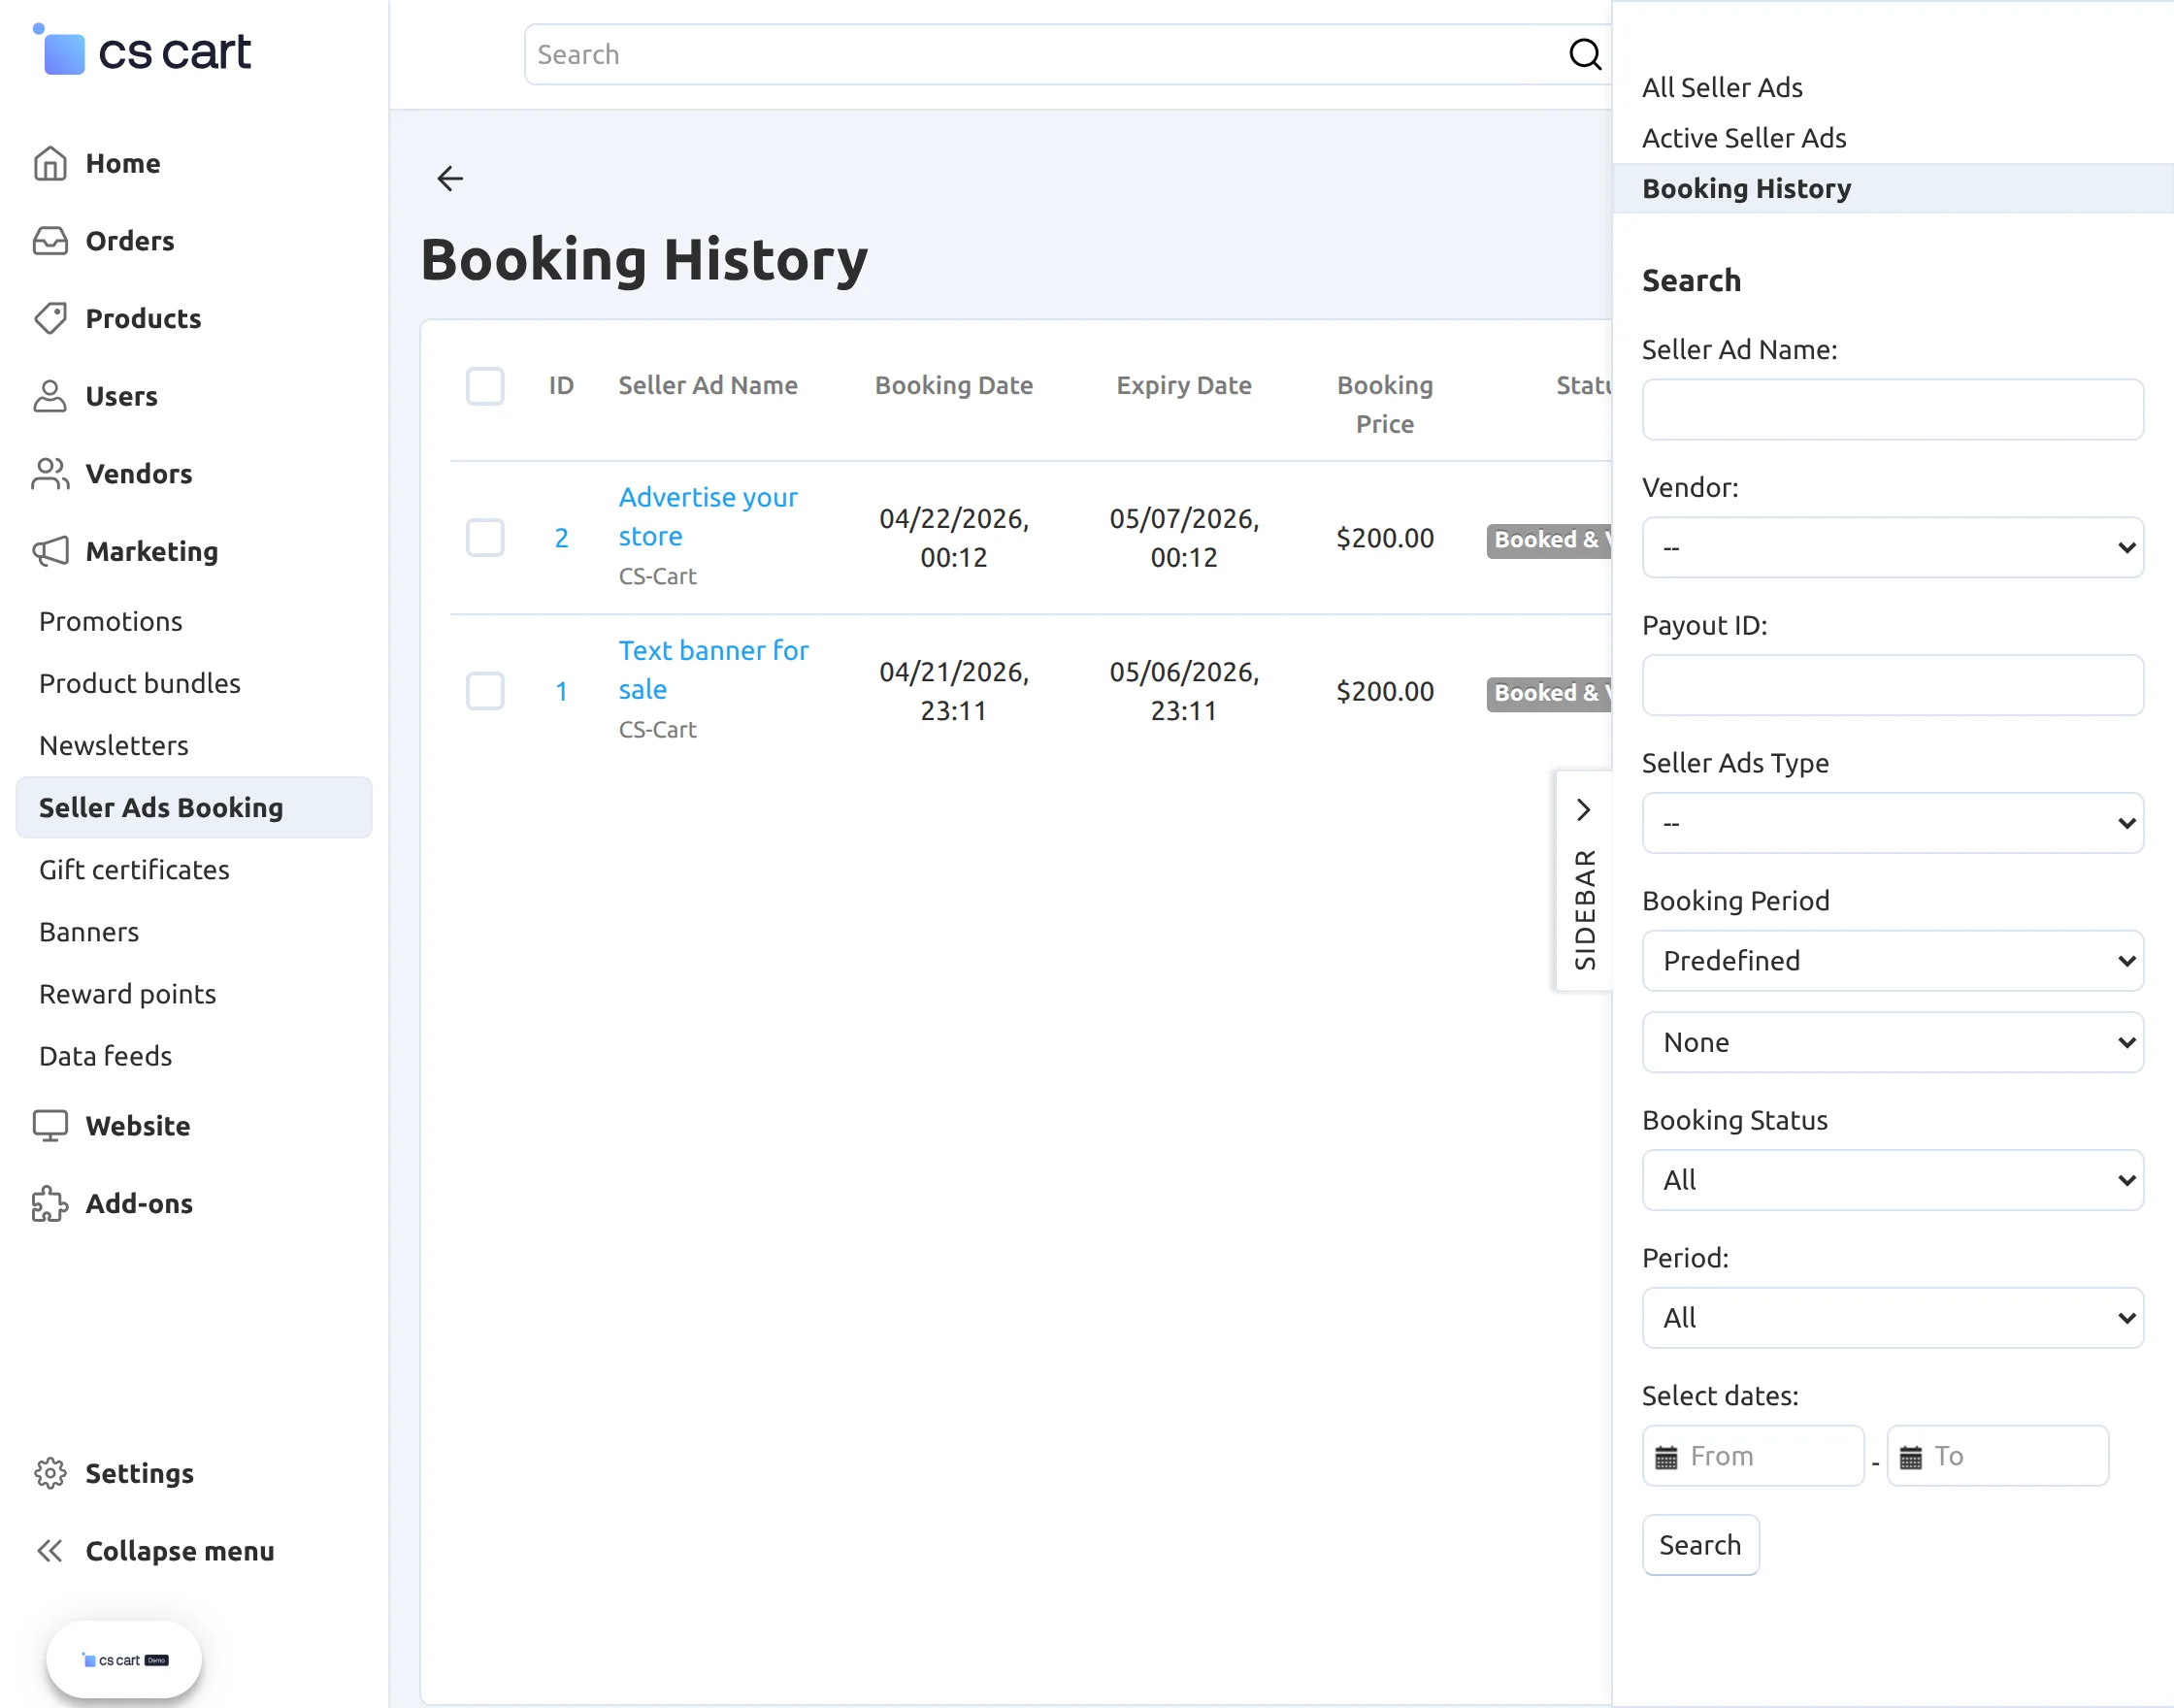
There is also an option to filter out the ads on various search parameters as shown in the below snapshot.
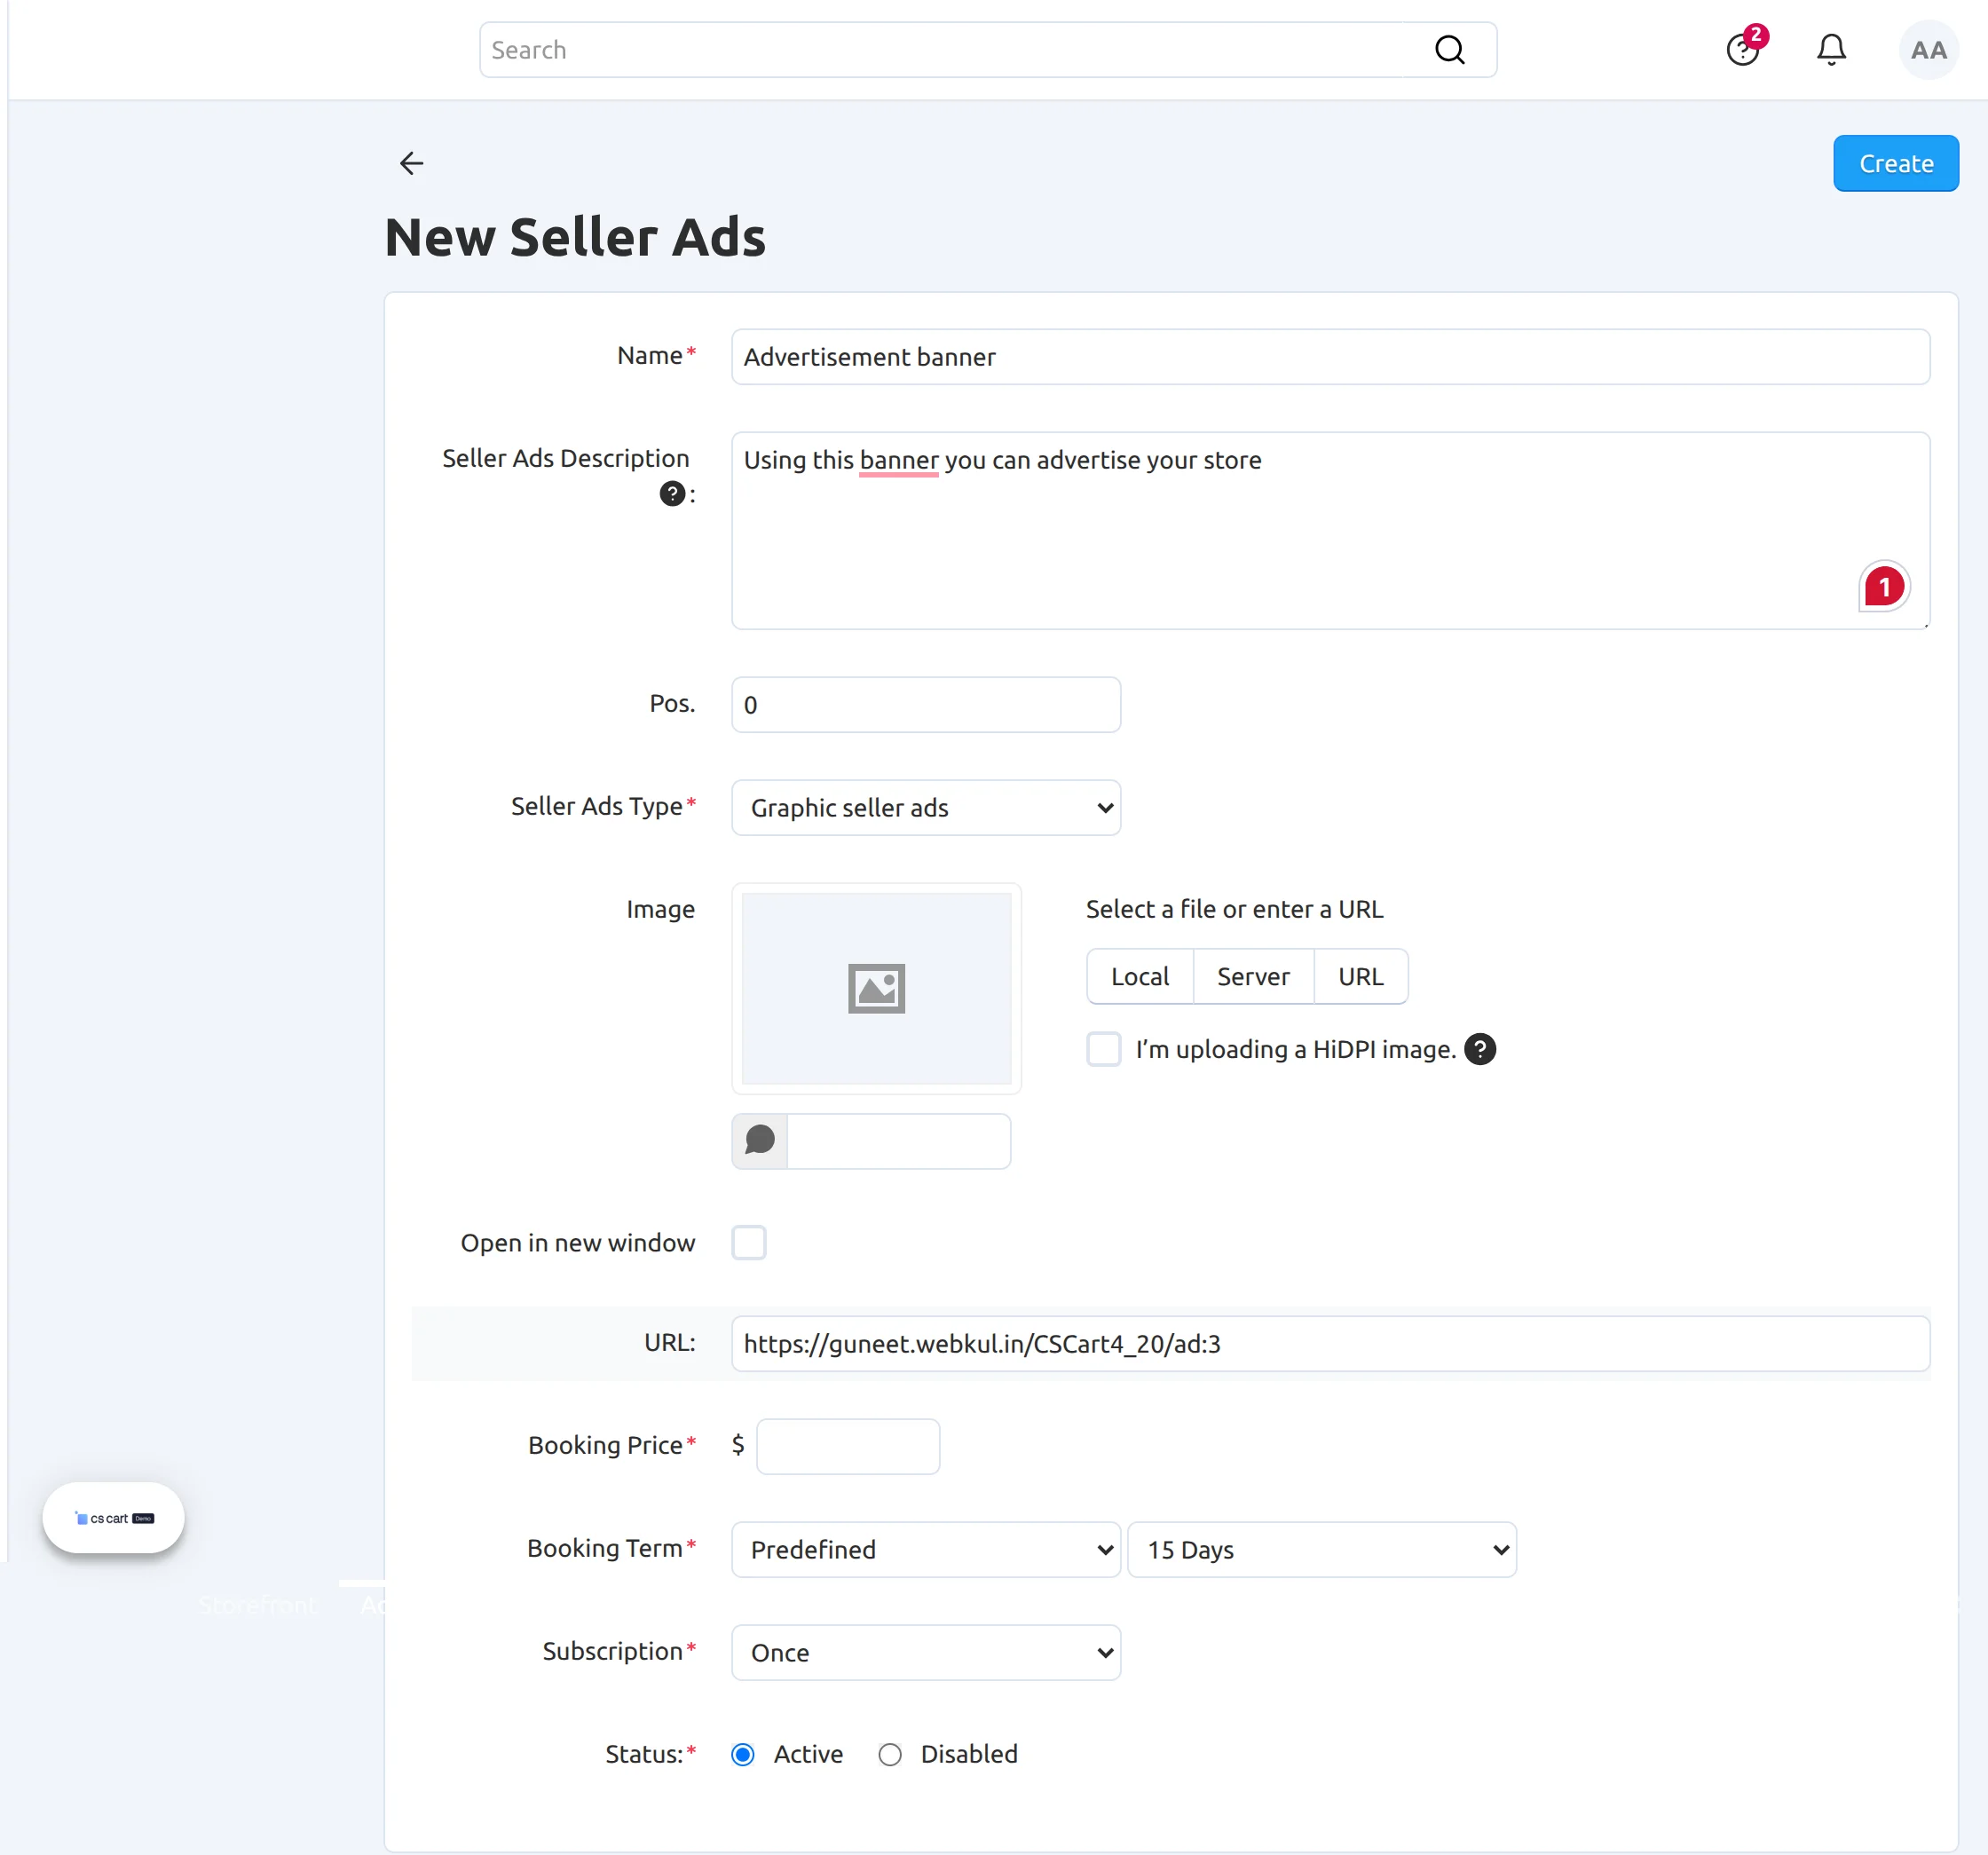
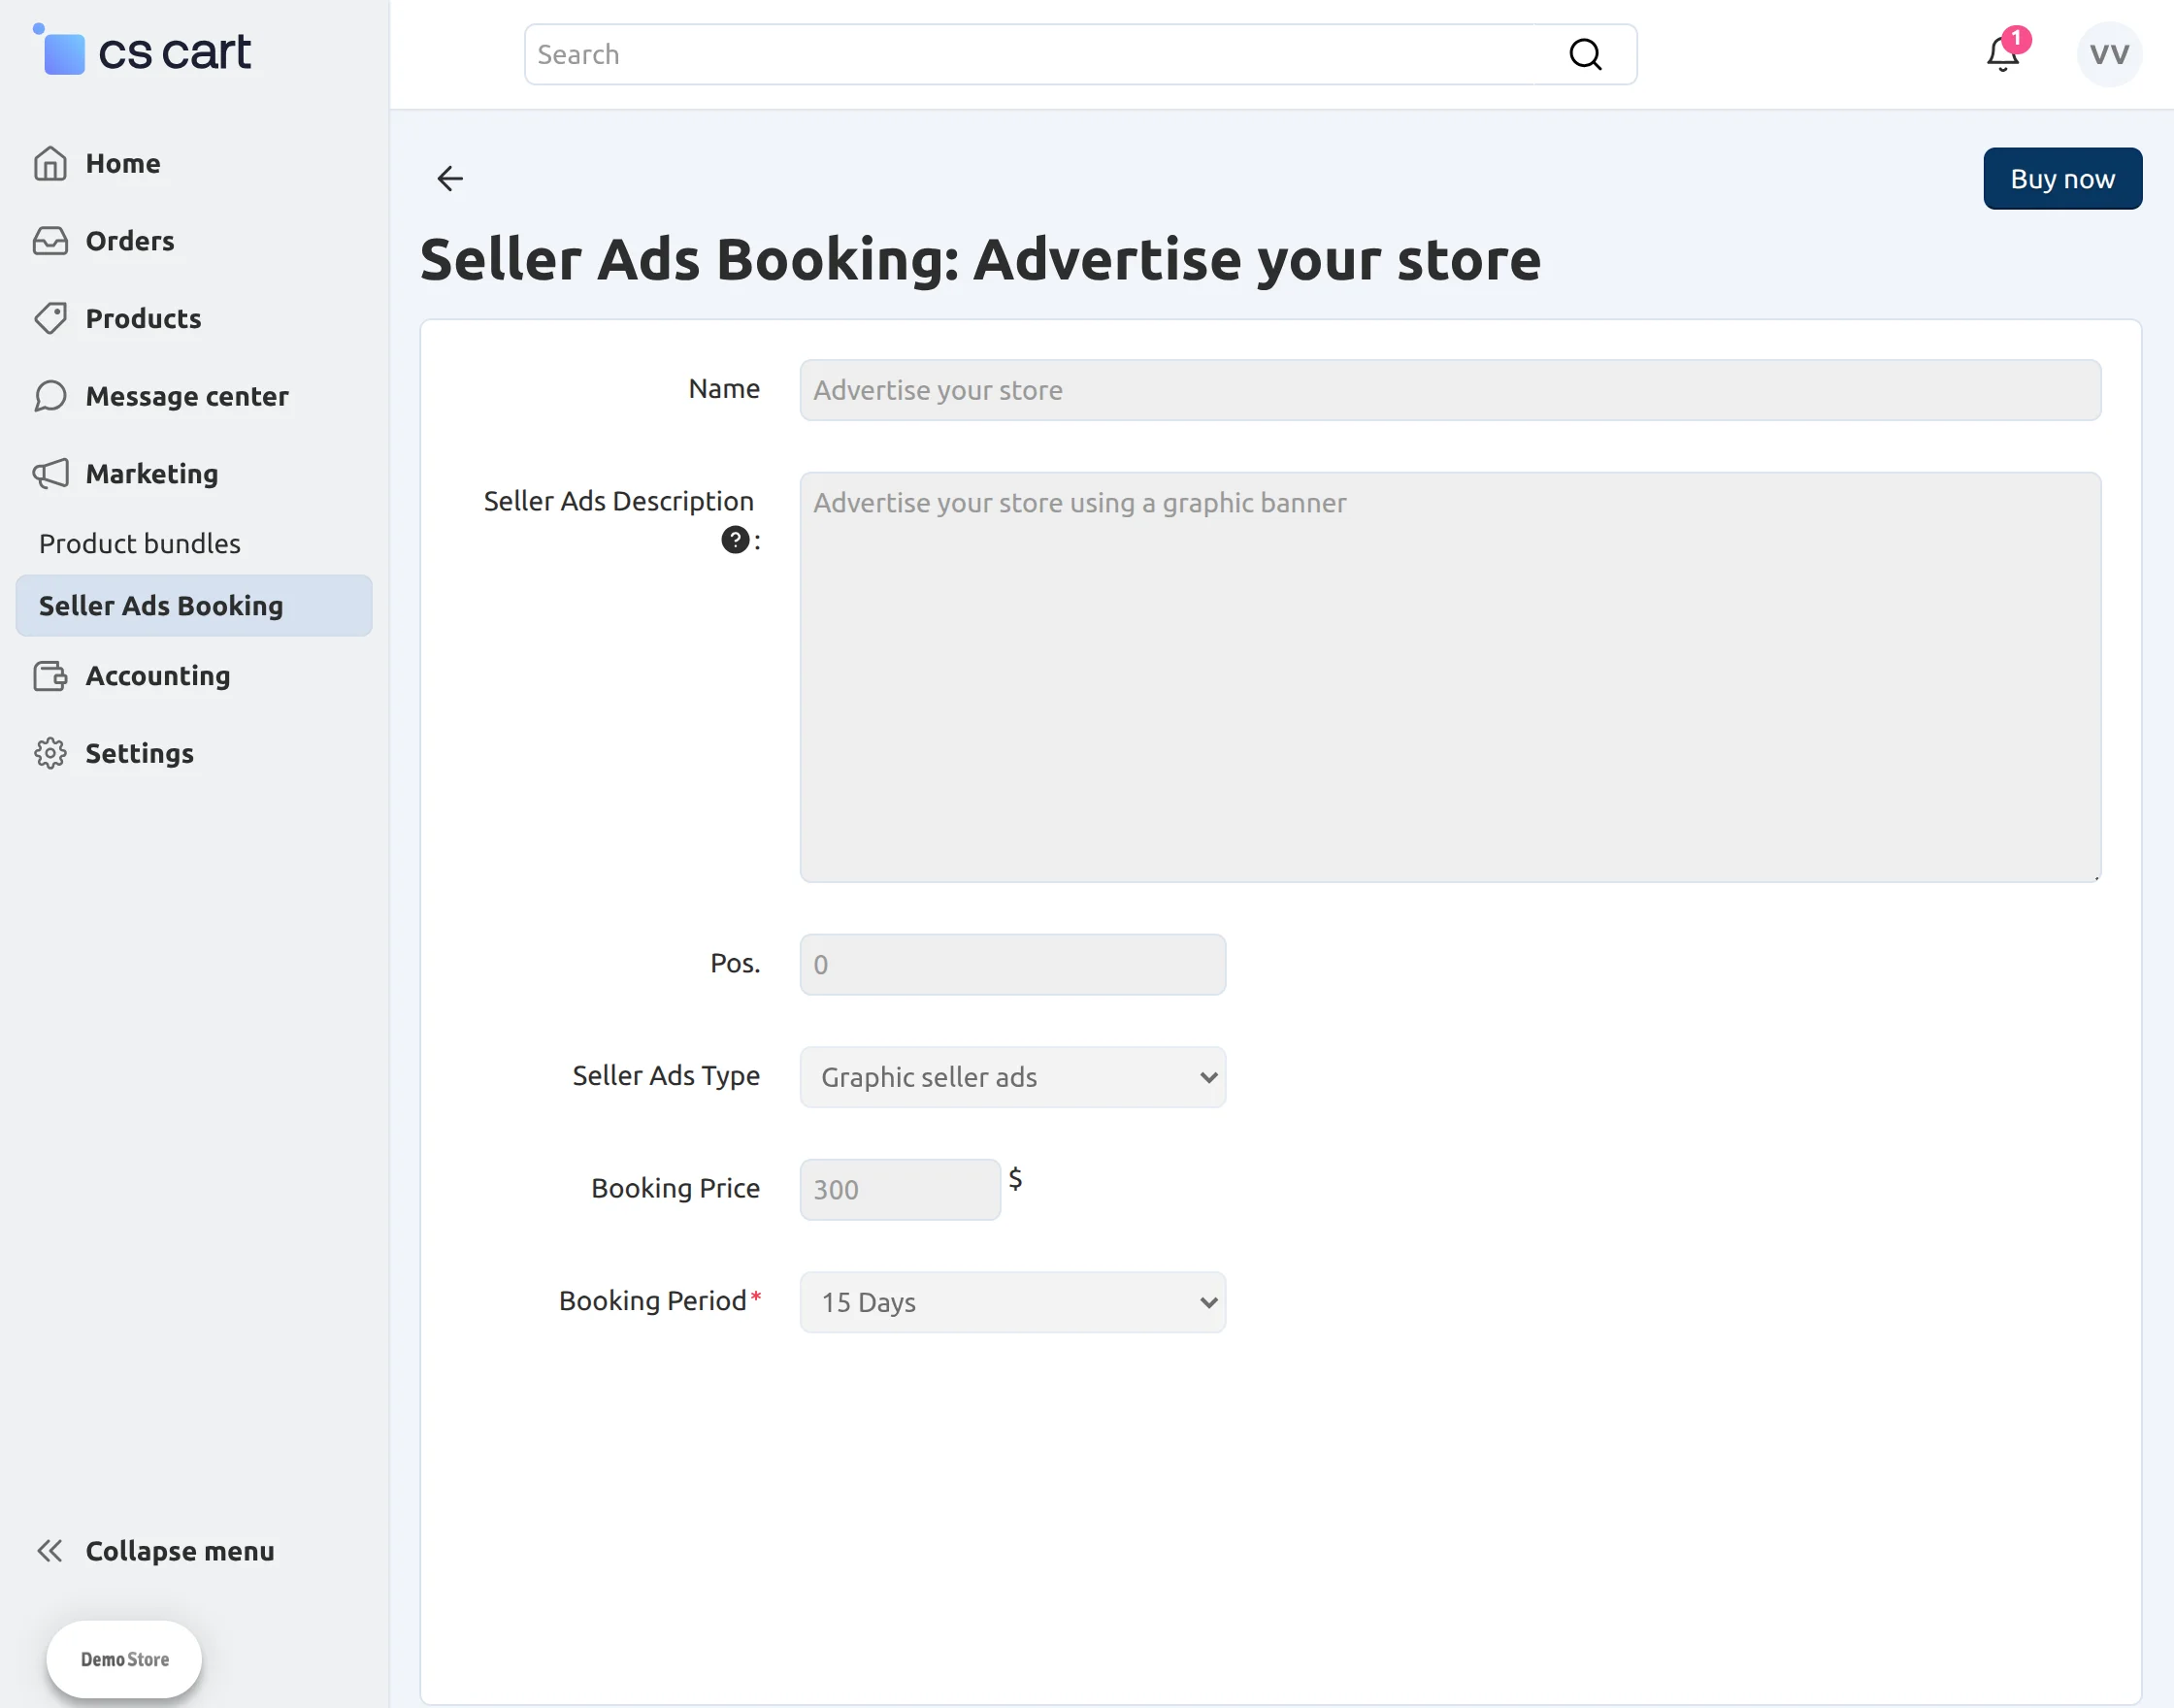
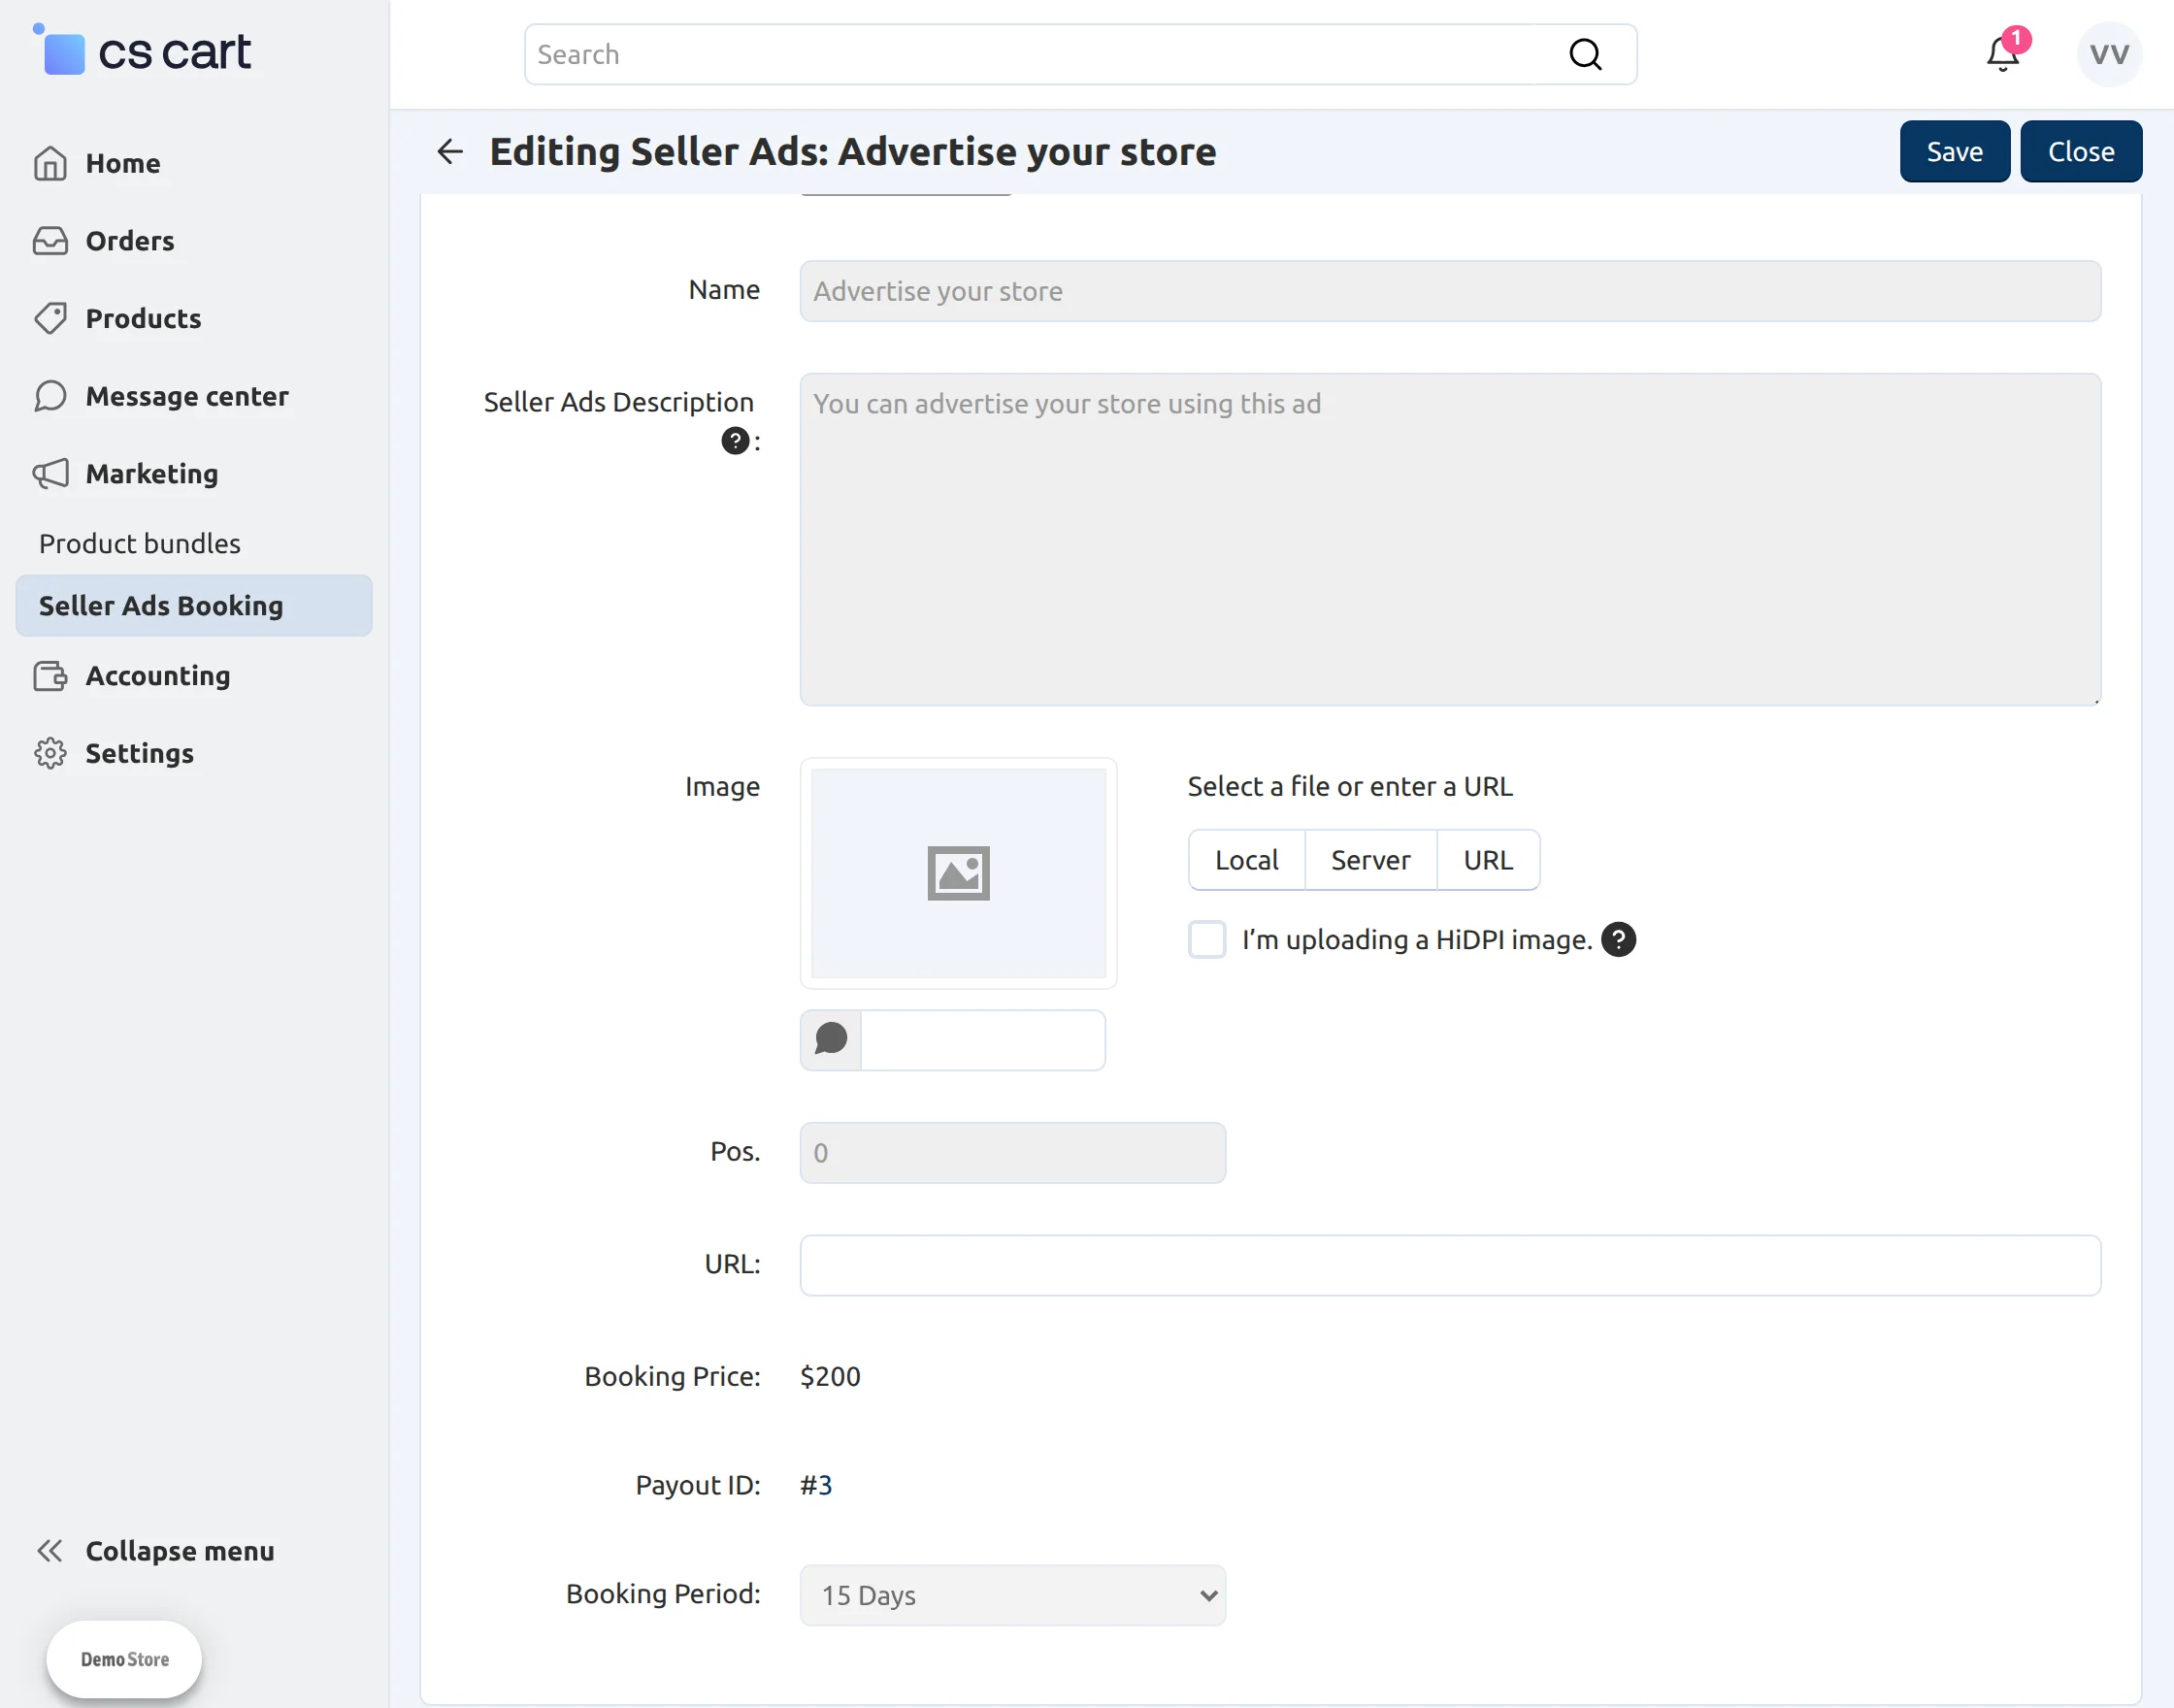
Click on + to add the advertisement.
Enter the details as per the below snapshot which includes –
- Name & small description of the advertisement which can be helpful for the vendor before booking.
- The position of the advertisement.
- Type of seller ad ie; Graphic or text.
- If it is a graphic seller ad, then an option to upload the banner image along with its redirecting URL will be available.
- If it is a text seller ad, then there will be an option to add text in the description box.
- Booking price for the ad as per the booking terms.
- There are some predefined time slots for booking which includes 15 Days, 1 Month, 3 Months, 6 Months and 1 Year.
- An option to add a significant number of days for booking is also available in the manual booking term option.
- The subscription (Once or Repeat) and Status of the ad.
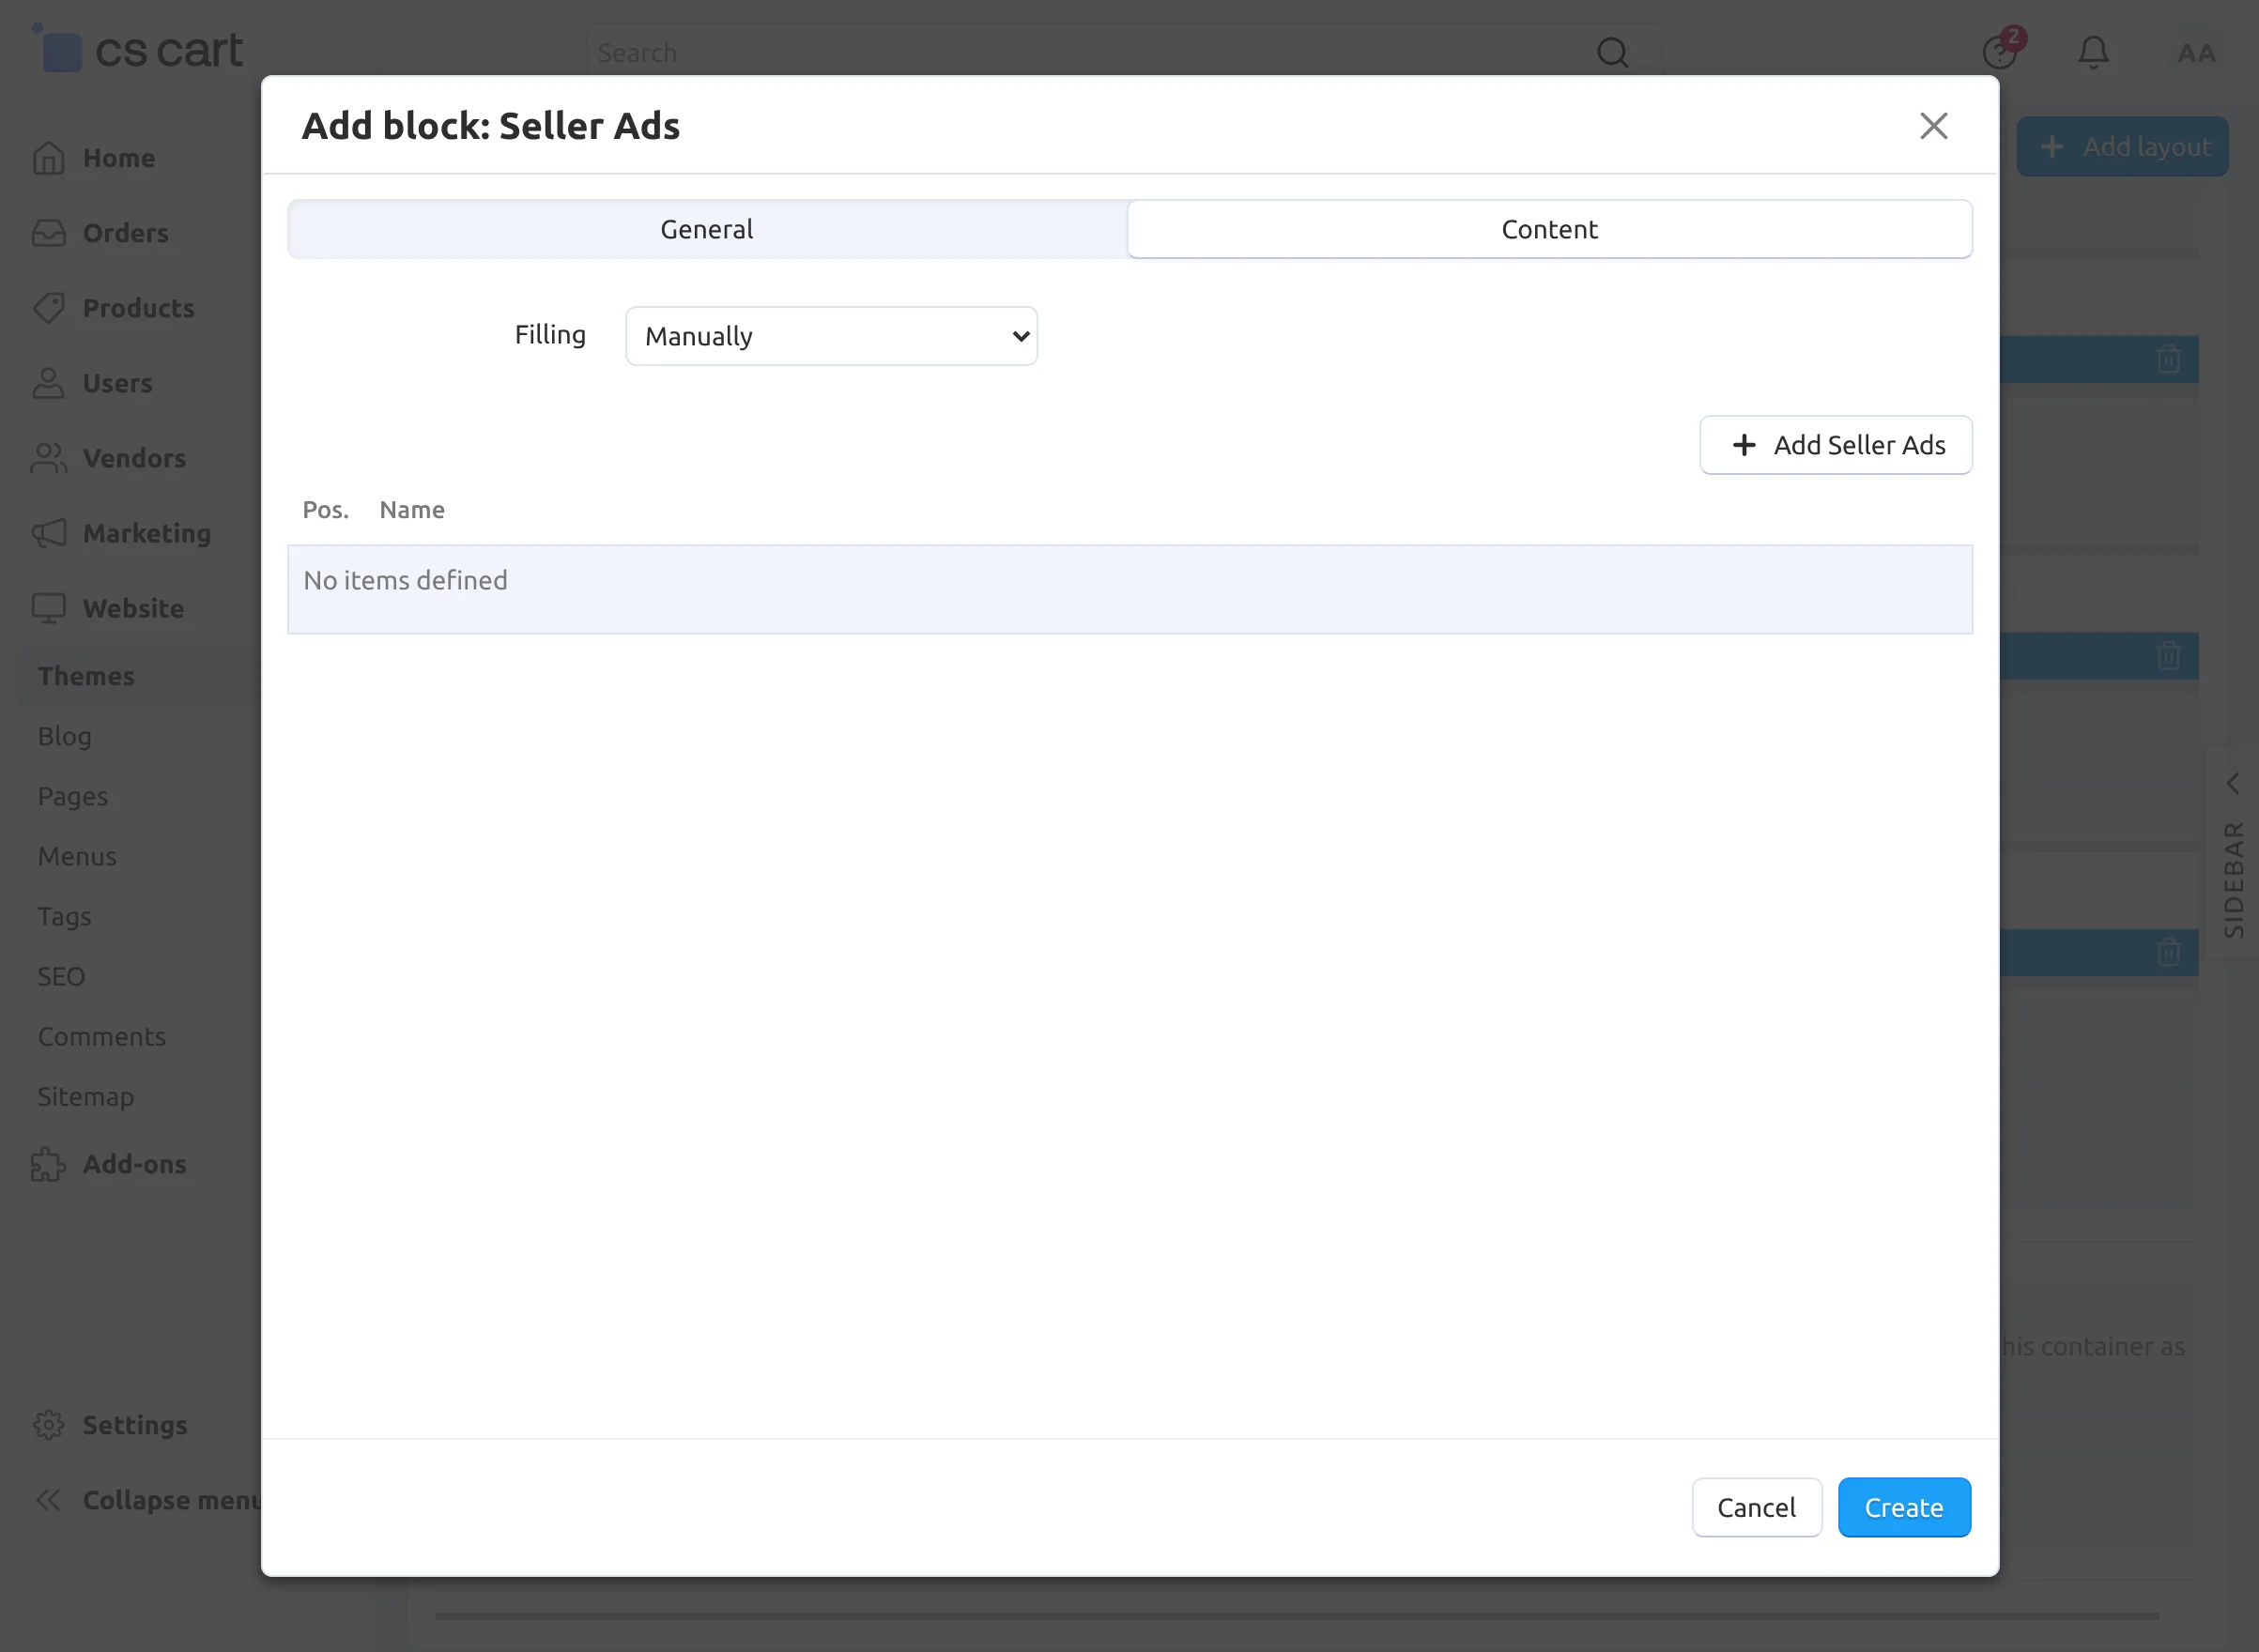
After you create a seller ad, you should use the Layout editor to add it to the storefront.
Go to Website → Theme →Layout.
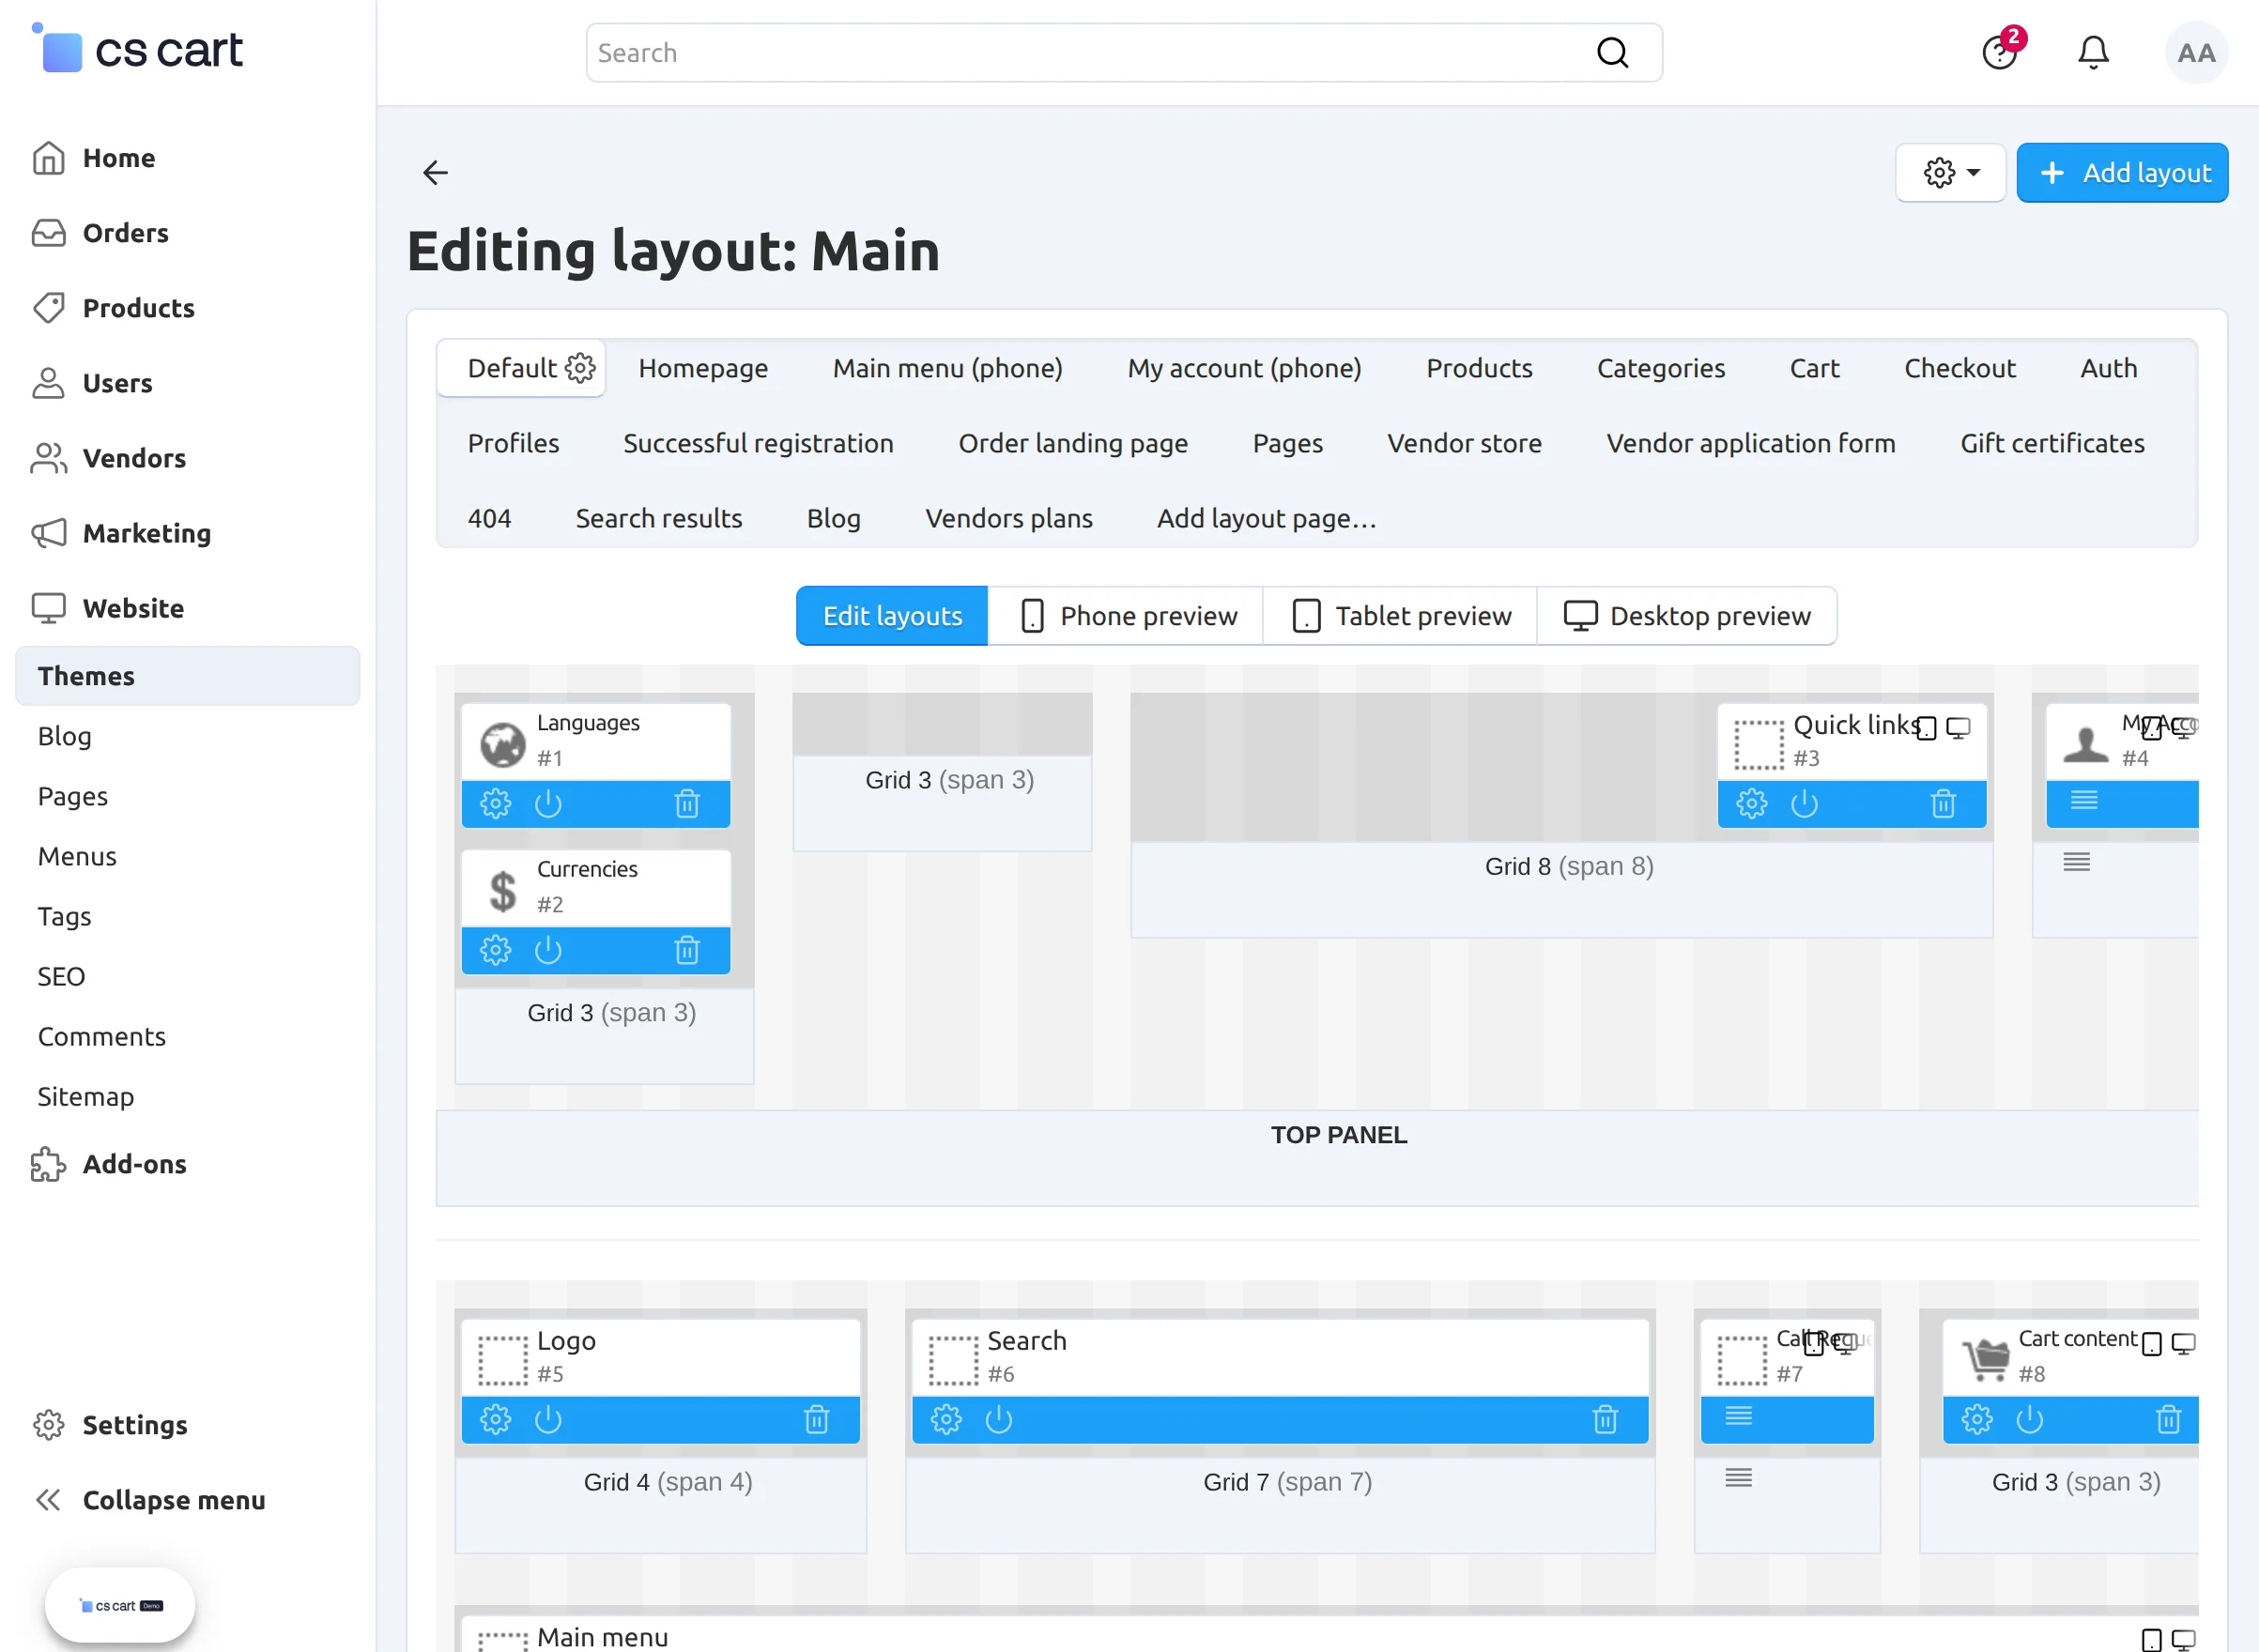
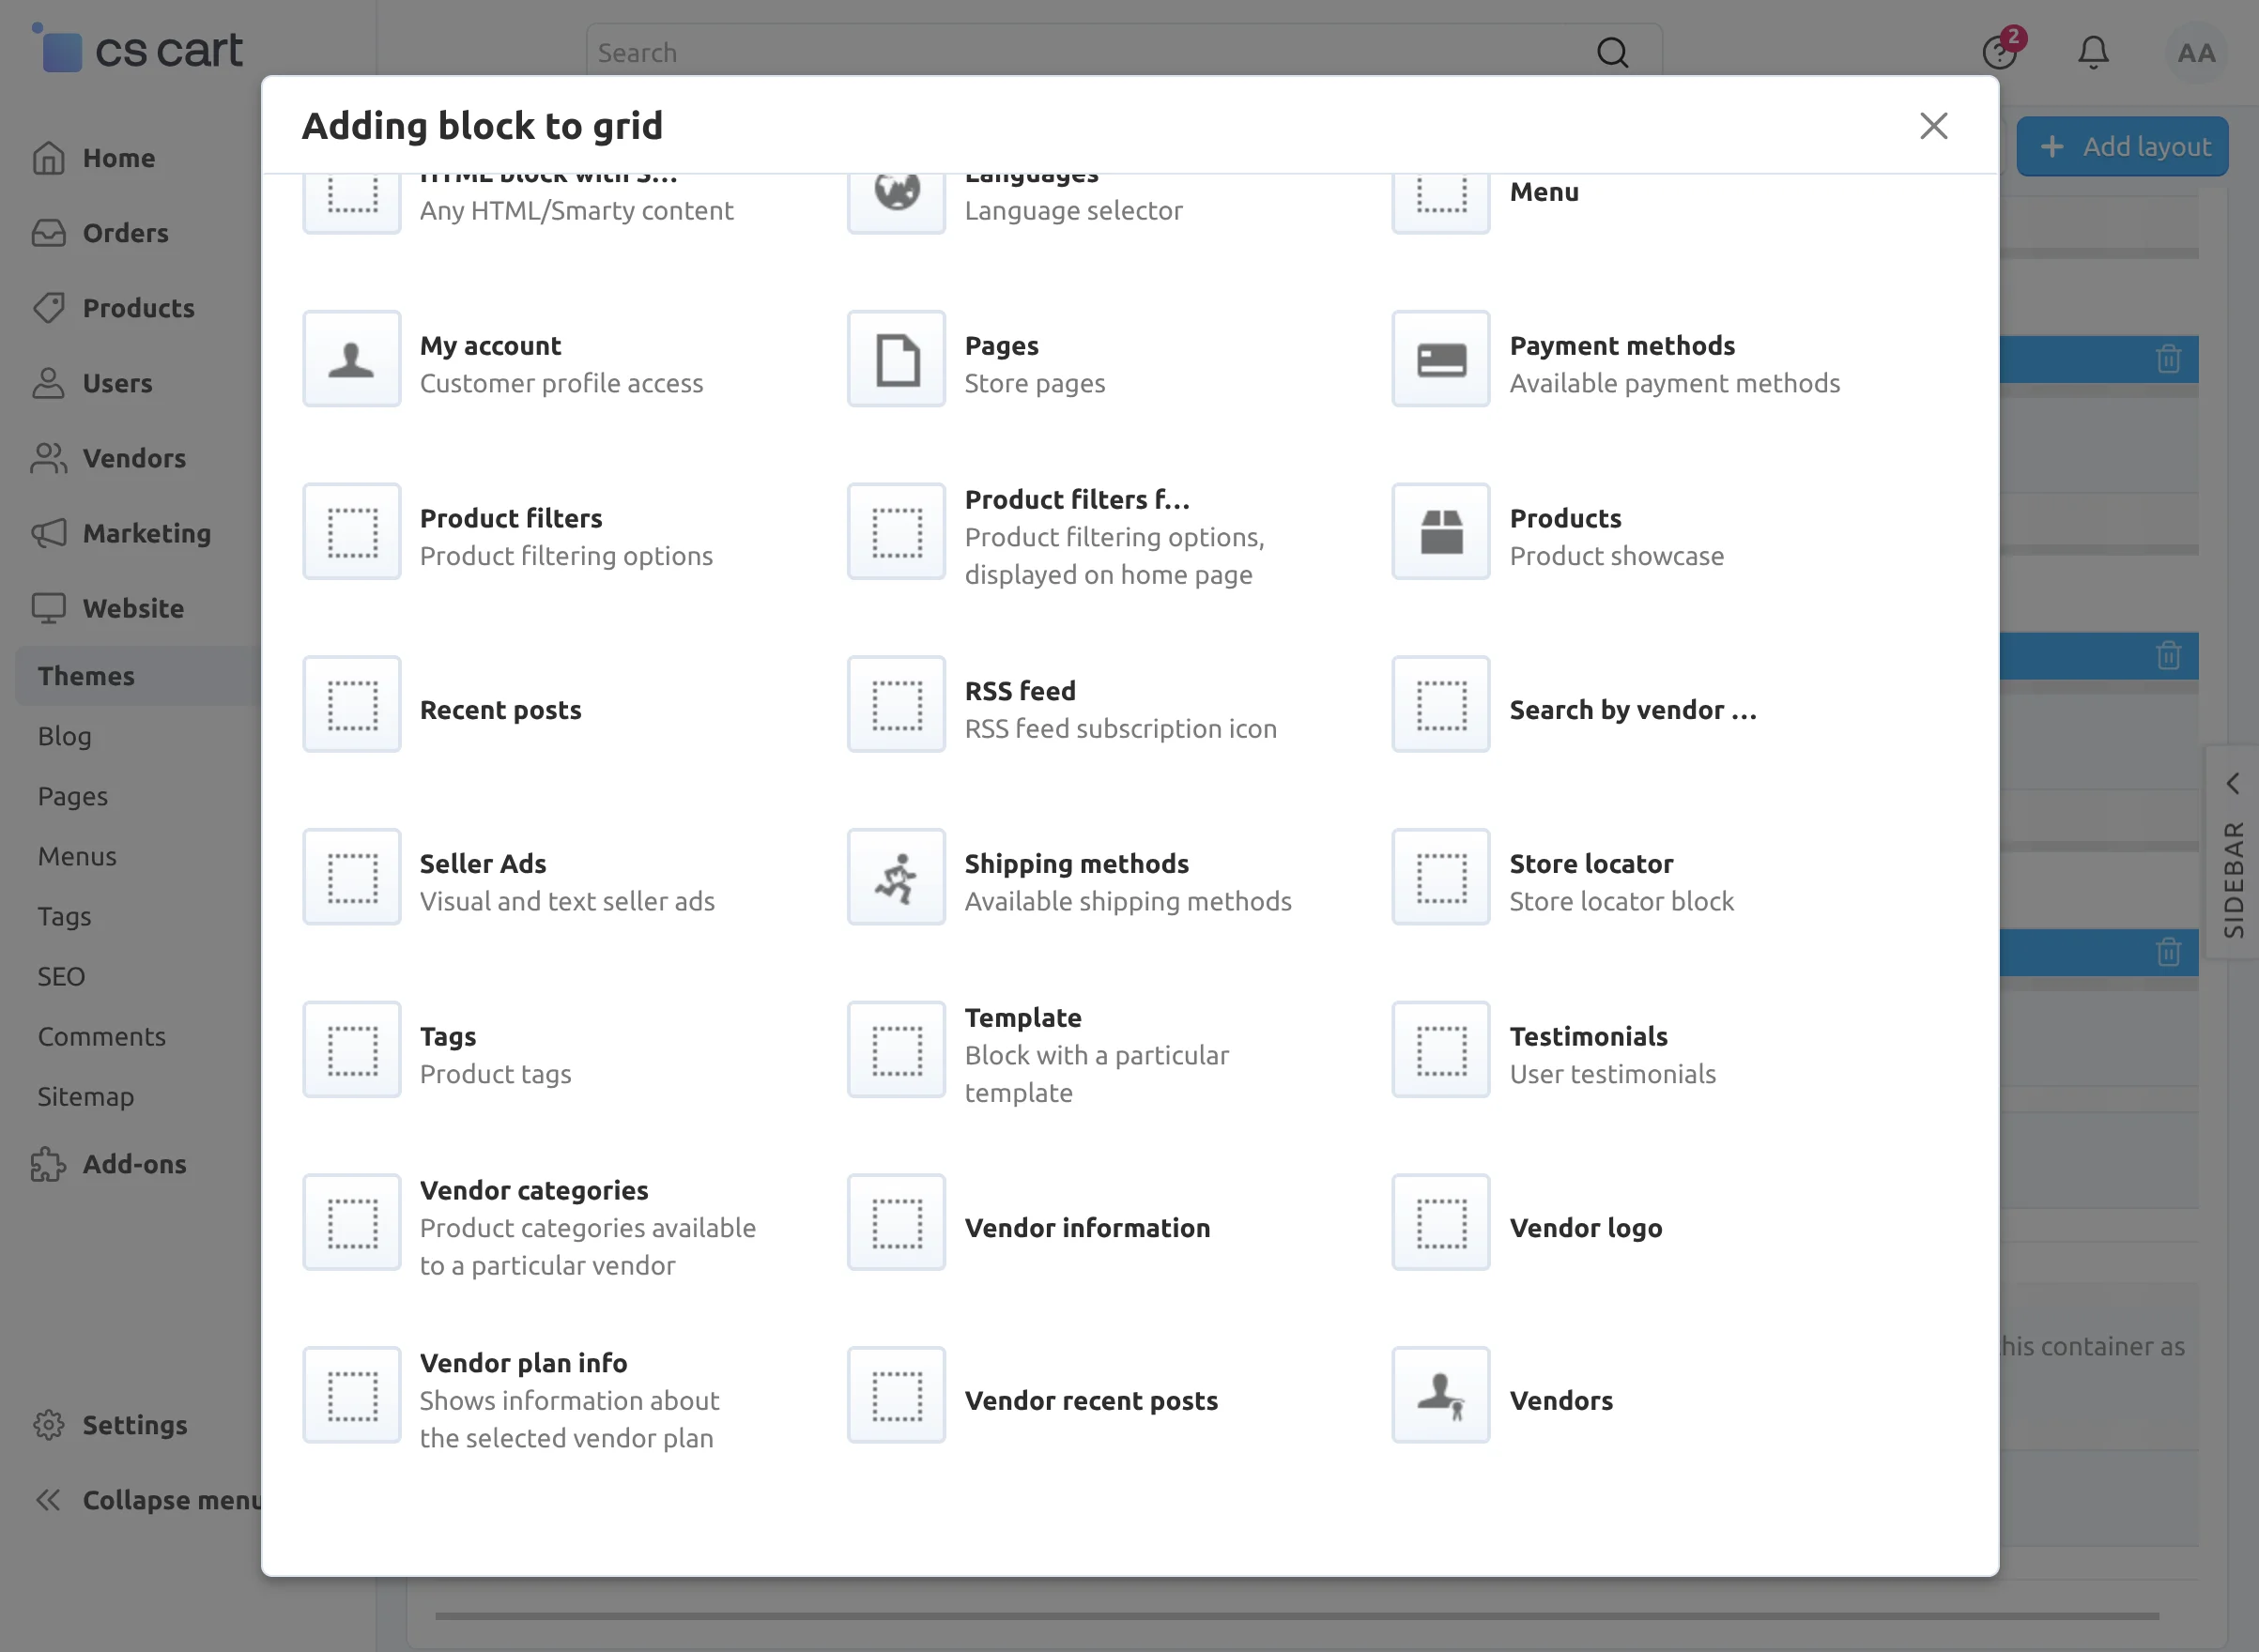
Switch to the location where you want the seller ads to appear, and add a new block with type Seller ads.
Enter the name of the block and select Carousel template.
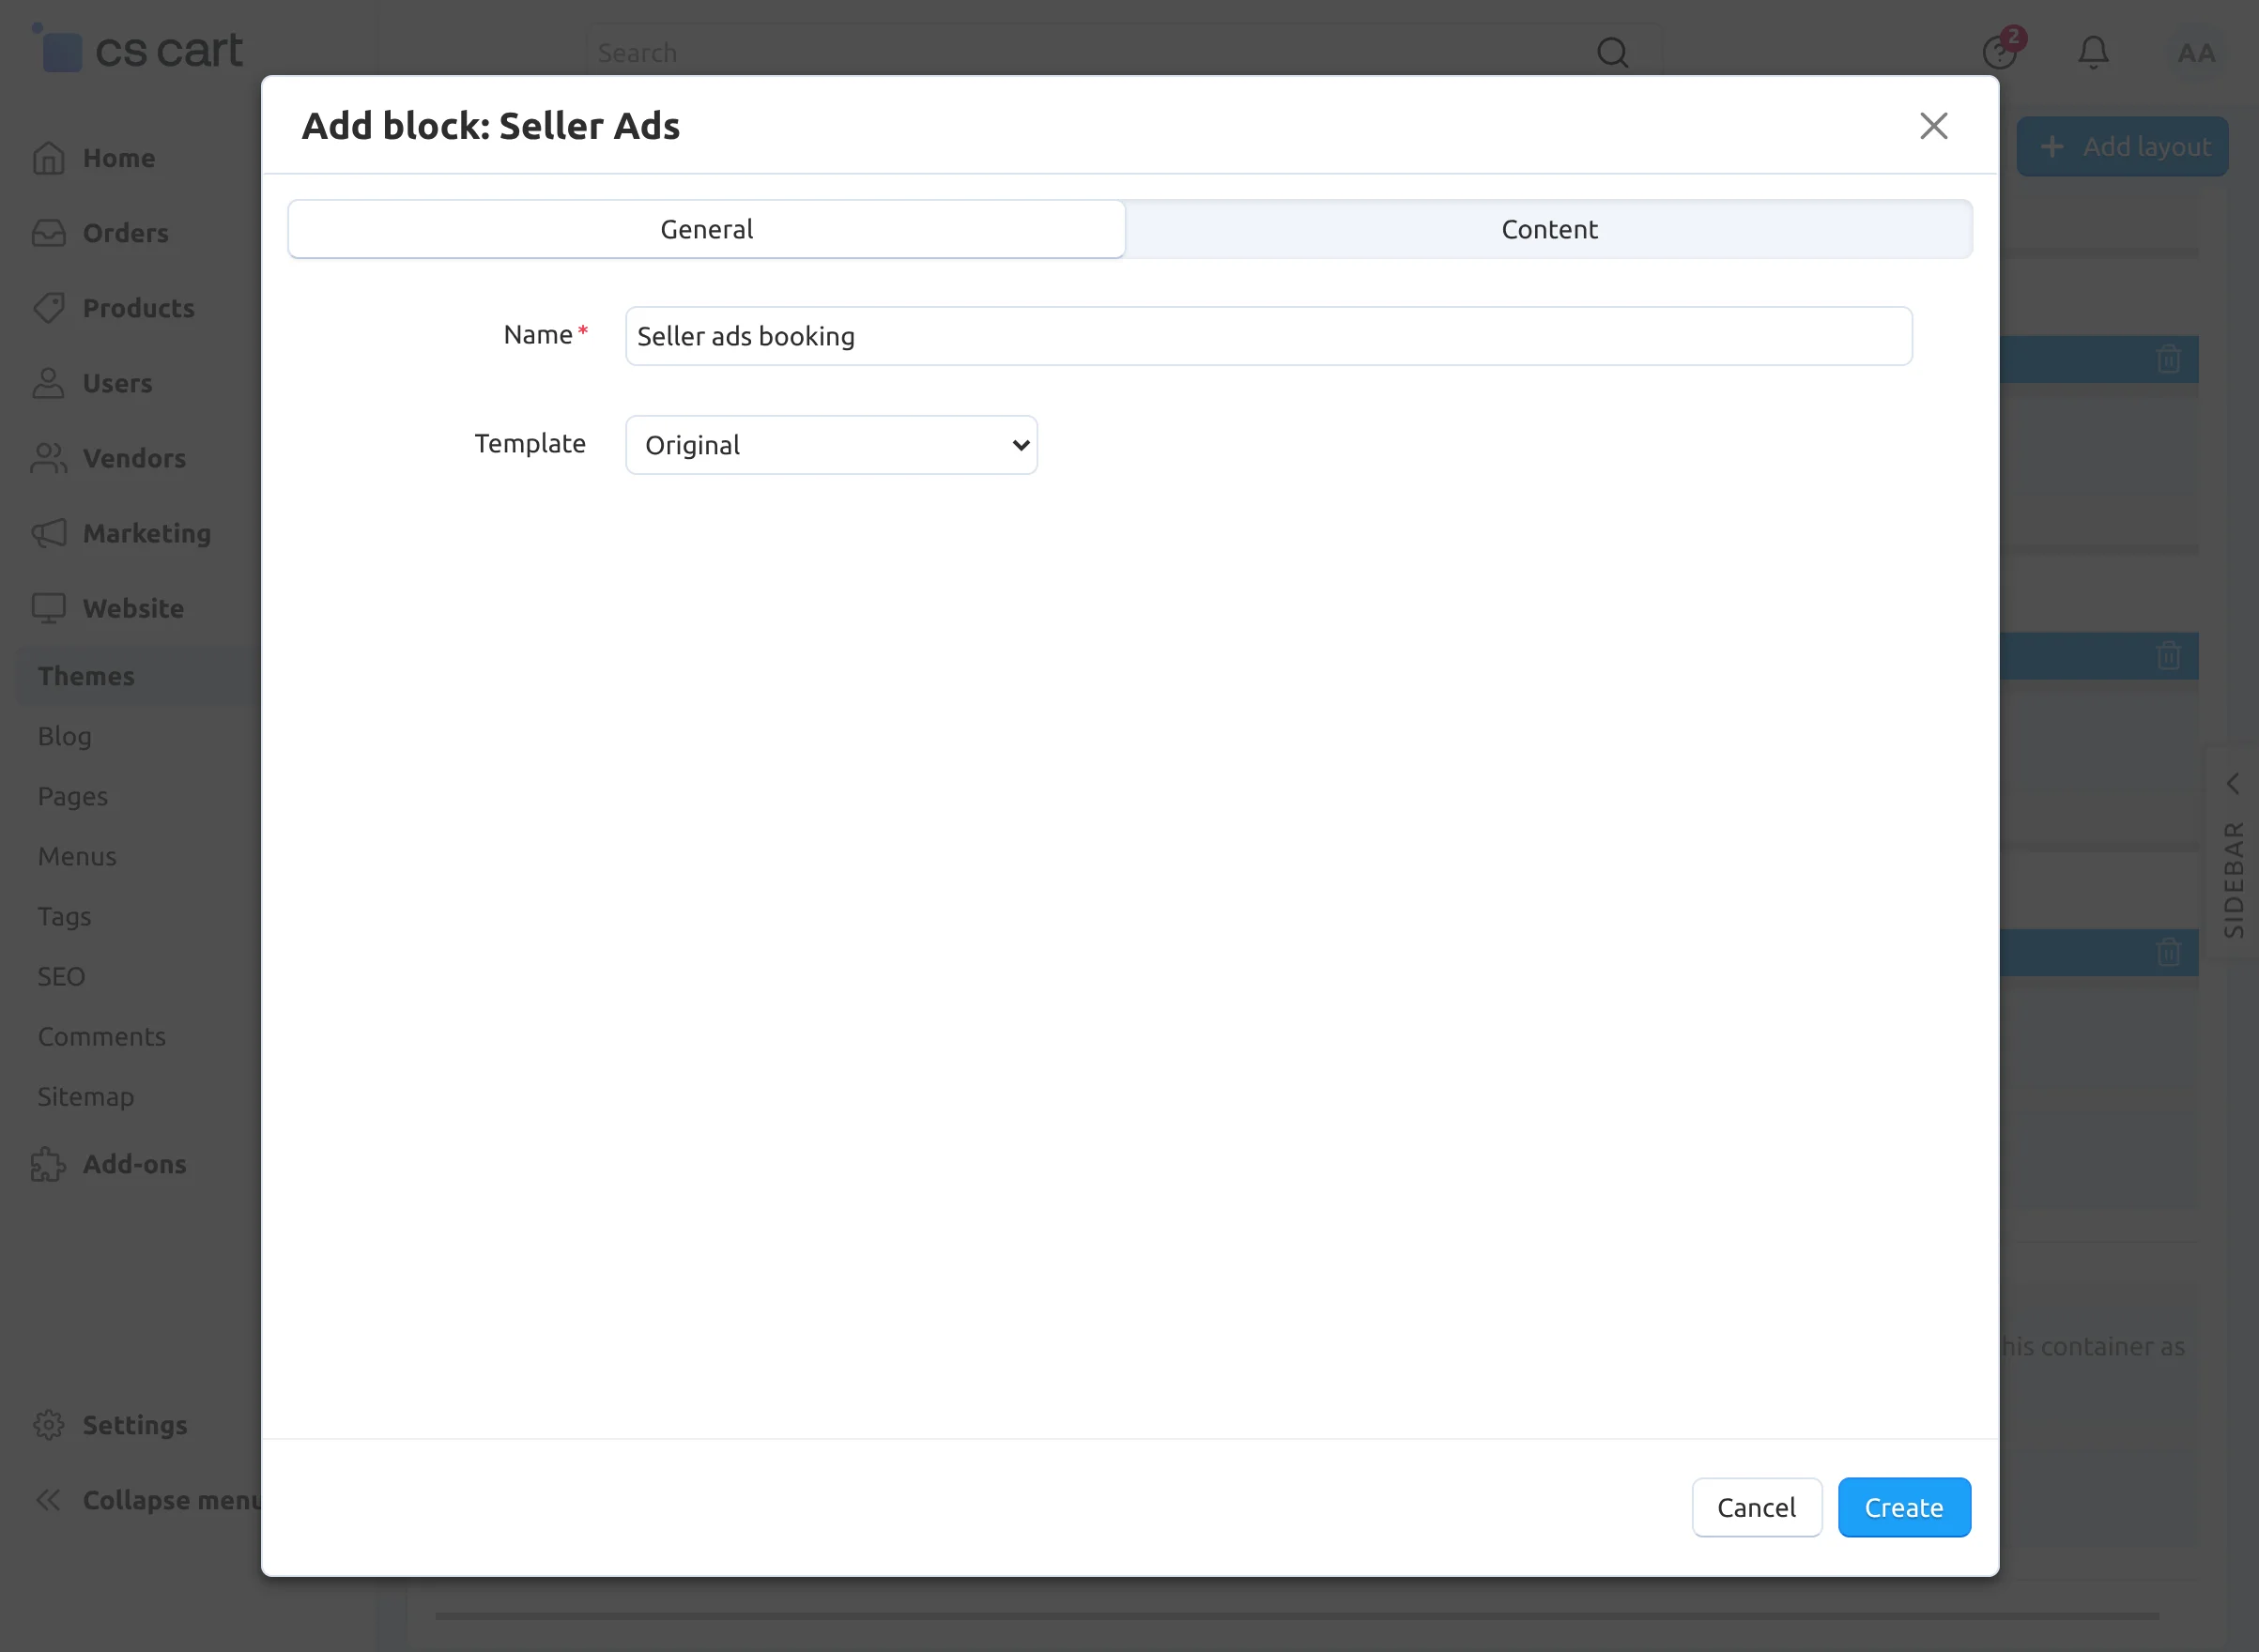
Go to the Content tab, pick the Manual filling, and click on the Add seller ads button.
You will see the list of all the seller ads in your store. Pick the one(s) you need and click on the Add seller ads and close button.
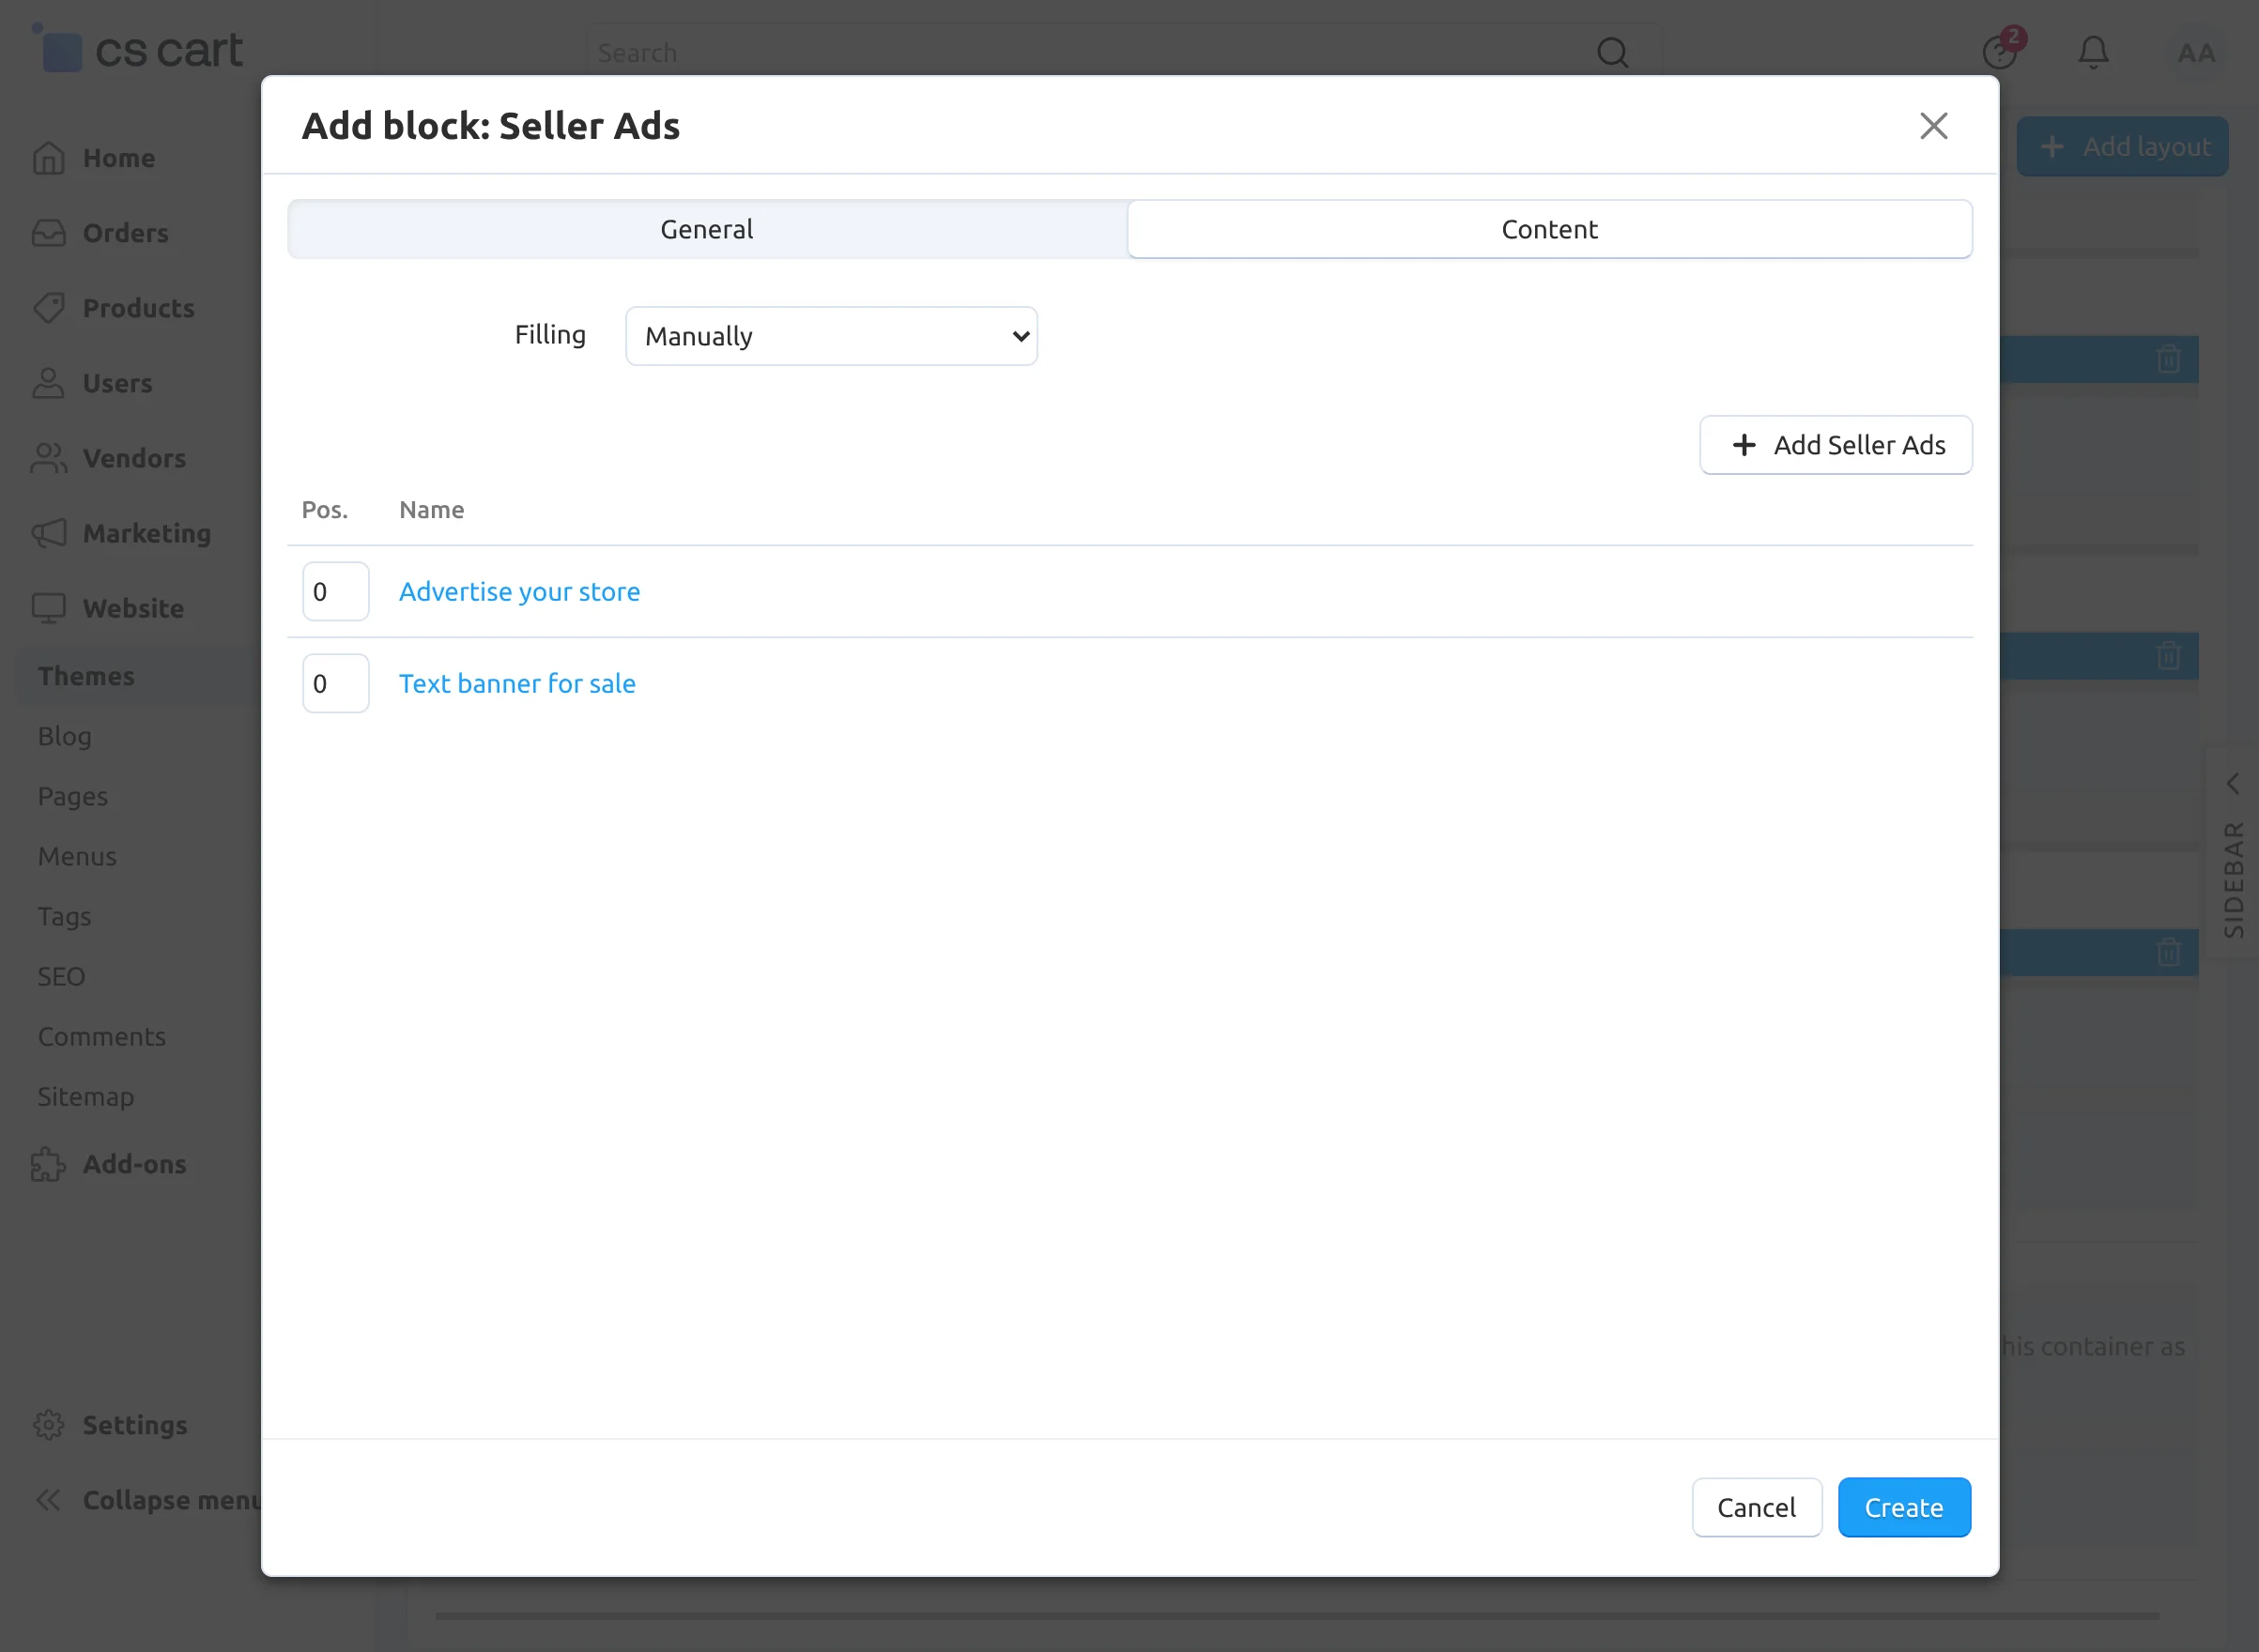
Finally, click on the Create button to save your changes.
Email Notifications-
Email notifications will be sent to admin and customer on any purchase, update or in the seller ads
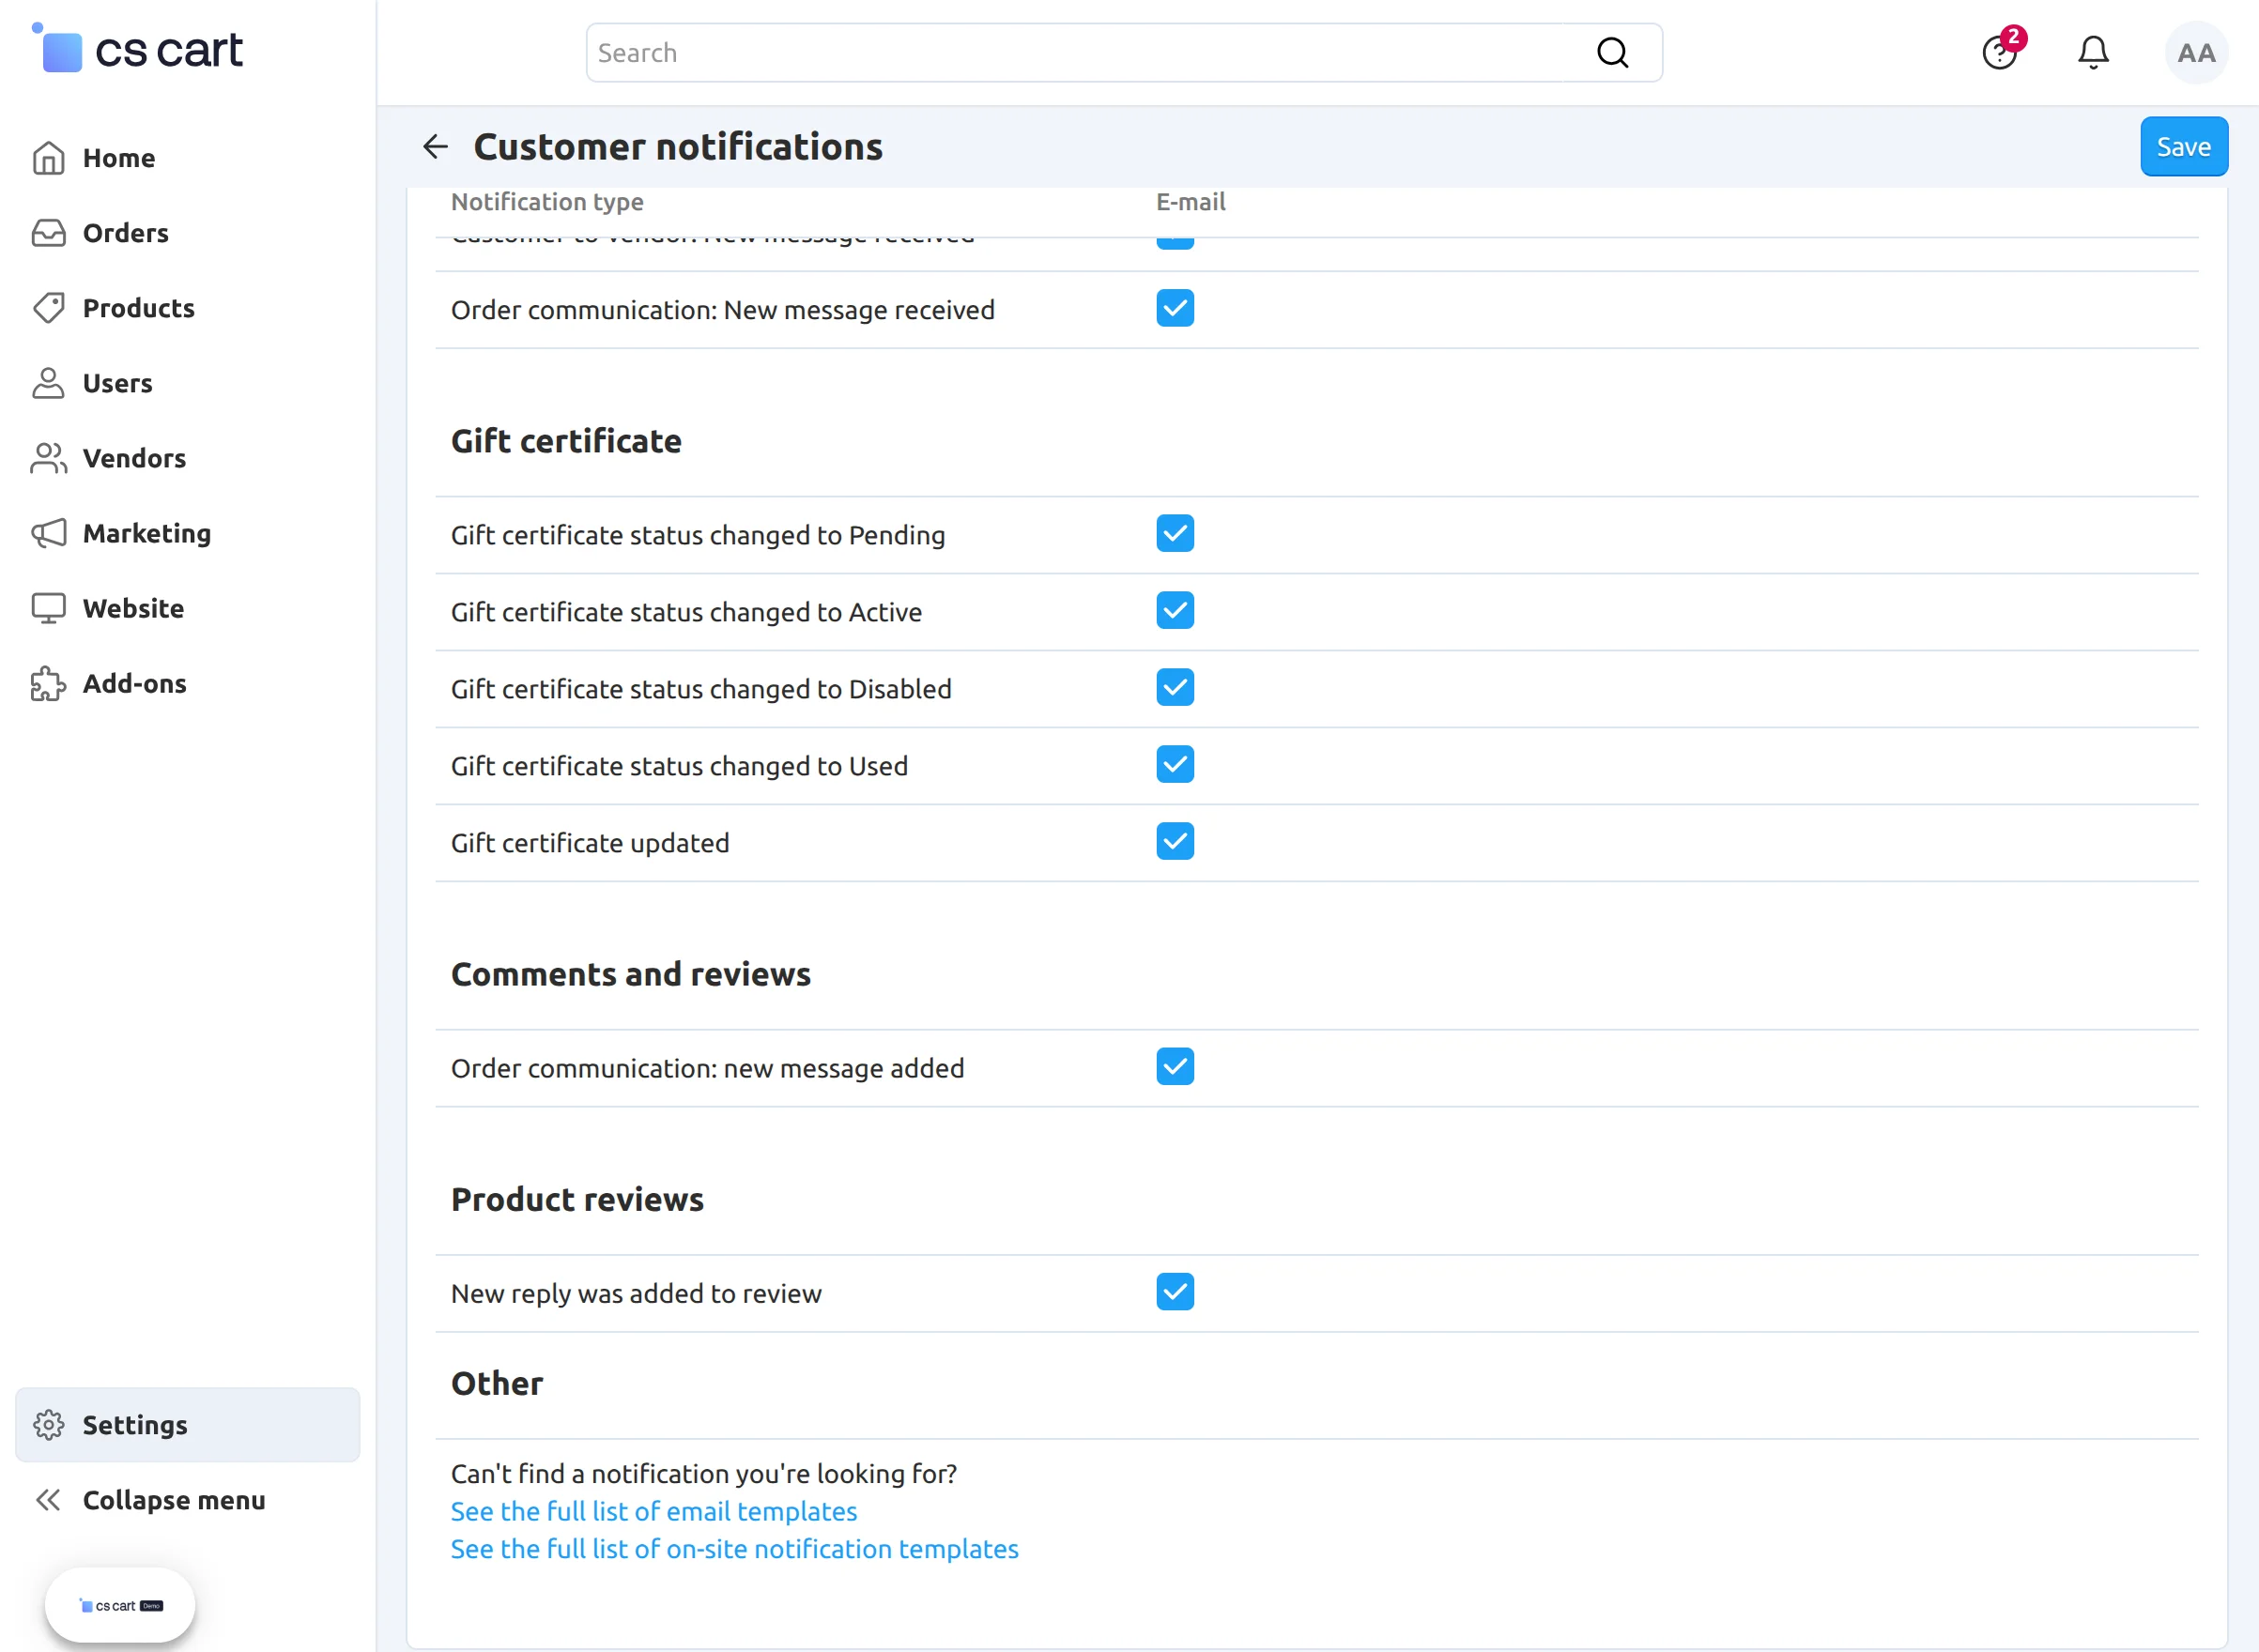
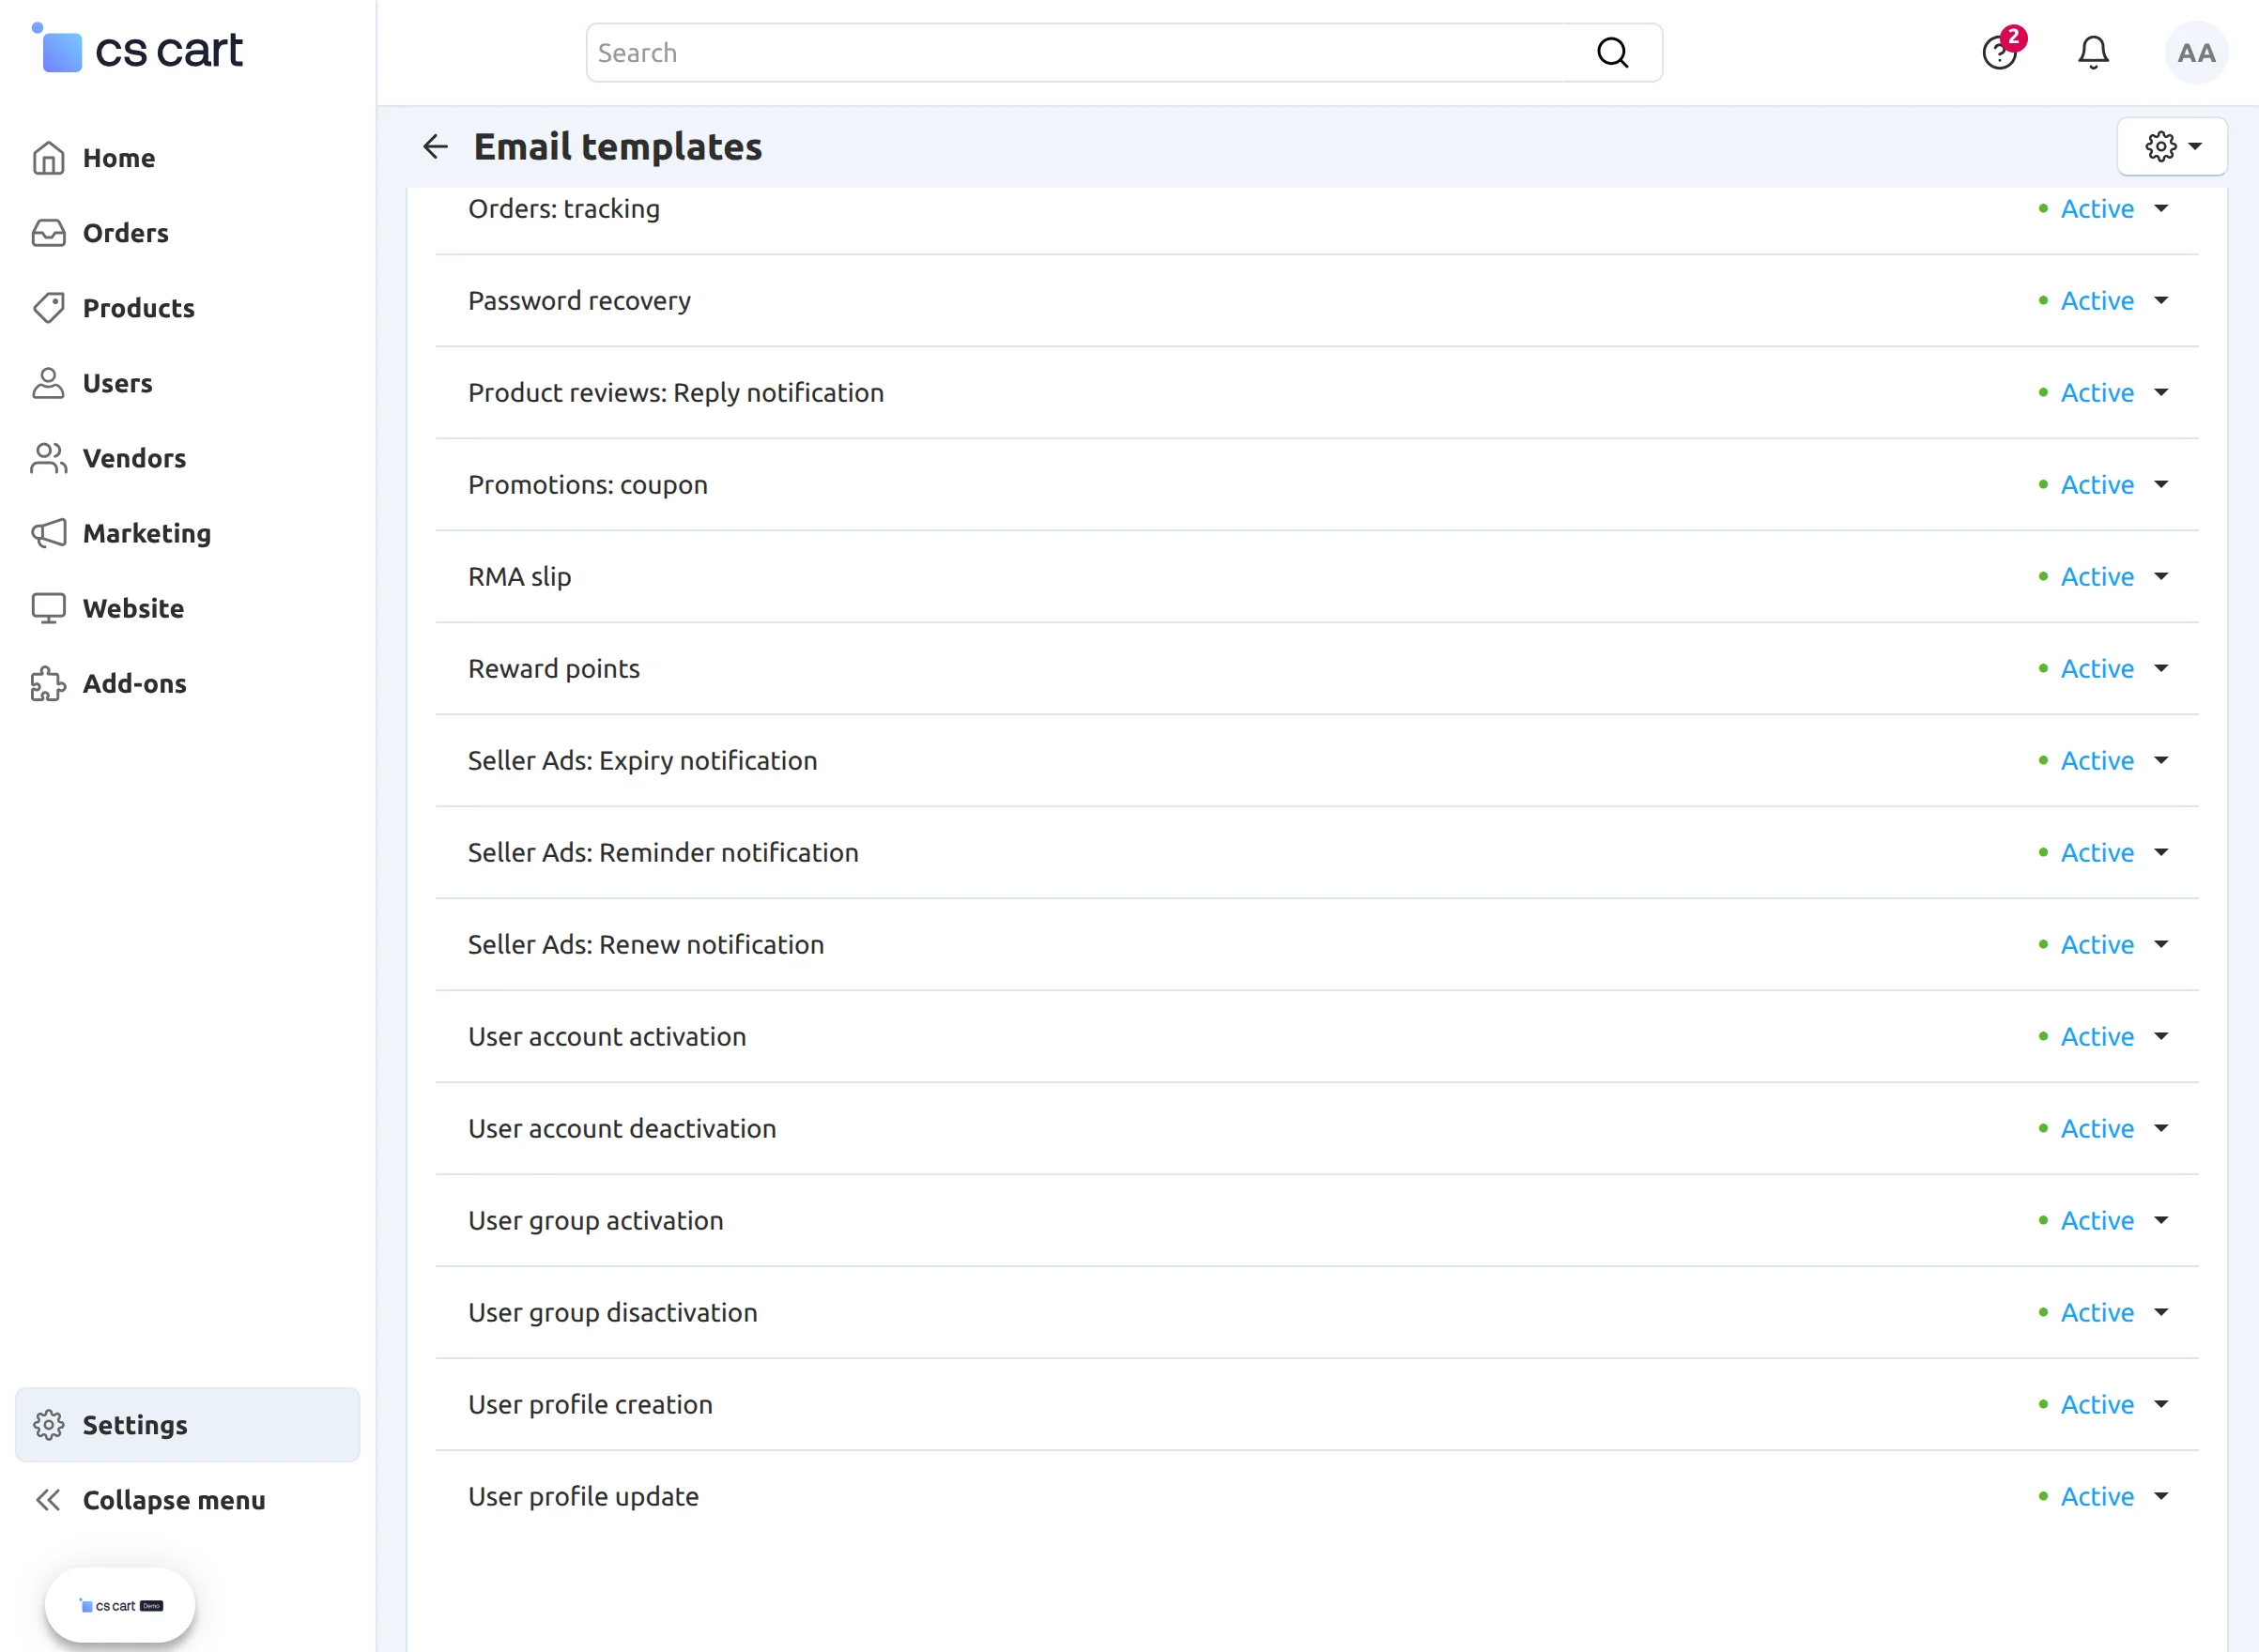
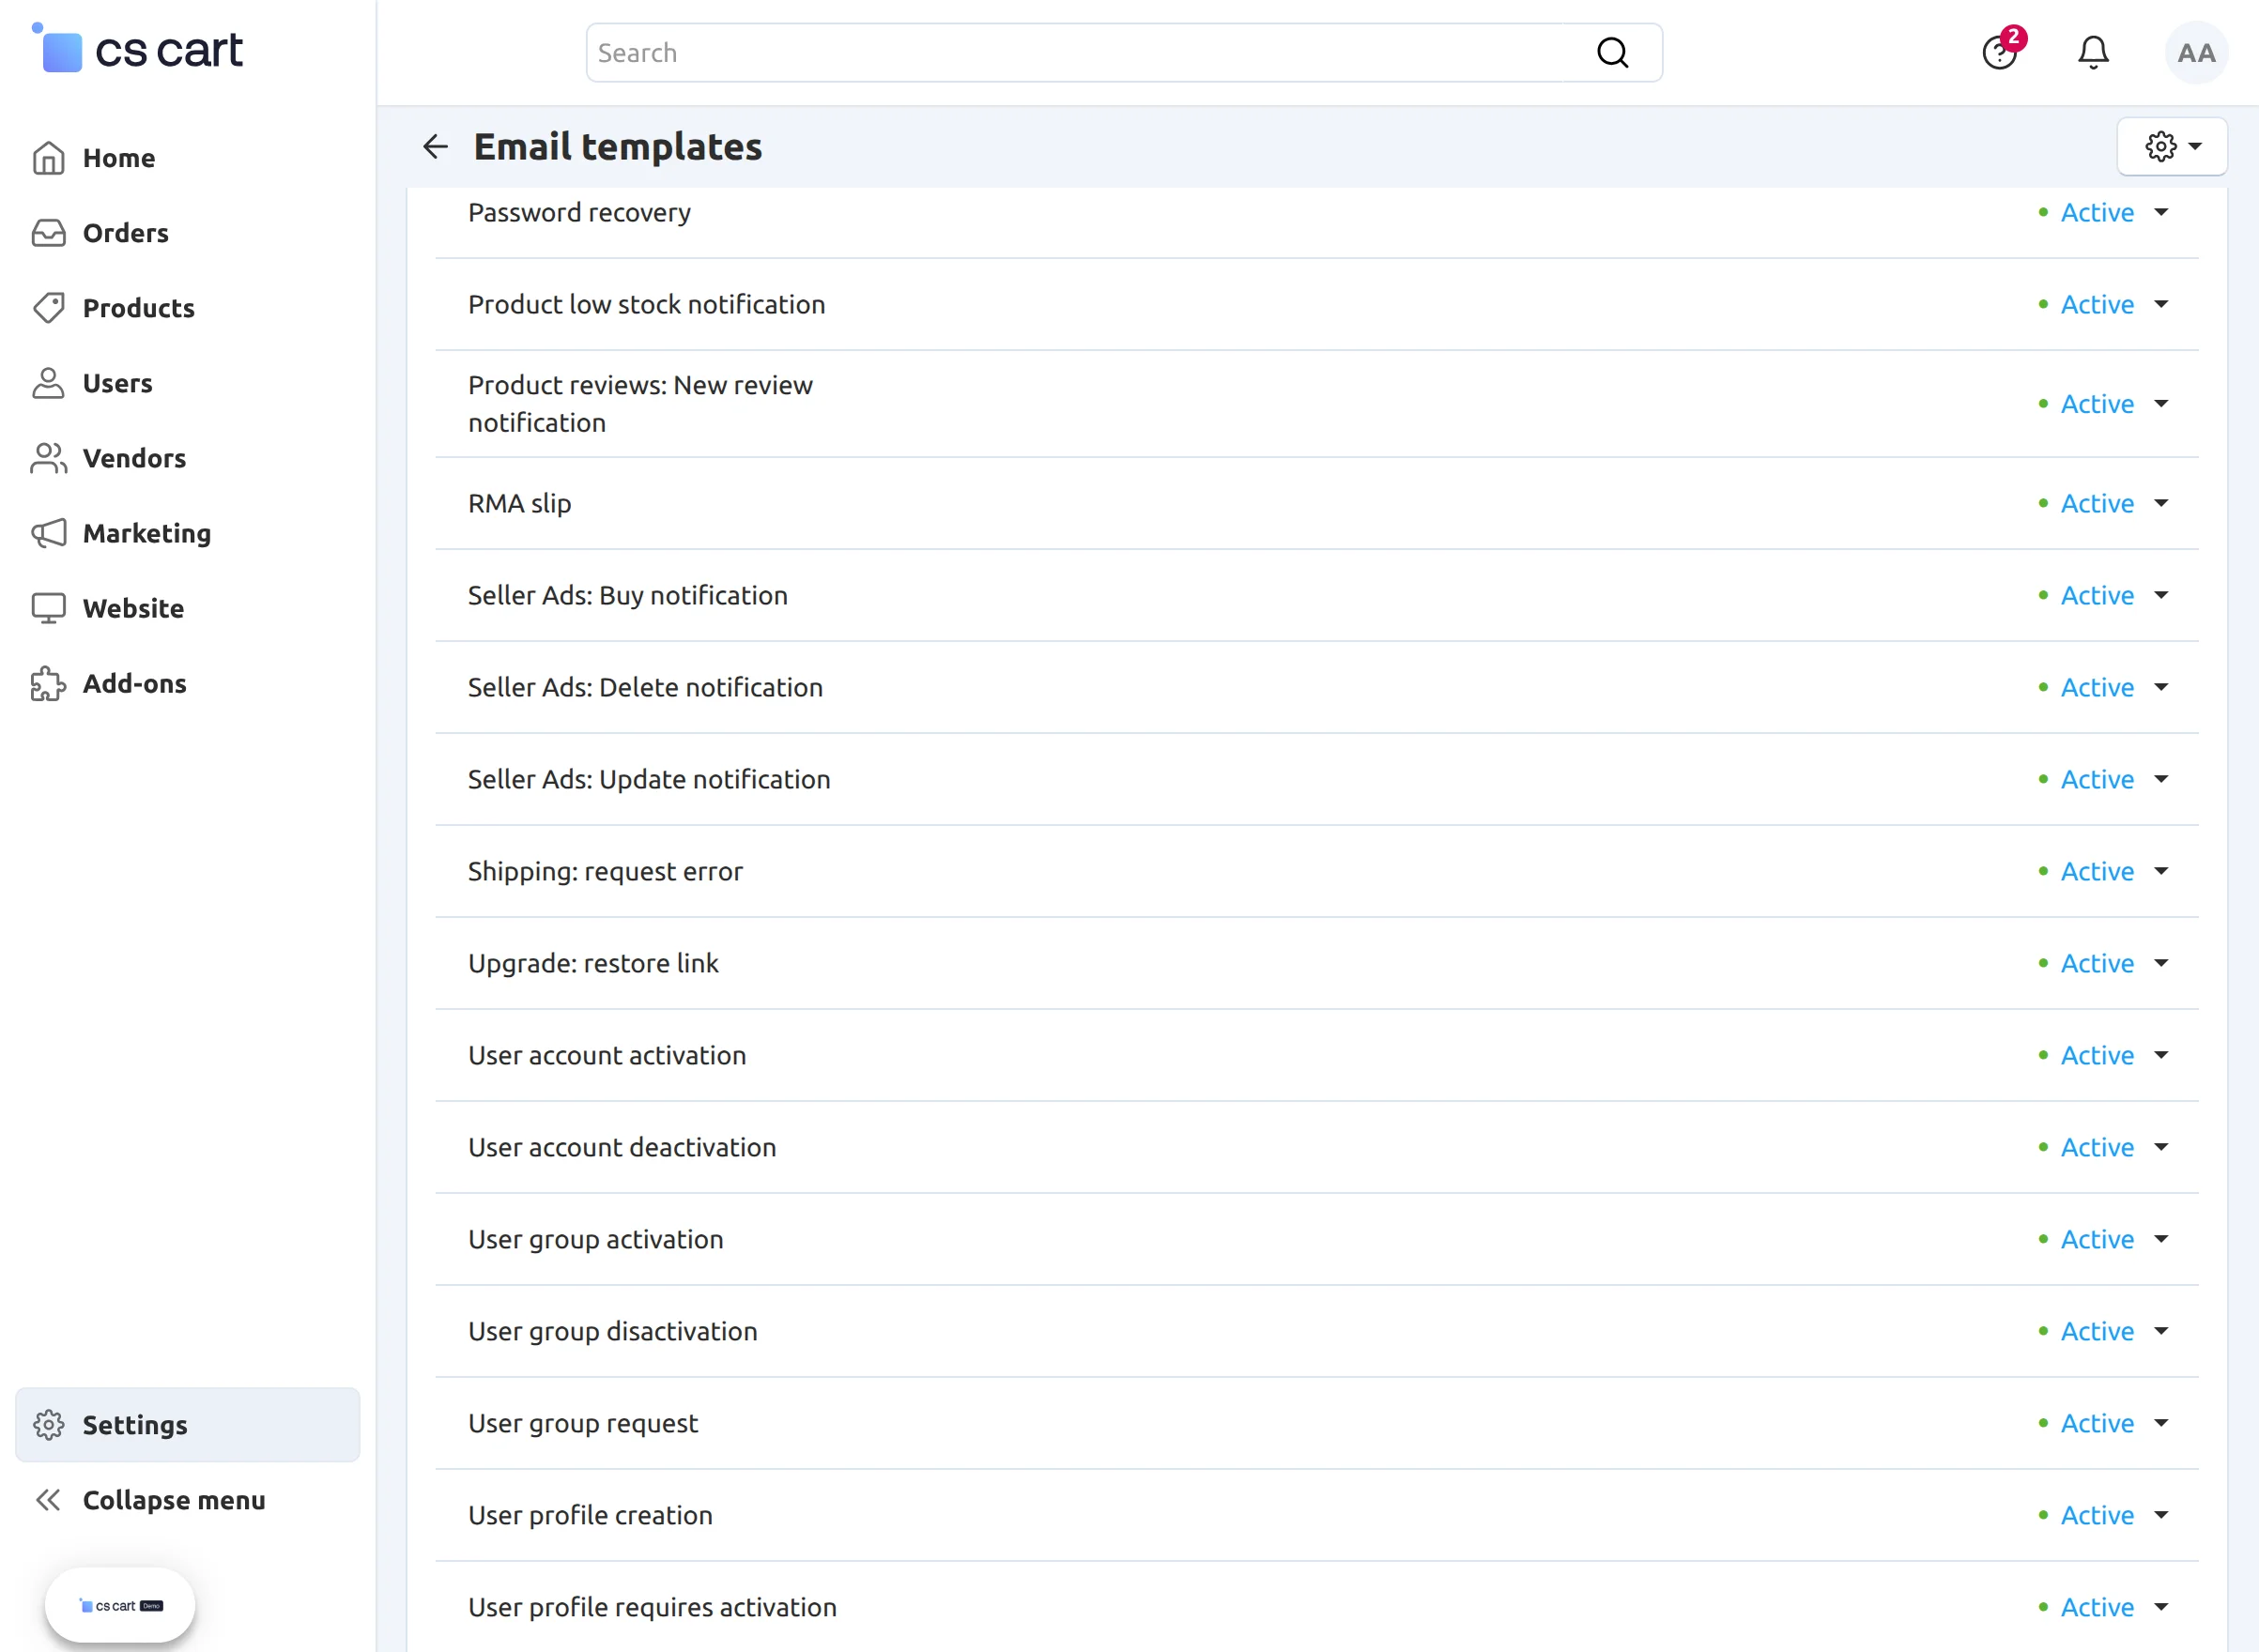
For setting email notification template, go to Design -> Email Templates.
The vendor will get expiration notification, reminder mail, renewal mail notifications.
Under Customer notifications tab, there is an option to edit and set email templates for the same as shown below.
The admin will get mail notifications for the purchase, deletion, and updating of the seller ad .
Under Administrator notifications tab, there is an option to edit and set email templates for the same as shown below.
Vendor Back-end View
The vendor will be able to view all the ads created by admin to book in the vendor panel itself as shown below.
Here’s the list of all the ads (including booked and available.) The vendor can view the desired seller ad by clicking the view button.
The vendor will have the view only access to the available ads until he has not purchased the one. To buy he/she needs to click on Buy now button as shown below.
After clicking the button, the ad will be purchased and the cost will be adjusted in the payout against a payout id.
If auto approval for the purchased ad is enabled in the addon settings then the status of the booking will be booked and Verified.
The vendor can upload the desired banner and set the redirecting URL for the banner. Rest other fields will be un-editable as shown below.
If the auto-approval is not enabled then the purchased ad will be verified by the admin and then, will get approved.
Till then it will remain pending and will not be editable by the vendor as shown below.

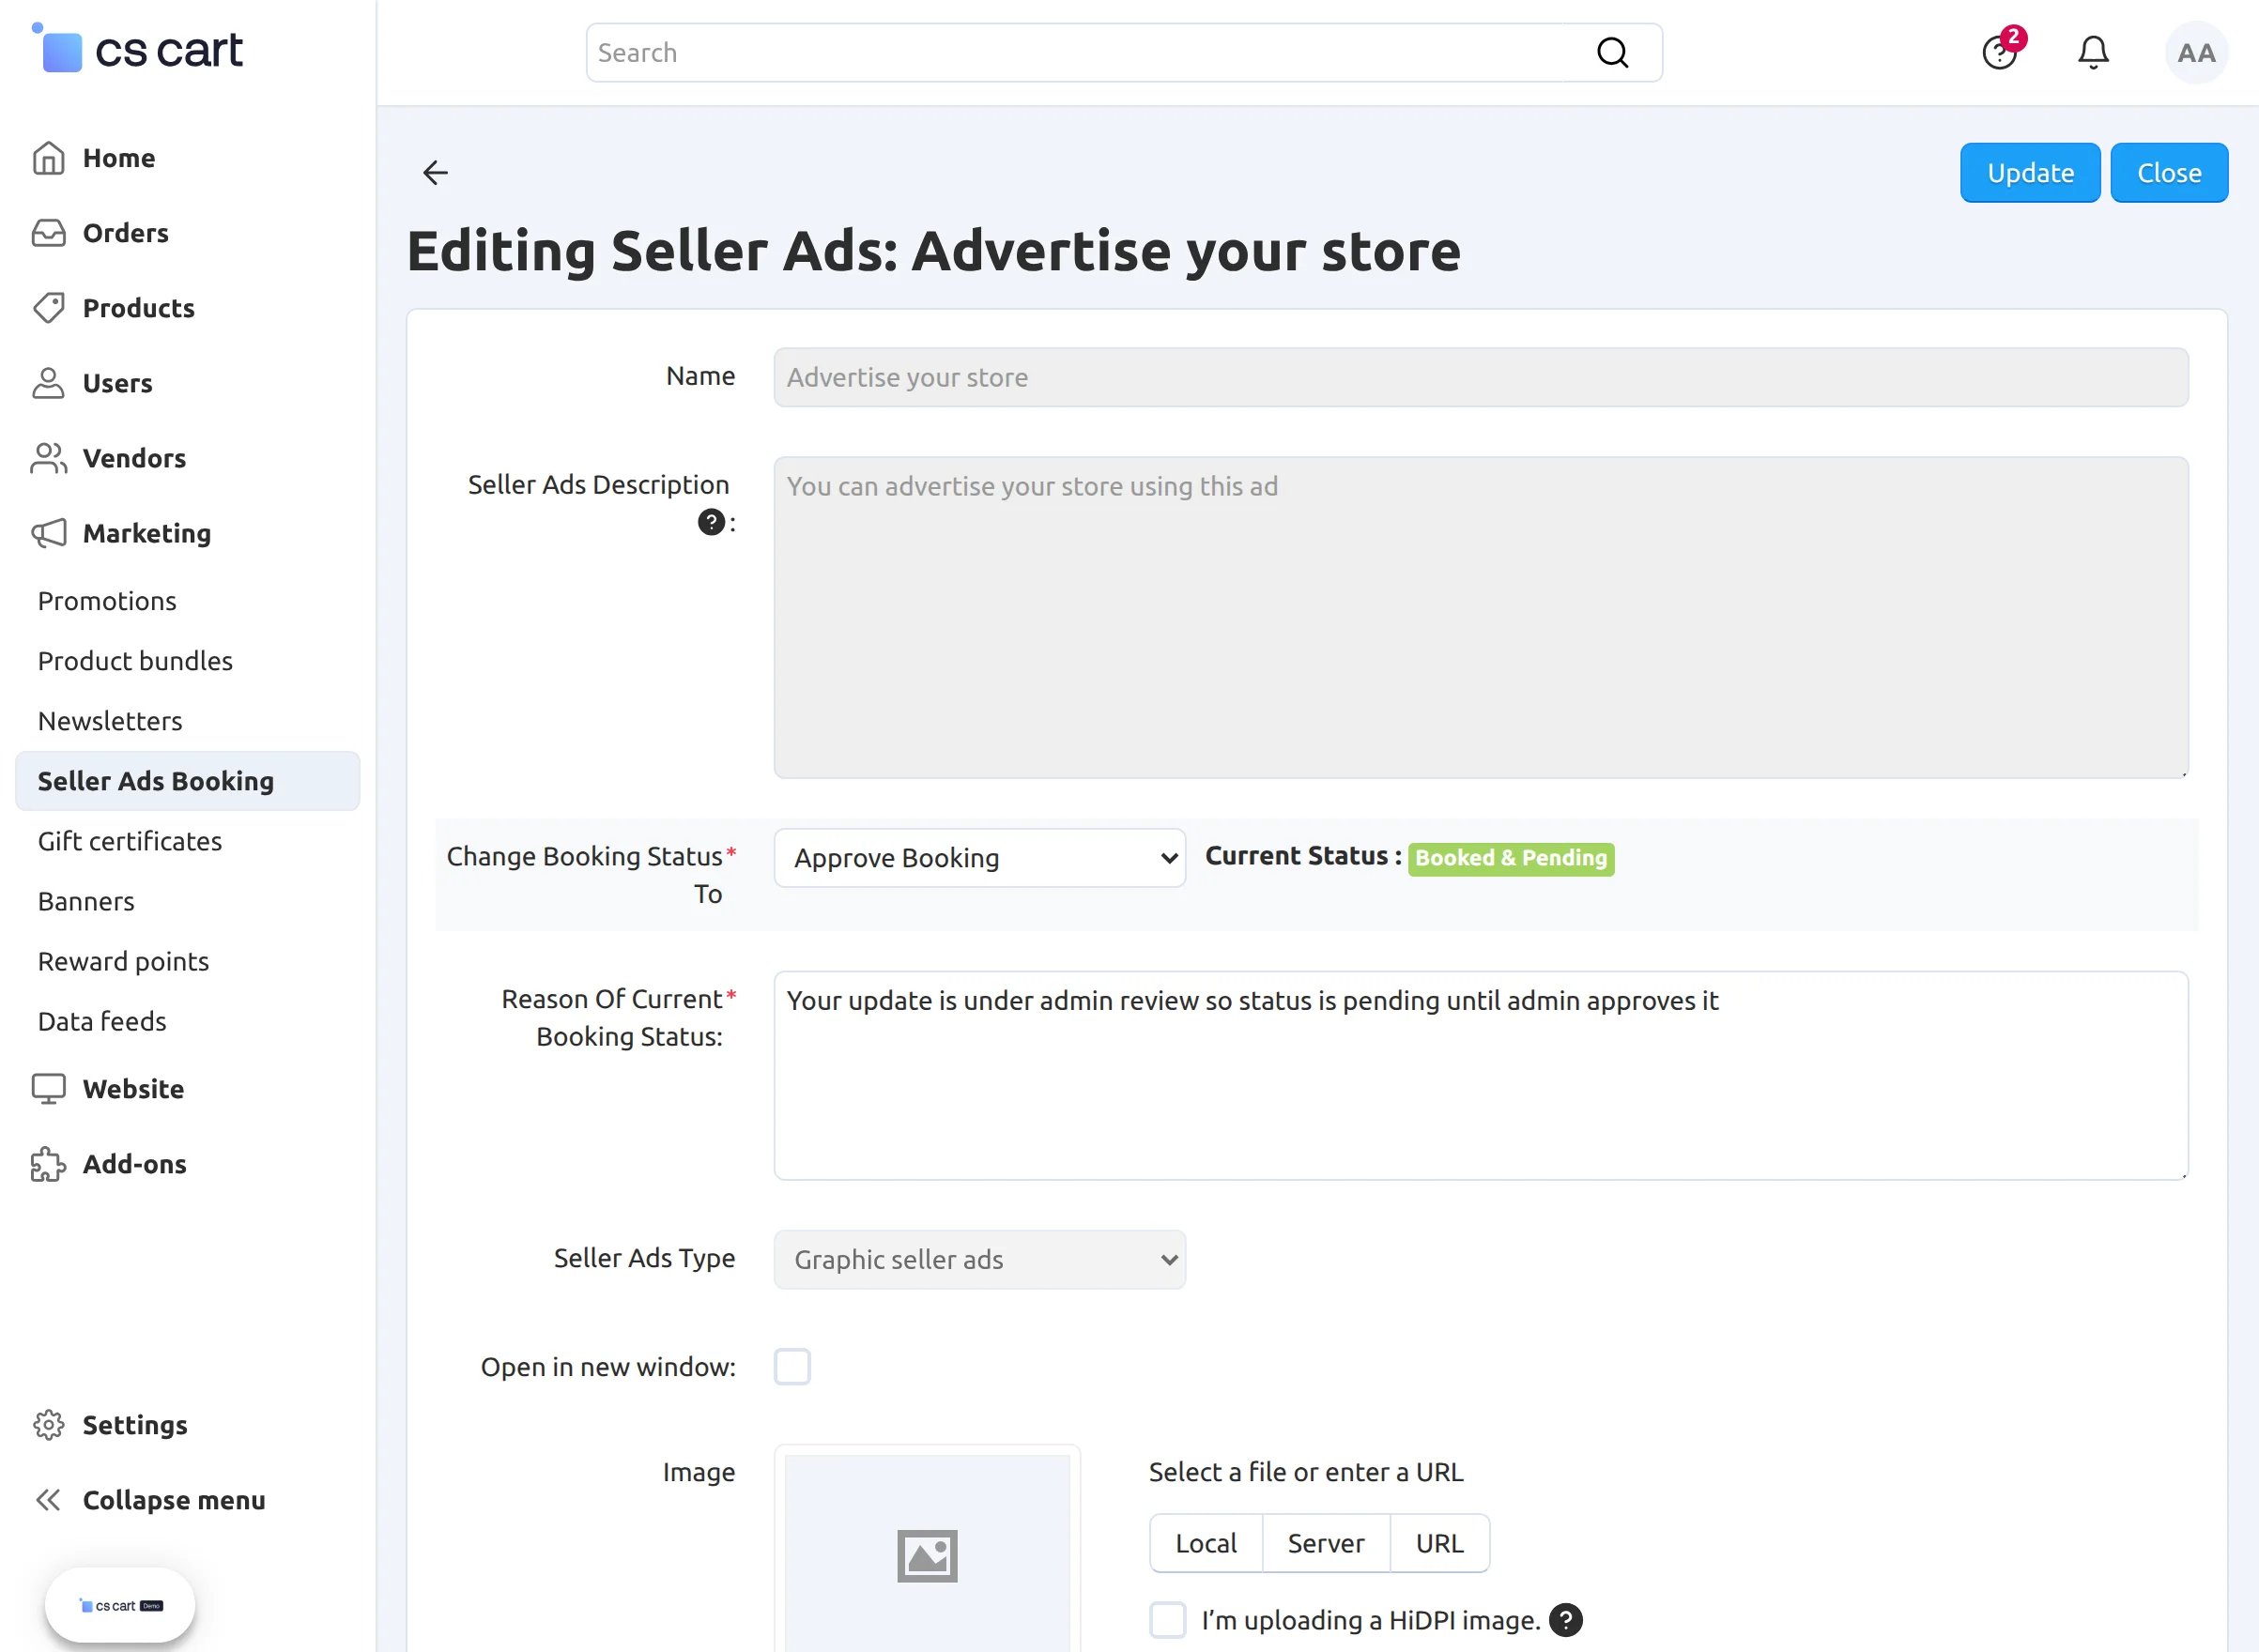
Let’s see how an admin can approve the purchased ad:
Admin will get notified if the ad is purchased by any vendor. He then needs to edit the status of the purchased advertisement via admin panel as shown below
Admin can approve, deny or cancel the booking along with an option to add the reason for the changed status.
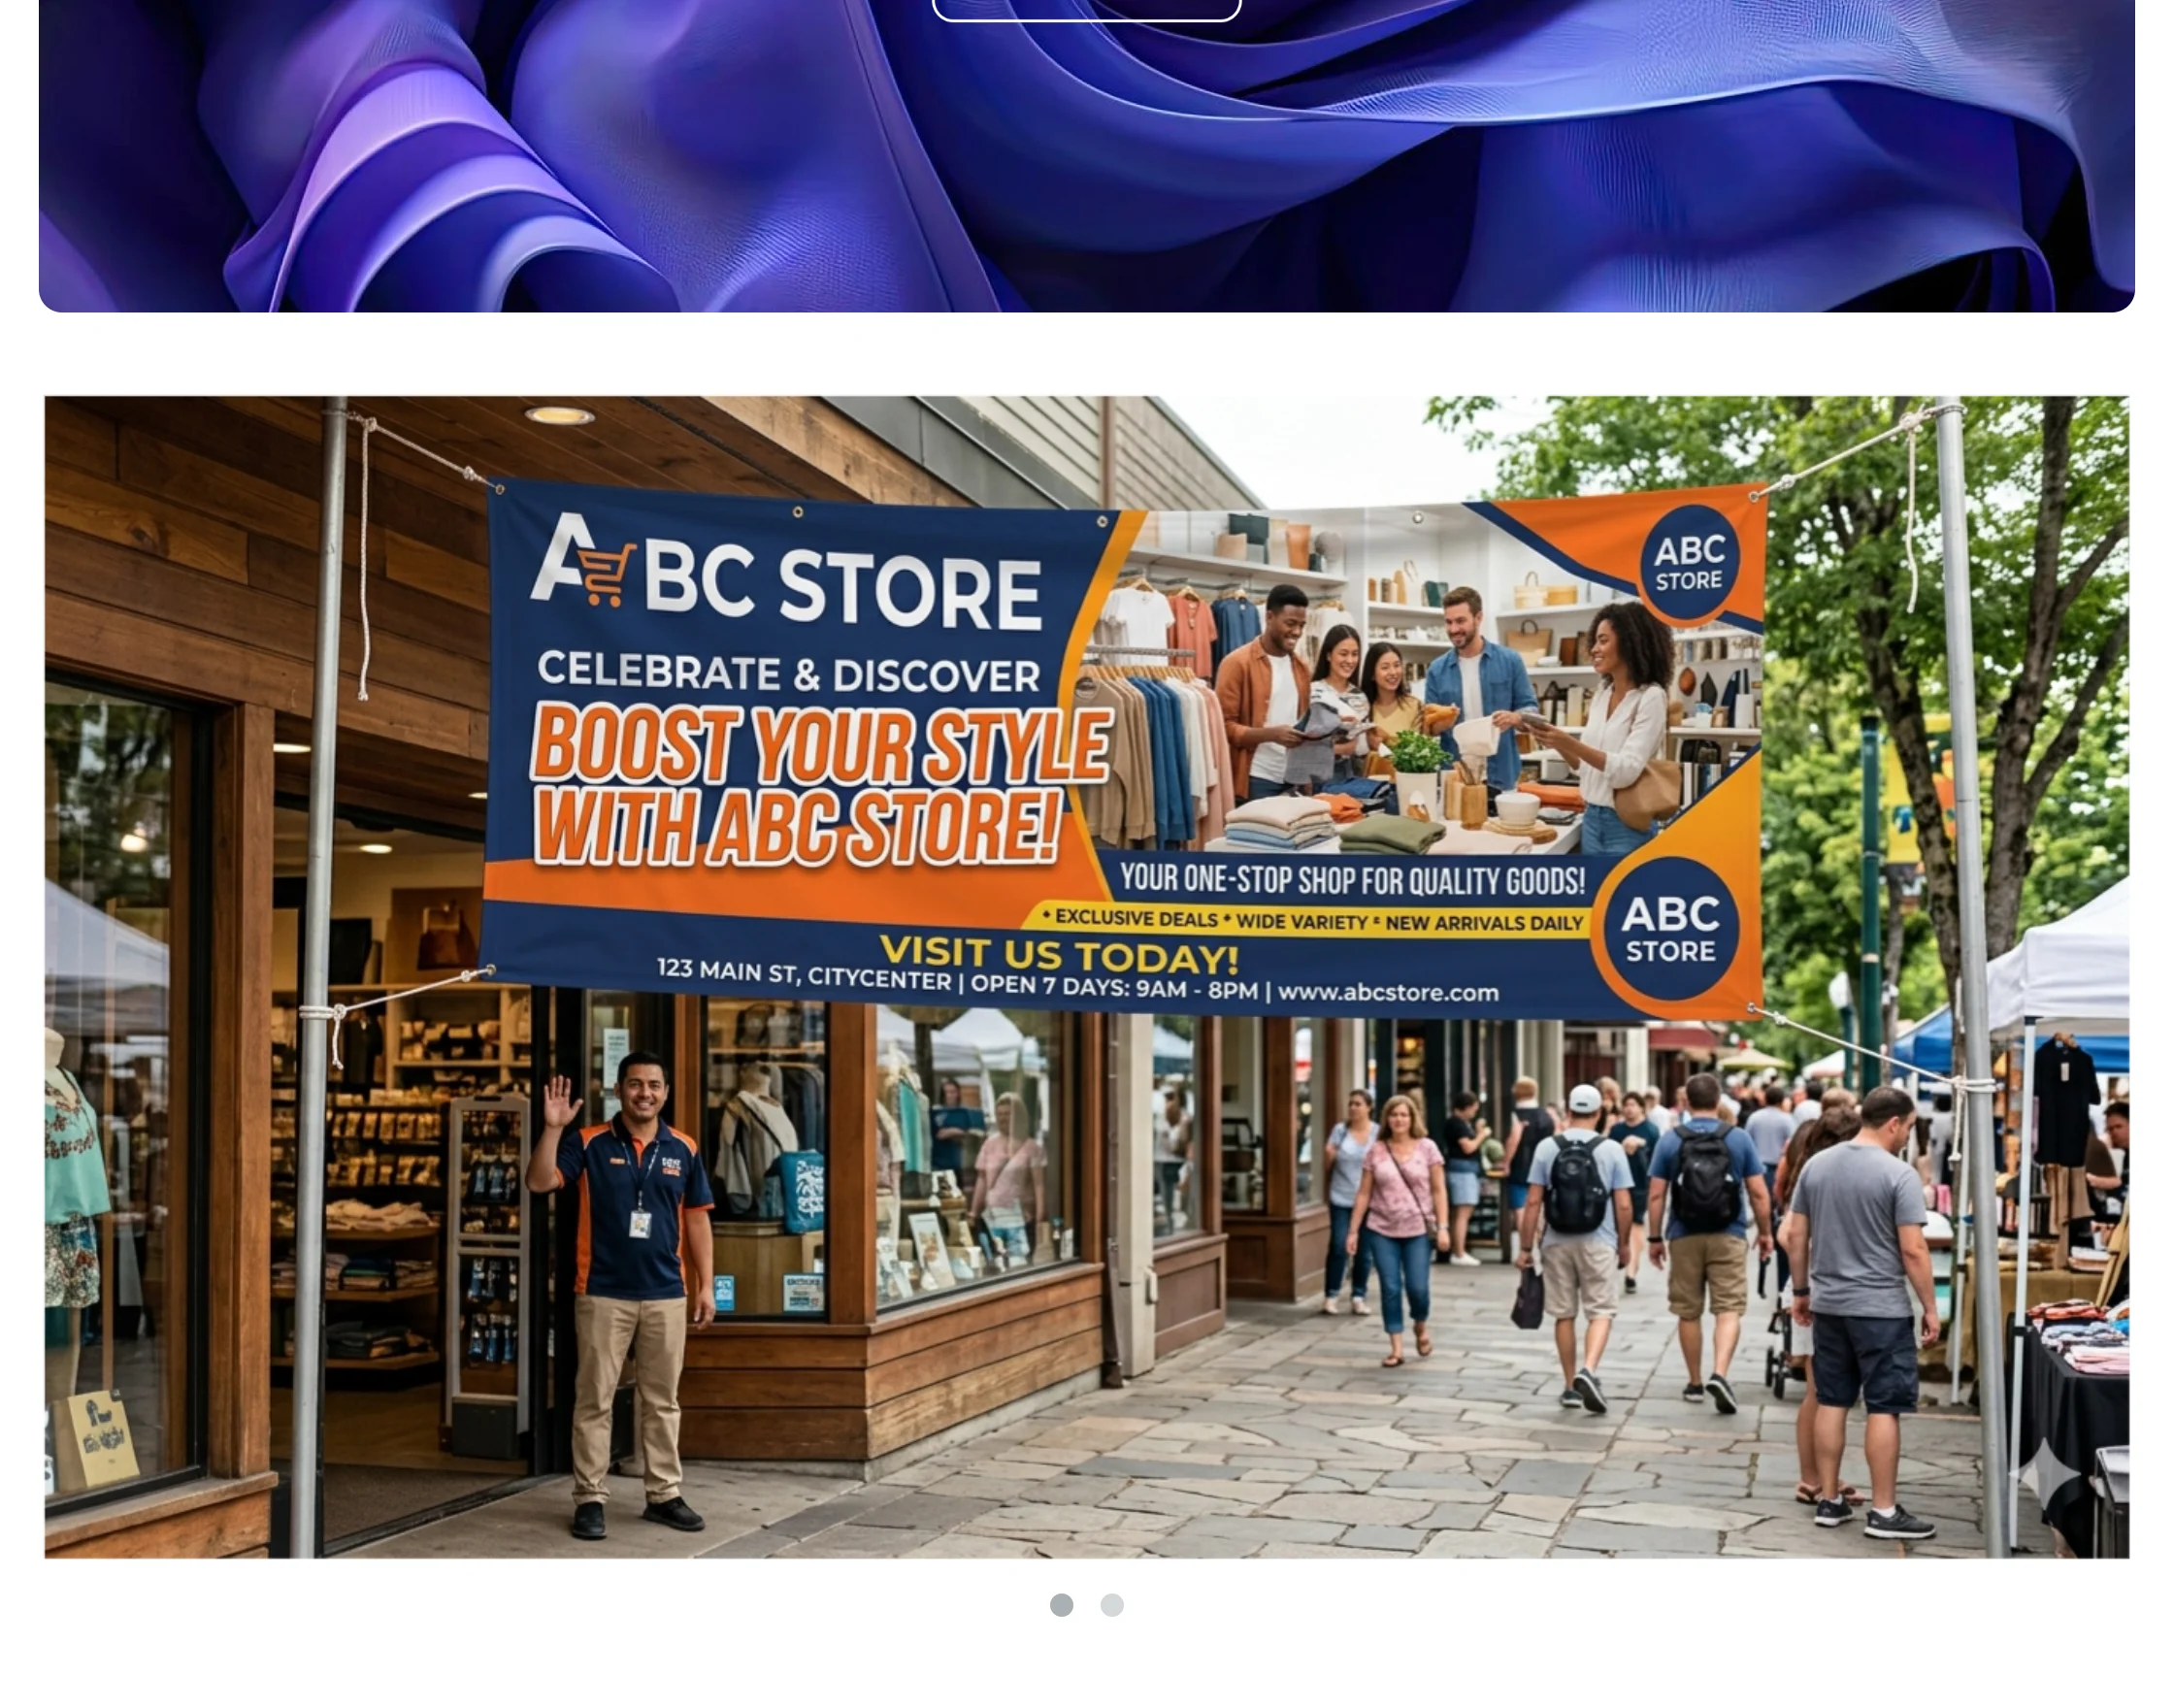
Front-End View
The purchased seller ads will be available at the front end as shown below. These banners will be click if the redirecting URL has been add.
Support
That’s all for the add-on “CS-Cart Multi-Vendor Seller Ads Booking”, still, have any issue, feel free to write here http://webkul.uvdesk.com and let us know your views to make the module better.
Please explore our Cs-Cart Development Services and Quality cs-cart add-ons.
Current Product Version - 3.0
Supported Framework Version - 4.18

Be the first to comment.