Building interactive Magento pages often means writing JavaScript, handling AJAX, and keeping frontend and backend states in sync. That can quickly increase the complexity of even simple UI features.
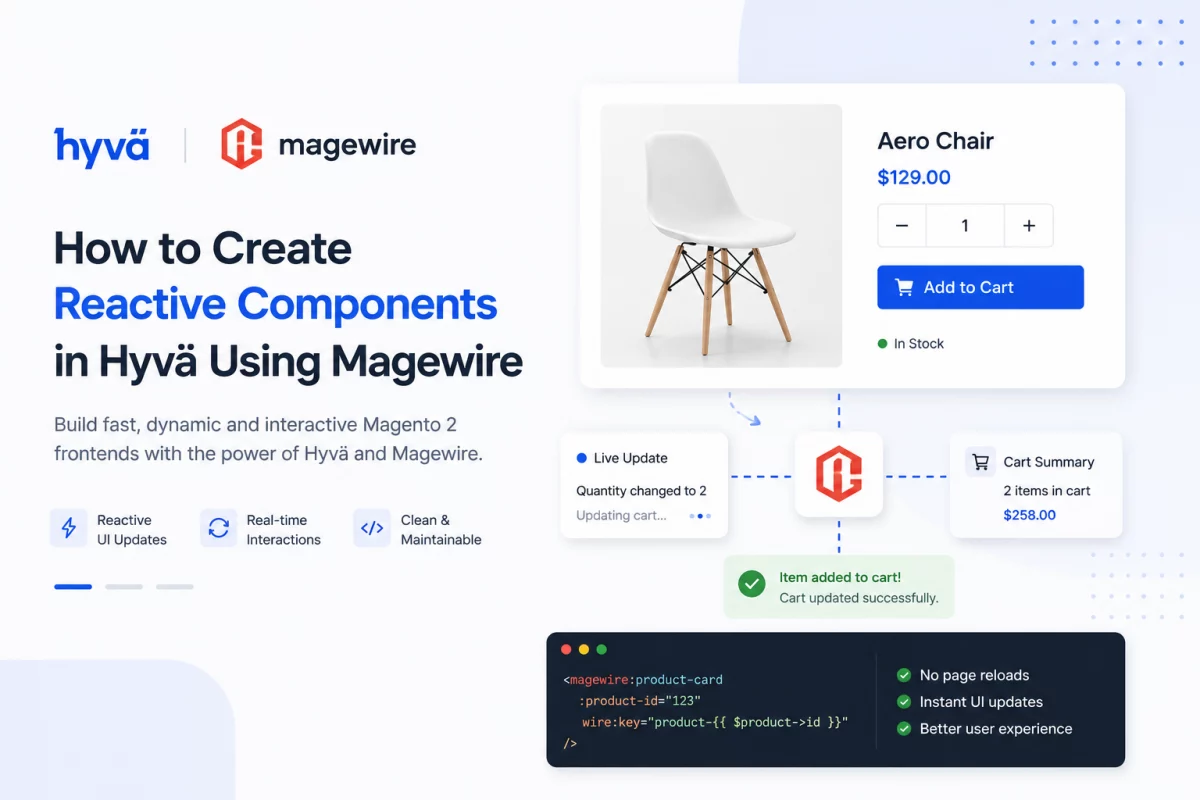
Hyvä Themes simplify Hyvä theme development with a lightweight frontend and Magewire. Build reactive Magento components using PHP instead of custom JavaScript, with automatic frontend synchronization.
What is Magewire in Hyvä?
Magewire is a server-driven UI framework inspired by Livewire. It allows developers to create reactive Magento components using PHP instead of building separate frontend APIs.
Whenever a user interacts with a component, Magewire sends an AJAX request, executes the PHP method, and updates only the affected HTML without refreshing the page.
This approach keeps business logic inside Magento while reducing frontend complexity.
You can check the detail magewire documentation.
Why Use Magewire with Hyvä?
Magewire offers several advantages for Hyvä development:
- Write reactive components using PHP.
- Reduce custom JavaScript.
- Automatic AJAX communication.
- Easy state management.
- Better code organization.
- Seamless integration with Alpine.js.
- Faster development for interactive features.
It is ideal for:
- Counters
- Product configurators
- Search filters
- Wishlist interactions
- Checkout enhancements
- Dynamic forms
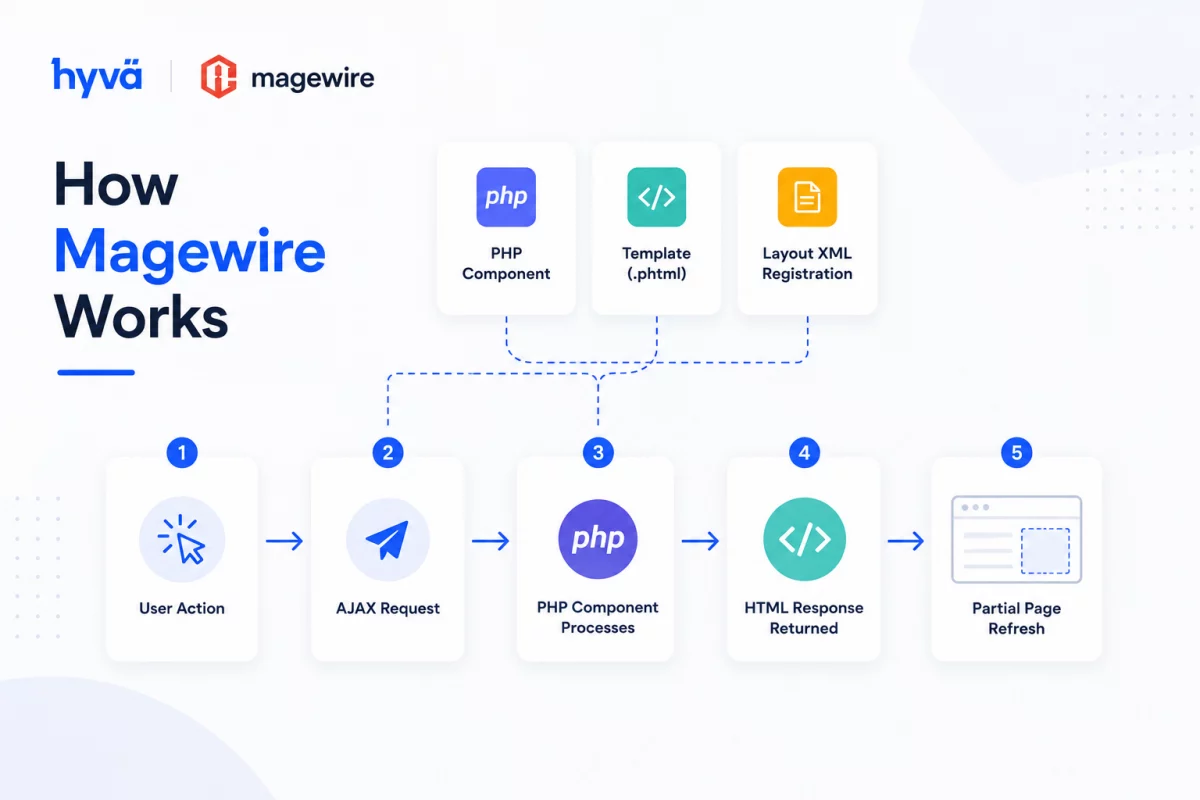
How Magewire Works
A Magewire component consists of three parts:
- PHP component
- Template (
.phtml) - Layout XML registration
When a visitor clicks a button or updates an input:
- Magewire sends an AJAX request.
- The PHP component processes the action.
- Updated HTML is returned.
- Only the affected portion of the page is refreshed.
No manual JavaScript API calls are required.
Step 1: Create the Magewire PHP Component
Create a new component inside your Magento module.
File
app/code/Vendor/Module/Magewire/Counter.php
<?php
declare(strict_types=1);

namespace Vendor\Module\Magewire;

use Magewirephp\Magewire\Component;

class Counter extends Component
{
    public int $count = 0;

    public function mount(): void
    {
        if ($this->count === 0) {
            $this->count = 1;
        }
    }

    public function increment(): void
    {
        $this->count++;
    }

    public function decrement(): void
    {
        if ($this->count > 0) {
            $this->count--;
        }
    }
}
This component stores the current counter value and exposes methods that the frontend can call.
Understanding the Component
The component uses three important concepts.
Public Properties
public int $count = 0;
Public properties automatically stay synchronized between the server and the browser.
Whenever the value changes, Magewire updates the UI automatically.
The mount() Method
public function mount(): void
{
    $this->count = 1;
}
The mount() method runs once when the component is initialized.
It is commonly used to load default values or fetch Magento data.
Public Methods
public function increment(): void
{
    $this->count++;
}
Every public method can be triggered directly from the template using wire:click.
Step 2: Create the Frontend Template
Now create the frontend template.
File
app/code/Vendor/Module/view/frontend/templates/counter.phtml
<?php
$magewire = $block->getMagewire();
?>
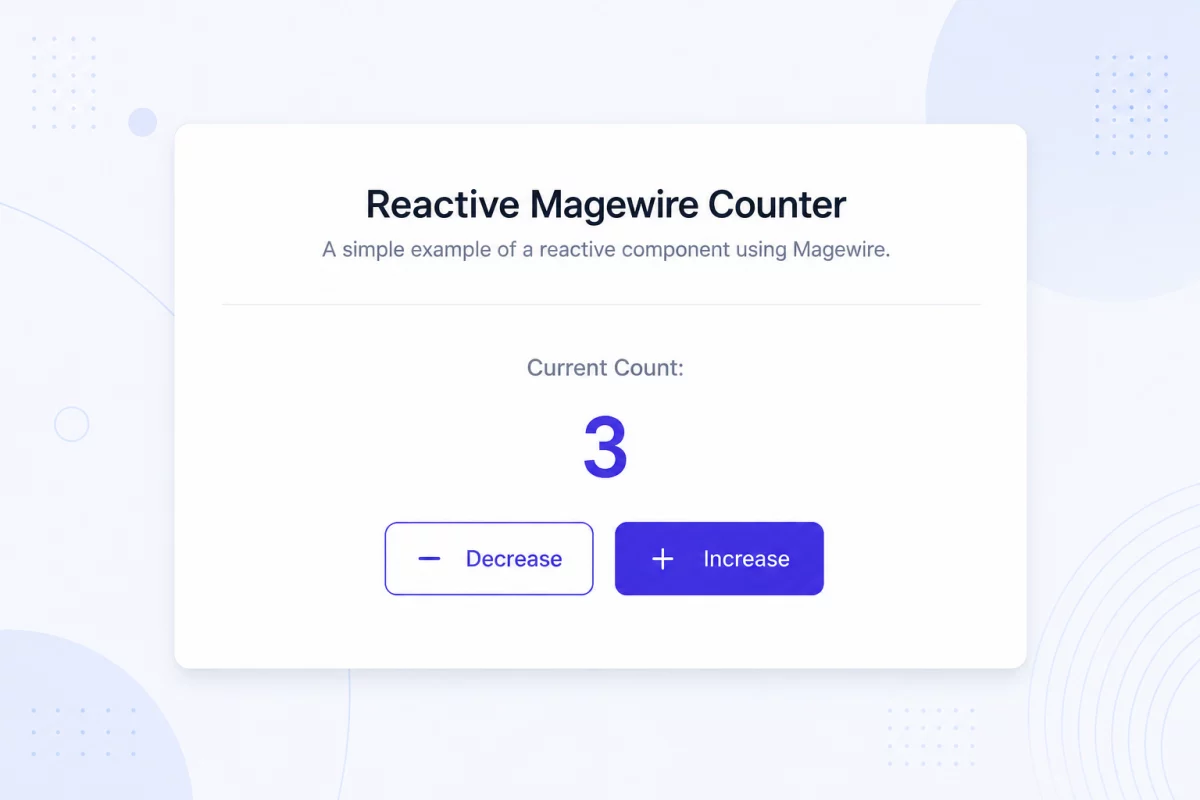
<div class="p-6 max-w-sm mx-auto bg-white rounded-xl shadow-md border border-gray-200">
<h3 class="text-xl font-medium">
Reactive Magewire Counter
</h3>
<p class="mt-3">
Current Count:
<span class="font-bold">
<?= $magewire->count ?>
</span>
</p>
<div class="flex gap-2 mt-4">
<button
wire:click="decrement"
class="px-4 py-2 border rounded">
- Decrease
</button>
<button
wire:click="increment"
class="px-4 py-2 border rounded">
+ Increase
</button>
</div>
</div>
The template displays the server state and binds button clicks directly to PHP methods.
Understanding wire:click
<button wire:click="increment">
This directive tells Magewire to execute the increment() method whenever the button is clicked.
There is no need to write JavaScript or AJAX requests manually.
Step 3: Register the Component
Now register the component inside your layout XML.
File
app/code/Vendor/Module/view/frontend/layout/default.xml
<?xml version="1.0"?>

<page xmlns:xsi="http://www.w3.org/2001/XMLSchema-instance"
      xsi:noNamespaceSchemaLocation="urn:magento:framework:View/Layout/etc/page_configuration.xsd">

    <body>

        <referenceContainer name="content">

            <block
                class="Magento\Framework\View\Element\Template"
                name="magewire.example.counter"
                template="Vendor_Module::counter.phtml">

                <arguments>
                    <argument
                        name="magewire"
                        xsi:type="object">
                        Vendor\Module\Magewire\Counter
                    </argument>
                </arguments>

            </block>

        </referenceContainer>

    </body>

</page>
This layout connects your template with the Magewire component and enables its lifecycle.
Common Magewire Directives
These directives make your components more interactive.
| Directive | Purpose |
|---|---|
wire:click | Call a PHP method |
wire:model | Sync input values instantly |
wire:model.lazy | Update after input loses focus |
wire:keydown.enter | Execute a method on Enter key |
wire:loading | Show loading state during requests |
wire:target | Apply loading state to specific actions |
Using wire:model
For reactive forms, Magewire keeps form inputs synchronized automatically.
<input
    type="text"
    wire:model="customerName">
Whenever the user types, the customerName property updates on the server.
Working with Alpine.js
Hyvä already includes Alpine.js, making it easy to combine client-side interactions with Magewire.
You can access Magewire properties directly.
this.$wire.count
You can also synchronize Alpine variables using entanglement for two-way data binding.
This allows lightweight frontend behavior while keeping business logic in PHP.
Access Magento Data Inside Magewire
Magewire components are standard Magento classes.
That means you can inject Magento services through dependency injection.
Example use cases include:
- Customer session
- Shopping cart
- Product repository
- Quote data
- Wishlist
- Custom services
This keeps your component clean and follows Magento best practices.
Best Practices
When building Magewire components:
- Keep components focused on one responsibility.
- Store business logic inside PHP classes.
- Use Alpine.js only for lightweight UI behavior.
- Avoid unnecessary AJAX requests.
- Keep templates clean and readable.
- Reuse components whenever possible.
When Should You Use Magewire?
Magewire works best for features that require frequent user interaction.
Examples include:
- Quantity selectors
- Dynamic pricing
- Product filters
- Checkout fields
- Multi-step forms
- Wishlist actions
- Search suggestions
- Live validation
For highly interactive browser-only applications, a JavaScript framework may still be the better choice.

Conclusion
Magewire makes reactive development in Hyvä much simpler by allowing developers to build dynamic interfaces using PHP instead of large amounts of JavaScript.
With public properties, reactive directives, and automatic AJAX updates, you can create maintainable Magento components while keeping frontend code lightweight.
Combined with Hyvä’s performance-focused architecture, Magewire is an excellent choice for building modern Magento experiences that are both fast and developer-friendly.

Be the first to comment.