The Multi-vendor Marketplace app is dedicated to convert your Shopify store into a fully-functional marketplace.
It is a feature-rich eCommerce solution for every merchant to grow-up their online stores.
You as an admin can register sellers on your marketplace who can showcase their brands worldwide.
Sellers can add items & sell them to your store. You, on the other hand, appreciate commission.
As soon as the sellers get registered to your marketplace, they will have separate seller panels from where they can manage their products.
You can also add products from your admin panel and assign products to any of your registered sellers.
How to add Products?
In order to add items, you need to visit the Products section of the app.

Go to the Product Listing & get the option to Add Products. All the added products will be listed in the same section.

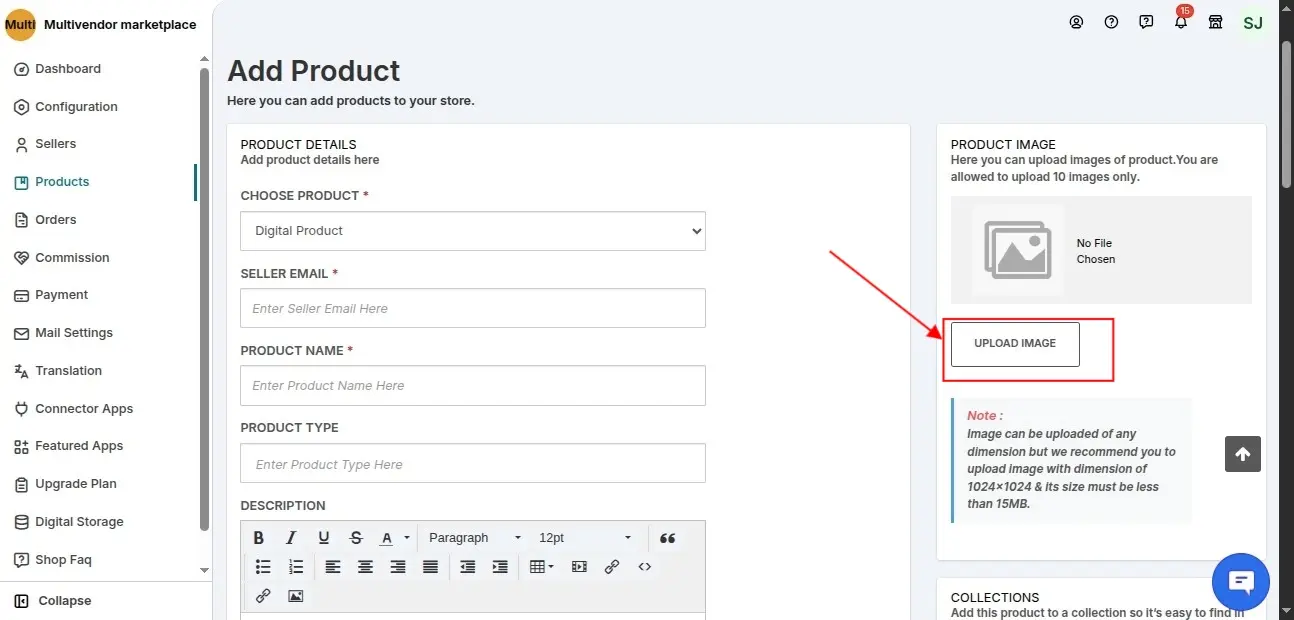
- Clicking the Add Product button, product form appears. Now, enter the details in the given fields of the product form.
- Choose products that you want to sell i.e. Normal (Physical) or Digital product.
- Enter seller email ID i.e. the seller to whom you want to assign the product.
- Write an appropriate title of the product.
- Enter product type, description, product tags, policies.
- Upload upto 10 images at a time for your product.
- You can easily replace the product name with the product ID in the Product Title and Product Handle from the Product Configuration section under the Configuration menu.
NOTE: When adding a product, if you upload an image larger than 500kb, our app will automatically compress the product image quality to 80%.
However, if the image is smaller than 500kb, the original quality will be retained.
- Shipping Details:- Enter product weight, choose “requires shipping” in case of normal products & choose a shipping method for the product.
- Pricing Details:- Enter product price & compare at price, if required. Choose to charge tax for the product.
- Inventory Details:- Enter barcode & product SKU to identify & track product inventory or stock.

Moreover, add a good quality image of your product, select a collection.
Most Importantly, mention the Meta Fields for your product i.e. Meta Title & Meta Description.
Save Changes
The same way sellers can add items from their respective seller panels.
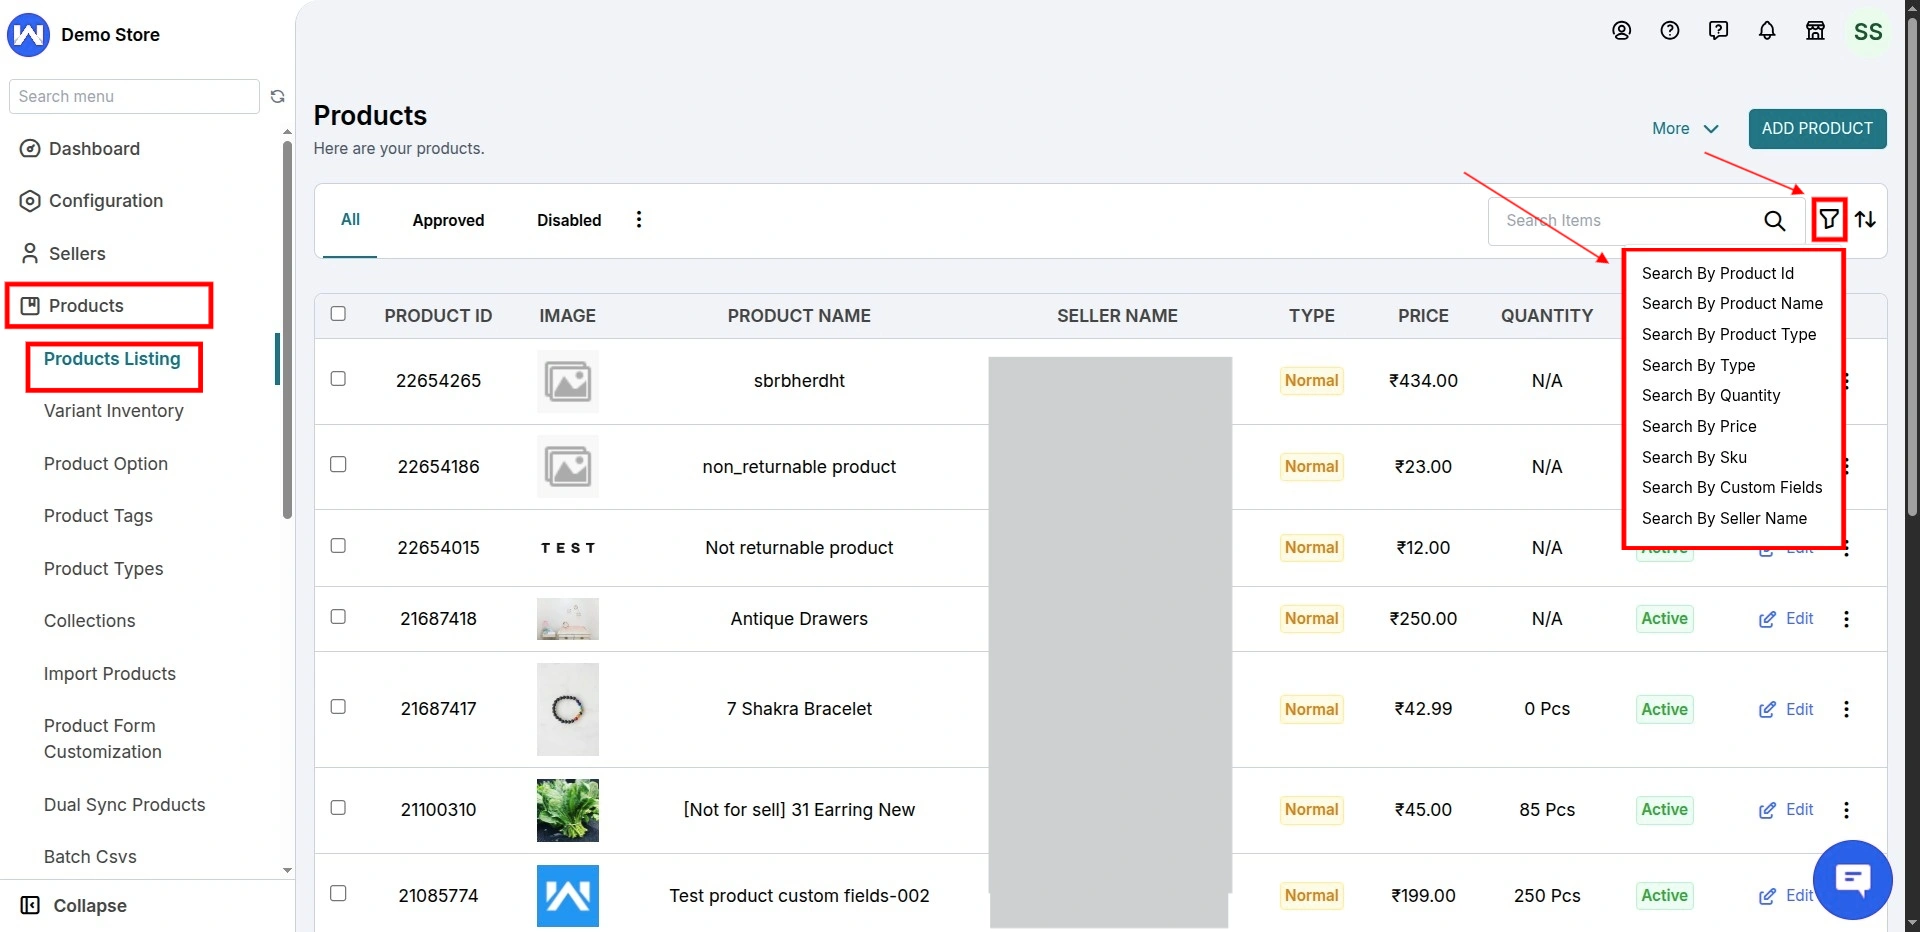
The admin can use the “filter by” option in the product listing to search the product by SKU, approved, disabled, approval pending, reapproval, and global product.
How to Add Variants?
Represent one version of your product with multiple options.
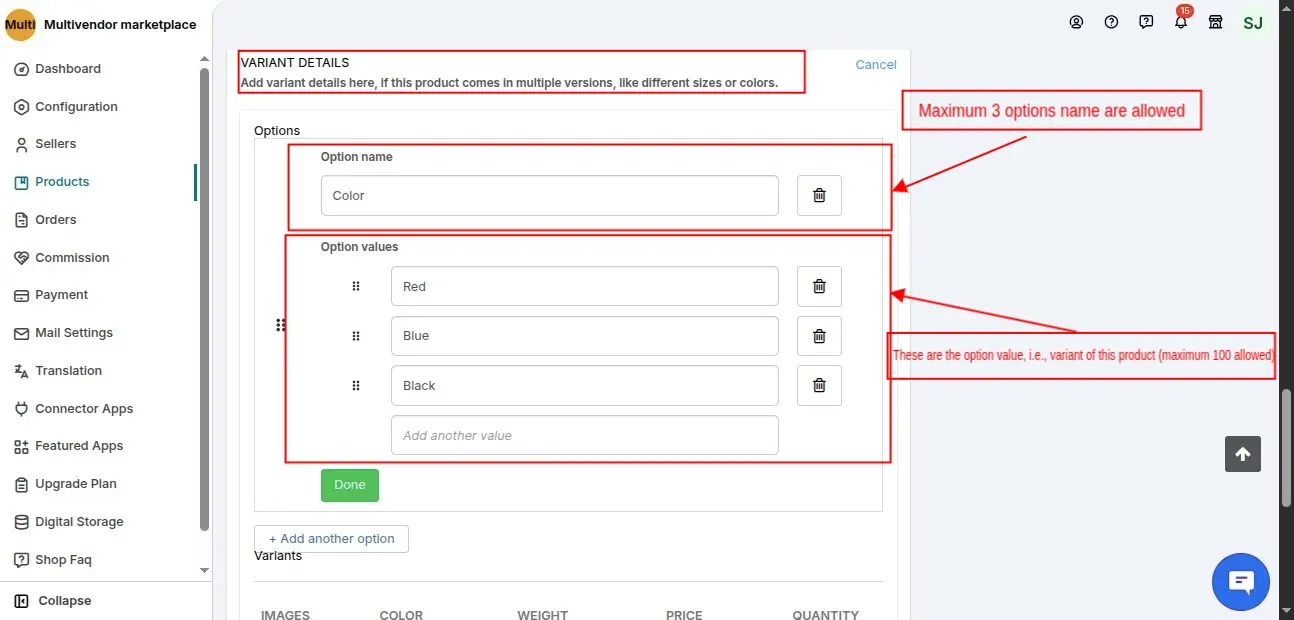
In the app, you can add variants to the products from the product form. Firstly, add options & then, add variants to the available options.
Note:- You can add a maximum of 3 options & 100 variants to a product.
Do follow the procedure to add variants:-
While Adding a Product
Firstly, click the “Add Variant” button in the product form.
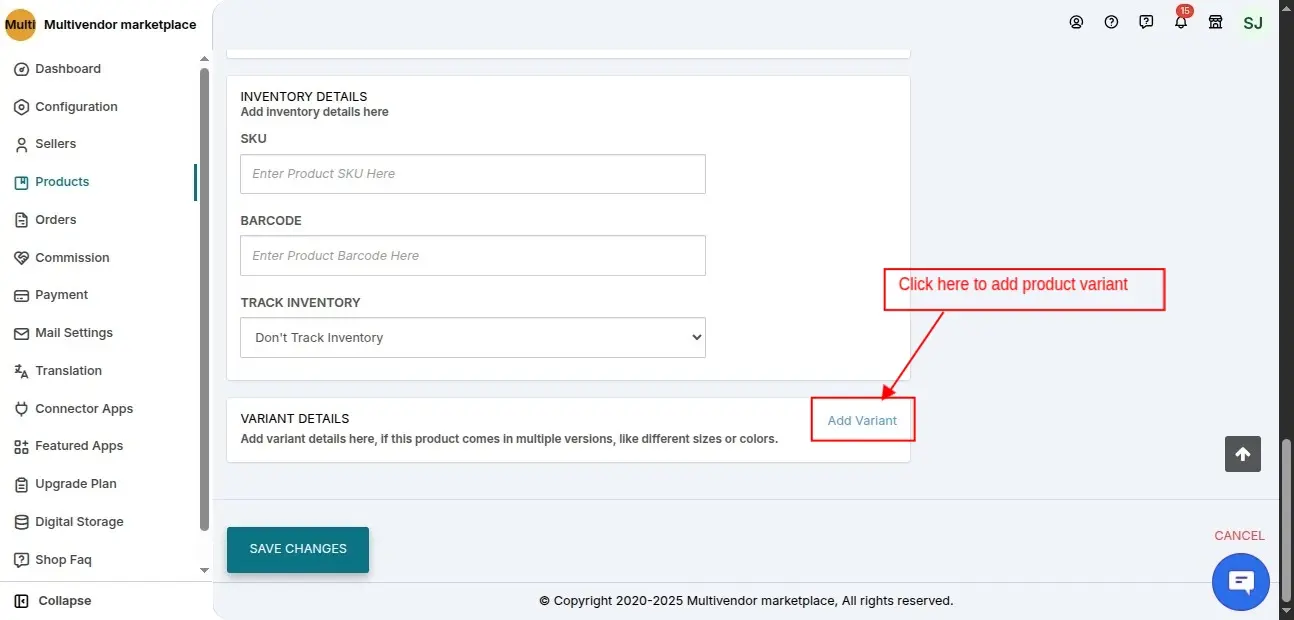
Clicking the Add Variant button, get the options to add options & related variants for the product.
Click the Save button.
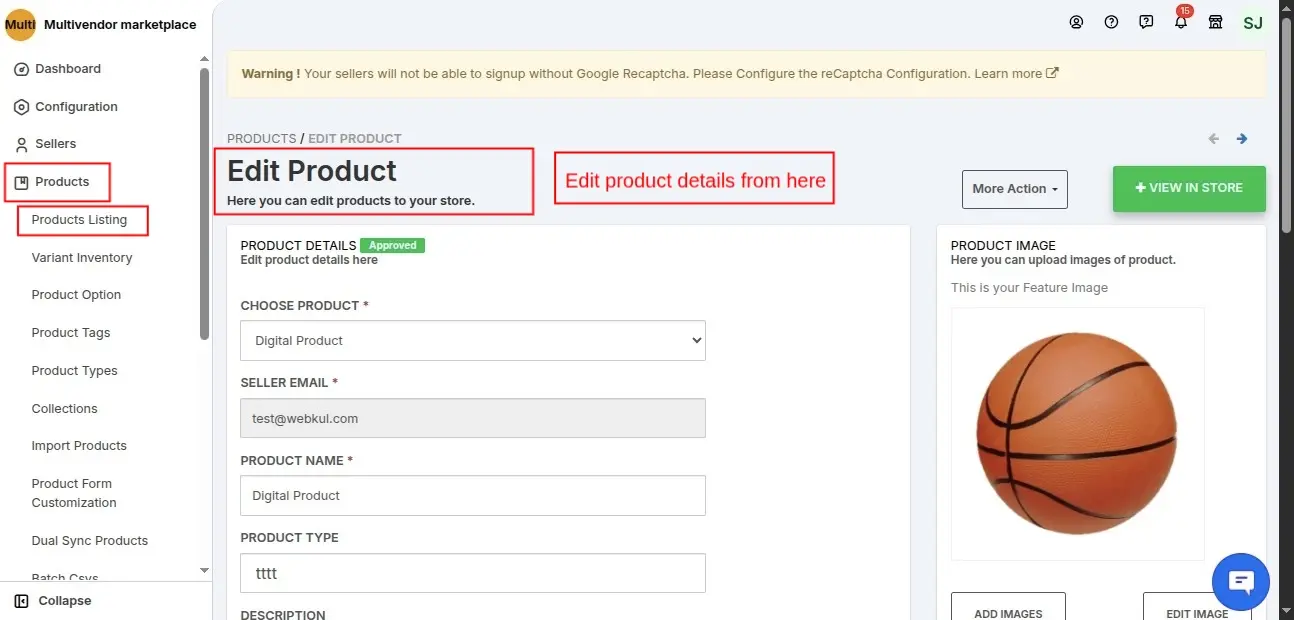
How to Edit Products?
You can also edit or update products once added. For that, you can visit the Product Listing menu & edit the product details in the app.
NOTE: When editing or updating a product, you can edit the image by resizing, cropping, rotating, or deleting it.

Go to the Multi-vendor admin panel>>Products>>Product Listing>>Edit (Action)>>Edit the details on the Edit Product page>>Save Changes.
Note:- You can’t edit product type (normal or digital) and seller email of any product.
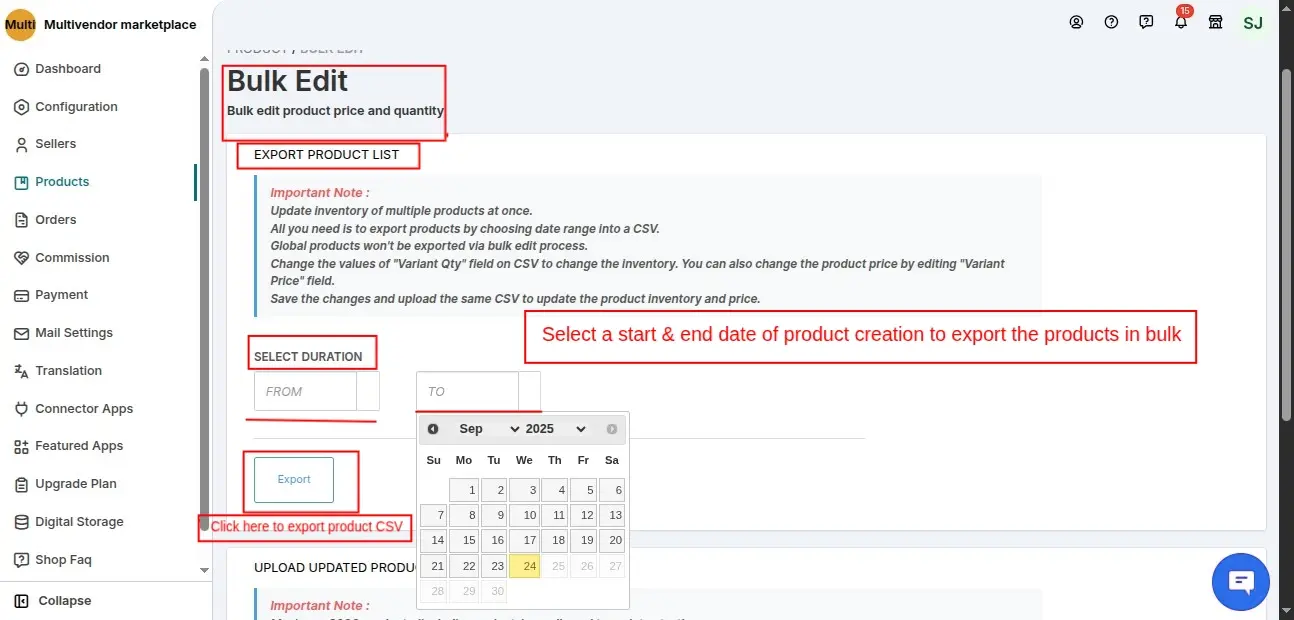
Bulk Edit Products
You can also edit the products in bulk in the app.
STEP 1: Visit the Product Listing page & click Bulk Edit button from the drop-down menu in More Action.

STEP 2: Export CSV
Clicking the Bulk Edit button, you need to select the start & end date of product creation & click the Export button to export the product CSV file.
STEP 3: Import the products via CSV, once edited.
Export the CSV file & make the changes in the product SKU, Quantity, Price wherever required. Once the changes are made in the product CSV, import the same in the app.

PLEASE NOTE:– You can edit the following product fields in the CSV via this process:-
-Variant SKU
-Variant Qty
-and Variant Price.
In case you want to update more fields, you can Update Products via CSV using Method 1
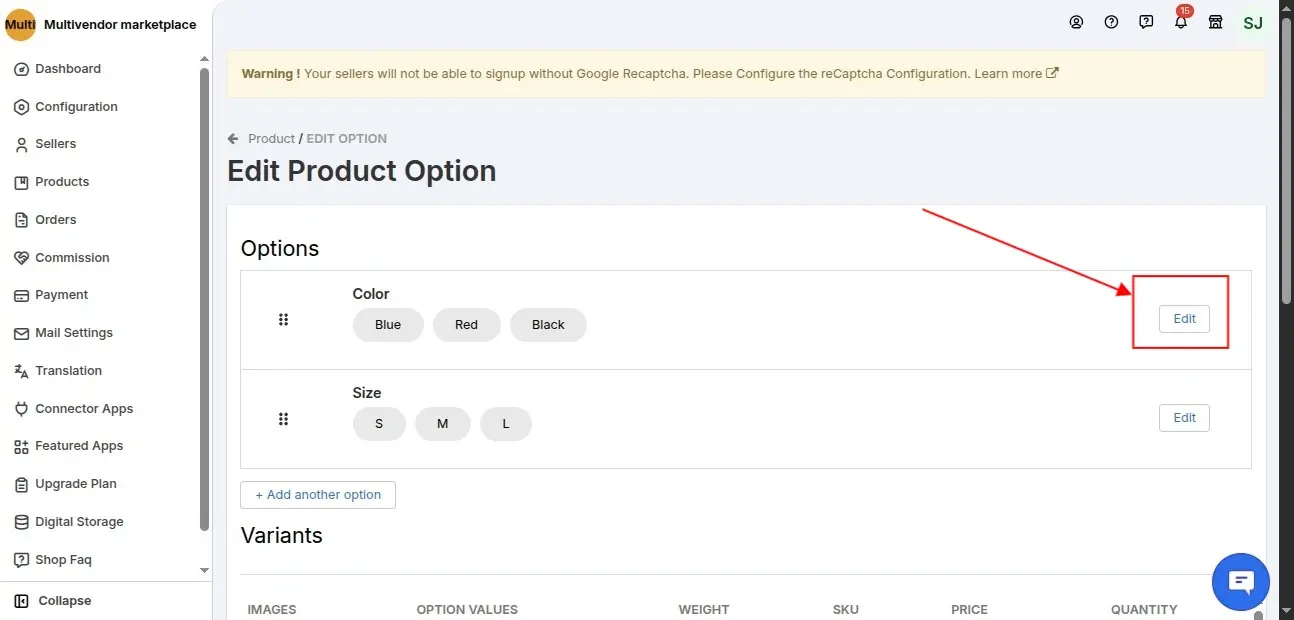
Edit Variants
Firstly, click the “Edit Option” button to add options for the product.

Once you click on the Edit Option, you will be redirected to the product edit page, where you can modify the option details — as shown in the image below.
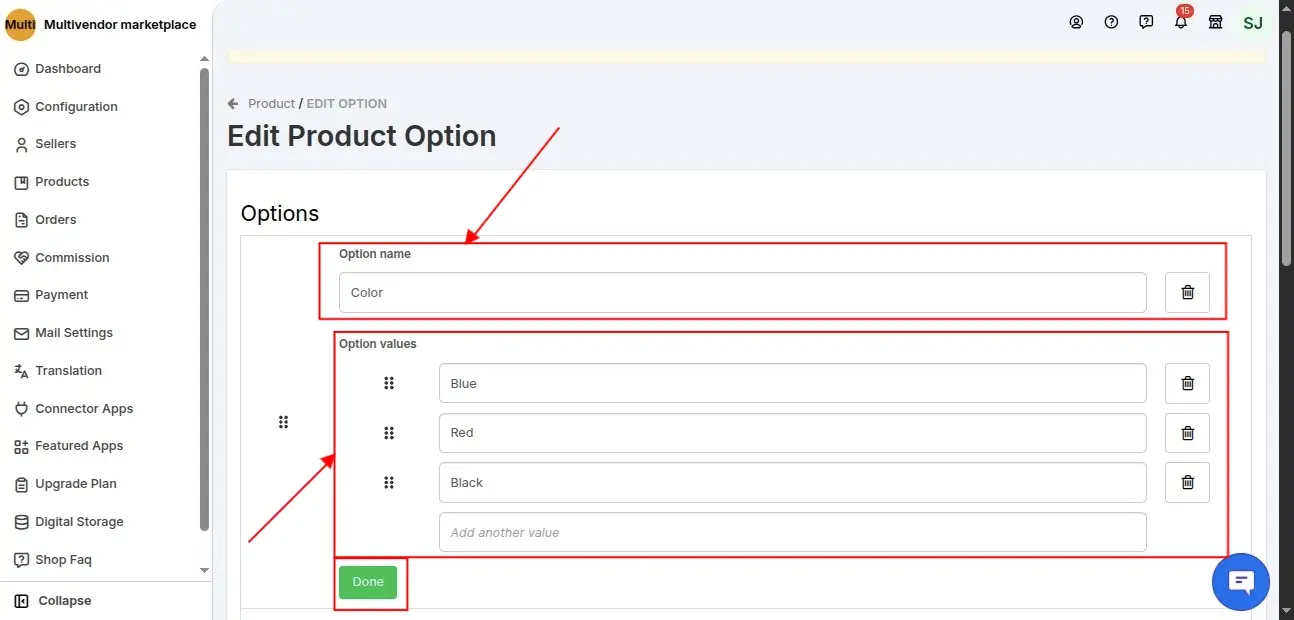
Now, proceed further to add more variants to the added options. For that, you need to click the “Add Variant” button.

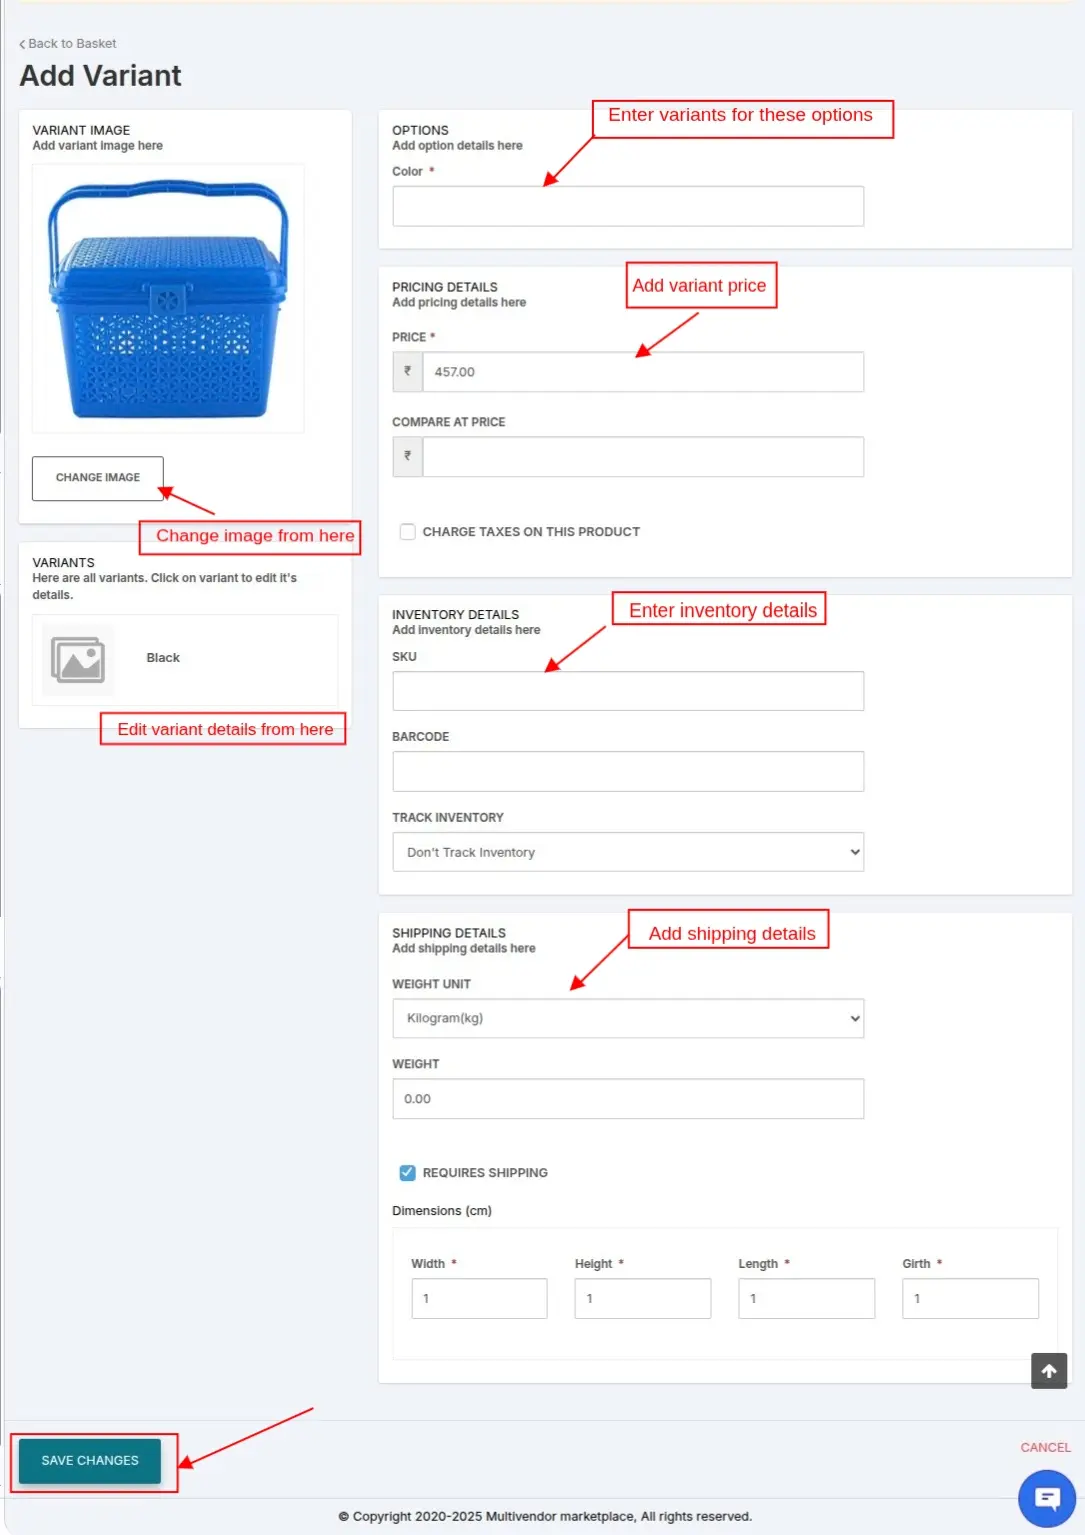
Clicking the Add Variant button, you will be redirected to a new page from where you can add variants to multiple options.
Additionally, you can add different images to the different variants & set up the variant pricing, inventory & shipping details.
This way, you can add variants to products in the app.
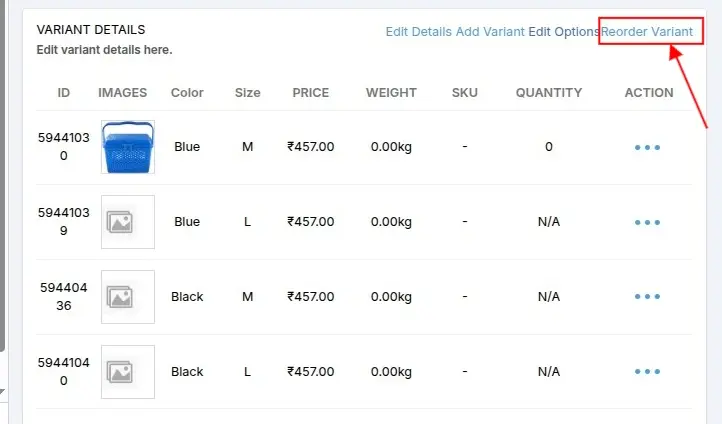
Added variants on the product page:-

This way, you can edit the products
Video Guide to Add Products within the App
Add Products in Bulk via CSV
In the multi-vendor marketplace app, both you and your sellers can add items in bulk via CSV file upload.
Firstly, you need to enable the option from the Product Configuration menu (under the Configuration menu) of the app.

Once enabled, you will get the option to add items via CSV in the Product Listing menu.
ADMIN END

SELLER END

For more details, do follow this guide to understand to upload Products via CSV by avoiding certain mistakes:-
https://webkul.com/blog/multi-vendor-marketplace-for-shopify-guide-to-upload-products-via-csv/
Learn to make the use of CSV files for Bulk Upload
Deny approved pending product in bulk
Now, after the product is added and the product is not approved yet the admin can deny that product in bulk
Select that pending products >> Click on the bulk action dropdown >> click “Deny selected”

seller end
The seller will now have the flexibility to add a different weight unit to each product variant in the app.
While adding/editing a variant, the seller can choose a weight unit such as kilogram, gram, Ounce, Pound, and enter the value as per the selected unit.
The product variant weight can be added in any of the 4 different units: kilogram(kg), gram(g), Ounce(oz), Pound(lb) in the app. And you can have a different weight unit for each product variant.
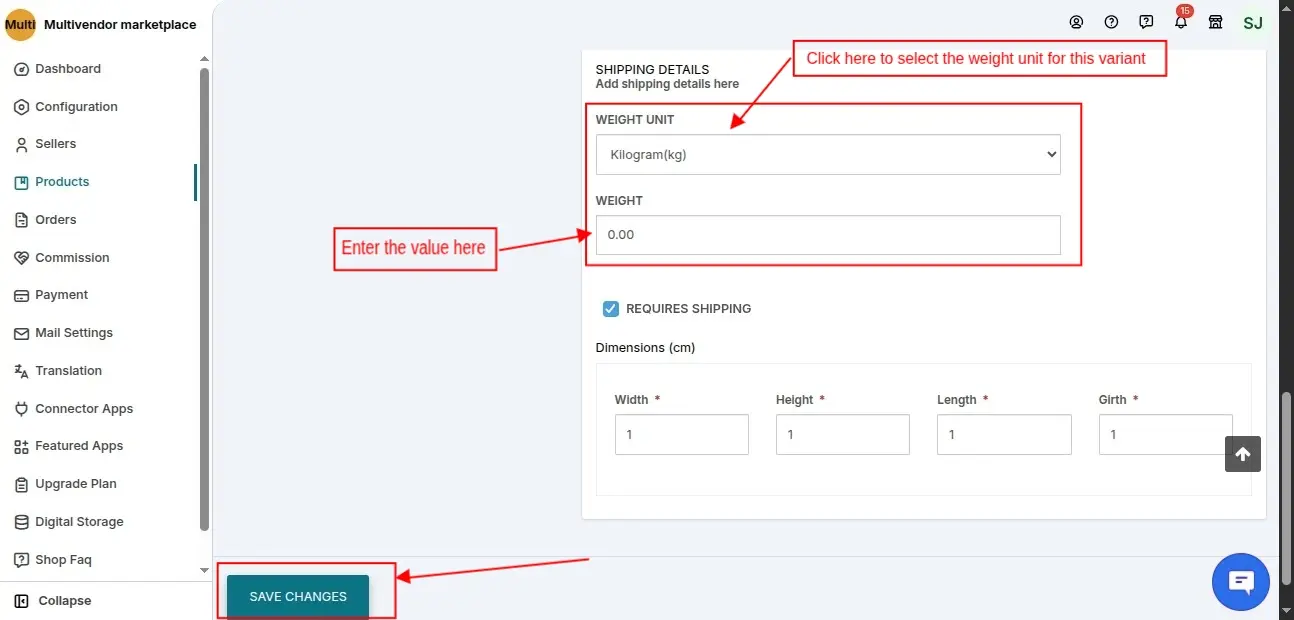
The seller needs to visit the Multi-Vendor Seller Panel → Products → Product Listing → Add/Edit Product → Add/Edit Variant (Action).
In the Shipping Details section, the seller can manage the weight unit of the product variant.
SELLER END

As an admin, you can select a different weight unit for each product variant in your marketplace.
This allows you to set a different product weight for each variant based on the selected weight unit.
ADMIN PANEL
Later, you can edit the unit for any of the product variants.
You can now allow sellers to reorder product variants with the Multi-vendor Marketplace app for Shopify.
Proceed to the Products section and select the variant that you wish to add for reOrder.
Video Guide to Add Products via CSV
Still, you need any assistance, feel free to CONTACT US.

Be the first to comment.