The Laravel eCommerce SaaS Multivendor module turns every tenant of your Bagisto SaaS platform into a complete multi-vendor marketplace, with its own sellers, catalogue, orders and payouts.
Each tenant runs an entirely separate marketplace on one Bagisto installation. Consequently, two tenants can apply different commission rules, approval workflows and seller plans side by side without ever seeing each other’s data.
Sellers, meanwhile, get a dedicated panel for their catalogue, inventory, pricing, promotions, orders, returns, payouts and performance. Above every tenant sits a super-admin marketplace area that reports across the whole platform.
Note:- This is an add-on of Laravel eCommerce Multi-Tenant SaaS. Therefore, install the Multi-Tenant SaaS module first, then add this one on top of it.
This release is compatible with Bagisto v2.4.9 and Bagisto Marketplace v2.4.9.
Features of Laravel eCommerce SaaS Multivendor Module
- Every tenant runs its own marketplace — sellers, products, orders, transactions, reviews and flags stay scoped to the tenant that owns them.
- A super-admin marketplace area reports across all tenants, and each listing names the owning tenant.
- New tenants are seeded automatically with their own marketplace configuration, seller attributes and flag reasons.
- Seller registration from the storefront, with optional admin approval before a seller goes live.
- Sellers create simple, configurable, grouped, bundle, downloadable, virtual and booking products, restricted to the types you allow.
- A guided stepped product form, or the classic single-page form — the choice is a configuration switch.
- Bulk upload wizard with CSV or XLS import, image ZIP upload, live validation and a downloadable error report.
- Magic AI product content generation for sellers, with a per-seller usage limit.
- Barcode generation and printing for seller products.
- Seller-owned inventory sources, bulk inventory updates and a low-stock threshold.
- Seller product discounts and checkout deals, plus opt-in enrolment into admin-run promotions.
- Order capabilities you switch on individually: create invoice, create shipment, cancel order and request payment.
- RMA handling, booking orders and manual fulfilment carriers for sellers who ship themselves.
- Account Health scoring with configurable cancellation-rate thresholds.
- Product and seller reviews with star ratings, plus product and seller flags with a red-flag limit.
- Optional subscription plans that cap products and staff, grant permissions, restrict product types and set commission.
- Seller reporting for sales, customers and products, with exports.
- Two-way messaging between seller and admin, and between seller and customer.
- Featured sellers and a configurable marketplace landing page on the storefront.
- Multi-lingual support across 19 locales, including RTL languages.
Note:
Install Bagisto Marketplace and Bagisto Marketplace SaaS together. Furthermore, follow this module’s installation steps only — do not run the instructions in the Marketplace README, and never seed the database with php artisan db:seed.
Installation of Laravel eCommerce SaaS Multivendor Module
Download and unzip the extension, then merge the “packages” folder into your project’s root directory.
- Add two entries to the psr-4 object in the root
composer.json:
"Webkul\\Marketplace\\": "packages/Webkul/Marketplace/src",
"Webkul\\MarketplaceSaaS\\": "packages/Webkul/MarketplaceSaaS/src"
- Next, register both service providers in
bootstrap/providers.php:
Webkul\Marketplace\Providers\MarketplaceServiceProvider::class,
Webkul\MarketplaceSaaS\Providers\MarketplaceSAASServiceProvider::class,
- Then register the Marketplace module service provider in
config/concord.php:
Webkul\Marketplace\Providers\ModuleServiceProvider::class,
- Finally, run the following commands to complete the setup:
composer require picqer/php-barcode-generator:^3.2
composer dump-autoload
php artisan marketplace-saas:install
php artisan optimize:clear
The installer runs the base Marketplace migrations first, then the SaaS ones, and finally seeds every existing tenant with its default marketplace data. Moreover, tenants you create later are seeded automatically when they register.
Step-by-Step: Installing the Module
- Merge the extension’s
packagesfolder into the Bagisto root directory. - Declare both namespaces in the psr-4 block of the root
composer.json. - Register both service providers in
bootstrap/providers.php. - Then register the Marketplace module service provider in
config/concord.php. - Run
composer require picqer/php-barcode-generator:^3.2followed bycomposer dump-autoload. - Run
php artisan marketplace-saas:install, thenphp artisan optimize:clear. - Set
QUEUE_DRIVER=databasein.envand keep a queue worker running for bulk imports.
Configuration for Laravel eCommerce SaaS Multivendor Module
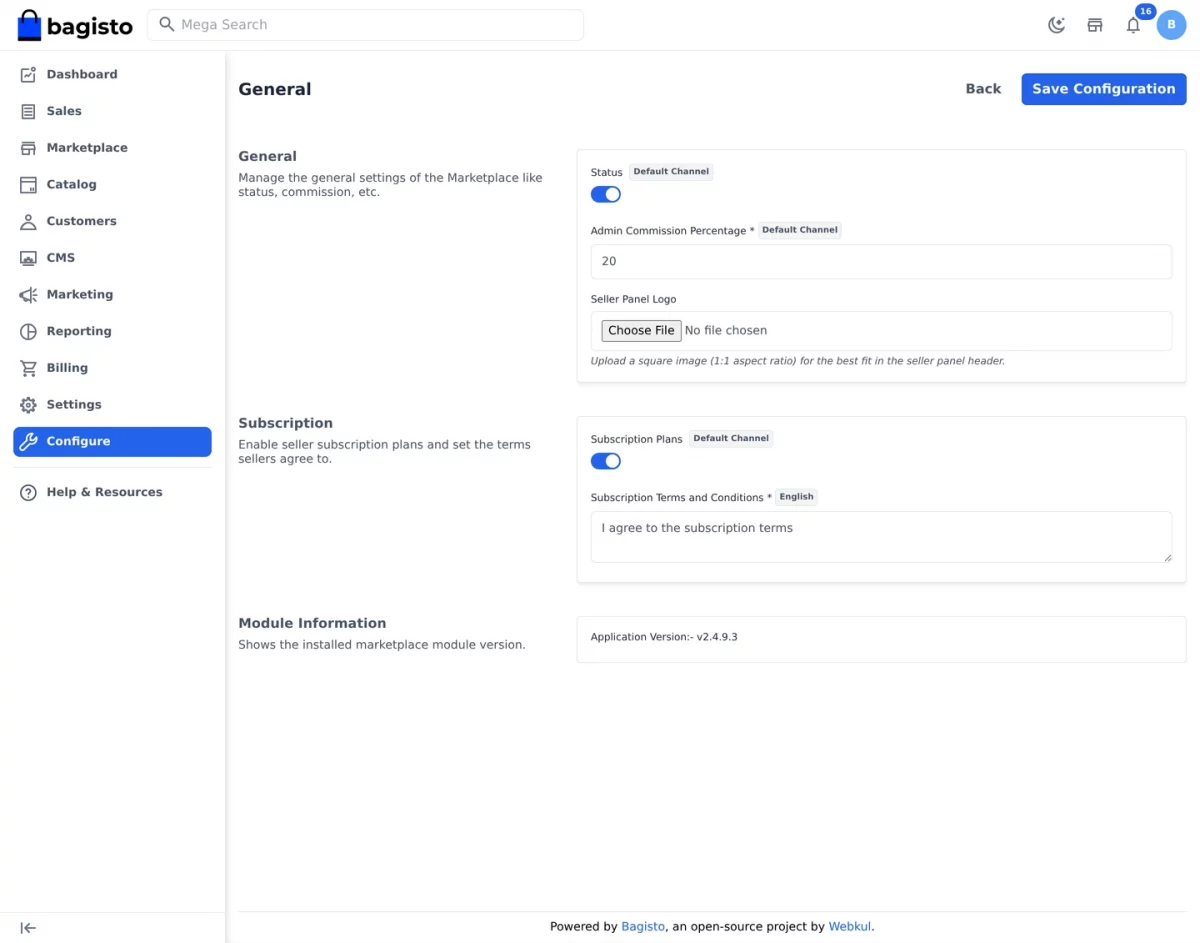
Every tenant configures its own marketplace from Configure > Marketplace. Because the settings are per tenant, one tenant can demand product approval while another publishes instantly.
General
Subscription turns seller subscription plans on or off, and Subscription Terms holds the terms sellers accept at checkout. In addition, an About field describes your marketplace on the storefront.
Sellers
Approval Required holds new registrations for review. Show Publicly controls whether a seller profile appears on the storefront, while Can View Customers decides whether sellers see their buyers.
Seller capabilities sit in the same tab. Specifically, Can Create Invoice, Can Create Shipment, Can Cancel Order and Enable Minimum Order Amount each toggle independently. A Max File Upload Size field caps seller uploads.
Products
Approval Required queues seller products for admin review. Similarly, Seller Can Create and Seller Can Assign decide whether sellers build their own products, list existing catalogue products, or both.
The form itself is configurable too. Enable Stepped Form switches between the guided wizard and the classic page, Stepped Form Nav chooses horizontal or vertical navigation, and Show Progress Bar displays listing completeness. Additionally, Low Stock Threshold drives the seller dashboard’s stock warnings.
Moderation & Health
Product Flags and Seller Flags let customers report listings and sellers. Notably, Show Red Flag and Red Flag Limit define when a seller is marked as risky. Cancellation Rate Warning and Cancellation Rate Critical then feed the Account Health score.
Marketing, Fulfilment and Featured Sellers
Enable Catalog Rule Join lets sellers enrol in admin promotions, and Auto Approve accepts those enrolments automatically. Meanwhile, a manual fulfilment carrier title covers sellers who arrange their own pickups. Featured Sellers takes a status, a limit count and a popularity criterion.
Landing Page
The landing page is fully editable. For example, you set the banner text, image and button, the highlight counters, the feature blocks and the seller-journey steps, all without touching a template.
Step-by-Step: Configuring the Marketplace
- Sign in to the tenant admin panel.
- Open Configure from the left menu, then choose Marketplace.
- Pick a section — General, Sellers, Products, Moderation, Marketing, Fulfilment Carriers, Featured Sellers or Landing Page.
- Change the fields you need; every switch applies to this tenant only.
- Click Save Configuration and wait for the confirmation message.
Super Admin Marketplace View
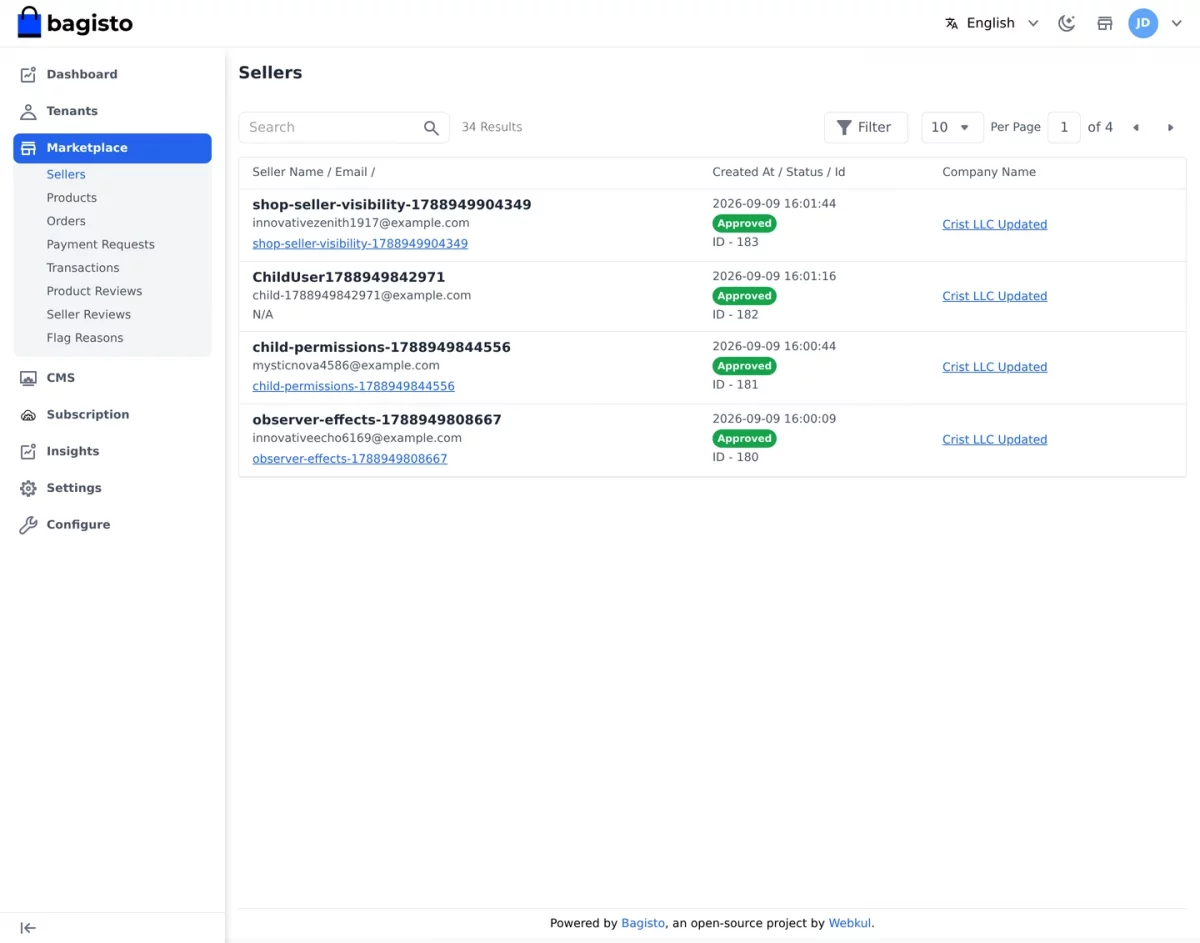
The platform owner works from Marketplace in the super-admin panel. Every screen there reads across all tenants at once and names the tenant that owns each row.
Sellers, Products and Orders
Sellers lists every seller on the platform together with their flags and tenant. Products does the same for seller listings, and Orders reports marketplace orders across tenants.
Payouts, Reviews and Flags
Payment Requests shows what sellers have asked to withdraw, and the super admin settles them from there. Transactions keeps the payout history. Furthermore, Product Reviews, Seller Reviews and Flag Reasons give a platform-wide view of trust and moderation.
Step-by-Step: Reviewing the Platform
- Sign in to the super-admin panel.
- Open Marketplace from the left menu.
- Choose Sellers to see every seller, with a Company column naming the tenant.
- Use the search box or Filter to narrow the list to one tenant.
- Switch to Payment Requests to settle a payout, or to Flag Reasons to review moderation settings.
Laravel eCommerce SaaS Multivendor Module Tenant View
Each tenant administrator manages their own marketplace from the Marketplace menu in the tenant admin panel.
Sellers
The Sellers screen lists accounts with their approval state, commission and flags. From a seller’s edit page the admin sets the commission, the allowed product types and every custom seller attribute.
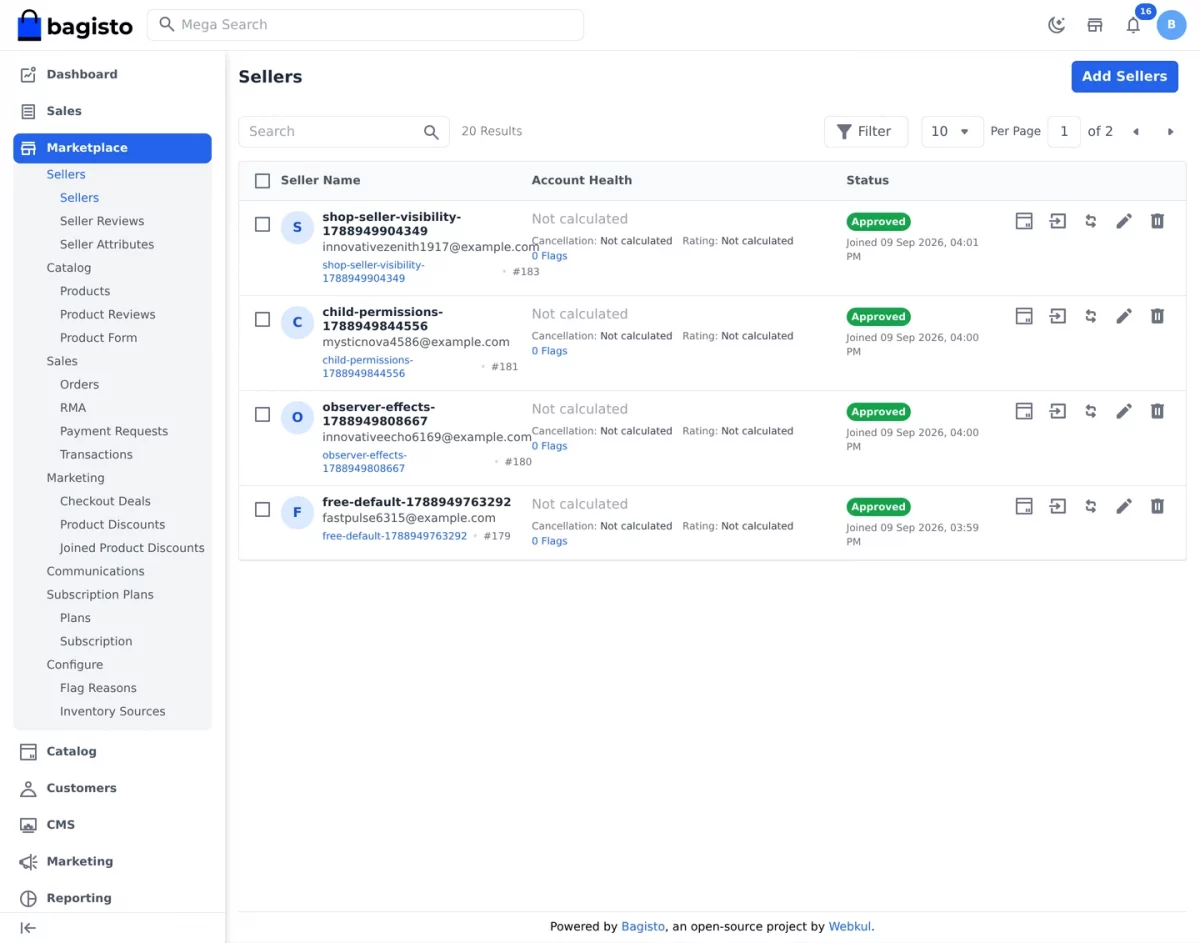
Two more screens sit alongside it. Reviews moderates seller ratings, while Seller Attributes and their group mapping define what a seller profile asks for.
Catalog
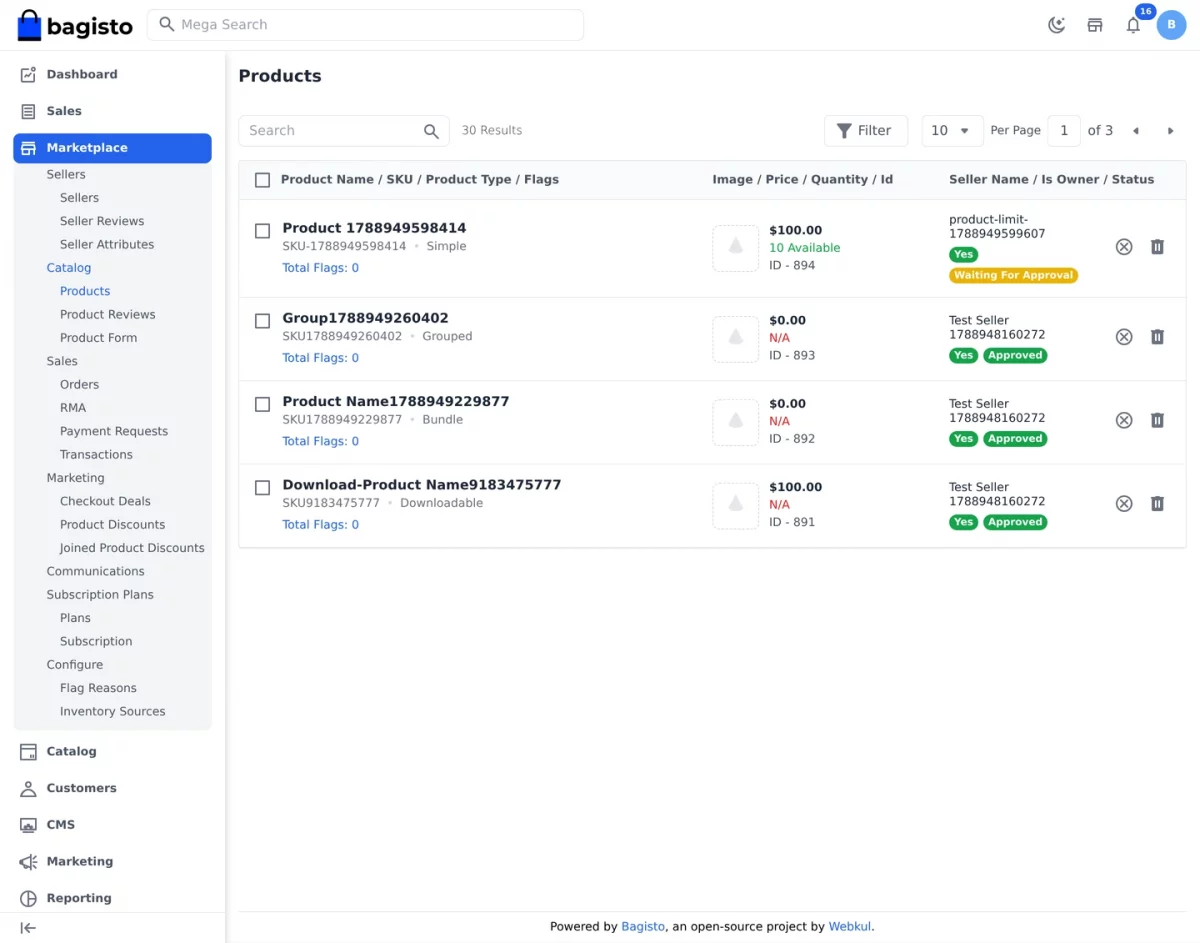
Products lists every seller listing with its flag count and approval state. Consequently, the admin approves, rejects or deletes a listing from one place. Product Reviews moderates customer ratings, and Seller Form Layout controls which fields a seller sees per attribute family.
Sales
Orders shows marketplace orders per seller with commission and payout figures. In addition, RMA handles returns, Payment Requests settles seller withdrawals, and Transactions records every payout made.
Marketing and Communication
Checkout Deals and Product Discounts list seller promotions, while Joined Product Discounts tracks sellers who enrolled in admin campaigns. Communications keeps the message thread between the admin and each seller.
Plans
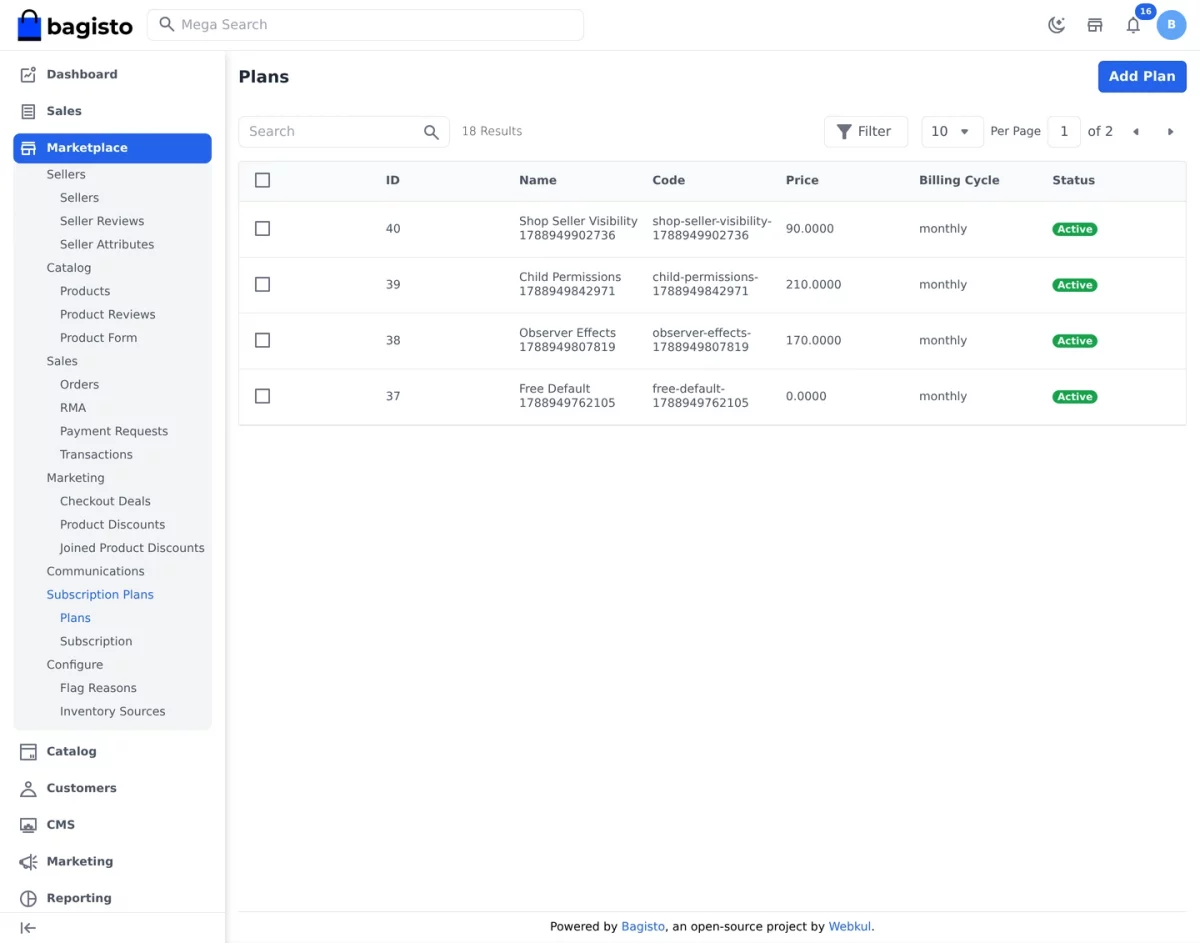
When subscription mode is on, Plans defines what sellers can buy. Each plan caps products and staff, grants a permission set, restricts product types and sets the commission. Subscriptions then lists who is on which plan, so the admin can approve or cancel.
Step-by-Step: Approving a Seller and Their Product
- Open Marketplace > Sellers in the tenant admin panel.
- Find the pending seller, then click the edit action on that row.
- Set the Commission and pick the Allowed Product Types.
- Switch the approval status to approved, then click Save Seller.
- Go to Marketplace > Catalog > Products and locate the seller’s listing.
- Approve the listing, or reject it with a reason so the seller can correct it.
SaaS Multi-Vendor Marketplace Seller View
Sellers work from their own panel on the tenant’s domain. The menu groups everything by job: catalogue, inventories, pricing, marketing, sales, performance, reporting, communication, customers, plans and settings.
Dashboard
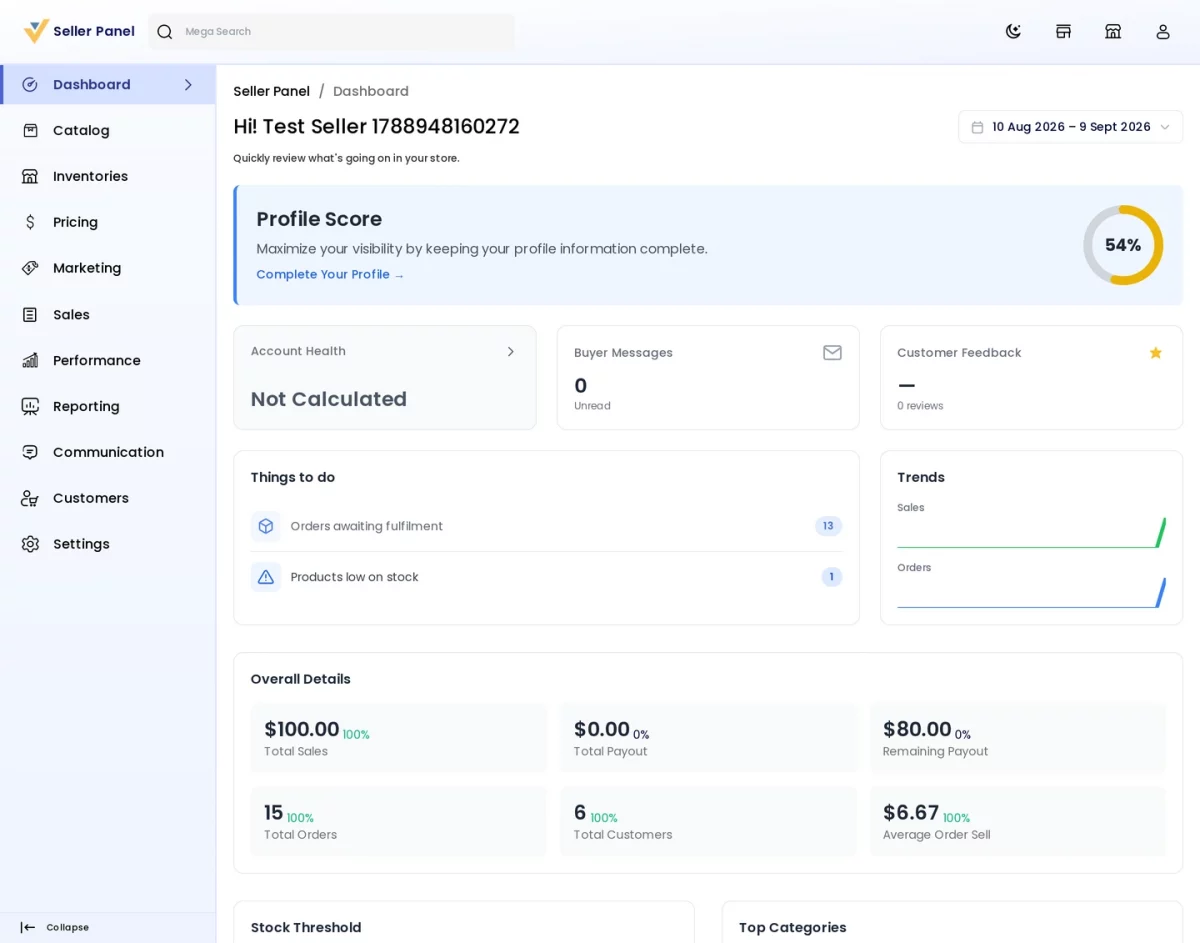
The dashboard opens on a profile score, account health, unread buyer messages and customer feedback. Below that, sellers track total sales, payouts, remaining payout, orders and customers, alongside stock warnings and top categories.
Catalog
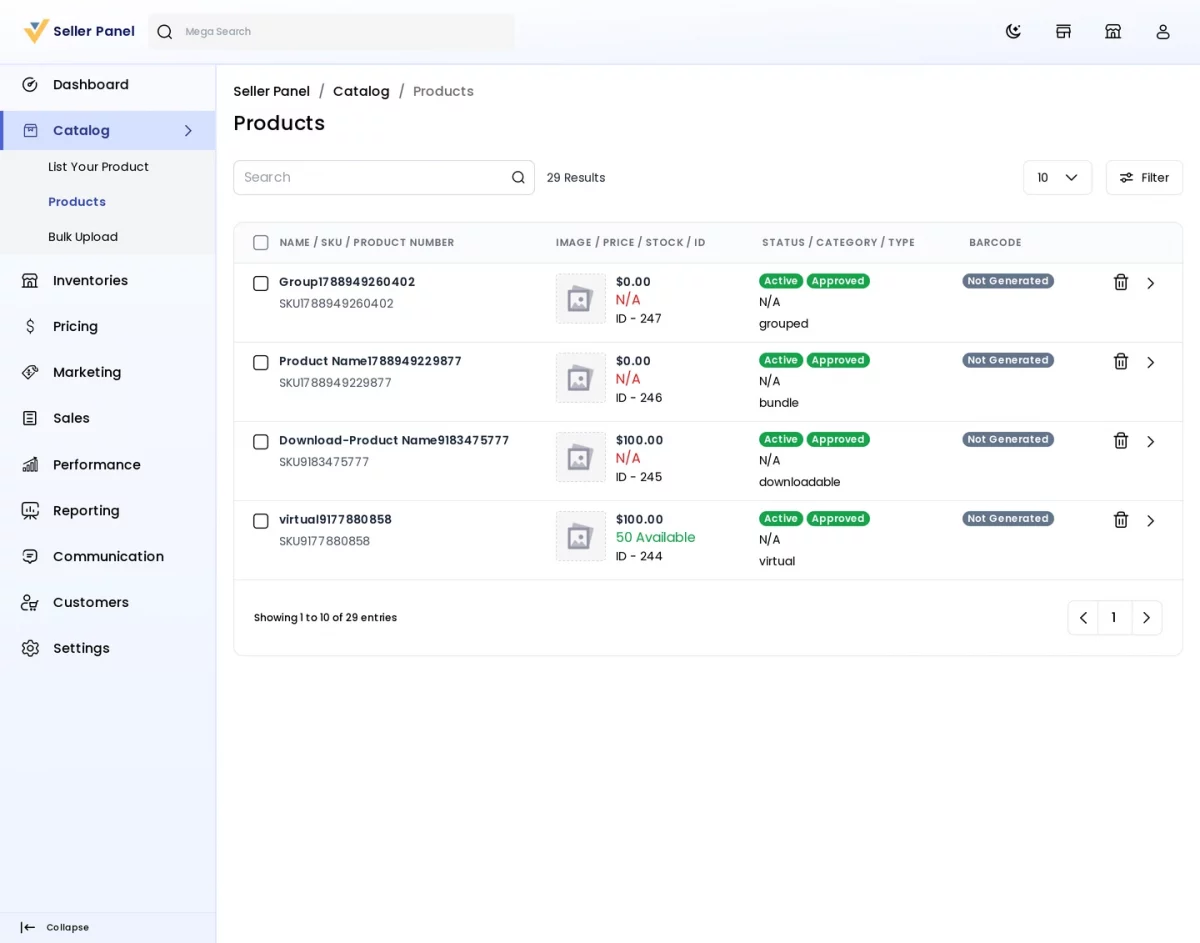
List Your Product offers two routes: search the tenant catalogue and sell an existing product at your own price, or create a brand-new one. Products then lists everything the seller owns, with its approval state and listing completeness.
Bulk Upload
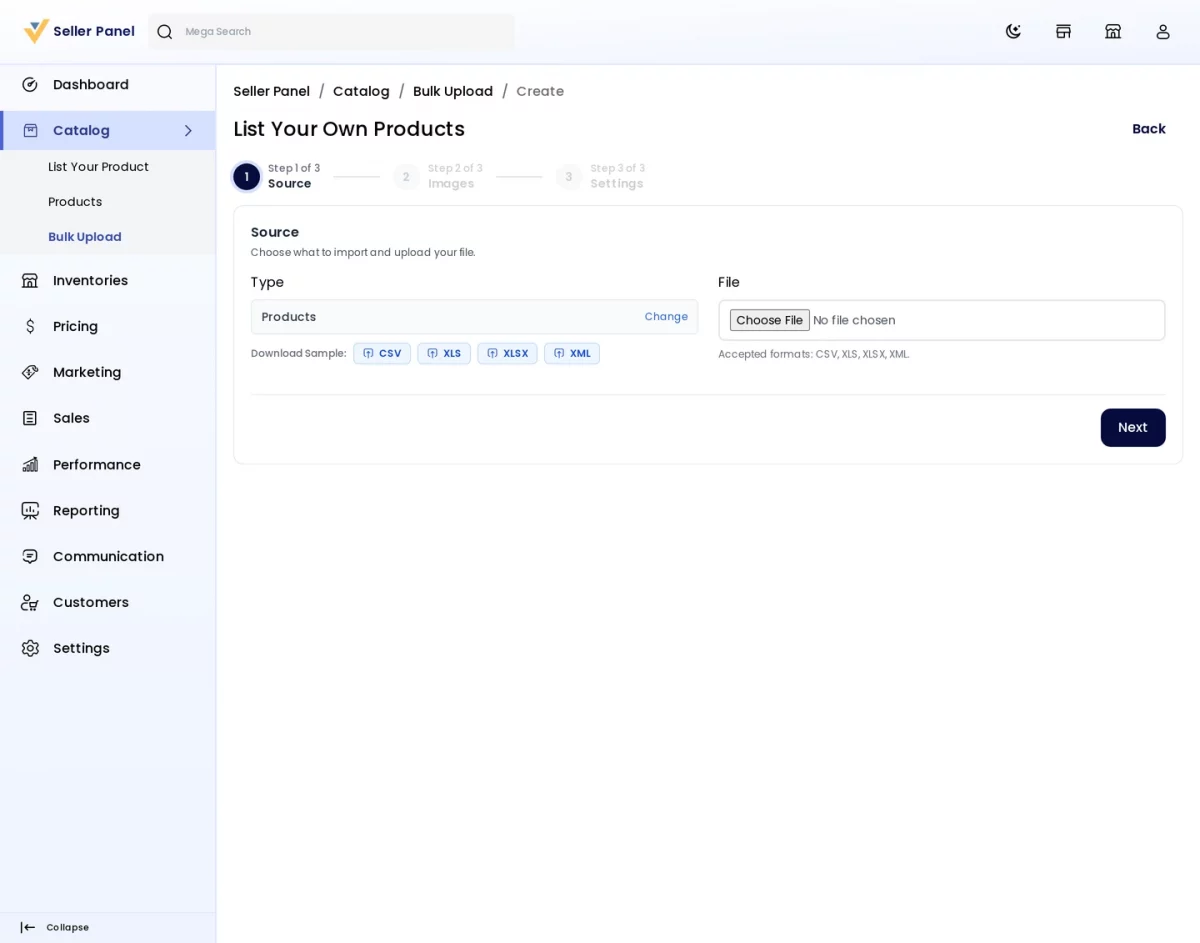
Large catalogues go through the bulk upload wizard. First the seller picks an upload method, then uploads a CSV or XLS file, adds an image ZIP, and finally chooses how the file is read. The import validates itself and reports errors row by row.
Inventories, Pricing and Marketing
Sellers keep their own inventory sources and update stock in bulk from Manage Inventory. Likewise, Manage Pricing updates prices across the catalogue. Under marketing, sellers build product discounts and checkout deals, or enrol in campaigns the admin is running.
Sales
Orders drives the whole fulfilment flow. Depending on what the tenant allows, a seller creates an invoice, schedules a pickup, cancels an order or requests a payout. RMA handles returns, Bookings covers booking products, and Transactions lists settled payouts.
Performance
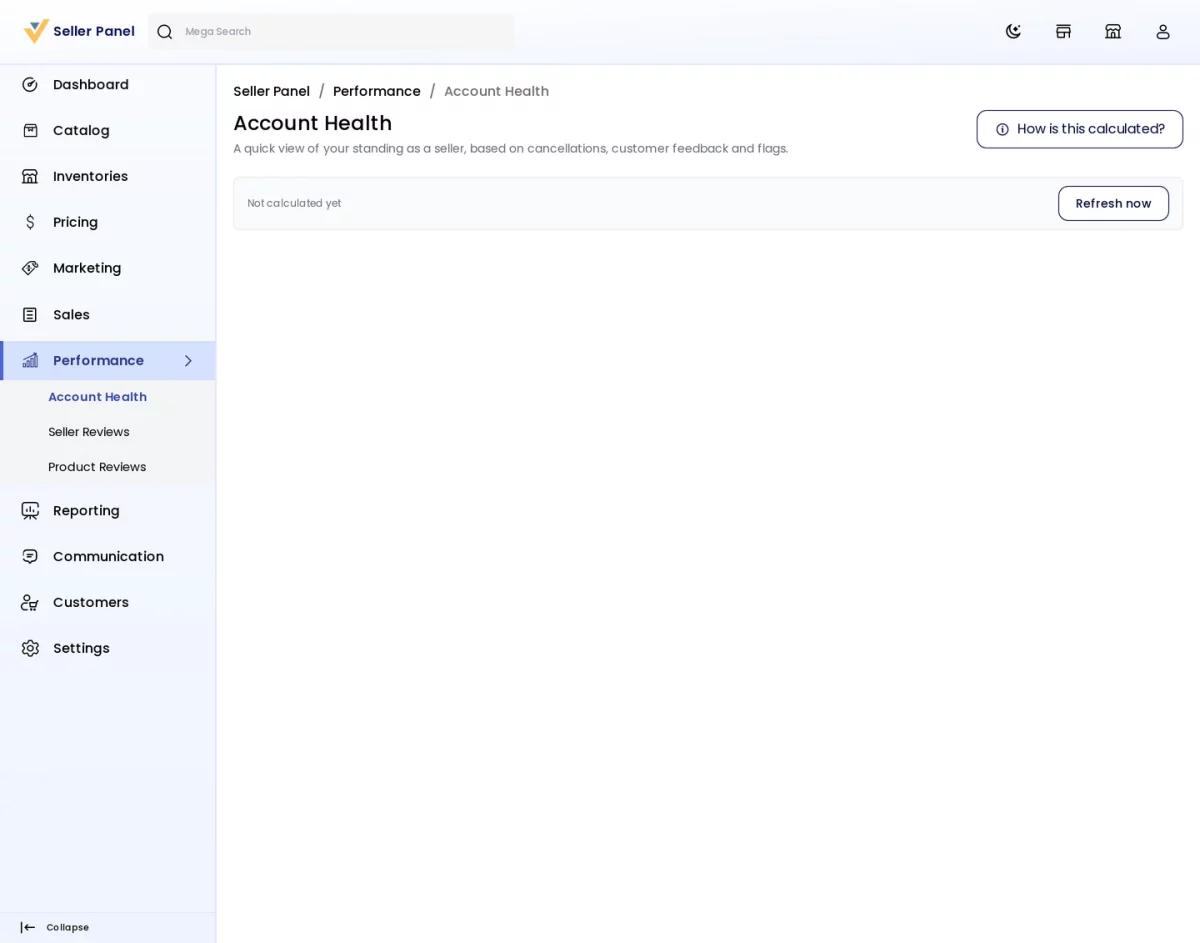
Account Health scores a seller against the tenant’s cancellation-rate thresholds, so problems surface before customers complain. Seller Reviews and Product Reviews collect the ratings buyers leave.
Reporting, Communication and Settings
Reporting covers sales, customers and products, each exportable. Communication carries two threads — one with the tenant admin, one with customers. Finally, Settings holds the shop profile, staff users and roles, so a seller delegates work without sharing one login.
Step-by-Step: Listing a Product as a Seller
- Sign in to the seller panel on the tenant’s domain.
- Open Catalog > List Your Product.
- Either search the tenant catalogue and pick an existing product, or choose Create New Products.
- Select the product type and attribute family, enter a SKU, then click Continue.
- Fill in the name, description, price, weight and inventory on the edit page.
- Turn on Status and Visible Individually, then click Save Product.
- Wait for admin approval when the tenant requires it; the list shows Waiting For Approval until then.
Marketplace Storefront View
Customers meet the marketplace on the storefront. A configurable landing page invites new sellers to open a store, while featured sellers highlight the strongest shops.

Every seller also gets a public profile carrying their product collection, reviews, an about tab and a contact form. Moreover, customers who have bought from a seller can review or report that seller, which keeps feedback tied to real purchases.
Step-by-Step: Registering as a Seller
- Open the marketplace landing page on the storefront.
- Click Open Store to reach the seller registration form.
- Enter the shop name, URL, email and password, then submit.
- Wait for the tenant admin to approve the account when approval is required.
- Sign in to the seller panel and complete the profile before listing products.
Conclusion
The Laravel eCommerce SaaS Multivendor module gives every Bagisto tenant a marketplace of its own, and gives you one place to watch them all. As a result, you scale the platform by adding sellers and tenants rather than by adding installations.
For technical details, see the Bagisto developer documentation. If you need help, raise a ticket at the Bagisto support forum and our team will get back to you.
Current Product Version - v2.4.9
Supported Framework Version - Bagisto v2.4.9

Be the first to comment.