Laravel eCommerce SaaS Multivendor Module can be very important for the merchants those have created an eCommerce store using the SaaS module.
The Multivendor module will convert a Bagisto eCommerce store into a multivendor marketplace where different vendors can assemble and sell their products/services under a single eCommerce store.
The seller can also manage their Products, Order Shipment, Payouts, Shop Profile and every standard marketplace features.
Note:- This is the add-on of Laravel eCommerce Multi-Tenant SaaS, to use this add-on. Firstly you have installed the Laravel eCommerce Multi-Tenant SaaS.
Features of Laravel eCommerce SaaS Multivendor Module
- Separate Seller/Vendor Profile with a dedicated Shop URL.
- Manage Seller Branding by providing the banner, social links and SEO friendly URLs for their shop.
- Product Search by Seller/Vendor on Vendor Panel.
- Separate view for the seller’s product collection. Seller’s feedback and interactive review system with the star rating.
- Product Assignment by Tenant to Seller Account
- Dedicated seller dashboard to view income, payouts, order details, latest comments, and reviews also.
- A proper check on Stock availability.
- Tenant can set a global commission for the seller and can also set separate commission for the individual seller.
- Vendor/Seller can also be Enabled/Disabled by Admin
- Product Approval by Tenant
- Special pricing also available for Sellers with date filter.
- An attractive landing page with top sellers and their associated top products.
- The seller can edit shop URL for the Profile page, collection page, and also the shop information.
- Multi-Lingual support / All language working including RTL ( https://en.wikipedia.org/wiki/Right-to-left Hebrew and Arabic).
- The seller can edit or delete products from their dashboard.
- Tenant can also delete or update Seller’s profile and products.
- Once an order is completed, an Tenant can create a “Payout” for the seller.
- Tenant has the option to generate invoice and ship the product.
- Sellers can maintain everything transparent between them and customers by displaying return & shipping policy and also providing shop description.
- The seller can also cancel the order.
- The Seller can add multiple images of the product.
- The seller can check total sales as made, total payout and remaining payout as done from Tenant end.
- Functionality to either create New Product or provide own details on the existing product.
- Tenant can choose to auto-approve orders or not.
Note:
- Please follow the Marketplace saas README for the installation process exclusively. Do not refer to or follow any instruction provided in the Marketplace README.
- Unzip the bagisto marketplace and bagisto marketplace saas Extension zip to the bagisto root directory and follow the readme.md file to configure the bagisto marketplace saas extension.
- Do not try to seed the database with command php artisan db:seed.
Installation of Laravel eCommerce SaaS Multivendor Module
Download and unzip the extension, then merge the “packages” folder into the project’s root directory.
- Do couple of entries in root
composer.jsonin psr-4 object:
"Webkul\\Marketplace\\": "packages/Webkul/Marketplace/src",
"Webkul\\MarketplaceSaaS\\": "packages/Webkul/MarketplaceSaaS/src"
- Goto
config/app.phpfile and add following line under ‘providers’
Webkul\Marketplace\Providers\MarketplaceServiceProvider::class,
Webkul\MarketplaceSaaS\Providers\MarketplaceSAASServiceProvider::class,
- Run the following commands to complete the setup:
composer dump-autoload
php artisan marketplace-saas:install
php artisan optimize:clear
- After following these steps, Laravel eCommerce SaaS Multivendor Module should be successfully installed and ready for use in your Bagisto project.
Configuration for Laravel eCommerce SaaS Multivendor Module
Once the commands have executed successfully the Tenants can see the option of the Marketplace on the left-hand side in the menu bar as shown in the image below:-

On the Tenant Admin panel click on the configure button that is on the left side of the screen in the menu bar from where the Tenant can configure the general setting of the SaaS marketplace as shown in the image below:-
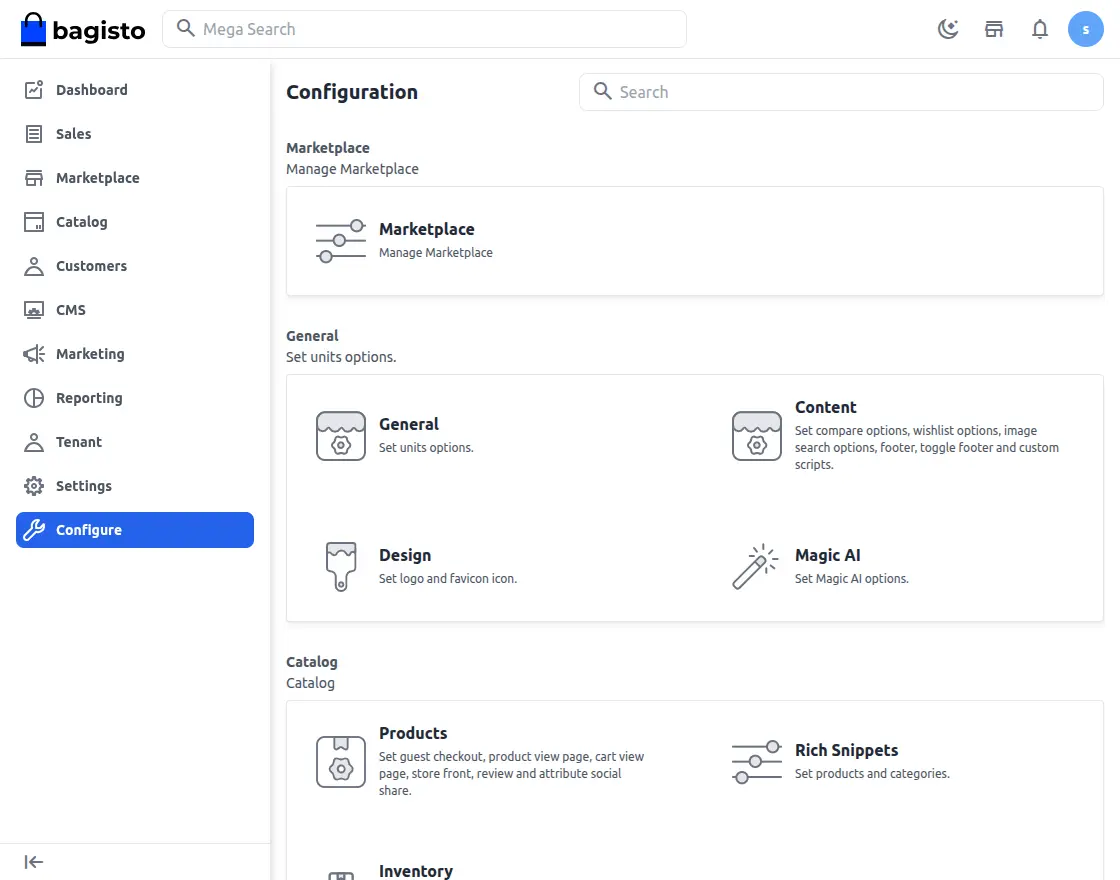
General Settings
Above you will get settings to choose channel and locale. Based on that you can also change the configuration of the marketplace.
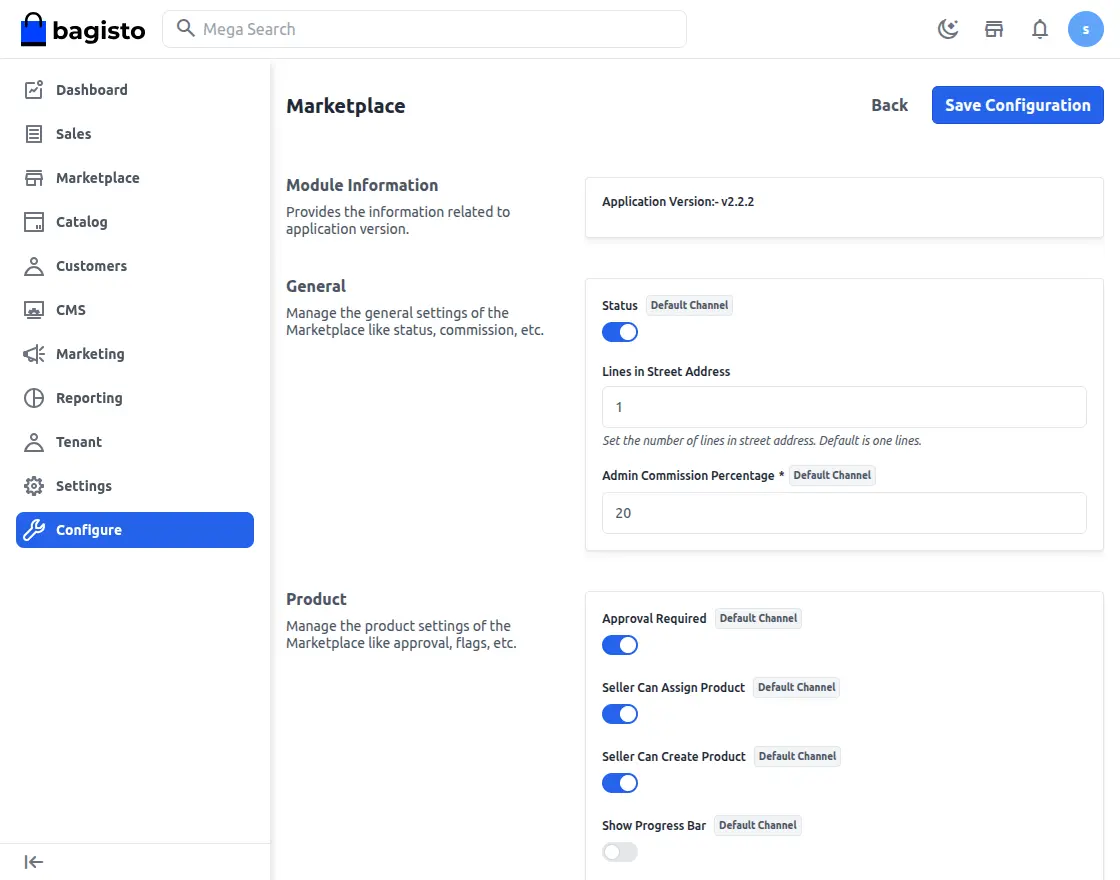
Let’s go through the Configuration Settings one by one
Status
To enable or disable the complete module functionality.
Seller Approval Required
Select Yes in this setting if approval is required whenever a new seller has been registered in the marketplace.
Product Approval Required
Select Yes in this setting if approval is required whenever a new product has been added by the seller on the marketplace.
Seller Can Create Invoice
Choose Yes in the setting if you also want to give the seller permission to create an invoice.
Seller Can Create Shipment
Choose Yes in the setting if you want to give the seller also permission to ship the product that has been ordered.
Seller Can Cancel Order
Choose Yes in the setting if you want to give the seller permission to cancel order.
Enable Minimum Order Amount
Enable the option if you want to enable minimum order amount for sellers.
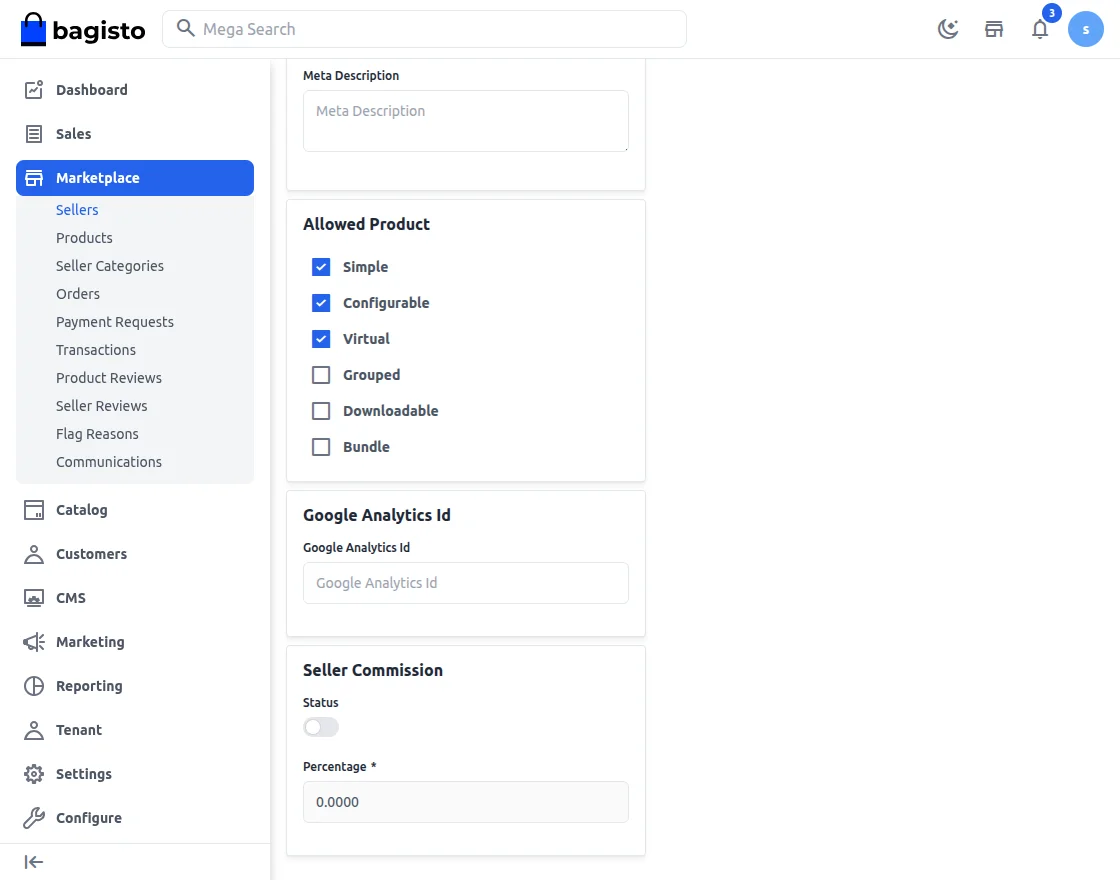
Seller Commission Per Unit (In Percentage)
Here the admin/merchant can set the global commission % for sellers that will be applicable to all.
If the admin/merchant has set global commission 10% for every seller in the marketplace, thus when a product is purchased admin will be earning 10% of the product cost as commission.
The Landing Page
In the landing page, the Tenant can provide descriptive information and attract sellers to sell on your marketplace. The landing page appears when you click Sell on your Frontend.

Let’s move on with each functionality.

Banner Title
Here you can give the main title to your landing page that will act as the main attraction for your seller.
Banner Description
Here you can provide the banner content that will appear on the banner image as provided.
Banner Button Title
Enter the title for the banner button.
Banner Image
Select the banner image for the front end.
Community Count
Add the community count here.
Business Hour
Enter the operating business hour here.
Payment Duration
Enter the payment duration here.
Serviceable code
Set the pin code for the serviceable area for easy shipments.
Feature Title
Set the feature image title here.
Laravel eCommerce SaaS Multivendor Module Tenant View
On the Tenant dashboard, click the marketplace icon which is there on the left-hand side to check on for the features as available in the backend for admin/merchant.
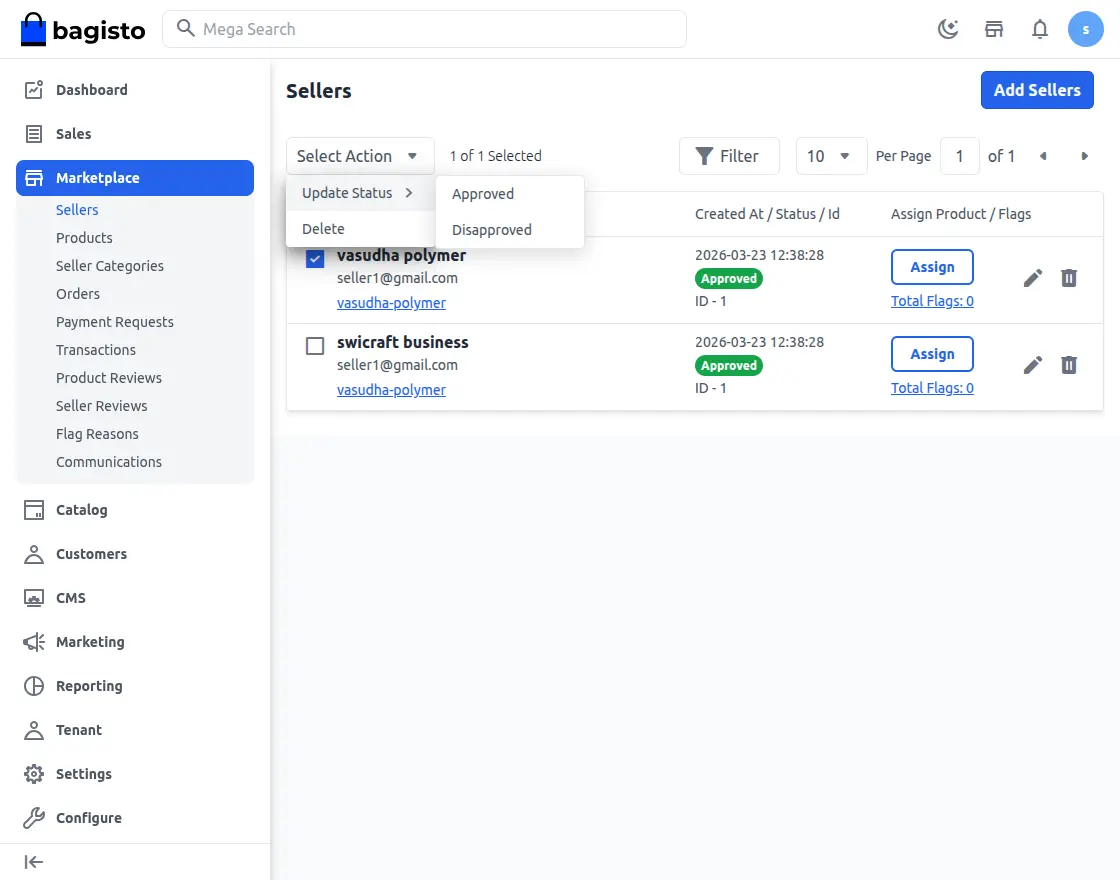
Sellers
Here the Tenant can view the sellers those have registered in the SaaS marketplace.
Based on the setting that has been done for Seller Approval in configuration, the status of the seller will also be shown here.
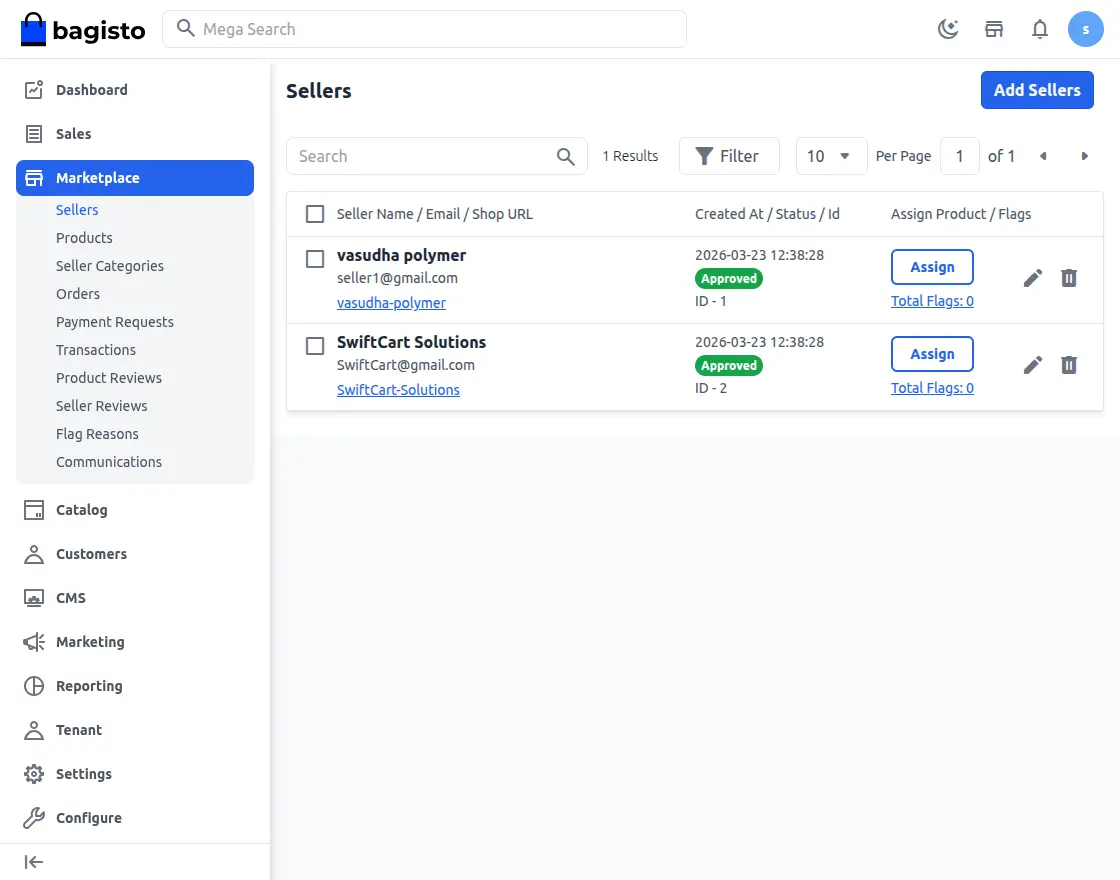
The Tenant can also assign products to the sellers
The Tenant can approve or disapprove the sellers by updating the status of the sellers that are registered in the SaaS marketplace.
Tenant can also delete the sellers according to the requirements.
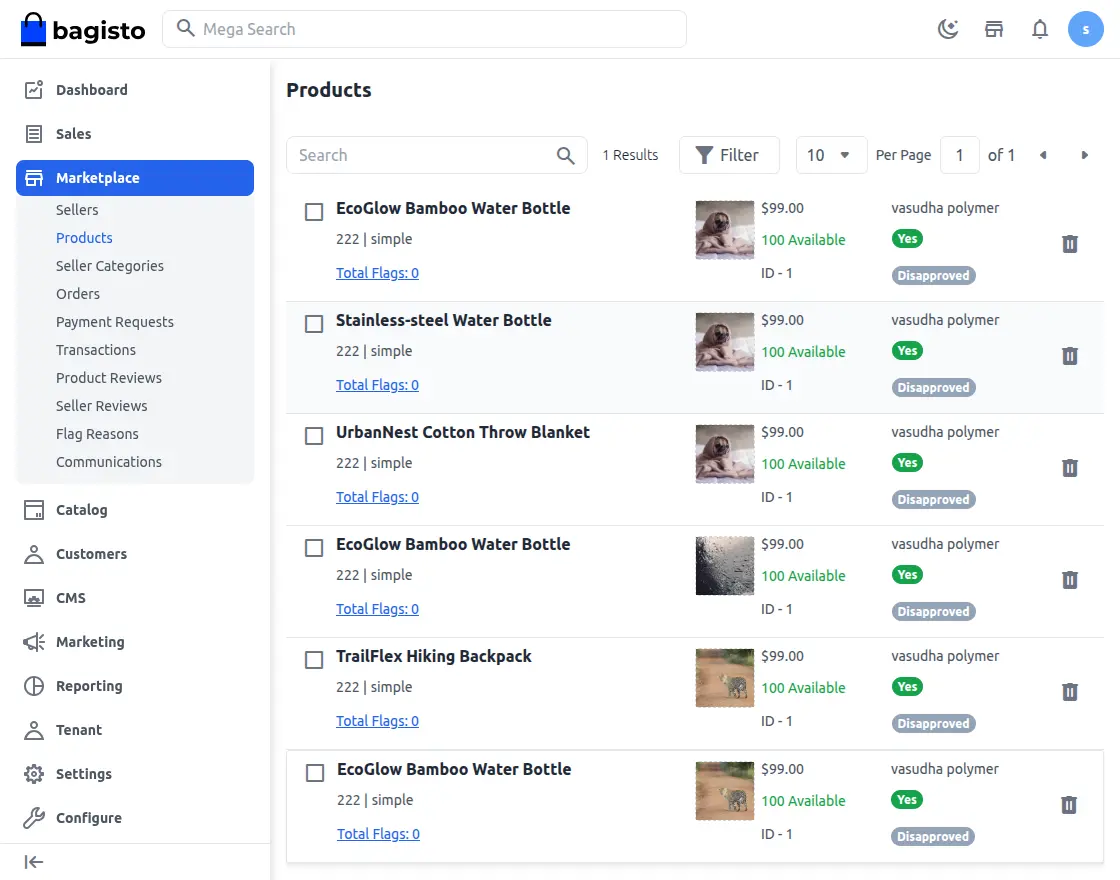
Products
Here Tenant can see the list of products as created by it’s sellers.
Based on the setting that you have done for Product Approval in configuration, the status of the seller will also be shown here.
Seller will be able to sell those products only which are approved by the admin.
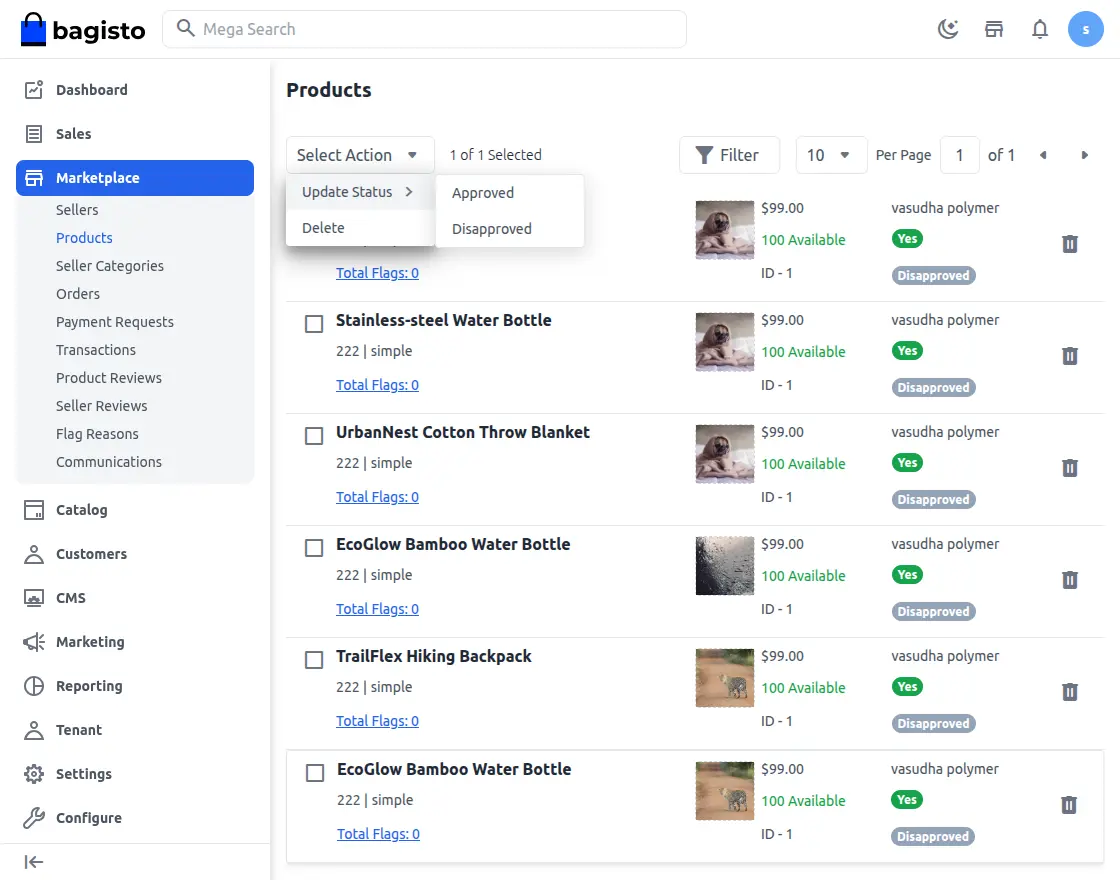
You can check the product for which you want to make any changes in the status and select the option to update or delete from the drop-down.
After selecting Update, you can further choose to Approve or Disapprove the Product.
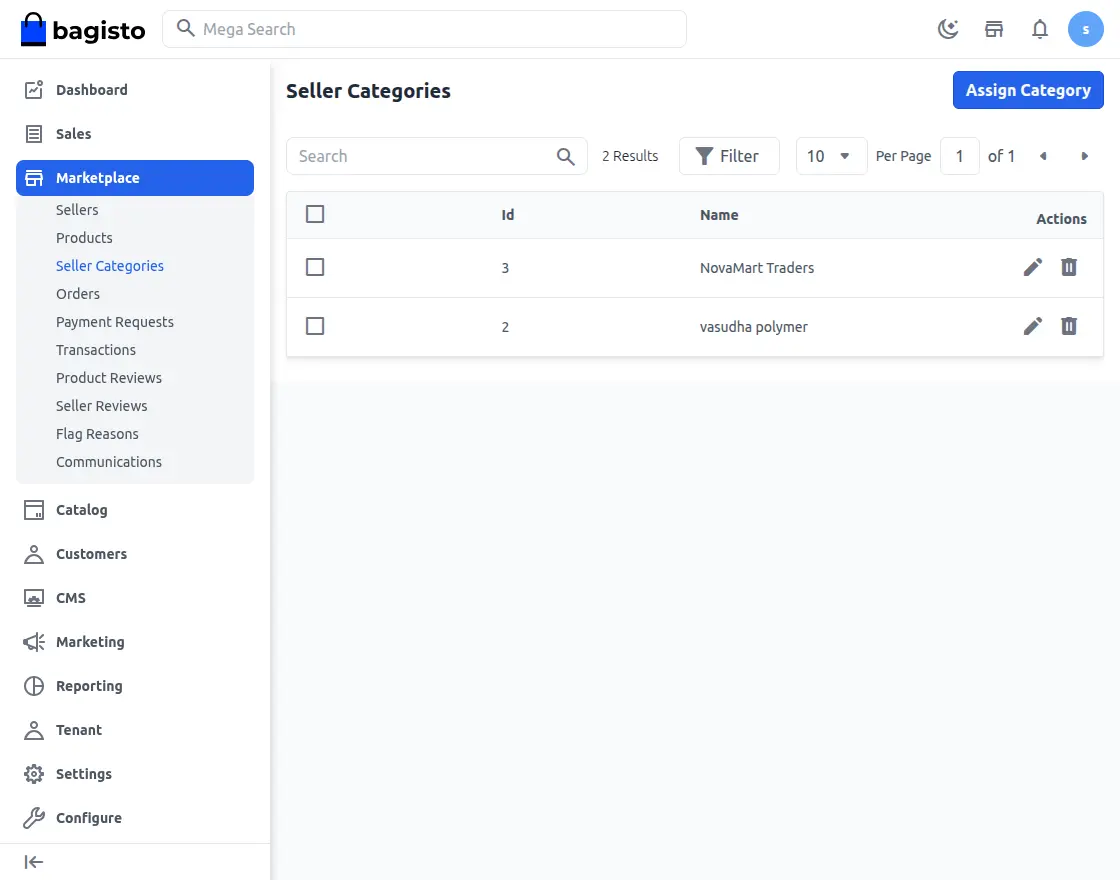
Seller Category
The tenant can view and assign seller categories from this section. Only the categories assigned to the seller are listed here.
Orders
Here admin/merchant can see the list of orders made by the customers on your website for the products as offered by the sellers with their status as Completed or Pending.
Based on the setting asset for the sellers to generate invoices and ship the product, actions are performed.
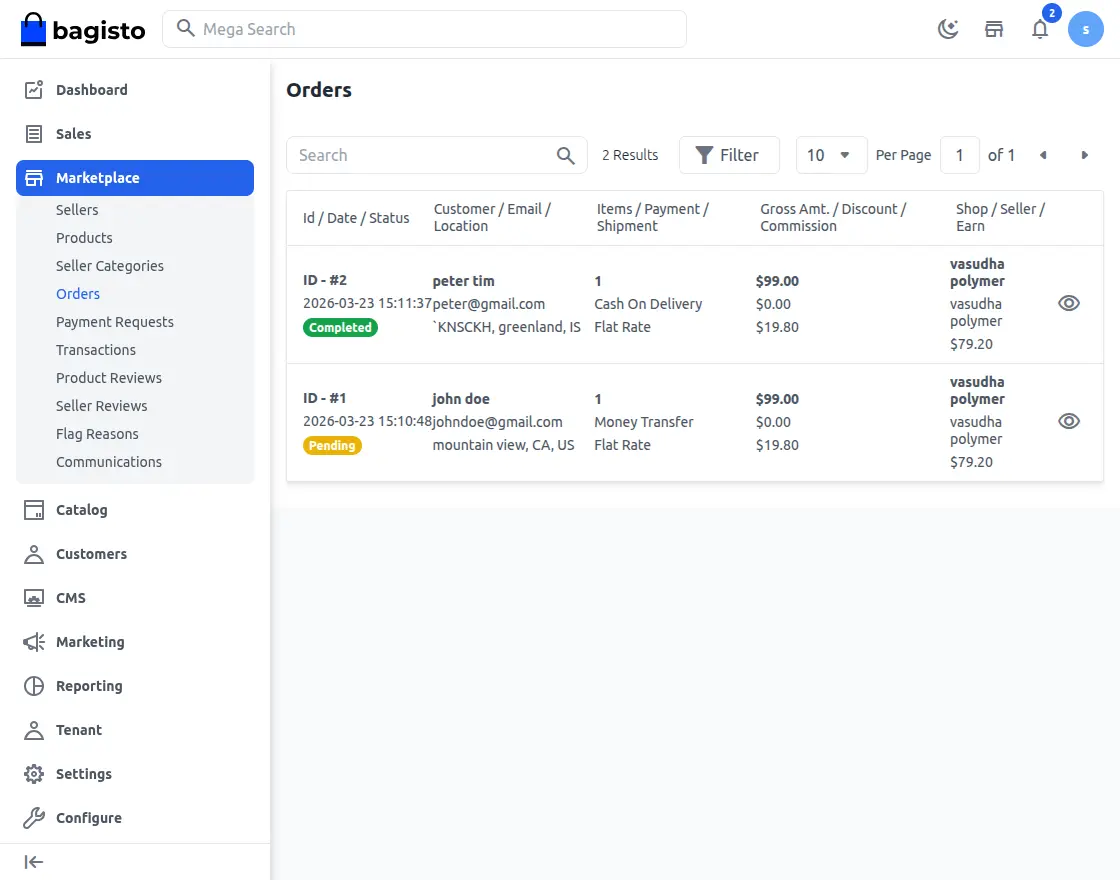
The admin/merchant can view the order details by clicking on the eye icon.

If the order is pending then click on the invoice button and add the quantity of the product for which the invoice needs to be generated.
After entering the quantity to invoice, click on the Create Invoice button at the top to generate the invoice.

Next, click the Ship or Refund button.
Shipment
On the Shipment page, you will find the details regarding the shipment. Number of the quantity ordered and order information.

Invoices
From this option, the admin can see the list of invoices created up til now for the products by the seller.

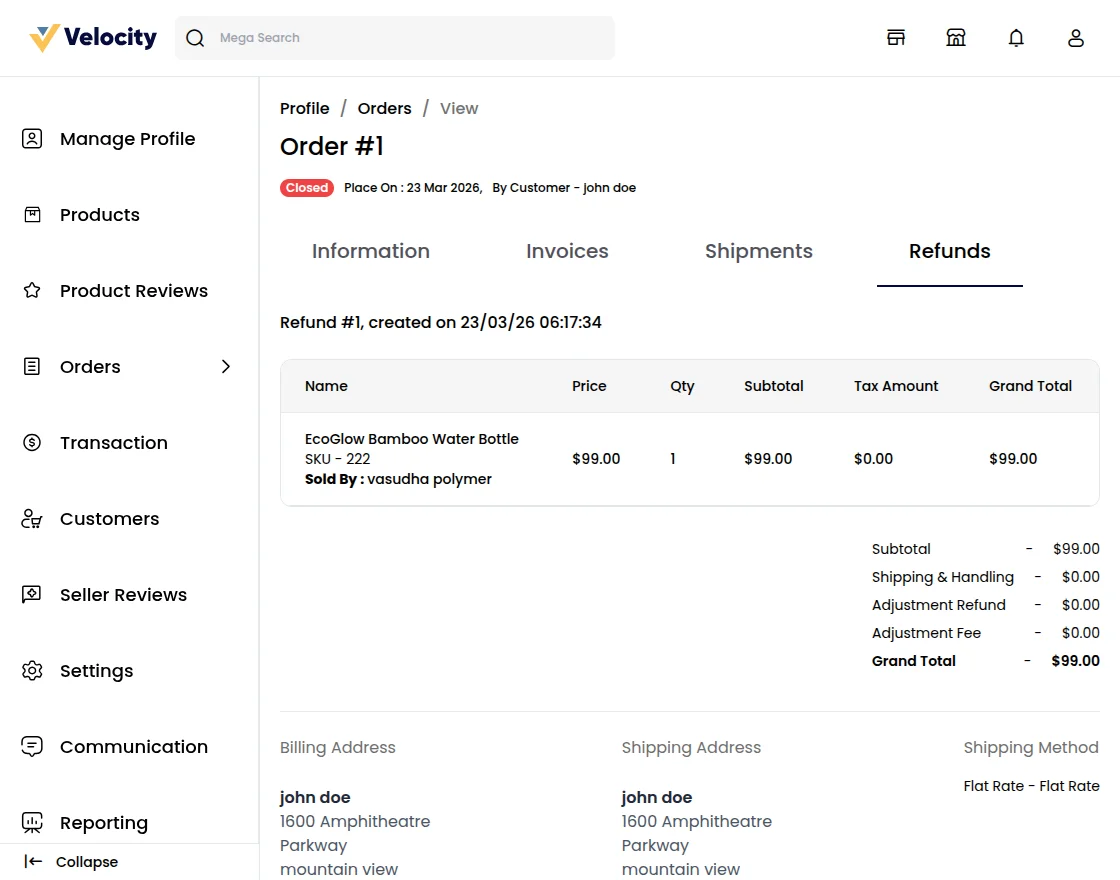
Refunds
A list of refunds that are initiated by the seller or by the admin is mentioned here:

Here the admin/merchant will find the list of payout transactions as done by the admin/merchant to the Sellers also with the amount paid.
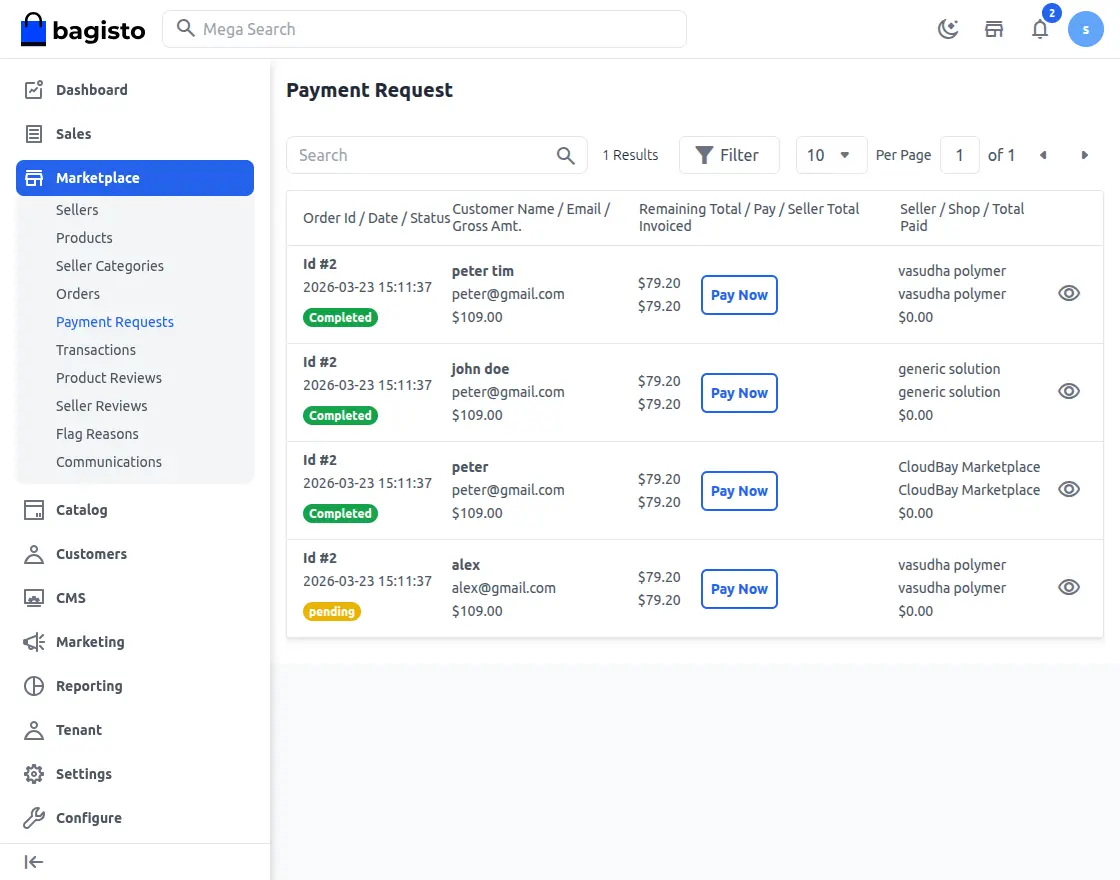
Payment Request
Payment requests initiated by the seller are listed here, The admin can check all the payment requests here:
Transactions
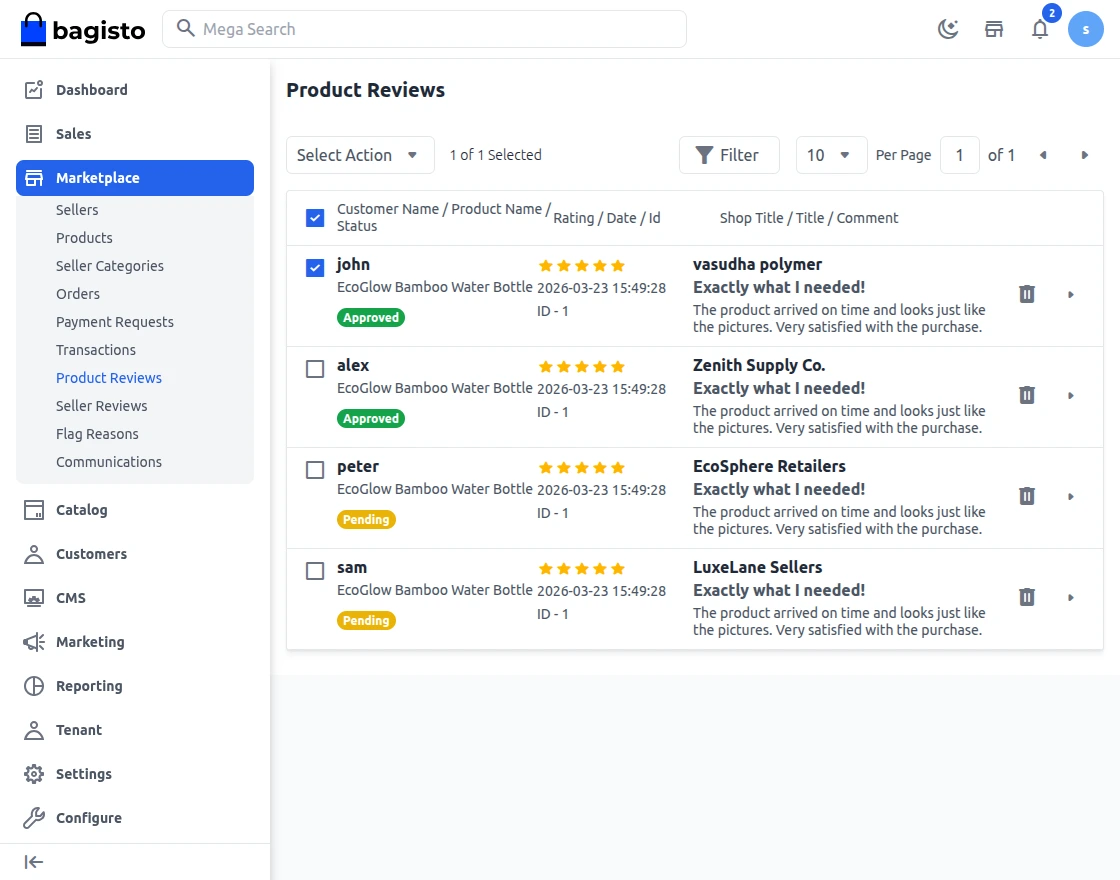
Product Reviews
From here the Tenant can find the reviews as shared by the customer for the products. By default, the status of the reviews remains unapproved.
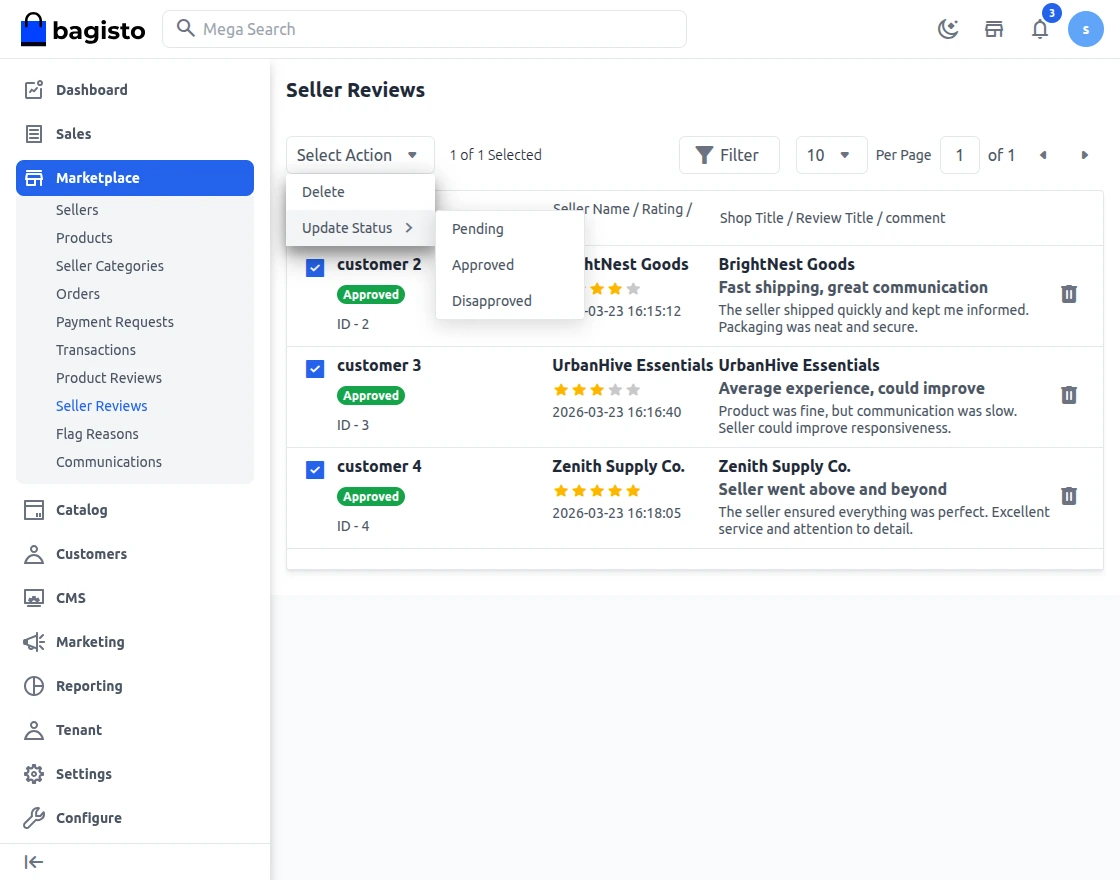
Seller Reviews
Here the Tenant can see the reviews provided by the customers for a particular seller. By default, the status of the reviews remains unapproved.
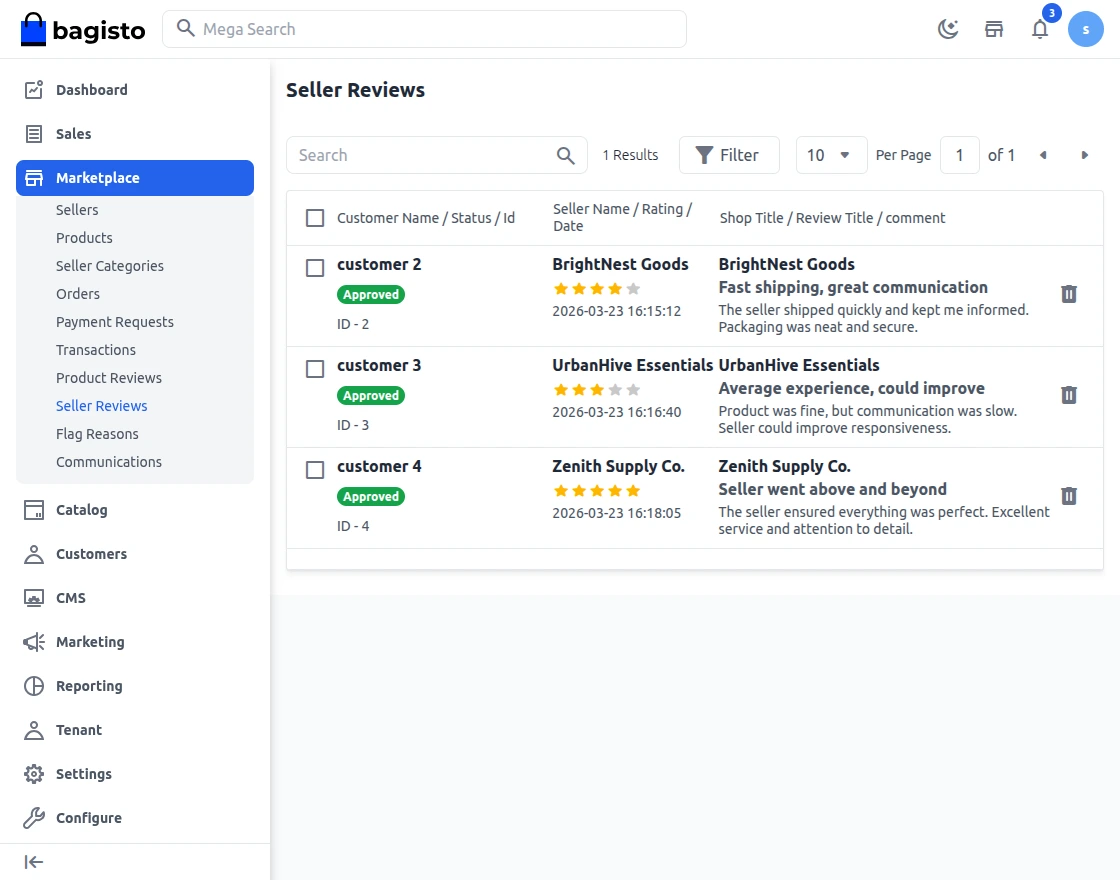
The admin/merchant need to select the review which you want to update and then from the above drop-down, choose Update and then Approve or Disapprove the review.
Seller and Product Flag Reasons
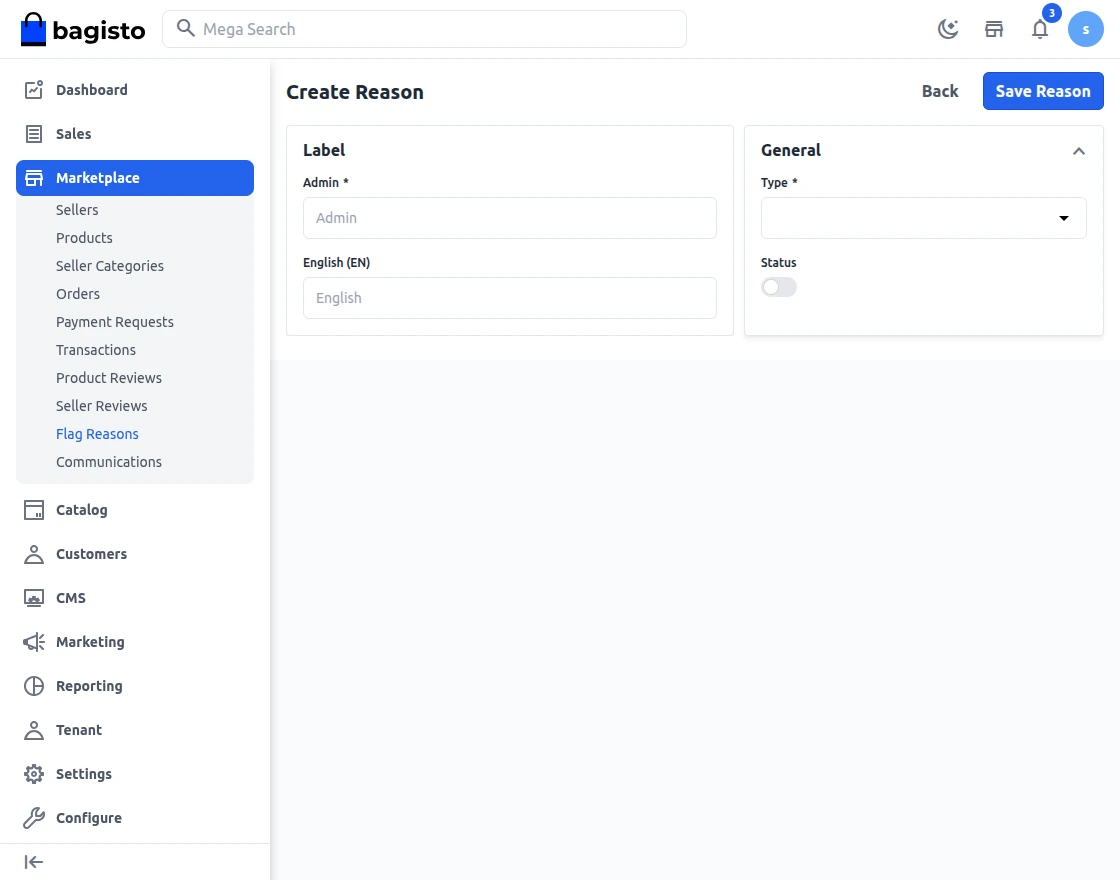
Now the seller/tenant can also create Seller Flag Reason and Product Flag Reason for any product and seller.
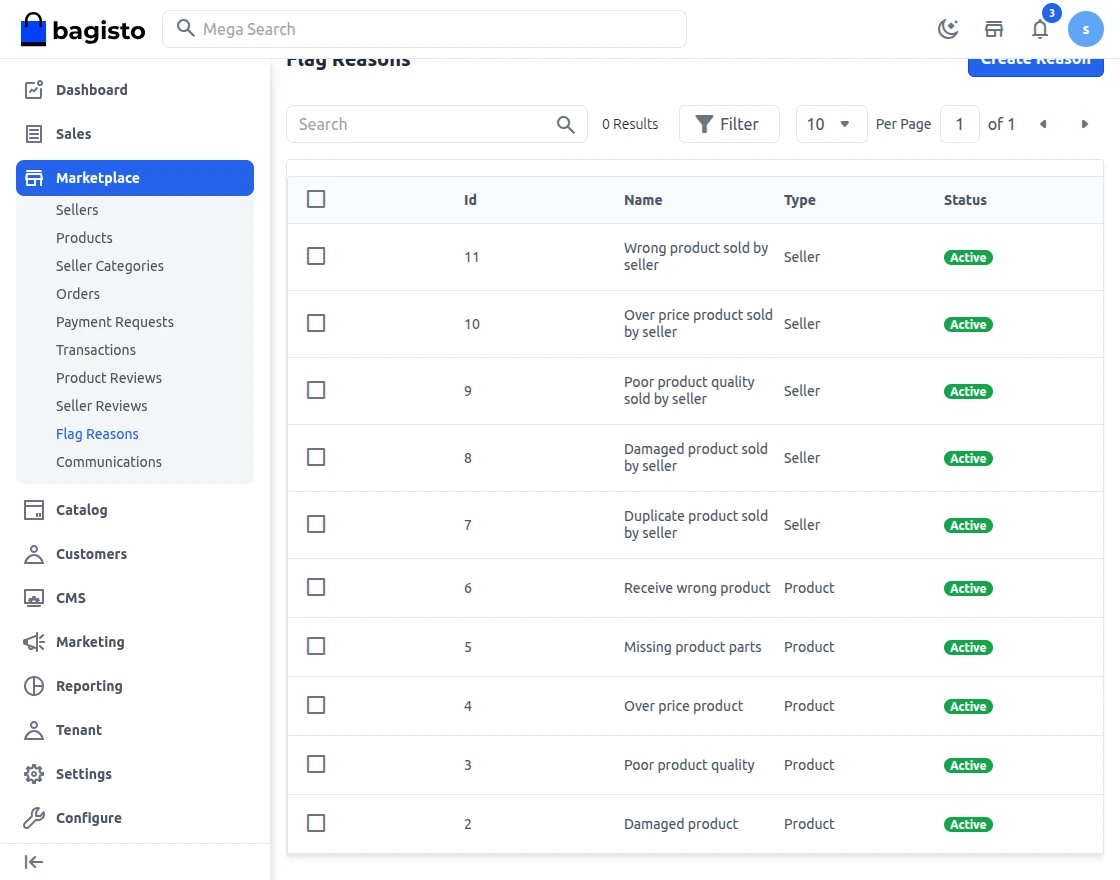
to add a new reason the admin just needs to click on the Create Reason as shown in the image below:-
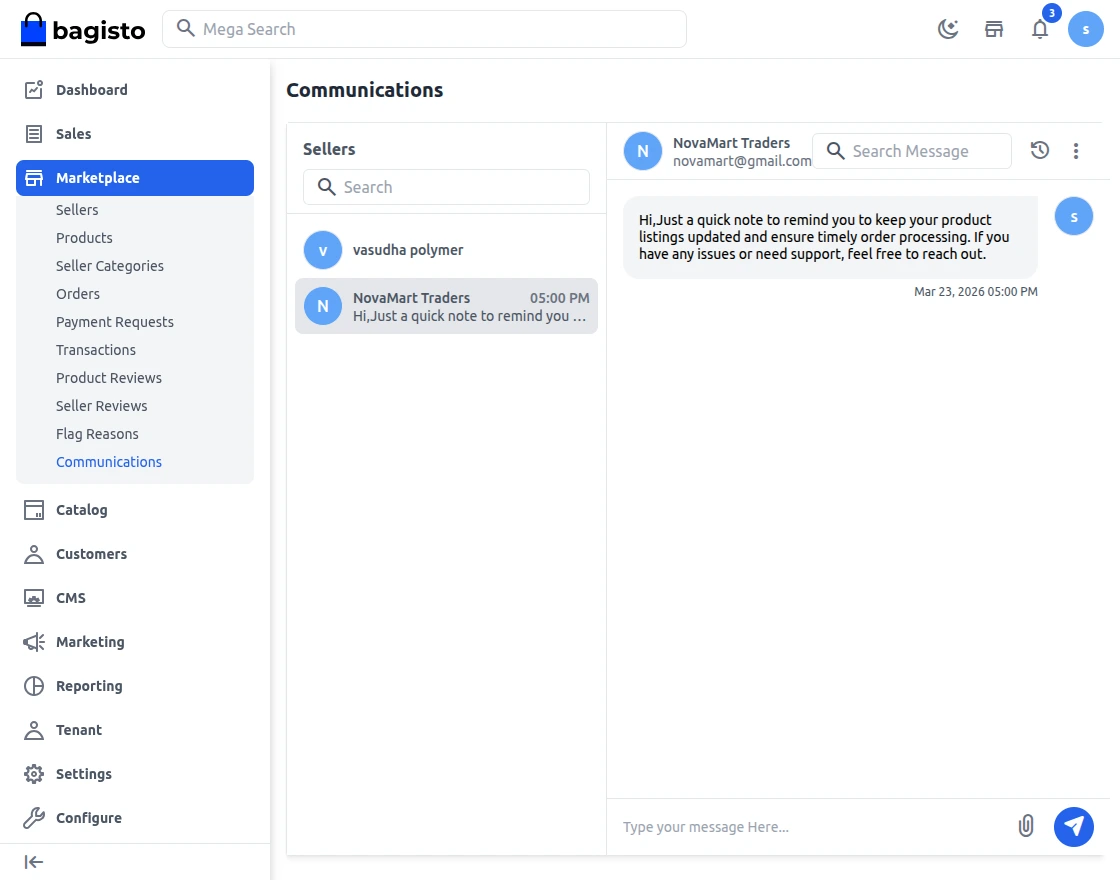
Communication
Communication feature allows tenants and sellers to interact directly through a built‑in chat system. This ensures smooth collaboration, faster responses, and transparent communication across the marketplace.
SaaS Multi-Vendor Marketplace Seller View
Now the seller can use their separate dashboard to perform various seller actions. They will open the marketplace and click on the open shop button.

It will navigate you to the seller registration page to Sign up as a seller. Now the customer can directly create their seller account by entering their details, they also need to provide their Shop URL.

Once you register your seller account will be created and you can log in to the seller dashboard by clicking on the sign-in button.

Dashboard
Here you can see complete details of your sales report with an intuitive bar graph. Also, with top-selling products and customers.
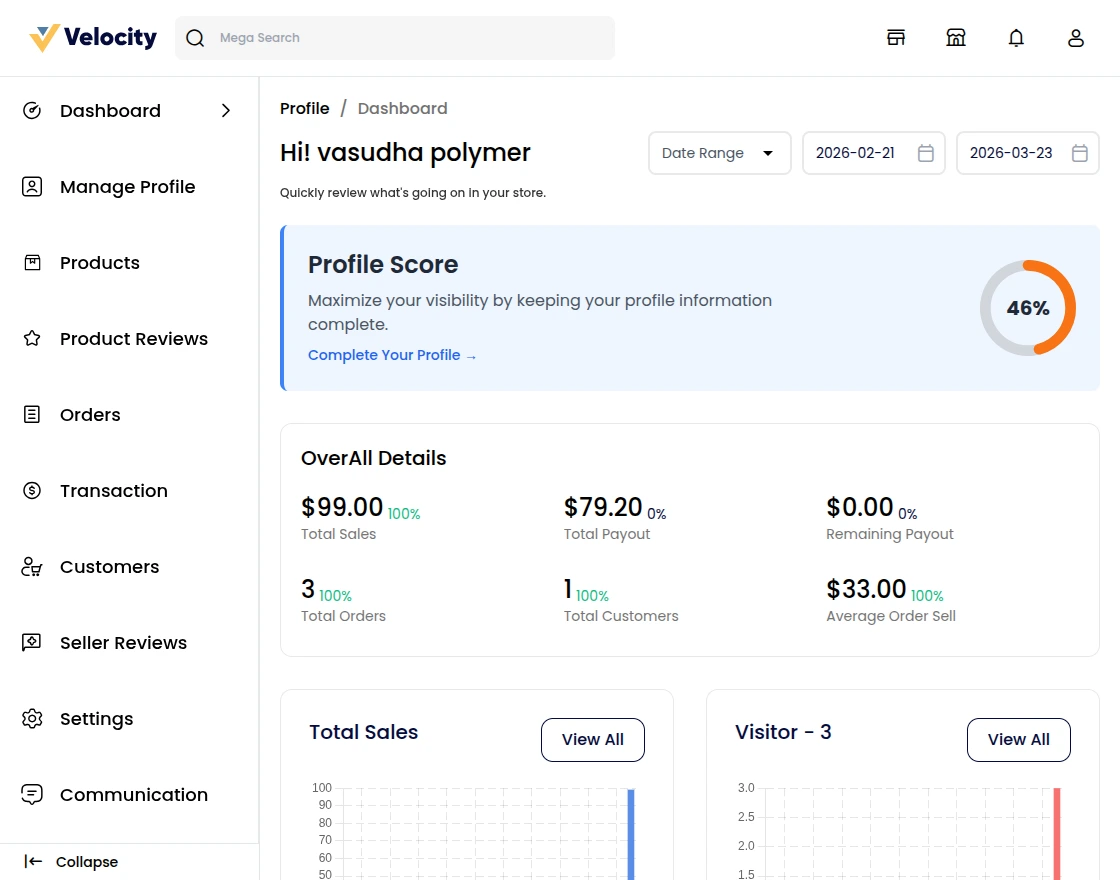
Total Sales- Here the Total sales made by the seller appear. The details that appear are only related to the product whose invoice is created.
Total Payout- The amount is received by the seller from Admin.
Remaining Payout- The amount is pending from the Admin and needs to be collected.
Total Orders- Orders related to the customers are placed. The count of orders appears here.
Total Customers – The count of customers appears here.
Average Order sale- The total sale is divided by the number of orders whose invoice is created.
Stock Threshold- Seller products and their stock-related information.
Products on Top- Shows the list of products that are on top sales.
Top Customers – Shows the list of customers who purchased the product the most.
Top Category – It shows the top category list which is top on sales.
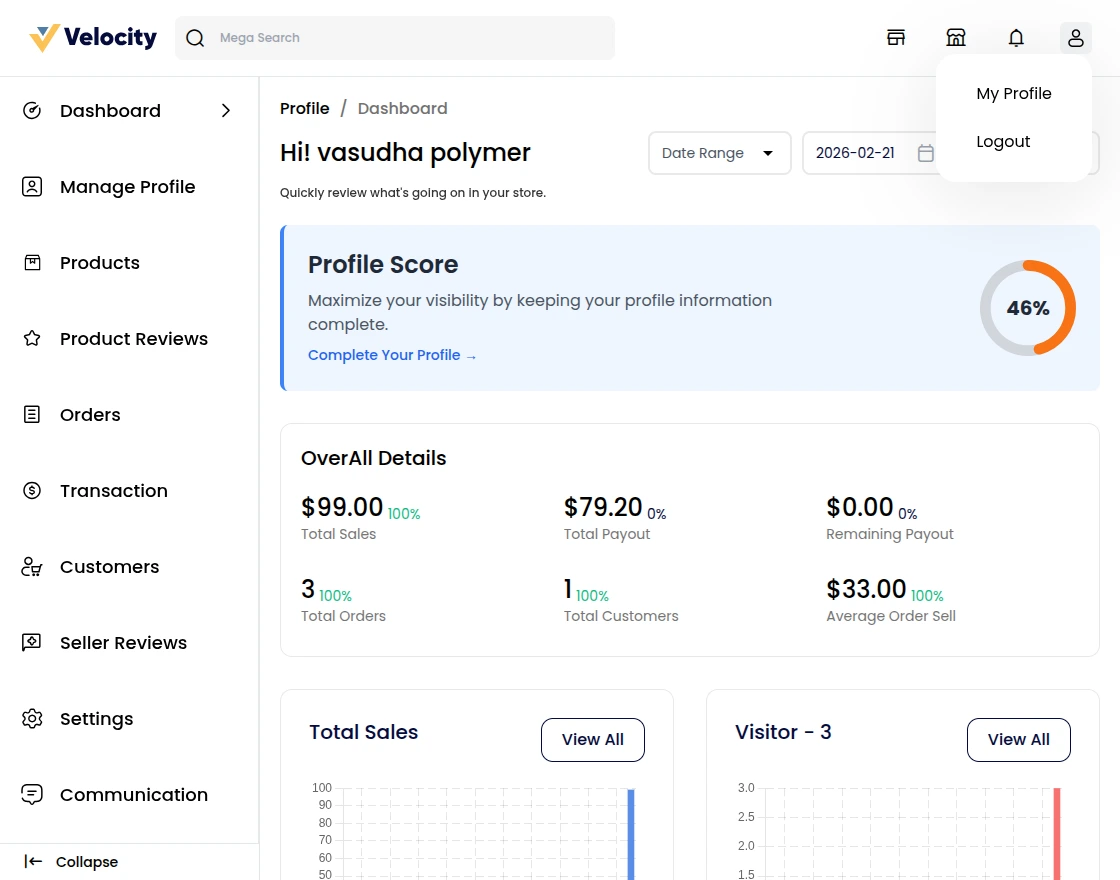
Seller Logout and Collapse
The seller can click on the logout button and logout from the seller panel.
Their collapse option is also available they can click on the same and the side menu pane will wrap up.

Profile
Here you can manage your shop profile. This is very useful in terms of shop branding by displaying useful information. Below are the fields that you will find in the profile section.
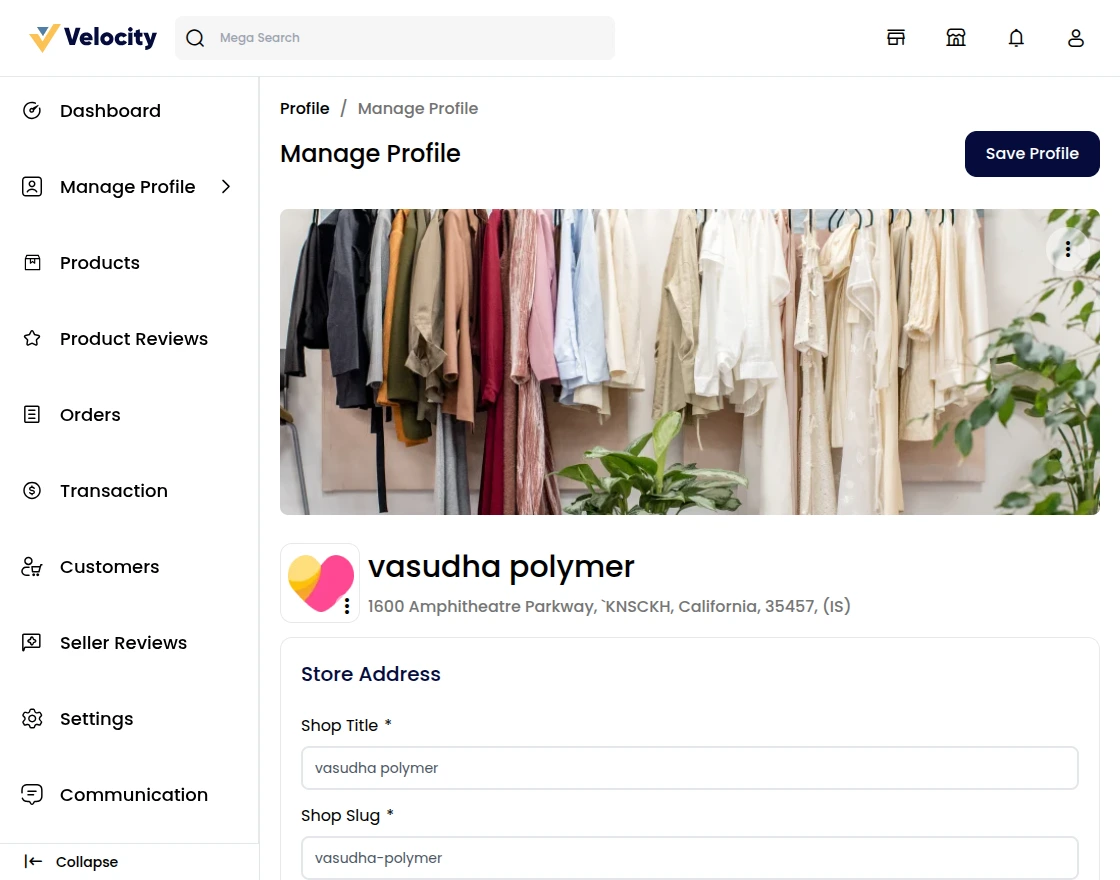
Under this section, you need to provide a logo and banner for the shop to be displayed at the front end.
Shop Title
Here you need to provide the title or name of your Shop. It’s a mandatory field.
Shop Url
Here you need to provide the URL for your shop by which your shop will be accessible to your customers.
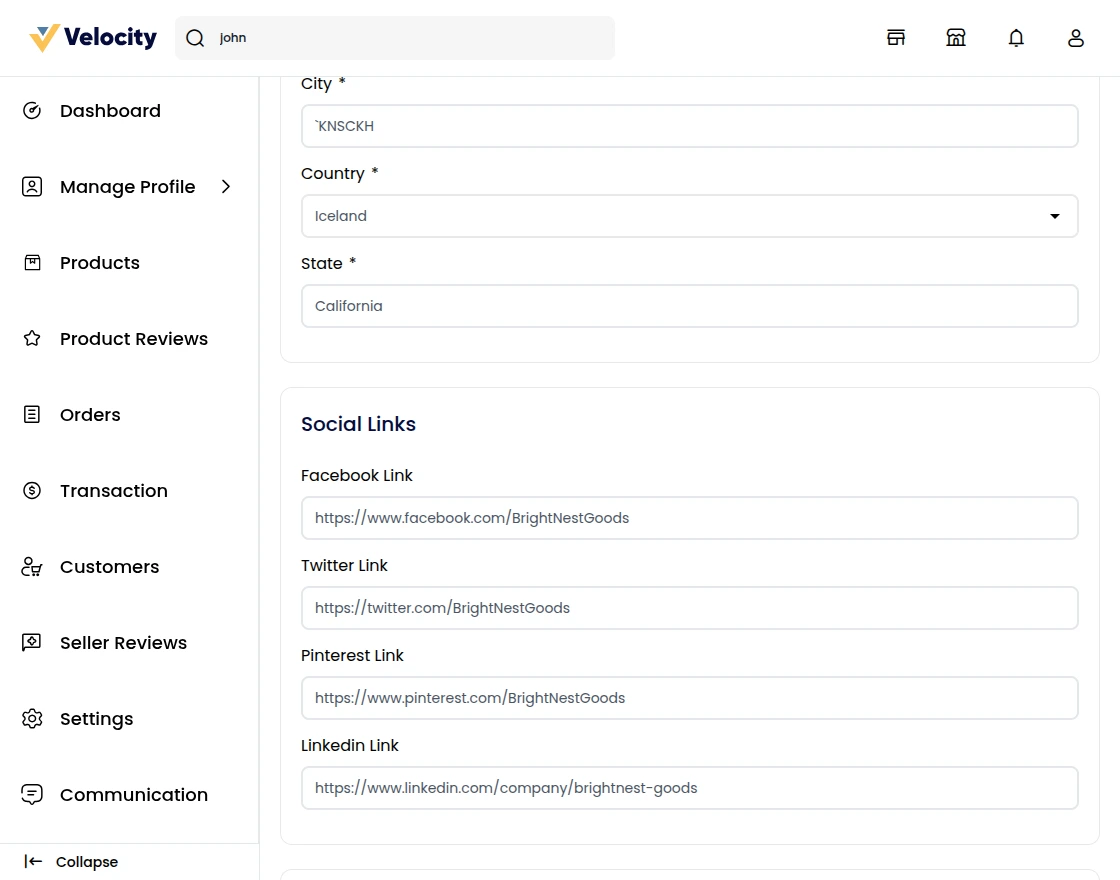
Store address
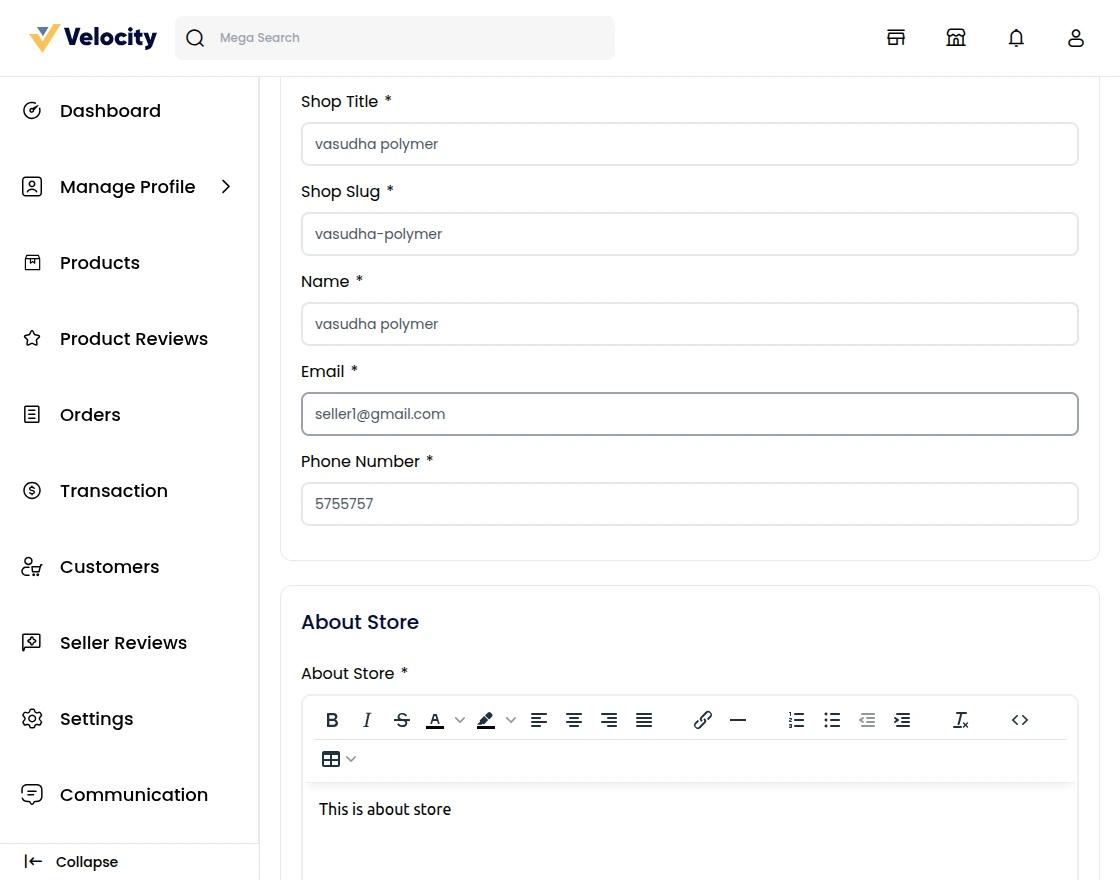
About store
Under this section, you can describe your shop inform customers about the products you sell, and other stuff to make it more informative.
Social Links
In this section, you can provide links to your shop’s social channels like Facebook, Twitter, Pinterest, and LinkedIn.
Meta Description
To improve your shop search ranking on search engines, you can enrich that by providing meta titles and descriptions.
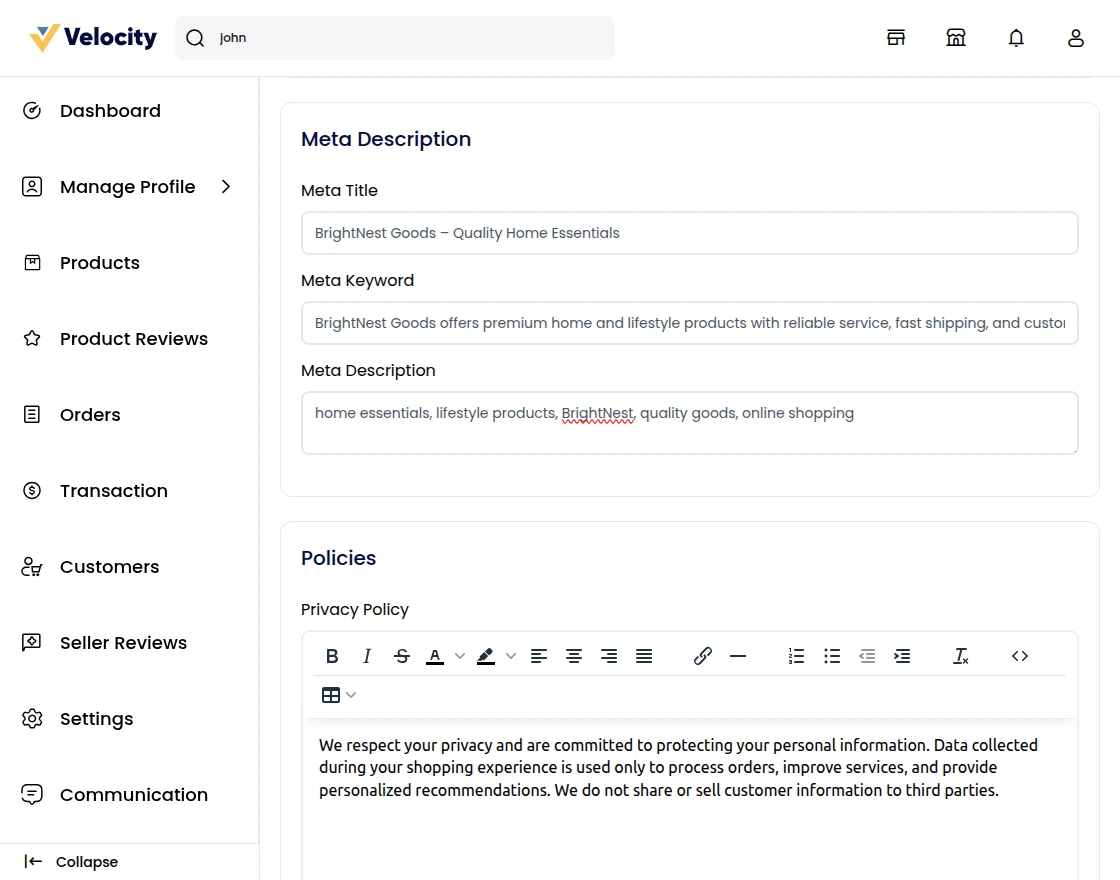
Policies:
To keep the purchase transparent between you and your customers, you can provide a Shipping, Return, and also Privacy policy.
Mega Search
The seller can also search products, orders, and customers by entering keywords and all the associated data will display in the drop-down option.
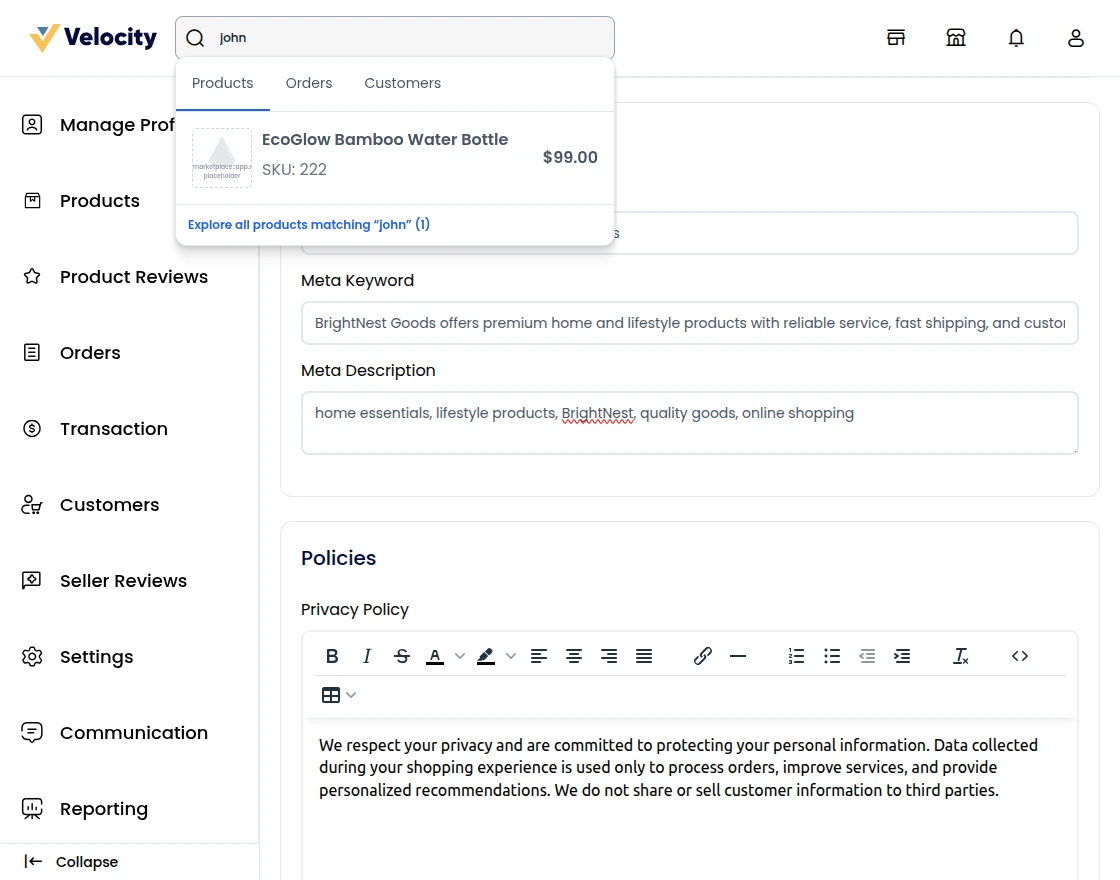
When clicking on products it will show the Explore all Products option so the seller can explore all the products to the related keyword.
Orders
Customers
View Seller Home Page
In the top right corner click on the collection page button to view the seller’s page.
You will then be redirected to the dedicated seller’s page.
 To check the seller’s product collection, click View Collection Page. You will then be redirected to the Sellers’ Product Collection page.
Products
Here you will find the list of products as created by the seller.
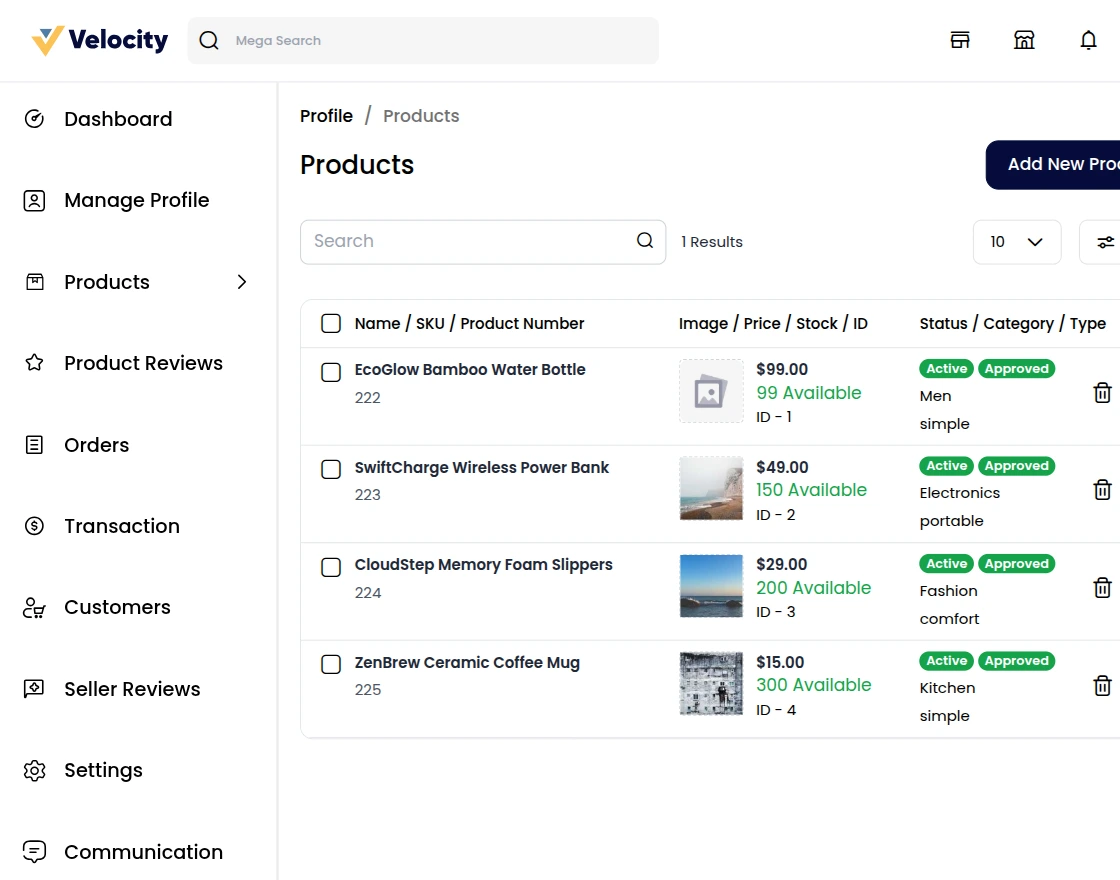
Here the seller can create products in two ways:
Create a New Product:
If the product is new, you can also click the Create New option and create a new product.
- You can create a simple product that doesn’t have any variations in it.
- For the products which have variations in their size, and color then you can create configurable products.
- If you want to sell some membership or any service then you can create the virtual products.
- The products that need to be downloaded in the form of files go with the downloadable products.
Note –
- In the default marketplace, the admin will allow only simple, configurable, virtual, and downloadable products for sellers to add and sell.
- If the admin allows the bundle and grouped product permission then only the seller can sell the products in a group or a bundle, and then create the Grouped or bundled products.
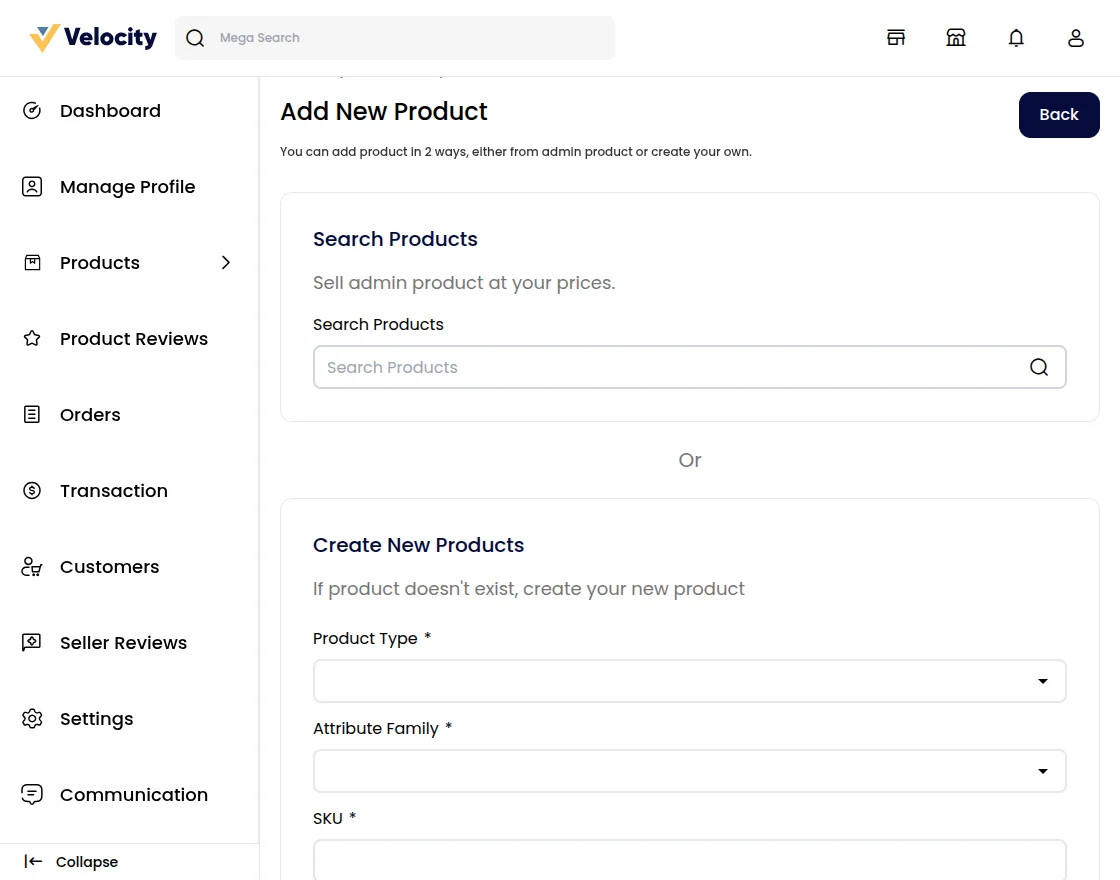
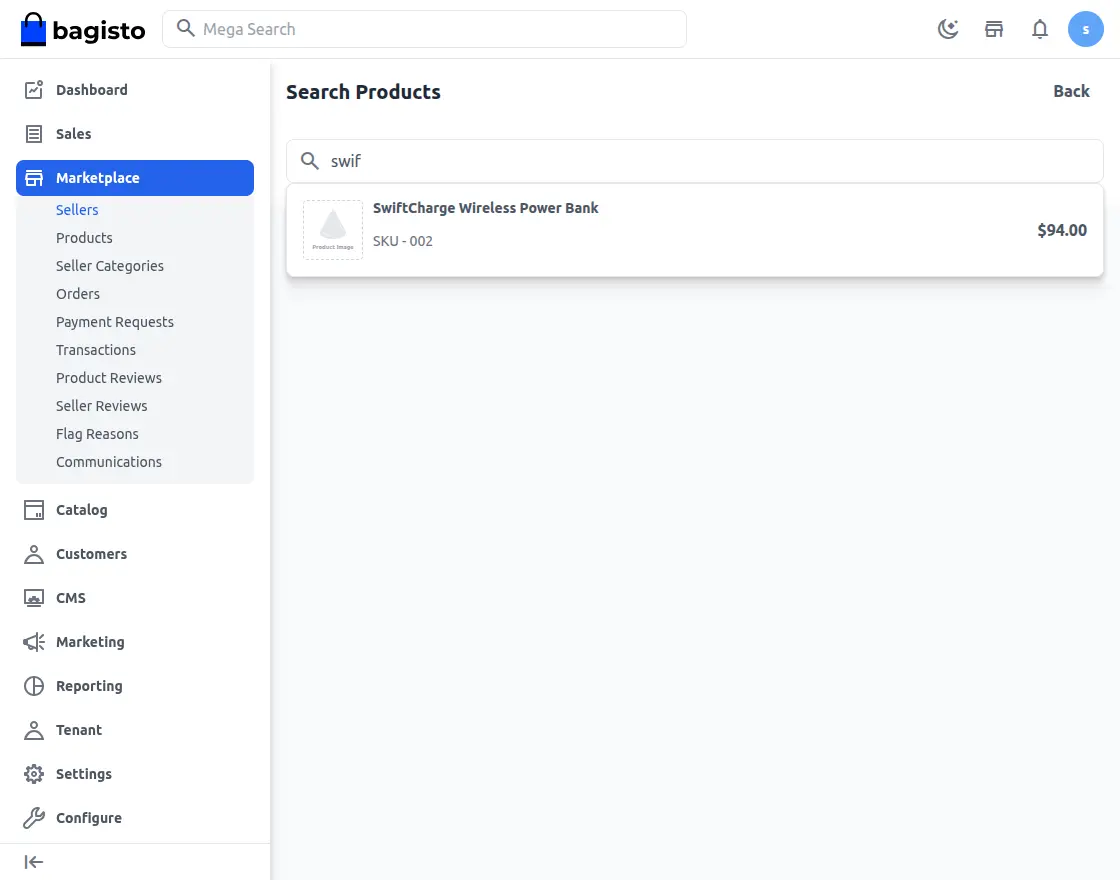
Assign an Existing Product:
If there is an already existing product on the website and you want to sell the same product of yours but with different prices, just type the first three letters of the product.
If the product is already there on the website, you will get that in the search results.
Click on Sell Yours to create your version of the existing product. You need to provide the following description of the existing product: Product Condition:
Here you can also select the condition of the product that you are selling as New or Old.
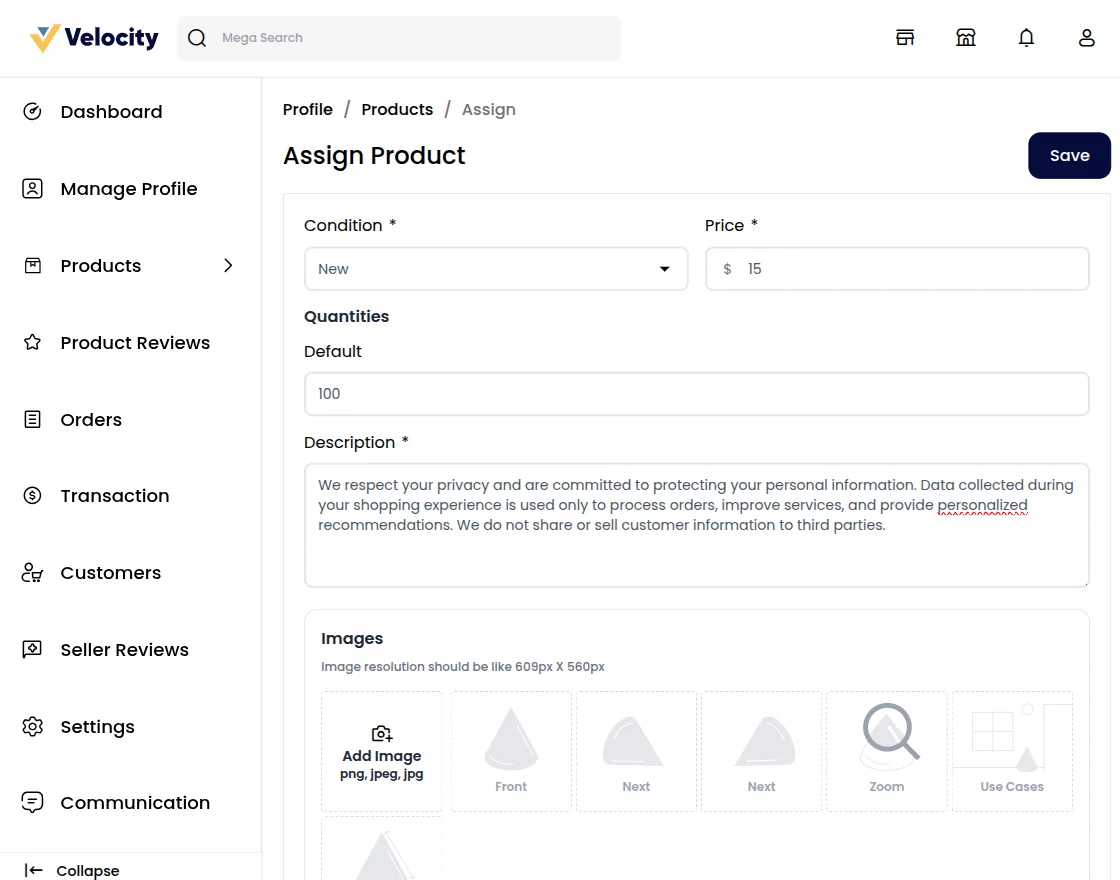
Price
Provide the price of your product in this field.
Description: Here you need to describe the product that you are selling.
Images: Provide images of your product here.
Inventory: Here you need to define the quantity of your product in the inventory sources as created by the seller.
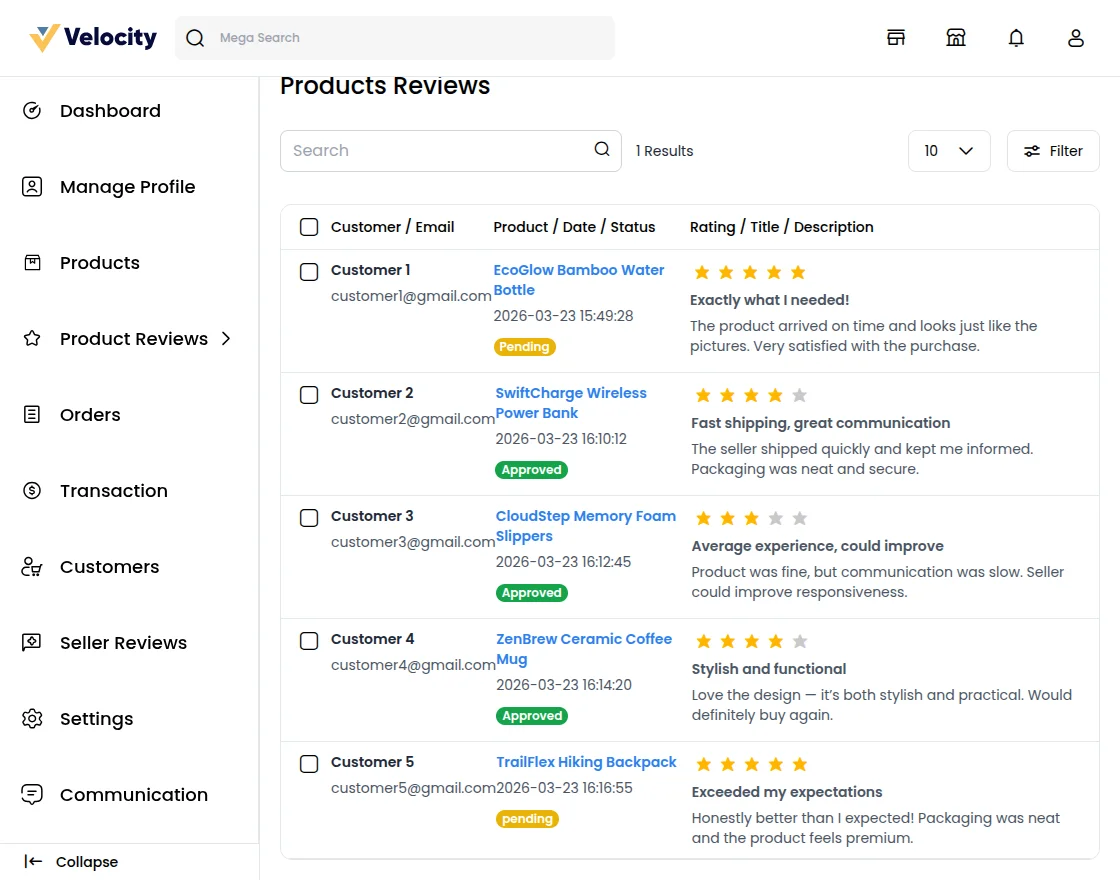
Products Review
Here, the seller can check the reviews given by the customer for particular products.
Assigned products
Products can be assigned in two ways Admin to Seller and Seller to Seller, which means admin can assign admin product to any seller or seller by itself. the same case goes with Seller-to-Seller product assigning.

After clicking more seller information it appears similar to the below image

Order
Here you will find the list of orders as made by the customers for your products.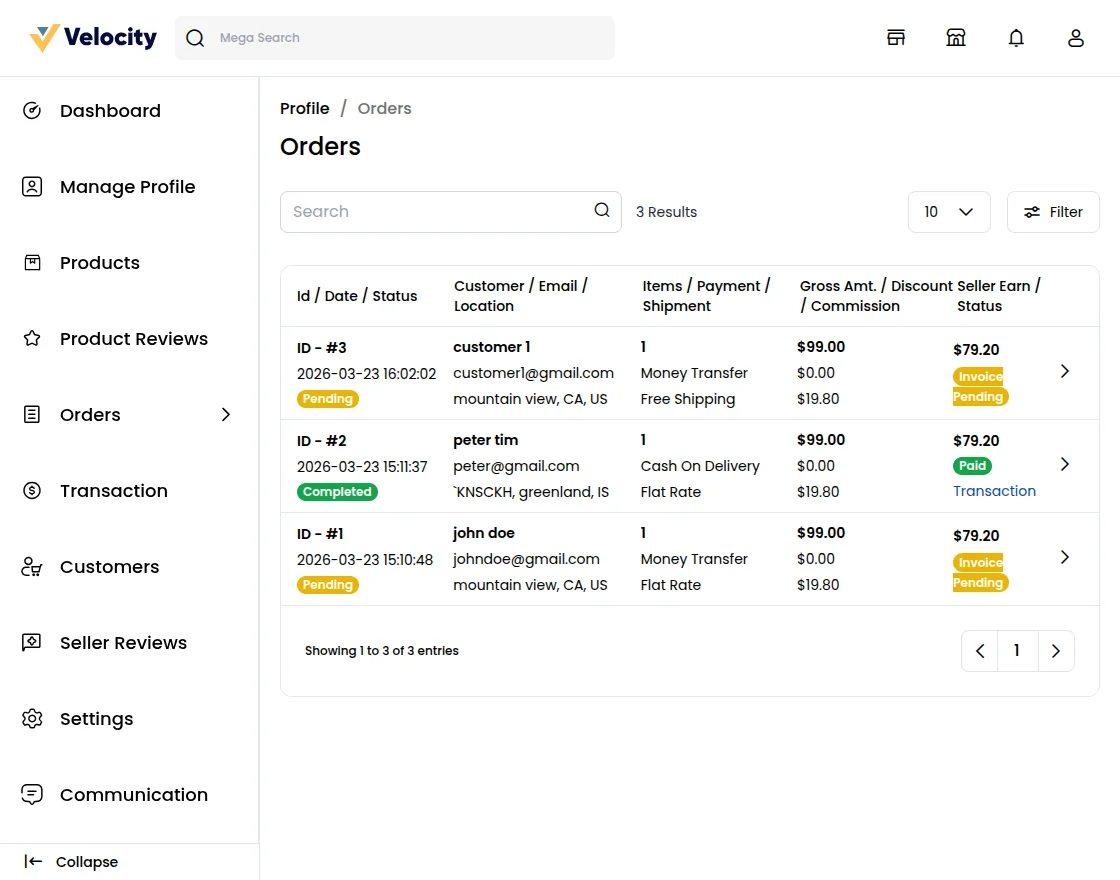
Clicking the arrow icon, you will find more information on the order along with the invoice and also shipment details.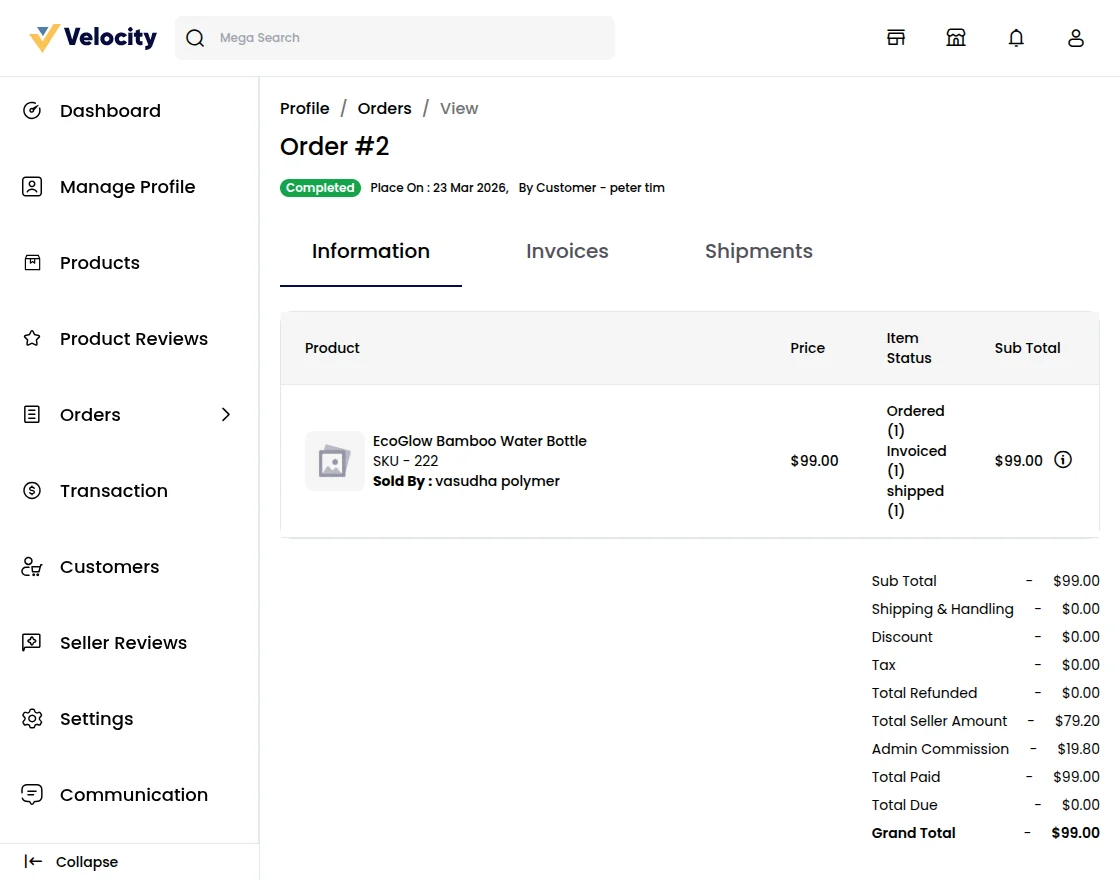
The seller can also do the following things once receives the order from the customer, the seller can create an invoice, ship, and cancel the product as mentioned in the snapshot.
By clicking on the invoice, it will show a popup with invoice details.
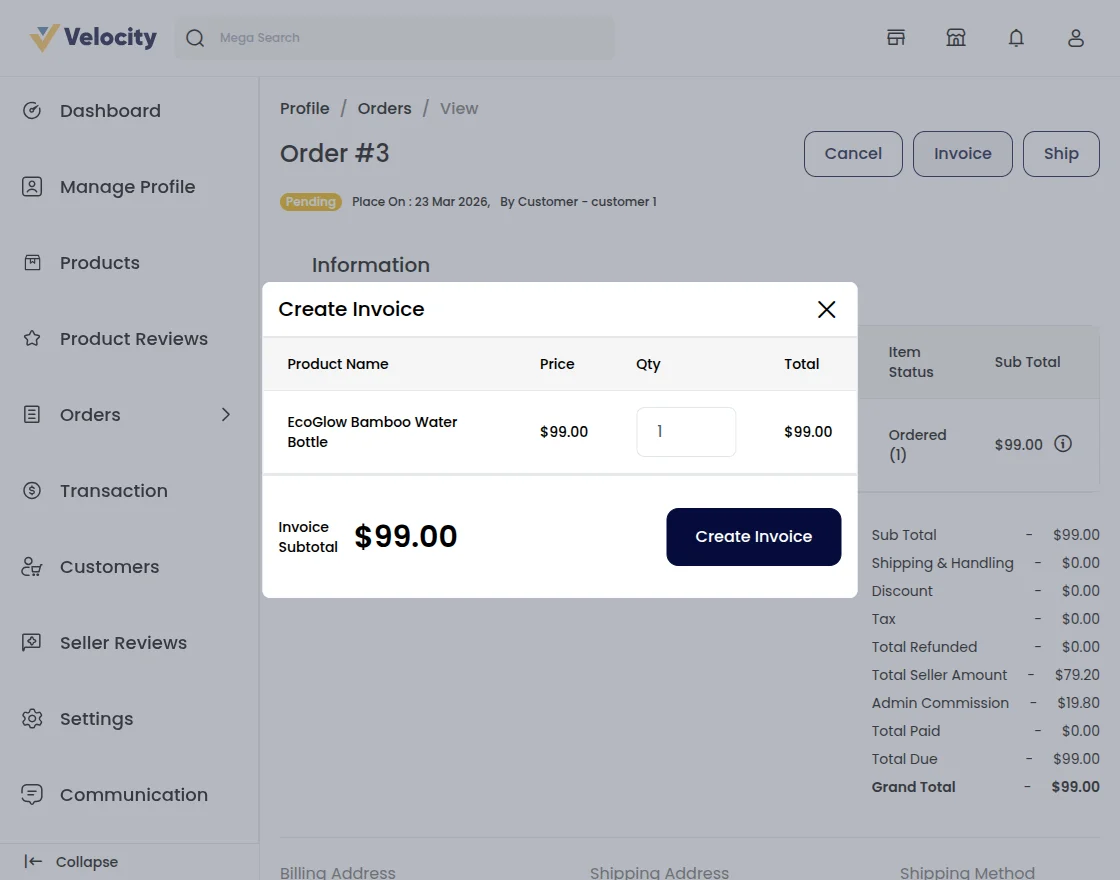
The seller can create the invoice.
Once the invoice is created, the seller can also do the shipment by clicking on the ship button. After clicking on the ship button you need to enter the shipment details and inventory source details:
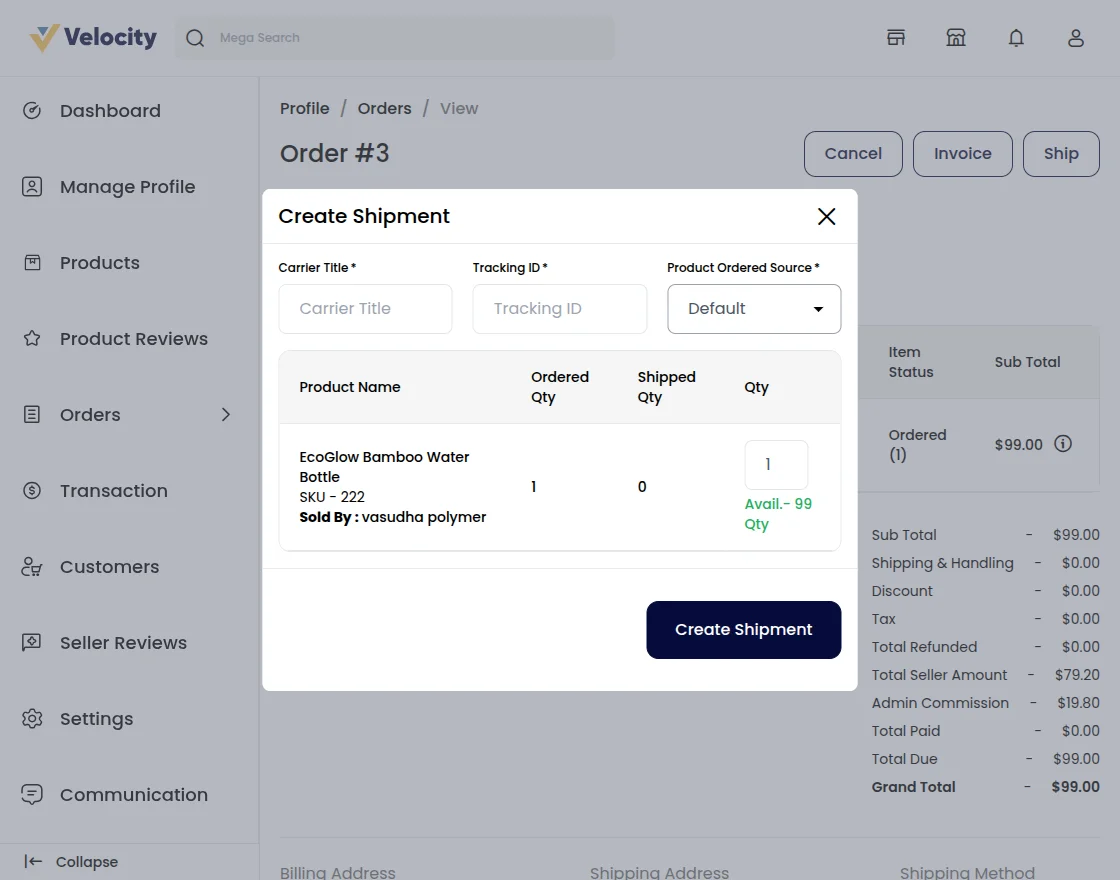
After clicking on create shipment the shipment will generate.
The seller can also check the refund details of any order. But the refund will be initiated by the admin only.
Transactions
Here you will also find the payouts report as done by the Admin to the seller. The dashboard here provides details of the total payout done and the amount left unpaid.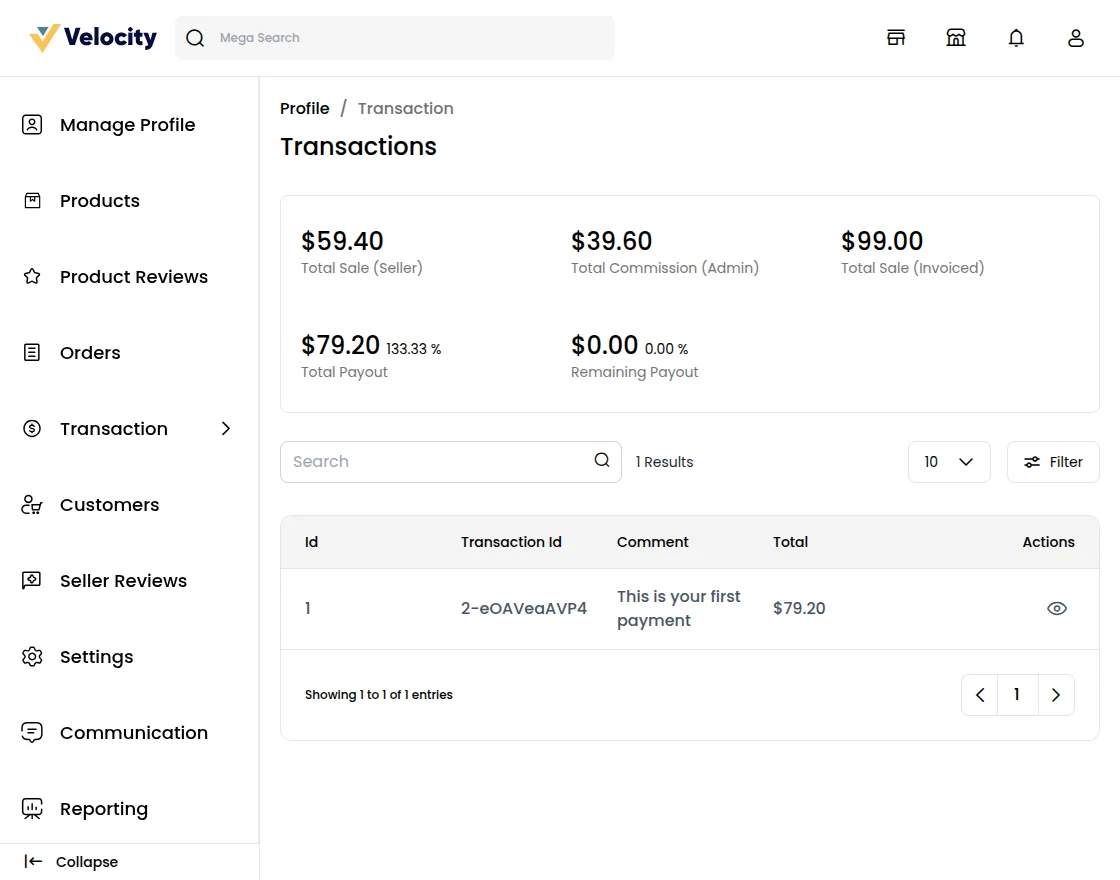
Total Sale (Seller)
This section displays the total sales made by the seller. The details shown are specific to the products for which an invoice has been created. Only completed and invoiced sales will be reflected here.
Total Commission (Admin)
This is the commission amount earned by the admin from the sales made by the seller. The commission is typically a percentage of the Total Sale and is deducted from the payout to the seller.
Total Sale (Invoiced)
The Total Sale (Invoiced) refers to the total amount invoiced for the products. It includes only those products for which invoices have been officially created.
Total Payout
The Total Payout is the amount the seller has received from the admin. This is the final payout after accounting for the admin’s commission and any other applicable deductions.
Remaining Payout
The Remaining Payout represents the amount still pending from the admin. This is the outstanding balance that the seller is yet to collect.
Payout Transactions List
In this section, you will find a list of all payout transactions, including both paid and pending payouts, along with detailed timestamps and amounts.
Customers
Here the sellers can also see their customer details who have purchased the products from seller and also the seller can see the Order count, on clicking the order count the seller can see the details of the Ordered product.

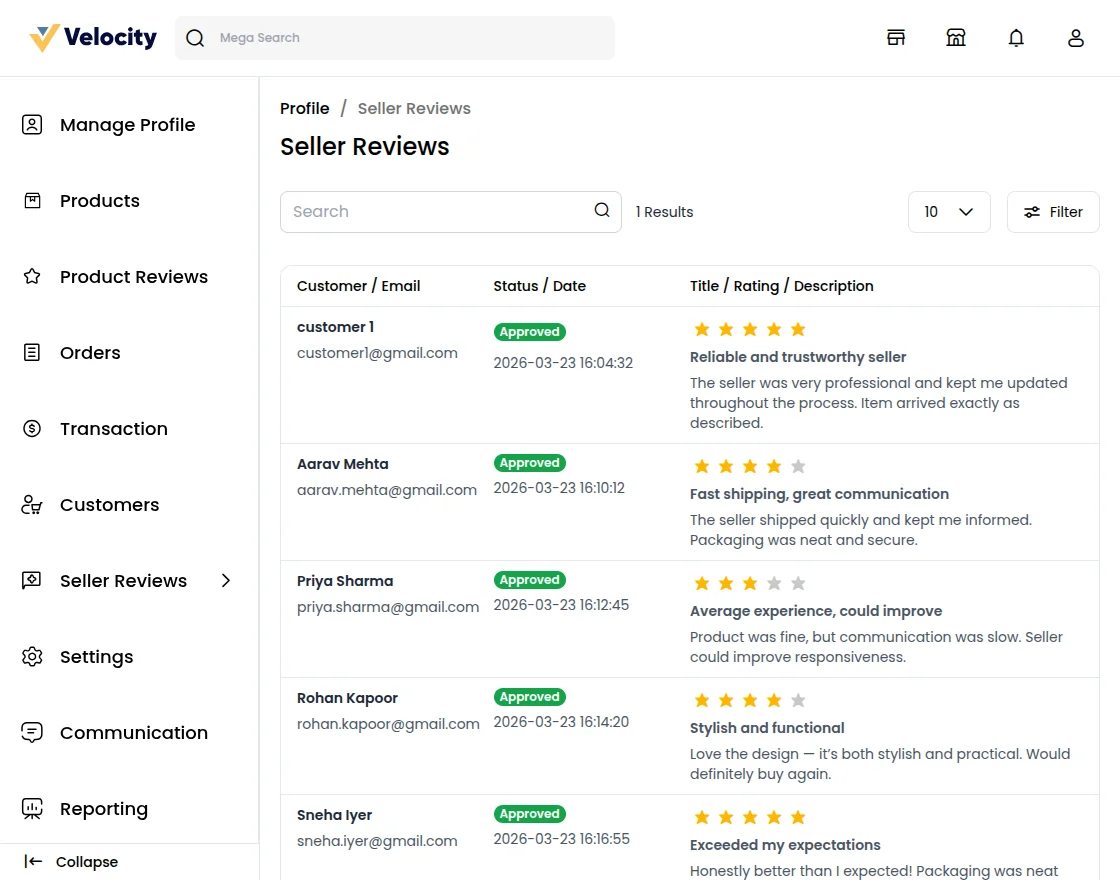
Seller Reviews
Here you will also get the list of reviews as given by the customer to the particular seller.
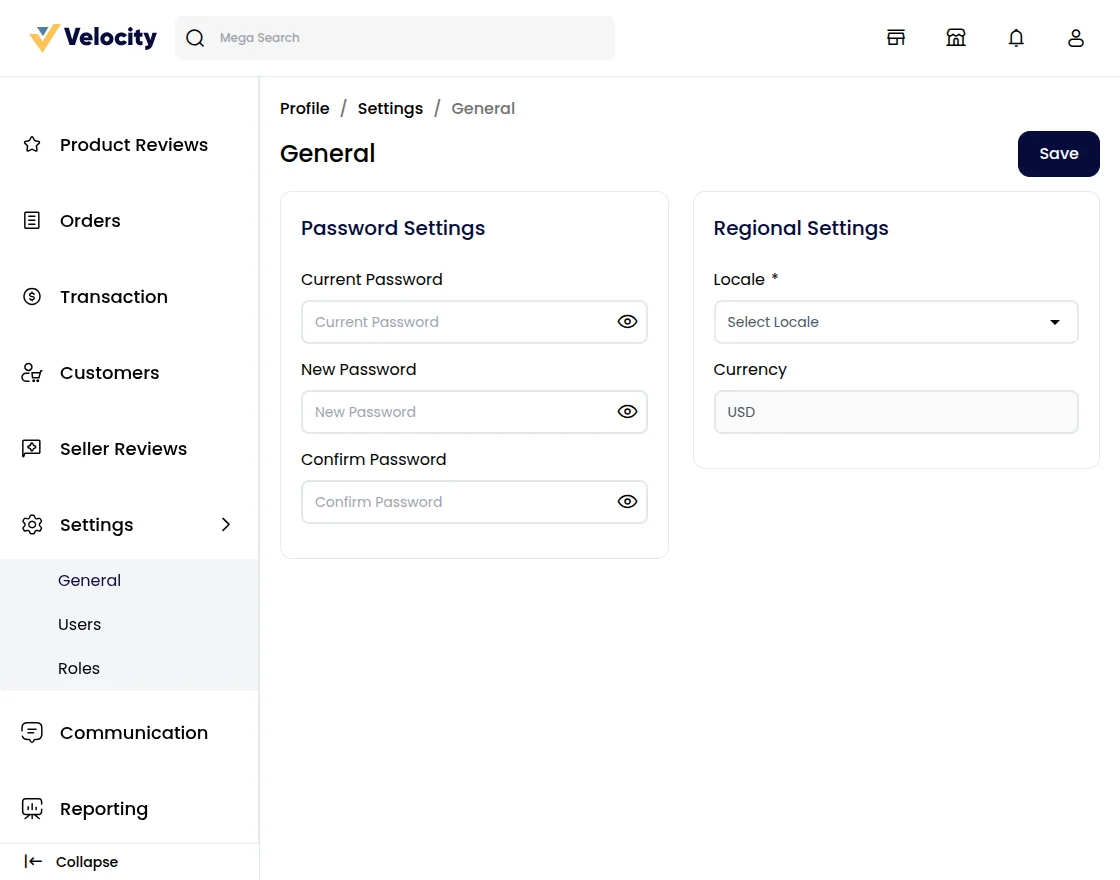
Setting
Seller can manage only the Locales but currency is the same as the admin panel
Users
Sellers can also create Sub-sellers. Under the Users Option on the left side seller can view all the sub-sellers.
To create a new Sub-seller click on the Create User Button.
Now, Enter all the details of the new user or sub-seller.
Name: Enter the Name of the user.
Email: Enter the Email of the user.
Phone Number: Enter the user’s Phone number. Phone numbers must be unique for all users.
Role: Select the role of the user.
Status: To Enable the status to be user.
Password: Enter the password
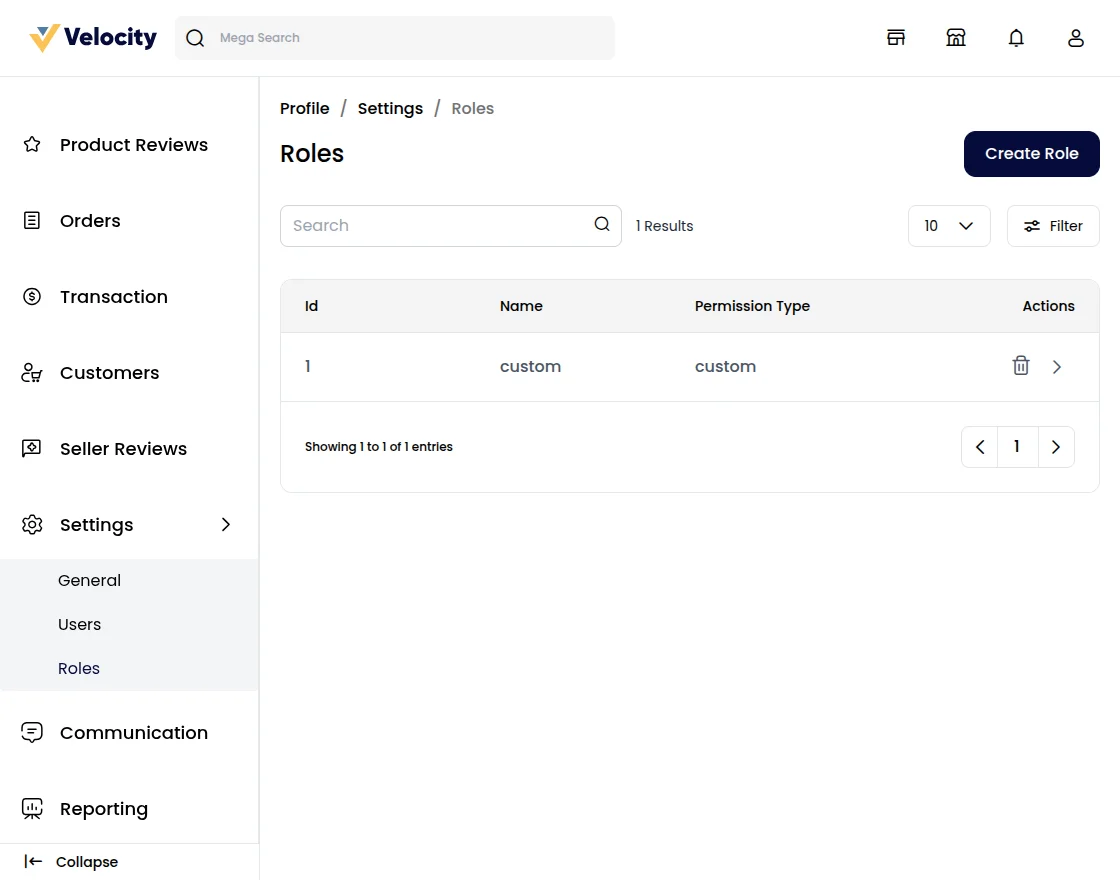
Role
Sellers can create a custom role for creating the sub-seller. and view all the roles in the Role section.
Communications
Now sellers can directly communicate with the admin of Laravel Multi Vendor Marketplace as shown in the image below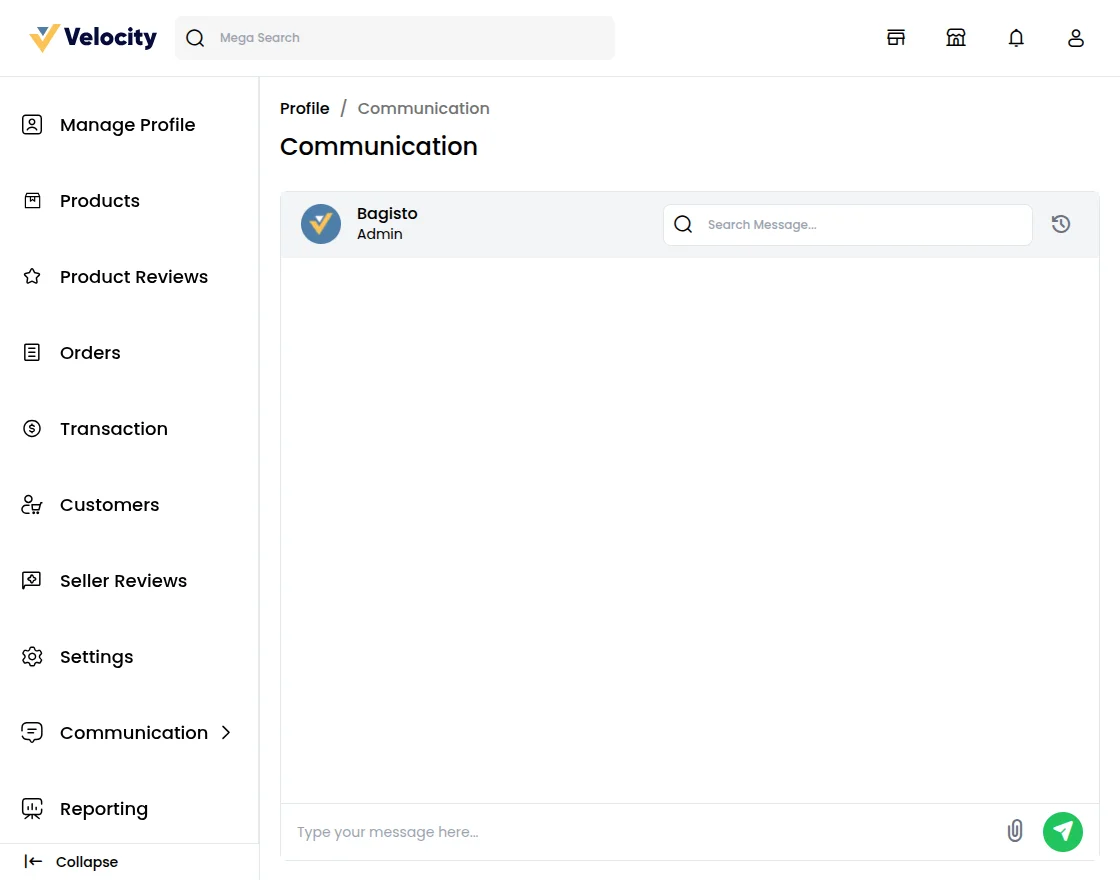
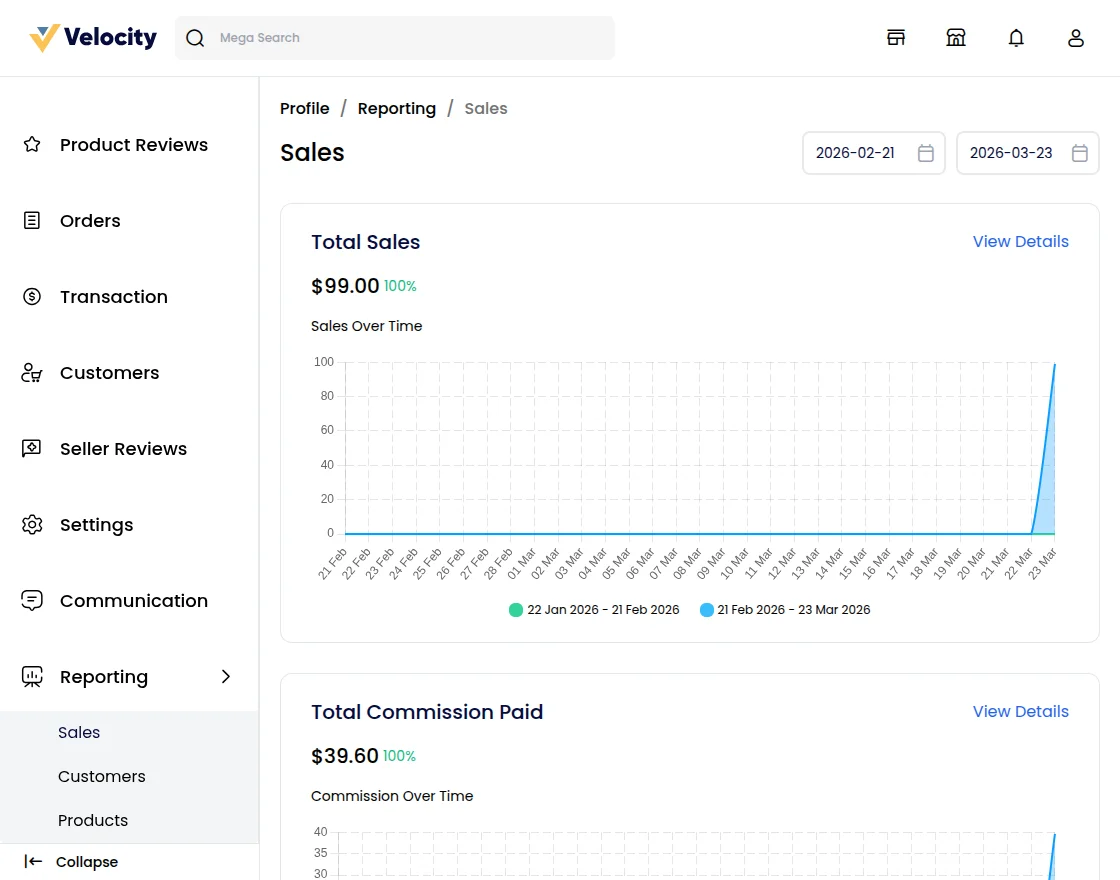
Sales Reporting
In the sales report seller can easily able to track
-
- Total Commission Paid
-
- Total Sales
-
- Purchase Funnels, Abandoned Carts
-
- Total Orders
-
- Average Order Value
-
- Tax Collected
-
- Refunds
Top Payment Methods.
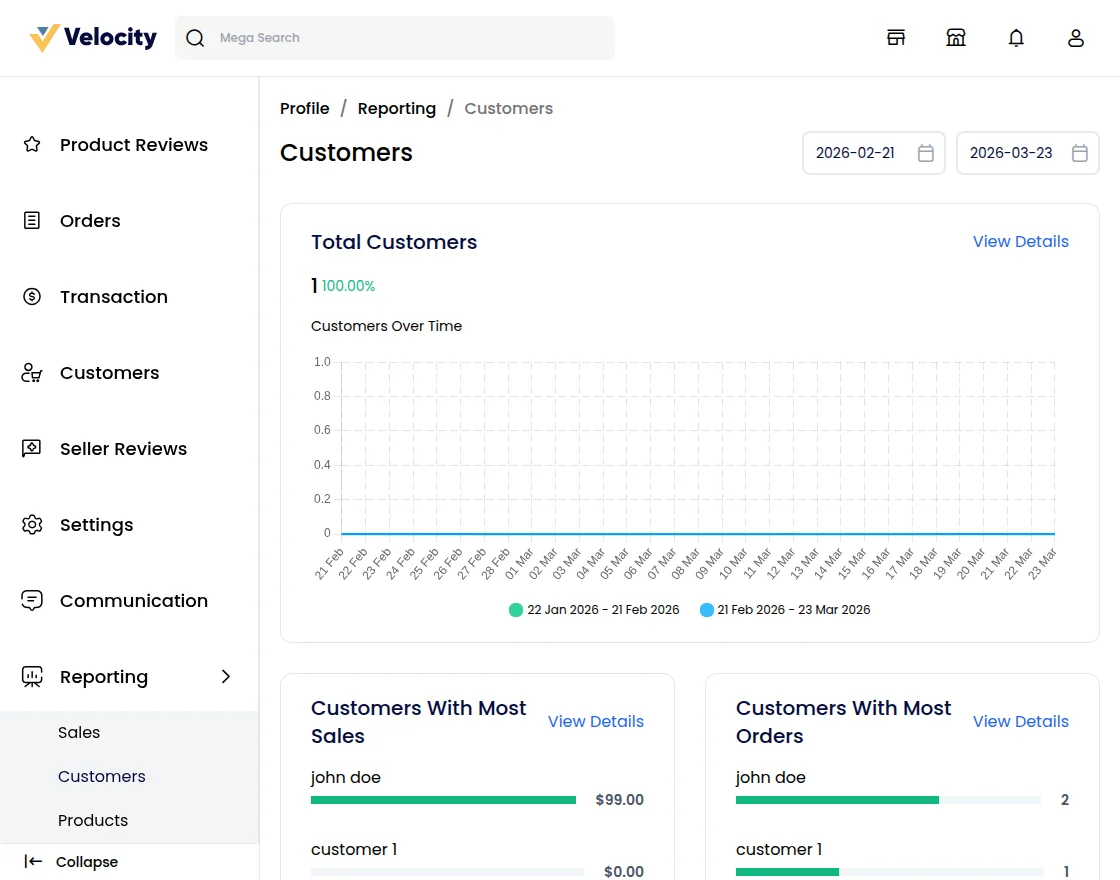
Customers
In the customers report seller can easily able to track
-
- Total Customers
-
- Customers With Most Sales
-
- Customers With Most Orders
-
- Customers Traffic
-
- Top Customer Groups
-
- Customers With the Most Reviews
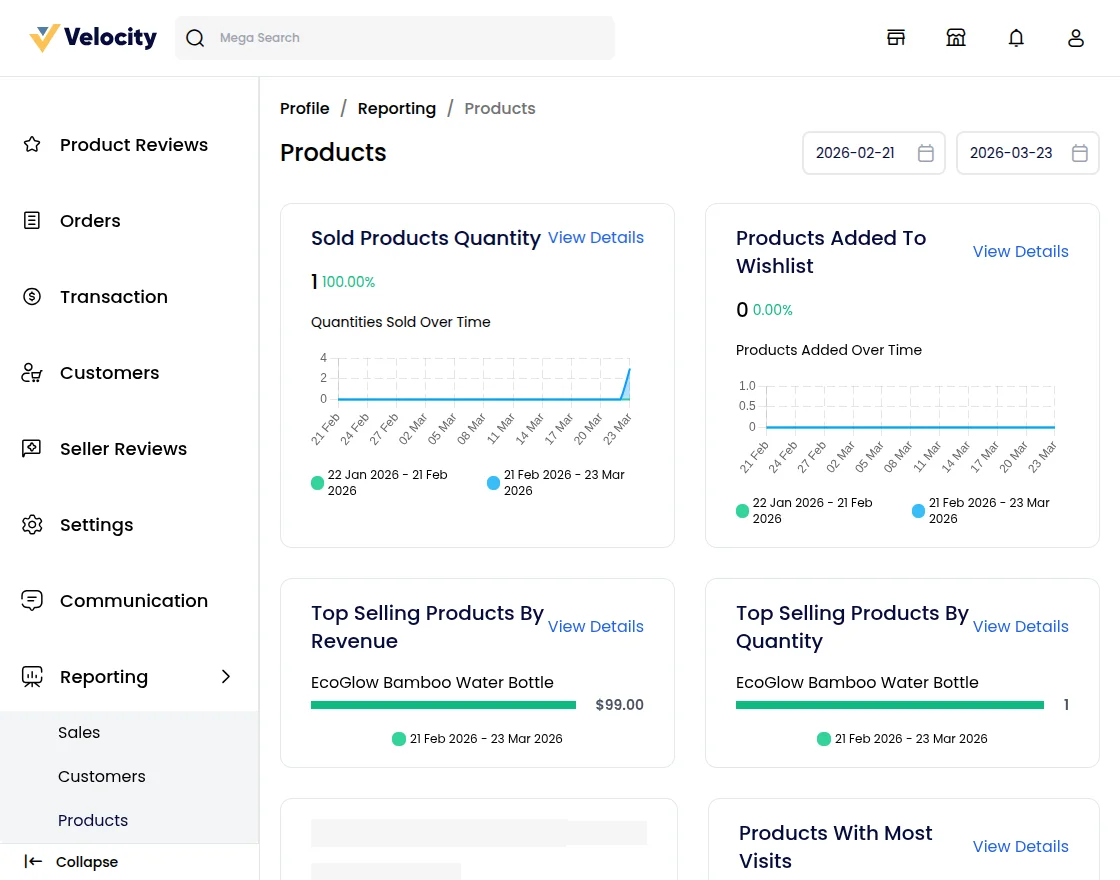
Products
In the products report seller can easily able to track
-
- Sold Products Quantity,
-
- Products Added To Wishlist
-
- Top Selling Products By Revenue
-
- Top Selling Products By Quantity
-
- Products With Most Reviews
-
- Products With Most Visits
Support
So, that was much about the User Guide of Laravel eCommerce SaaS Multivendor Module for any queries or doubts reach out to us at [email protected].
Current Product Version - v2.2.2
Supported Framework Version - Bagisto v2.2.2

Be the first to comment.