PrestaShop Marketplace Seller Vacation module allows merchants to inform about the vacation to customers & thus manage the shop effectively.
As many people say that vacations help to rejuvenate people. So, now sellers can also go on vacation without worry about their shop.
This module helps them to display a customized message during the vacation period to the customers.
The sellers can also choose to disable the “add to cart” button during the course of vacation in order to receive less orders.
Check the overview of the plugin in the video mentioned-below –
Features of the PrestaShop Marketplace Seller Vacation module
- A seller can add a vacation detail & inform the customers about it too.
- A new tab to manage vacation details becomes available at the seller’s end.
- The sellers can choose whether they want to enable the “Add to cart” button during the vacation period or not.
- A seller can also add the message to show to the customer during the vacation period.
- Vacation message is visible to the customer on the product page, seller shop page & seller profile page.
- The seller becomes active automatically after the end of the vacation period.
- Admin can choose to delete the vacation from the backend.
- An admin can also enable the “Add to cart” button on the vacationing seller product.
- The seller gets to add the vacation message in multiple languages.
- A seller can also update the vacation details afterwards.
NOTE:
PrestaShop Marketplace Seller Vacation module is Multi-Shop Compatible with PrestaShop Advanced Multi-Vendor Marketplace version 5.4.0/3.4.0 and above.
How to install the PrestaShop Marketplace Seller Vacation module
In order to install the module, you need to install the PrestaShop Advanced Multi-Vendor Marketplace module first.
After installing the marketplace module, you can now proceed to install the PrestaShop Marketplace Seller Vacation module.
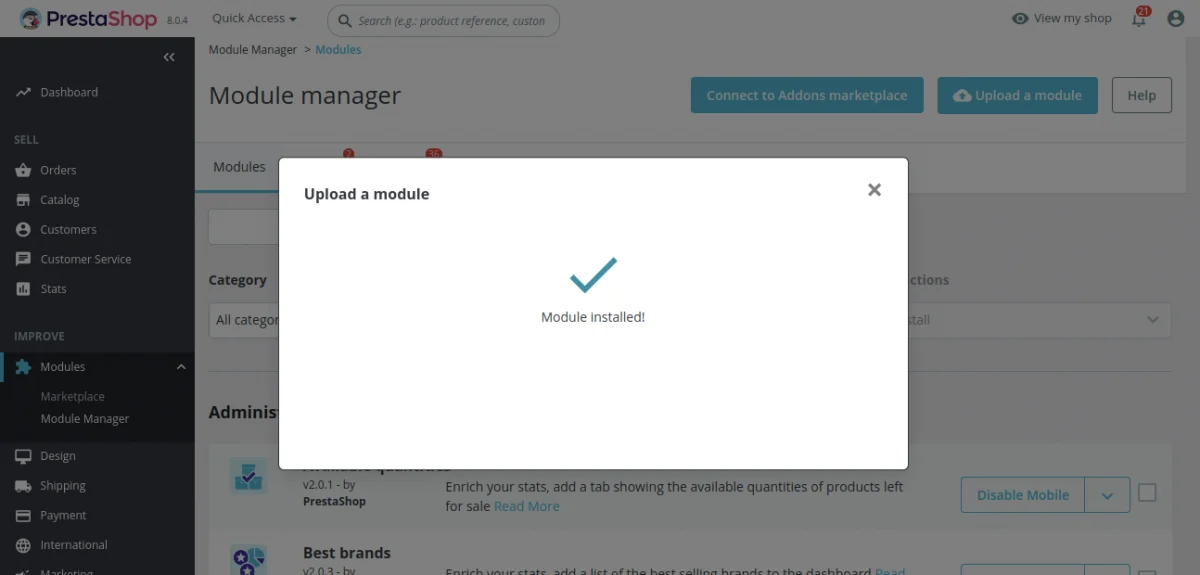
- Firstly, go to the Module Manager in Back office and click on ‘upload a module’.
- After that, drag and drop the module file or select the file from the system.
- In this way, the module installation will be successful.


Workflow of the PrestaShop Marketplace Seller Vacation module
After installing the module, you don’t need to configure anything as there are no configuration settings.
So, let’s just proceed further to see all the available options on the front-end.
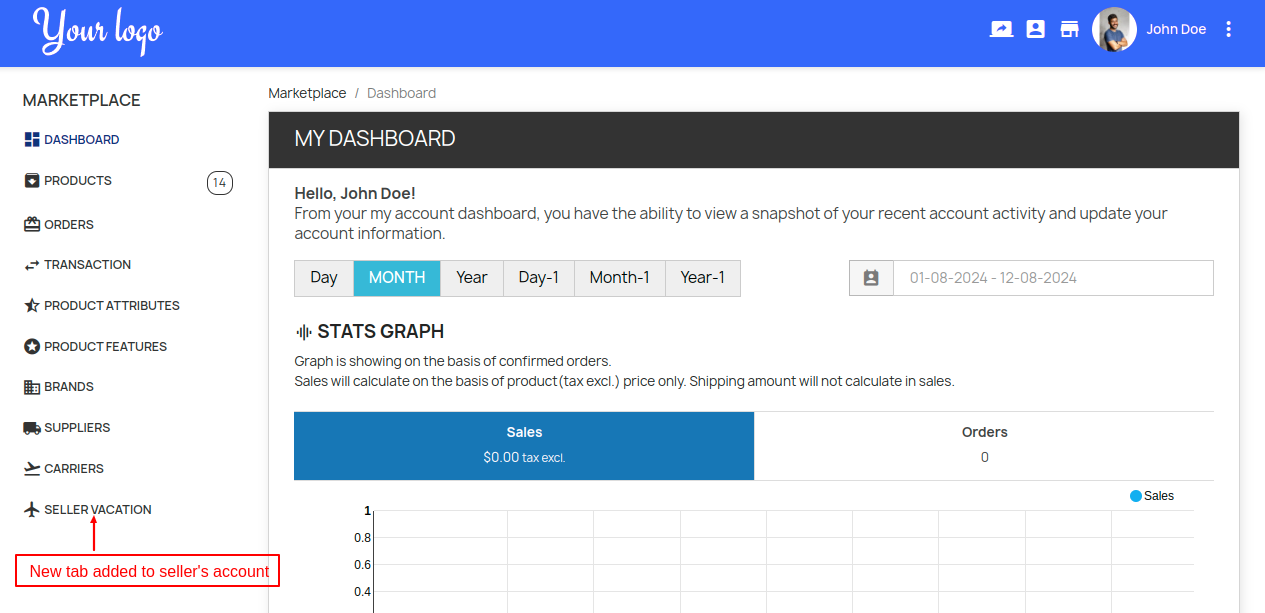
Firstly, a new tab with the name “Seller Vacation” adds to the seller dashboard just after the installation of the module.
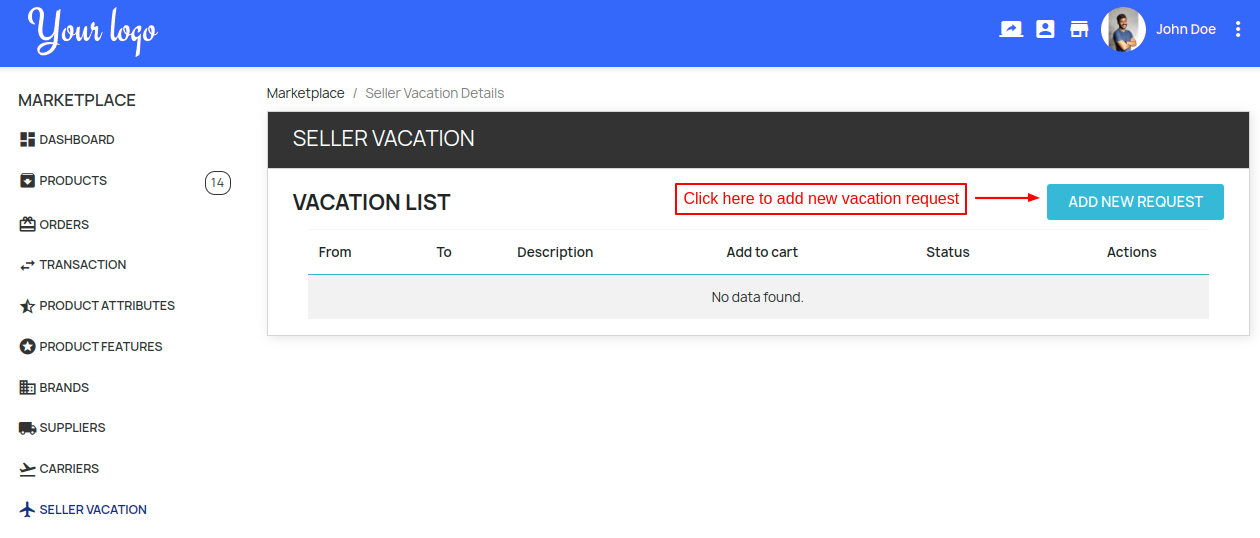
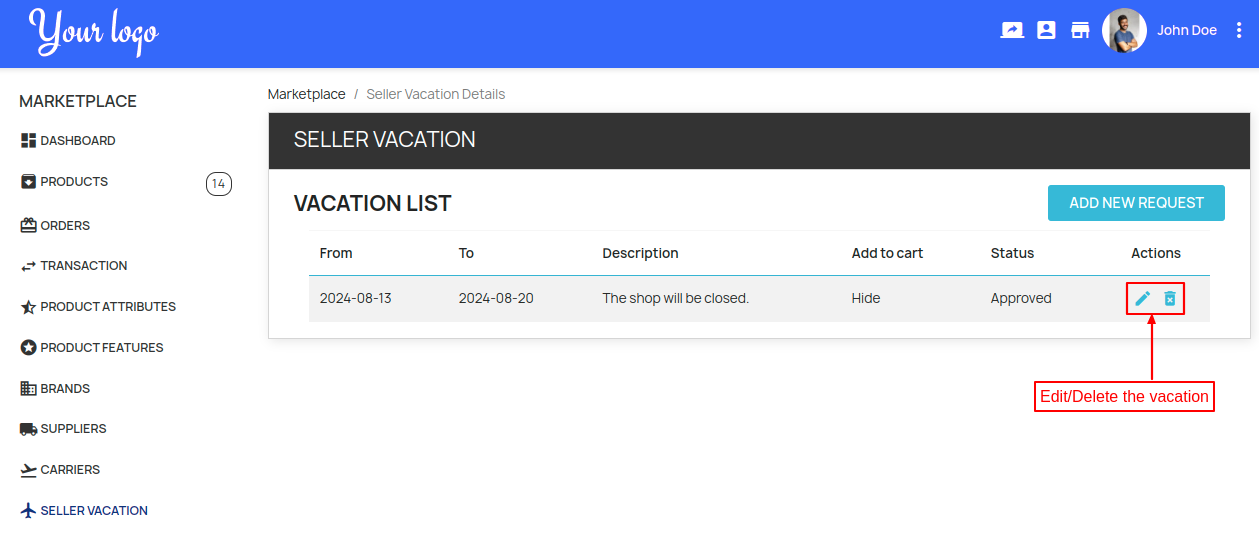
Now, a seller can click on the seller vacation tab to view the list of all the added vacations.
However, this list will be empty if a seller did not add any vacation detail previously.
Now, to continue to add a vacation detail, a seller can click on the “Add New Request” button.
By default, the vacation request will be active. However, the admin reserves the right to deactivate it at any point in future.
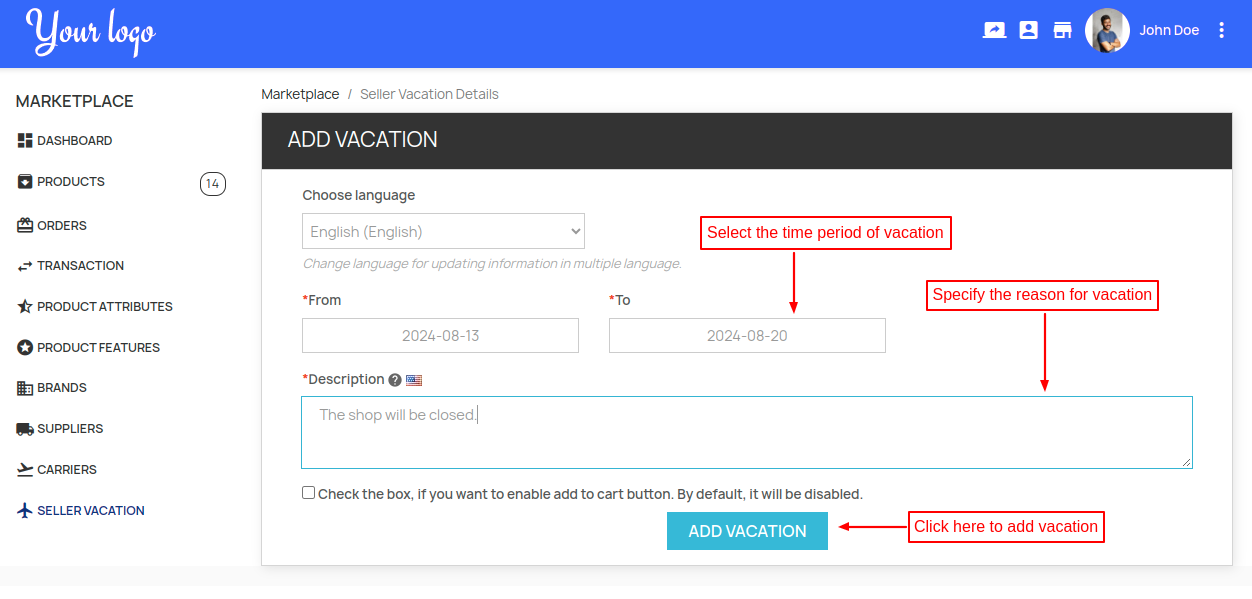
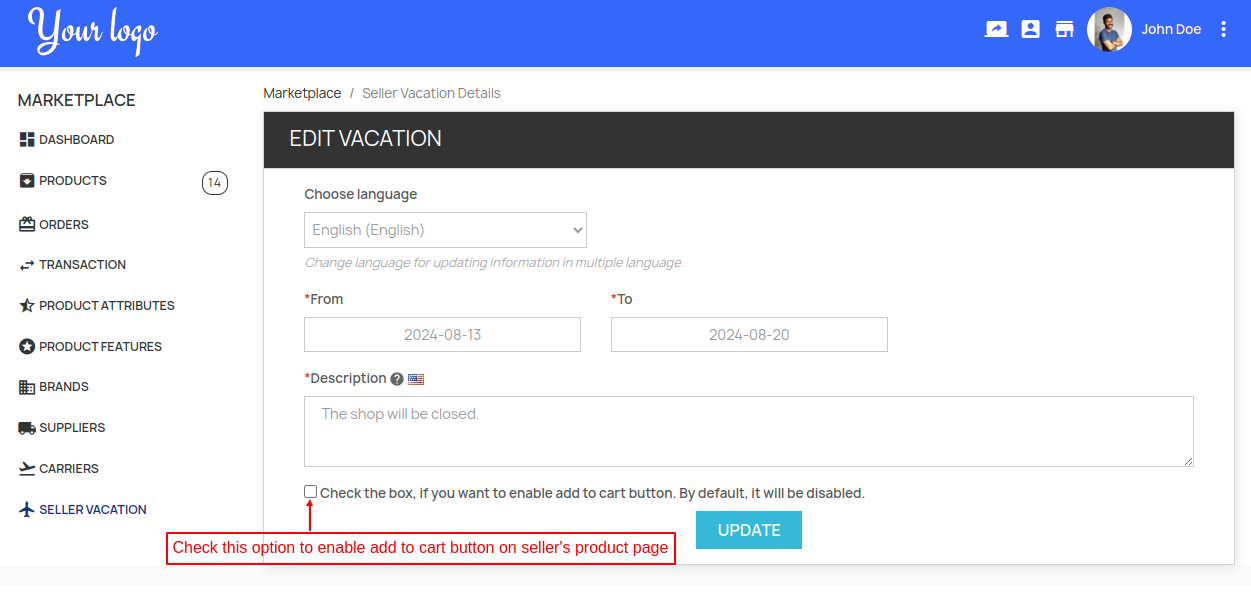
Now, a seller needs to fill in the required details in order to create a new vacation request.
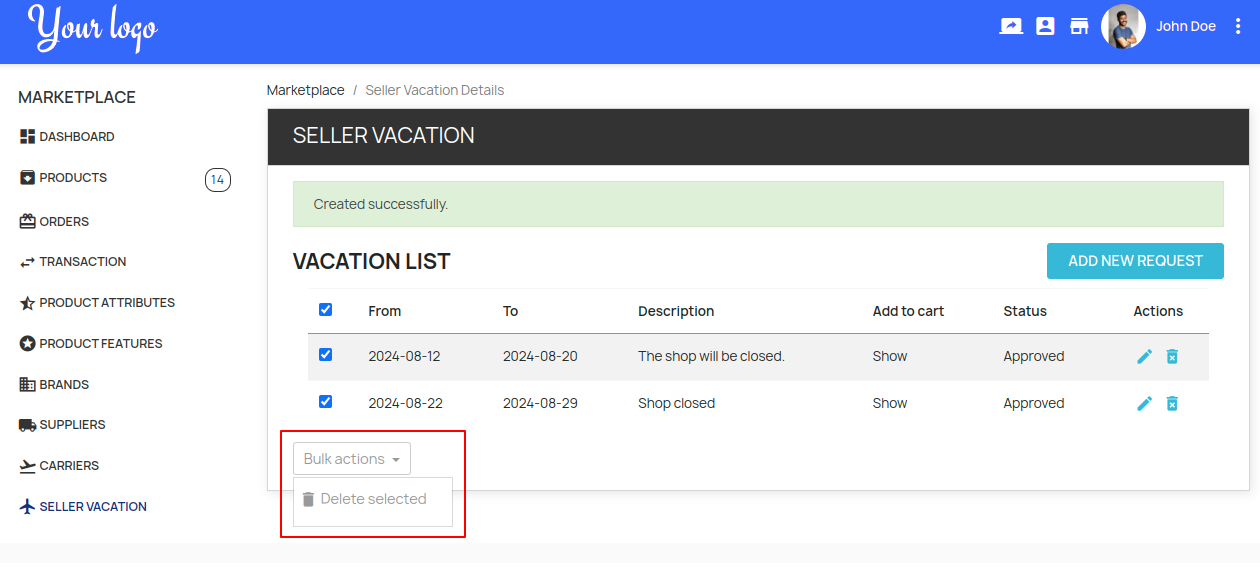
After adding the vacation detail, a seller can view a list of all the vacations. If a seller wants, then he/she can also choose to edit or delete the vacation detail.
Bulk Delete Option
Seller Vacation Message on Product Page
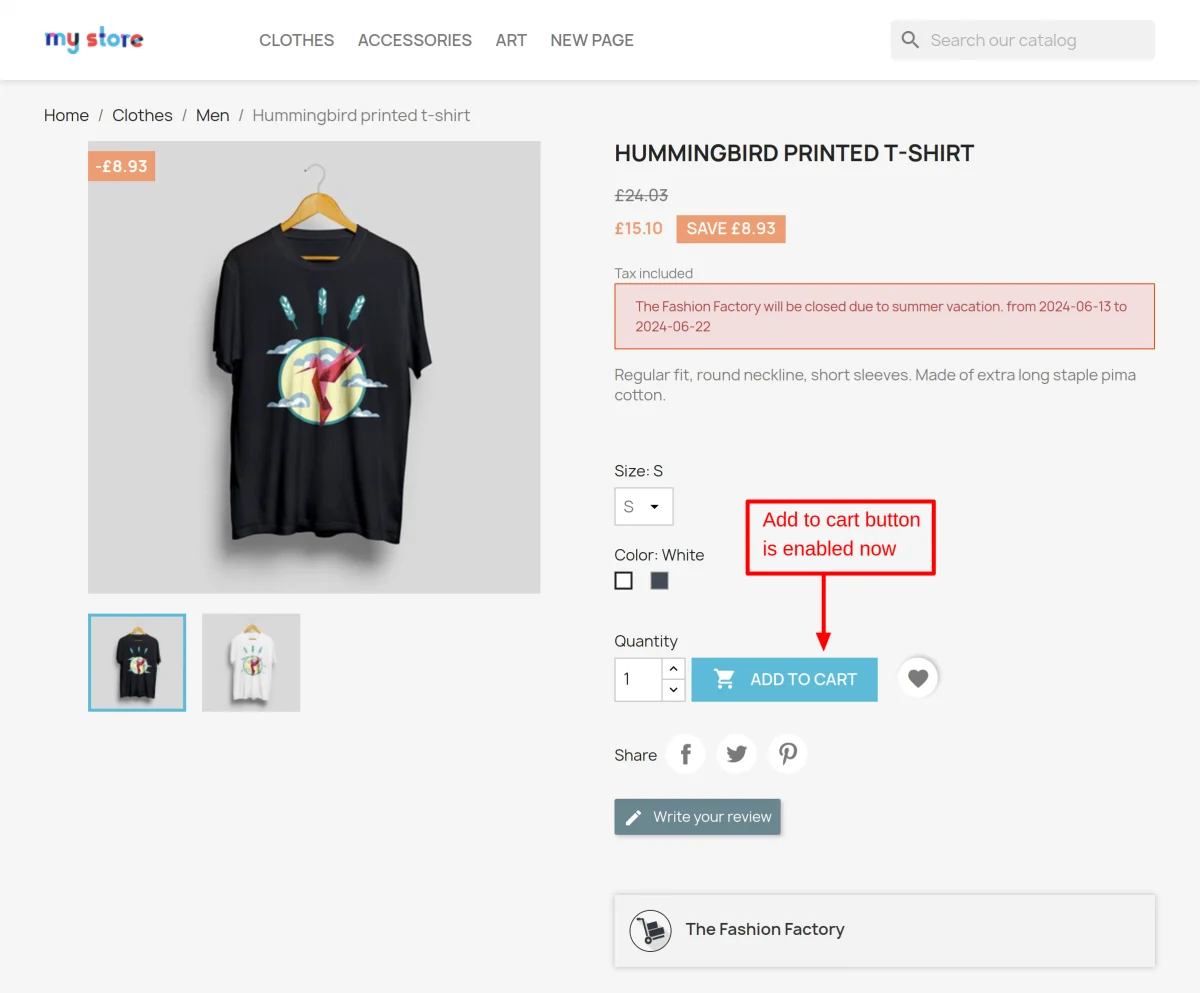
After adding the vacation detail, customers will be able to see the message on the product page.
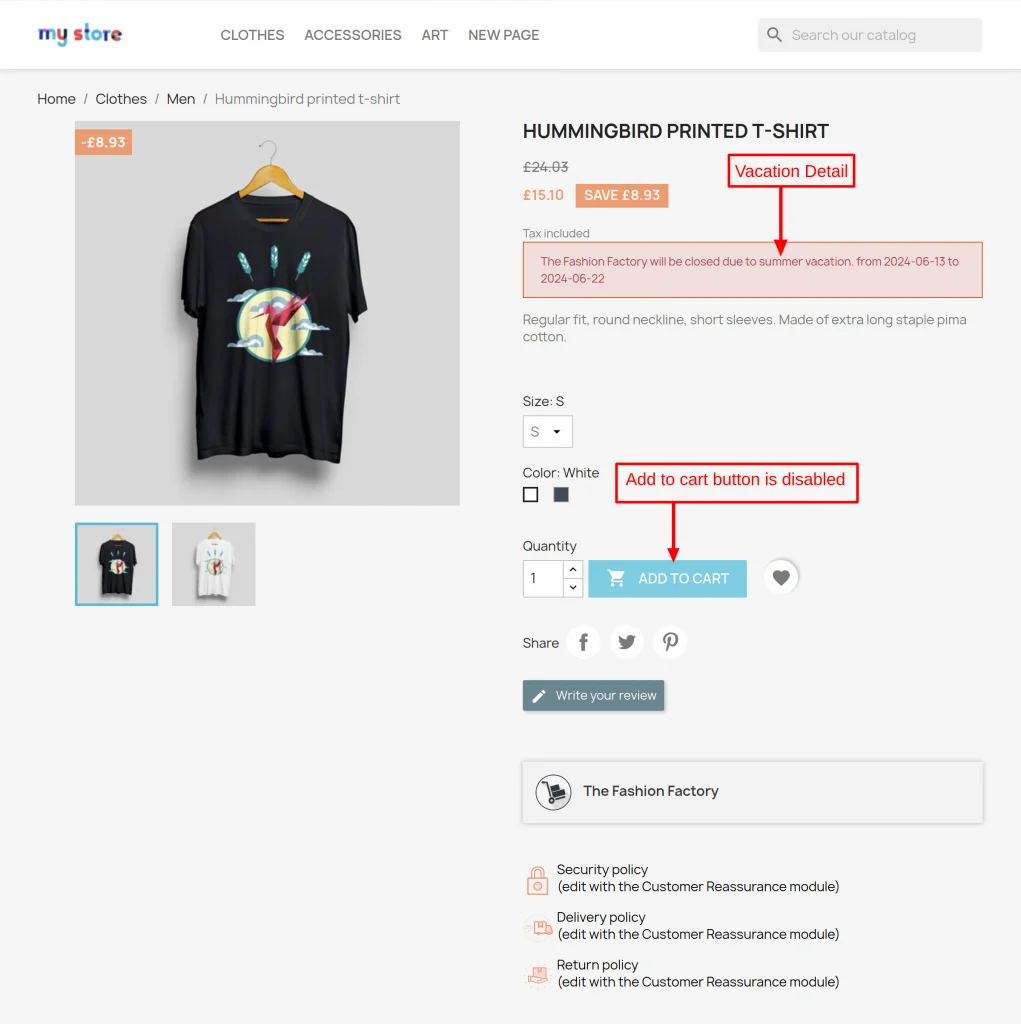
If a seller wants, then he/she can choose to deactivate the “Add to cart” option during the vacation period.
After enabling the “Add to cart button”, the button will be enabled from all the product pages of the seller.
Vacation message at the seller shop page
The seller vacation message also displays on the seller shop page. And, as per the vacation details update, add to cart button will also be inactive.

Vacation message at the seller profile page
The seller vacation message also displays on the seller profile page too.

By default, the “add to cart” button is inactive on the product page during the vacation period.
However, a seller can check the box while adding a vacation detail to enable the ‘add to cart” button.
The vacation message will hide after the end of the vacation period. And, the “add to cart” button will also become visible again.
So, this was all about the process to let the seller add and manage the vacation from the front end.
At the admin’s end
After the installation of the module, a new tab i.e., “Seller Vacation” adds under the “Marketplace” section.
Here, a list of vacation details of all the sellers is available. An admin gets to manage the following things here from the list.
- Enable or disable the “Add to cart” button on product pages of the seller.
- Show or hide the vacation message from the product pages of the seller.
- Delete the vacation detail of a particular seller.

So, this was all about PrestaShop Marketplace Seller Vacation Module. I hope this document will help you in checking the functionality of the module in a better way.
Also, do let us know about your views in the comments.
Are you planning to add videos of your product on the product pages? If yes, then check out the blog right now to know more about the module.
Support
For any kind of technical assistance or query, please raise a ticket at http://webkul.uvdesk.com or send us a mail at [email protected]
Also, please explore our PrestaShop development services & vast range of featureful PrestaShop Addons.
Current Product Version - 5.0.6
Supported Framework Version - 9.x.x, 8.x.x, 1.7.x.x

Be the first to comment.