Using this module you can add seller’s locations from the admin side and the seller can also add their location from the profile page. This is a very useful module if you have the Opencart marketplace. The customer can search sellers by exact location or by radius distance.
Since it’s an add-on for the Marketplace Module, so Marketplace Module must be installed before installing the Opencart Marketplace Seller Locator.
Note:
1. This module supports all templates and themes including the Journal theme.
2. Opencart Marketplace Seller Locator module supports the Multi-Store feature of default Opencart.
Features
- Seller can add multiple location.
- Admin can add / manage seller’s location.
- The Admin can enable or disable the module.
- Customer can search sellers by location as well as radius distance that helps customer to search nearby sellers too.
- It is working with full functionality in all the browsers .
- Seller’s searching is done by ajax, so page will not load again and customer will get data faster.
- Admin can also search the location by ZIP and Postal code.
Note – Google Map API feature is a paid service.
Opencart Marketplace Mobile App
This is a technology-based era where everything is simplified even online shopping. We all know about shopping apps and its advantages-how it reduces and makes our shopping experience hassle proof. So it is very important for all the Store owners to have a shopping app for providing a more convenient way to shop from their online store and now Webkul has launched its new app Opencart Marketplace Mobile App.
Opencart Marketplace Mobile App converts your marketplace store for Opencart into a mobile app. Your customers can easily purchase products on the go. They don’t need to have a laptop or desktop, they can easily explore your store through their smartphones. It will not only benefit the store owner and customer it will benefit the sellers too. Sellers can see their dashboard, order history through the mobile app. So what are you waiting for, you must now have an Opencart Marketplace Mobile App to be a step ahead.
- Seller list.
- The Seller Collection.
- Seller Profile.
- The Seller Dashboard.
- Seller Order History.
- The customer can contact the seller.
- Market Place Sell Page
- Users can review sellers.
- Seller Location is mentioned on the map.
Installation
The installation of the Opencart Marketplace Seller Locator module is very simple. You just need to move admin, catalog, and image folder into the Opencart root directory.

You can also install this module by uploading the zip and XML file through Extension Installer.

After uploading the file go to the Extensions > Modification and click on refresh field.

Also, after that in Admin panel go to System -> Users -> Usergroup and edit ‘Administrator’ and choose select all for both Access and Modify Permission and save it.

After that under Extension > Module, install the Opencart Marketplace Seller Locator module like this way.
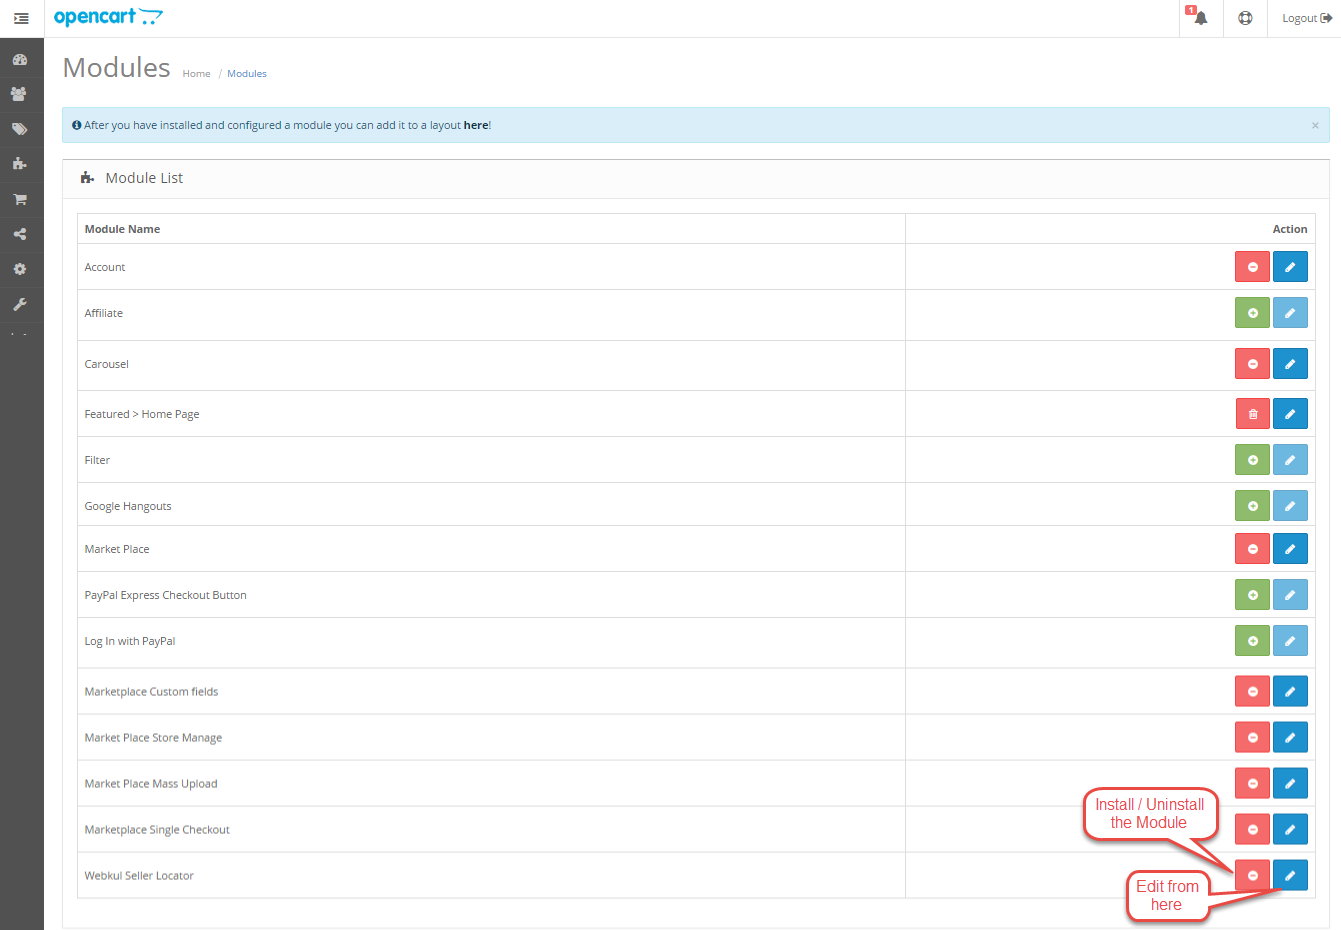
Also, after clicking on the Edit option Seller Locator configuration page will be opened as shown in the below screenshot. Here the admin has to provide the following information:
Status – Set this option to Enabled to use this Seller Locator module or else select Disabled if you don’t want to use.
Zoom Level – Adjust the default map zoom level using – and + buttons.
Detect Location – Tick the check-box option, if you want to load customer’s default location automatically.
Default Location – Here the admin can enter its store address, street name, city, pin code etc.
Default Latitude & Longitude will be retrieved automatically once the default location has been entered.
API-KEY – Here you have to enter your Google Maps API-Key. Click below link to get your API-Key as seen in below screenshot.

How to get Google Maps API-Key
To get a Google Maps API-Key, please Log In to your Google account and visit this link. After logging to your account you will see this below page. Click Get an API key link as shown in below screenshot.

After clicking the above link will arrive at this page. Click Google API Console link as shown below.

A new page will be opened, select Yes button and then click Agree and continue button as shown in below screenshot.
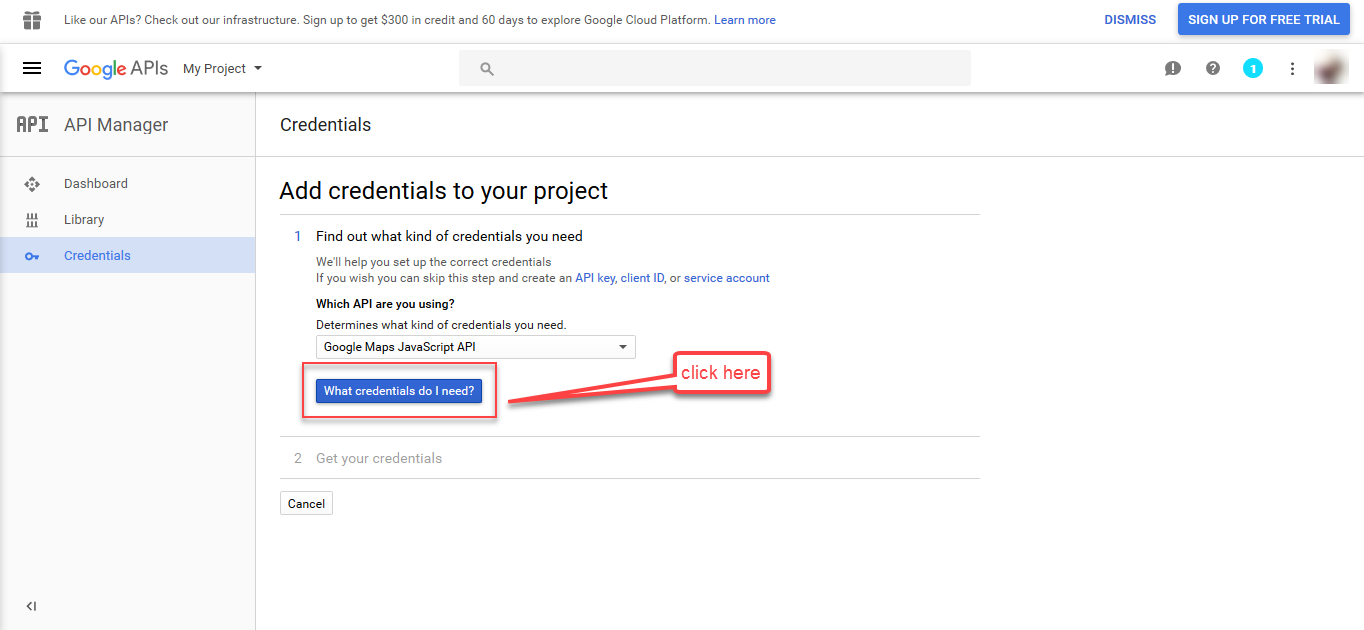
 After clicking Agree and continue button, you will arrive at API Manager Credentials page. Please click the button named What credentials do I need?
After that, you will get your Google Maps API-key as shown in below screenshot. After copying the key, click Done button and paste this key to your Opencart Seller Locator Configuration.

Domain Verification
The user needs to follow the given steps for verifying the domain.
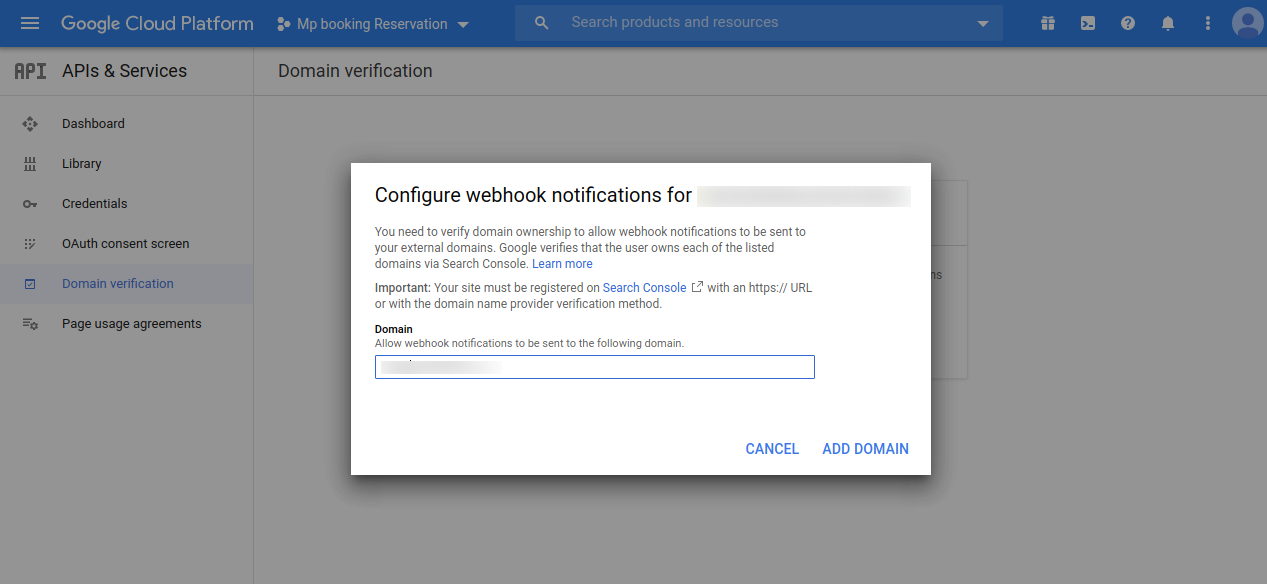
Initially, on the Google Cloud Platform page, the user must navigate to APIs & Services > Domain verification as shown below.

This navigates the user to the Domain Verification page, where the user needs to click on the Add Domain button.

A popup shall appear as shown in the image, where the user needs to fill in the Domain URL (https://example.com/) in the text box and click the ADD DOMAIN button.
On clicking the ADD DOMAIN button, another popup opens up bearing a name Verify ownership.
The user must click on TAKE ME THERE, to proceed further.

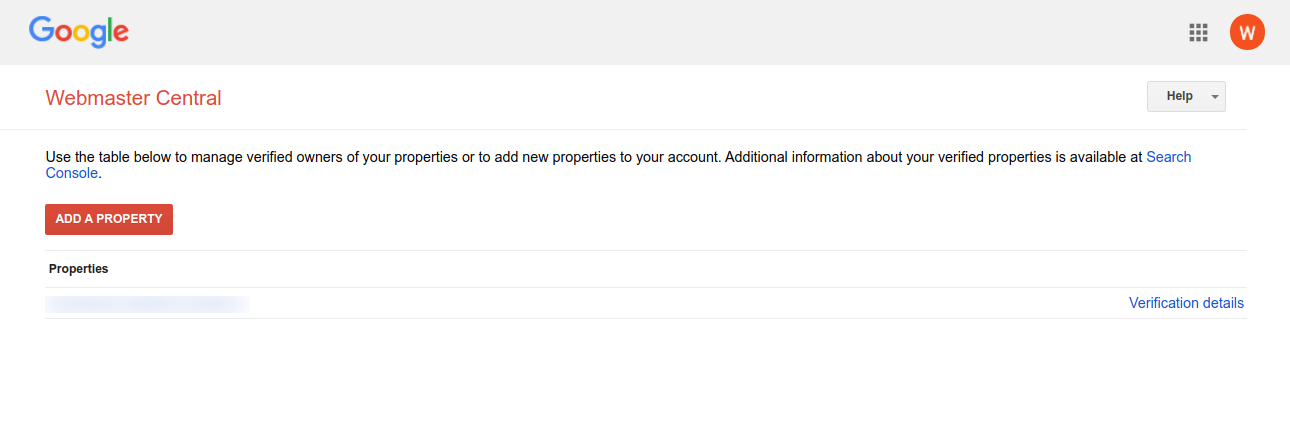
On clicking the same, it redirects the user to the Webmaster Central page as shown in the image below.
The user must click on ADD A PROPERTY button present on this page.
A textbox opens up where the user needs to add the URL of the property that the user wishes to verify and click on Continue.

Google recommends some steps that the user must follow to verify the URL of the property.

Thereafter, the user can tick-mark the I’m not a robot checkbox and further click Verify button.

Once the verification process is completed, the following page shall appear.

Enable Google API Keys
To enable the Google APIs, the user must open up the Google Cloud Platform page and navigate to the Credentials page.
The user will find All Google Maps APIs dropdown, clicking which the user needs to click on the ENABLE API.

In doing so, a list of Google APIs opens up. If users don’t find the required API, they can type the name of the API in the search box and search for it.
To enable the API, the user needs to click on it.
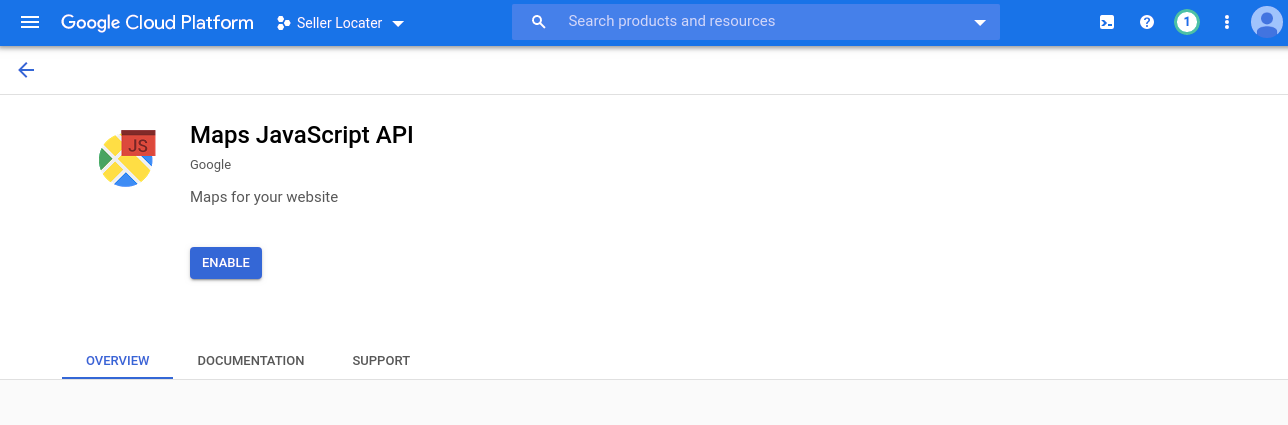
Geocoding & Maps JavaScript APIs

Geocoding API: Enable

Maps JavaScript API: Enable
Places API

PLaces API: Enable

Module Translation
As this Marketplace module supports multiple languages so this section will describe how to make the module work in different languages. Please check this link for language translation
Admin Management
Admin can add and manage the Seller’s Location Under Marketplace > Manage Partner’s Location.
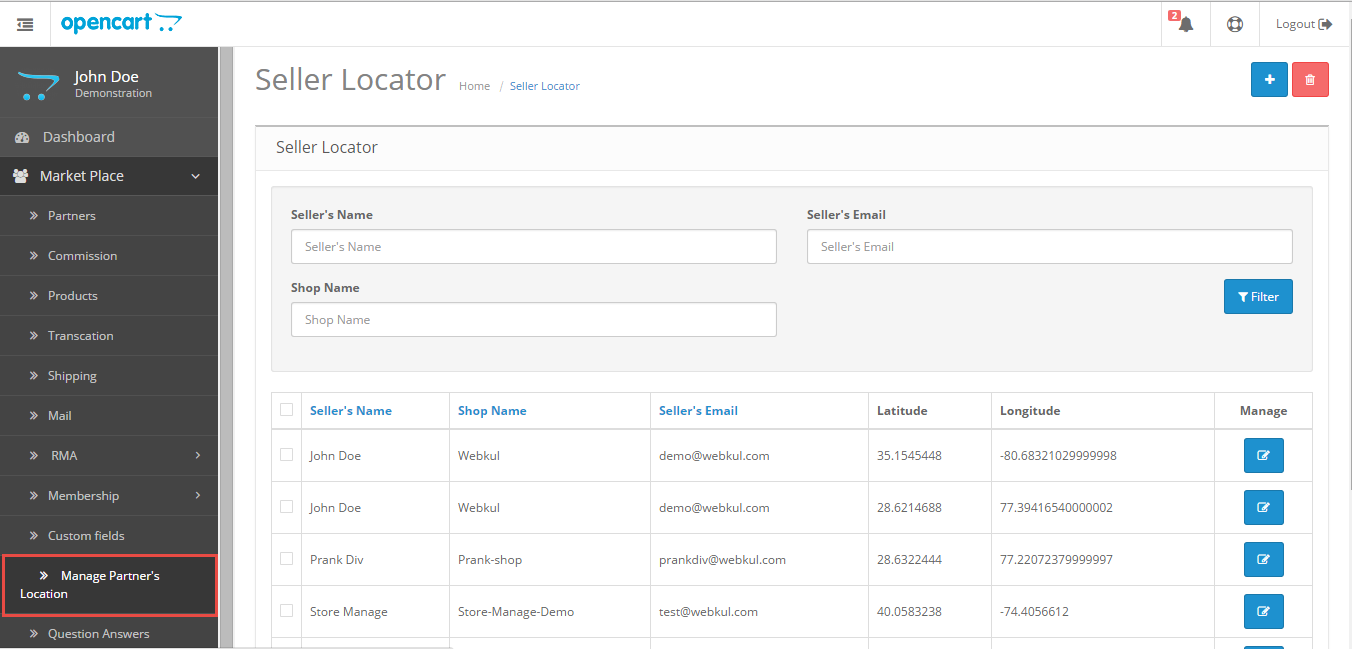

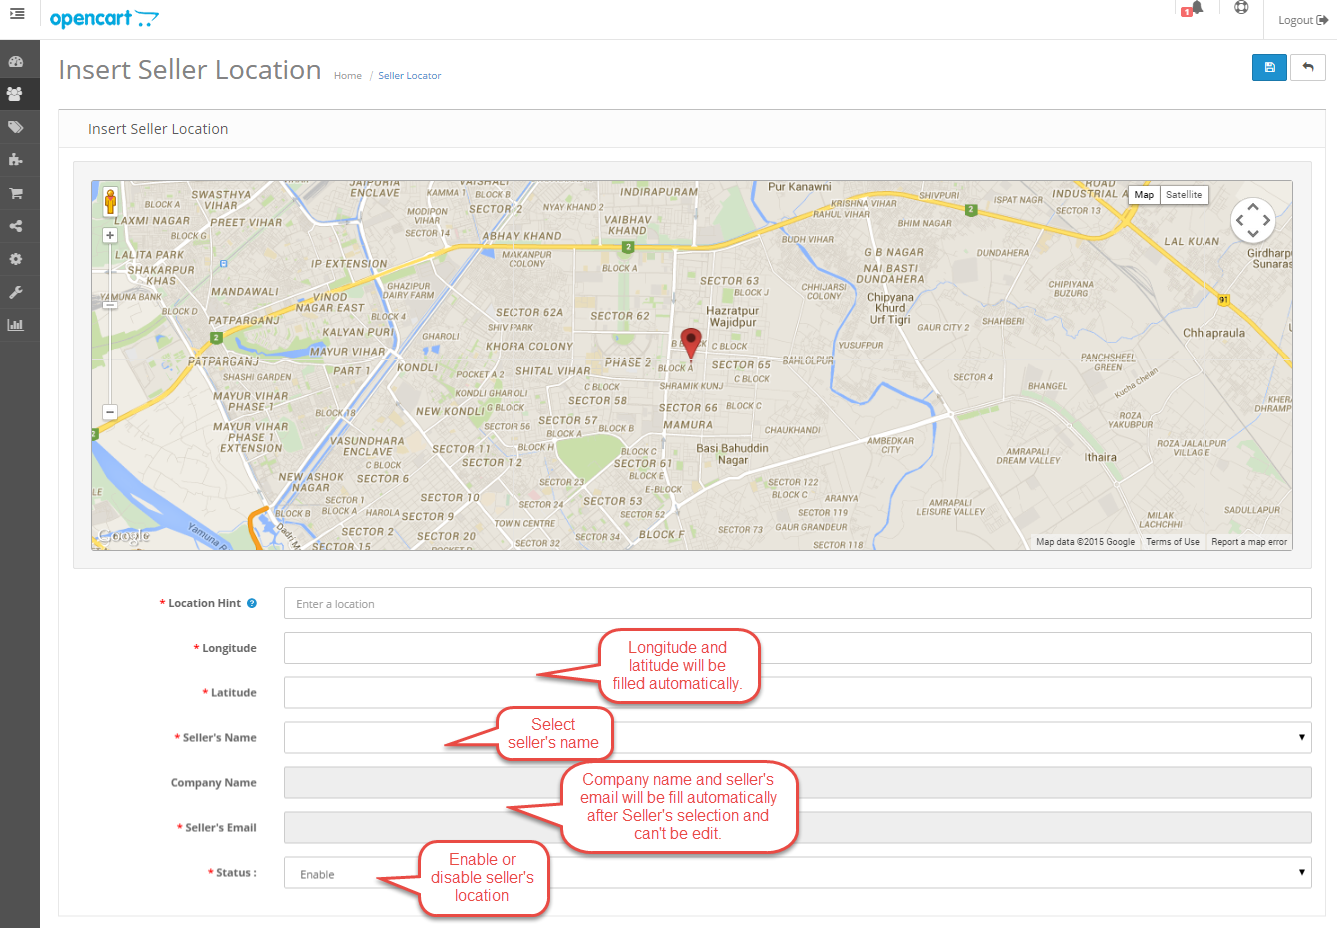
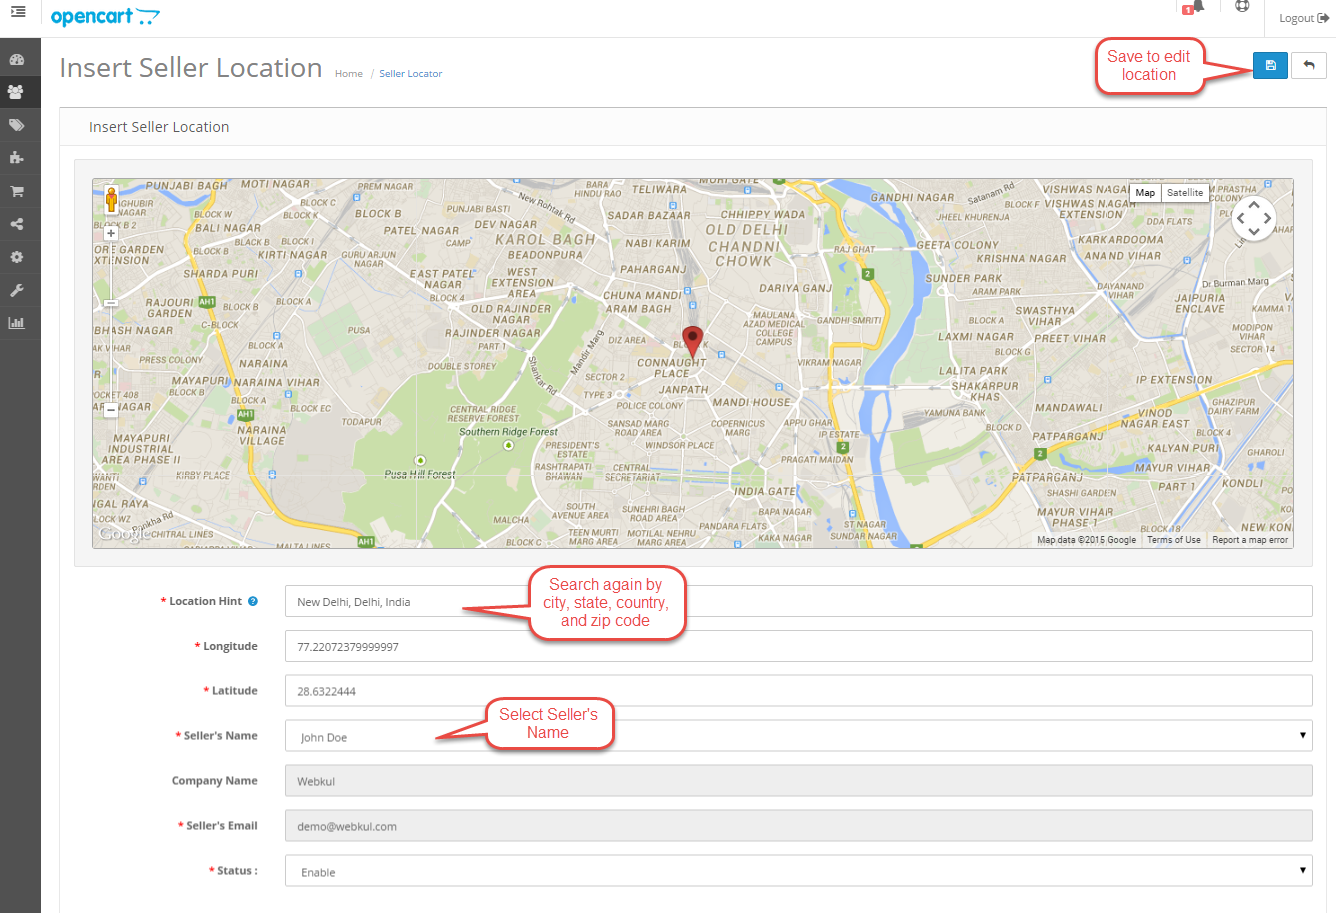
After click on Insert button below page will be open where admin can insert new seller location. Admin can search the location by city, state, country or pin, and zip codes.
After click on edit, below page will be open with previous values of any particular seller’s location, edit them as per the need and save it.

The seller can add their location.

If you want to update existing location, then click on update button and below page will be appear.

After click on Seller Locator, you can see seller’s location and also search their location by entering radius distance and by location.

After click on Seller’s location, it will reflect on map with store link.

If customer want to see Seller’s store then click on Store link.
All of those information are very much self explanatory still have any doubt please add a support ticket https://webkul.uvdesk.com/.
Current Product Version - 3.0.1.0
Supported Framework Version - 3.x.x.x

Be the first to comment.