WooCommerce Multi Vendor Membership Plugin:
The Marketplace Seller Membership Plugin for WooCommerce allows sellers to purchase memberships, which ensures that the sellers keep their customers intact in the store.
There’s no doubt in the fact that sellers are an essential part of any online business and also are a key to a business’s growth.
Through the Marketplace Seller Membership Plugin for WooCommerce, sellers can purchase a membership and become a members of a store.
A seller can purchase memberships according to their requirements, and with this, a seller will lure more customers to a store.
This will create more revenue and also enhance and ensure the growth of an e-commerce site.
Note: The Marketplace Seller Membership Plugin for WooCommerce is an add-on to the WooCommerce Multi-Vendor Marketplace Plugin.
The user must first install WooCommerce Multi-Vendor Marketplace to make use of the Marketplace Seller Membership Plugin for WooCommerce.
Note: This module is now compatible with WooCommerce’s latest feature Cart and Checkout blocks, and High-Performance Order Storage (HPOS) feature.
Check the flow of the vendors to get the membership in the video below, and the rest of the configurations as well –
Features
- The admin can create memberships on the basis of time, products, or both.
- The seller can purchase a membership as per the plans specified by the admin.
- The seller receives a membership email after purchasing the membership plan.
- Also, the sellers get an email when their plan is deactivated or it reaches its product limit.
- A seller can purchase only one membership at a time.
- Only one membership is active at a time.
- The number of products that the seller adds cannot exceed the product list of membership.
- The admin can see the list of sellers who opted for the membership.
- The admin can assign/remove a membership plan to any seller
- The admin selects the product type for different membership plans.
- The admin can add commissions with different membership plans.
- The draft and online options under the product status tab are enabled only when the seller purchases the membership.
- Plugin supports WooCommerce PayPal Payments and WooCommerce Stripe Gateway for recurring payments.
- Admin can create email templates for renewal reminders, payment receipts, and expiration alerts.
- Purchase of membership can be done via the allowed payment gateways.
- Enable multi-currency support for Stripe and PayPal membership plans.
- Automatically synchronize membership plan prices across all allowed currencies.
- Configure trial periods for membership plans using Stripe and PayPal.
- Manage multilingual membership products, categories, and product type restrictions with improved WPML compatibility.
- Automatically synchronize membership plan metadata across translated WPML content.
Note – If any product is already present in the cart, then the seller cannot add a membership to the cart. Similarly, if membership is present in the cart, the seller cannot add any other product.
Installation
The user will get a zip file that needs to be uploaded in the “Add New” menu option in the WordPress admin panel.
For this login to WordPress Admin Panel and in the Dashboard hover your mouse over the “Plugins” menu option and select the “Add New” option.

After this, the user will see an option on the top of the page that is “Upload Plugin”, click the option to upload the zip file.

On clicking the “Upload Plugin” option, the user will see a “Choose File” button. Click on the button to browse for the zip file as per the image below.

After browsing the file, click on the “Install Now” button so as to install the plugin as per the snapshot.
 Once the user installs the plugin, a message “Plugin installed successfully” displays and an “Activate Plugin” is visible to activate the plugin.
The user needs to click on the “Activate Plugin” button to activate the plugin.

Activate and Update Plugin
Check how to activate your WooCommerce plugin through the purchase code and get updates on Webkul Modules directly on the Plugins page.
Payment Setup (PayPal & Stripe)
Before adding membership plans, set up at least one payment gateway so sellers can buy plans immediately. The plugin supports WooCommerce PayPal Payments and WooCommerce Stripe Gateway for recurring subscriptions.
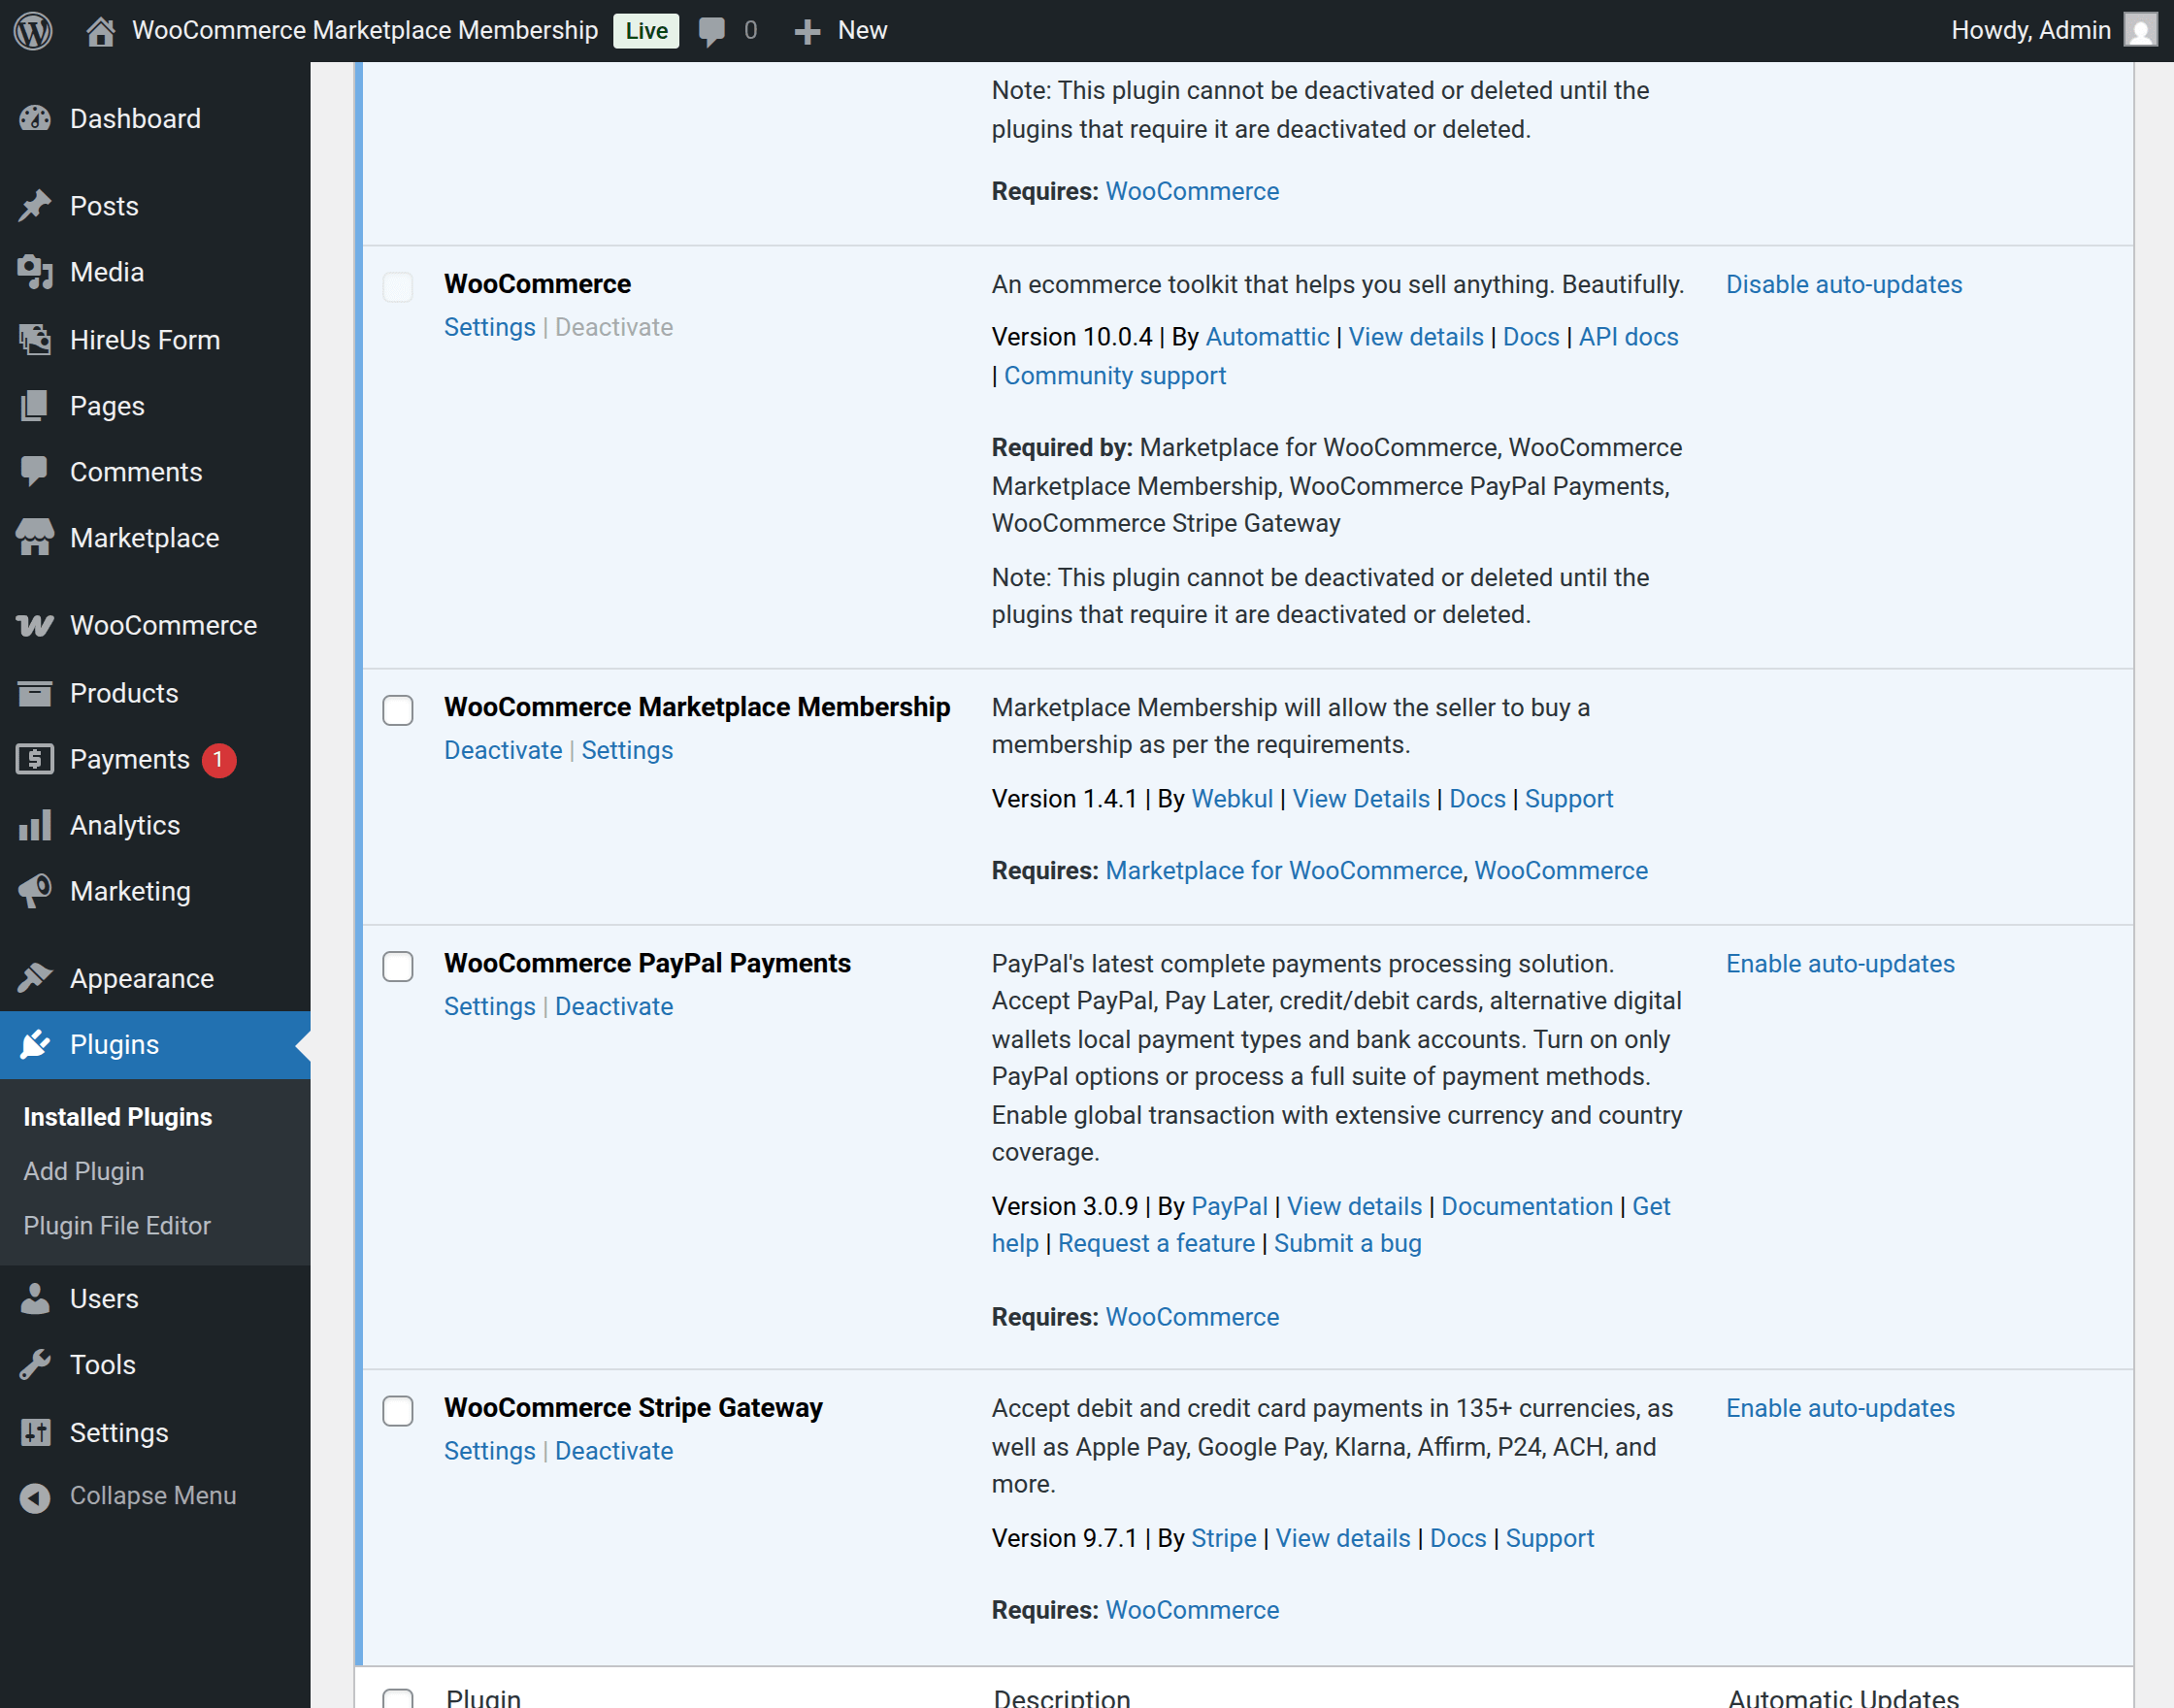
Step 1 – Install & Activate the Payment Gateway Plugin
- From the WordPress admin panel, navigate to Plugins → Add Plugin.
- Search for WooCommerce PayPal Payments and WooCommerce Stripe Gateway plugins.
- Install and activate the required gateway(s).
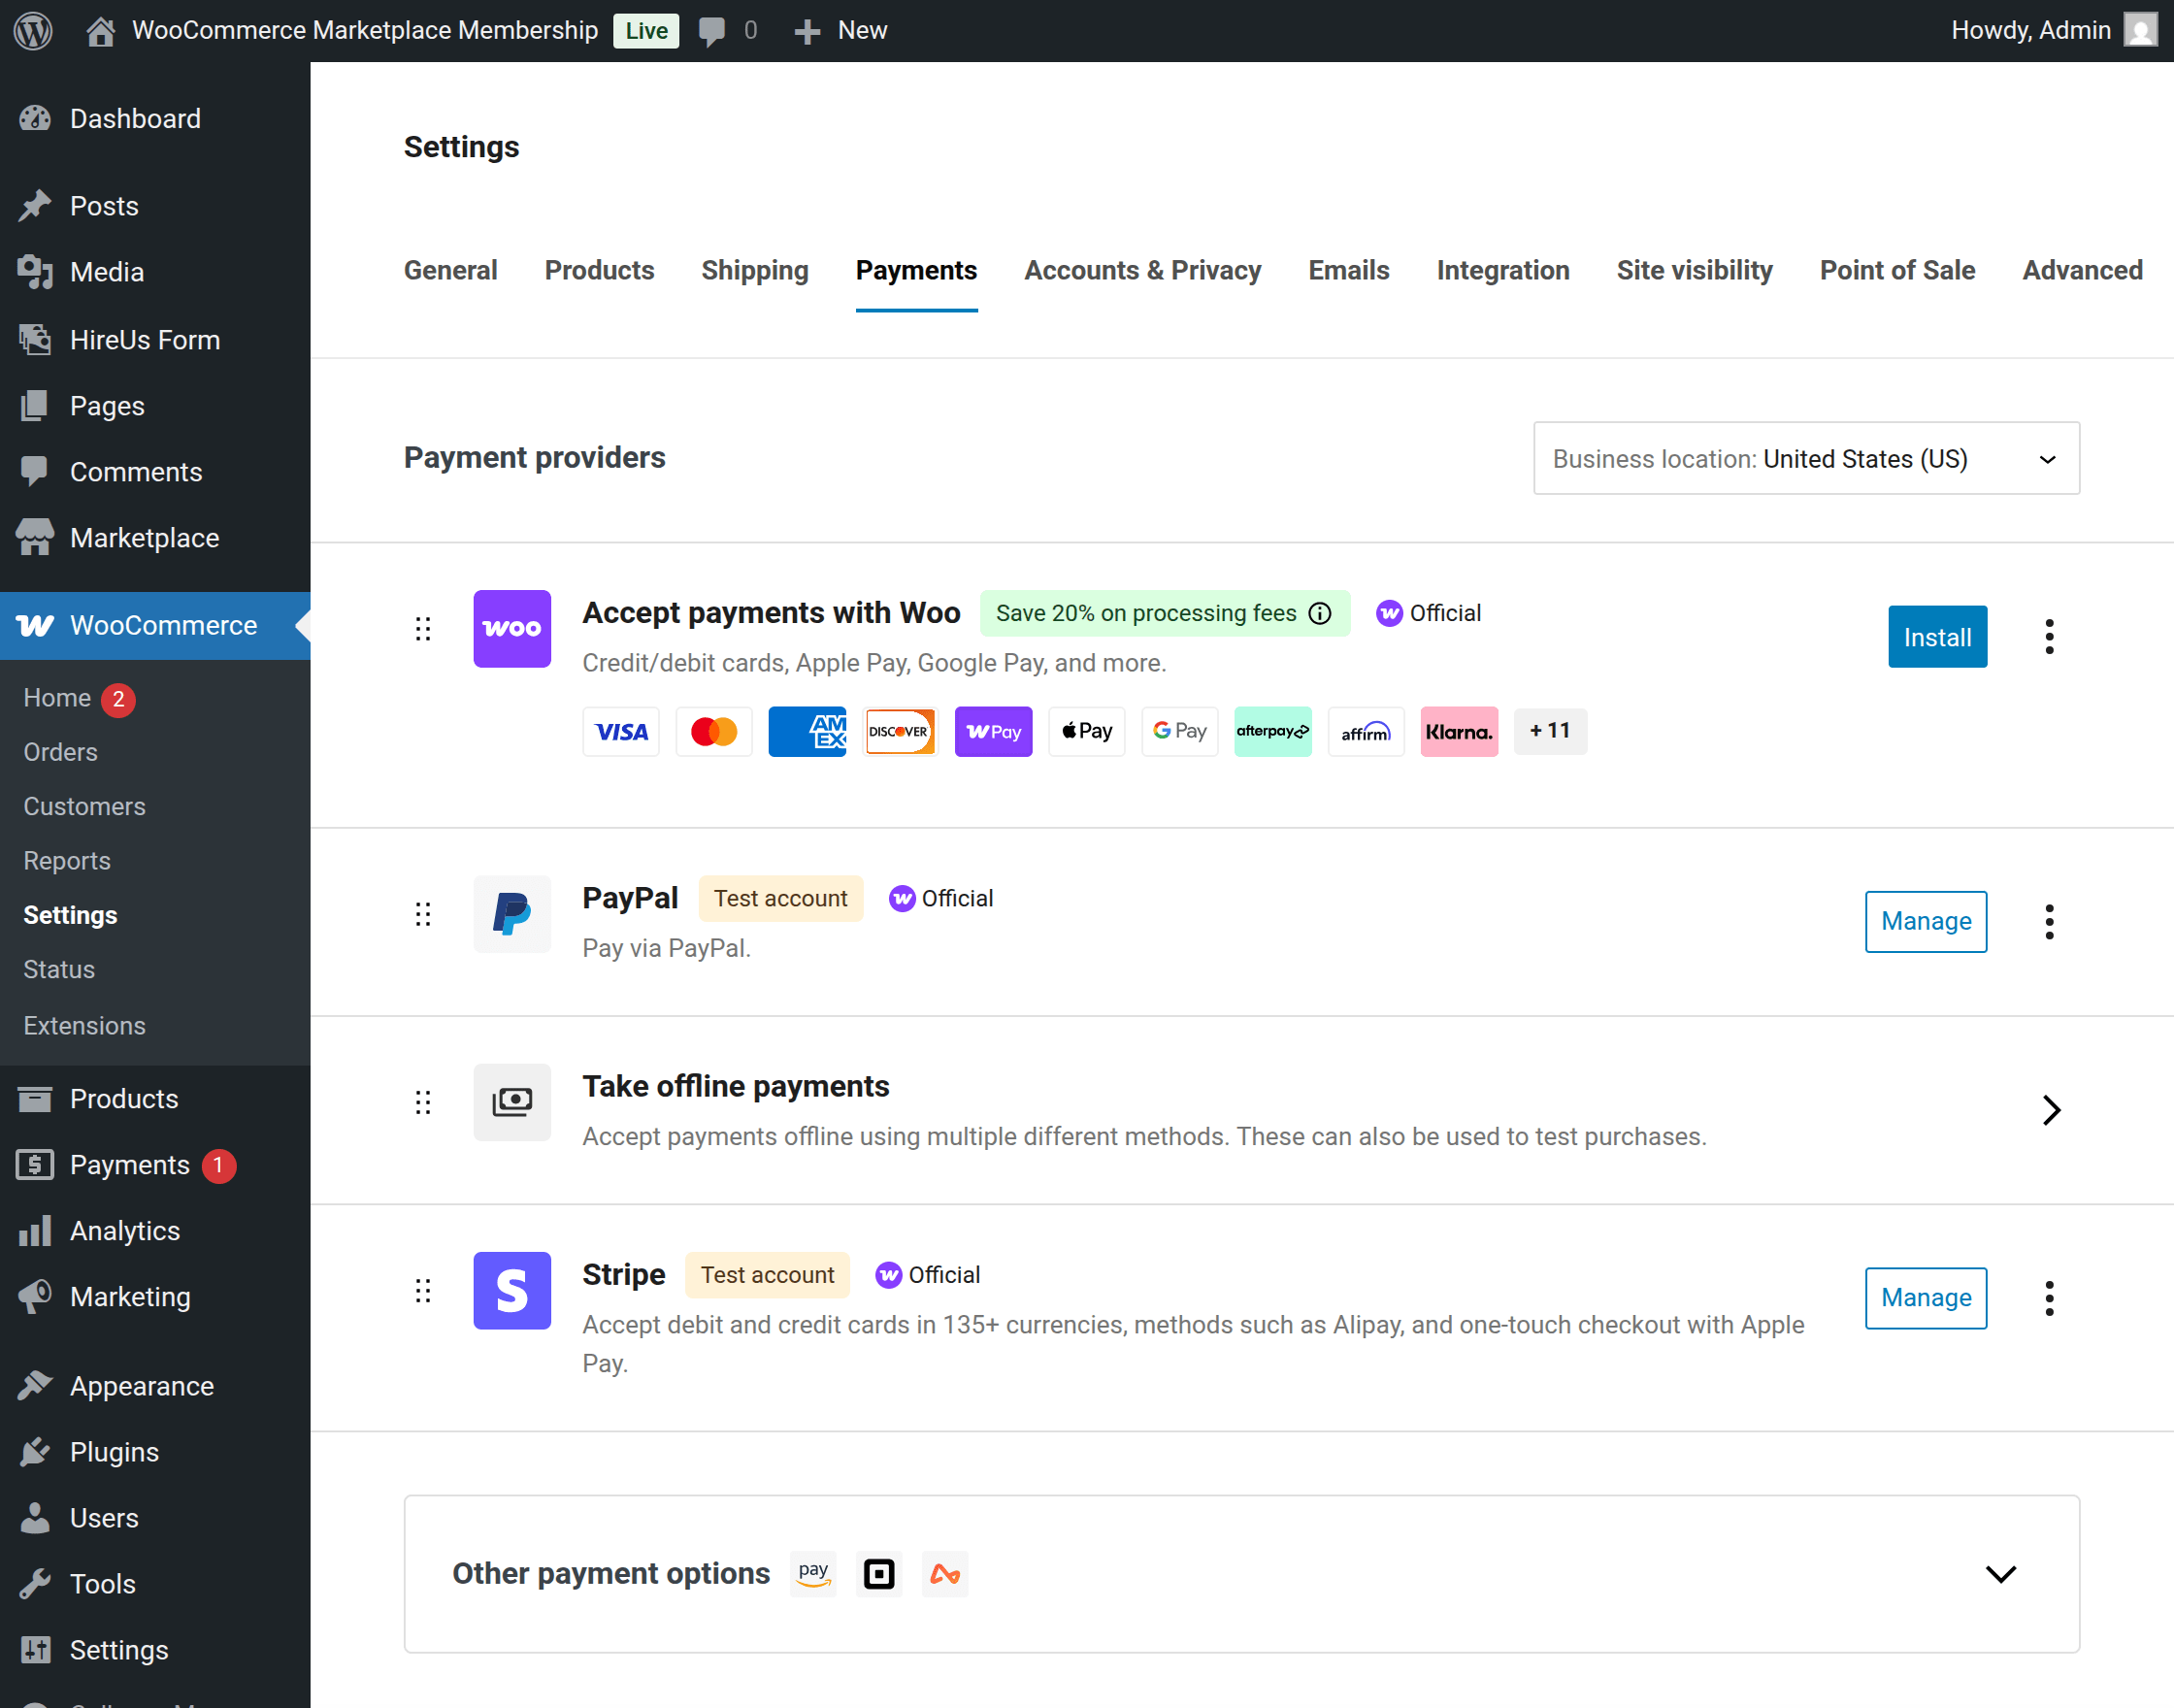
Step 2 – Enable and Configure the Gateway in WooCommerce
- Go to WooCommerce → Settings → Payments.
- Locate the payment gateway (PayPal or Stripe), toggle it ON, and click manage.
For Stripe:
Log in to the Stripe Dashboard.
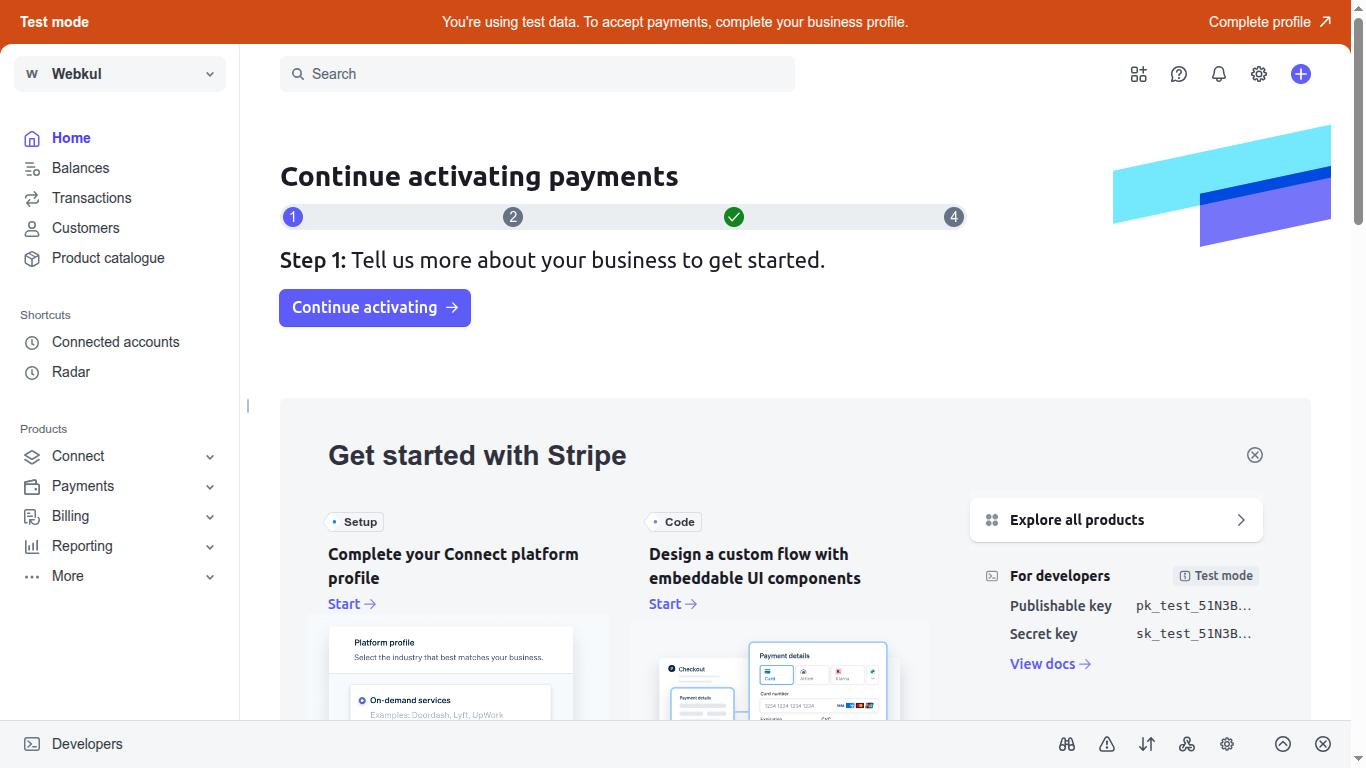
Navigate to Developers → API Keys to get your Publishable Key and Secret Key. Use Sandbox/Test mode credentials during testing to avoid real transactions.
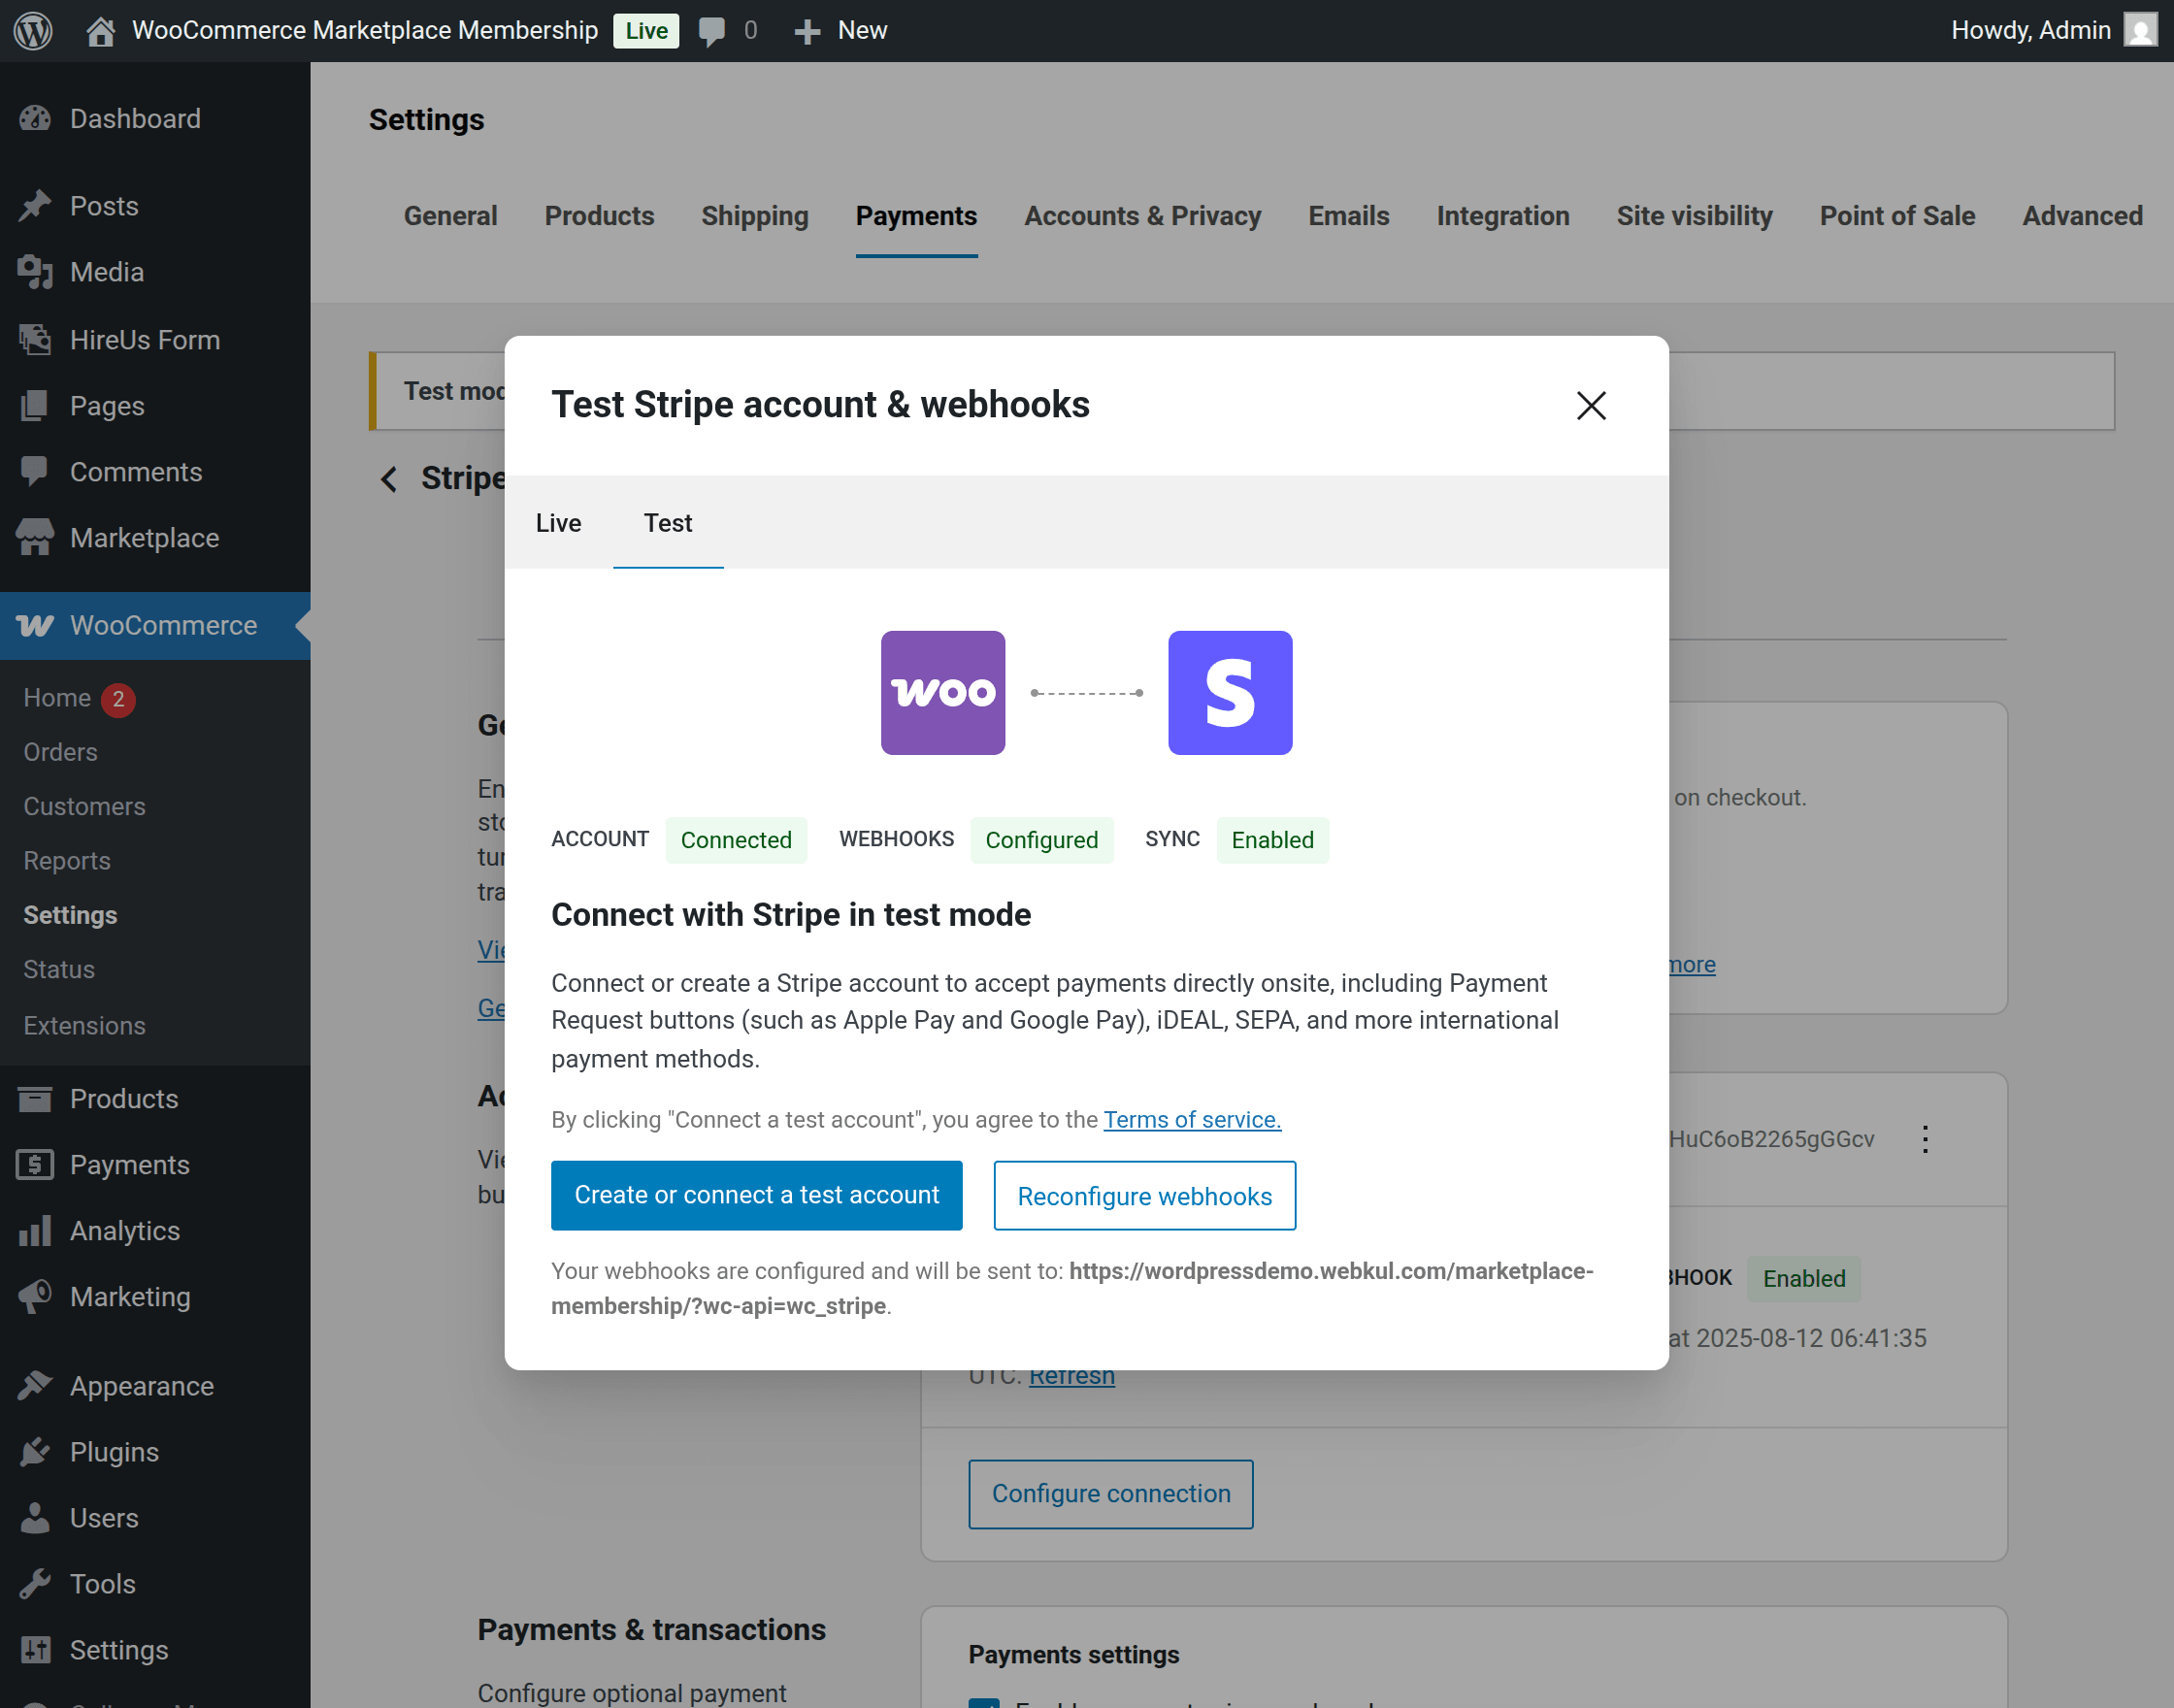
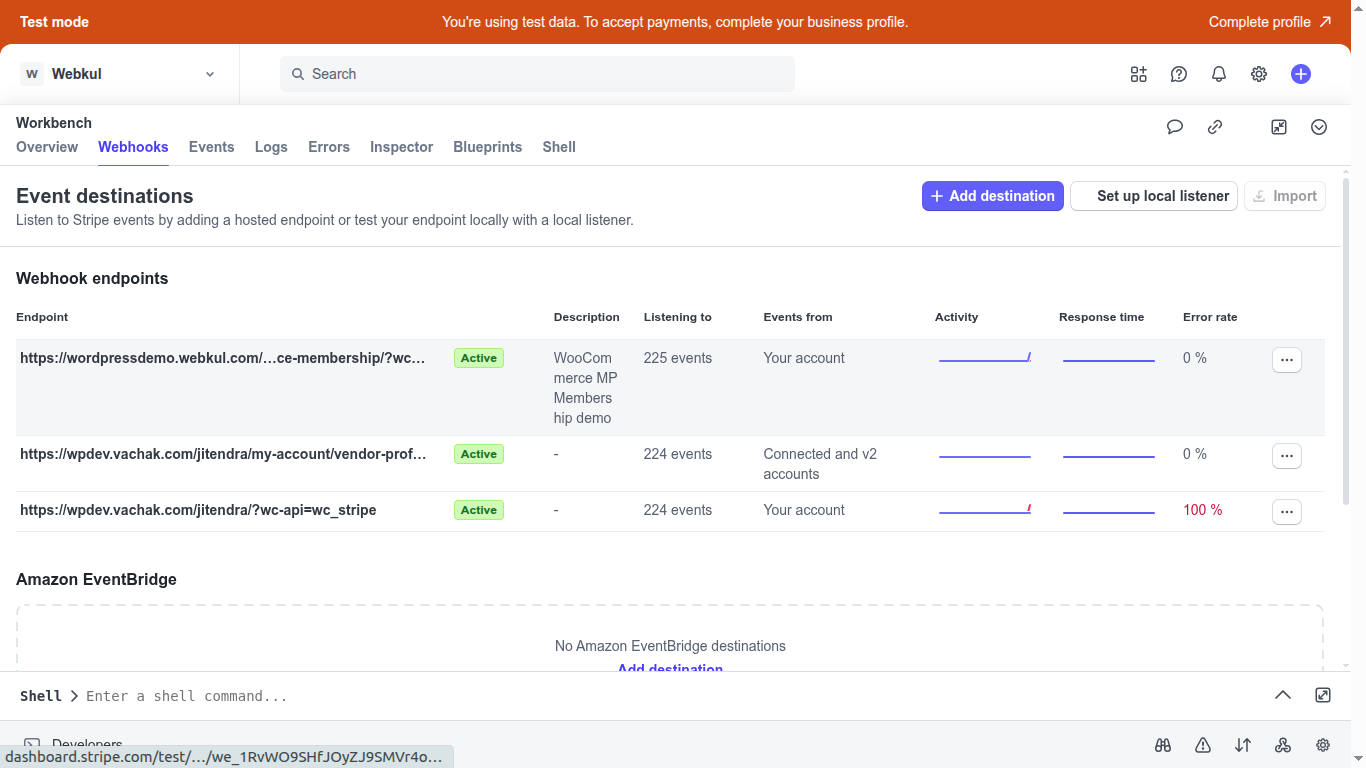
Configure your webhook on Stripe: {your-site-url}/?wc-api=wc_stripe.
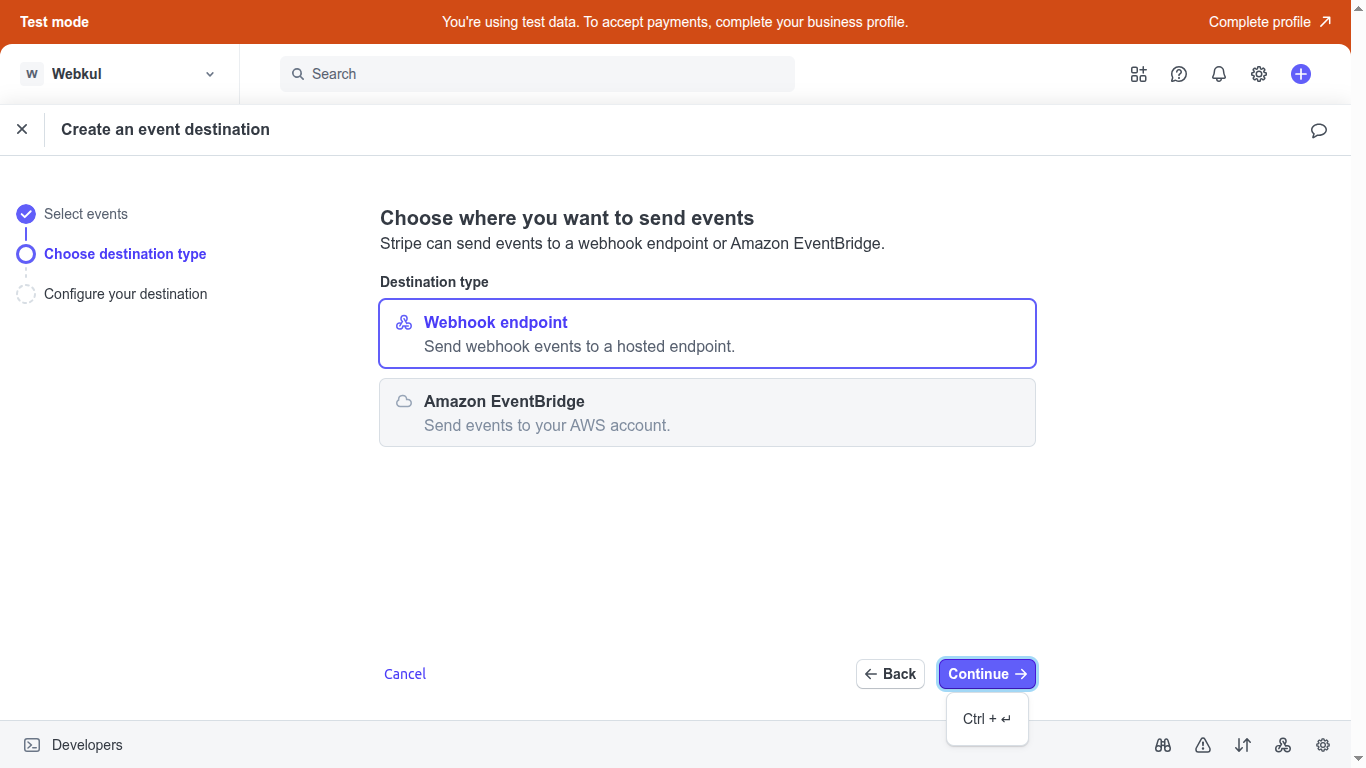
Navigate to Stripe Dashboard > Developers > Webhook
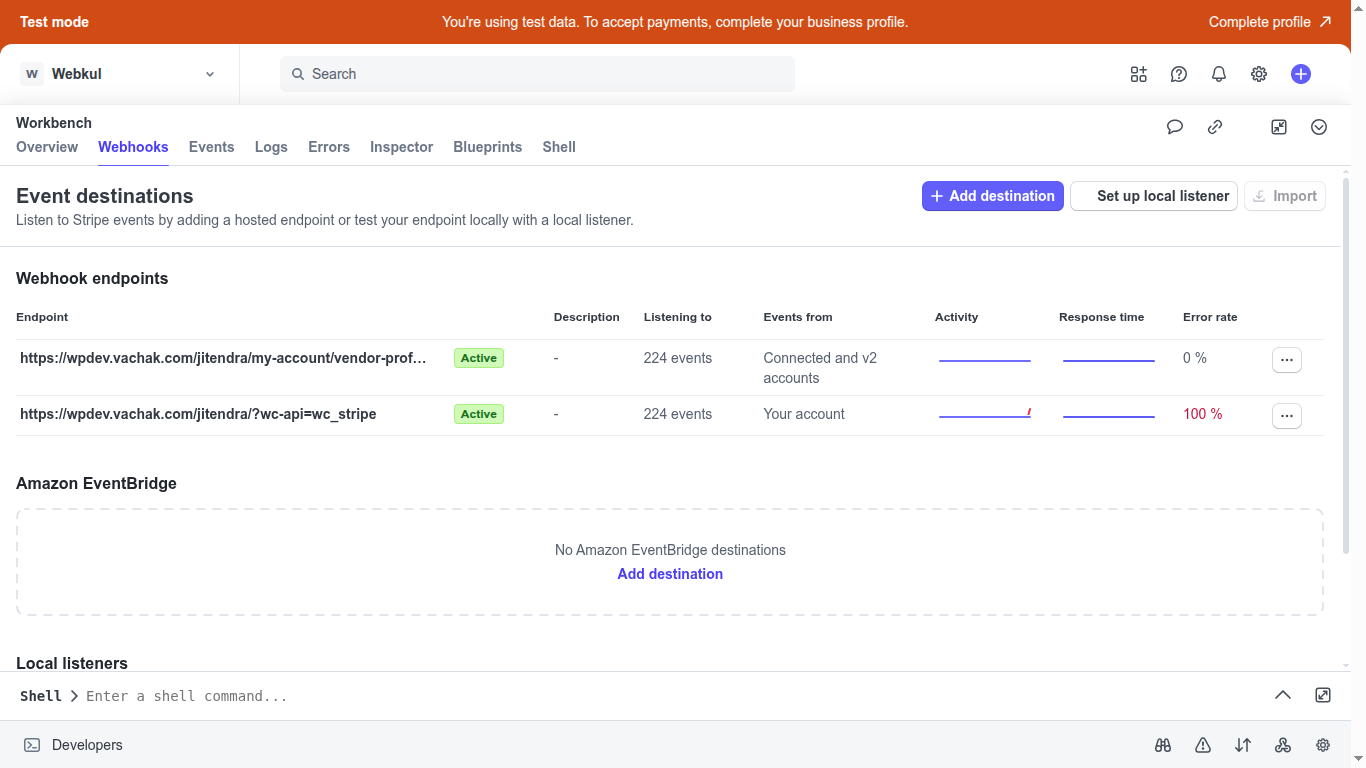
Now click on Add Destination button > and select the Webhook endpoint
Now enter your Webhook: {your-site-url}/?wc-api=wc_stripe.
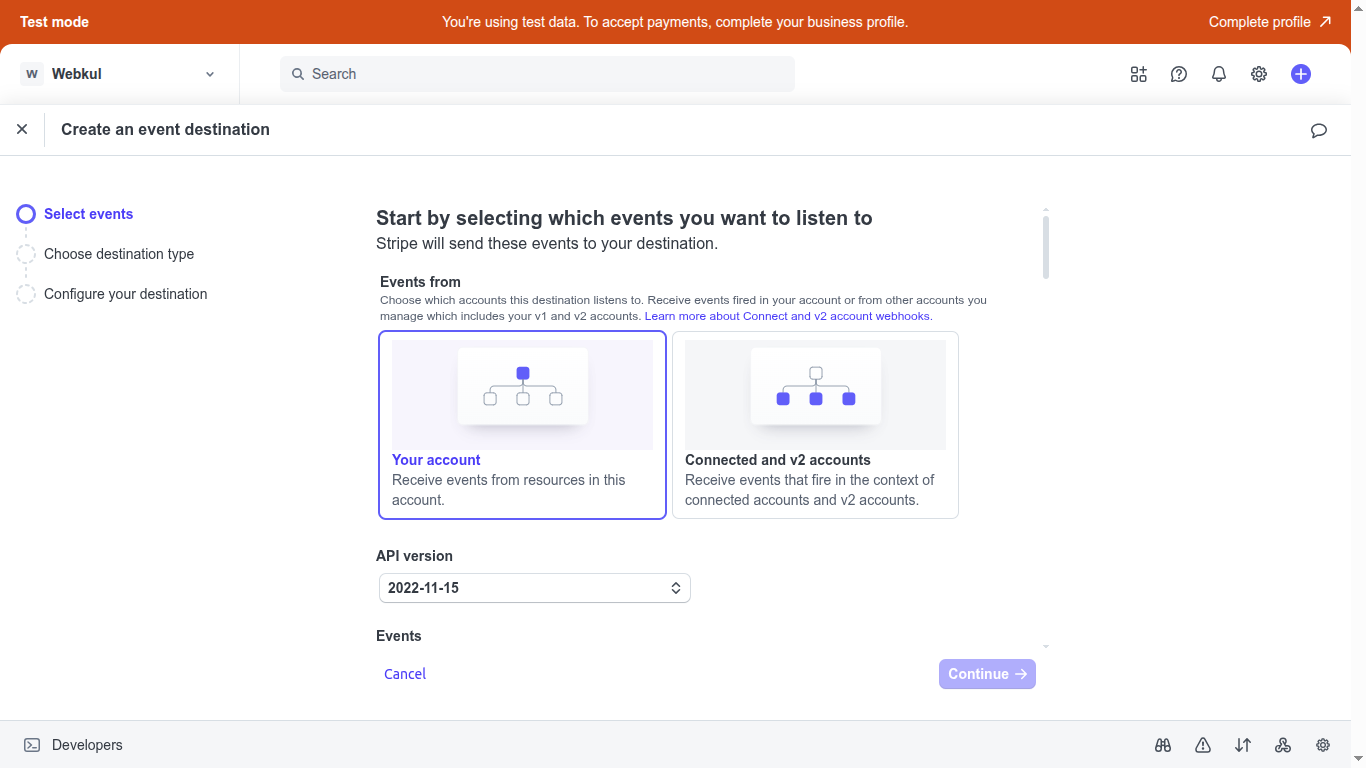
and select the event for subscription creation mentioned below.
charge.succeeded, invoice.payment_succeeded, invoice.payment_failed, customer.subscription.updated, customer.subscription.deleted
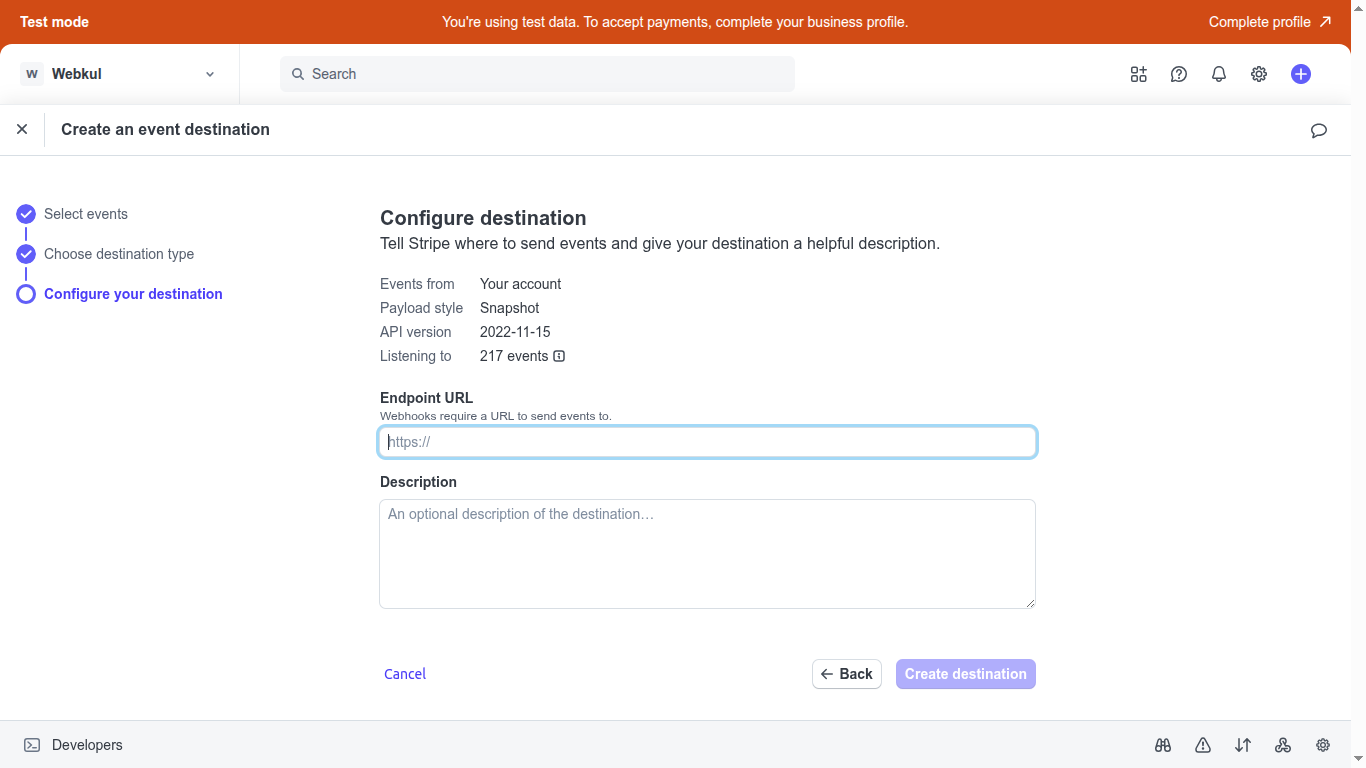
Now, click on the Create destination button:
Step 3 – Obtain API Credentials
For PayPal:
Log in to the PayPal Developer Dashboard: http://developer.paypal.com/
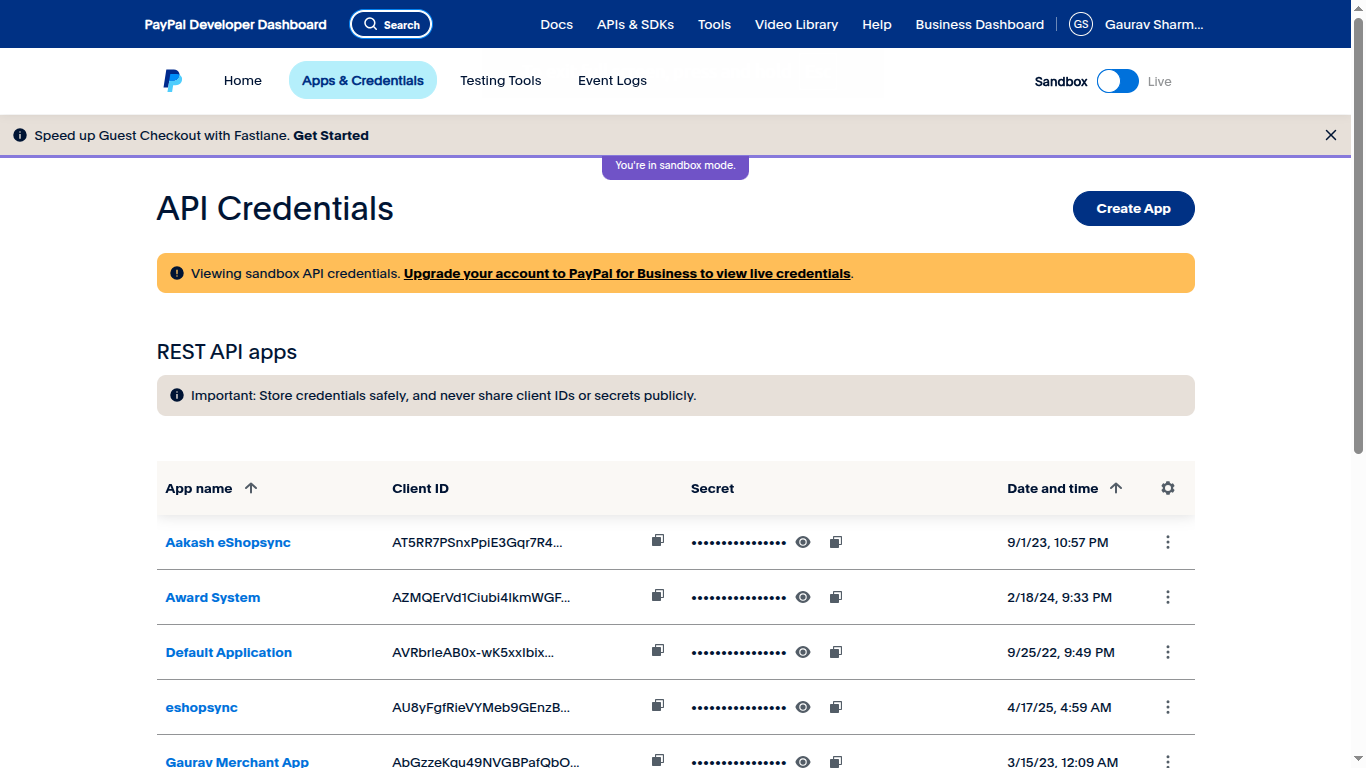
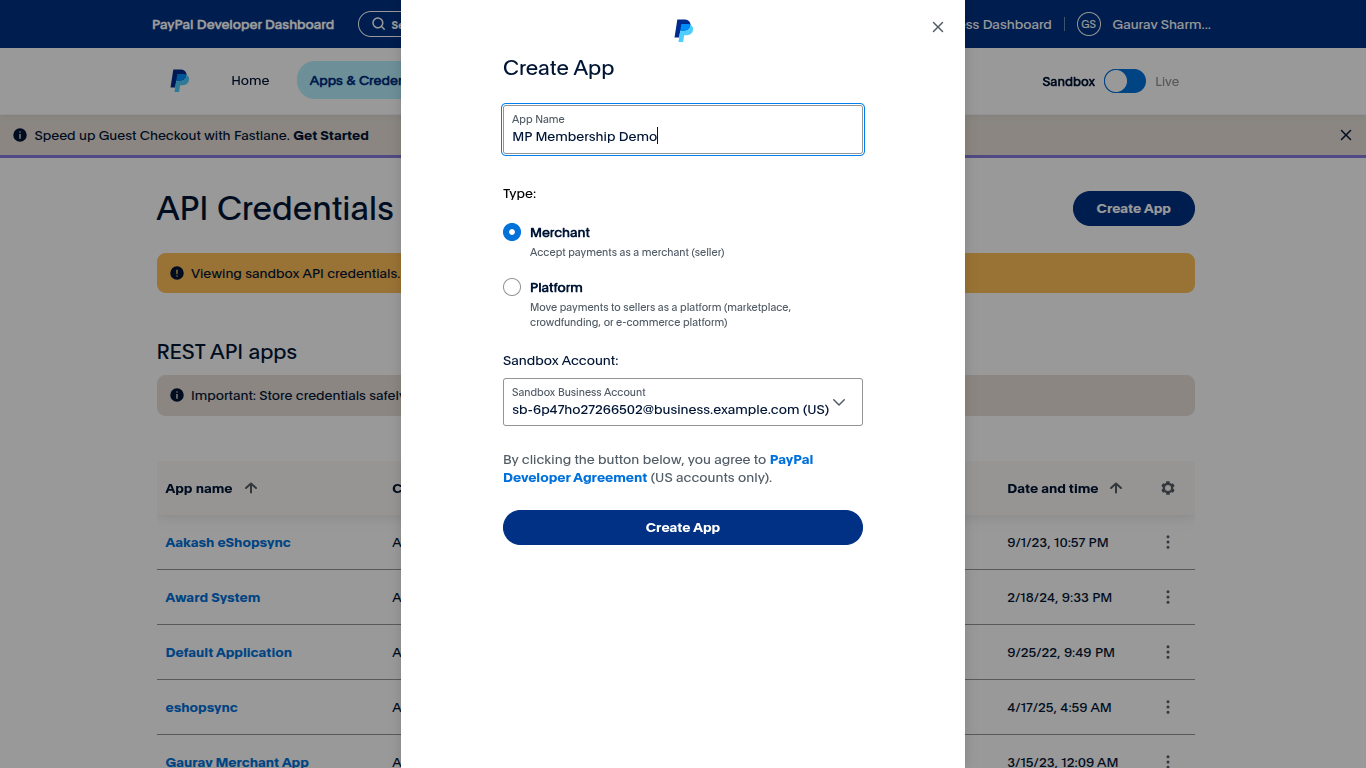
Now, create an App by clicking on the Create App button
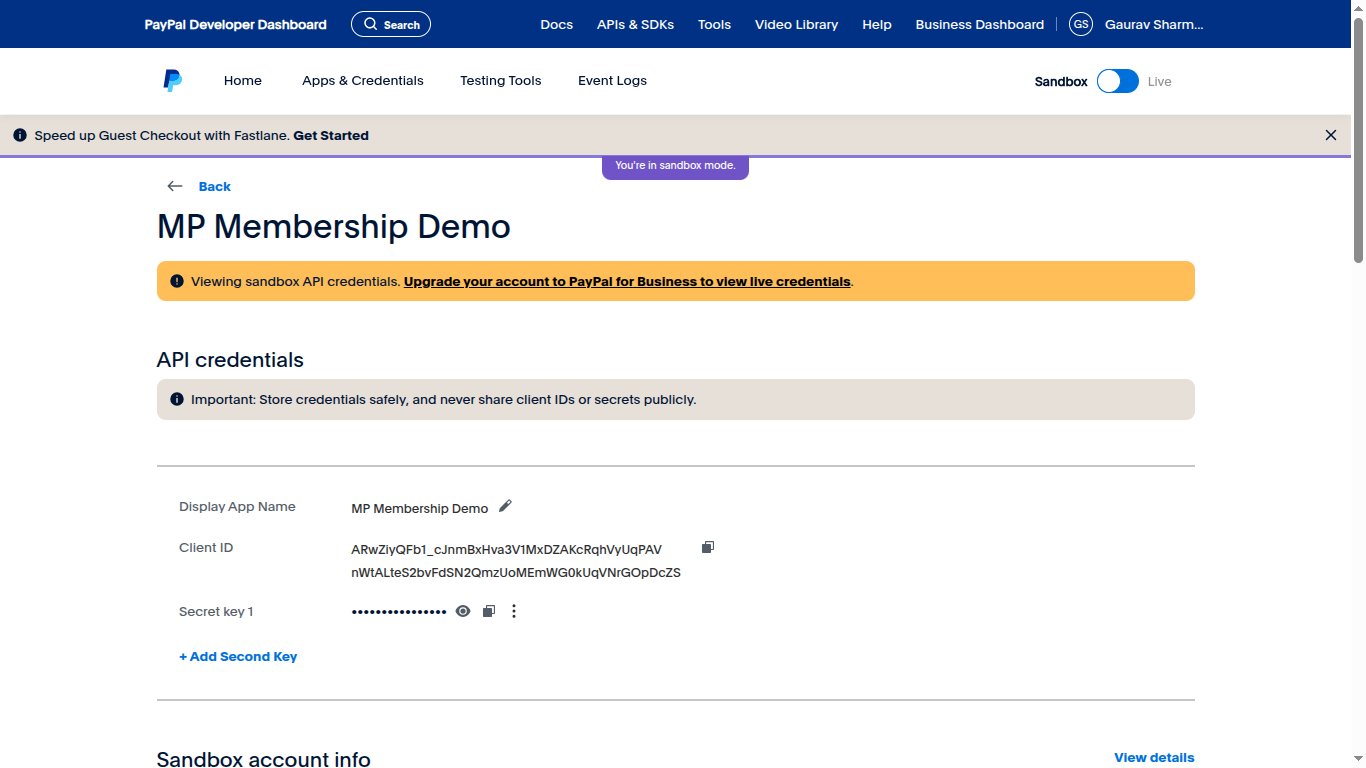
Now App credentials are visible like Secret Key, Client Key, etc.c
Configuration of Marketplace Seller Membership Plugin
After the successful installation and activation of the Marketplace Seller Membership Plugin, let’s configure the admin settings-
Admin Configuration Settings
The admin can configure the settings for the membership under the Membership Plans tab in the admin dashboard.
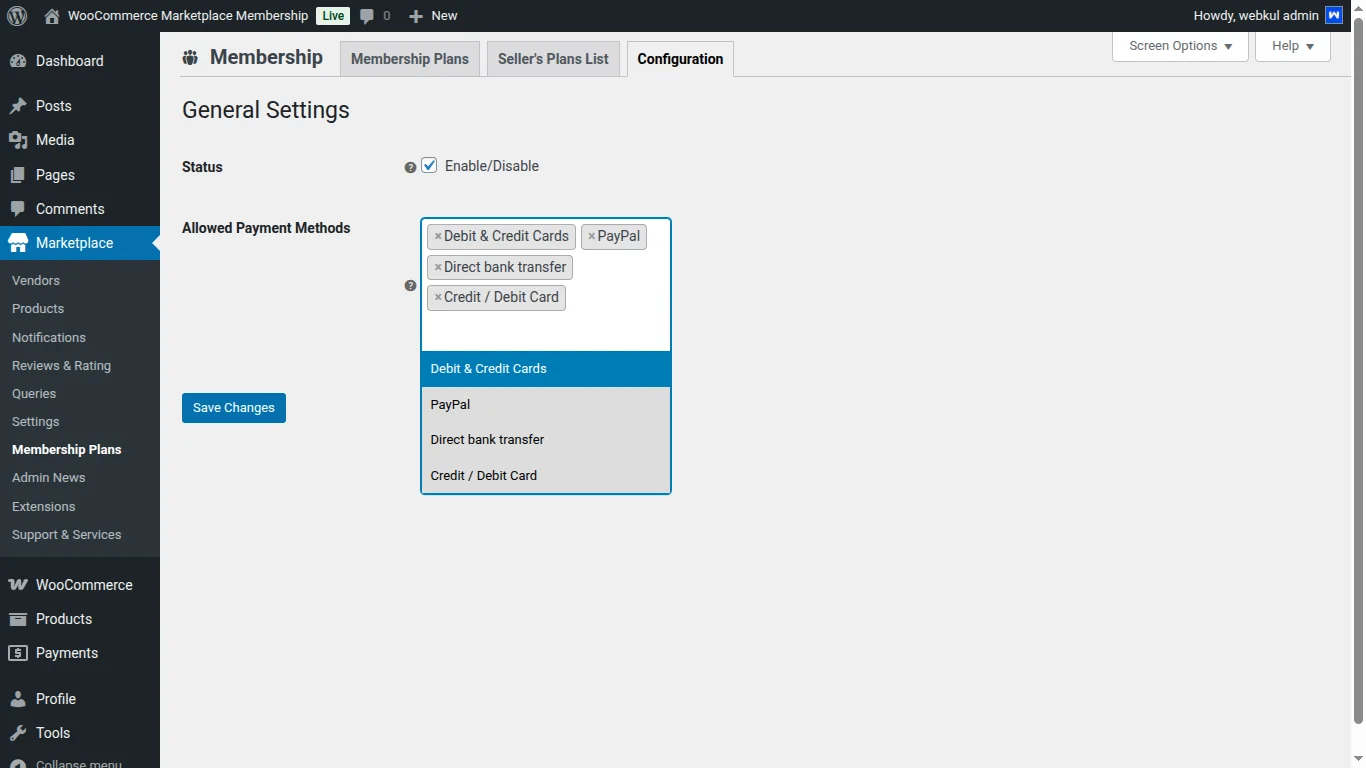
Under the configuration tab, as shown in the image below, the admin can set the following configurations:
Status: Set the status as ‘Enable’ or ‘Disable’.
Allowed Payment Methods: Set the payment methods that would be visible on the frontend during the checkout process, when the seller purchases a membership plan, not products.
Membership Configurations
The admin can add a new membership in the admin dashboard by navigating through Marketplace > Membership Plans > Add New Membership.
The configurations are set under New Membership as shown in the image below.
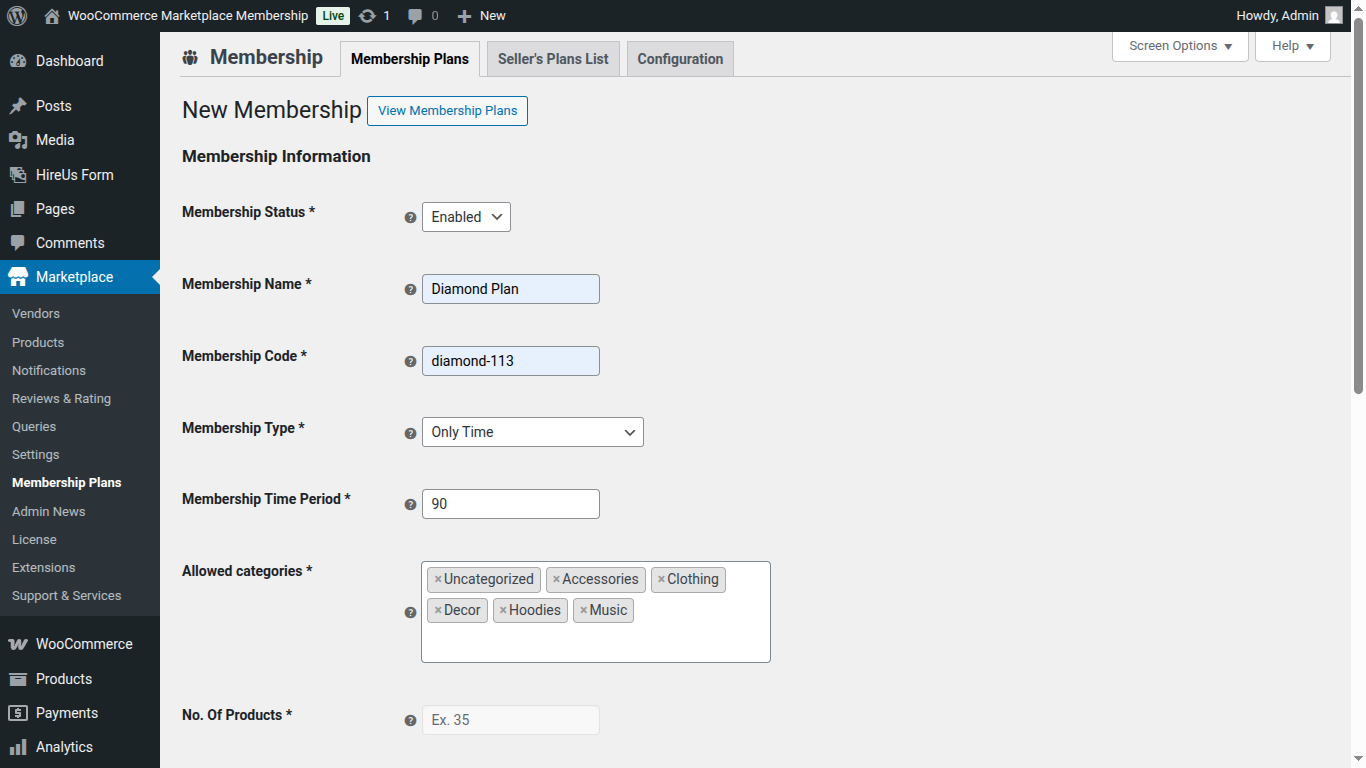
The admin can configure the Membership settings as follows:
Status: Set the membership status as Enable or Disable, to activate or deactivate the membership.
Name: Set the name of the membership that would be displayed on the frontend to the seller and the customer.
Code: Set the unique code for the membership.
Type: The user can select any of the three given options, i.e. only time, only number of products, and time and number of products.
Membership Time Period: Allows the seller to upload and sell products in-store for a set membership time period.
When the user selects only the time or time and no. of products option in the memberships type.
Allowed Categories: The user can choose categories from the list. These categories would be displayed on the frontend to the sellers.
No. Of Products: If the user selects only a no. of products or time and no. of products, then the seller can set the number of products that would be allowed with the membership.
Fee Amount: Set the amount for the membership.
Color: Set the color for the membership from the given color palette.
Image: Upload the image associated with the membership.
Product Type: Choose a product type i.e. simple, variable, external, or group that you want to allow the seller to add new products.
Add Commission: Set the commission percentage for the membership plan.
Renewal Notification Before: Set the number of days before the membership renewal notification will be enabled.
The admin can select any of the three options from the dropdown list given against Membership Type, as shown in the image below.
- Only Time: If the admin selects the Only Time option, then the admin only provides the time duration. The seller can add any number of products under this membership type.
- Only Products: If the admin selects the Only Products option, then the admin provides the number of products. There is no need to provide the time duration under this membership type.
- Time and Number of Products: Under this membership type, the admin provides both the time duration and the number of products.
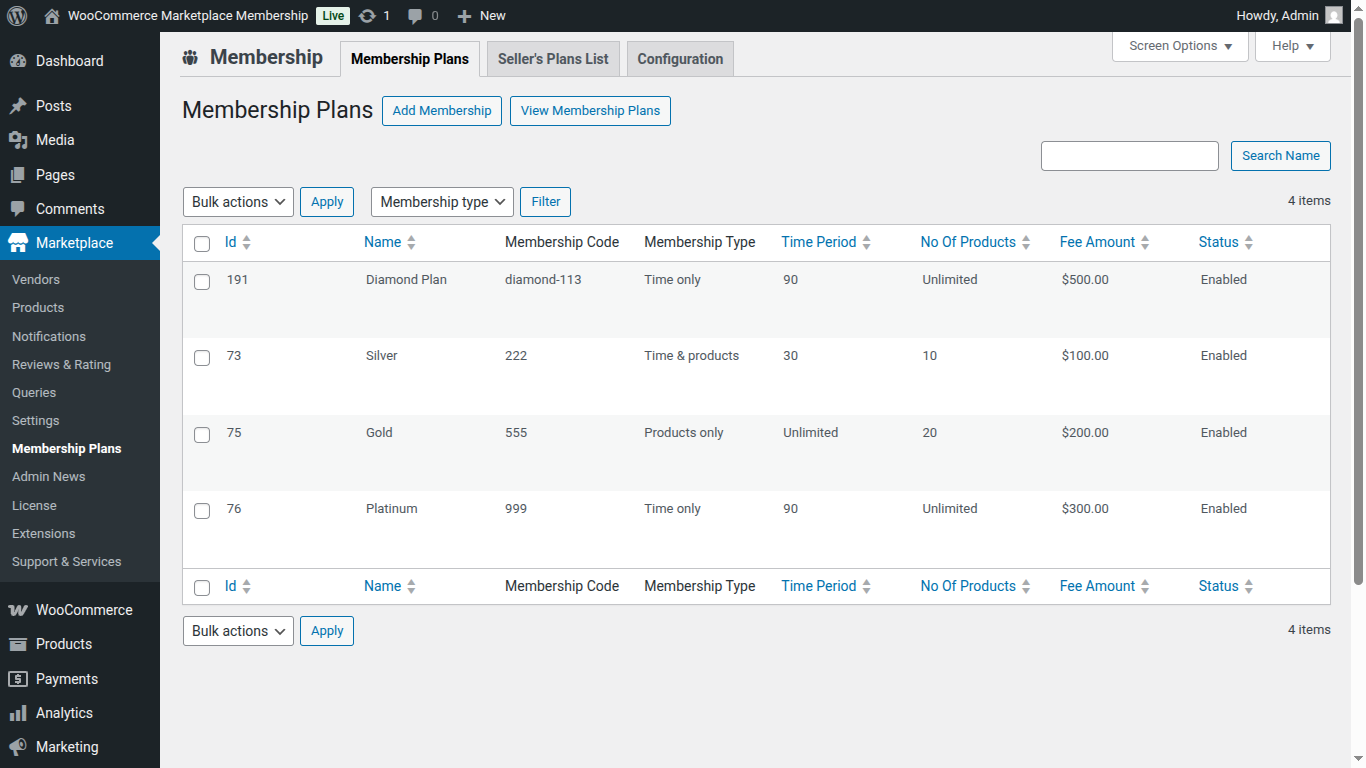
The membership that the admin creates is visible under the Membership tab in the admin dashboard.
The details that the admin configures, such as name, membership code, membership type, no. of products, etc, can be viewed here.
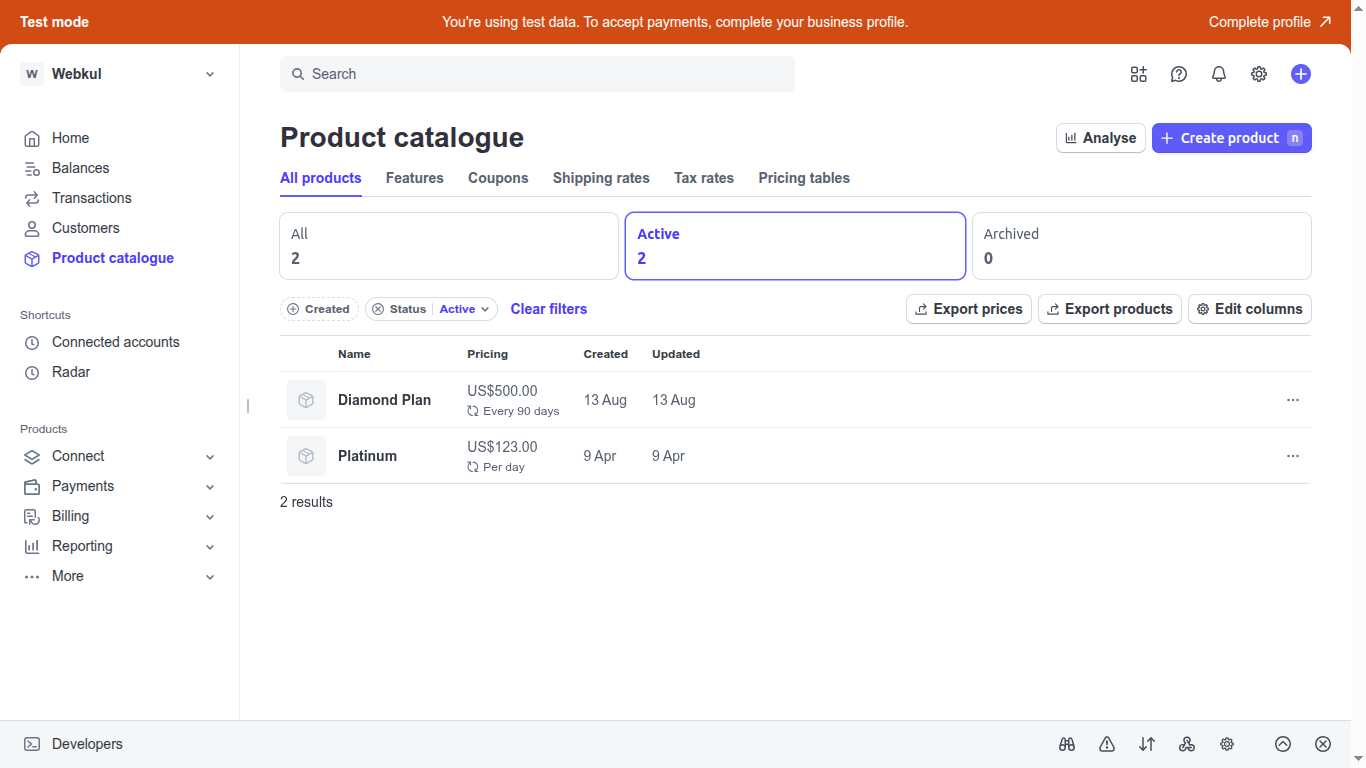
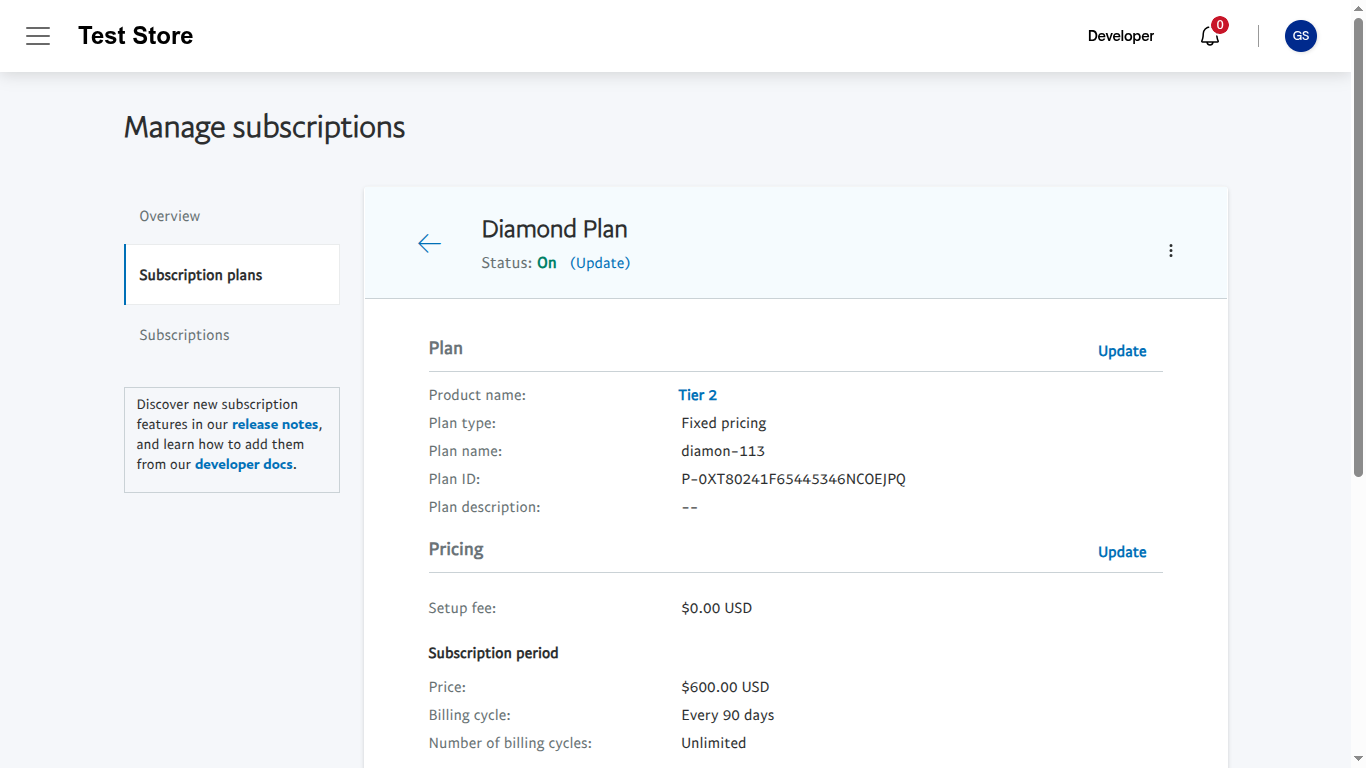
After creating the new membership, a corresponding subscription plan is automatically created on Stripe and PayPal, respectively, containing the plan details, pricing, and billing cycle.
Subscription Plan Detail in Stripe:
Subscription Plan Detail in PayPal:

Click on a particular plan to check the subscription’s plan details
Seller’s Plans List
From here, the admin can view the seller’s list of those who have purchased the membership plans.
Furthermore can check the seller’s Membership Plan, the Total Products of the seller, Published Products, Membership Type, and membership Expiry Days.
Check the image below for more details:

Also helps the admin to select and assign the membership plan to the sellers in bulk.
Here, the admin needs to select the seller to whom membership should be assigned as shown in the given image:

Moreover facilitates the admin to quickly search for the seller from the list using the “Search Seller” filter option. Check the image for more details:

Now, the admin needs to select the respective plan and click on the Assign button to complete the membership assignment process.
Seller-end Workflow – WooCommerce Multi Vendor Membership
If the seller has not purchased the membership, a message as shown in the image shall display and the seller will have to purchase the membership first.
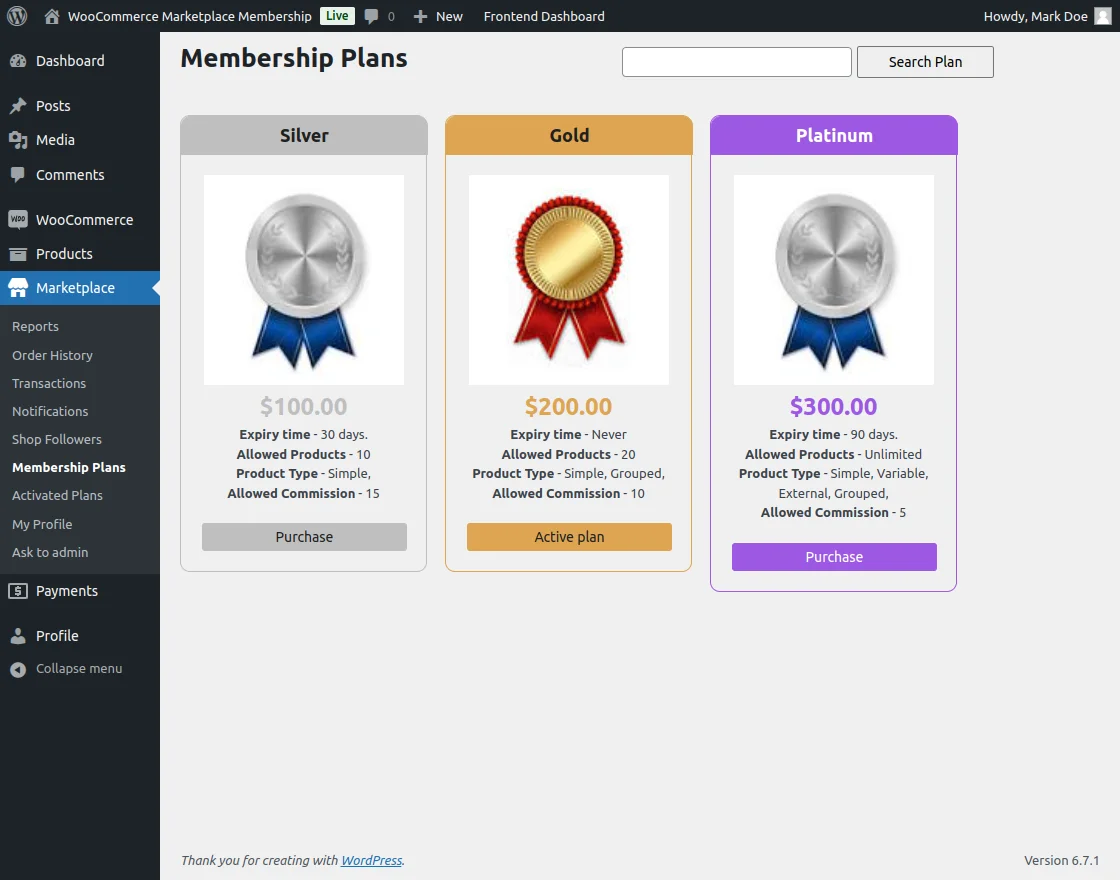
Under the “Membership Plans”, the seller can view the membership plans.
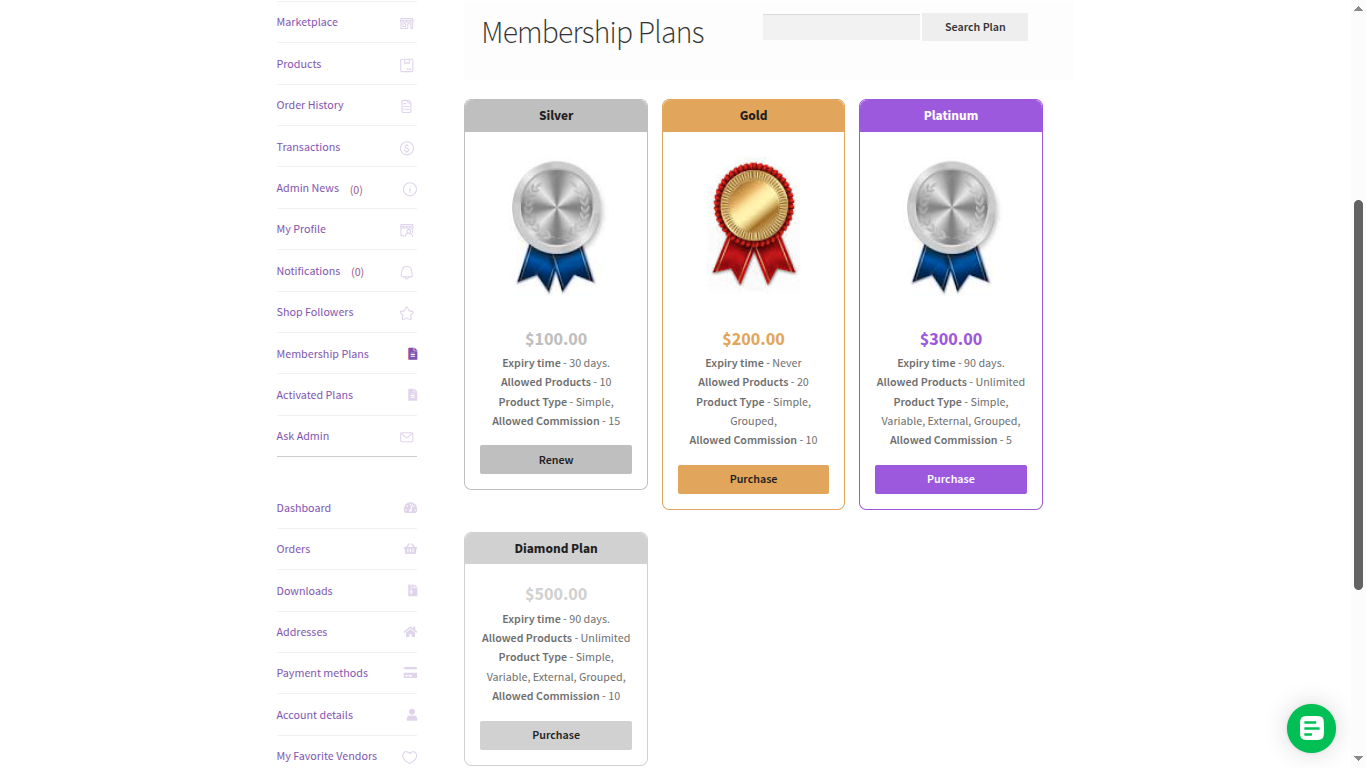
After selecting the specific plan, the system generates a link.
Click on the Click here option to purchase the plan; it will redirect the seller to the frontend.
Please refer to the image below for a better understanding.

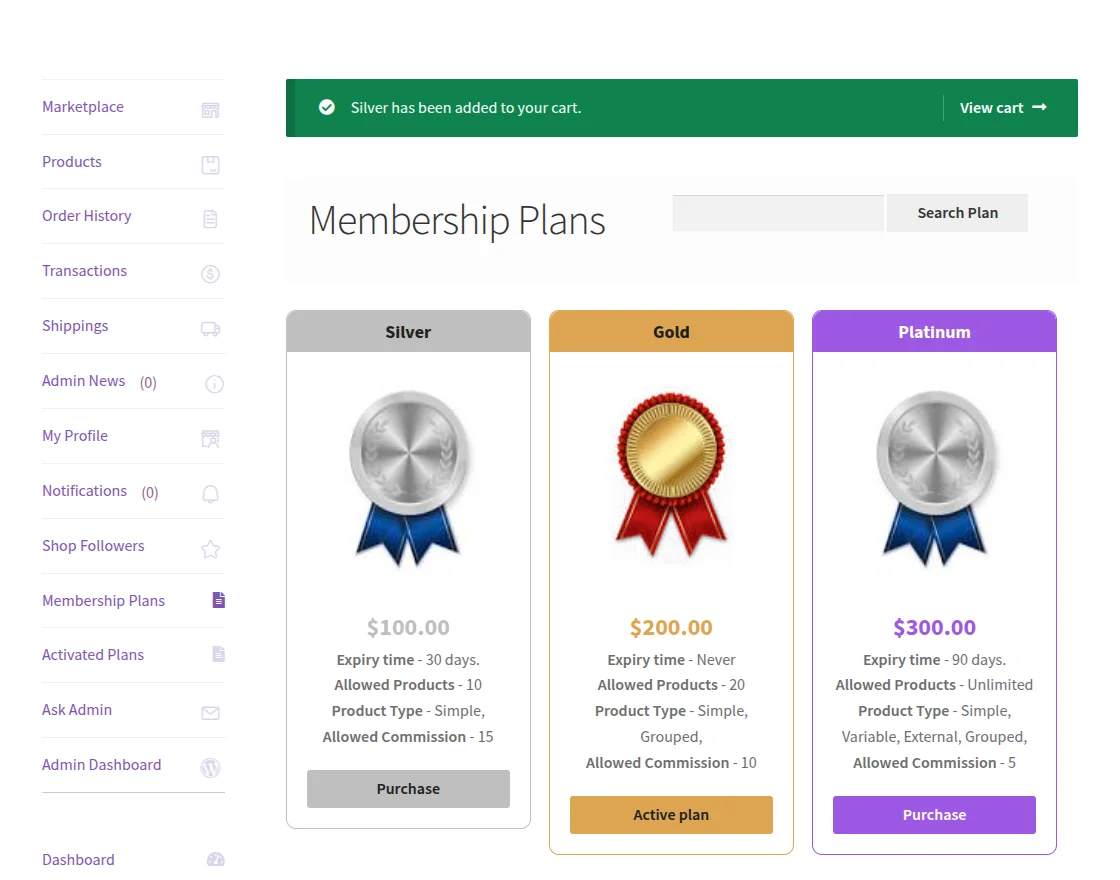
After redirecting to the frontend, the seller clicked on the membership plan in order to purchase it.
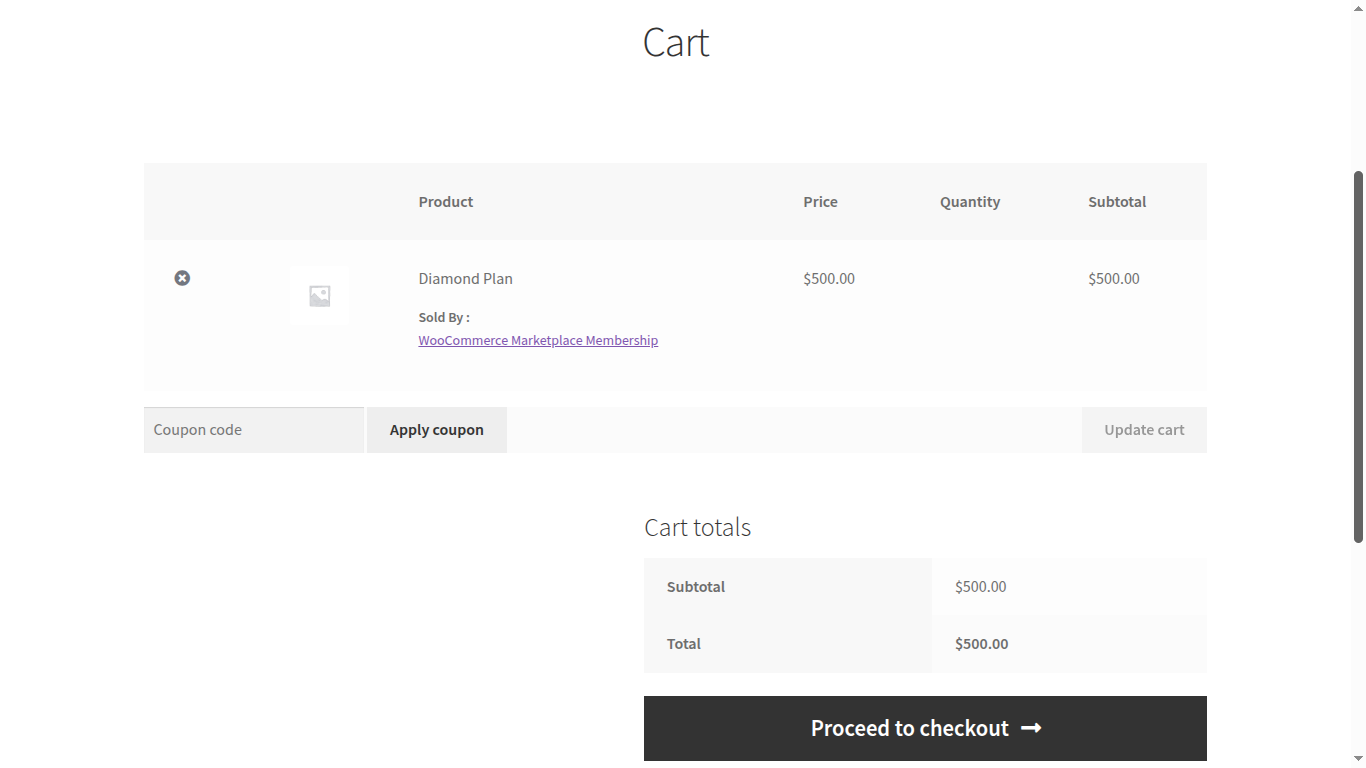
The system successfully adds the selected membership plan to the cart, as shown in the image below.
The user can purchase a membership just like a normal product.
A user can simply add the membership to the cart and proceed to check out.
On the checkout page, just like the user places an order for a normal product, similarly, the user can place an order for a membership by simply clicking on the ‘Place Order’ button.

When the user places an order, Woocommerce Multi Vendor Membership generates the order details for the user.
Seller receives membership email on the given email after purchasing the membership plan, as shown in the image below.

Hence, if a seller purchases the membership, the activated membership is visible to the user under the “Activated Plans” tab.
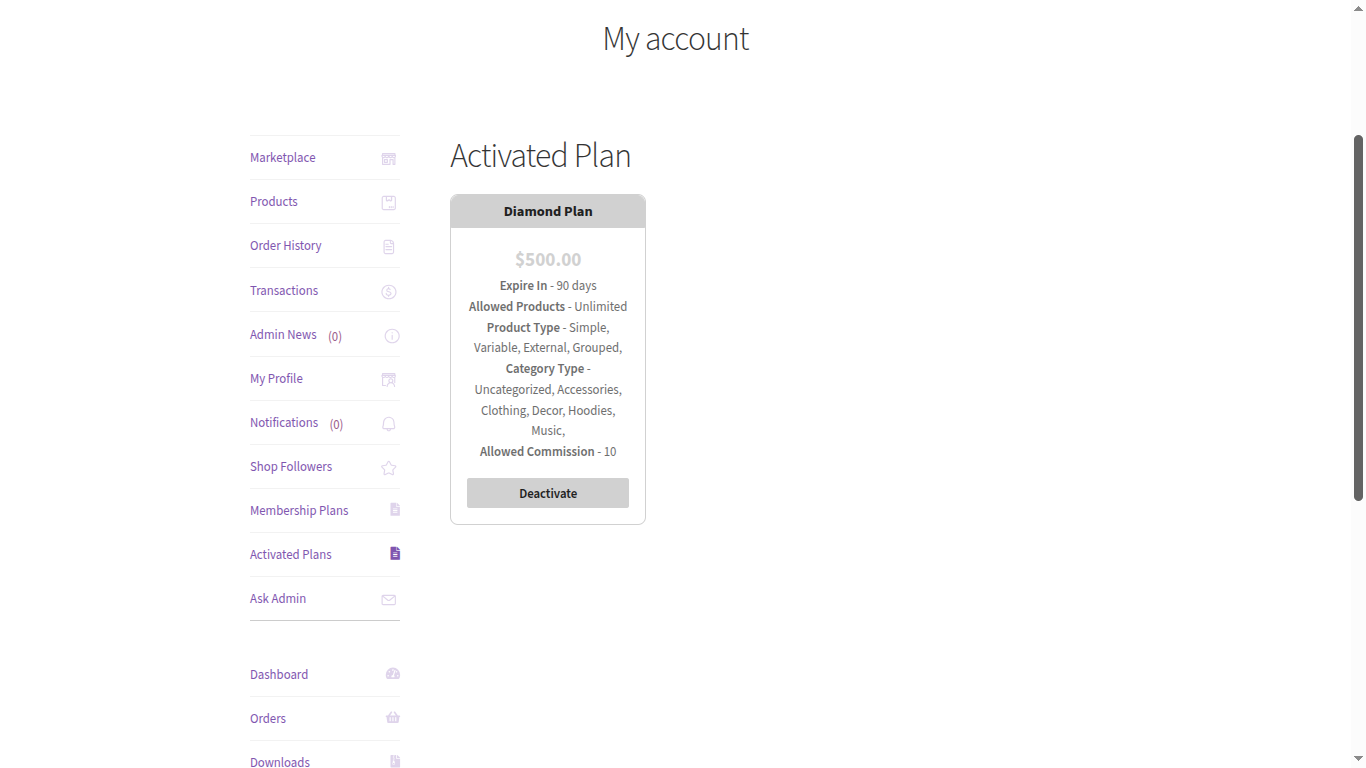
The seller can make use of the membership plans as configured by the admin in the admin panel.
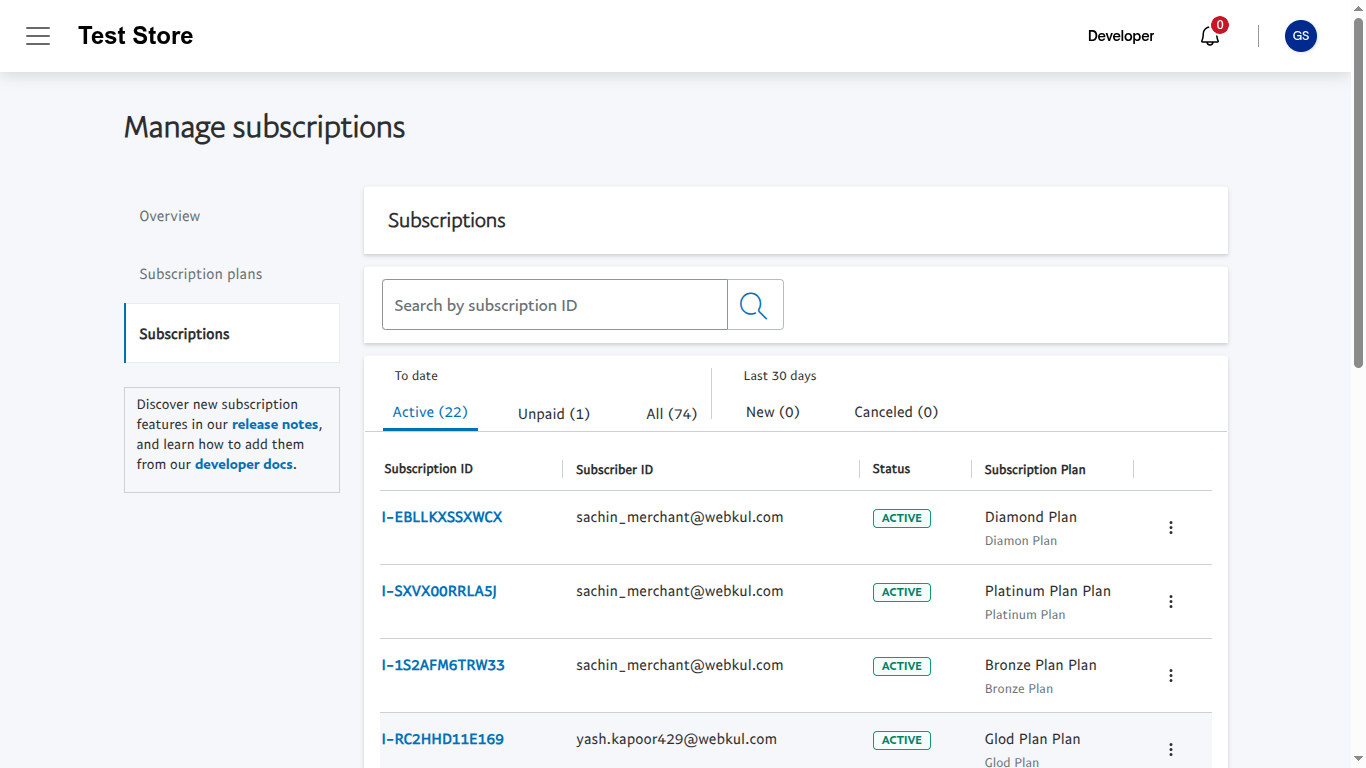
Once a seller purchases a membership plan, a corresponding subscription is instantly created Stripe, with seamless payment management.
In Stripe
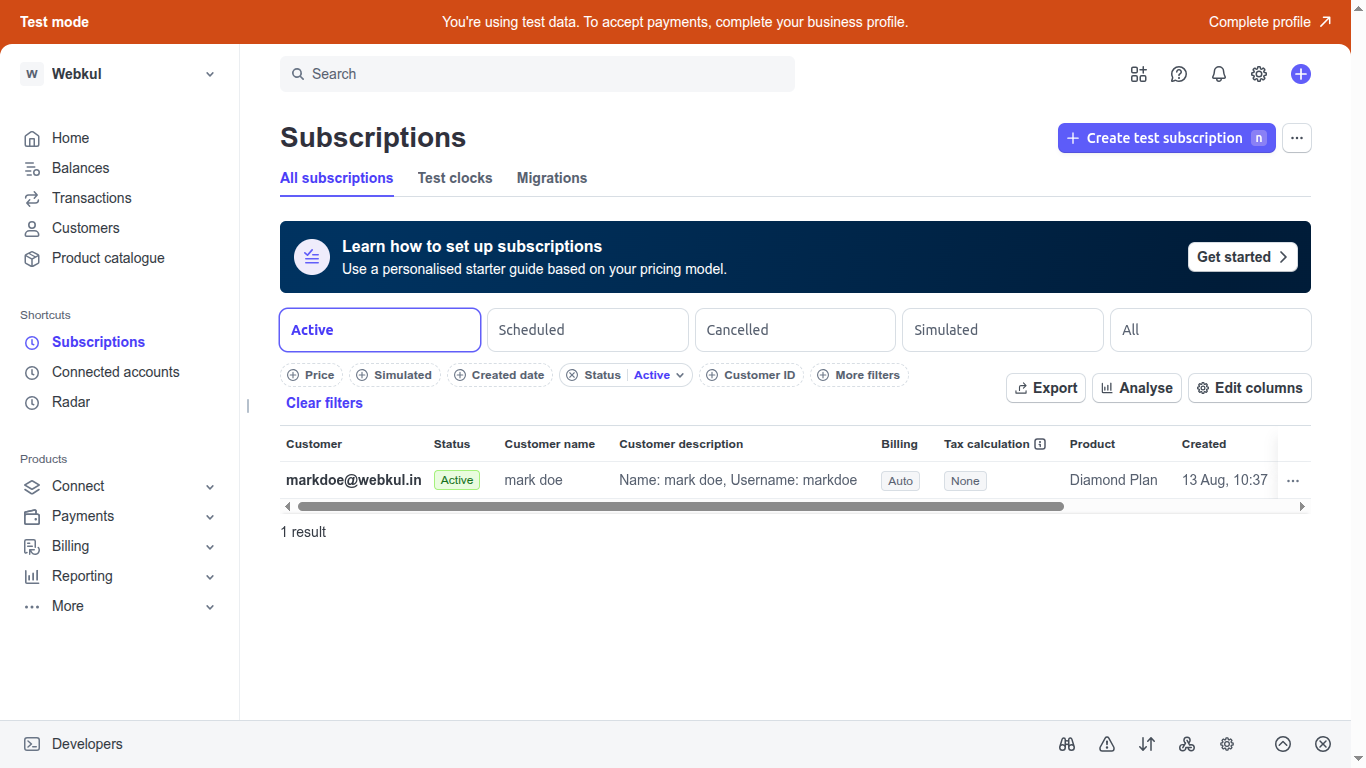
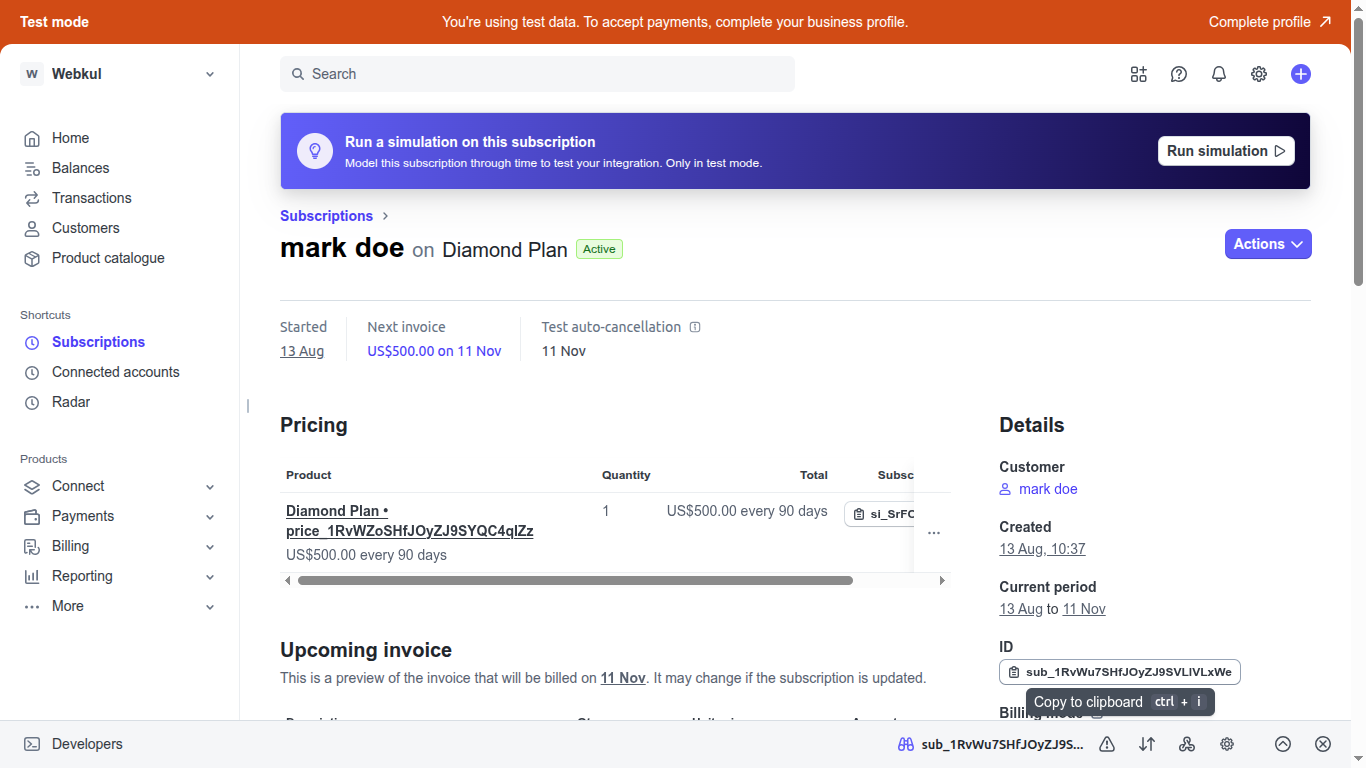
Check the Subscription details by clicking on a particular subscription
If the Seller purchased the membership plan using PayPal, then the Subscription will be created on Paypal sandbox account.
In Paypal
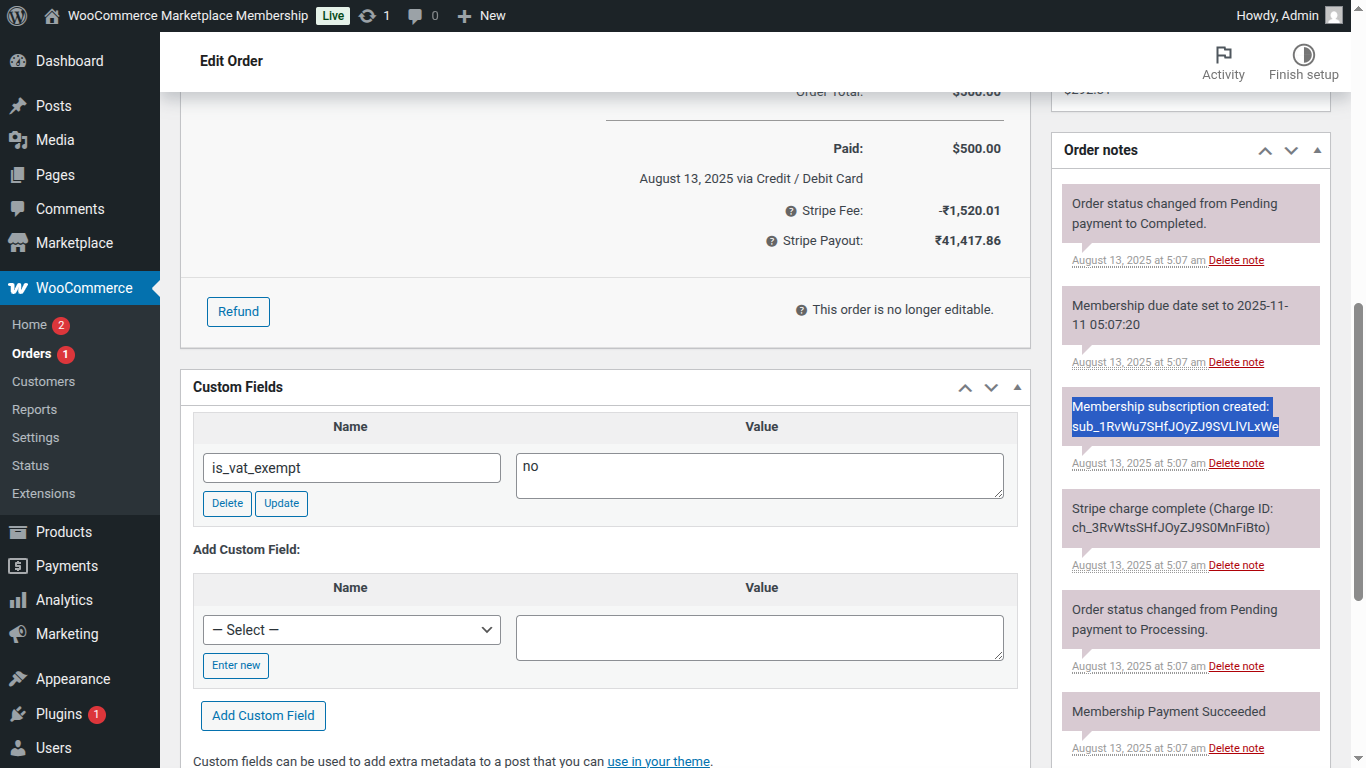
The Admin can also check the subscription ID by clicking on a particular Order ID:
Member Notification Emails
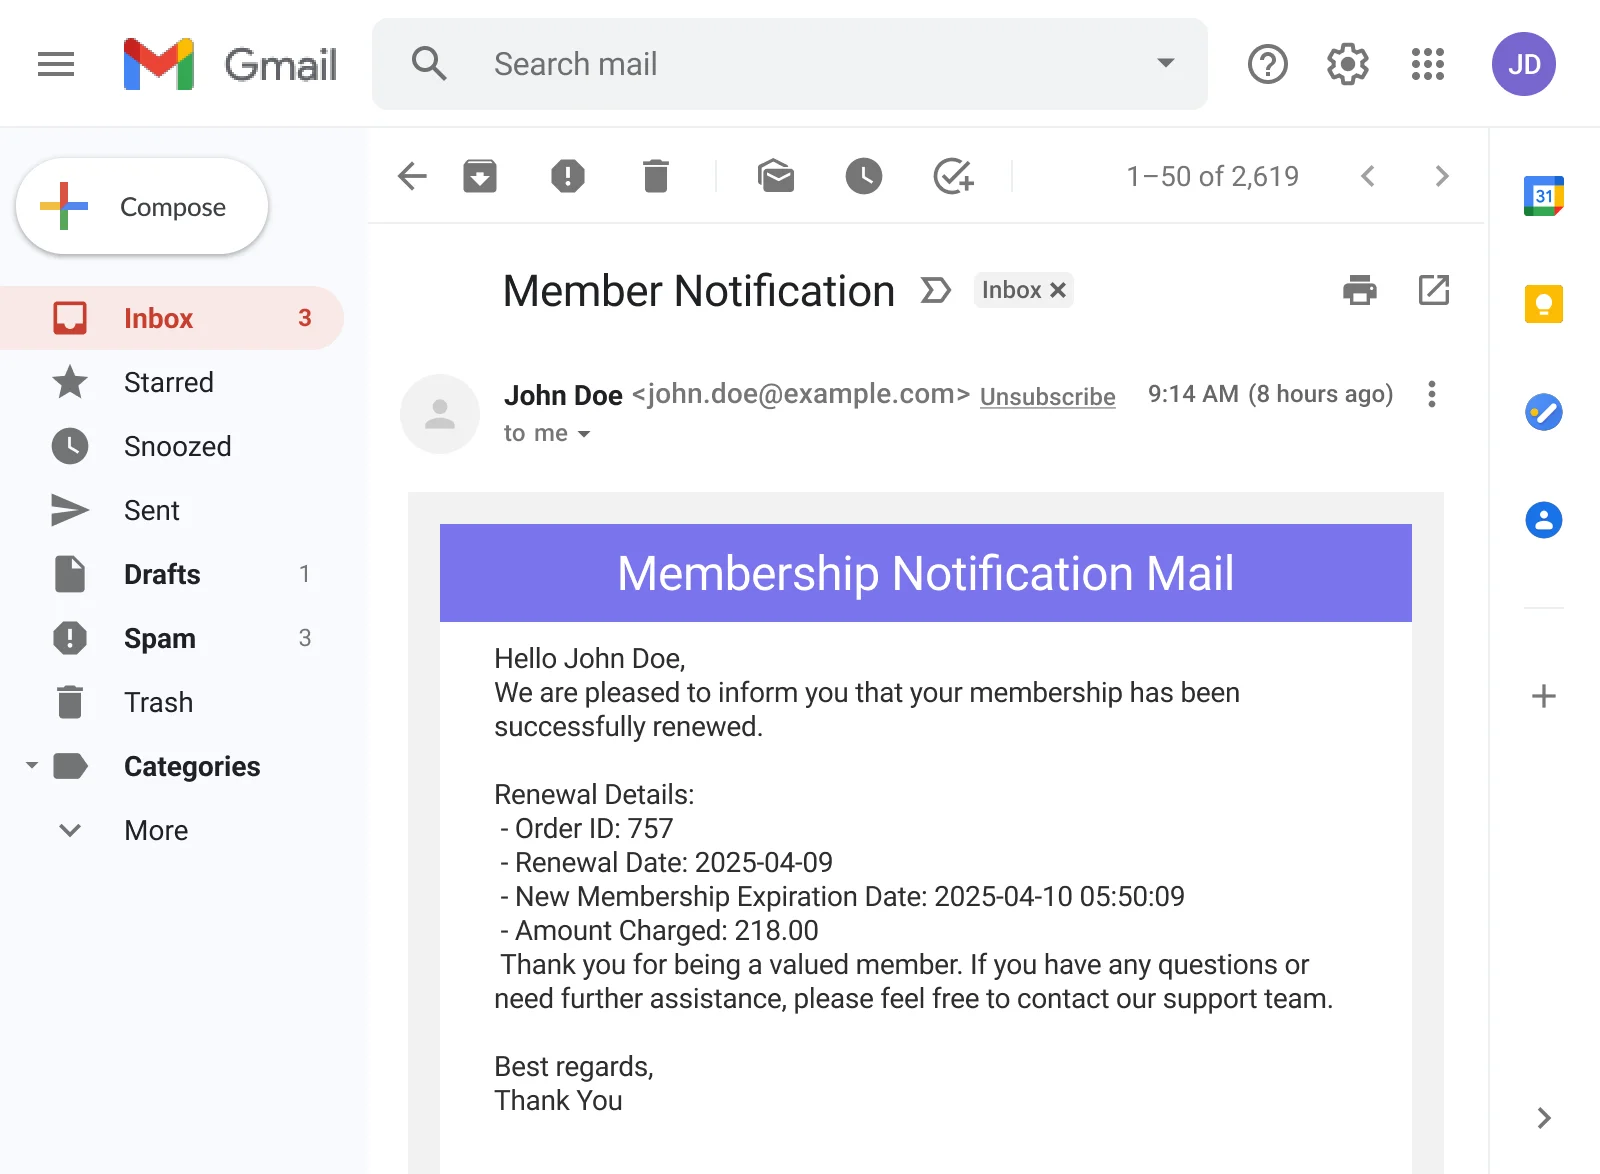
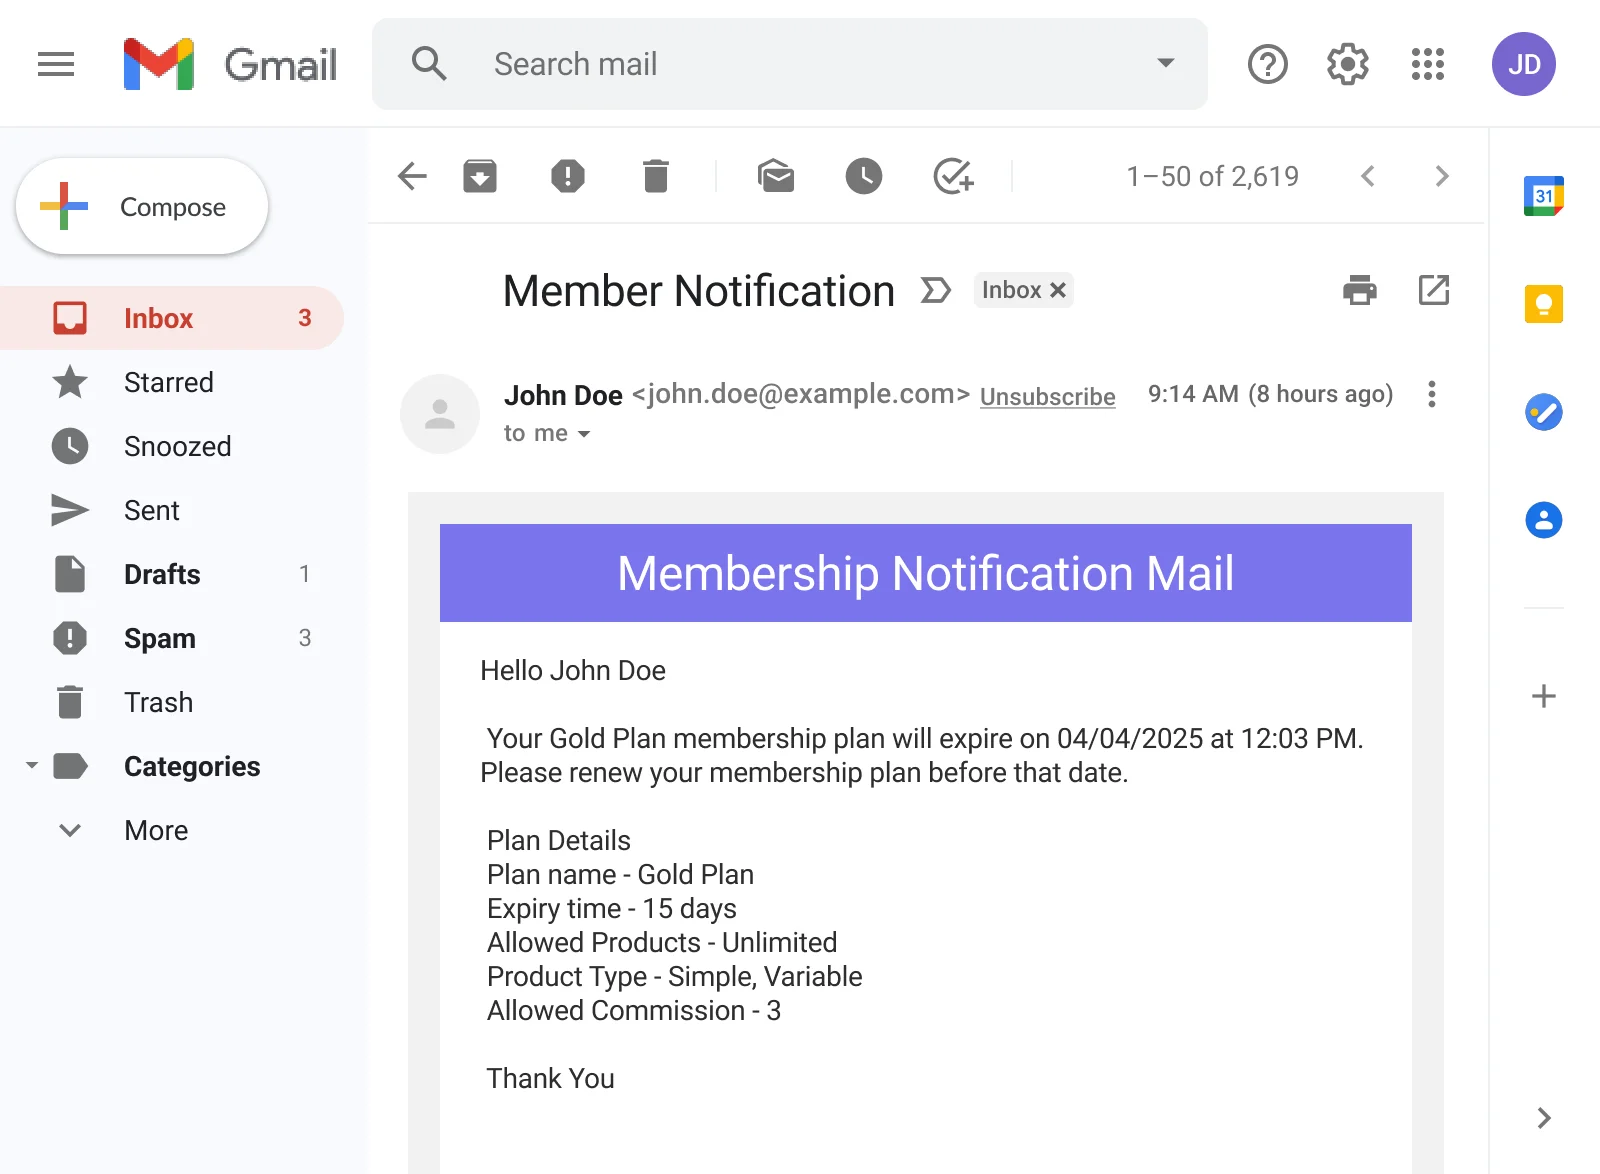
The Sellers receive member notification emails as well on Membership renewal and Reminder for renewal of membership They are as below,
Membership Renewal
Reminder for Membership Renewal
That’s all for the WordPress Marketplace Seller Membership Plugin for WooCommerce.
If you still have any issues, feel free to add a ticket and let us know your views on our Webkul Support System.
Current Product Version - 1.6.0
Supported Framework Version - WordPress: 6.8, WooCommerce: 9.x.x, WooCommerce Marketplace : 10.x.x

2 comments
If you are facing any issue with our plugin, Kindly email us at [email protected]. So we can assist you better.
Thanks