INTRODUCTION
Send Notifications to the Visitors of Your Site With Odoo Web Push Notifications!
Odoo Web Push Notifications helps you send notifications to customers and website visitors through their web browsers. You can share important updates, special offers, discounts, and other messages to keep users informed about your website.
The module allows you to create notification templates with a title, message, logo, and other available details. You can choose the users who should receive notifications, manage registered browsers, and schedule notifications for a specific date and time.
With Odoo Web Push Notifications, you can also send Live Chat push notifications when the related feature is enabled. These options help you manage browser notifications from Odoo and share useful information with your customers more easily.
FEATURES
- Send browser push notifications to website visitors and customers.
- Share offers, discounts, and website updates through notifications.
- Create notification templates with a title, message, logo, and banner.
- Select All, Odoo Users, Public Users, Website Users, or Selected Users as recipients.
- Manage registered users and their browser registration keys.
- Schedule notifications for a specific date and time.
- Enable browser push notifications for Odoo Live Chat.
- Configure Firebase settings for website and Live Chat notifications.
INSTALLATION
- Once you purchase the App from the Webkul store, you will receive the link to download the zip file of the module.
- Extract the file on your system after the download finishes. As a result, you will be able to see a folder named- ‘odoo_web_push_notifications’.
- Copy and paste this folder inside your Odoo Add-Ons path.
- Now, open the Odoo Apps and then, click on the Settings menu. Here, click on Activate the Developer Mode.
- Then, open the Apps menu and click on the ‘Update Modules List’.
- In the search bar, remove all the filters and then, search ‘odoo_web_push_notifications’.
- As a result, you will be able to see the module in the search result. Click on ‘Install’ to install it
WORKFLOW
1. Create a Web Push Notification
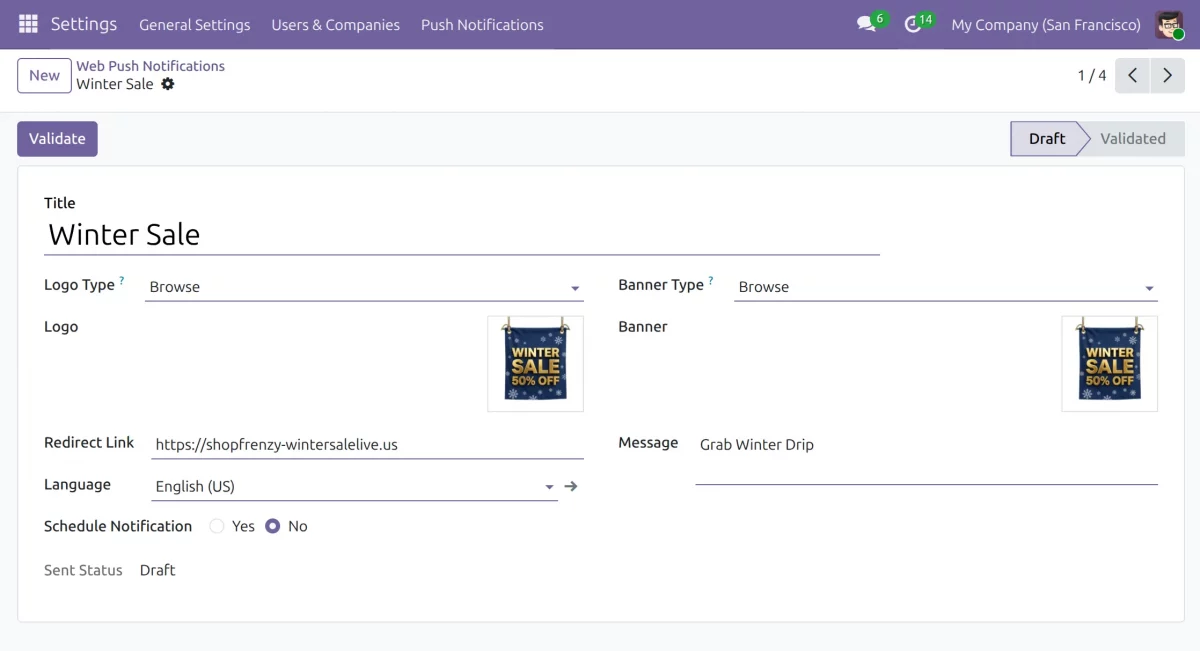
- Navigate to Settings → Push Notifications → Web Push Notifications and click New to create a notification.
- Enter the notification title and message, upload a logo and banner, add a redirect link, and select the language.
- Choose whether to schedule the notification. The notification remains in Draft until you validate it.
2. View Web Push Notifications
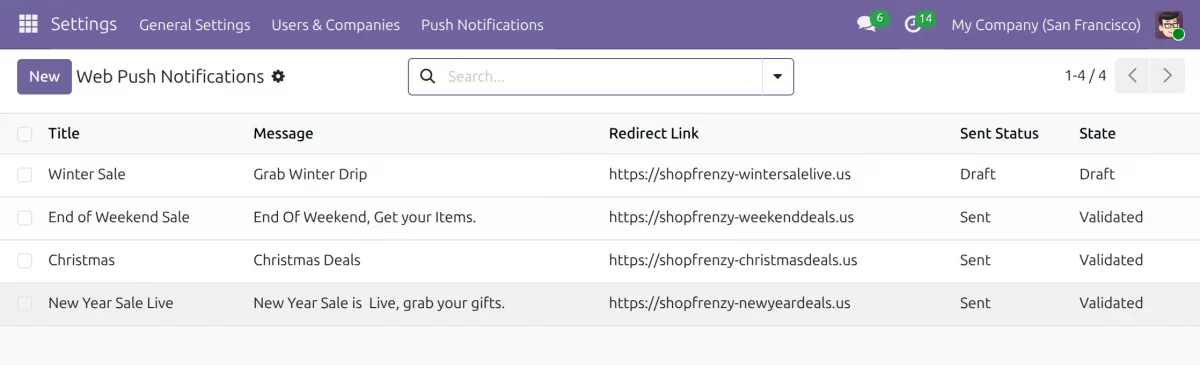
- Open Web Push Notifications to view the list of created notifications.
- Review each notification’s title, message, redirect link, sent status, and current state.
- Select a notification to view or manage its details.
3. Send Notifications to Users
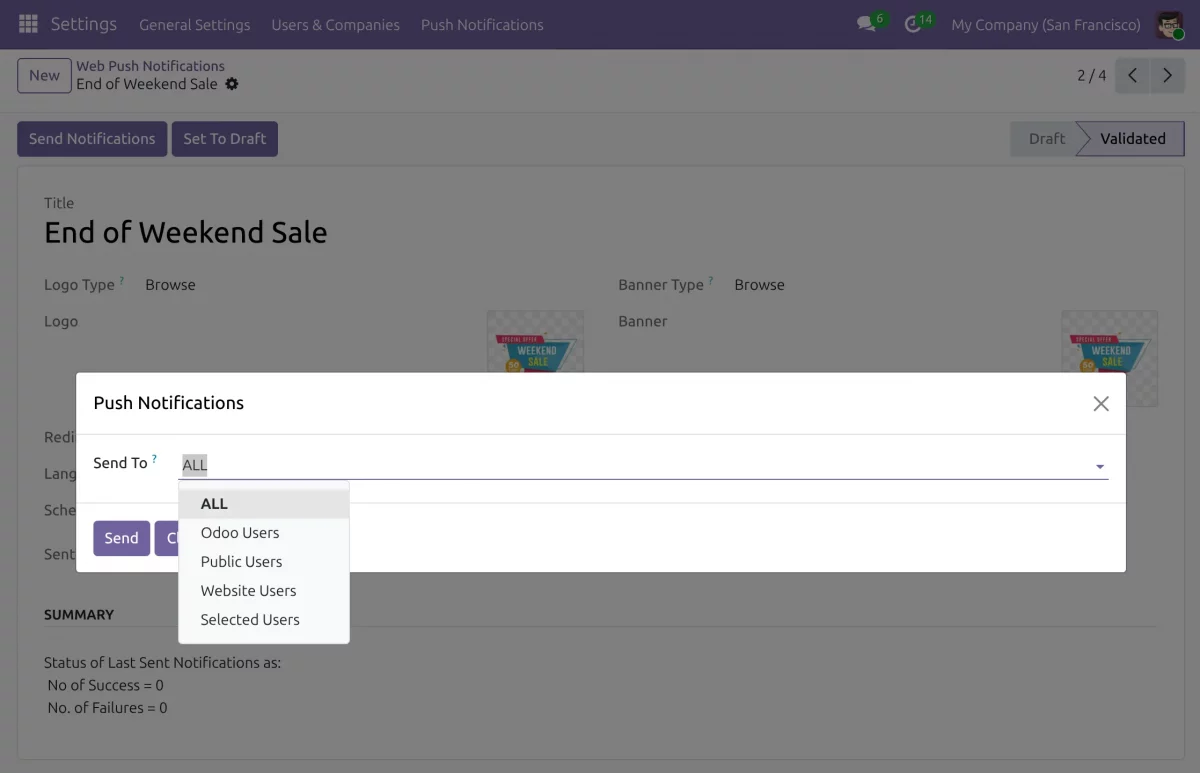
- Open a validated notification and click Send Notifications to choose the recipients.
- In the Send To field, select All, Odoo Users, Public Users, Website Users, or Selected Users.
- Click Send to send the notification to the selected recipients.
4. View User Registrations
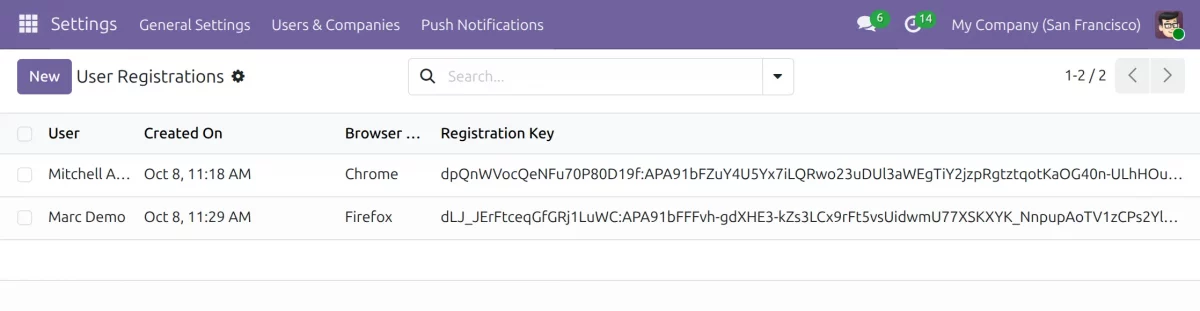
- Open User Registrations under the Push Notifications menu.
- Review the registered users, registration dates, browser names, and registration keys.
- Use this list to view the browser registration details stored in Odoo.
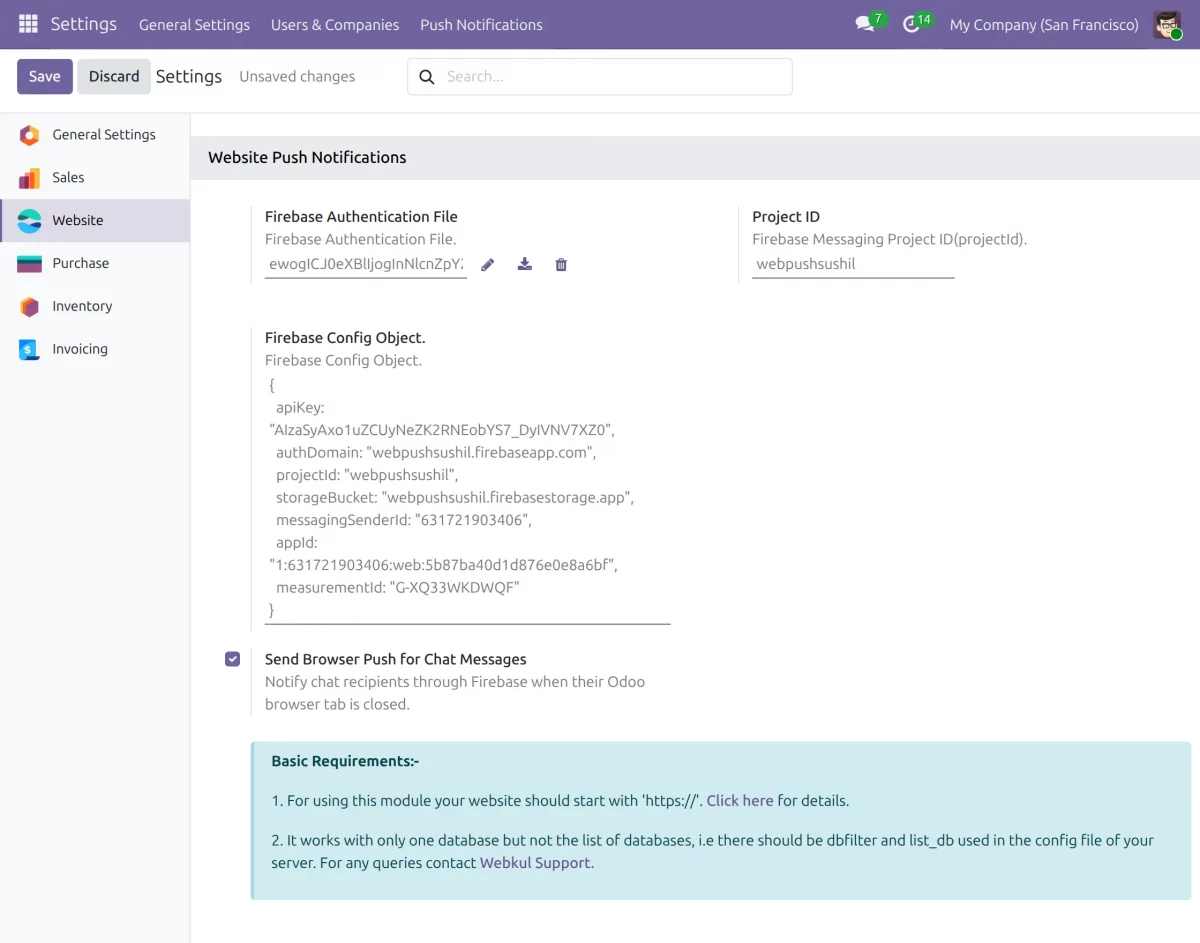
5. Configure Website Push Notifications
- Go to Settings → General Settings → Website and locate Website Push Notifications.
- Configure the available Firebase-related settings, including the authentication file, Project ID, and Firebase Config Object.
- Enable Send Browser Push for Chat Messages to notify chat recipients through Firebase when their Odoo browser tab is closed.
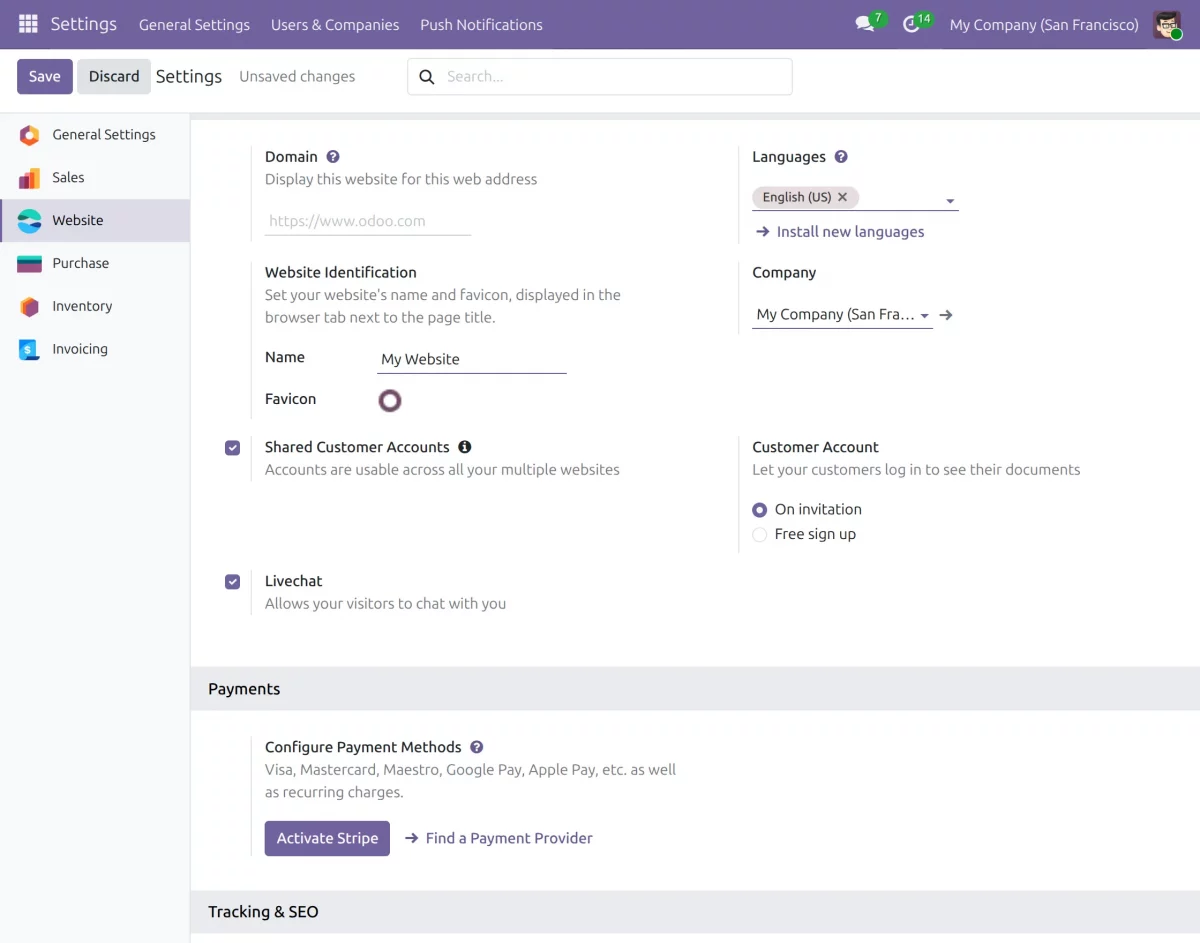
6. Enable Live Chat on the Website
- Navigate to Settings → General Settings → Website.
- Locate the Livechat option in the website settings.
- Enable the option to allow website visitors to chat with your team, then click Save to apply the changes.
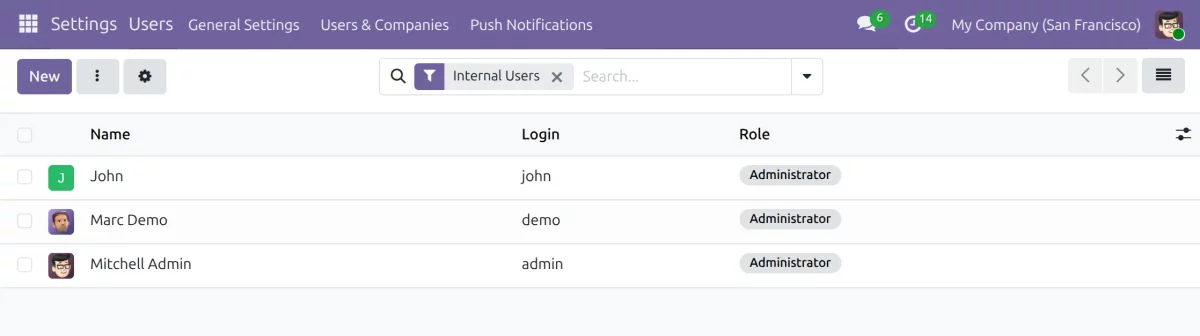
7. View Users
- Open the Users menu to view the available user records.
- Review user names, login details, and assigned roles.
- Use the list to identify the users available in the system.
USER GUIDES FOR OTHER MODULES
NEED HELP?
Hope you find this guide helpful! Please feel free to share your feedback in the comments below.
If you still have any issues/queries, please create a ticket at the UV Desk.
I hope this helps. In case of any further queries, contact us at our support mail.
Thanks for paying attention!!
Current Product Version - 1.0.0
Supported Framework Version - Odoo V20, V19, V18, V17

4 comments
It seems some steps are missing which are needed to be checked. You can share your problem regarding the module configuration in our ticket portal or mail us at [email protected]