In this guide, we are sharing the steps to follow for configuring the Gmail SMTP settings in your application so that the end user will receive the emails from your own email address.
Video Guide
Steps to configure SMTP
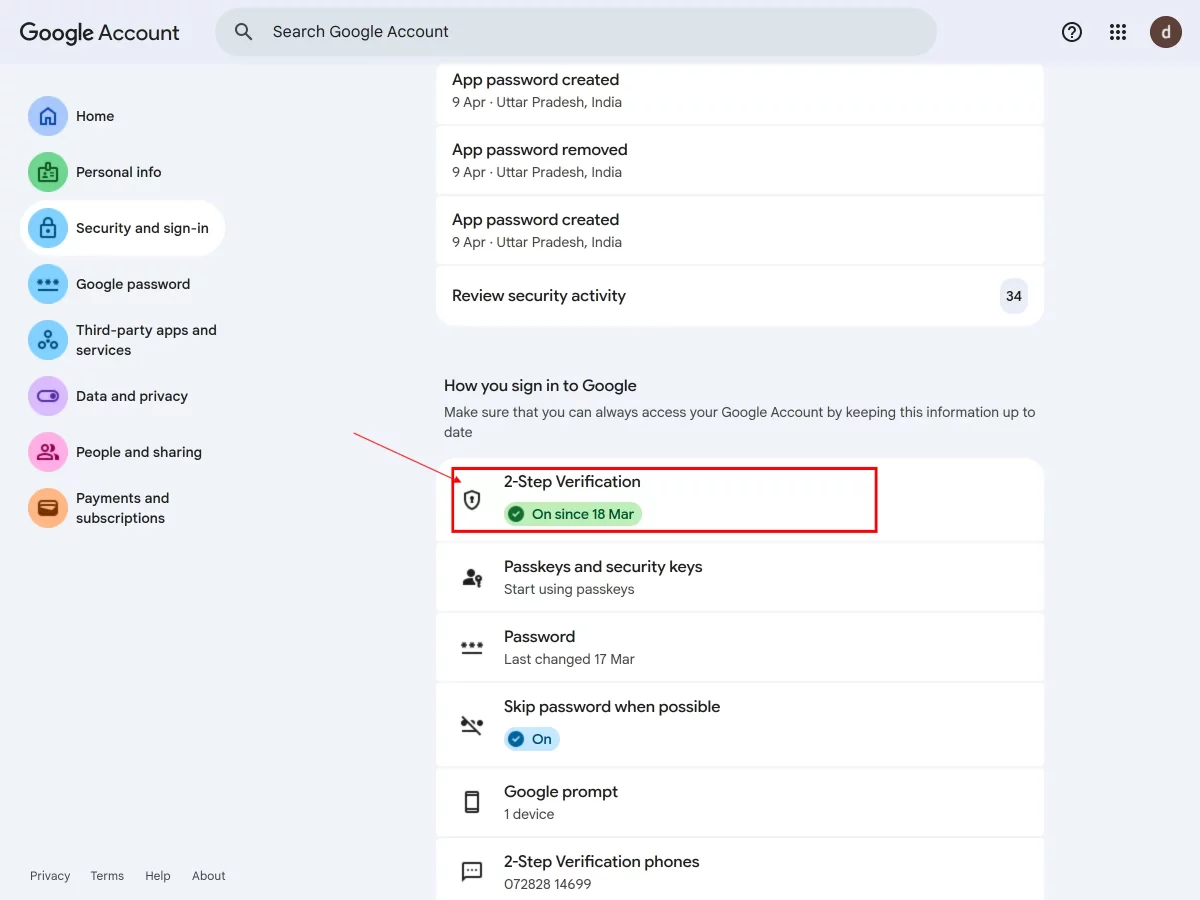
Step 1: In the first step, you need to complete the 2-Step Verification in the Google account settings. To do this, you need to open your Google account settings and then click on Security.
In security, you need to click on 2-step verification and turn it “On”.
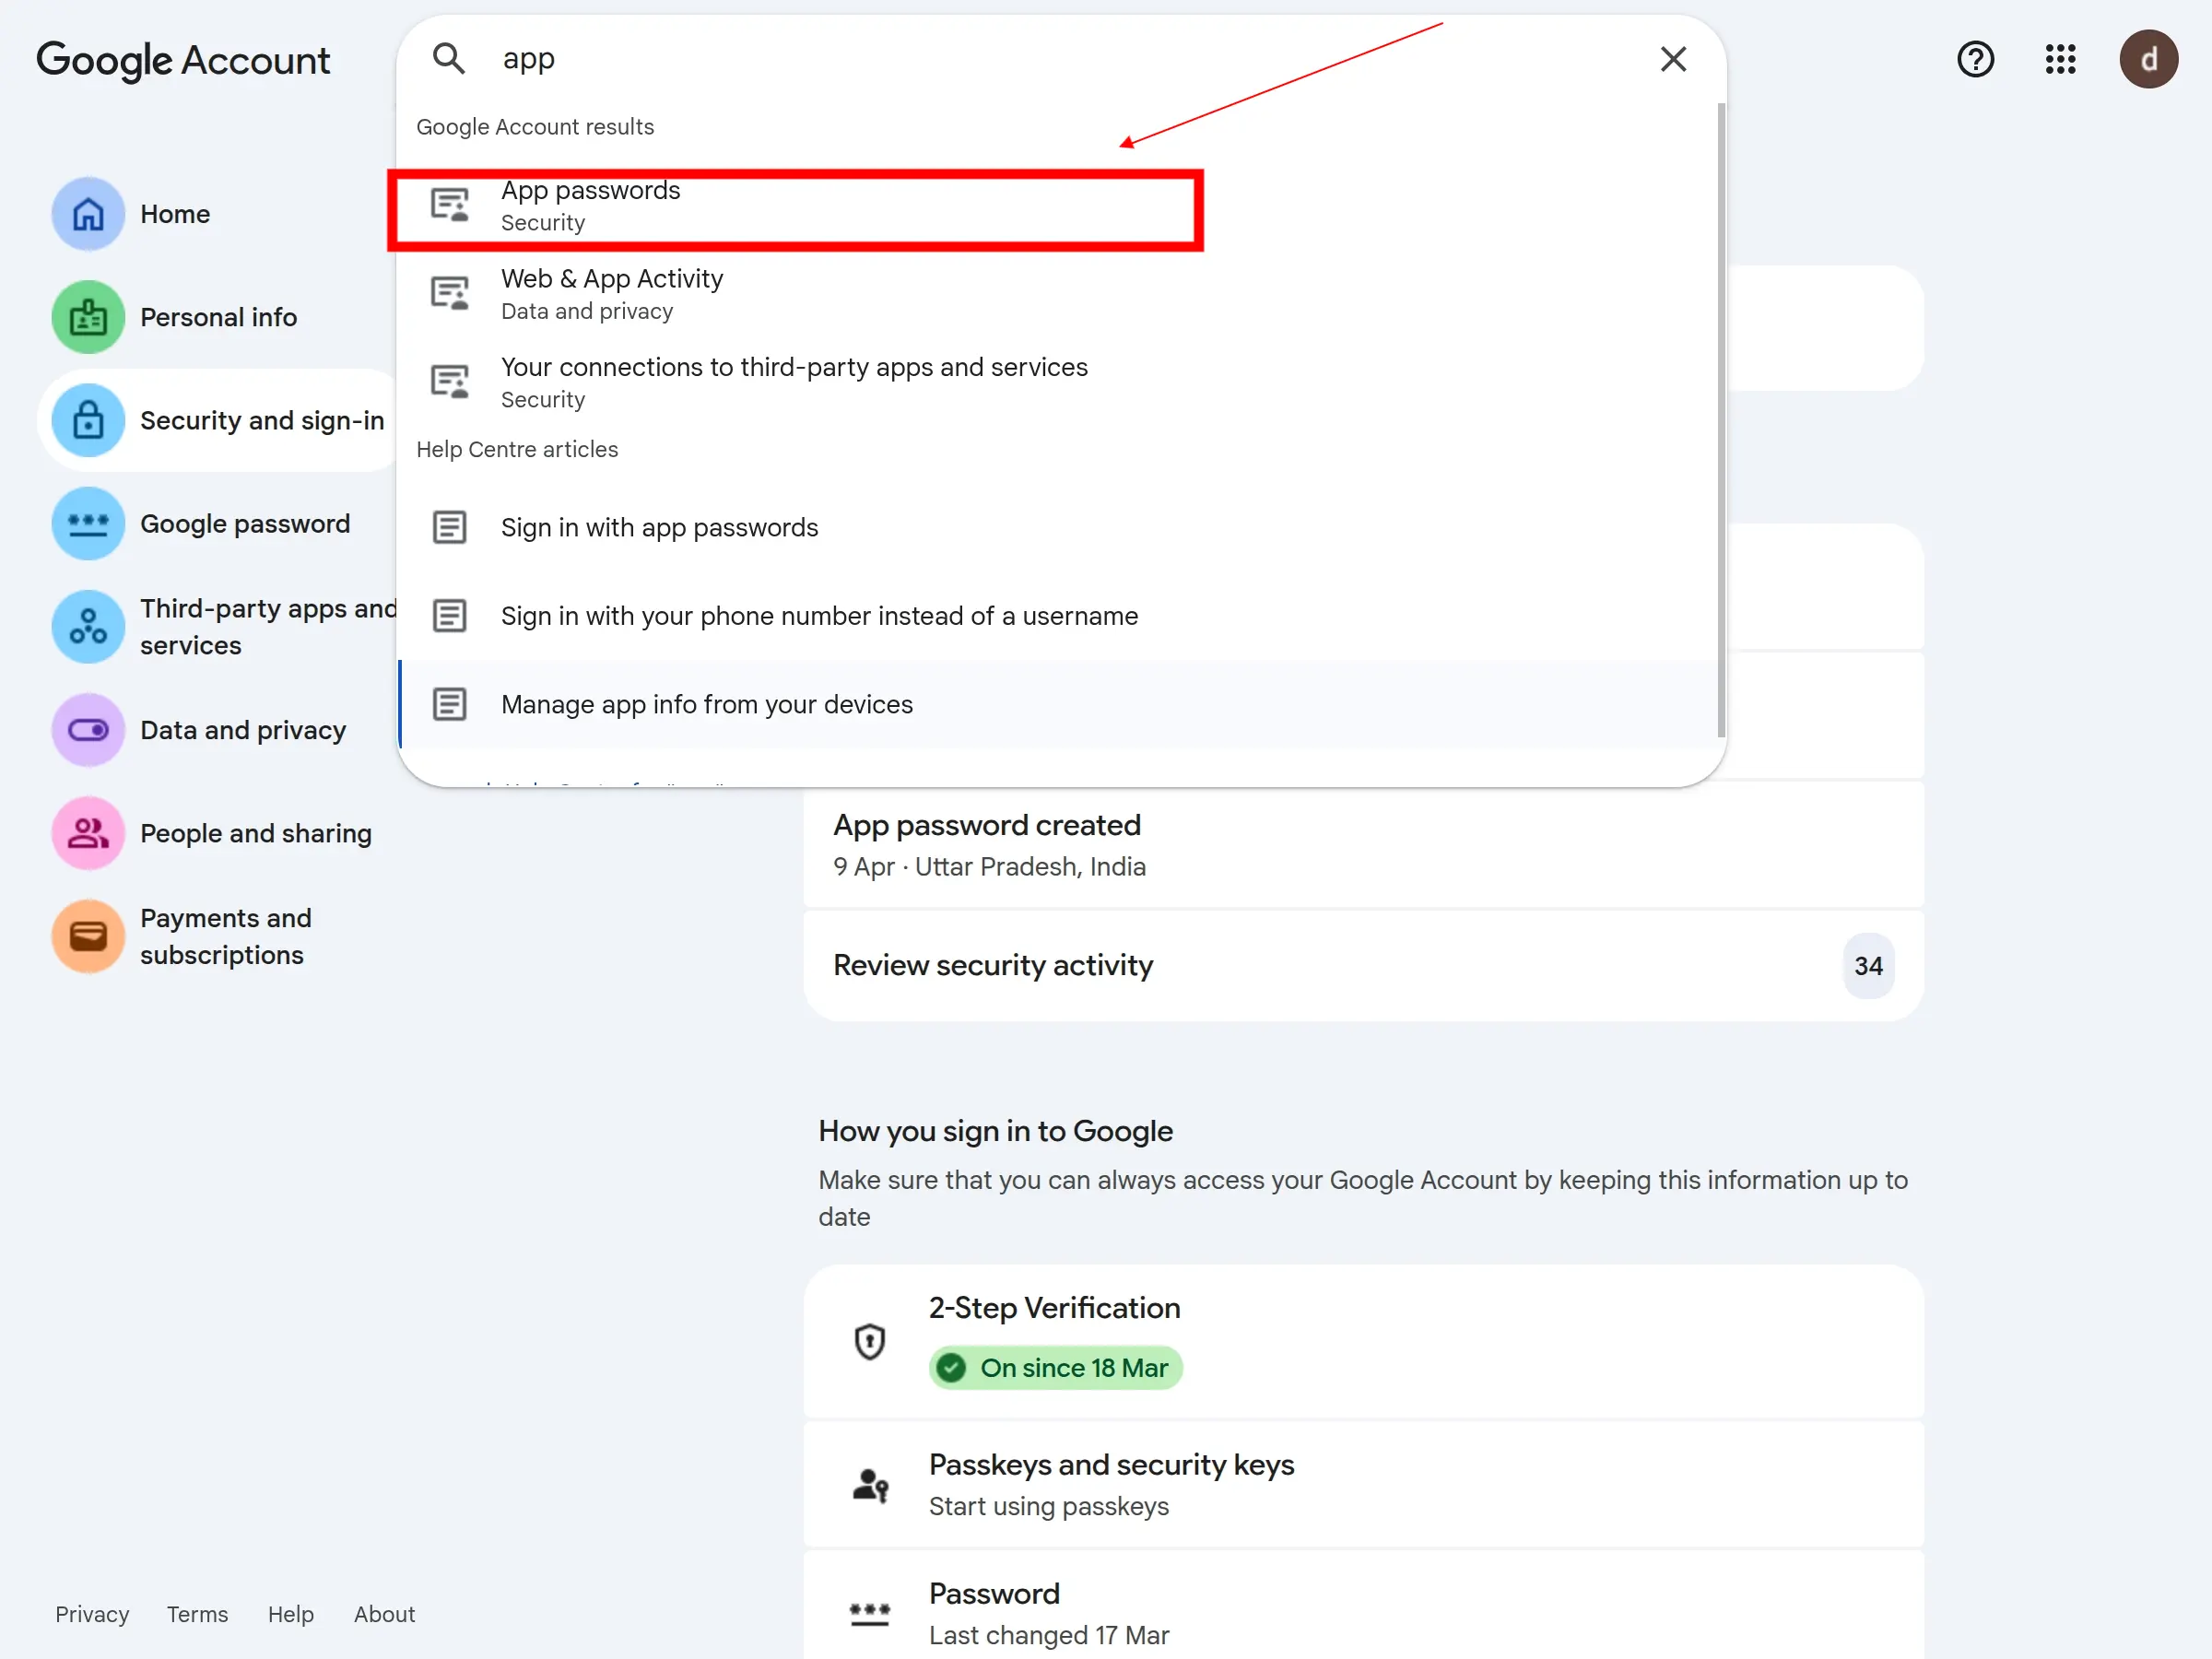
Step 2: After turning ON the 2- Step Verification, you need to search for “App Password” in the search box.
Then you will find “App Password” in the search result, then click on App Passwords as shown.
Step 3: Now you need to create the password for the application you want to use. Click on the select app and choose Other(Custom name).

Step 4: After choosing Other(Custom name), enter the name of the application for which you want to generate the password and click on Generate.

Step 5: After clicking on generate, you will get a one-time password, which you can use to configure with your Gmail.
Note: Kindly copy and save the password in the notepad because you can use it only one time.

Step 6: After getting the password, kindly go back to the application and enter the below details and click on Save:-
Host – smtp.gmail.com
Port – 465
Username – Enter the email address from which you generated the app password.
Password – Enter the one-time password that you copied.
Encryption – SSL
Email From – Enter your email address.

Click on Save to save the configuration settings.
And yes, you are ready to go!
We hope this blog will help you to understand the complete process involved in configuring the Gmail SMTP settings in your application.
If you have any queries, please generate a ticket at http://webkul.uvdesk.com

Be the first to comment.