PrestaShop AI Reporting lets you ask questions about your shop in plain English and get the answer back as a table or a chart.
This guide covers connecting an AI provider, choosing which data the AI can query, and running, saving and revisiting reports from the Back Office.
Note: The module needs either an API key from one of six LLM providers or a Webkul preconfigured endpoint and token to answer questions.
Orders, Products and Customers are served from flat tables that you build once from the configuration screen before they return data.
Features of PrestaShop AI Reporting
- Turn a plain-English question into SQL and return the answer as a table or chart
- Report on nine entities: Orders, Refunds, Products, Customers, Product Inventory, Category, Abandoned Cart, Product Reviews and Wishlist
- Serve Orders, Products and Customers from rebuildable flat tables for fast queries
- Connect to a Webkul preconfigured endpoint or your own OpenAI, Gemini, Anthropic, OpenRouter, Cerebras or DeepSeek key
- Guard every generated query with a single-statement check, a keyword blacklist and a table/column whitelist
- Switch between table, line, pie, bar and area chart views and inspect the generated SQL
- Save reports to a dashboard that reorders, re-runs and redraws them on load
- Export table results as CSV and chart views as PNG
- Rebuild flat tables on demand from the configuration screen or on a token-guarded cron schedule
How to install PrestaShop AI Reporting
- In the Back Office go to Modules › Module Manager and click Upload a module.
- Drag the module ZIP into the drop area, or select it from your computer.
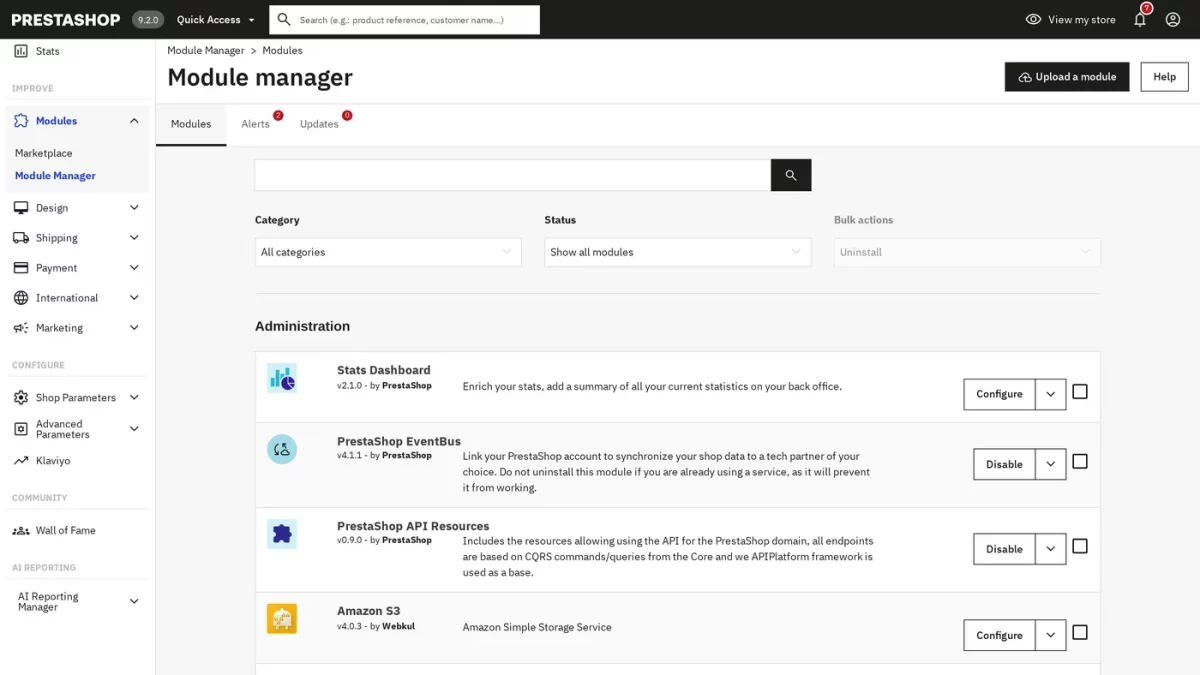
- Wait for the installer to finish. AI Reporting then appears in the Module Manager list, in the Administration category.
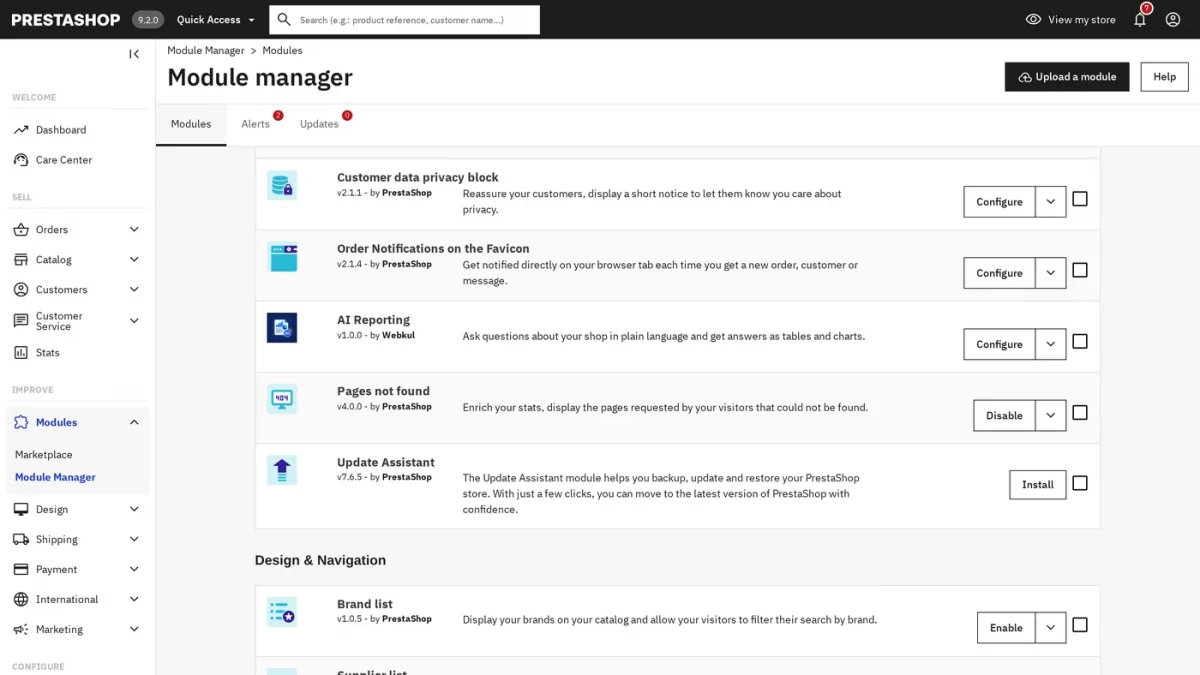
The install adds an AI Reporting section to the Back Office main menu, with an **AI Reporting
Manager submenu holding Search AI Report Manager and Saved AI Report Manager**.
Module Configuration
Open Modules › Module Manager, find AI Reporting, and click Configure.
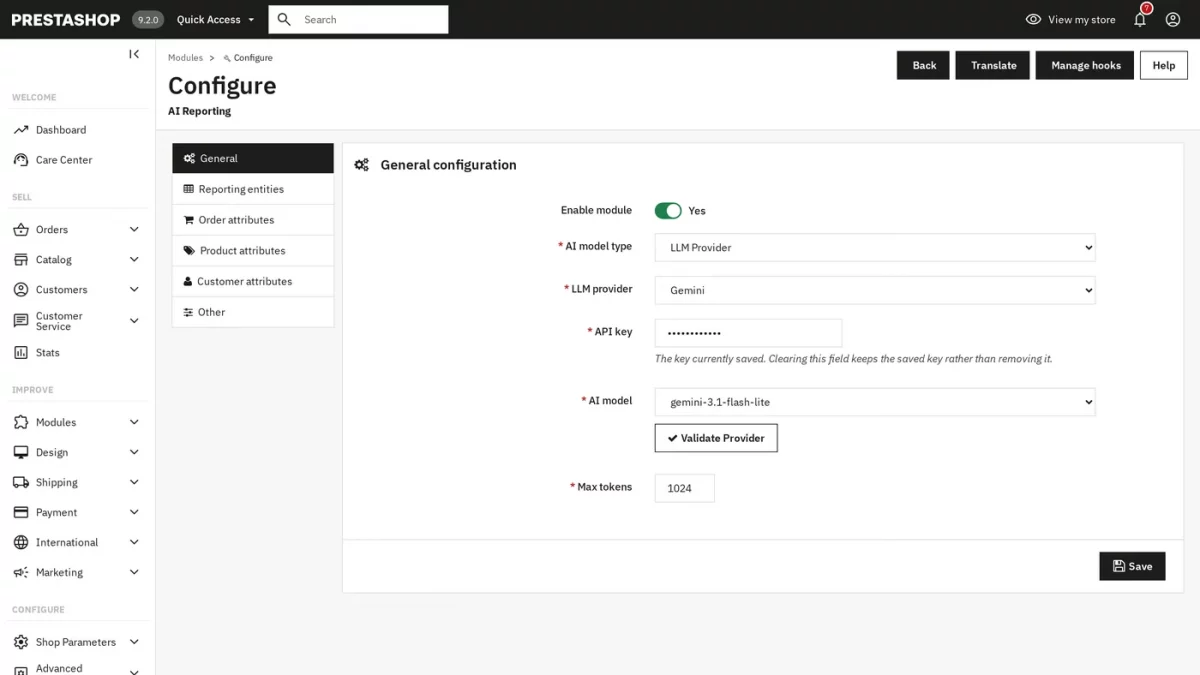
The configuration page has six tabs down the left side: General, Reporting entities, Order attributes, Product attributes, Customer attributes and Other.
General
- Enable module — turns the module on or off. Defaults to Yes.
- AI model type — Preconfigured (the Webkul-hosted gateway) or LLM Provider (your own key). Required.
- Reporting endpoint and Token key — shown only when AI model type is Preconfigured; the gateway URL and the token issued for it. Both required in that mode.
- LLM provider — one of OpenAI, Gemini, Anthropic, OpenRouter, Cerebras or DeepSeek. Defaults to OpenAI. Shown only when AI model type is LLM Provider.
- API key — the key for the selected provider. Clearing this field keeps the saved key rather than removing it.
- AI model — the model to call for that provider. Use Validate Provider to confirm the key and model work before saving.
- Max tokens — the reply size limit sent to the provider. Defaults to 1024.
Reporting entities
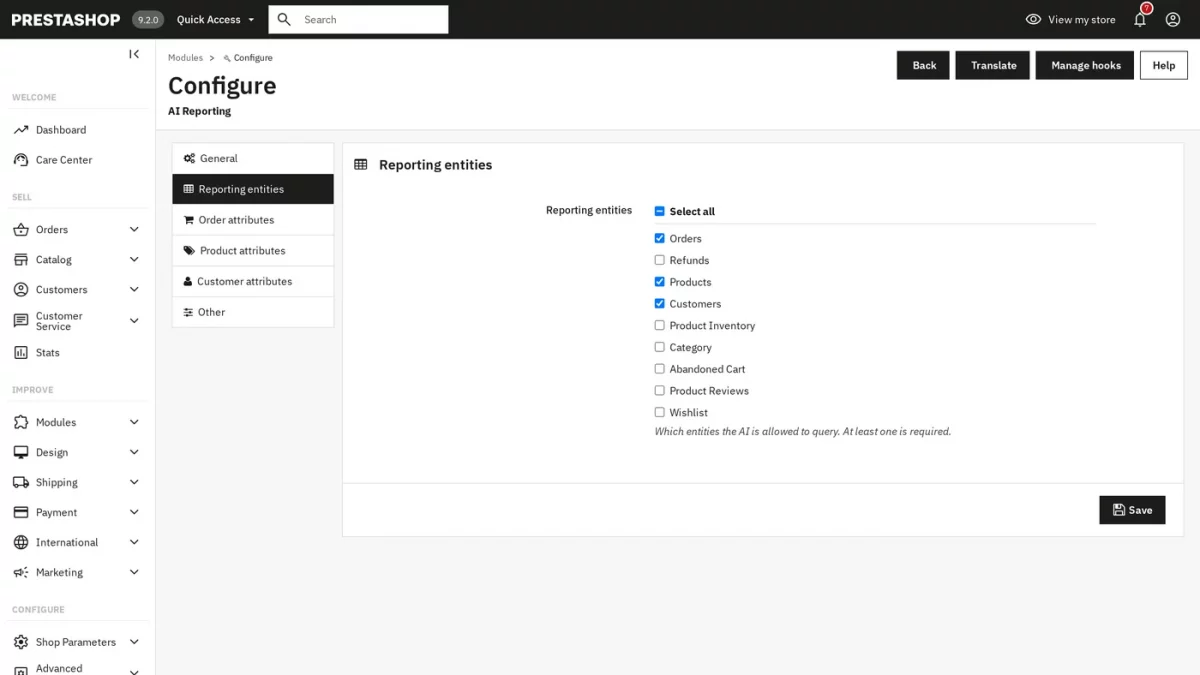
Check which of the nine entities the AI is allowed to query — at least one is required. Orders, Products and Customers default to checked.
Product Reviews and Wishlist appear only when the productcomments or blockwishlist modules are installed.
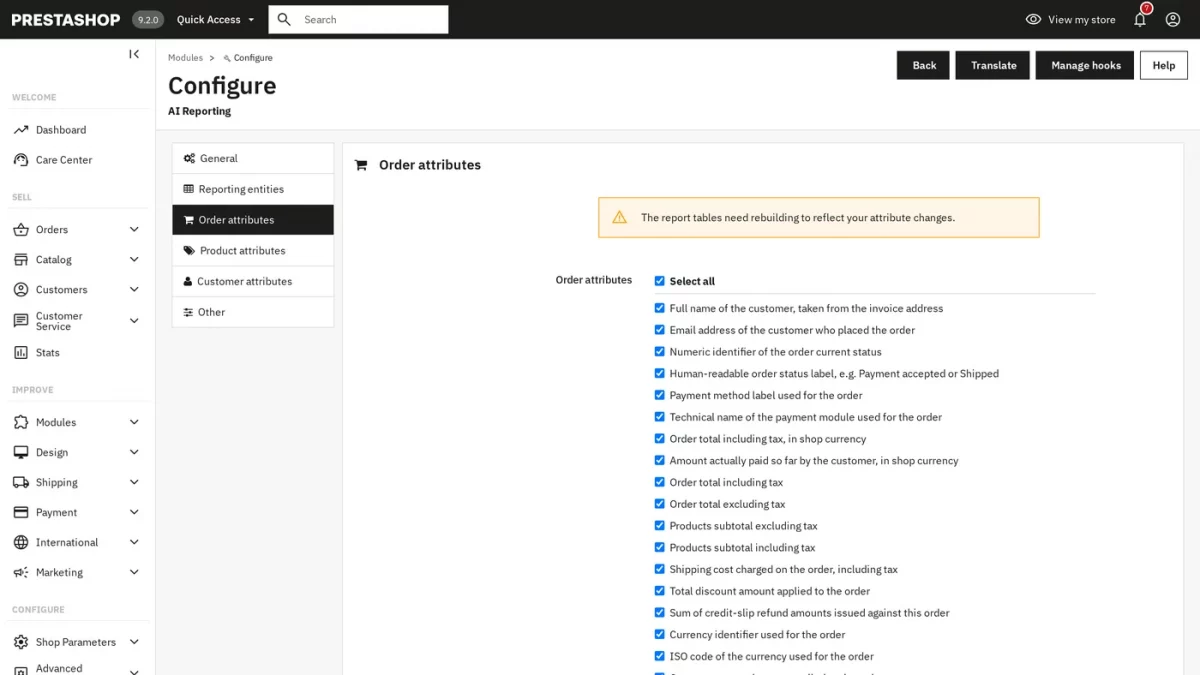
Order, Product and Customer attributes
Each of these three tabs lists the optional columns available for that entity’s flat table — for example, order status label, payment method, or discount amount for Orders.
Every optional column is checked by default on a fresh install.
Unchecking a column removes it from that flat table on the next rebuild; a yellow notice appears on these tabs and on Other configuration whenever a saved selection no longer matches the built tables.
Other
- Language — which
*_langrows populate the flat report tables. Defaults to the shop’s default language. - Shop — the multistore scope for the flat tables. Shown only when multistore is active; hidden entirely on a single-shop install.
- Row limit — the maximum rows returned per query, between 1 and 5000. Defaults to 500.
- Default chart — Table, Line chart, Pie chart, Bar chart or Area chart. Defaults to Table.
- Show generated SQL — shows the SQL view button on the Search page. Defaults to Yes.
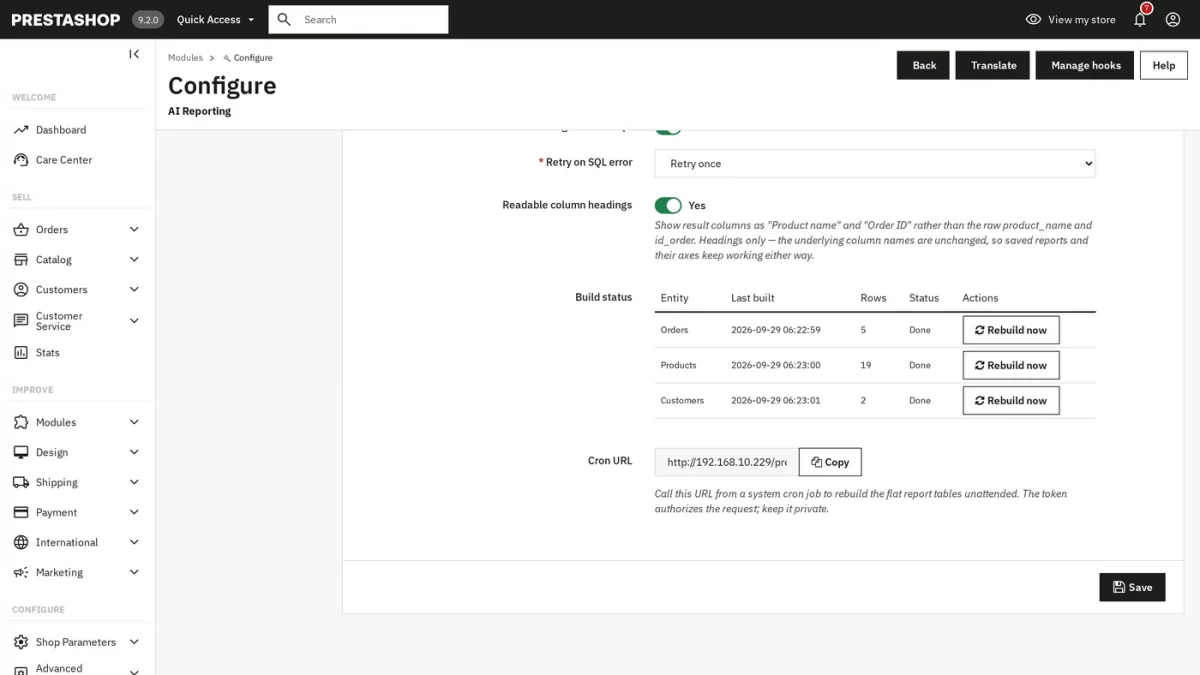
- Retry on SQL error — Do not retry or Retry once. Defaults to Retry once.
- Readable column headings — shows result columns as “Product name” instead of the raw
product_name. Headings only; saved reports keep working either way. Defaults to Yes. - Build status — one row per flat entity with its last build time, row count, status and a Rebuild now button.
- Cron URL — a tokenised URL you can call from a system cron job to rebuild the flat tables unattended, instead of clicking Rebuild now by hand.
AI provider setup
If you are using your own provider instead of the Webkul preconfigured endpoint:
- Open the console for your chosen provider (OpenAI, Gemini, Anthropic, OpenRouter, Cerebras or DeepSeek) and create an API key there.
- On the General configuration tab, set AI model type to LLM Provider and pick that provider from the LLM provider list.
- Paste the key into API key, choose a model under AI model, and click Validate Provider. A failed validation means the key, model or account access is wrong — fix it on the provider’s side before saving.
- Click Save.
Before the Search page can answer questions about Orders, Products or Customers.
Go to the Other tab and click Rebuild now next to each of those entities at least once — a report run against an unbuilt flat table returns no rows.
Using the module
Search AI Report Manager
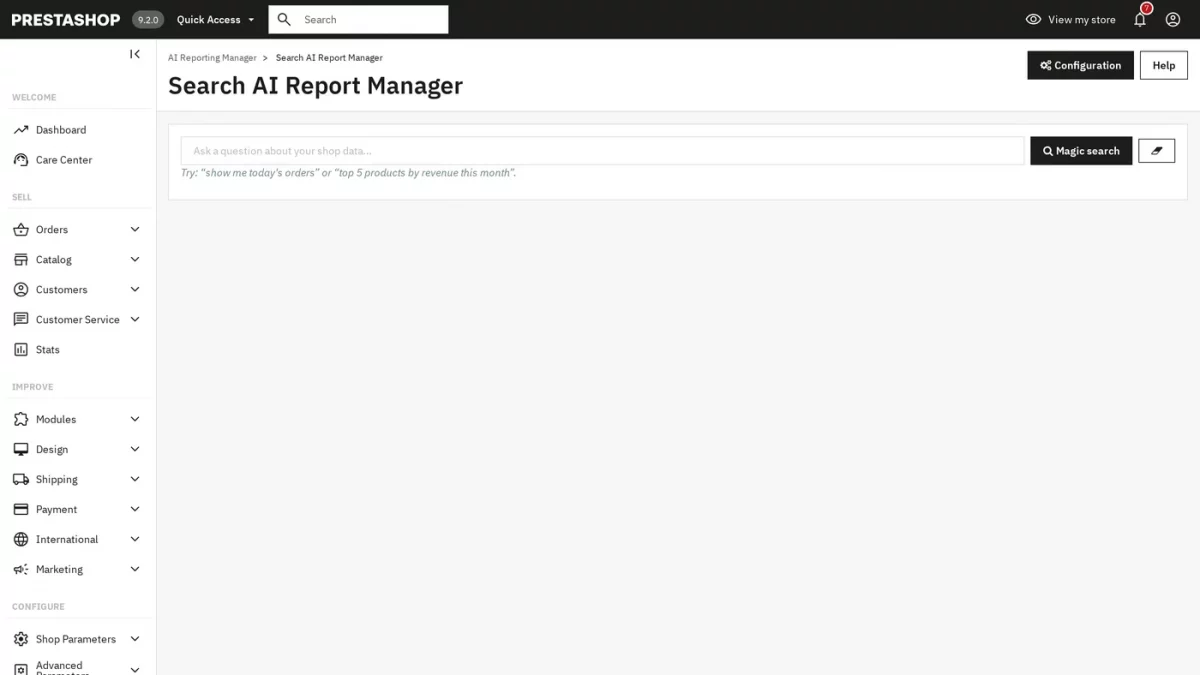
Go to AI Reporting › AI Reporting Manager › Search AI Report Manager.
Type a question in plain English — the placeholder suggests “show me today’s orders” or “top 5 products by revenue this month” — and click Magic search.
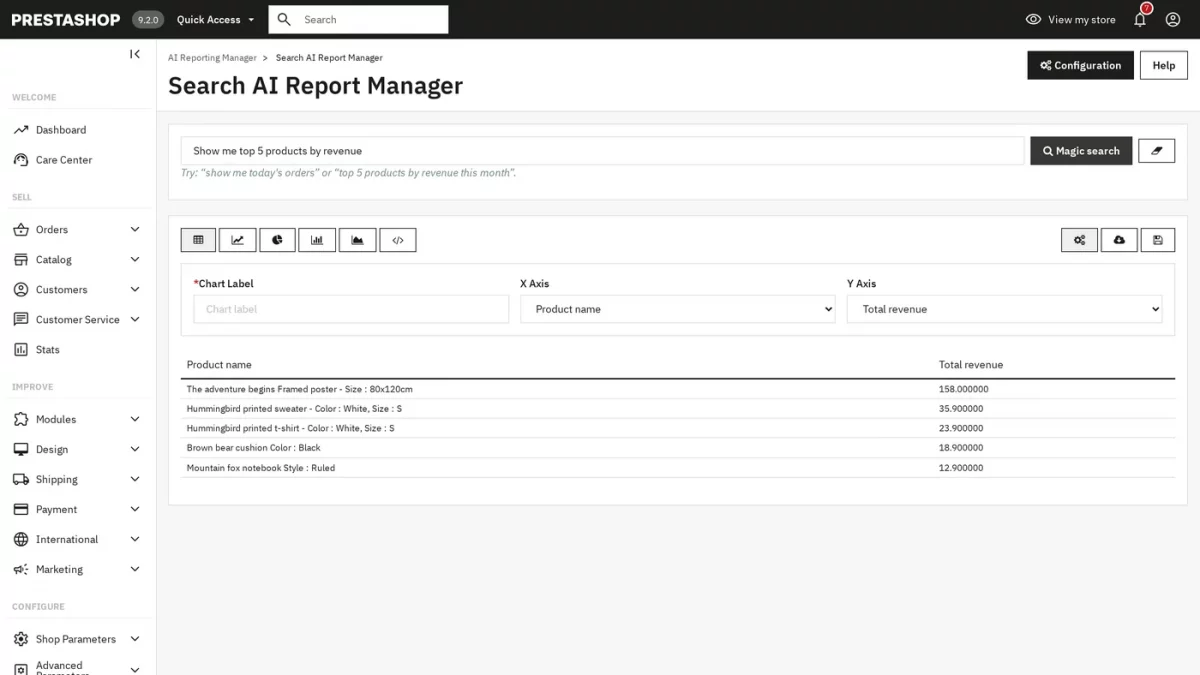
The result appears as a table by default. Use the row of icons above it to switch to a line, pie, bar or area chart, or to the </> view to read the generated SQL.
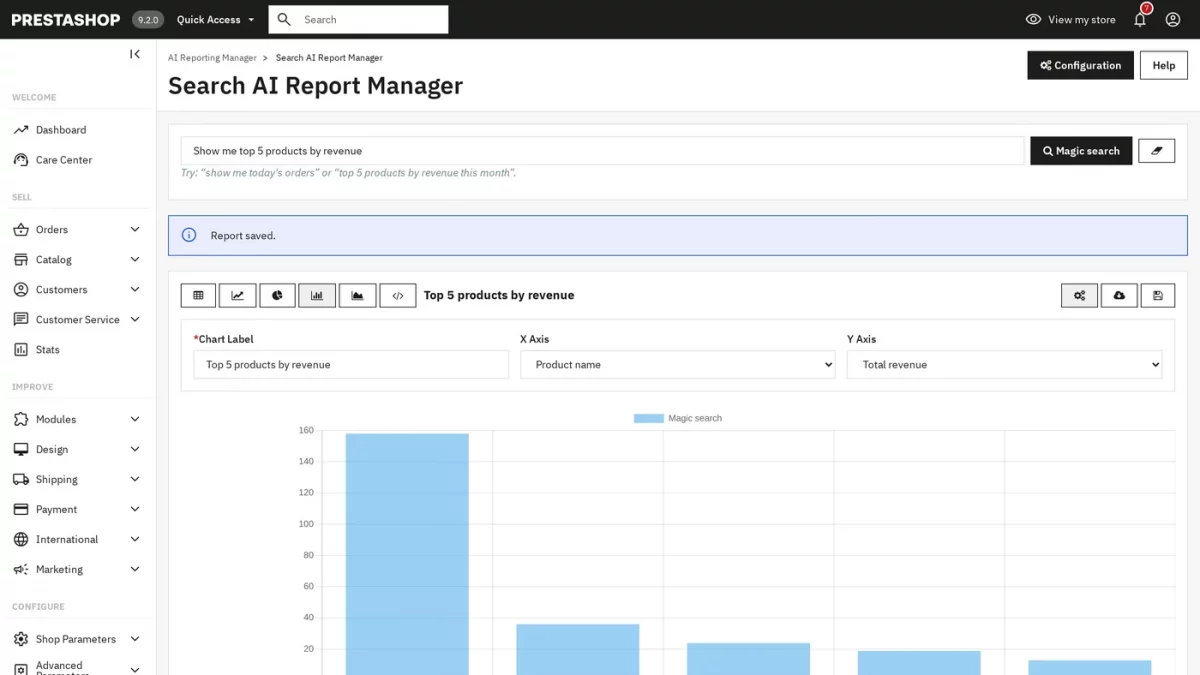
On a chart view, set **Chart Label, X Axis and Y Axis**, then use the download icon to save the table as CSV or the chart as a PNG image.
The same result on each chart view:
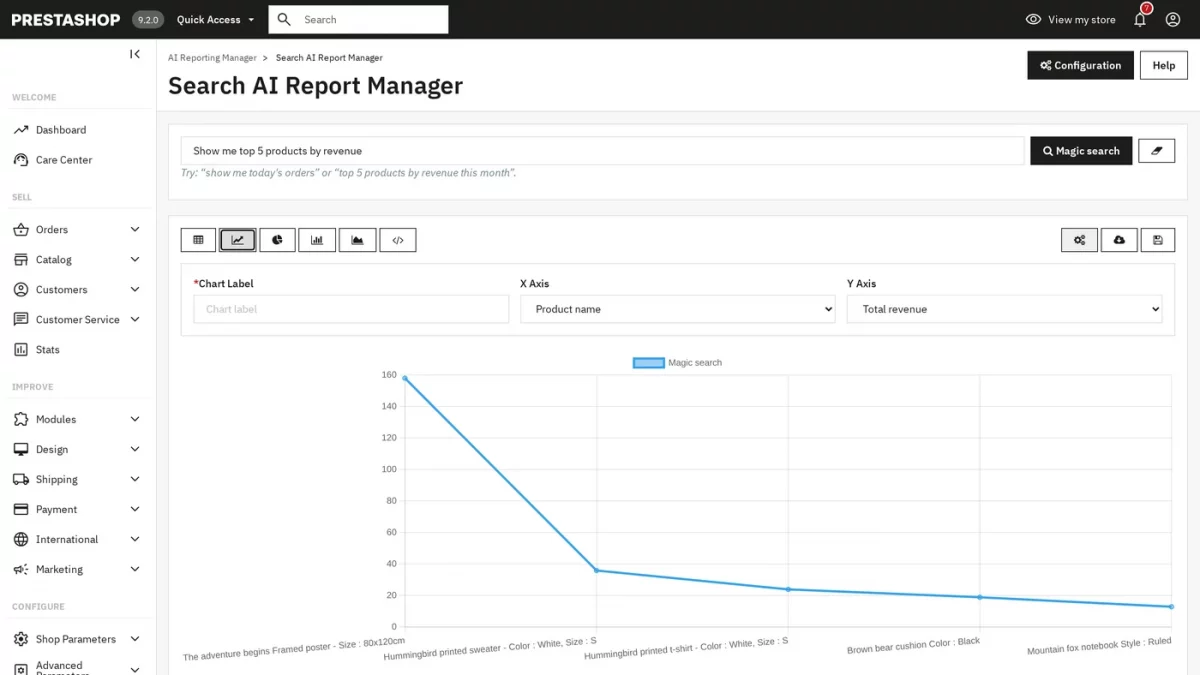
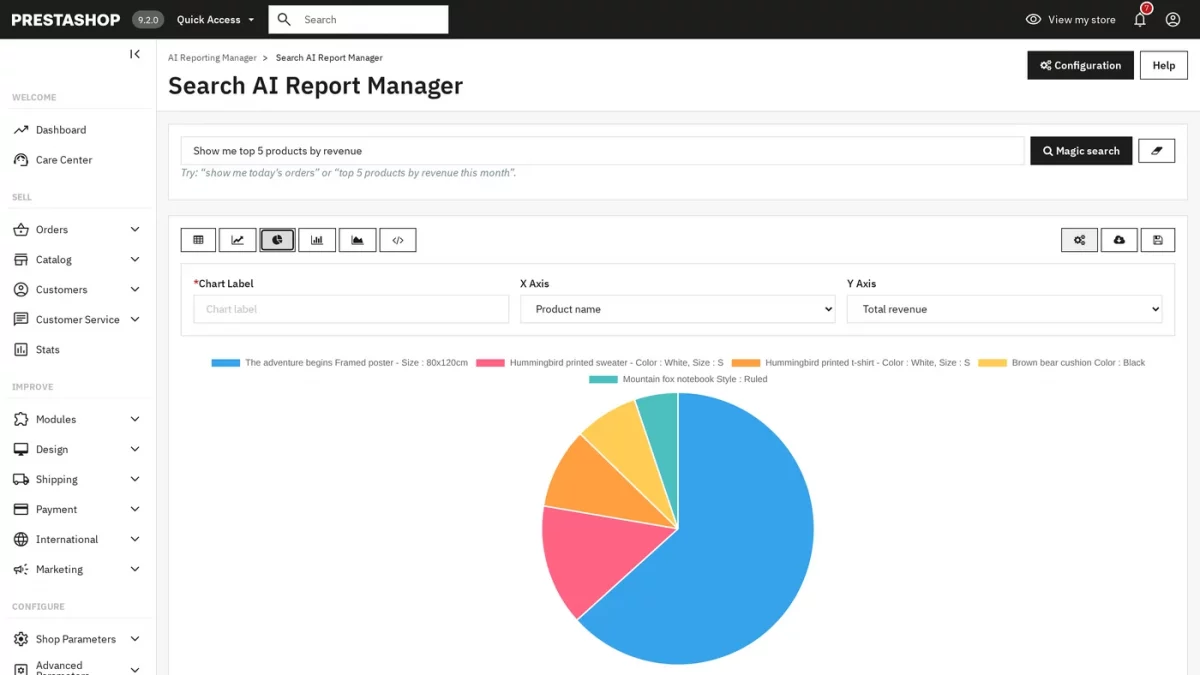
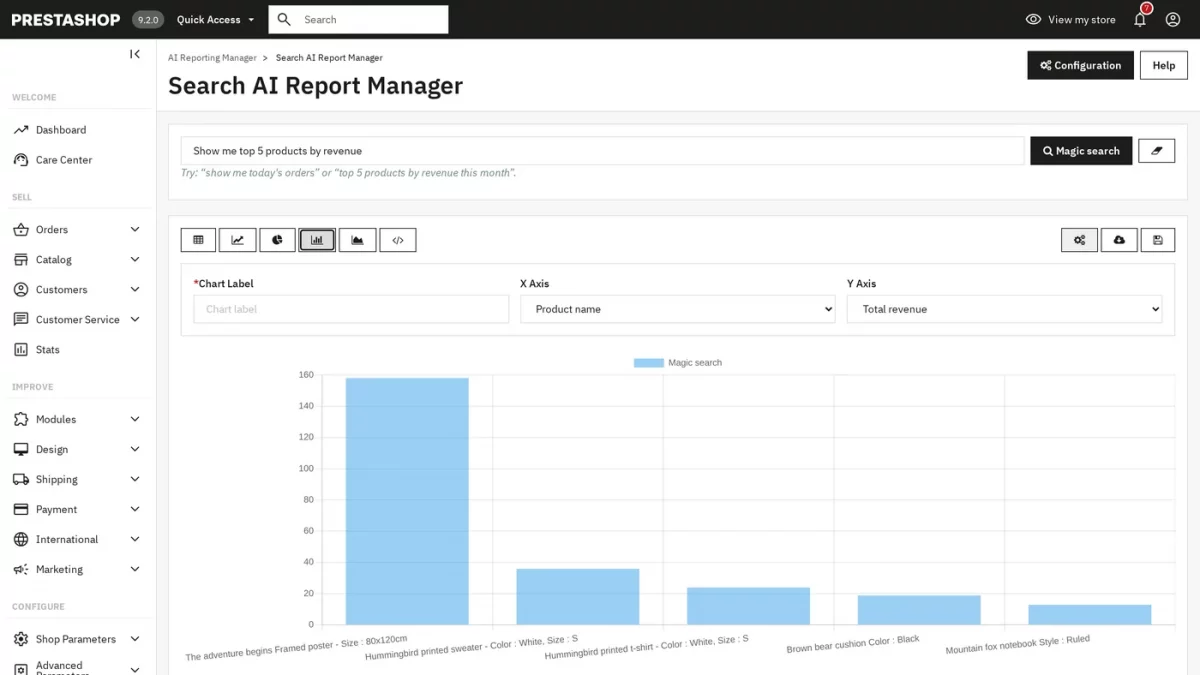
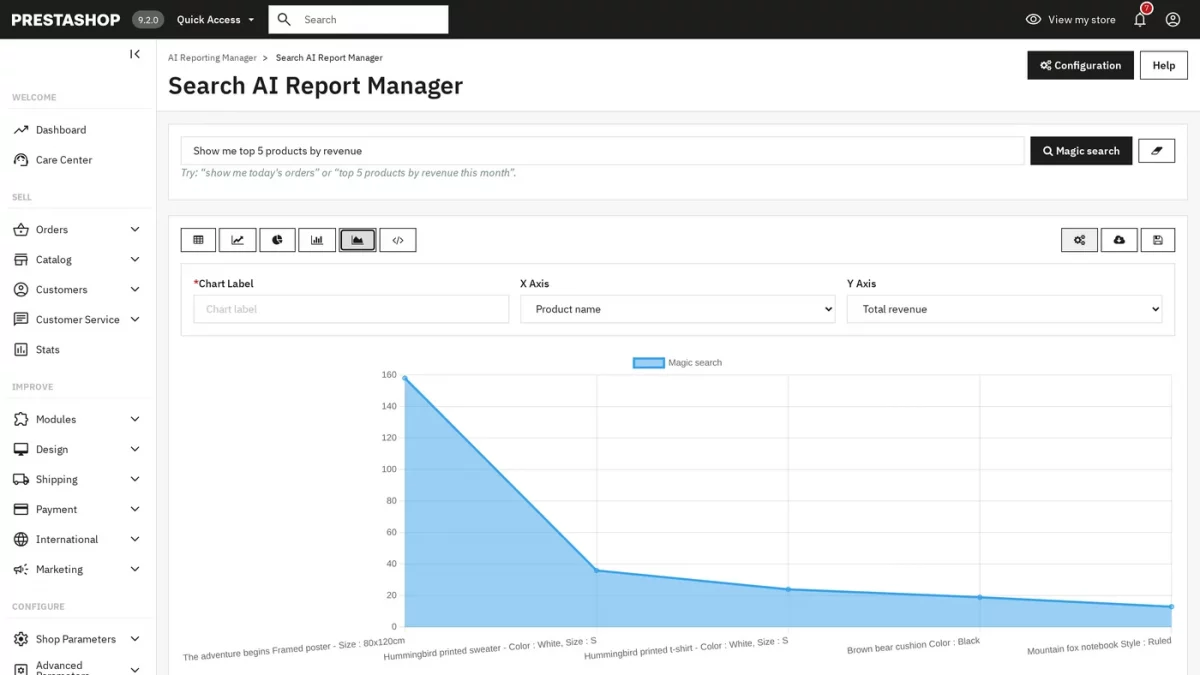
The </> view shows the SQL the AI generated for the question, with a Copy button.
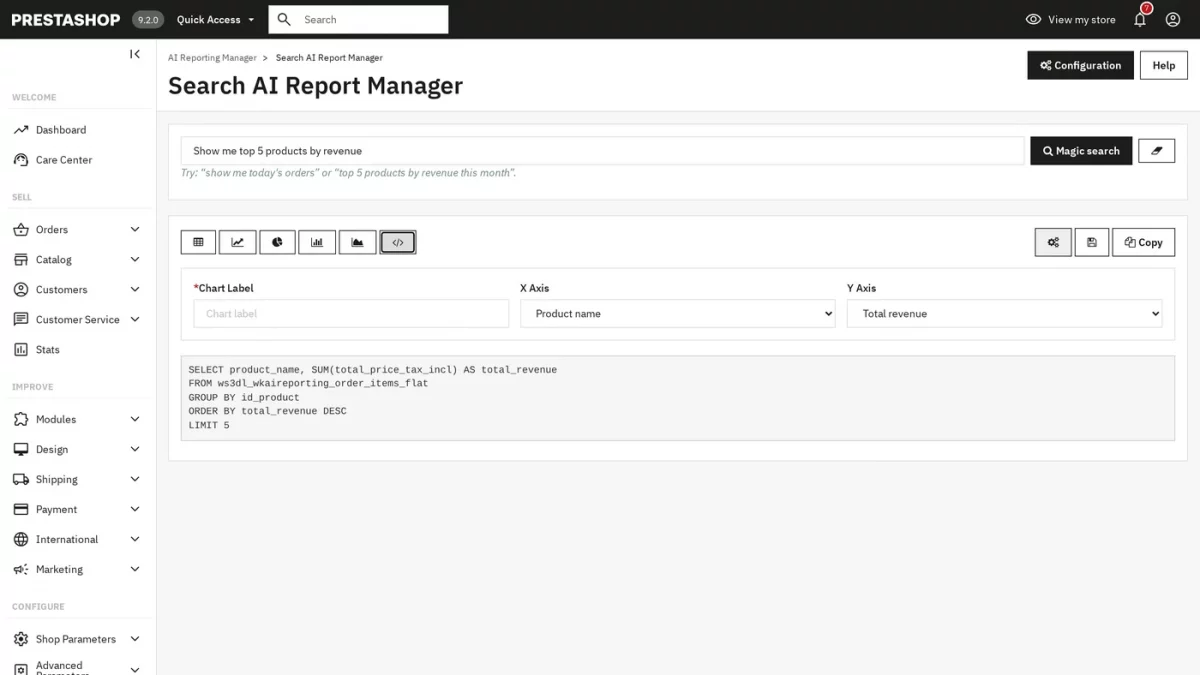
To keep a report, type a name into Chart Label and click the save icon. A confirmation banner appears once the report is stored.
Saved AI Report Manager
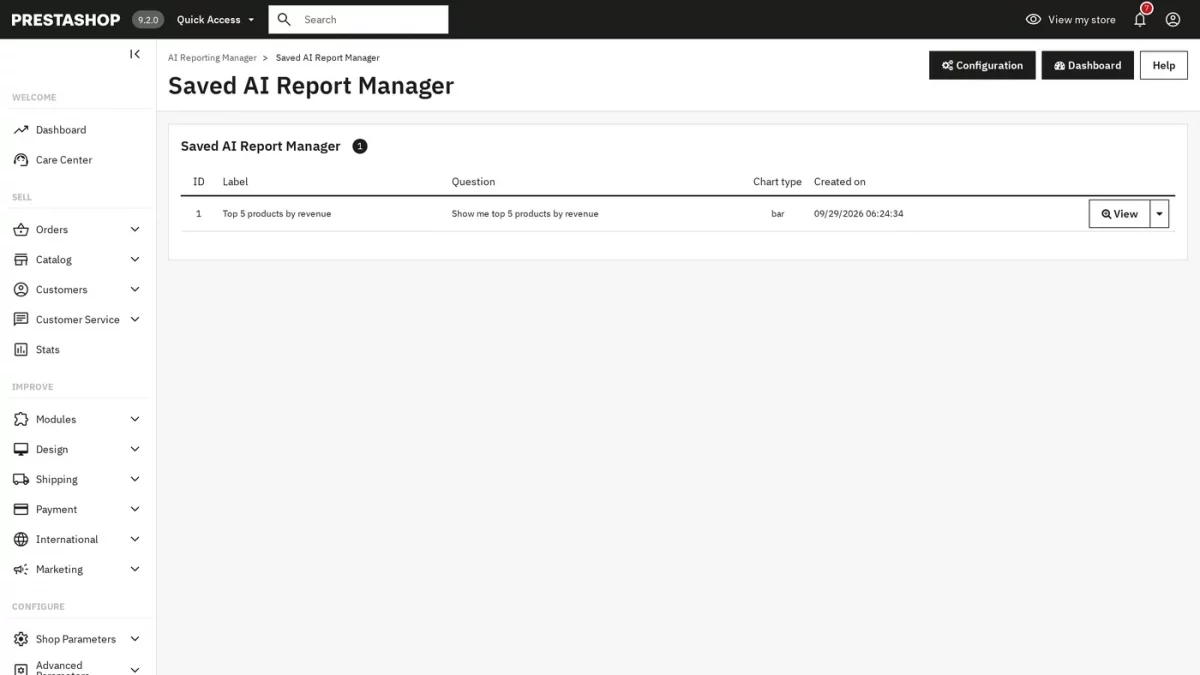
Go to AI Reporting › AI Reporting Manager › Saved AI Report Manager to see every report you have saved, with its label, original question, chart type and creation date.
Use View on a row to open it, or the dropdown next to it to delete it.
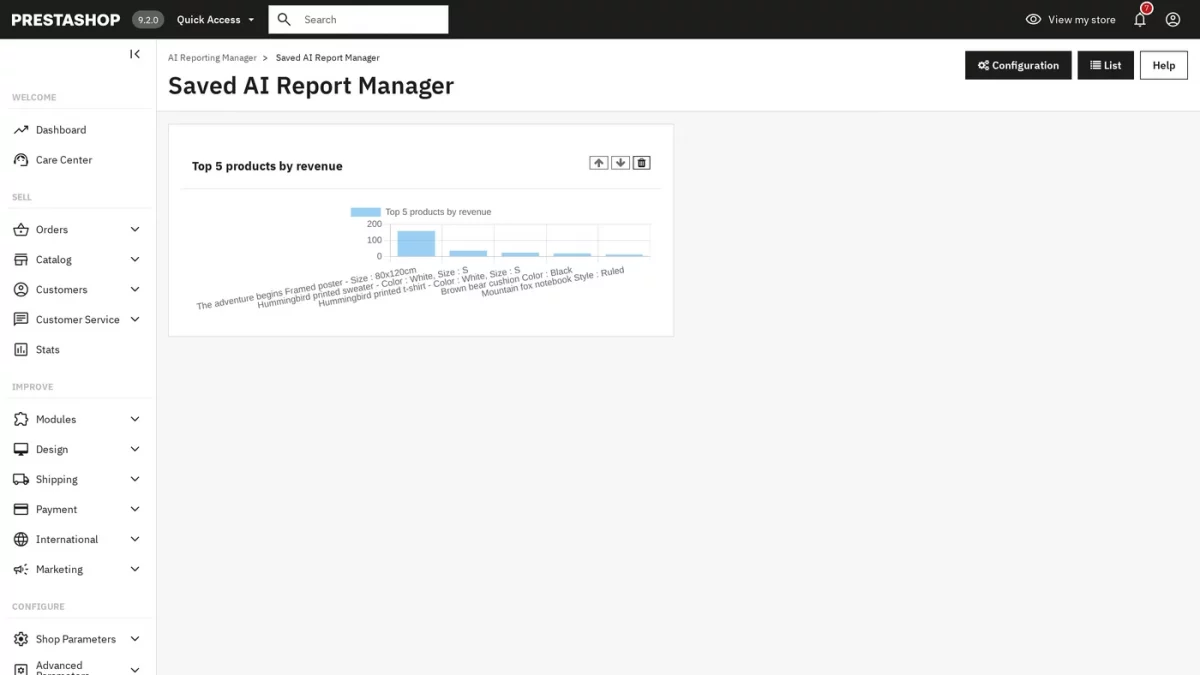
Click Dashboard in the top right to switch to card view, where every saved report re-runs and redraws automatically. Reorder cards with the up and down arrows, or remove one with the trash icon.
Support
For any kind of technical assistance or query, please raise a ticket at webkul.uvdesk.com or send us a mail at [email protected].
You can also explore our PrestaShop development services and our range of PrestaShop addons.
Current Product Version - 1.0.0
Supported Framework Version - 9.x.x, 8.x.x, 1.7.x.x

Be the first to comment.