Introduction
Odoo ZKTeco Attendance Integration connects ZKTeco biometric devices with Odoo to automate attendance management.
It syncs employee check-in, check-out, and break records directly with Odoo, reducing manual work and improving accuracy.
The module supports manual sync, scheduled cron, real-time webhook, and ADMS cloud synchronization for flexible attendance management.
Features
- Easily connect ZKTeco biometric devices with your Odoo instance.
- Synchronize attendance using manual, cron, webhook, or ADMS methods.
- Automatically update employee attendance records every ten minutes.
- Track employee check-ins, check-outs, and break times accurately.
- Enroll or remove employees directly from biometric devices.
- Prevent duplicate punches using configurable attendance control settings.
- Automatically synchronize the device timezone with your Odoo timezone.
- Fetch enrolled biometric device users directly into Odoo automatically.
- Monitor device connection status with automatic ADMS disconnect detection.
- Sync users across multiple biometric devices easily, including employee data and fingerprints.
Installation
- Once you purchase the App from the Webkul store, you will receive a link to download the module’s zip file.
- Extract the file on your system after the download finishes. As a result, you will be able to see a folder named- ‘wk_zkteco_attendance_management’.
- Copy and paste this folder inside your Odoo Add-Ons path.
- Now, open Odoo App and click on the Settings menu. Here, click on Activate Developer Mode.
- Then, open the Apps menu and click on ‘Update Modules List.’
- In the search bar, remove all the filters and search ‘wk_zkteco_attendance_management’.
- You will be able to see the module in the search results. Click on ‘Activate’ to install it.
Workflow
Manual Connection
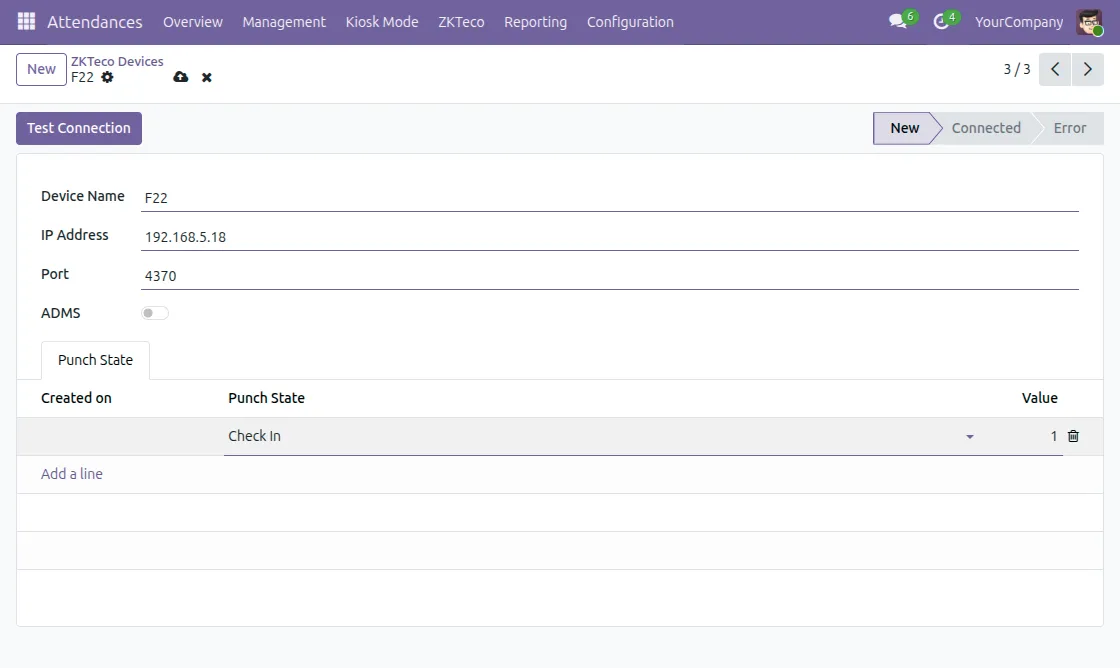
1. After installing the Odoo ZKTeco Attendance Integration module, go to Attendance → ZKTeco → Devices, create a device, and enter its IP Address and Port Number to connect it with Odoo.
Next, configure the Punch States by entering the same punch values configured on your biometric device.
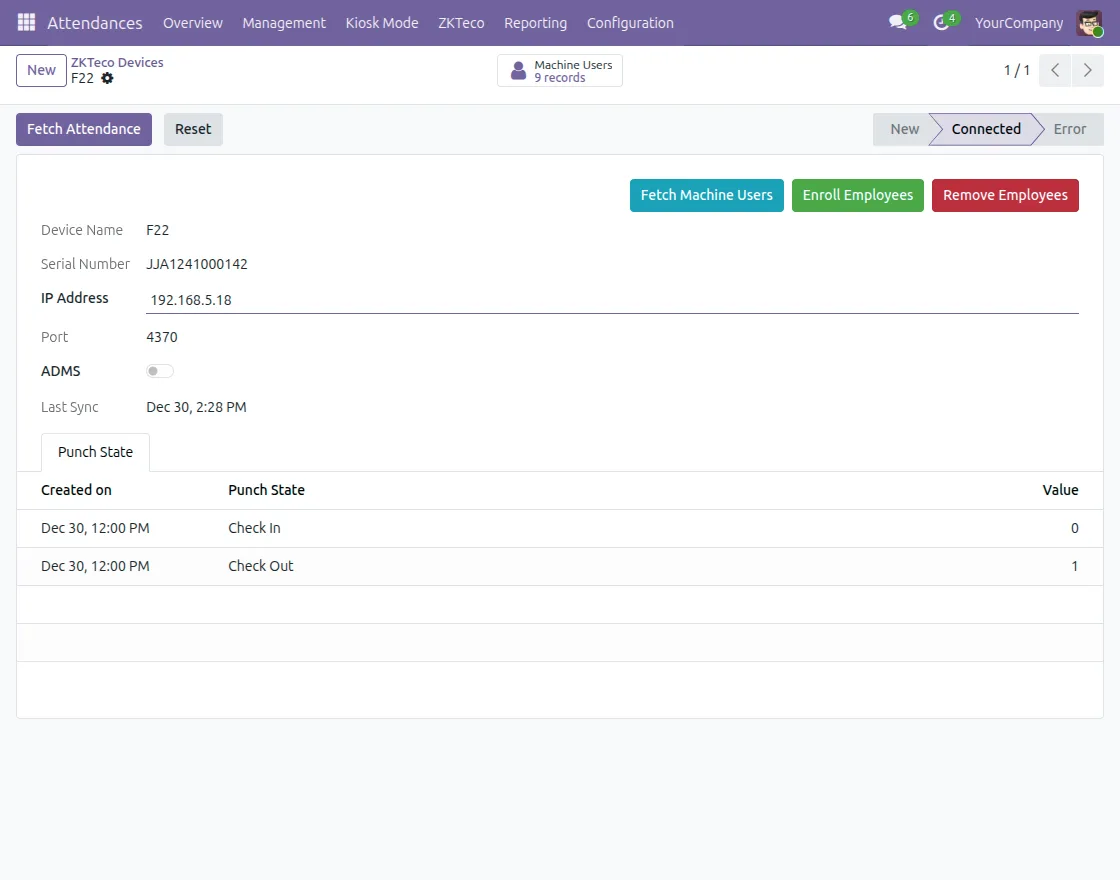
2. Once the device is connected, click the Fetch Attendance button to import attendance records from the biometric device into Odoo.
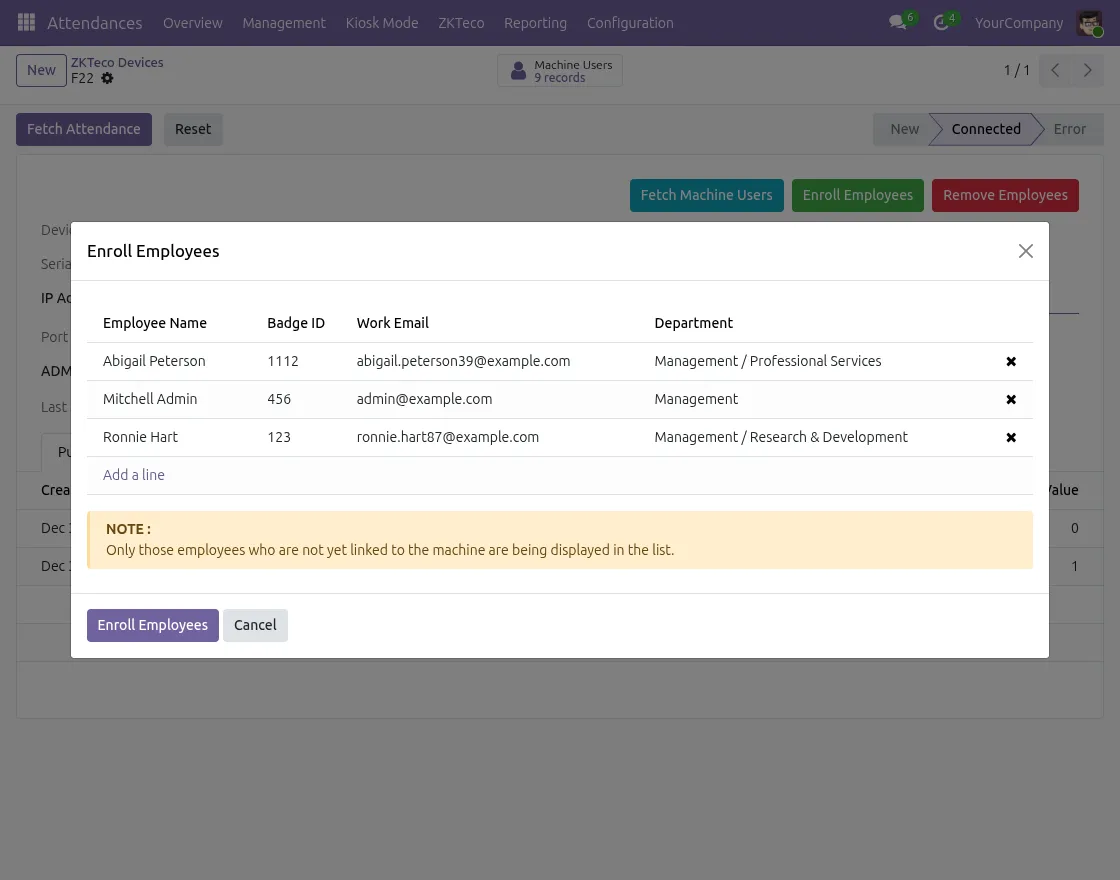
3. Click the Enroll Employees button, add the employees you want to enroll, and confirm the action. The added employees will be enrolled in Odoo.
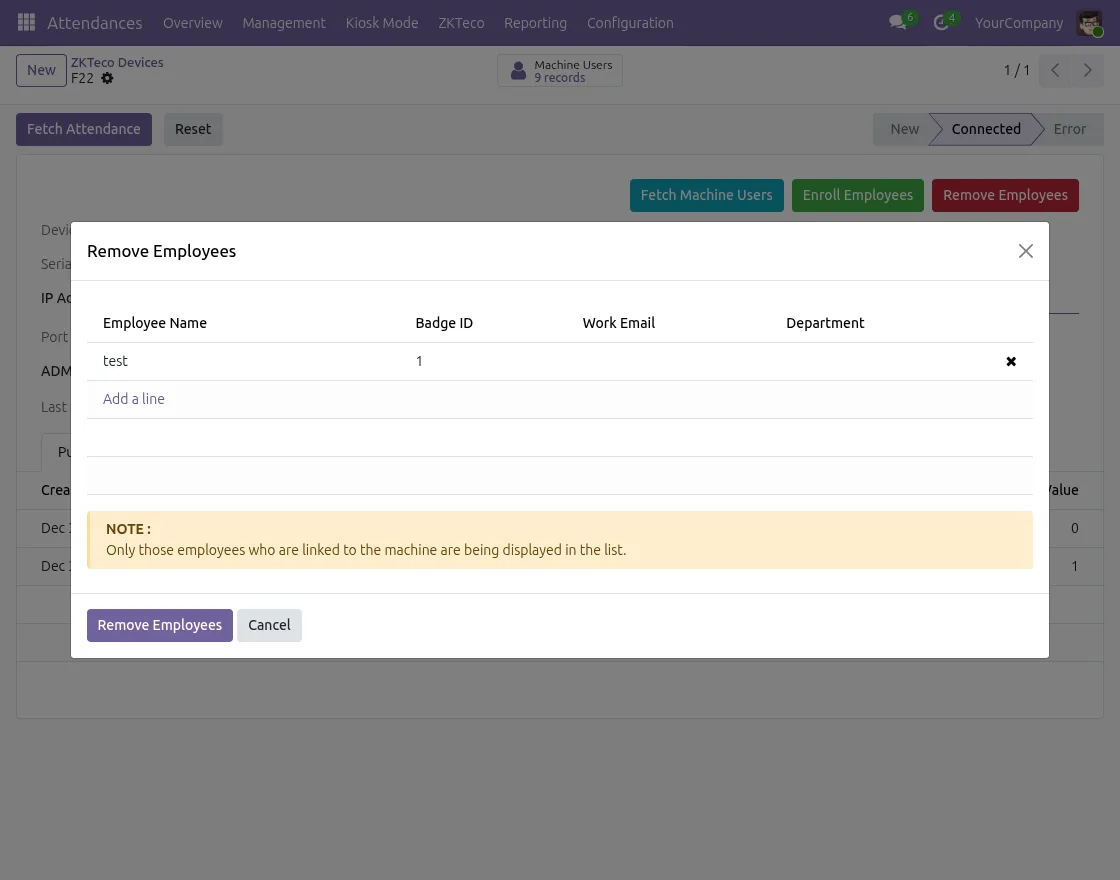
4. To remove enrolled employees from Odoo, click on Remove Employees, add the employees, and click Remove Employees.
ADMS Connection
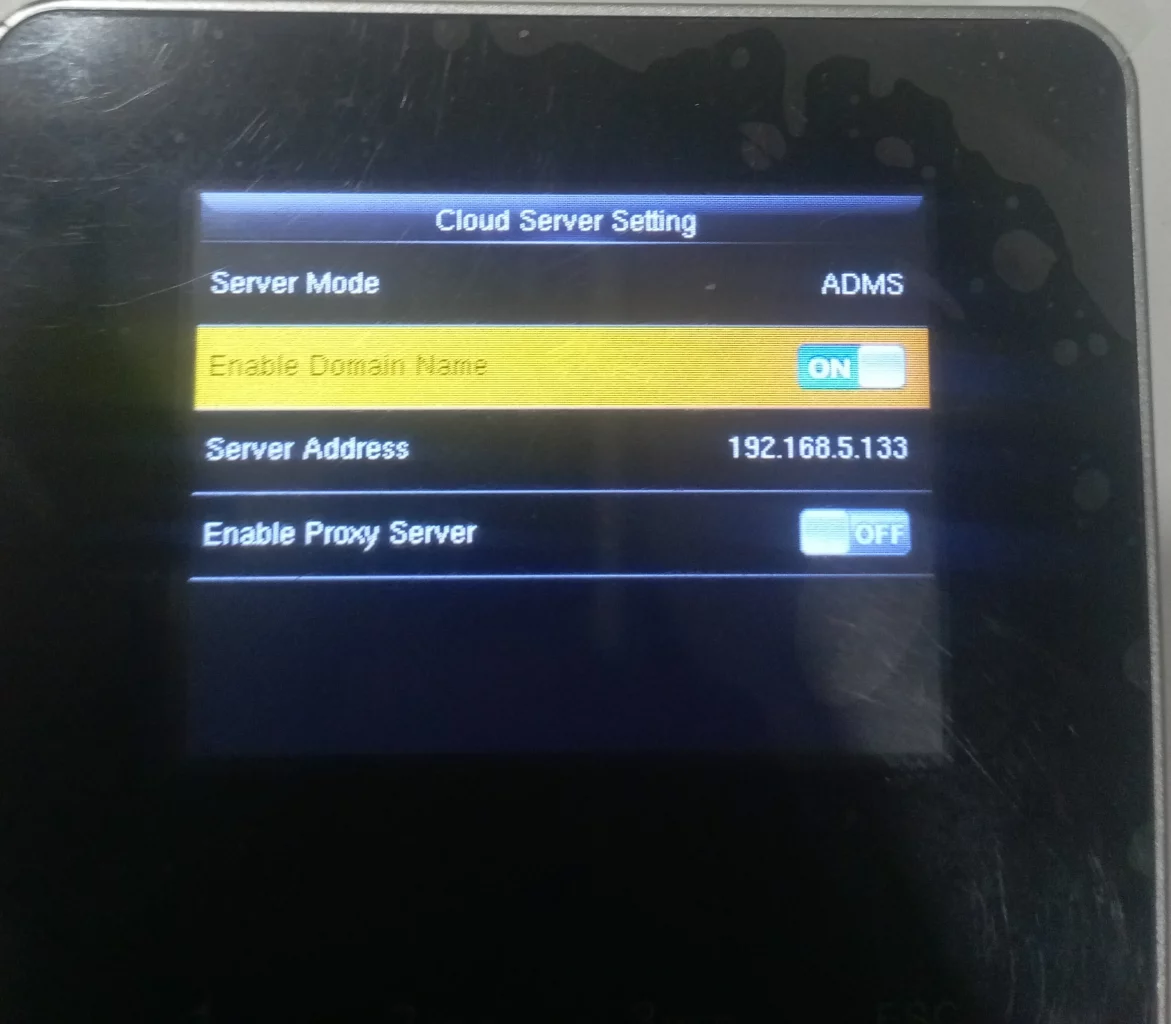
5. To connect a device using ADMS, navigate to Communication → Cloud Server Settings on the biometric device. Enable Domain Name, and add the Server Address.
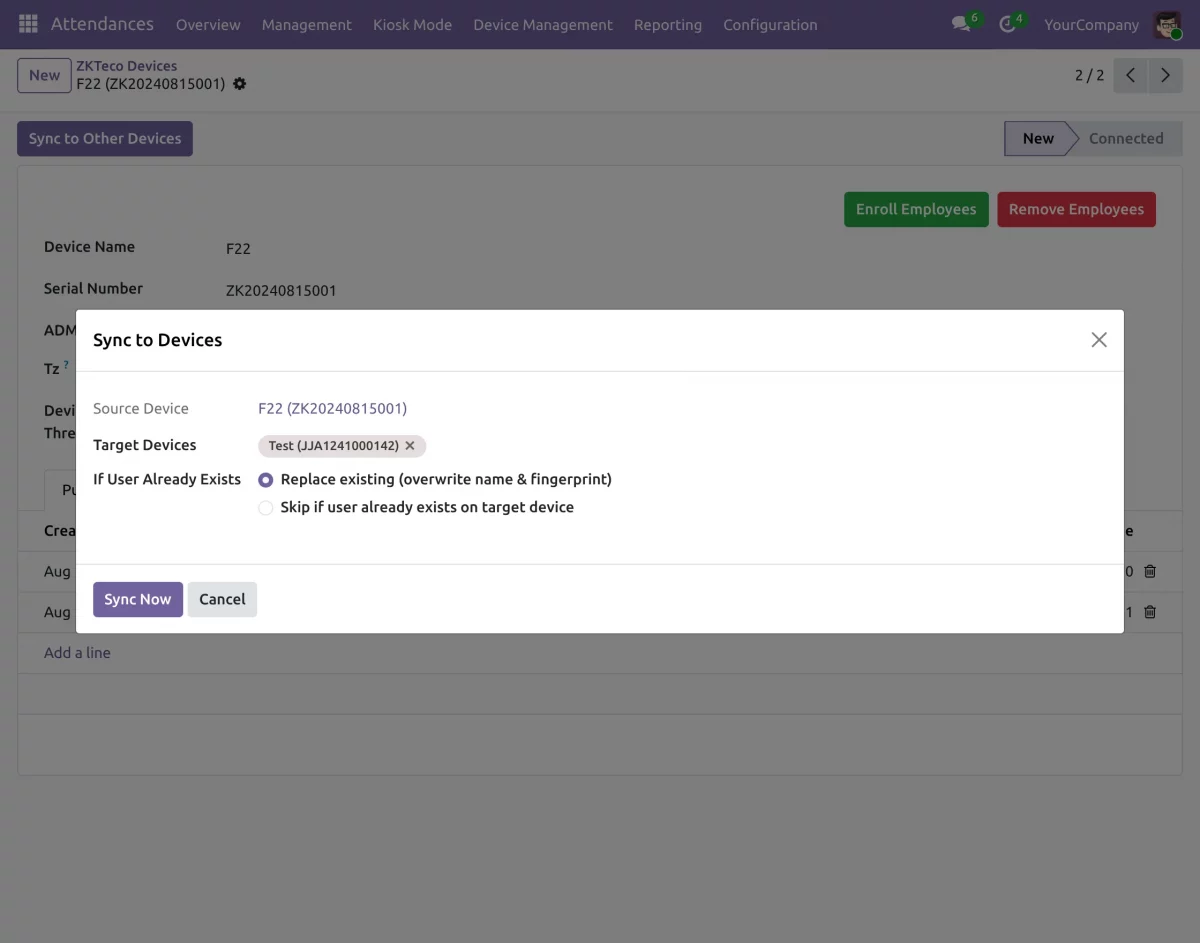
6. Select the Source Device and Target Device(s), then click Sync to transfer employee data and fingerprints.
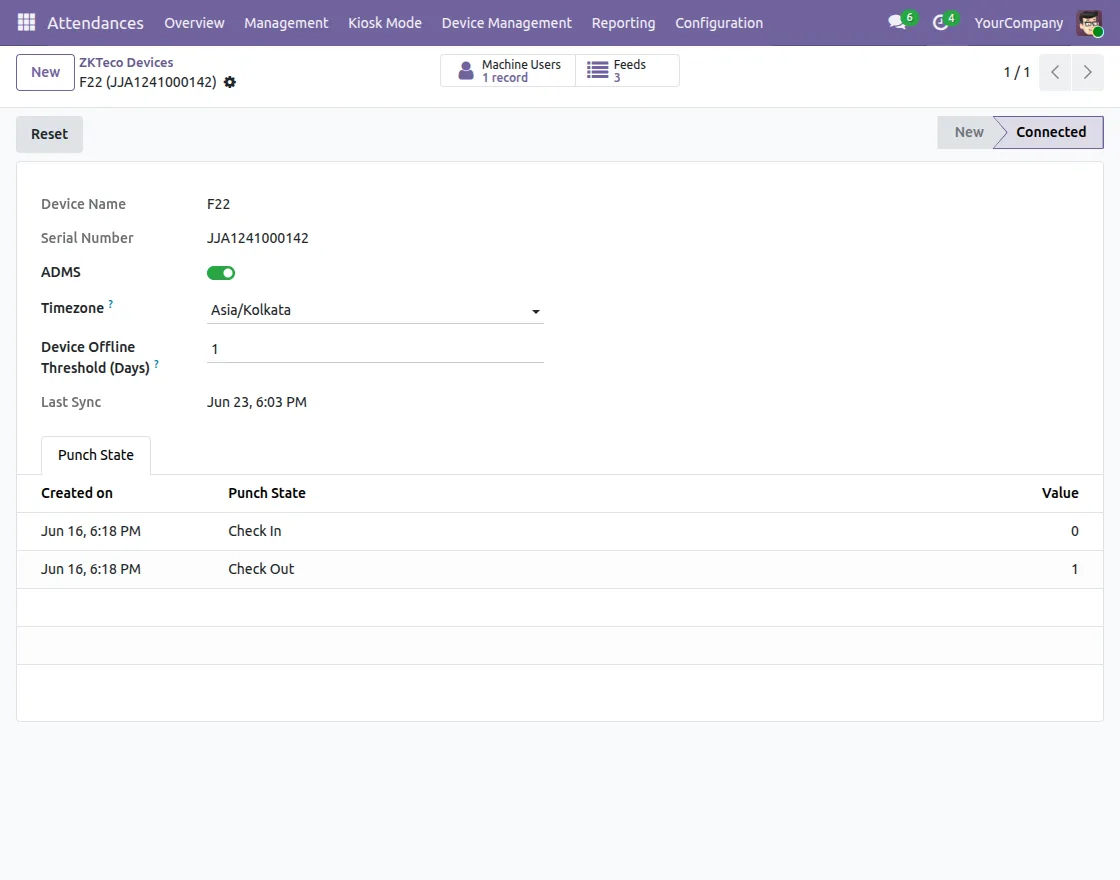
7. Next, go to Attendance → ZKTeco → Devices in Odoo, enable ADMS, enter the device Serial Number, and configure the Punch States using the same values set on your biometric device.
Save the device configuration to establish the ADMS connection.
Webhook
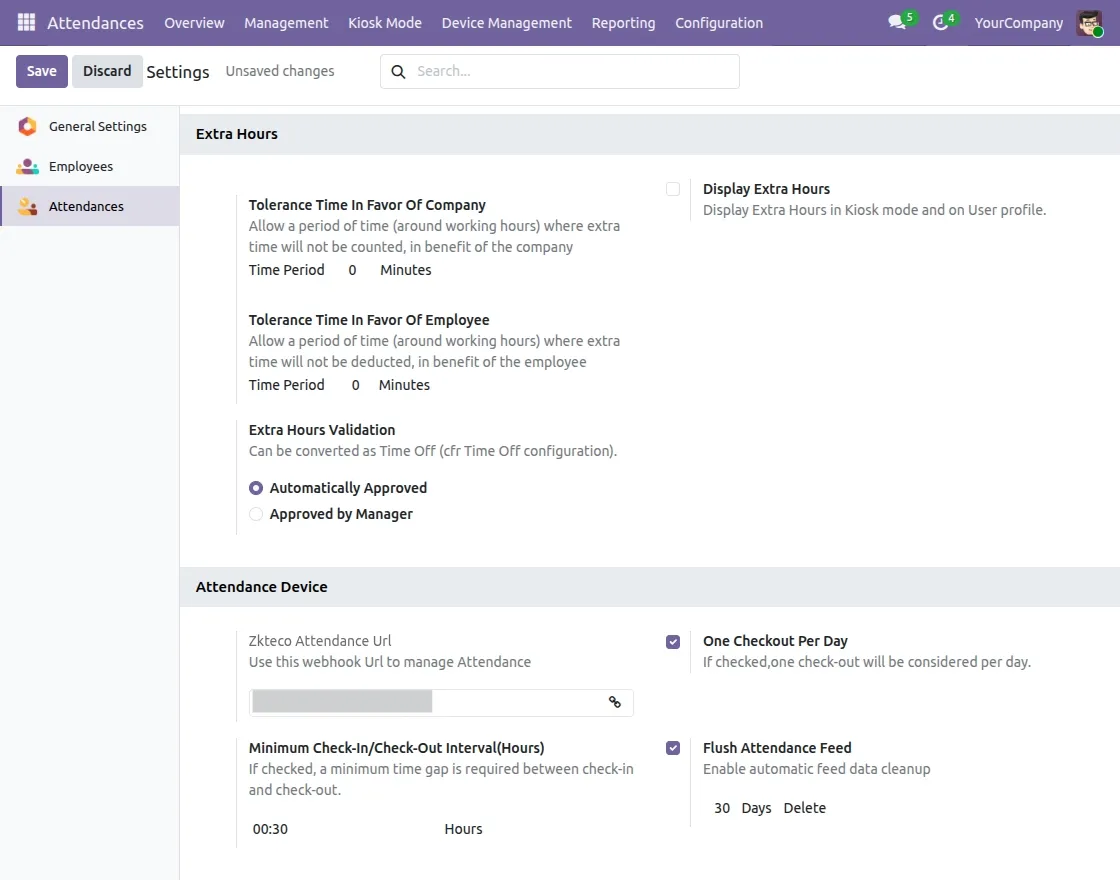
8. To connect through Webhook, navigate to Settings and in the Attendance Device setting, copy the Webhook URL and paste it into the API URL field in EasyTime Pro.
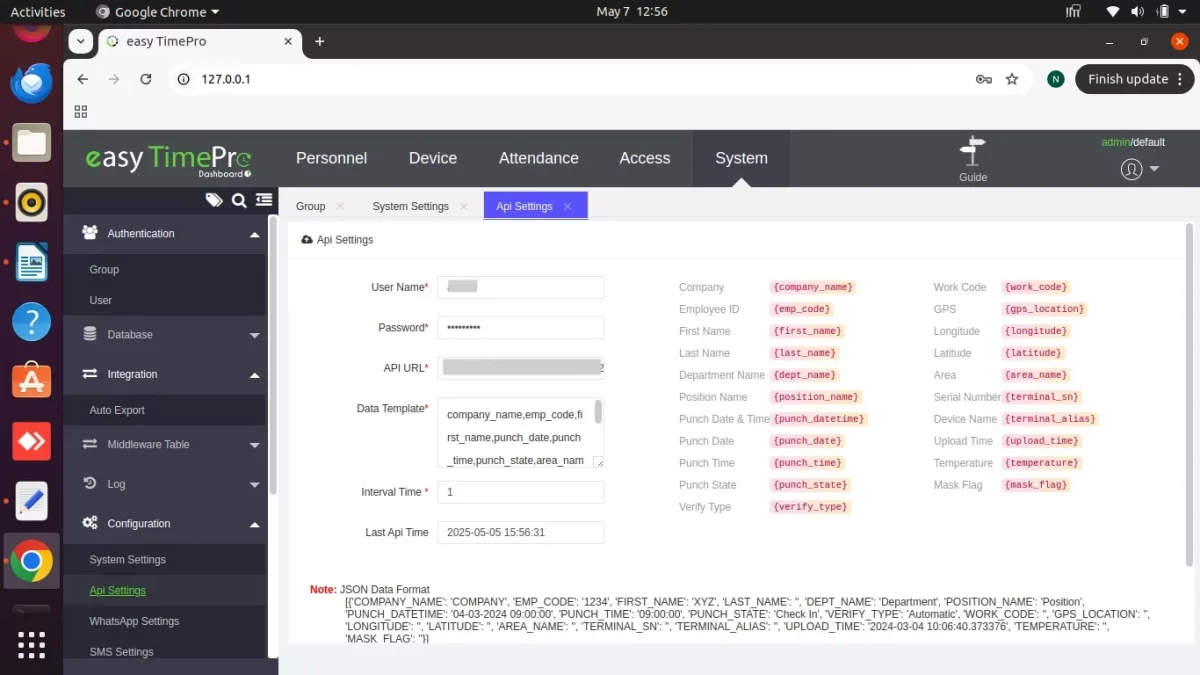
9. In EasyTime Pro, navigate to configuration -> API settings, enter the Username, Password, and API URL to authenticate the connection with Odoo.
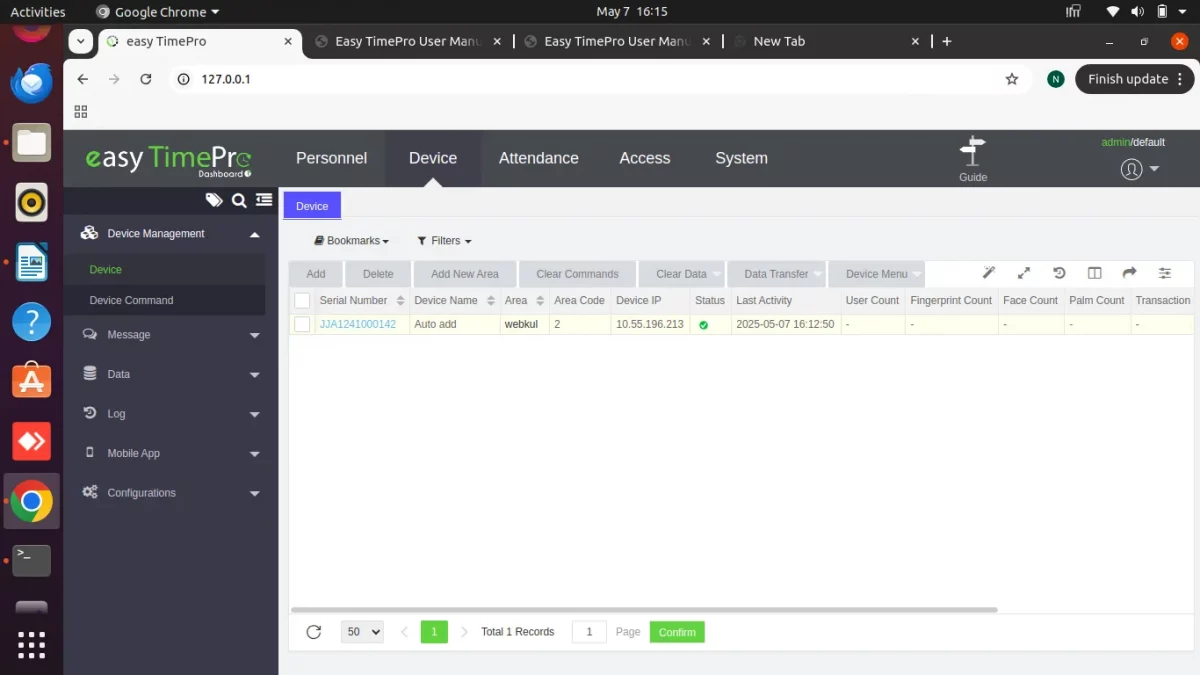
10. Navigate to Device in EasyTime Pro and enter the required biometric device details.
Once the device is configured, EasyTime Pro and the biometric device are successfully connected, and attendance records will be synchronized with Odoo through the webhook.
NEED HELP?
Hope you find guide helpful! Please feel free to share your feedback in the comments below.
If you still have any issues/queries, please create a ticket at the UV Desk.
I hope this helps. In case of any further queries, contact us at our support mail.
Thanks for paying attention!!
Current Product Version - 1.0.2
Supported Framework Version - Odoo V18, V19

2 comments
We have created a ticket on your behalf and our team will connect with you soon regarding your queries.
Thanks and Regards,
Team Webkul