NOTE: This module describes the Workflow of Odoo Boomcast SMS Gateway. To know the workflow of the Base module, read User Guide for Odoo SMS Notification.
INTRODUCTION
Simplify SMS notifications with Odoo Boomcast SMS Gateway!
Marketing is essential for business promotion, so choosing a suitable advertising method is critical for business growth. SMS is one of the fastest and most affordable ways to promote business.
SMS enables you to send offers, discounts, promotional messages, and invoice updates on users’ mobile numbers.
Odoo Boomcast SMS Gateway allows you to send messages to customers using Boomcast. Moreover, in the backend, you can set various templates for global and condition-based use. Also, you can view the status of every sent message.
Further, Boomcast permits you to send SMS to individuals or groups, so you never miss an opportunity to reach out to customers.
NOTE: Odoo Boomcast SMS Gateway Module works in conjunction with the following module:
First, you must install this module in your system for Odoo Boomcast SMS Gateway module to work correctly.
FEATURES
- The module allows integration with Boomcast.
- Boomcast operation area depends on the chosen service.
- Create SMS groups for sending bulk messages.
- Select and send messages to SMS groups.
- Using the SMS form, send messages to customers or vendors.
- Also, you can send messages to groups or multiple customers.
- Admin can assign access to SMS features at the user level.
- Moreover, users with the SMS feature enabled can send messages to people in Odoo.
- Create a template or use an existing one for sending SMS.
- Choose to use the template Globally or based on Condition.
- Global templates are available for use so you can send messages to all users and groups.
- Condition-based templates are only available when a particular condition is met.
- Choose a condition from the backend and set a template for SMS.
- Define conditions for sending SMS automatically for efficiency.
- Condition-based SMS is automatically sent to customers when the condition is met.
- In the backend, Odoo maintains the history of all the sent SMS.
- Users can view the details of any record by clicking it.
- Moreover, you can enable auto-delete features for the messages.
- After you enable the auto-delete feature, the system will auto-delete the sent SMS list and delivery status reports.
- Admin can view the status of all the sent SMS.
INSTALLATION
- Once you purchase the App from Webkul store, you will receive the link to download the zip file of the module.
- Extract the file on your system after the download finishes. You will be able to see a folder named- ‘boomcast_gateway.’
- Copy and paste this folder inside your Odoo Add-Ons path.
- Now, open the Odoo App and click on the Settings menu. Here, click on Activate the Developer Mode.
- Then, open the Apps menu and click on ‘Update Modules List.’
- In the search bar, remove all the filters and search ‘boomcast_gateway.’
- You will be able to see the module in the search result. Click on ‘Install’ to install it.
WORKFLOW
CONFIGURATION
1. Firstly, log in to the Odoo backend and go to ‘Settings,’ scroll to the bottom of the page and ‘Activate the Developers Mode.’

2. Next, open the ‘SMS’ settings and enable ‘Are you managing country calling code with customer’s mobile number?’ (enable it only if you are handling the country calling code with the customer’s mobile number).
2.1. Click the checkbox next to ‘Install Boomcast SMS Gateway’ for installing Boomcast.
2.2. Additionally, click on the ‘Configure SMS Gateway Account’ to open the new page.

3. On the new page, Fill in the details and click the ‘Save’ button. Also, choose Boomcast in the ‘SMS Gateway’ section.

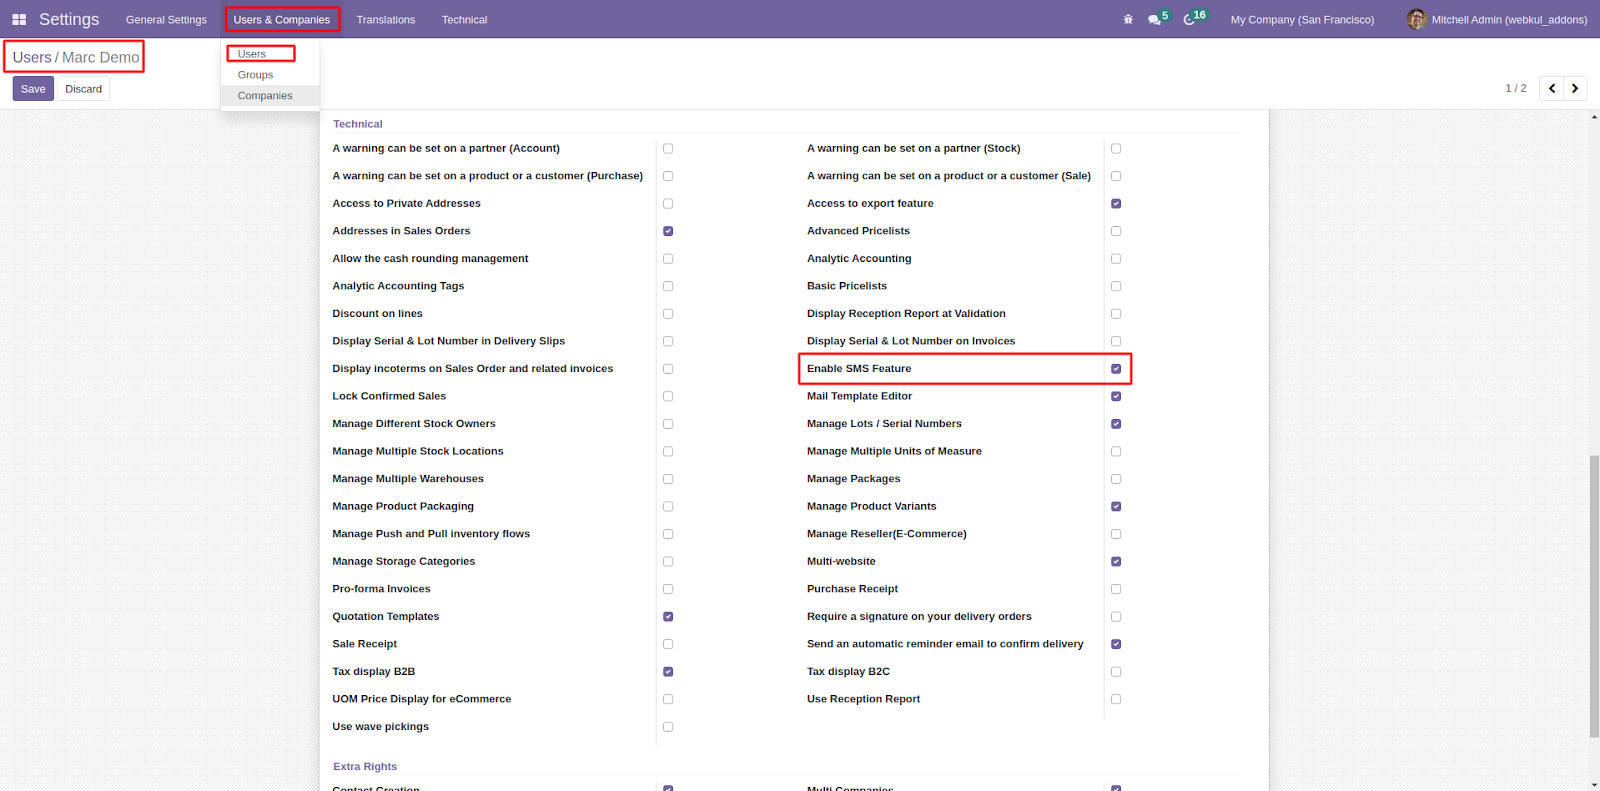
4. After that, follow the trail ‘User & Companies> Users’ and open any users. Locate ‘Enable SMS Feature’ and tick the box next to it.
CREATING TEMPLATES AND SENDING SMS
5. Once configured, go to the SMS menu, and on the SMS Gateway Dashboard, you can view the details of every message.

6. Now, go to the ‘Templates> Create,’ enter the details and click the ‘Save’ button.
6.1. Global- Ticking the box will apply the template globally for all SMS.
6.2. Auto Delete- Enabling this will delete all messages.

7. SImilarly, while creating a template, if the box next to global is unticked, then the system will use a condition-based template. Moreover, in the ‘Conditions’ block, choose the condition for sending SMS, choose Language, and in the ‘Content’ tab, enter the design code for the template.

8. Next, click on the ‘Send SMS’ menu and fill in all the details. In the ‘SMS’ tab, choose the template and click the ‘Send Now’ button to send the message immediately, or click ‘Save as Draft’ to send the message later on.

9. In the same way, you can create an SMS form for Multiple members too. Fill in the form details and click ‘Send Now or Save As Draft.’

10. After that, go to ‘SMS Group> Create’ and fill in the group name, add members by clicking ‘Add a Line’ and choose ‘Member Type.’ Once done, click the ‘Save’ button.

11. Now, open the ‘Draft SMS’ menu to view all the drafts. Also, you can send the draft to customers by clicking the ‘Send Now’ button.

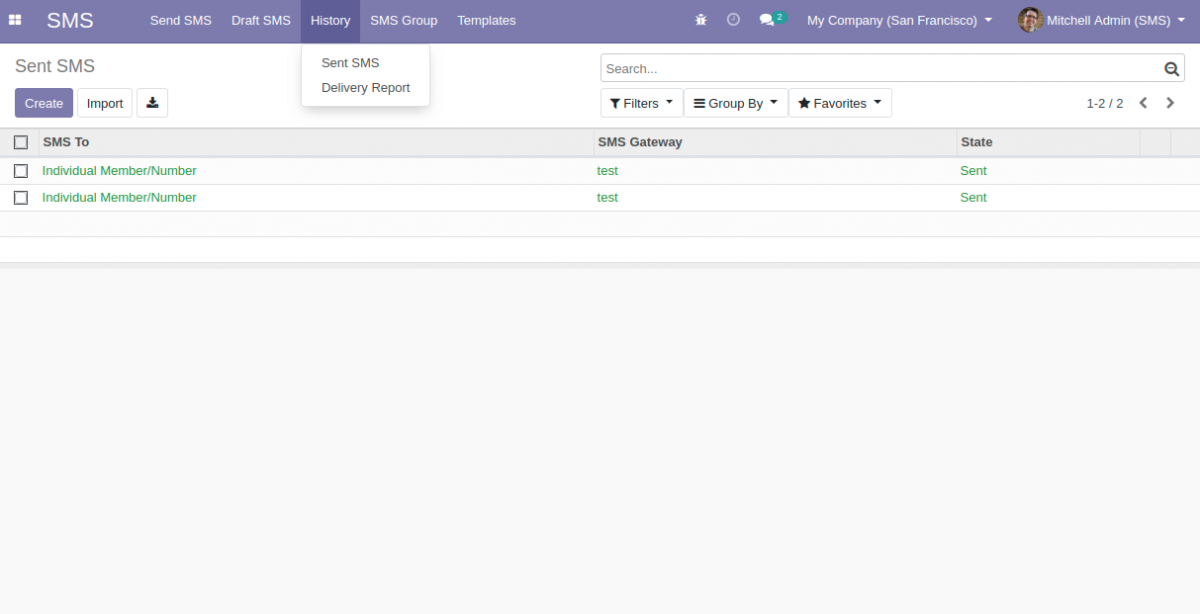
12. The ‘History’ menu has two sections:
12.1. Sent SMS- This option shows the record of all the sent SMS.
12.2. Delivery Report- With this option, you can view all the delivery reports and their status.
OTHER ODOO SMS GATEWAY MODULES
- Odoo Twilio SMS Gateway
- ClickSend SMS Gateway
- Odoo Nexmo SMS Gateway
- Odoo Netelip SMS Gateway
- Skebby SMS Gateway
- Odoo MessageBird SMS Gateway
NEED HELP?
Hope you find the guide helpful! Please feel free to share your feedback in the comments below.
If you still have any issues/queries regarding the module, please raise a ticket at https://webkul.uvdesk.com/en/customer/create-ticket/.
Also, please explore our Odoo development services & an extensive range of quality Odoo Apps.
For any doubt, contact us at [email protected].
Thanks for paying attention!!
Current Product Version - 1.0.0
Supported Framework Version - V15, V14, V13

Be the first to comment.