CS-Cart Cloudflare R2 Storage Add-on for CS-Cart allows store owners to seamlessly connect their store with Cloudflare R2 Object Storage for managing product images, media files, downloadable products, and other store assets.
Cloudflare R2 is a scalable and cost-effective cloud object storage service designed to deliver files quickly while minimizing server storage usage and bandwidth costs.
With this add-on, all media assets can be uploaded and stored directly on Cloudflare R2 instead of the local hosting server.
This helps improve store performance, reduce server load, and efficiently manage large image catalogs for growing eCommerce businesses.
The add-on is especially beneficial for media-heavy stores, multi-vendor marketplaces, and high-traffic eCommerce websites that require reliable and optimized file storage infrastructure.
Features
- Supports CS-Cart Ultimate and CS-Cart Multi-Vendor.
- Uploads product images and media files directly to Cloudflare R2 Storage.
- Reduces local server storage consumption.
- Improves storefront speed and media delivery performance.
- Uses Cloudflare R2 as an alternative to the local file system.
- Ideal for downloadable products and media-rich stores.
- Secure cloud-based storage infrastructure.
- Optimized for high-traffic eCommerce environments.
- Supports bulk product image uploads.
- Integrated with CS-Cart Queue Handler for background processing.
- Prevents timeout issues during large image synchronization.
- Efficiently handles thousands of product images.
- Enhances scalability for growing online stores.
- Helps optimize hosting resource usage.
- Provides reliable object storage for large catalogs.
Installation
To install CS-Cart Cloudflare R2 Storage, follow these steps:
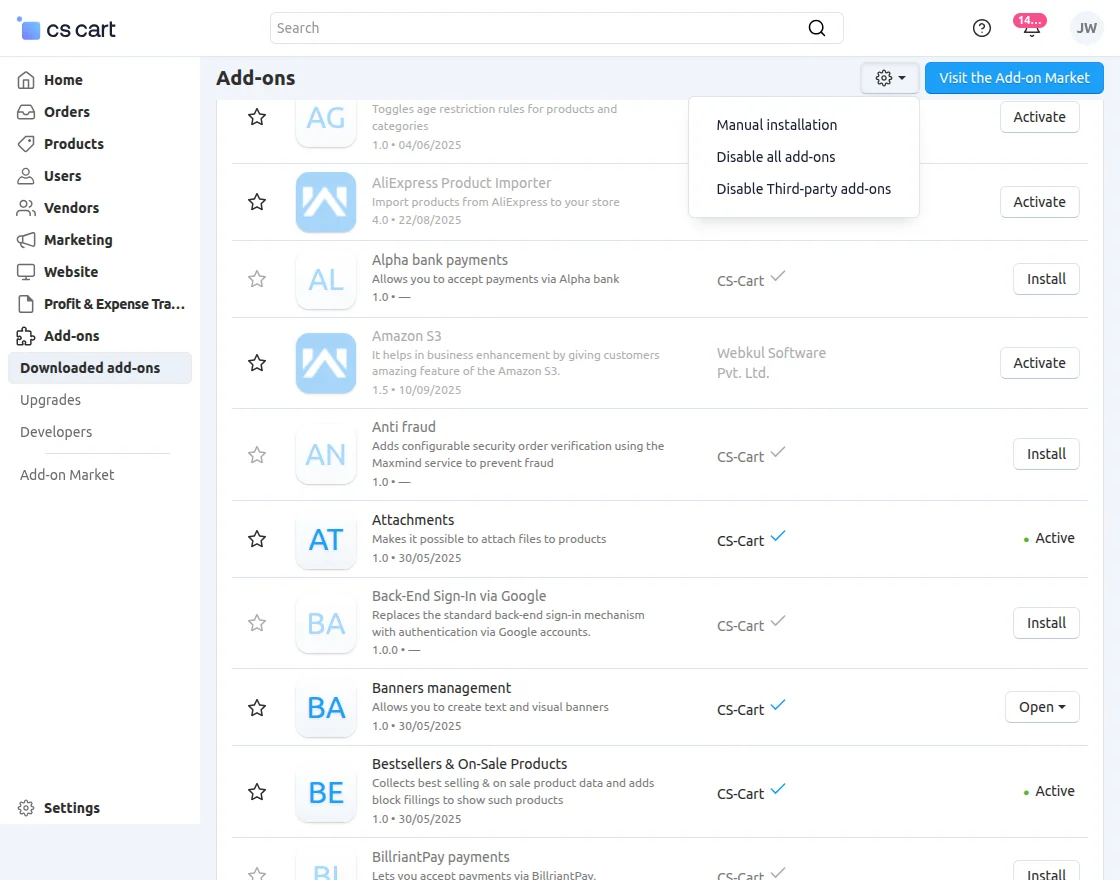
- Go to Manage Add-ons, click on the gear drop-down, and select Manual Installation.
2. Select the zip File and click on Upload&install.

Add-on Configuration
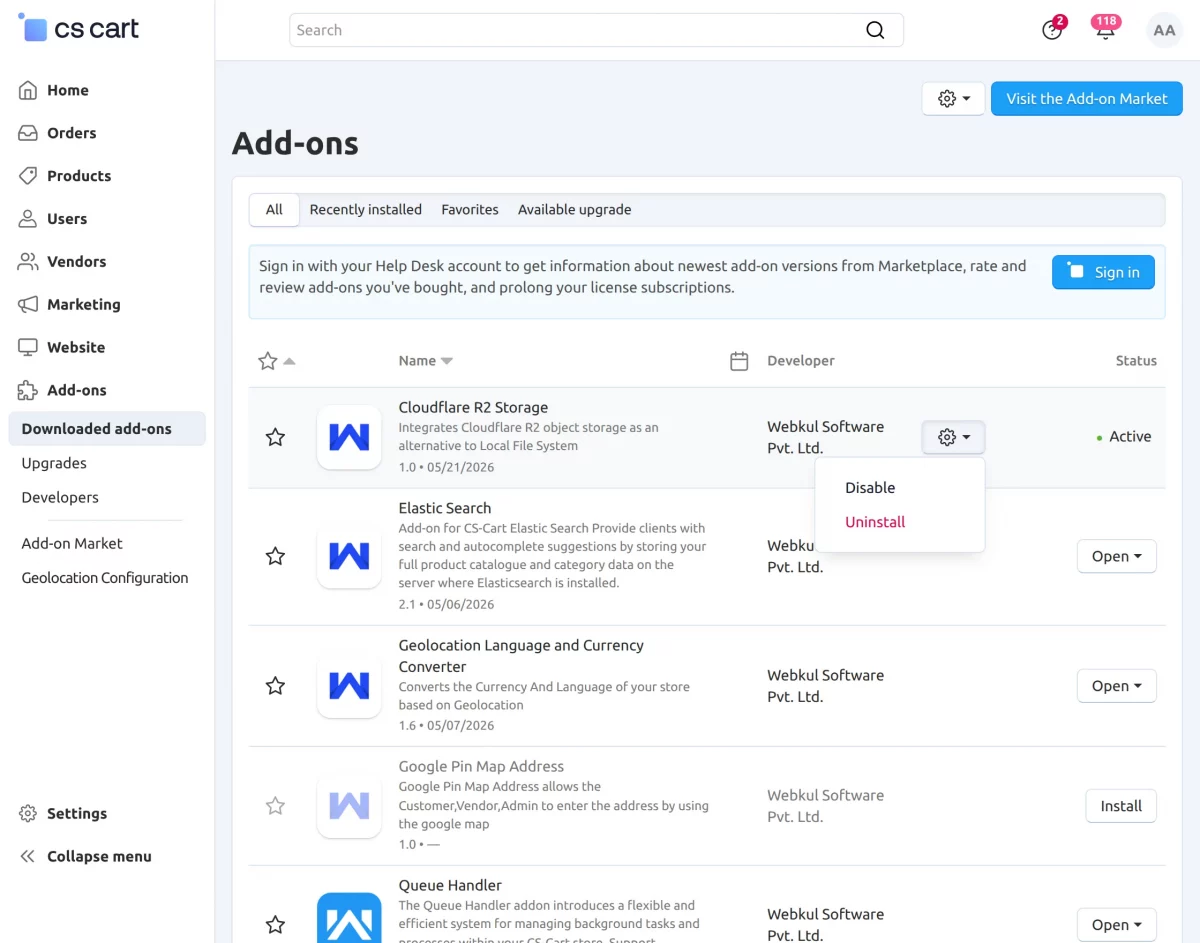
After installation of the add-on, you will find Cloudflare R2 Storage in the list of the available add-ons.
Click on “settings” to enable, disable, install, or refresh.
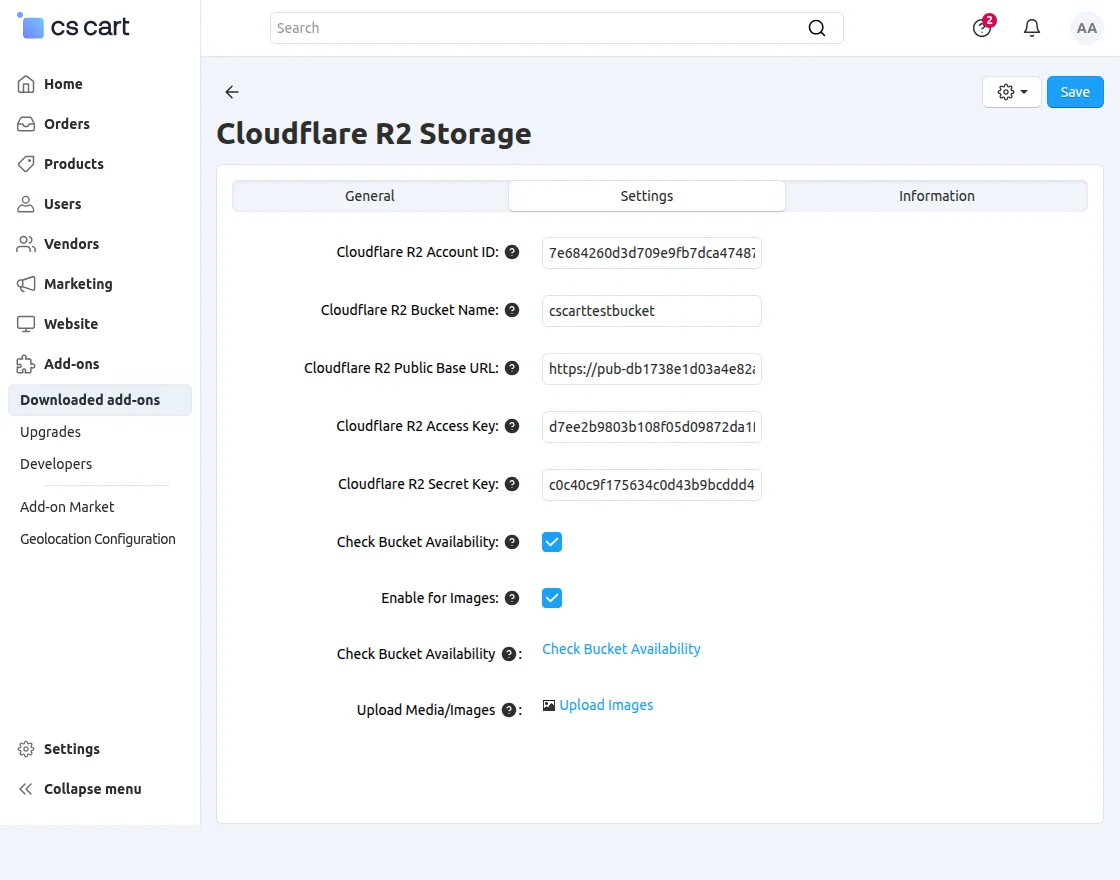
General Settings
- Cloudflare R2 Account ID
Enter your Cloudflare Account ID to connect the add-on with the R2 service. - Cloudflare R2 Bucket Name
Specify the bucket name where product images and media files will be stored. - Cloudflare R2 Public Base URL
Provide the public URL used for accessing files stored in the R2 bucket. - Cloudflare R2 Access Key
Enter the access key generated from your Cloudflare R2 account credentials. - Cloudflare R2 Secret Key
Provide the secret key associated with the configured access credentials. - Check Bucket Availability
Verifies whether the configured R2 bucket is accessible and connected properly. - Enable for Images
Enables storing and serving product images directly through Cloudflare R2 storage. - Upload Media/Images
Automatically uploads product images and media files to Cloudflare R2 storage.
Click on Upload Media/Images. A dedicated upload page will open.
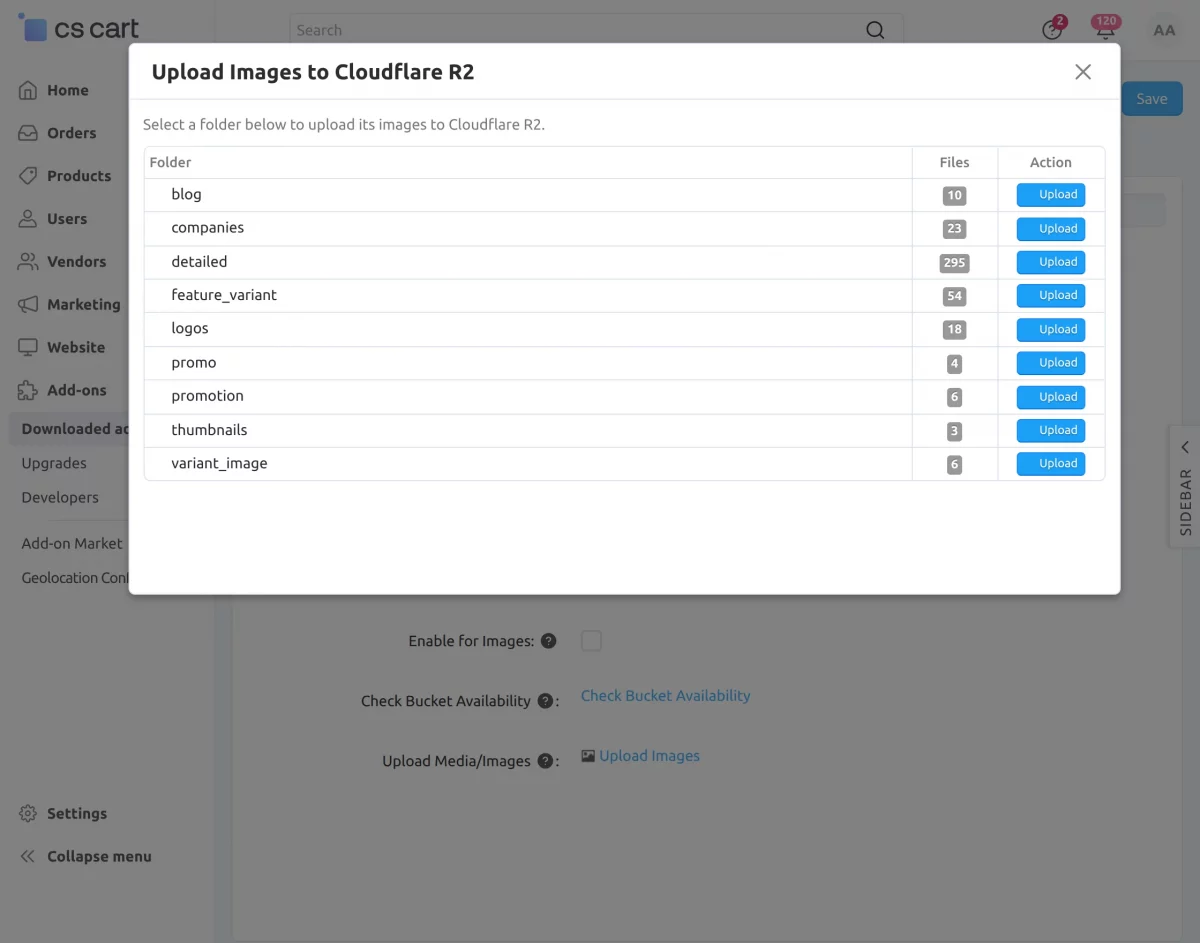
Select and upload the required product images or media files.
The uploaded files will be synchronized with Cloudflare R2 storage.
After uploading the images, enable the images for the respective products.
Once enabled, product images will be served directly from Cloudflare R2 instead of the local server. Supports bulk image uploads for large product catalogs.
Integrated with Queue Handler for smooth background processing and upload management.
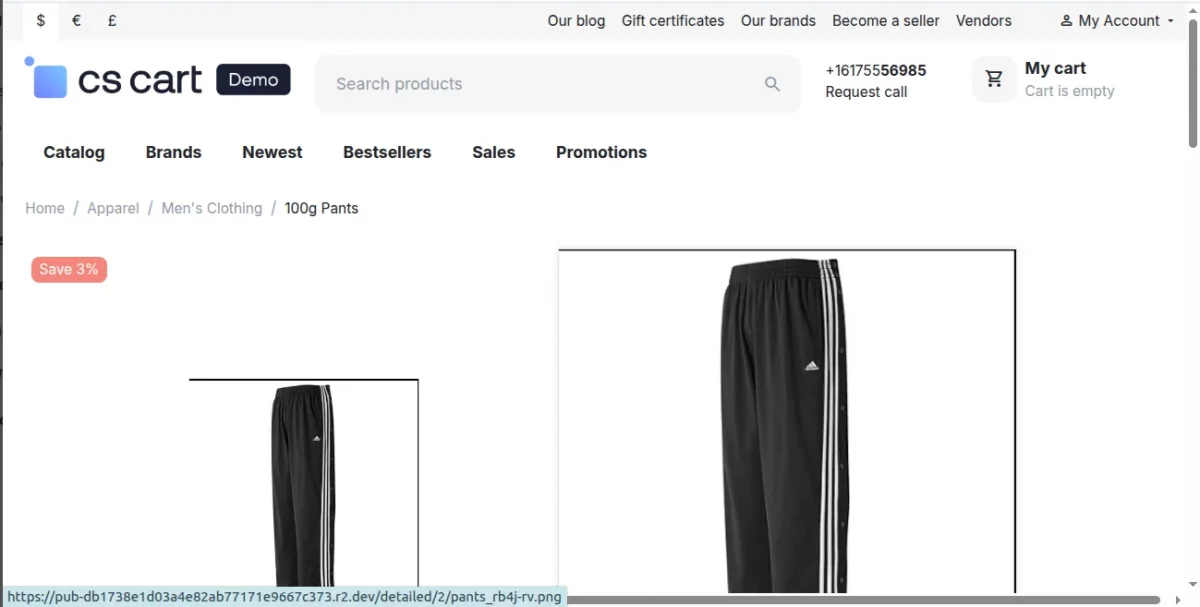
- After uploading and enabling the product images, the files will be served directly from Cloudflare R2 Storage.
- You can verify this by checking the image URL or image path in the browser.
- The image source path will display the configured Cloudflare R2 Public Base URL instead of the local server path.
- This confirms that the images are being loaded directly from Cloudflare R2 storage.
Queue Handler Integration
Before installing the R2 Cloudflare Store add-on, you must first install the CS-Cart Queue Handler add-on.
The Queue Handler is included with your purchase at no additional cost and is required for processing large uploads efficiently in the background.
Cloudflare R2 Account Setup Process
To get Cloudflare R2 Storage API credentials the admin needs to click the below link.
https://www.cloudflare.com/en-gb/.
After clicking the link the admin will redirect to the Cloudflare website. Here the admin needs to “Sign Up” or if already have an account then click on “Log in“.

Here the admin needs to provide a valid email ID and password to log in.

After login, the admin needs to scroll down the left side menu and click on “R2”.

Clicking on R2 Object Storage, now the admin needs to select “Manage R2 API Tokens” from API dropdown.

After clicking on “Manage R2 API Tokens”, now the admin needs to click on “Create Account API Token” or “Create User API Token” as per need.

After clicking on “Create API Token”, now the admin needs to choose “Object Read & Write: Allows the ability to read, write, and list objects in specific buckets.”
then needs to click on “Create API Token”.

Here the admin will get the Access Key ID, Secret Access Key and storage endpoint URL.

Bucket Creation
Here the admin needs to click on “Create Bucket”.

Clicking on “Create Bucket”, then the admin needs to define the bucket name choose “Automatic” and click on “Create Bucket”.

After clicking on “Create Bucket”, the admin needs to click on “Setting”.

After clicking on “Setting”, they needs to choose “R2.dev Subdomain” and then click on “Allow Access”.
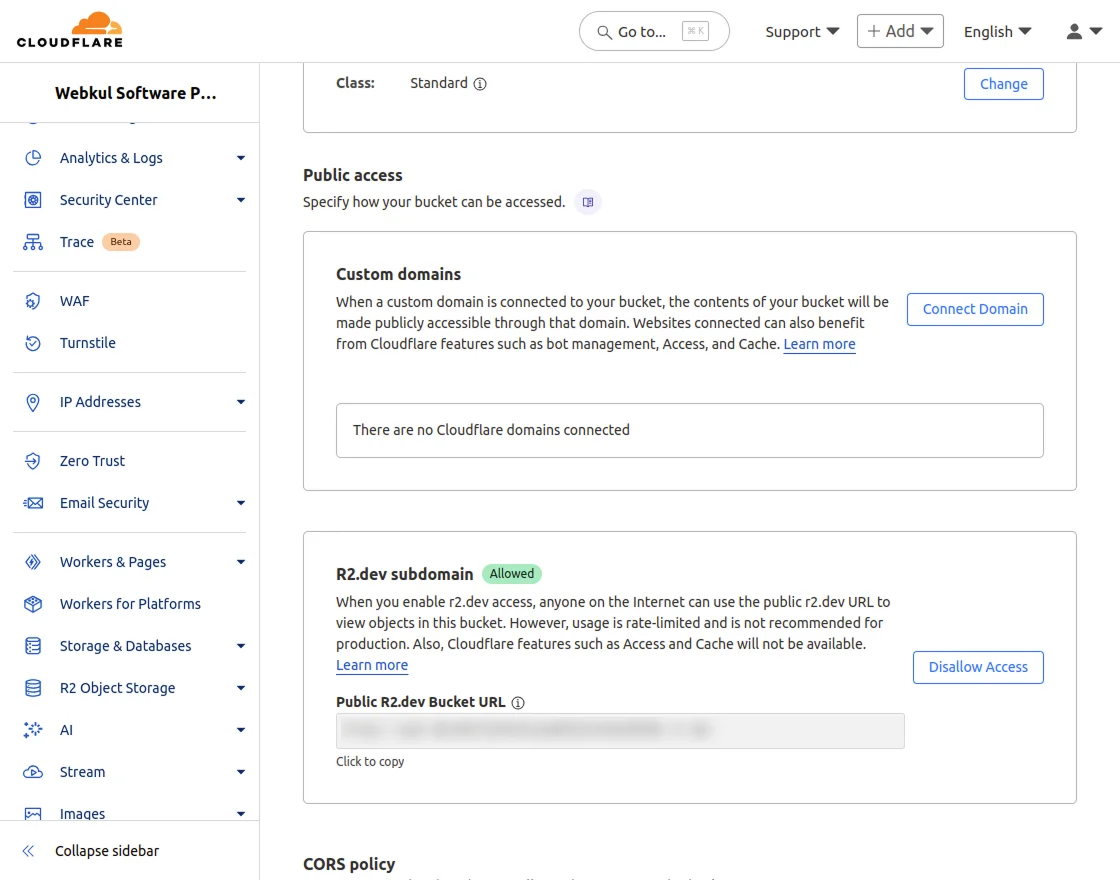
Clicking on “Allow Access”, the admin needs to enter “allow” in small letter and then click on “Allow”.

After clicking on “Allow”, then the admin will get the bucket URL.

Note: Now, you have to make sure that Cors permissions are given to the bucket provided in Cloudflare R2.

Benefits of Queue Processing
- Processes image uploads in the background.
- Prevents server timeout issues during bulk uploads.
- Improves synchronization stability for large catalogs.
- Efficiently handles thousands of product images.
- Suitable for enterprise and high-volume stores.
- Reduces server load during image processing operations.
Benefits of Using Cloudflare R2 with CS-Cart
- Faster website loading speed.
- Reduced server resource consumption.
- Better performance during heavy traffic.
- Lower hosting storage requirements.
- Improved scalability for growing stores.
- Reliable cloud-based object storage infrastructure.
- Optimized delivery of media files and downloadable products.
- Efficient handling of large product image libraries.
- Improved performance for multi-vendor marketplaces.
- Cost-effective storage management solution for eCommerce businesses.
Support
For assistance with CS-Cart Cloudflare R2 Storage setup or customization, contact [email protected] or Webkul Support.
Discover more powerful CS-Cart extensions to enhance your store’s functionality!
Current Product Version - 1.0
Supported Framework Version - 4.18.x, 4.19.x, 4.20.x,

Be the first to comment.