Magento 2 Size Chart module lets admins create reusable size chart templates and easily assign them to products for accurate sizing.
The size chart will be displayed on the web-store product page.
Magento 2 Size Chart Module helps the buyer view the size chart.
Allowing customers to easily find the right size and increase customer satisfaction.
Note –
- Magento 2 Size Chart extension works with simple and configurable products.
Check the plugin working in the video mentioned below –
Features
- Enable/disable the module.
- Create, delete, and edit the Size Units.
- Mass delete and change the status of Size Units.
- Create, delete, and edit the Body Measurements.
- Upload the image of Body Measurements.
- Mass delete and change the status of Body Measurements.
- Create, delete, and edit the Size Chart Template.
- Upload the specific images of the Measurements for the Custom Size Chart Form.
- Set the Size Chart Template to the specific product.
- Customers can check the size chart for the product.
- Customers can also give his/her custom Measurements using the Custom Size Chart Form.
Installation
Customers will get a zip folder and they have to extract the contents of this zip folder on their system.
The extracted folder has an src folder, inside the src folder you have the app folder.
You need to transfer this app folder into the Magento2 root directory on the server as shown below.

After the successful installation, you have to run these commands in the Magento2 root directory.
php bin/magento setup: upgrade
php bin/magento setup:di: compile
php bin/magento setup:static-content: deploy
php bin/magento indexer:reindex
php bin/magento cache:flush
After running the commands, you have to flush the cache from Magento admin panel by navigating through->System->Cache management as shown below.

Language Translation
If you need to do the module translation.
Navigate to the following path in your system app/code/Webkul/SizeChart/i18n.
Open the file named en_US.CSV for editing as shown in the below screenshot.

Once you have opened the file for editing. Replace the words after the†comma(,)†on the right with your translated words.

After editing and translating the CSV file.
Save the translated file name according to your region language and country code such as – de_DE.CSV.
Then upload the translated file to the same folder from where you have obtained it.
Now your module translation is complete.

Initial Configuration Settings
After the successful installation of the Magento 2 Size Chart module.
Admin can go to Stores > Configuration > Webkul-> Size Chart.
From here, the admin can make the initial configuration settings for the extension.

Here, the admin will be able to –
- Enable or disable the extension for use in the store. Apart from that, after enabling the extension the side panel option Size chart appears in the admin panel.
For the customer size chart, the admin can configure the –
- Acknowledgment to the customers.
- Add the acknowledgment note for the customers visible in the size chart pop-up.
- Enter the footer note.
Lastly, save the configuration settings.
Size Chart Options
After the successful installation and configuration, the Size Chart menu option is visible to the admin.

Here, the admin has three options to configure –
- Size Units
- Measurements
- Size Chart Templates
Let’s go through each of them.
Size Unit Creation
Under this section, the admin can create the size units for the size chart as required. If you have already created the size units then they will be listed under this section.

Apart from that, the admin can do bulk action that includes – deletion and updating of the size units status as enable or disable as per the snapshot below.

To add a new size unit, tap the Add Unit button on the top right-hand corner, and that brings up the below section.

Here, for the Size Unit Information enter the size unit that you want to create and set the status as enabled or disabled as required.
Lastly, save the size unit by tapping the Save Unit button. A success message for the same is shown and the newly created size unit is listed under the section.

After creating the size units, the admin can edit them by tapping the edit link for the respective size unit.
Measurement Creation
Under this section, the admin can create the measurements for the size chart as required. If you have already created the measurements then they will be listed under this section.
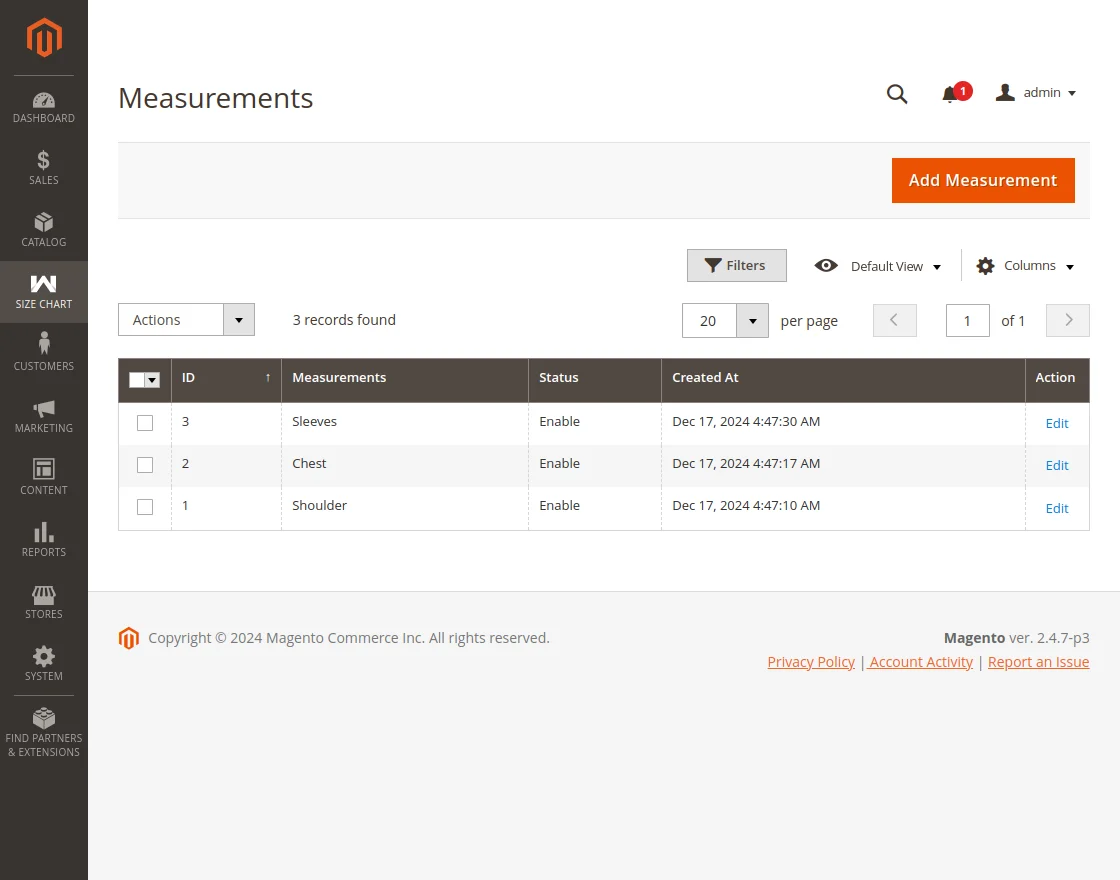
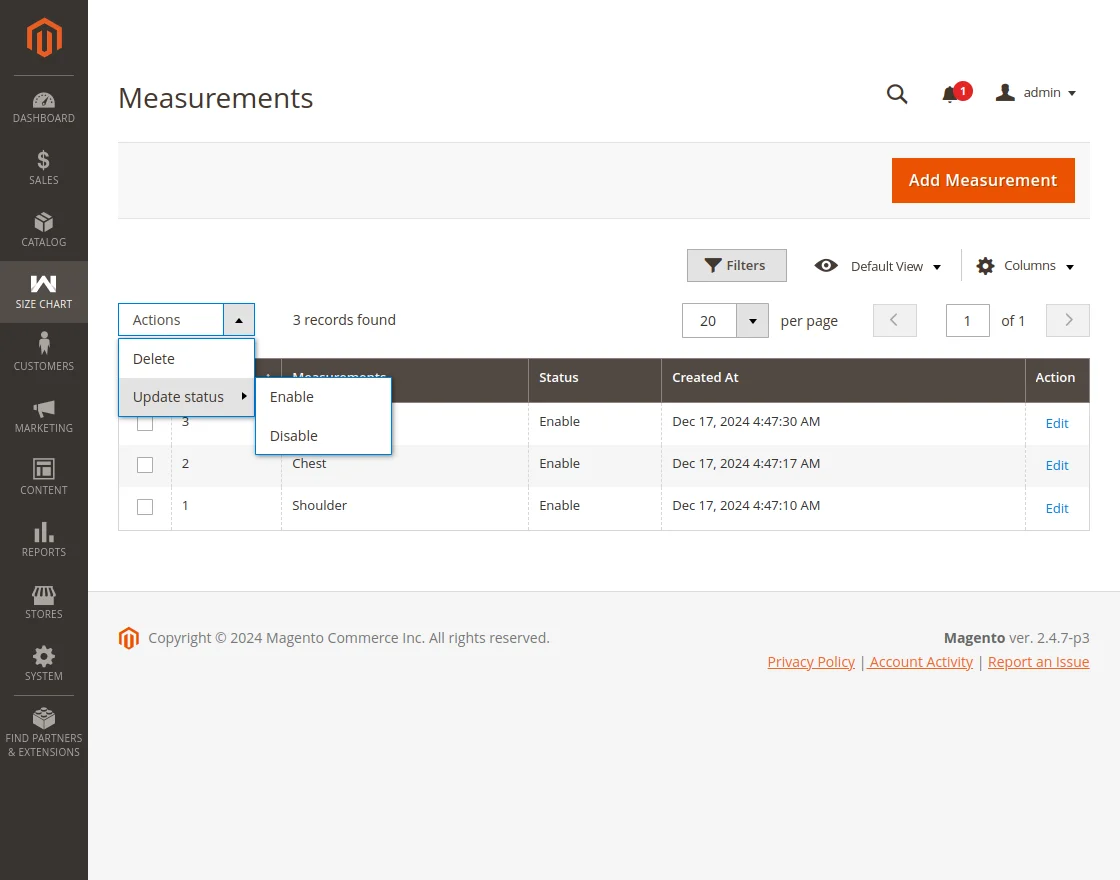
Apart from that, the admin can do bulk action that includes – deletion and updating of the measurement status as enabled or disabled as per the snapshot below.
To add a new measurement, tap the Add Measurement button on the top right-hand corner, and that brings up the below section.
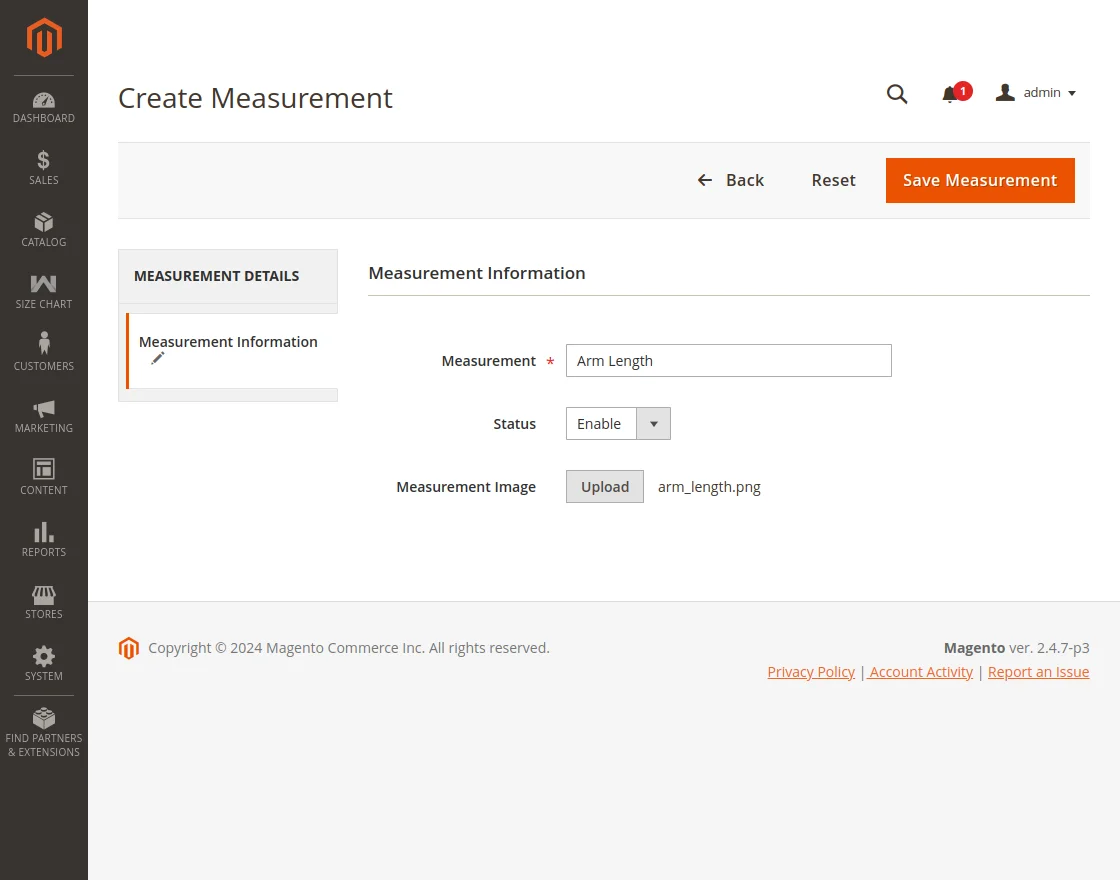
Here, for the Measurement Information enter the Measurement that you want to create, set the status as enabled or disabled, and upload an image for the measurement.
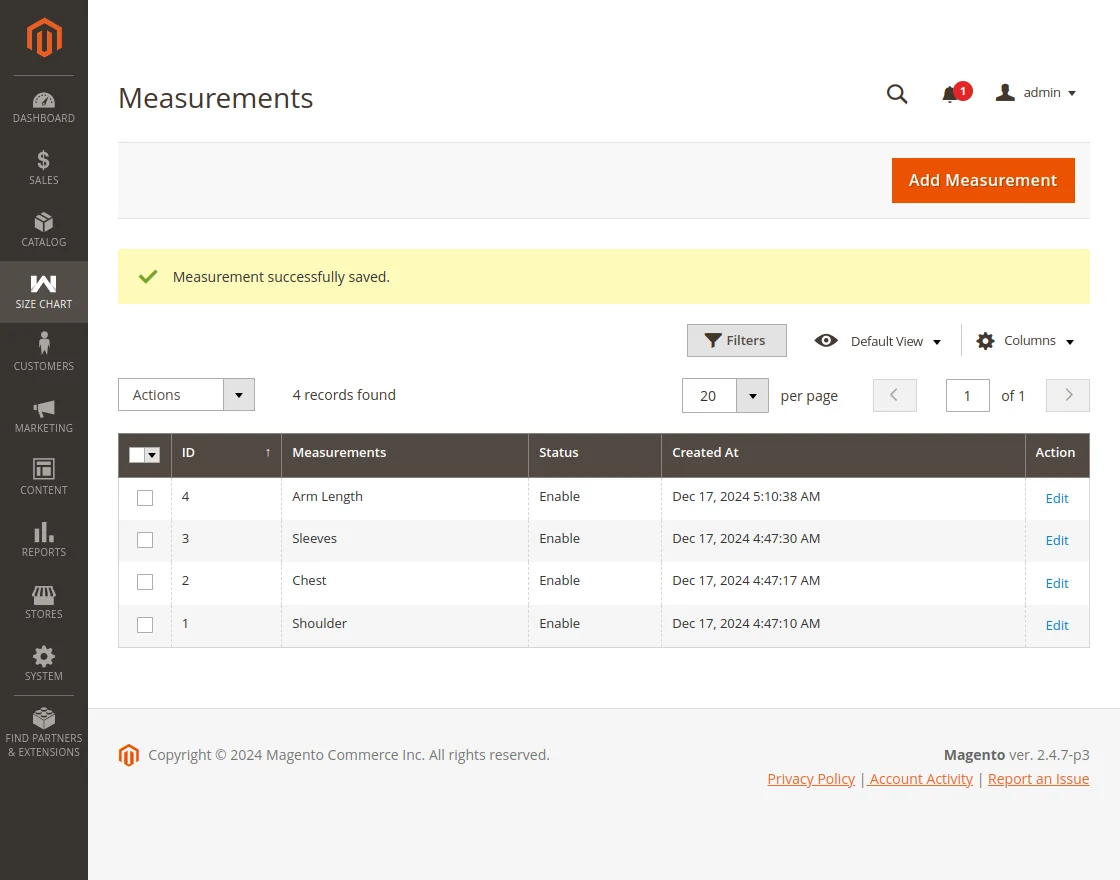
Lastly, save the measurement by tapping the Save Measurement button. A success message for the same is shown and the newly created measurement is listed under the section.
After creating the measurements, the admin can edit them by tapping the edit link for the respective measurement.

Size Chart Template Creation
Under this section, the admin will find all of the created size chart templates as required and can delete or add more templates.

Apart from that, the admin can do bulk action that includes – deletion and updating of the size chart template status as enabled or disabled as per the snapshot below.
The admin can also edit and of the created size chart templates as required by tapping the edit link for the respective template.

To add a new size chart template, the admin will tap the Add Template button, and that brings up the below section.

Here, for the size chart template –
- Enter the template name.
- Enter the template code.
- Set the status of the template as Enable d or Disabled.
- Choose the size units and the measurements.
After the above settings tap the Generate Template button.
Now, enter the values for the sizes(in range as well) available as required.

Then, upload the measurement images as required and save the template.

After saving the size chart template, the admin will be able to see a success message and the size chart will be listed under the section.

After saving the template you can edit the template as well as per the snapshot below.

The admin can also edit the uploaded measurement images for the size template.

Add Size Chart Template to Product
To assign a template to the product, navigate through Catalog->Products and edit a product.
Navigate to the Size Chat Section and from the drop-down option select a template to apply to the product as required.

After that, save the product.
Size Chart Option On Product Page
Now, the size chart option for the product will be visible on the product page as per the image below.

Tapping the Size Chart button brings up the pop-up as shown below with the details to refer to the available sizes for the product.

One chart is the default size chart for the product and the other allows the customers to enter their custom size values for the respective product.

The customer will enter the values for the required sections of the product.
And choose their body type as plump, normal, or Sportive.
After that, check the acknowledgment and tap the save measurement button.
Now, the custom-size data is visible on the product page to the customers.

Thereafter, the customer can add the product to the cart and proceed further. Within the cart, the customers can see their selected size as required.

The entered size values are visible on the shipping method section page.

The entered size values are visible on the place order page under the order summary as well.

After placing the order, the selected size details are visible in the respective order history.

The same details are visible in the order confirmation mail as well.

The store admin can also see the customer entered custom values for the product size as per the snapshot below.

Support
That is all about the Magento 2 Size Chart Module. If you have any queries regarding the plugin, please contact us at Webkul Support System.
If you’re looking to create a custom e-commerce website, it’s a great idea to hire Magento developers who can help you build a powerful and scalable online store.
You can also check our complete Magento 2 extensions.
Current Product Version - 4.0.4
Supported Framework Version - Magento 2.0.x, 2.1.x, 2.2.x,2.3.x, 2.4.x

Be the first to comment.