As we have updated the theme of our
Multi Vendor Marketplace app for Shopify,
so please head over to the provided link to get the updated blog for this app:
Multivendor Marketplace App for Shopify-Make An Offer (New Theme)
You can use Make An Offer Featured App if you are using the Multivendor Marketplace App for Shopify.
With the help of this featured app, you can not only increase the conversion rate but can also reduce the abundant cart on your Store.
With the Make An Offer App, you can have the customer request quote for the product/service as per the requirement and through this, you can also check the customers offer request.
You will have the customer details and you can use them to contact the customer and can convert the purchase.
Avoid losing sales. As now you can have the customer information so you can personally pursue them for the purchase.
This a featured app within the Multivendor App at an additional cost of 10$ per month apart from the monthly costing of Multivendor App.
Features
- Helps to convert your store visitors to customers by providing the best offers.
- Admin/Store Owner can enable the feature for the seller/vendor.
- The seller can have the “add to cart” disabled for the products and add “Request a Quote” option.
- Email notification sent to the seller/admin as per the app configuration.
- Change the labels on your own as we have provided the option for label translation too.
- The fields in “make an offer/request” form for the customer are editable.
Activation
To enable Make An Offer feature, go to “feature apps” menu in the Multivendor App. It will cost you 10$ USD per month in addition to the multivendor app plan.

Once you have enabled the feature, you need to accept the additional monthly charges for the feature added to the multivendor app charges.
Front End Display
To have the Make An Offer applied on the product, seller end, customer end, you need to copy and paste the following in the liquid file on the Shopify Store.
–>> Copy the following code into product.liquid (or product-template, if exist) template to display the “make-an-offer” button.
<div id="wk_make_an_offer" data-pid ="{{product.id}}" data-vid ="{{variant.id}}" {% if customer.id %} data-cid ="{{customer.id}}"{% endif %} style="display:none; padding:5px;"></div>
–>> Copy the following code into customers/account.liquid template to display the customer offer request button on the customer account page.
<div id="wk_make_an_offer_div" style="clear: both!important; margin:10px 0!important;">
–>> Hide Add to Cart button on your store’s product description.
<{% unless product.tags contains 'wk_rfq' %} {% endunless %}
Admin End Configuration
After enabling “make an offer” feature two new menus will be added to the admin end in the app.

Admin needs to configure it from the “Make An Offer Configuration” menu :
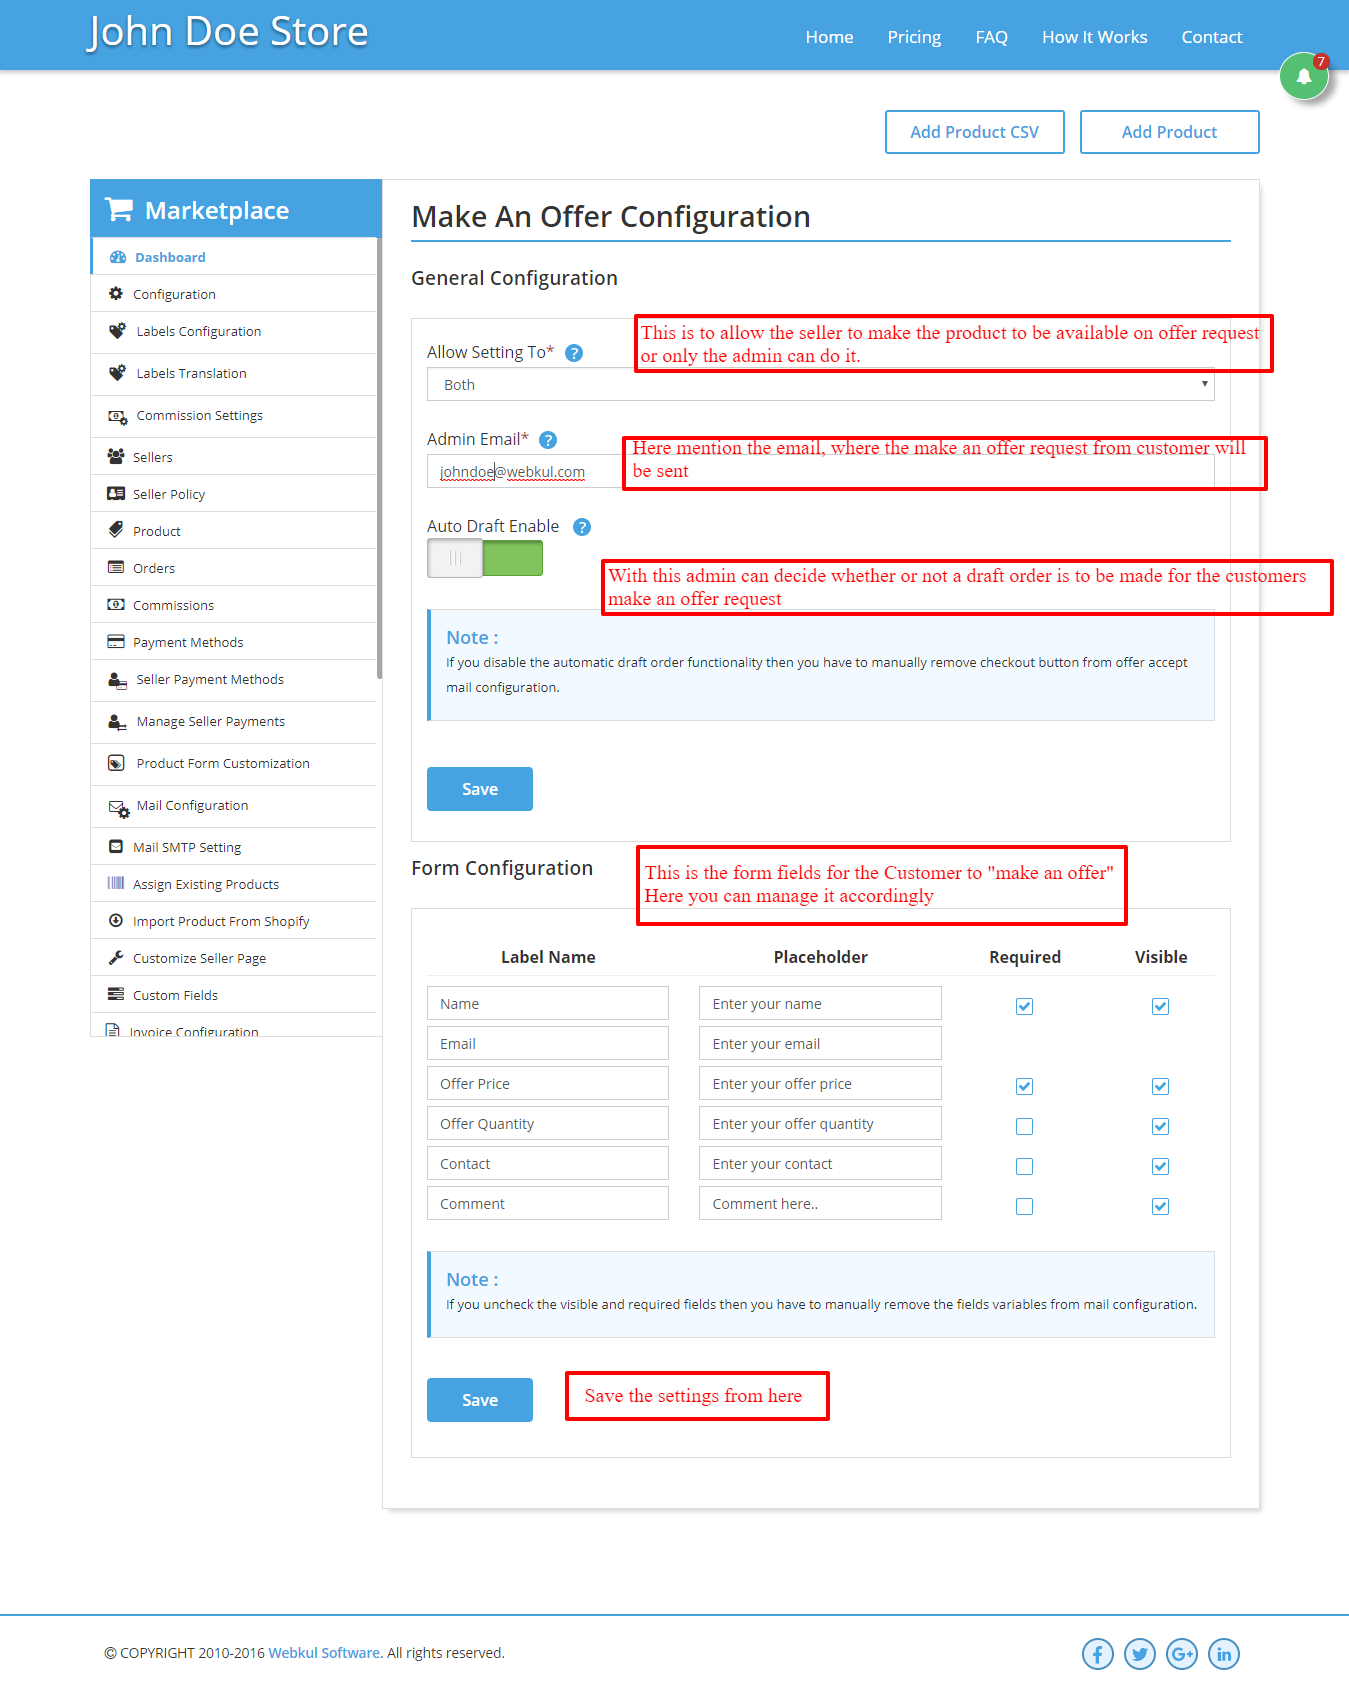
This way once the admin will set the configuration and now once the customer submits the request then the admin can view the request
(if the configuration has been set so) in the “Make An Offer Request” menu in the app. Here admin can view all the requests.

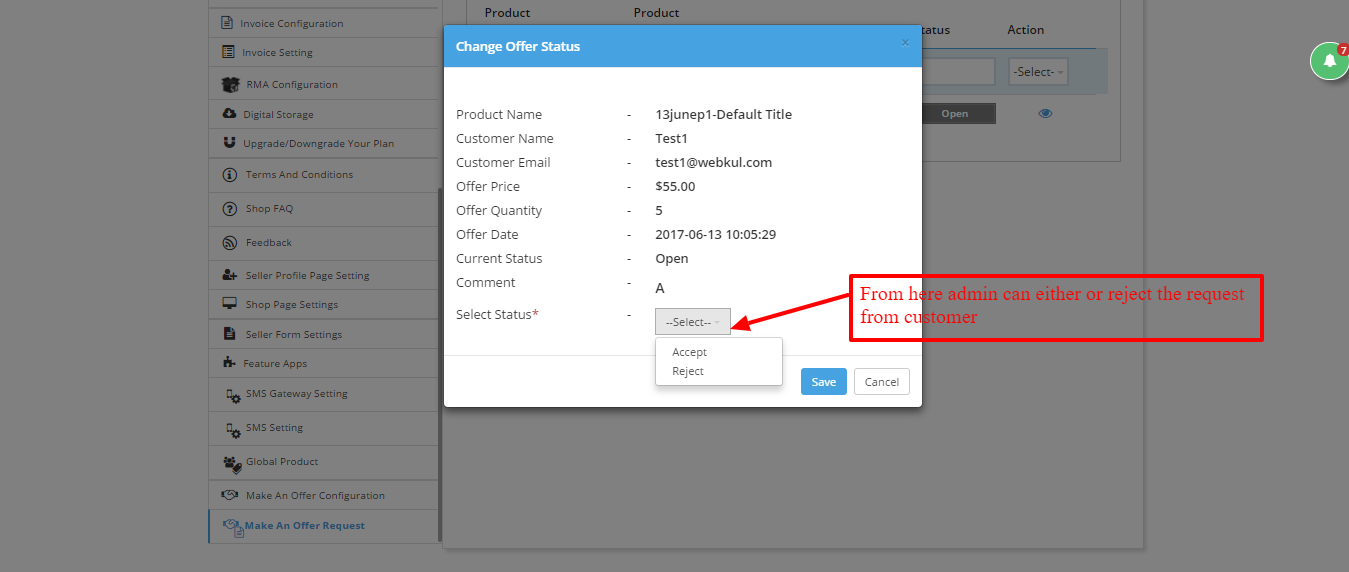
The Admin can either Accept or Reject the Request from the Customer.
If the Admin accepts the offer then it is sent to the Customer for the payment to be made.
If the Admin rejects the Request then the Customer can again request for it.
Seller End Configuration
Once the seller has logged into the account on the app, can view the request from the customer under “make an offer request” menu.

The Seller will view the received request from the Customer.

The seller will view the details, can accept or reject the request/offer from the customer. Here we also provided the option to add the shipping cost to the price requested.
If the seller adds the shipping cost and changes the status to accept then once the changes are saved, the customer gets notified about the offer from the client.
It might be possible that you don’t want the seller to add any fees and accept or reject the offer/request from the client,
then the seller can simply uncheck the shipping cost and leave it blank.
NOTE: If admin enables “auto draft enable” then a draft order is created once the seller/admin accepts the request (if in case you check the shipping cost option)
and the customer requests the invoice from his end.
But if you do not check the shipping cost option then draft order is created once the customer accepts the request, i.e. requests the invoice.
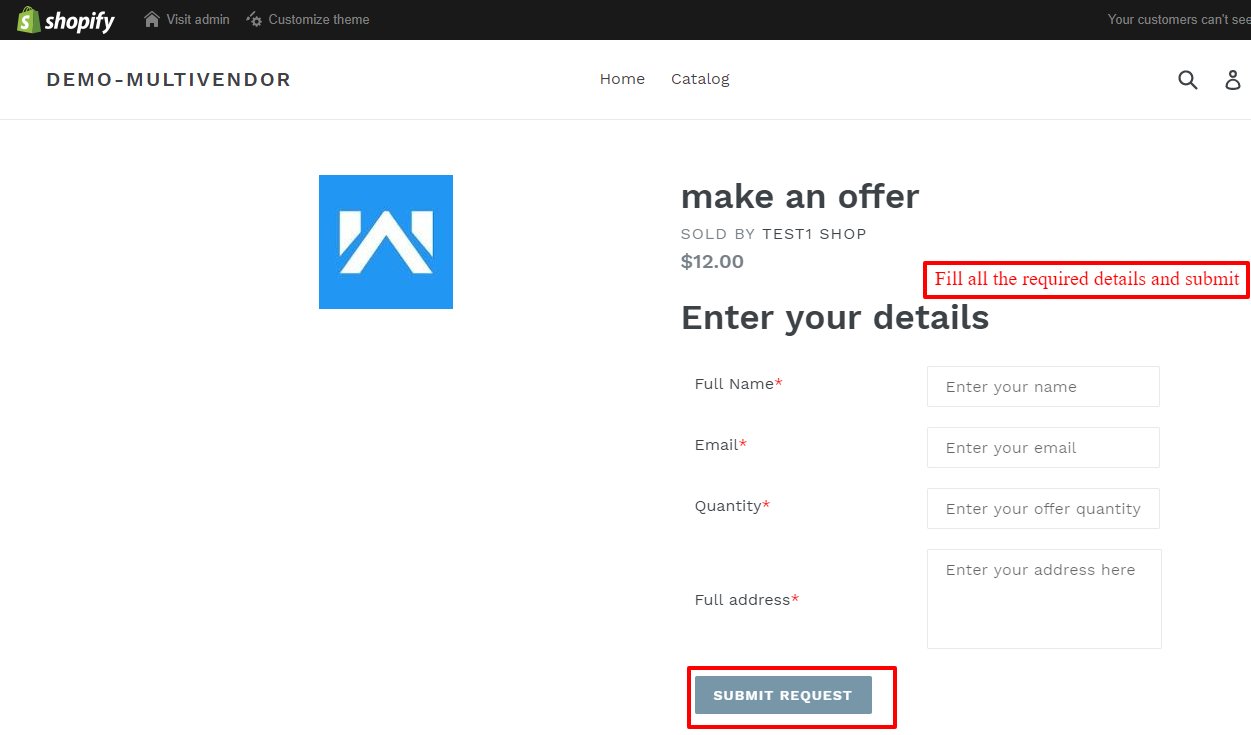
Customer End
The Customer can request a quote / make an offer for the product from the product page, as shown below :

Once the customer clicks the button, a form opens up and the customer can submit the request by submitting the details in the form.
Once the customer submits the form, the product seller as well as to the admin will receive the email regarding the same.
They can view it from the “make an offer request” menu in the app.
And as shown above, the seller can either accept or reject the request.
The customer can view the offers/request made from my account section on the Shopify store.


If the seller/admin rejects the request then it ends here. But if the seller/admin accepts the request, customer can see this on storefront and will receive a mail regarding save.
Now the customer can either deny the request or request an invoice, then the seller needs to send an invoice.
The status is changed to “invoice created” and now the customer can check out and buy the product.
Also note that as soon as the customer submits the form, a customer account is created on the store and an email is sent to the customer,
if the customer is not registered on the Shopify store.
This was the whole process by which the store owner can have the offer/request from the customer and can offer him the desired product with affordable pricing.
Support
Furthermore for any kind of technical assistance, just raise a ticket at http://webkul.uvdesk.com/and for any doubt contact us at [email protected]
Thanks for reading the blog.

Be the first to comment.