Prestashop Marketplace iyzico Payment Gateway extension allows the store owner to integrate iyzico payment gateway with Prestashop marketplace.
Prestashop Marketplace iyzico Payment Gateway helps the marketplace vendors to accept payments online by enabling the iyzico payment method for the product purchase.
Customers can use iyzico payment method to pay for their purchases during checkout with ease as the payments done through this gateway are fully secure.
Features of Prestashop Marketplace iyzico Payment Gateway
- A Seller can register as iyzico Sub-merchant.
- Admin can allow/disallow seller to register as a sub-merchant.
- Admin has the functionality to approve/disapprove sub-merchant request or auto-approve request.
- Admin can cancel iyzico transaction.
- Seller and Admin have mail notifications on multiple actions like approval of sub-merchant request, cancel payment and refund.
- Seller and Admin can refund iyzico transaction.
- Admin has the functionality to approve seller refund request.
- Admin can approve/disapprove seller payment transfer.
NOTE:
- Prestashop Marketplace iyzico Payment Gateway module is MultiShop Compatible with PrestaShop Advanced Multi-Vendor Marketplace version 5.4.0/3.4.0 and above.
- For split payment functionality, you need Split Class modification in current marketplace version, this will be in default in next marketplace version. Create a ticket to get this functionality.
- The admin needs to email the iyzico team requesting the conversion of the account to the marketplace account. Due to this reason, the module works only for seller products and not for admin. Also, the marketplace iyzico payment account should be completely new.
How to Install Prestashop Marketplace iyzico Payment Gateway
For installing this module, you need to install the Prestashop Advanced Multi Vendor Marketplace module first.

After installing Prestashop Advanced Marketplace module, you can start the installation of Prestashop Marketplace iyzico Payment Gateway.
- Firstly, go to the module manager in the back office and click on ‘upload a module’.
- After that, drag and drop the module file or select the file from the system
- In this way, the module installation will be successful.


Module Configuration
After the successful installation of the extension, admin has to configure the iyzico payment settings, email & approval functionality settings under Configuration tab as shown below:

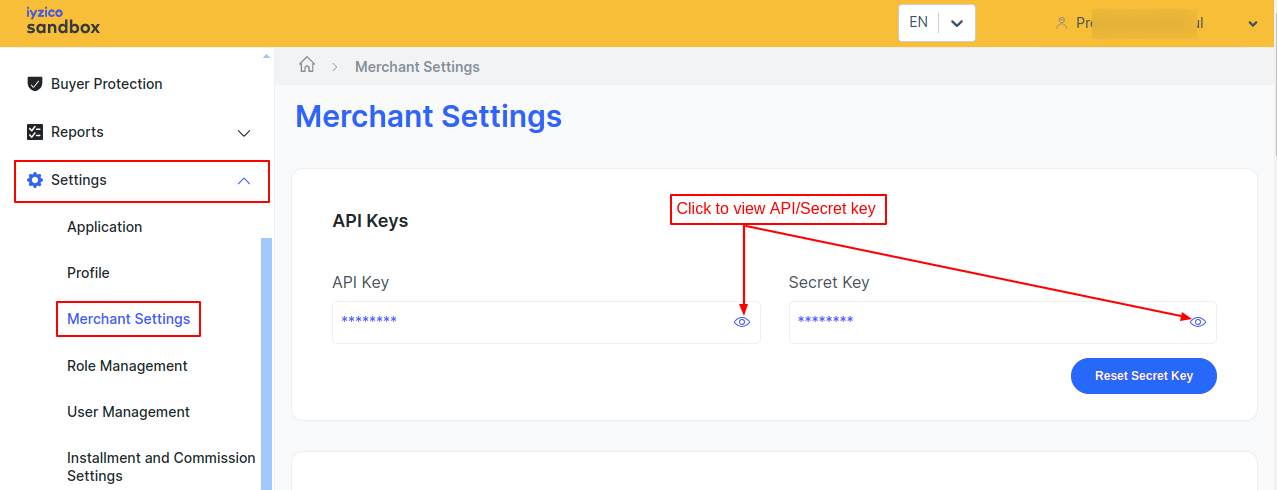
iyzico Account Payment – How to get API and Secret Key
Login to your iyzico Production or Sandbox account.
To obtain the API credentials, go to Settings > Merchant Settings.
Admin Management
Admin can manage iyzico Seller by navigating through Marketplace Management->iyzico Seller.
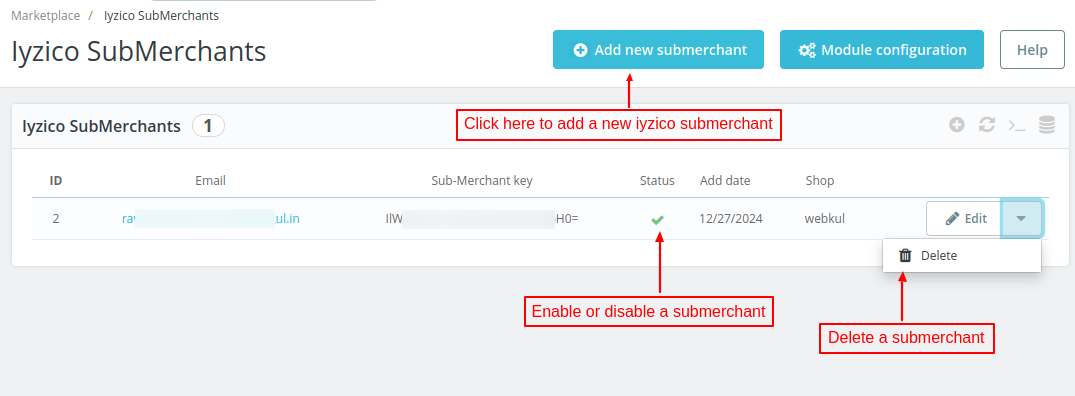
After clicking on “Add new seller” admin can add a new iyzico seller.

After saving the details of a seller, a Sub-Merchant Key for that seller gets generated.
Seller End Workflow
After the successful installation of the module, a new tab “iyzico Registration” gets available in the seller’s account.
On clicking “iyzico seller registration“, a form appears on the page.
The seller has to select the type of company, enter his name, email id, address, international bank account number, mobile number, shop name, identity number, and swift code.
After entering all the required details, the seller has to Accept iyzico terms & conditions and then click on “Submit” button.

After clicking on “Submit” button, an approval message will display on the page if “Auto approve seller iyzico registration request” is enabled by the admin.

Ordering Process
On the front end, when a customer adds a product to the cart and clicks on proceed to place an order, he can view iyzico payment option on the checkout page.
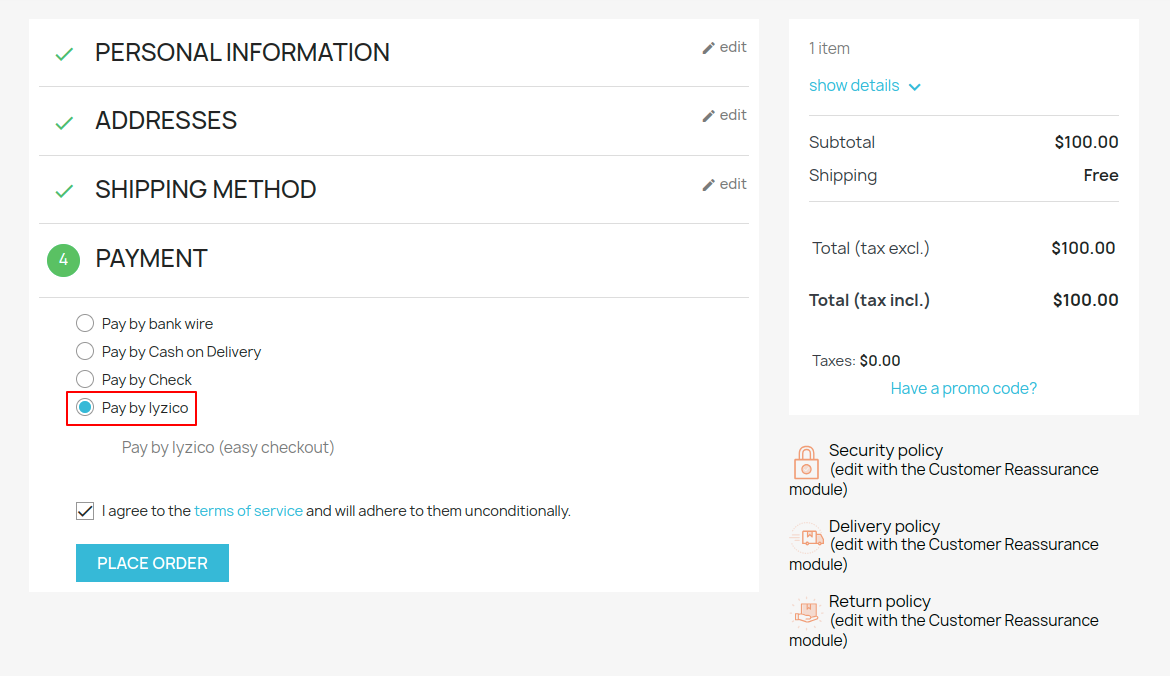
On clicking “PLACE ORDER” a payment form will appear on the screen where the customer can enter his card details.

After clicking on “PAY” button, a customer will redirect to iyzico payment gateway site and when the payment process gets complete, he will get back to a payment confirmation page.

Once an order has been confirmed, the admin can view it under “Orders” tab.

When admin clicks on “View” button, he can view all the transaction which have been done using iyzico payment gateway under “iyzico Seller Transaction”.
iyzico Seller Transaction
Admin can view iyzico Seller Transaction details by clicking on “View” button.

A seller can also view the iyzico Transaction under “Orders” tab as shown below:

Once admin has approved the transaction, then seller can process the refund.

Once admin has approved a transaction, then on the front end transaction status will be updated from Pending to Approved and seller will be able to process the refund.

On clicking the ‘REFUND’ button, a refund request will be sent to admin. Seller can view the refund details by clicking on ‘Refund History’.

Once a seller has placed a refund request, it will be visible to admin and he can confirm it.

On clicking ‘Confirm Refund’ button, the transaction will be refunded and the admin can view refund details by clicking on ‘Refund History‘.

The refund status will also be updated on the front end in seller’s account after confirmation of refund by admin in the backend panel.
A seller can also view refund details by clicking on “Refund History” as shown below:

Support
For any kind of technical assistance or query, please raise a ticket or send us a mail at [email protected]
Also, please explore our Prestashop development services and vast range of quality Prestashop addons.
Current Product Version - 5.3.1
Supported Framework Version - 8.x.x, 1.7.x.x

Be the first to comment.