PrestaShop LLMs TXT Generator creates llms.txt files to improve AI SEO, Generative Engine Optimization (GEO), and AI visibility for your store.
It helps AI-powered search engines and assistants like ChatGPT, Claude, Gemini, and Perplexity better understand your store, improving AI discoverability and visibility.
The module logs every AI crawler visit and gives you a dashboard to track it. This guide covers setup, all settings tabs, cron jobs, file creation, and analytics.
You’ll learn to pick which content and fields show up, set language or domain versions, and use the Visibility Score to improve AI SEO and AI discovery over time.
NOTE: Prestashop LLMs TXT Generator is compatible with the PrestaShop Multi-store feature.
Why AI SEO & GEO Matter
Traditional SEO helps websites rank in search engines like Google. AI SEO helps AI assistants understand your store and surface your products in AI-powered search results.
Generative Engine Optimization (GEO) improves how AI models interpret your catalog using AI-friendly files like llms.txt.
The module generates llms.txt files that help AI understand your products, categories, CMS pages, and business information for better AI visibility.
Features of Prestashop LLMs TXT Generator
- Generates llms.txt and llms-full.txt files to improve AI SEO and AI search visibility.
- Per-shop or per-domain generation scope, with language-specific variants for multilingual shops.
- Granular controls for CMS pages, categories, products, and brands — each with its own enable toggle, field selection, and exclusion list.
- Filters products by attribute group and value, and caps the product list at a configurable maximum.
- Automatically marks files pending when products, CMS pages, categories, or brands change.
- One-click Generate Now button with live file status badges and an inline preview modal with copy and download actions.
- .htaccess rewrite rules are injected automatically, so llms.txt routes are publicly accessible.
- Token-protected generation and aggregation cron URLs with configurable frequency and time.
- Detects 22 known AI crawlers and optionally logs unknown bots, with configurable sampling and retention.
- Analytics dashboard with Overview, Crawlers, URL Intelligence, Activity, and Alerts tabs, plus a CSV export for URL data.
- AI Visibility Score from 0 to 100 to measure AI visibility and AI SEO performance, with trend-indicator KPI cards.
How to Install PrestaShop LLMs TXT Generator
- Firstly, go to the module manager in the back office and click on ‘upload a module’.
- After that, drag and drop the module file or select the file from the system.
- In this way, the module installation will be successful.
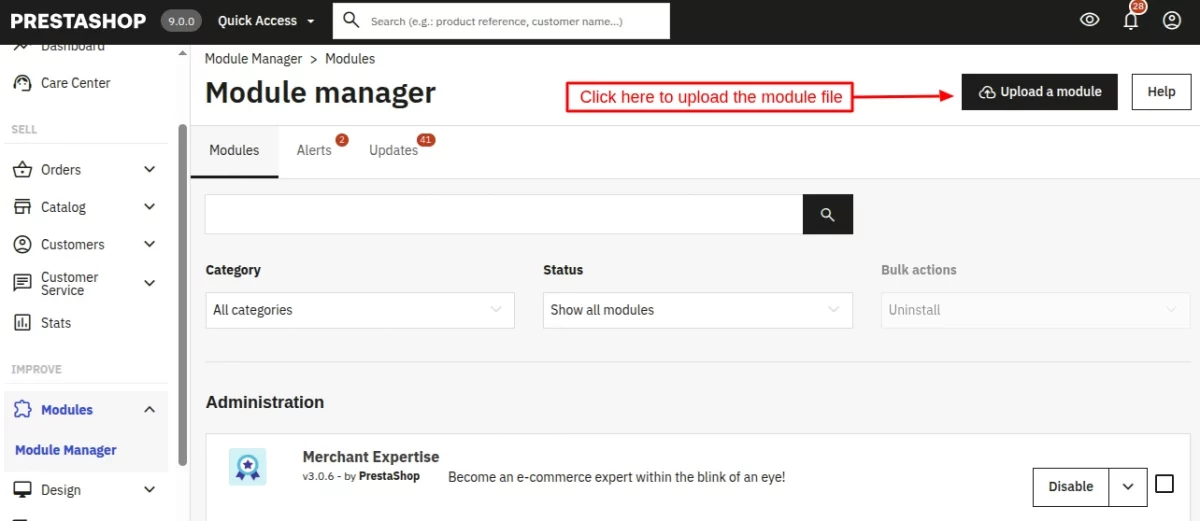
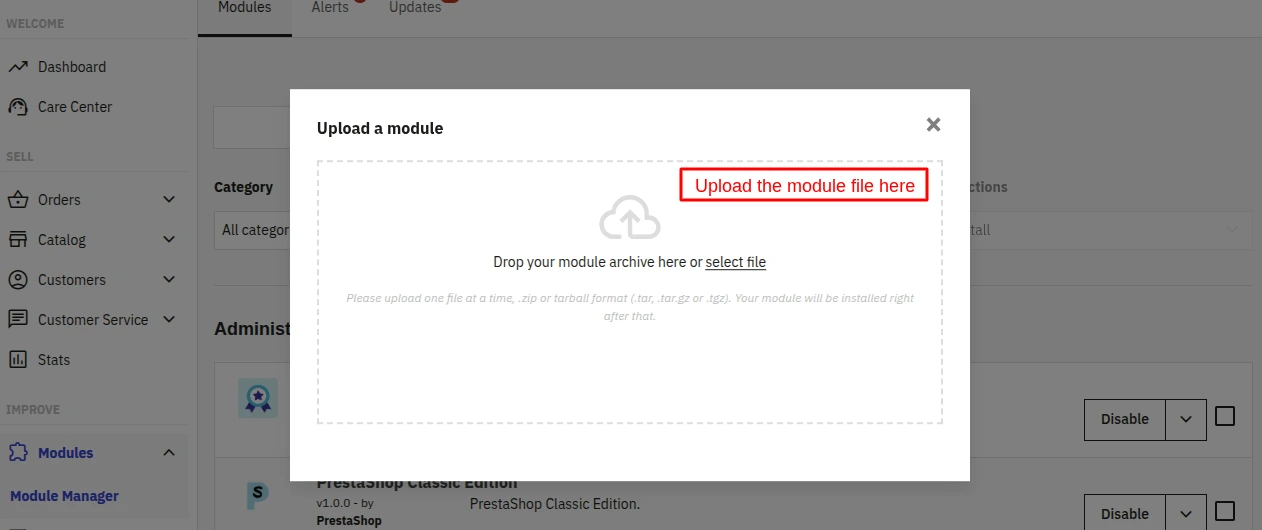
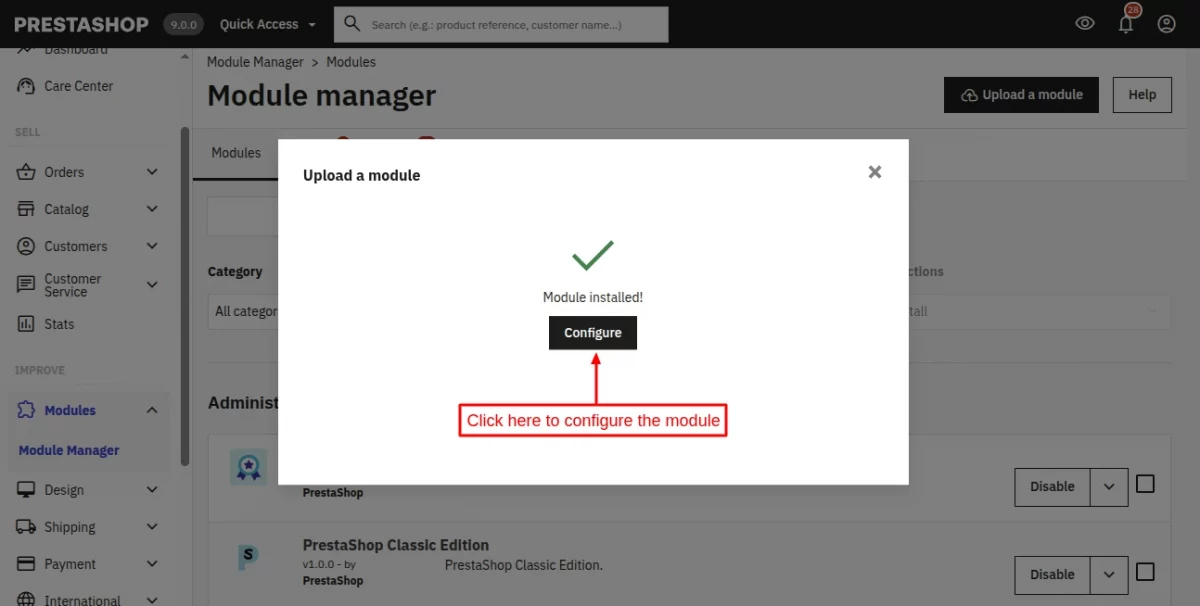
PrestaShop LLMs TXT Generator Module Configuration
After installing the module, go to SEO & URLs > LLMs Config in the back office. The configuration panel uses ten tabs, each covered below with every field, its default value, and what to set it to.
General
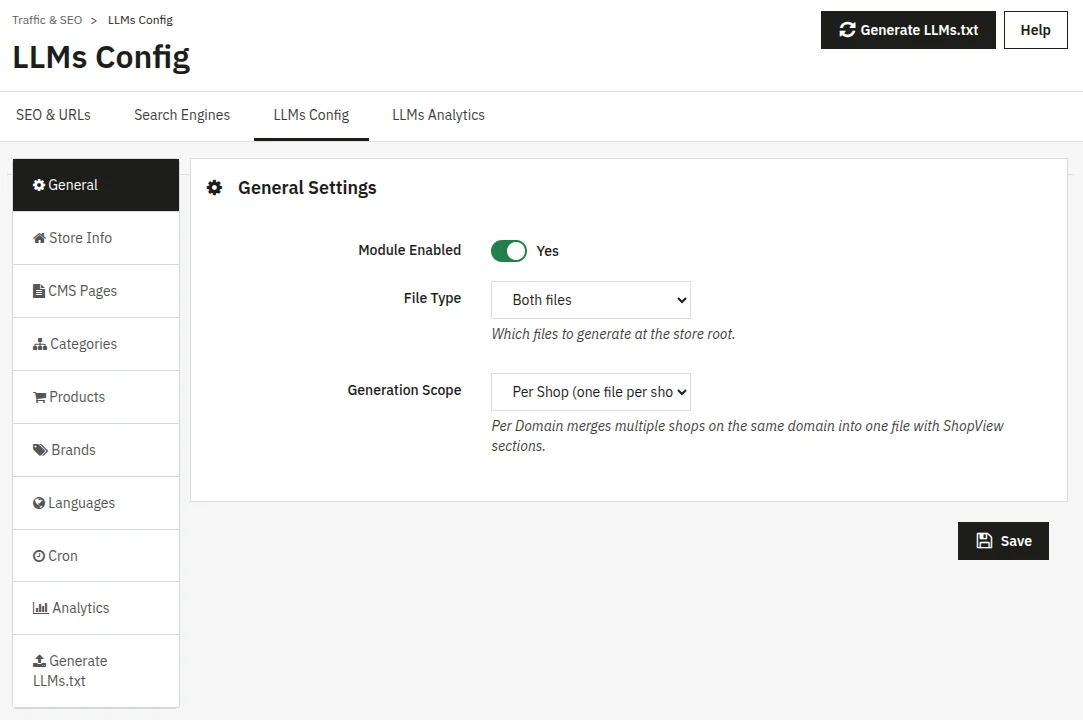
Controls the master switch, which file variants are generated, and whether files are created per shop or merged per domain.
- Module Enabled: The master on/off switch for the whole module. When disabled, no files are generated, and crawler visits are not logged.
- File Type: Choose llms.txt only for a lightweight summary, llms-full.txt only for an expanded version, or Both (recommended) so crawlers can pick whichever format they prefer.
- Generation Scope: Per Shop creates one file per shop and language combination. Per Domain merges all shops that share the same public-facing domain into a single file, using ShopView sections to separate shop-specific content.
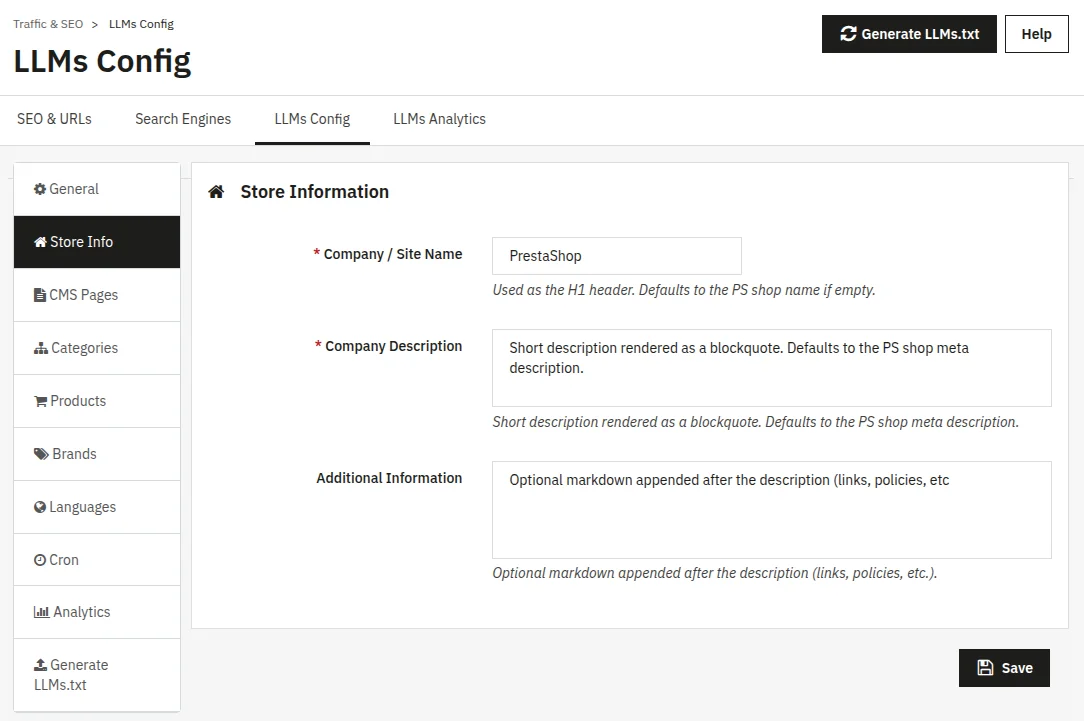
Store Information
This is where you introduce your business to AI assistants, supporting AI SEO and Generative Engine Optimization (GEO) — think of it as the “About Us” section AI will read first.
This content appears at the top of every generated llms.txt file.
- Company / Site Name: Used as the H1 header inside the file. Falls back to the PrestaShop shop name if left empty.
- Company Description: A short 2–3 sentence paragraph, rendered as a blockquote after the H1, describing what your business sells as if introducing it to a new customer. Falls back to the shop’s meta description if left empty.
- Additional Information: Optional markdown appended after the description — return policy, founding year, unique selling points, contact links, or partner notes. Maximum 5,000 characters.
CMS Pages
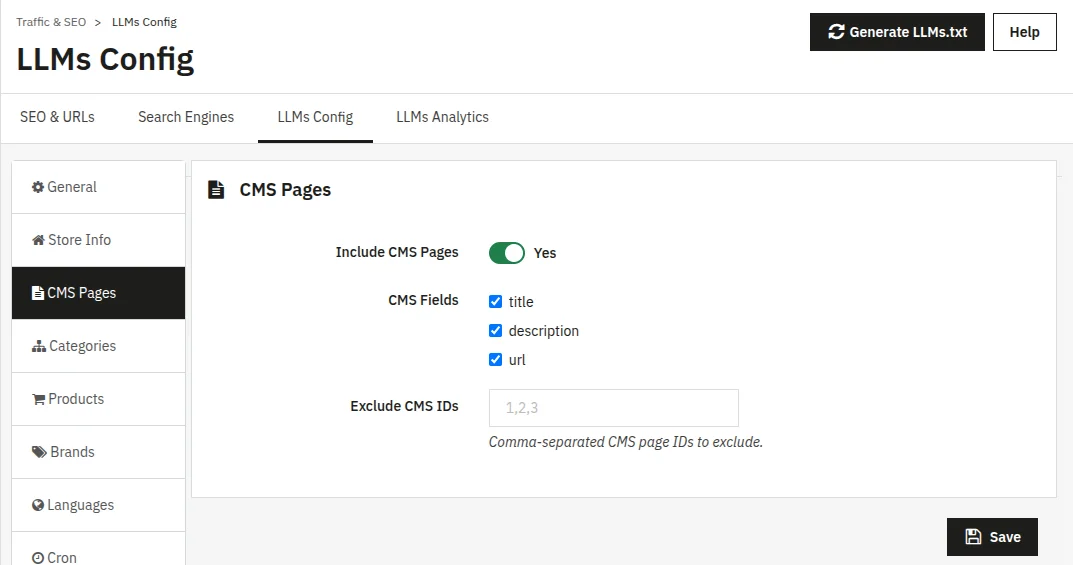
CMS pages are your fixed information pages — About Us, Delivery Information, Terms and Conditions, Contact Us, and similar.
- Include CMS Pages: Enables or disables CMS content in the output. Turn off if your info pages aren’t useful AI context.
- CMS Fields: Select one or more fields per page: title (the page name), description (the actual text content), and url (so AI can link back to the page). Ticking all three gives the best results.
- Exclude CMS IDs: Comma-separated CMS page IDs to skip — useful for private or in-progress pages. Example: 3,7,12. Find a page’s ID under CMS > Pages in the admin.
Categories
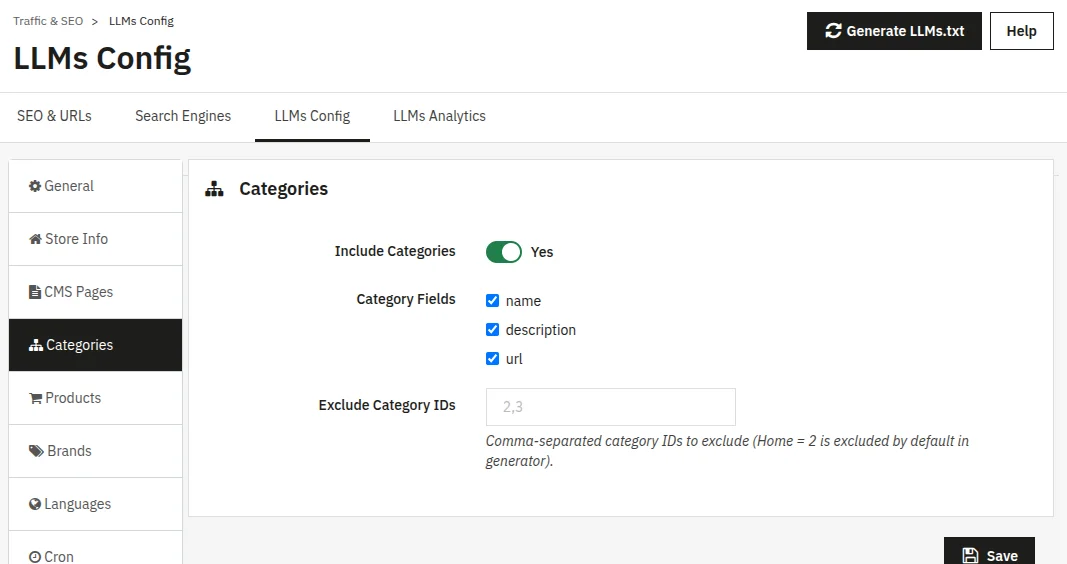
Categories are the groups your products are organized into — for example, Men’s Shoes, Women’s Clothing, and Accessories.
- Include Categories: Enables or disables category content in the output. This helps AI understand your store’s structure.
- Category Fields: Select one or more fields per category: name, description, and url.
- Exclude Category IDs: Comma-separated category IDs to skip — useful for hidden, sale, or in-progress categories. The Home category (ID 2) is excluded by default in the generator logic.
Products
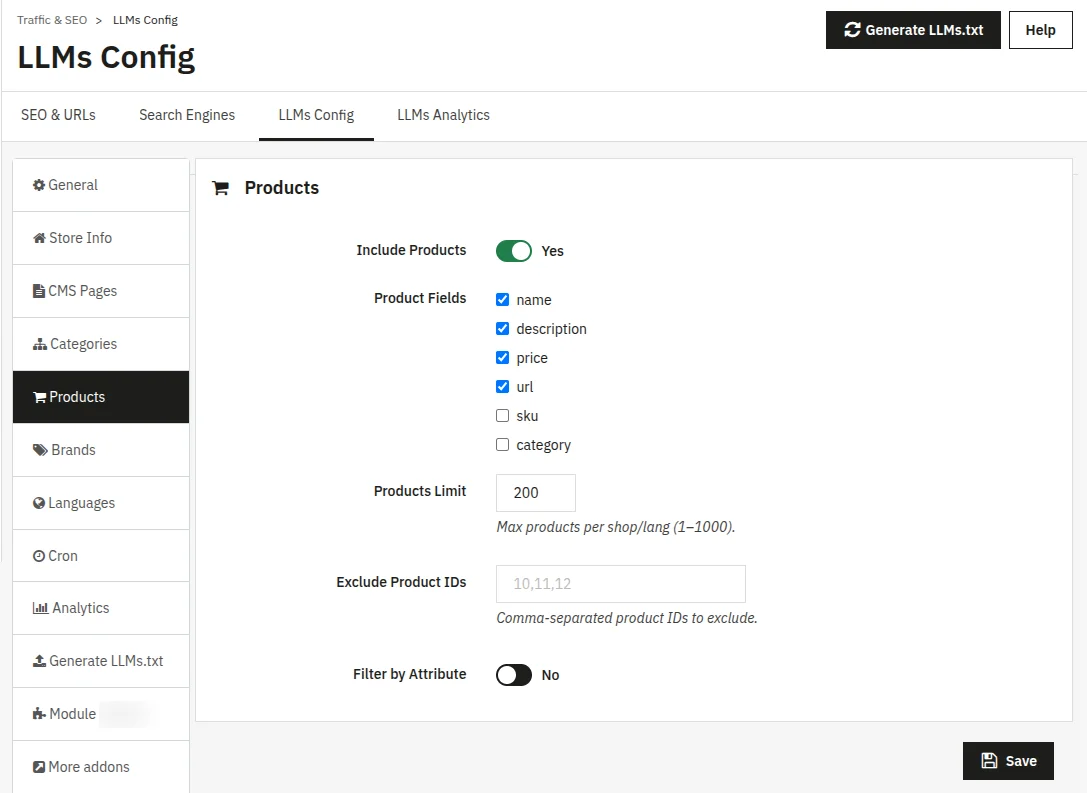
This is usually the most important section — it tells AI assistants what you actually sell.
- Include Products: Enables or disables product content in the output.
- Product Fields: Select one or more fields per product: name, description, price, reference, url, sku, and category.
- Products Limit: Maximum number of products included per shop-and-language combination. Range is 1–1,000; default is 200. Increase this for large catalogs, but note that very large limits may slow file generation.
- Exclude Product IDs: Comma-separated product IDs to skip — discontinued items, drafts, or products sold only offline.
- Filter by Attribute: When enabled, includes only products matching a specific attribute group and value, such as Colour = Red or Size = Medium. Leave this off unless you specifically want the file to represent a single variant family rather than the full catalog.
- Attribute Group / Attribute Value: Appears once Filter by Attribute is enabled. Choose the attribute type first (e.g., Colour), then the specific value within it (e.g., Red).
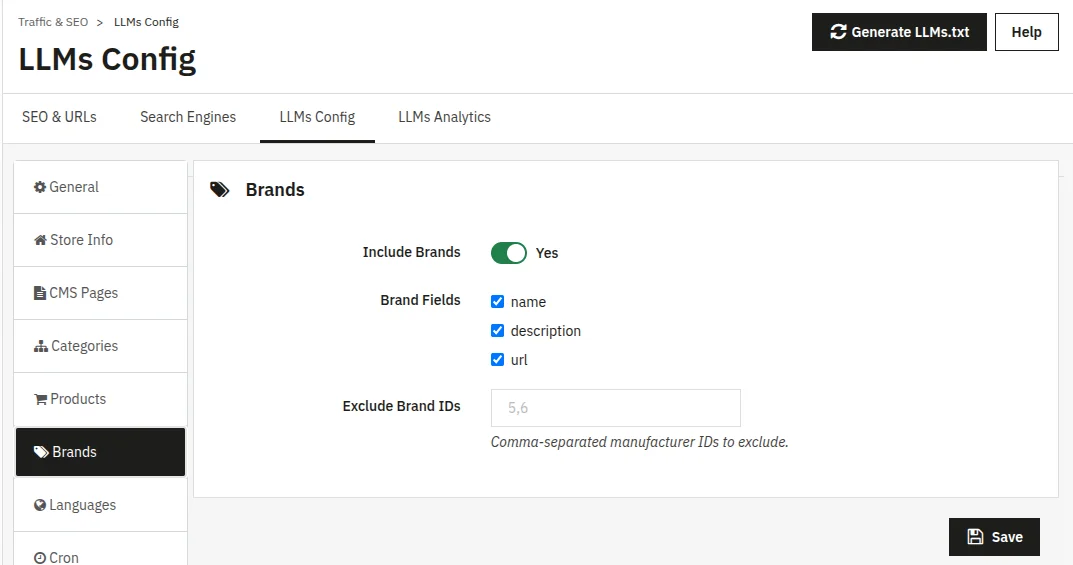
Brands
Brands are called Manufacturers in PrestaShop — the companies that make the products you sell (Nike, Samsung, Nestlé, and so on).
- Include Brands: Enables or disables brand content in the output. Useful if you’re a multi-brand retailer and want AI to know which brands you stock.
- Brand Fields: Select one or more fields per brand: name, description, and URL.
- Exclude Brand IDs: Comma-separated manufacturer IDs to skip.
Languages
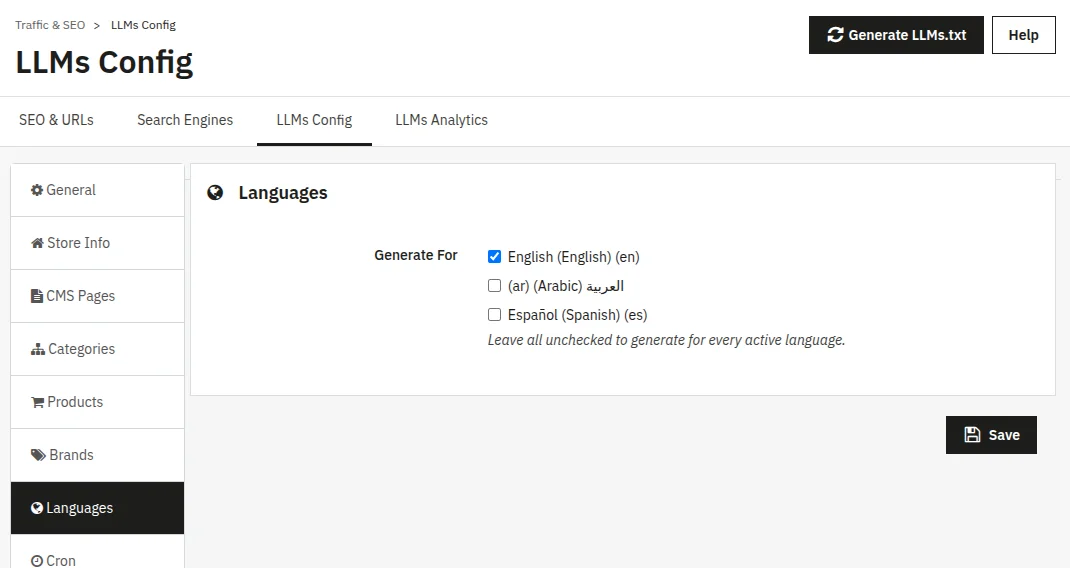
Select which active languages receive llms.txt files. Each checked language produces one file variant, typically served at a language-prefixed path such as /fr/llms.txt or /de/llms.txt.
- Generate For: Tick the languages you want included. Leave all unchecked to generate a file for every active language in the shop.
Cron / Scheduled Generation
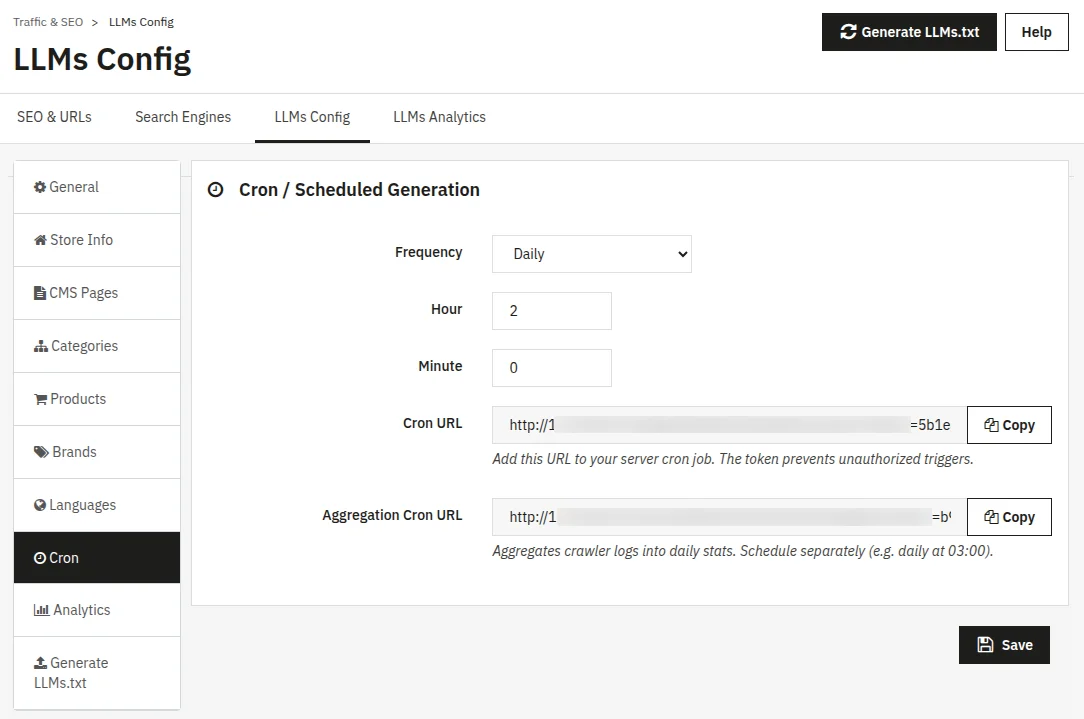
A cron job is an automatic task that runs on a schedule — like setting an alarm clock for your server — so all the llms.txt files stay current without manual regeneration.
- Frequency: Daily, Weekly, or Monthly. Weekly runs every seven days and Monthly runs every thirty days. Daily is recommended for active stores; Monthly is fine for stores that rarely change their catalog.
- Hour / Minute: The time of day for automatic regeneration, in 24-hour format. The default is 2:00 AM — typically a low-traffic window — but you can set any time.
- Cron URL: A token-protected URL you copy into your server’s cron job or an external scheduler; the token prevents unauthorized triggers. Hand this to your hosting provider or IT contact — they don’t need to understand the URL itself, just schedule it.
- Aggregation Cron URL: A second scheduled task that processes the previous day’s crawler logs into aggregated statistics, prunes old data, and creates alert notifications. Schedule this separately from the generation cron — for example, daily at 03:00.
Analytics Settings
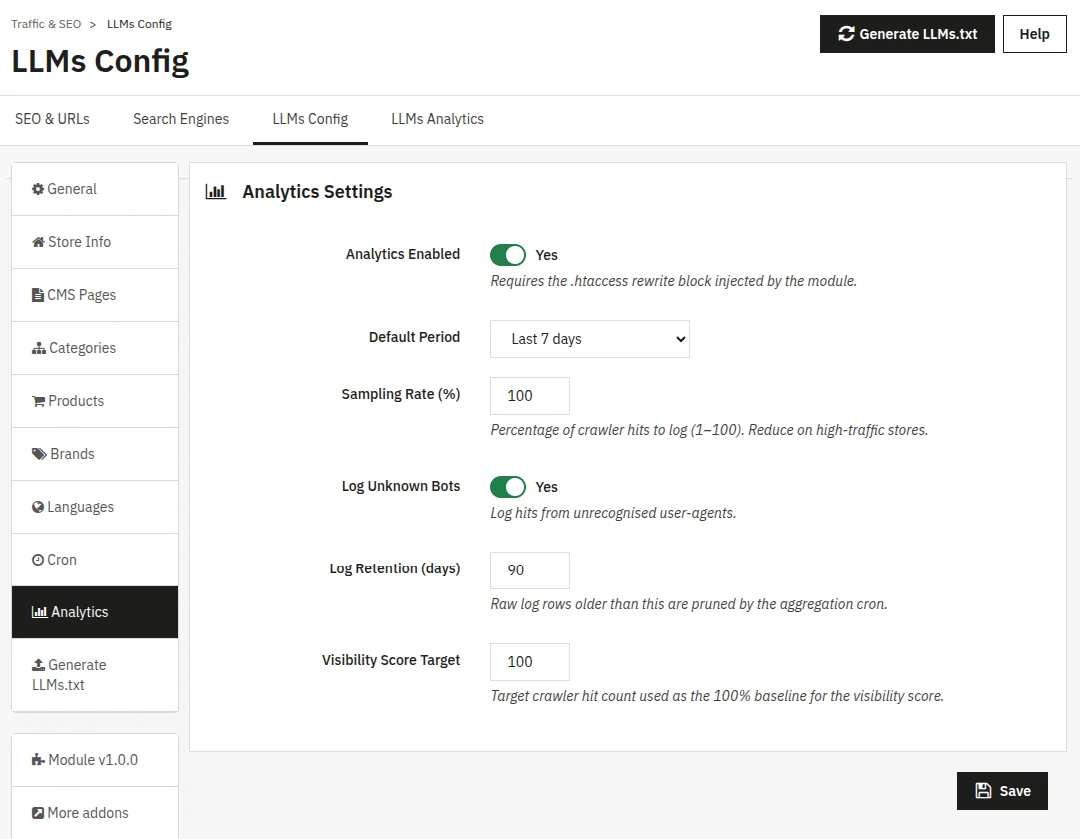
Controls how crawler hits are tracked and how long data is retained.
- Analytics Enabled: Turns crawler tracking on or off. Requires the .htaccess rewrite block that the module injects automatically.
- Default Period: The time window shown when you first open the analytics dashboard: last 24 hours, 7 days, 30 days, or 90 days. You can always change this later from the dashboard itself.
- Sampling Rate (%): Percentage of crawler hits to log, 1–100. Default is 100% (log every visit) — recommended for most stores. Reduce this only on very high-traffic stores where logging every hit would grow the database too quickly; 50% logs roughly half of all visits, 10% roughly one in ten.
- Log Unknown Bots: When enabled, also logs visits from user-agents that don’t match any of the 22 known AI crawler signatures — these appear as “Unknown” in analytics. Enable temporarily if you suspect new crawlers are visiting and want to identify them.
- Log Retention (days): How many days of raw log rows to keep before the aggregation cron prunes them. Range is 1–3,650; default is 90 days. Increase to keep records longer, or reduce to keep the database smaller.
- Visibility Score Target: The crawler-hit count used as the 100% baseline for the AI Visibility Score formula. Default is 100. Lower this if you’re satisfied with a smaller score and don’t want to keep seeing improvement suggestions past that point.
Generate LLMs.txt
This is the control room for actually creating or refreshing your files. It shows when files were last generated, and lists each tracked file with a status badge.
- Last Generated: Timestamp of the most recent successful generation across the current multistore context.
- File Status: Lists each expected file with a badge: Generated (green) — the file exists and was created successfully; Pending (yellow) — something changed in your store since the last generation and the file needs refreshing; Error (red) — something went wrong during the last write.
- Generate Now: Triggers an immediate generation for the files relevant to the current shop or domain context. This appears in place of the Save button when this tab is active, and runs instantly — no waiting required.
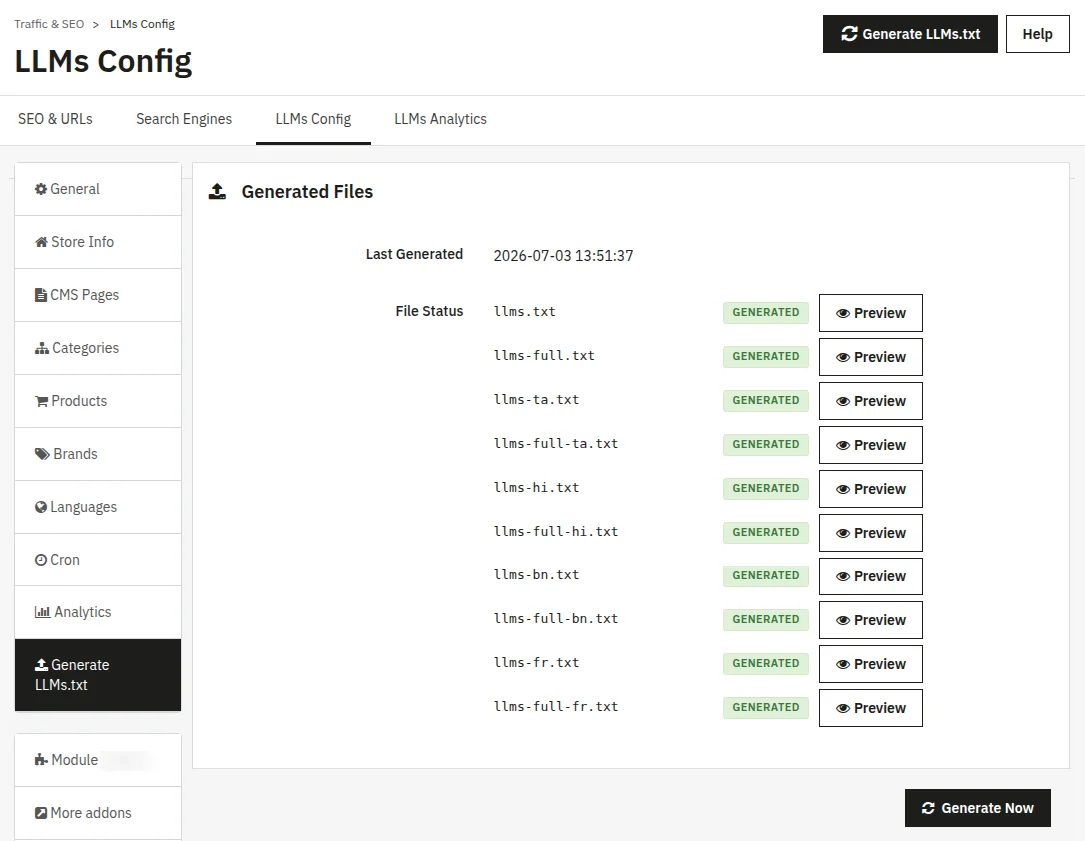
- Preview: Opens a modal with the raw file content plus Copy and Download actions — useful for confirming your products, categories, and descriptions are appearing correctly. The preview URL is validated server-side, so only legitimate llms.txt filenames are accepted.
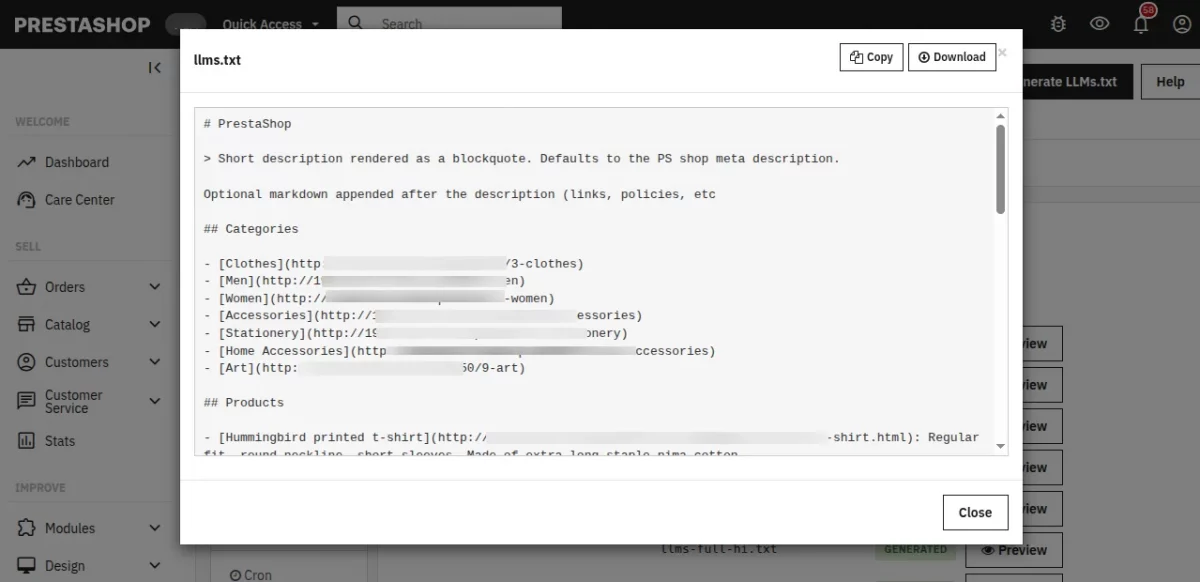
Note: In a multistore setup, the module generates a separate llms.txt file for each shop.
LLMs Analytics panel
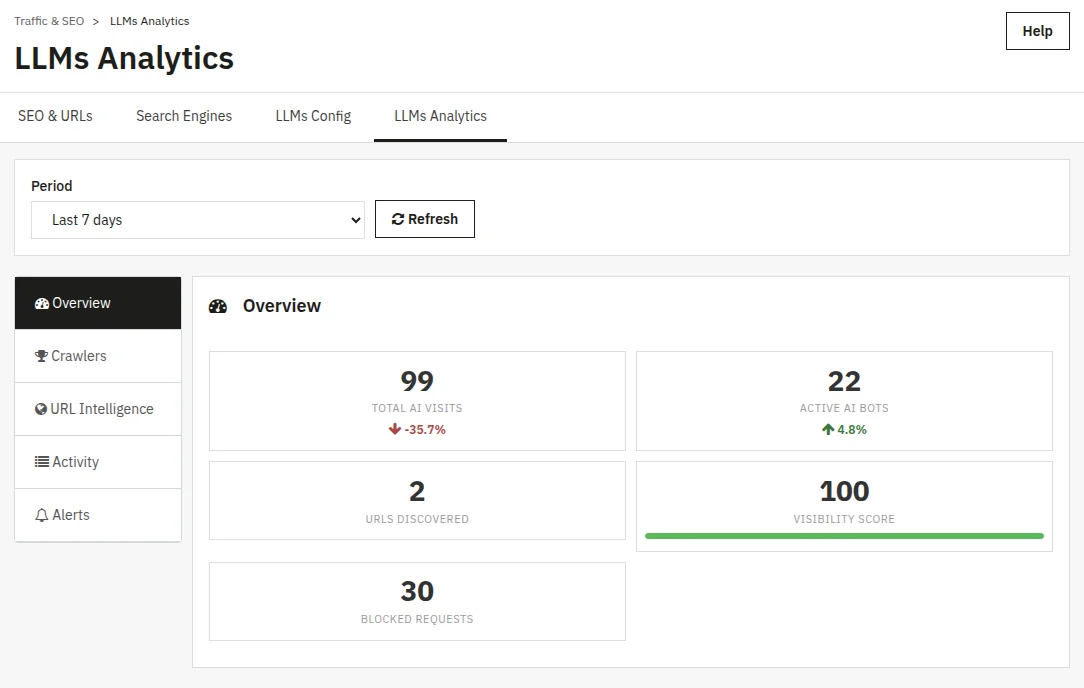
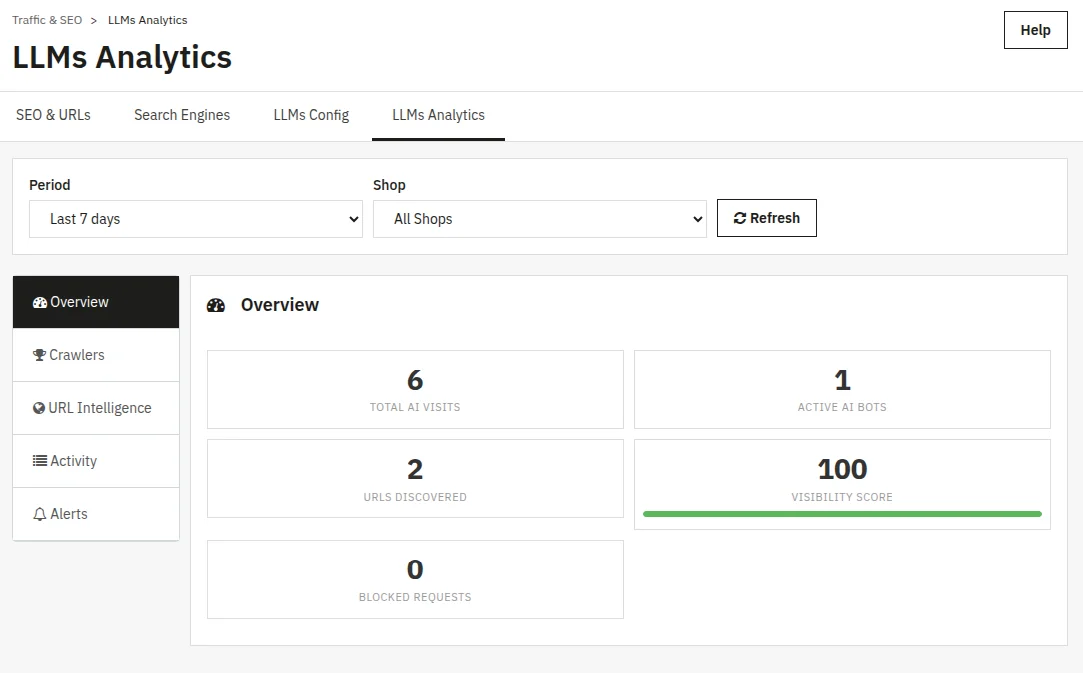
The LLMs Analytics panel is a read-only dashboard under SEO & URLs. Use the Period dropdown to change the time window, the Shop dropdown for multistore, and Refresh to reload data instantly.
Overview
KPI cards summarizing AI crawler activity, with trend arrows comparing the current period to the previous one.
Total AI Visits: Total number of times an AI crawler downloaded your llms.txt file during the selected period. A higher number means AI companies are actively paying attention to your store.
Active AI Bots: How many different AI crawlers visited during the period — 1 means only one company’s AI is reading your file, 8 means eight different companies are.
URLs Discovered: How many different files did AI crawlers access? If you generate both llms.txt and llms-full.txt and both were visited, this reads 2.
Visibility Score: A 0–100 score measuring your store’s AI SEO, AI visibility, and AI discovery.
Blocked Requests: How many times has a crawler tried to access your file but got an error. Ideally, zero — a non-zero number can mean a missing file or a server configuration issue.
If multistore is enabled, the Shop selector appears, allowing you to view analytics for an individual shop.
Crawlers
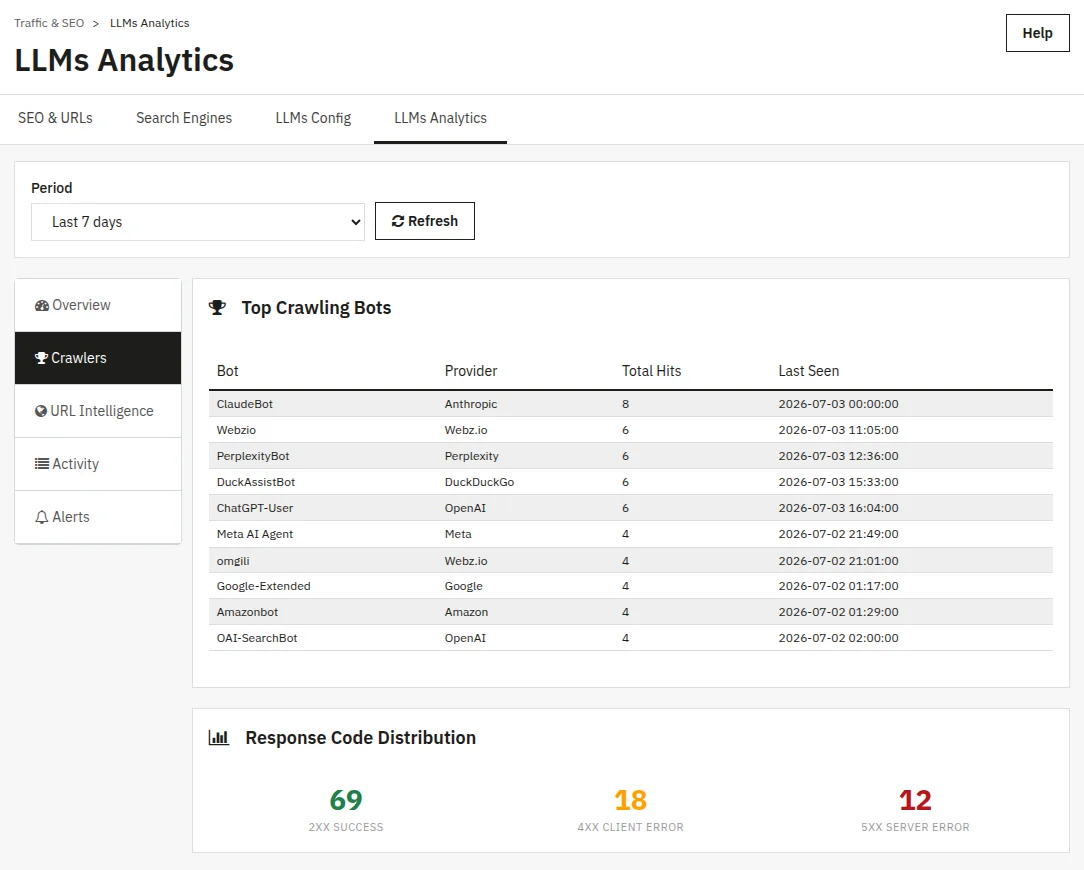
Top Crawling Bots table: A leaderboard of AI crawlers ranked by visit count, showing Bot (crawler name, e.g. ClaudeBot), Provider (owning company, e.g. Anthropic), Total Hits, and Last Seen.
Response Code Distribution: Shows visit results: 2xx (green) — success, 3xx (blue) — redirect, 4xx (yellow) — file not found/blocked, 5xx (red) — server error. Ideally, almost all hits should be 2xx.
URL Intelligence
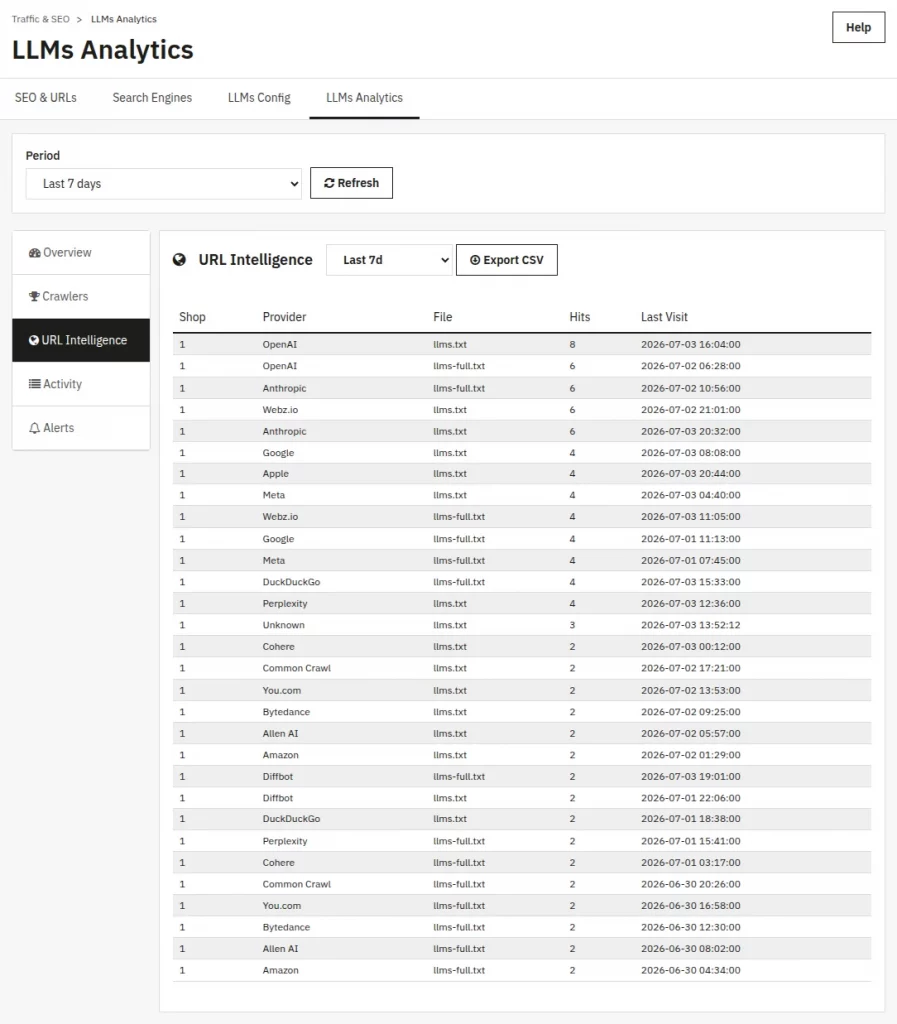
Shows which files each AI provider is accessing and how often, with its own independent period selector and a CSV export.
Table columns: Shop (relevant for multistore setups), Provider (e.g. OpenAI, Google), File (e.g. llms.txt, llms-full.txt), Hits, and Last Visit.
Export CSV: Downloads the table as a spreadsheet with Shop ID, Provider, File, Total Hits, and Last Visit columns.
Activity
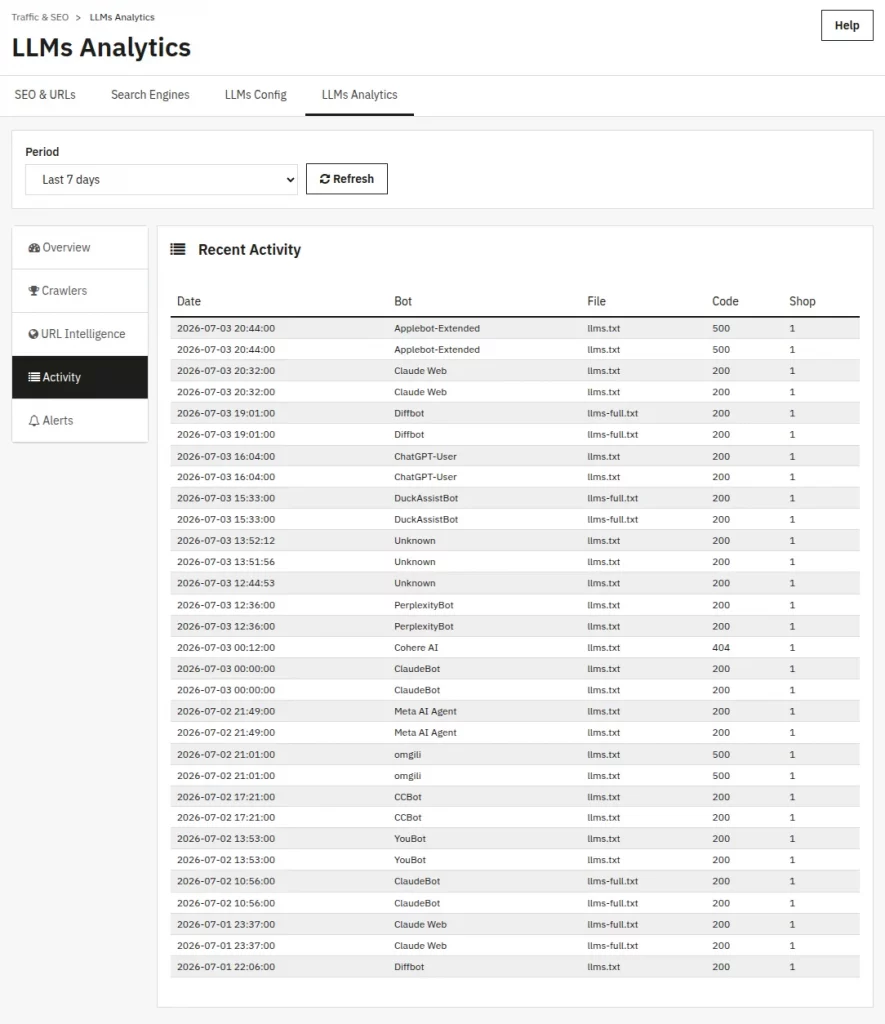
A real-time log of the 50 most recent AI crawler hits, newest first — useful for confirming things are working (click Generate Now, then refresh this tab to see new visits appear).
Table columns: Date, Bot (crawler name), File, Code (response code — 200 success, 404 not found, and so on), and Shop.
Alerts
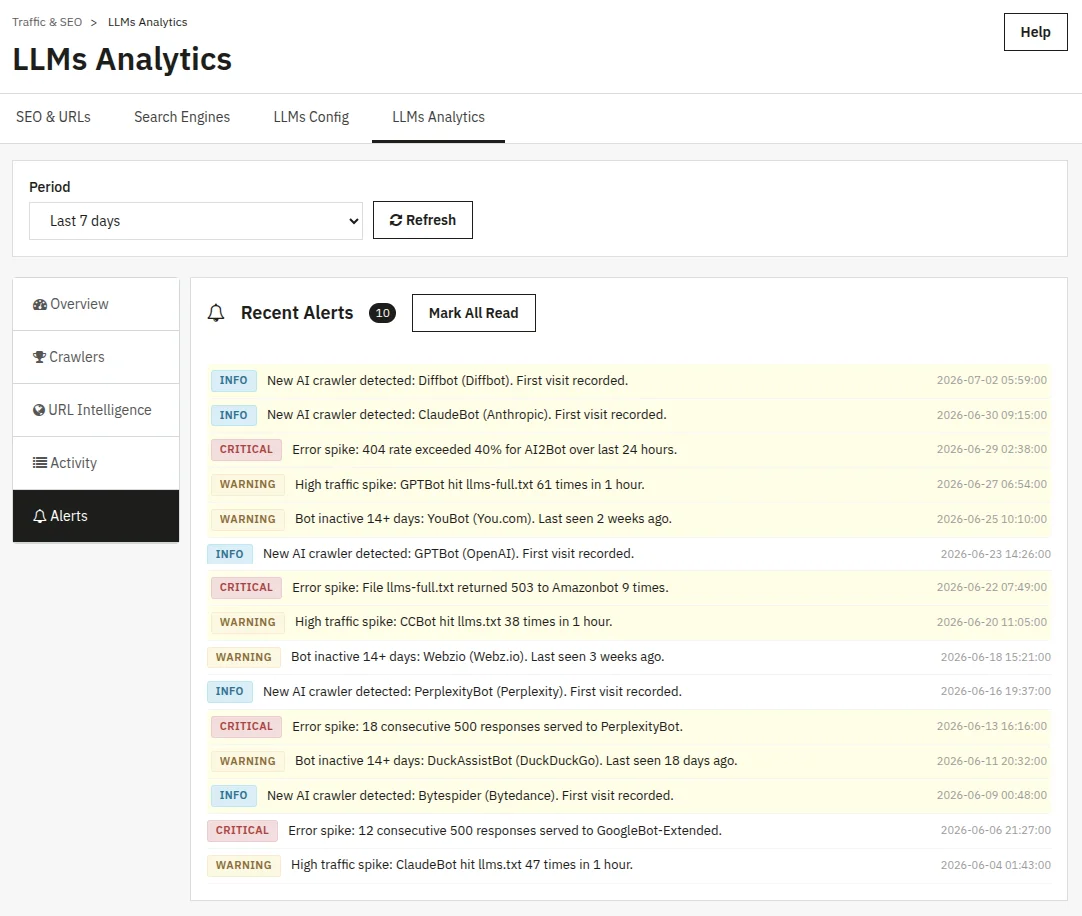
The module reviews analytics data overnight and raises alerts when something is worth knowing, each tagged with a severity badge.
Info (blue): Something new and interesting — no action needed. Typically, a new AI crawler is visiting for the first time.
Warning (yellow): Worth checking — e.g., a bot that visited regularly has been quiet for 14+ days, meaning the AI company may have changed its crawling or hit a file issue.
Critical (red): Something that needs attention now — for example, an error-rate spike or a run of failed responses served to a crawler.
Mark All Read: Dismisses the unread counter. Alerts remain visible; only the unread badge disappears.
This was all about the Prestashop LLMs TXT Generator Module. I hope this document will help you in checking the functionality of the module in a better way.
Also, do let us know about your views in the comments.
Support
For any kind of technical assistance or query, please raise a ticket or send us an email at [email protected]
Also, please explore our Prestashop development services and vast range of quality Prestashop addons.
Current Product Version - 1.0.0
Supported Framework Version - 9.x.x, 8.x.x, 1.7.x.x

Be the first to comment.