PrestaShop AI Locale Translator is a module that rewrites your store content into other languages using artificial intelligence.
Instead of typing every translation yourself, you choose the languages and the content, and the AI does the writing.
This guide walks you through installing the module, translating your products, categories, pages, and more. By the end, your store will be ready to welcome shoppers in several languages.
NOTE: Prestashop AI Locale Translator is compatible with the PrestaShop Multi-store feature.
Features of Prestashop AI Locale Translator
- Connects to popular AI services like OpenAI, Google Gemini, Anthropic, OpenRouter, Cerebras, or DeepSeek using a key.
- Connects to your own AI that you host on your server through a simple web address.
- Translates 26 types of store content, including products, categories, pages, attributes, features, brands, suppliers, and delivery methods.
- Translates the text inside your installed modules, your active theme, and the built-in PrestaShop labels on both the admin and customer sides.
- Shows a live progress screen so you can watch each translation as Pending, In Progress, Completed, or Failed.
- Let’s you cancel a waiting translation or delete a finished or failed one.
- Creates clean, readable web addresses for each translated page to help search engines list your store.
- Keeps your layout, images, prices, links, and special codes exactly as they are — only the words change.
- Translates right away from your admin panel, or runs automatically in the background on a schedule.
- Adds a quick “Translate” button on individual category edit pages.
- Adds bulk “Translate” actions to the product, pages, attribute, and feature listing tabs.
How to Install Prestashop AI Locale Translator
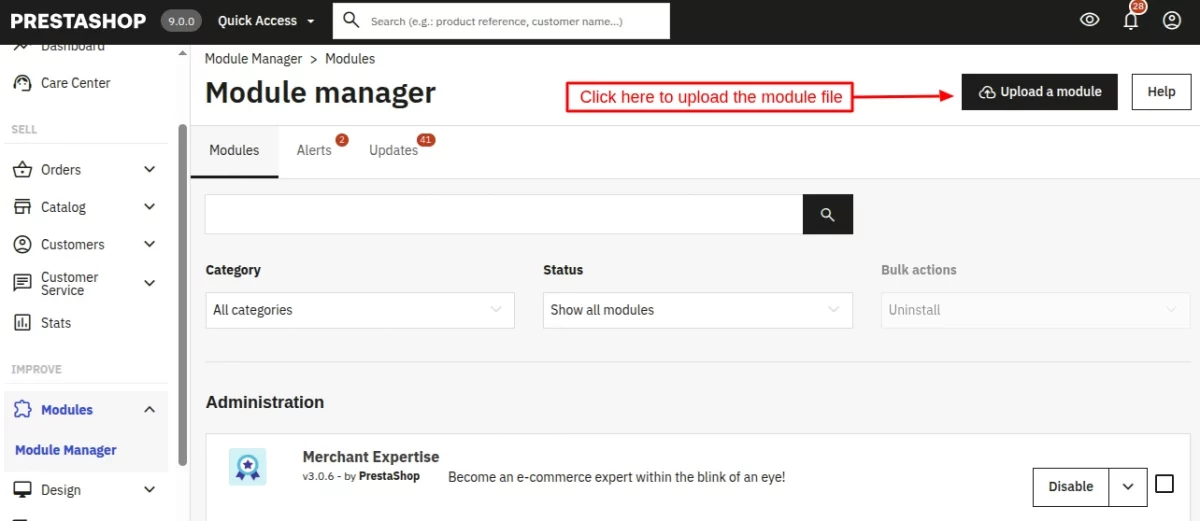
- Firstly, go to the module manager in the back office and click on ‘upload a module’.
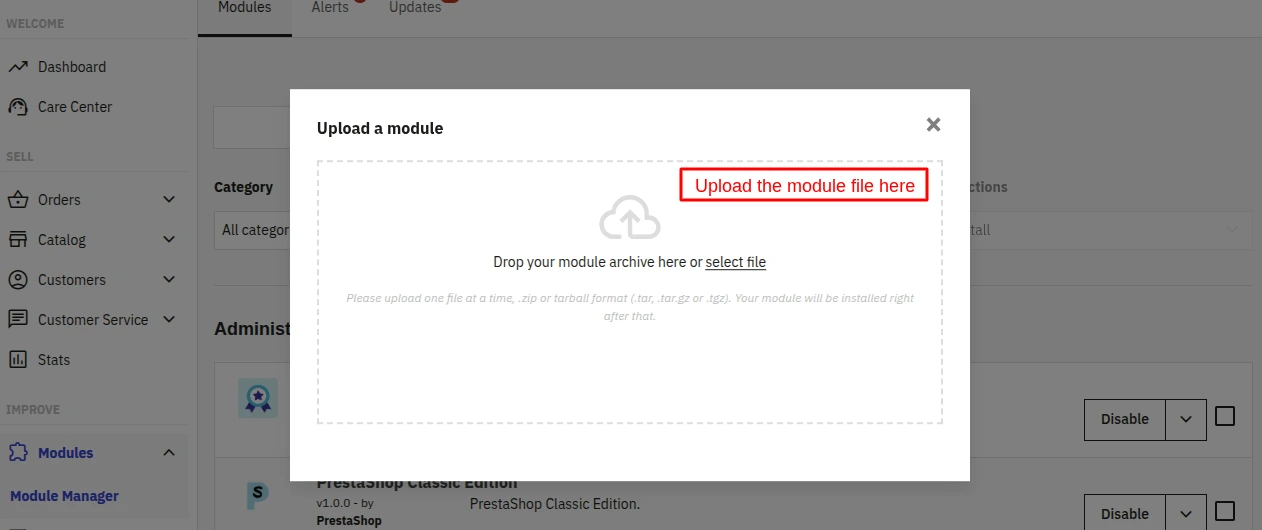
- After that, drag and drop the module file or select the file from the system.
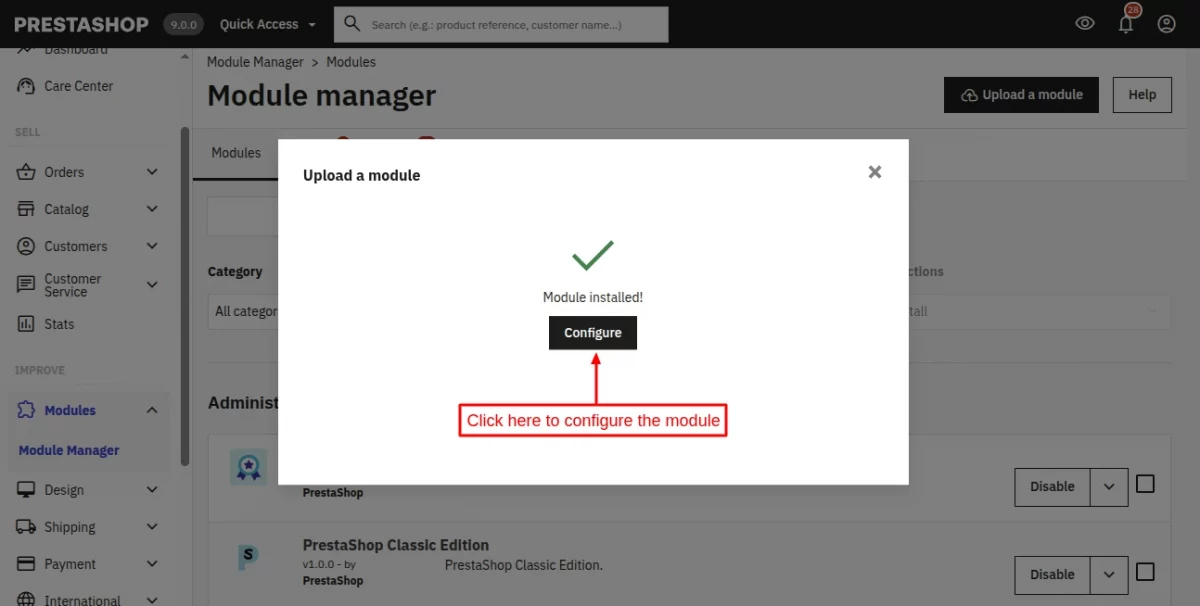
- In this way, the module installation will be successful.
How to Get API Keys for LLM Providers
To use AI-powered translation services, generate an API key from your preferred LLM provider using the links below:
- OpenAI API Key: Generate your OpenAI API key here
- Gemini AI API Key: Generate your Google Gemini AI API key here
- Anthropic API Key: Generate your Anthropic API key here
- OpenRouter API Key: Generate your OpenRouter API key here
- Cerebras API Key: Generate your Cerebras API key here
- DeepSeek API Key: Generate your DeepSeek API key here
Prestashop AI Locale Translator Module Configuration
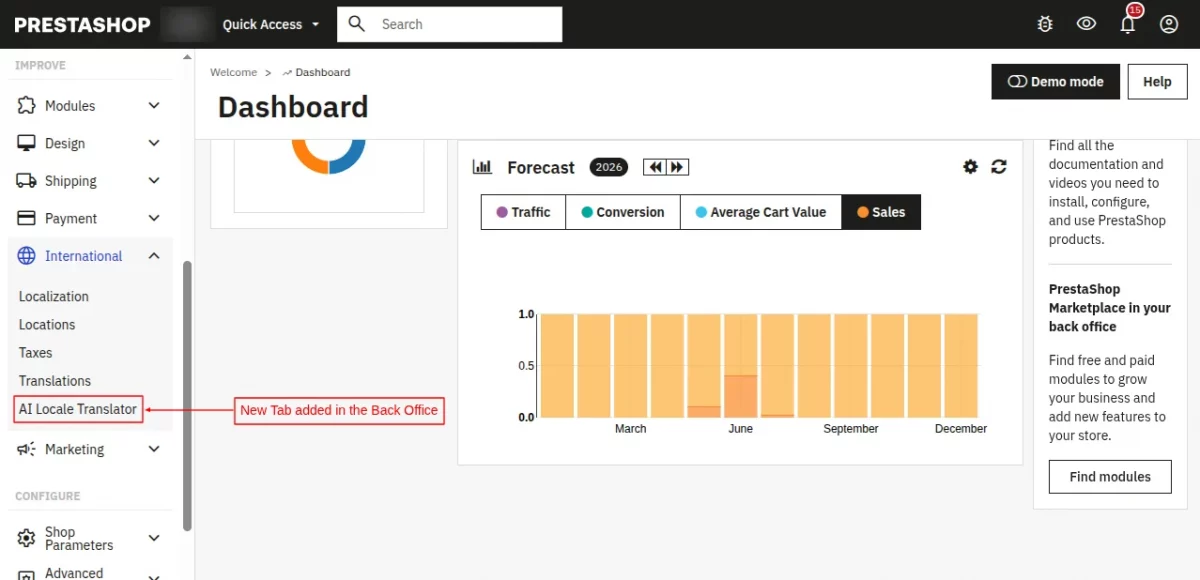
After installation, the admin can configure the module either through the International tab or the Module Manager by opening AI Locale Translator.
General configuration
From this tab, the Admin can connect the module to an AI service and decide how translations are produced. You can fill in the following fields, then click Save.
- Enable module: Turn the module on or off. Keep it set to Yes so translations can run. Switch to No if you want to pause all translation activity.
- AI model type: Choose how the module reaches AI. Pick “Preconfigured” if you are connecting your own AI using its web address. Pick “LLM Provider” if you want to use a service like OpenAI or Gemini with a key.
If the Admin chooses “Preconfigured” —
- Content generation endpoint: The web address of your own AI that writes the translations. Only needed when “AI model type” is set to Preconfigured. Leave it blank if you are using an LLM Provider instead.
- Model fetch endpoint: The web address the module uses to list the available AI models from your own AI. Only needed for the Preconfigured option. There is a “Fetch Models” button next to this field to load the list.
- Preconfigured model: The specific AI model to use from your own AI. Only shown for the Preconfigured option, and it is filled after you fetch the models.
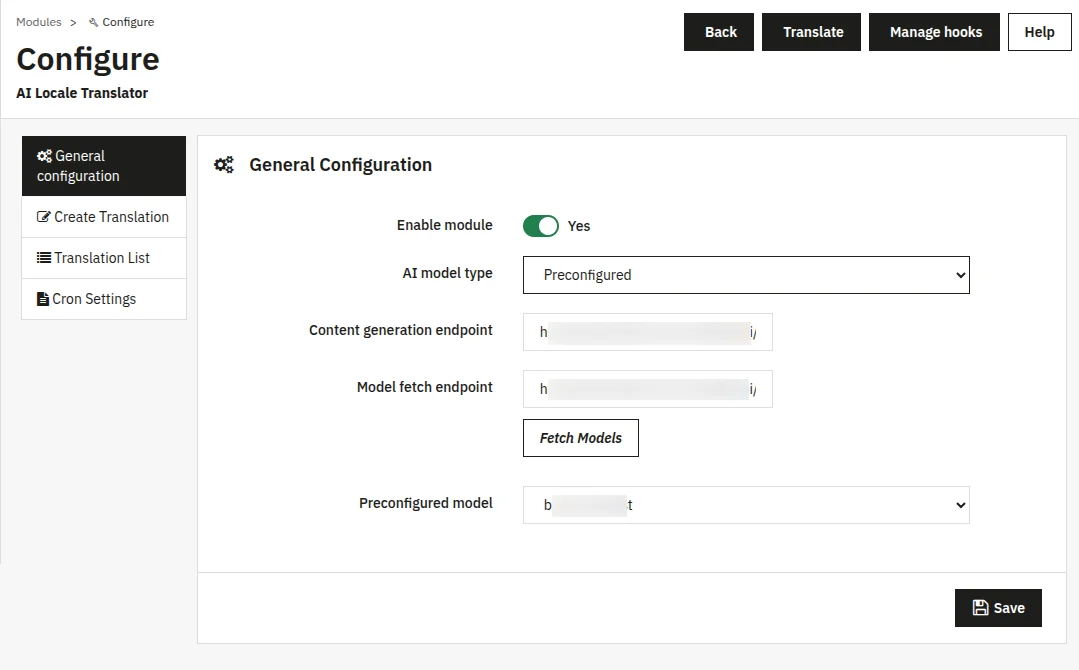
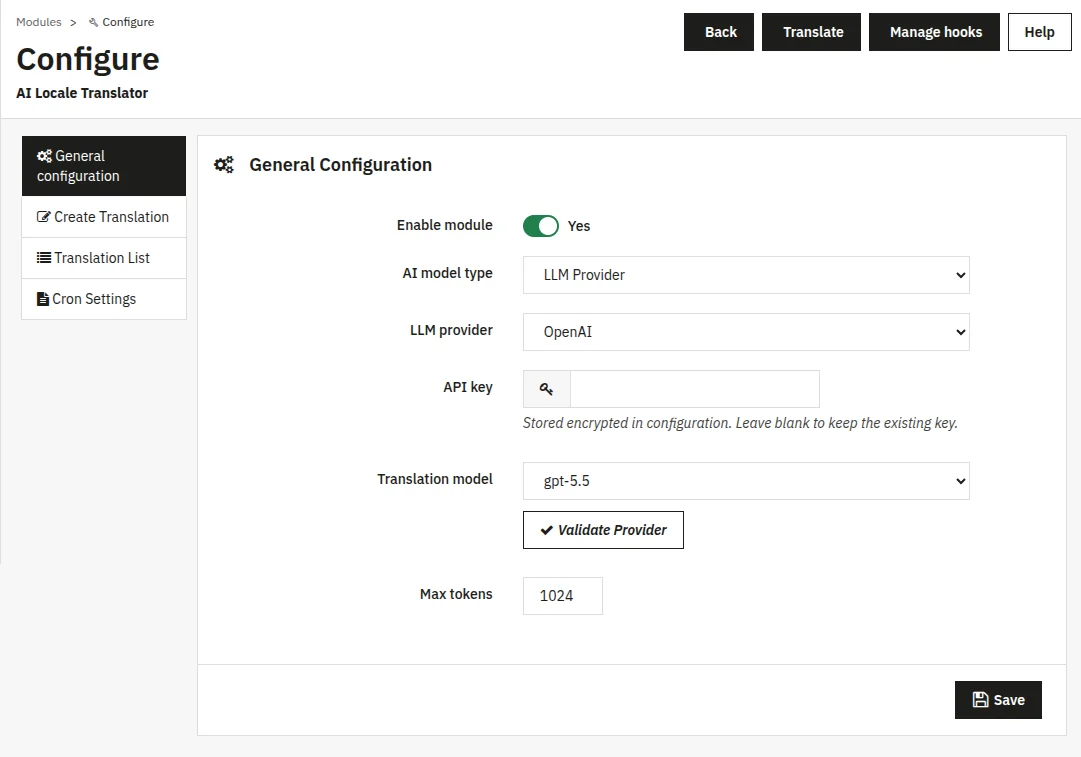
If the Admin chooses “LLM Provider” —
- LLM provider: The AI service you want to use — OpenAI, Gemini, Anthropic, OpenRouter, Cerebras, or DeepSeek. Choose the one whose key you will add.
- API key: The private key your chosen AI service gives you. Paste it here to connect. It is stored safely and hidden — leave this field blank if you only want to keep the key you already saved.
- Translation model: The specific model from your chosen provider to use for translations. Click “Fetch Models” or “Validate” to load and check it.
- Max tokens: The maximum length of each translation. The default of 1024 is fine for most product text. Raise it for very long pages or lower it for shorter, faster results. Must be a whole number greater than zero.
PrestaShop AI Locale Translator Module Workflow
Create Translation
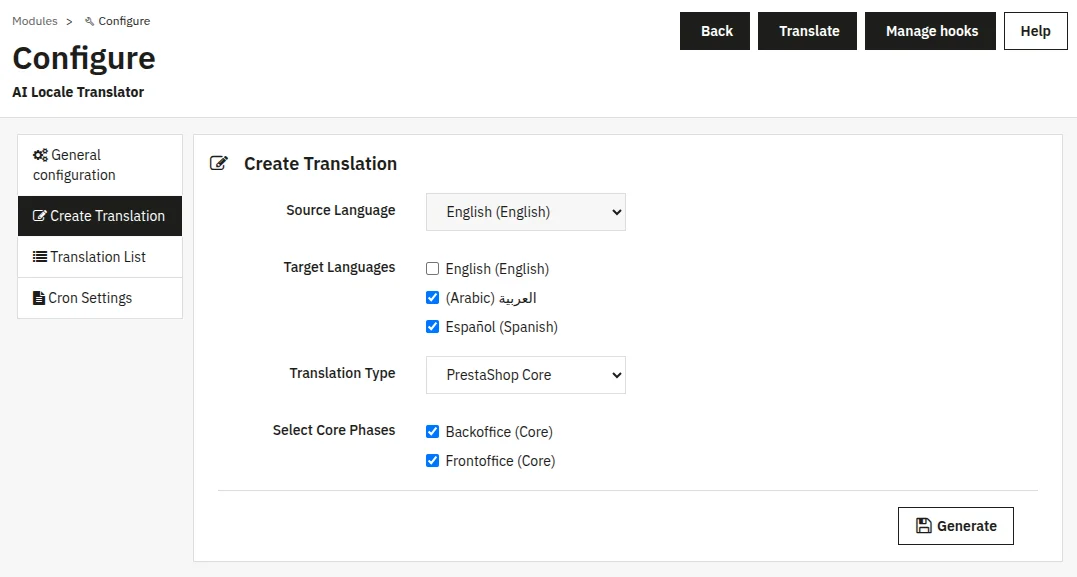
This is where you start a translation. Choose what to translate and into which languages, then click Generate.
Follow the steps below to complete the translation process using the module.
- Select the source language — the language your current content is written in.
- Choose one or more target languages — the languages you want the content translated into.
- Choose a Translation Type: your store content (products, categories, pages, and more), Modules, Themes, or PrestaShop Core text.
- If you choose Modules, select the modules you want to be translated.
- If you choose Themes, pick your theme from the list.
- If you chose a content type, decide whether to translate all of them or select specific ones using the search box. You can also choose exactly which text fields (for example, name and description) to include.
- For categories, you can choose to include sub-categories as well.
- Click Generate. The module adds the work to the translation queue and begins processing.
Translation List
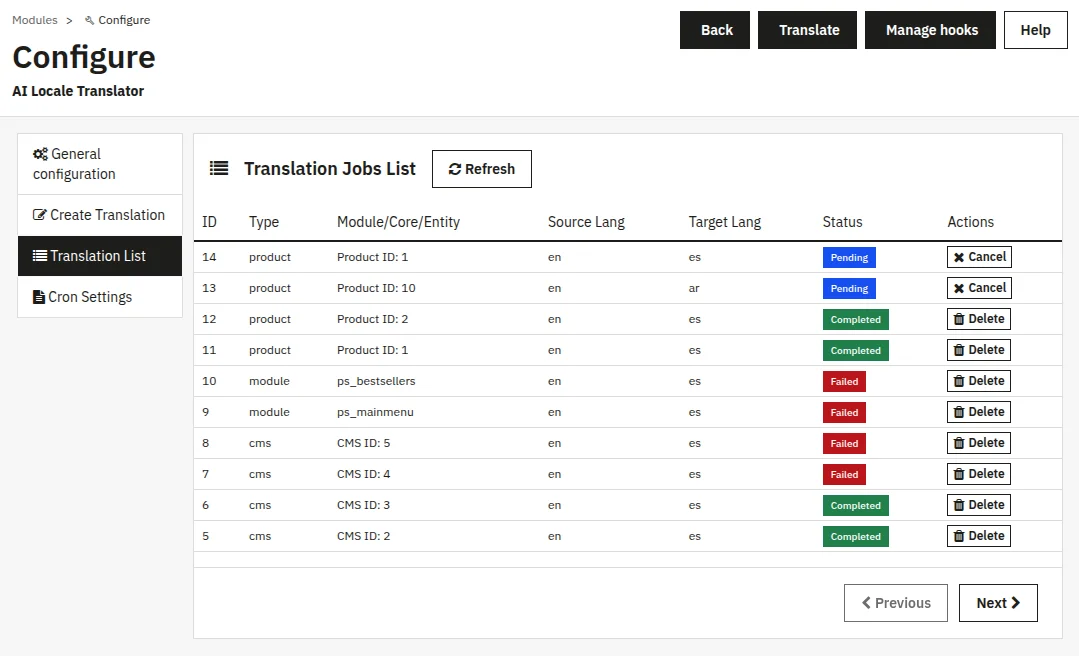
This tab shows a listing of every translation job and its live status.
- Each row shows the type, the item, the source and target languages, and the status: Pending, In Progress, Completed, or Failed.
- Use the Delete button on a completed or failed job to remove it, or Cancel on a waiting one to stop it.
- Use Refresh to update the view, and Previous / Next to move through your job history.
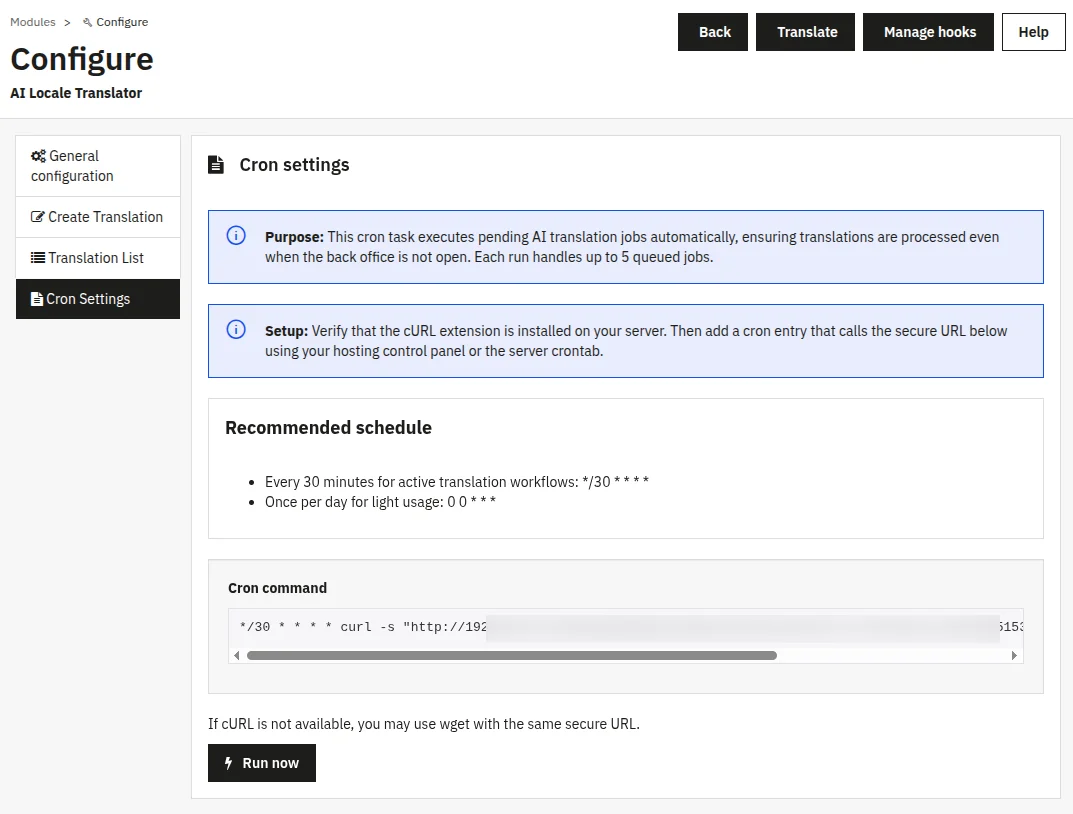
Cron Settings
This tab allows the translations to run automatically in the background on a schedule, so you do not have to start them by hand.
- Copy the secure cron URL shown on this screen.
- Add it to your hosting schedule. The suggested timing is every 30 minutes or once a day for lighter use.
- Each run processes a batch of up to 5 waiting translations. You can also click “Run now” to trigger one pass immediately.
Translate from a category page
You do not always need the Create Translation tab. On the edit page of every category, a Translate button is available.
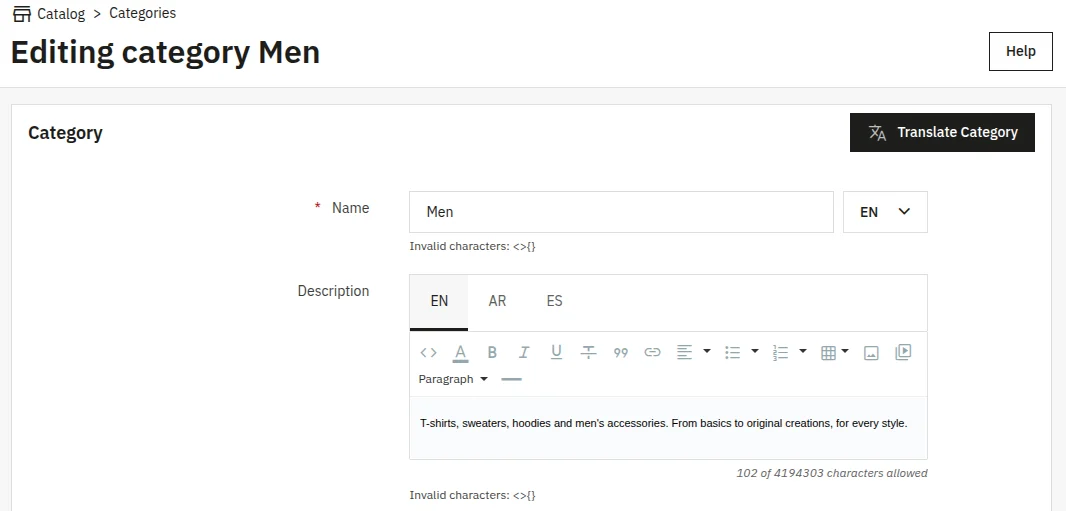
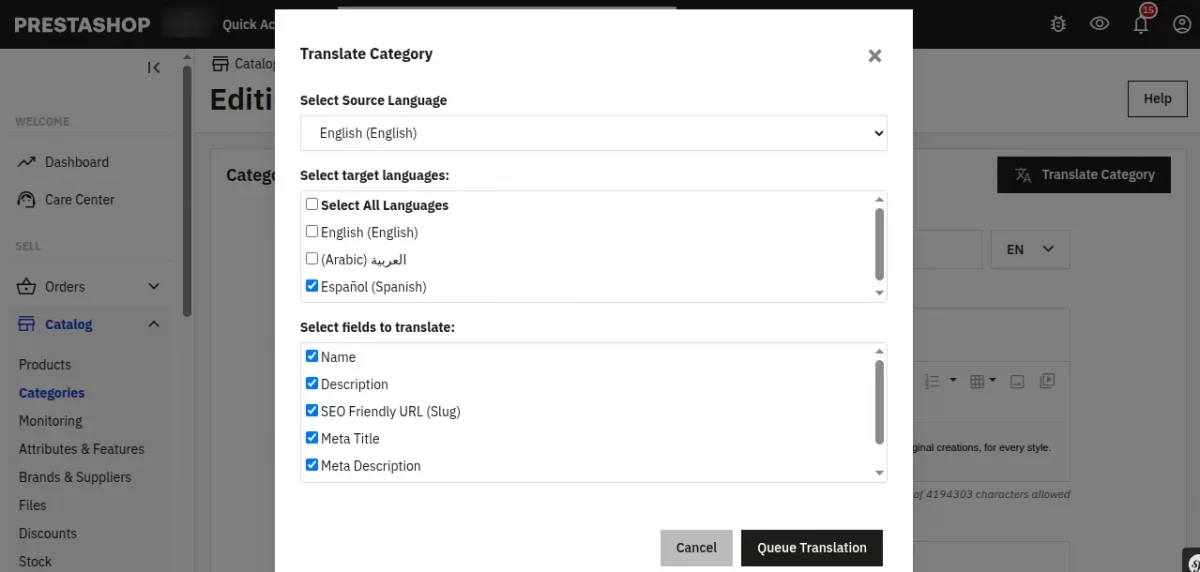
To translate the Category directly from the edit page, follow the steps below.
- Open the category you want to translate and click the Translate button on that screen.
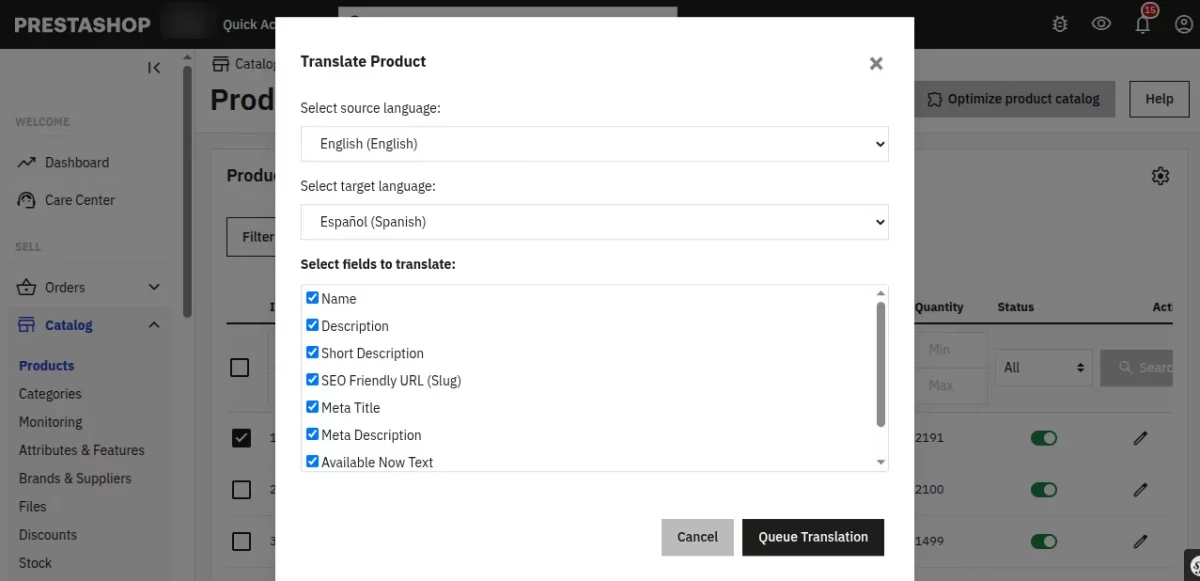
- Choose the source language and the target language, then pick the fields you want translated (such as Name or Description).
- Click Queue Translation. The job appears in the Translation List, where you can follow its progress.
Translate in bulk from a listing page
The product list, pages list, attribute list, and feature list each have a Translate bulk action.
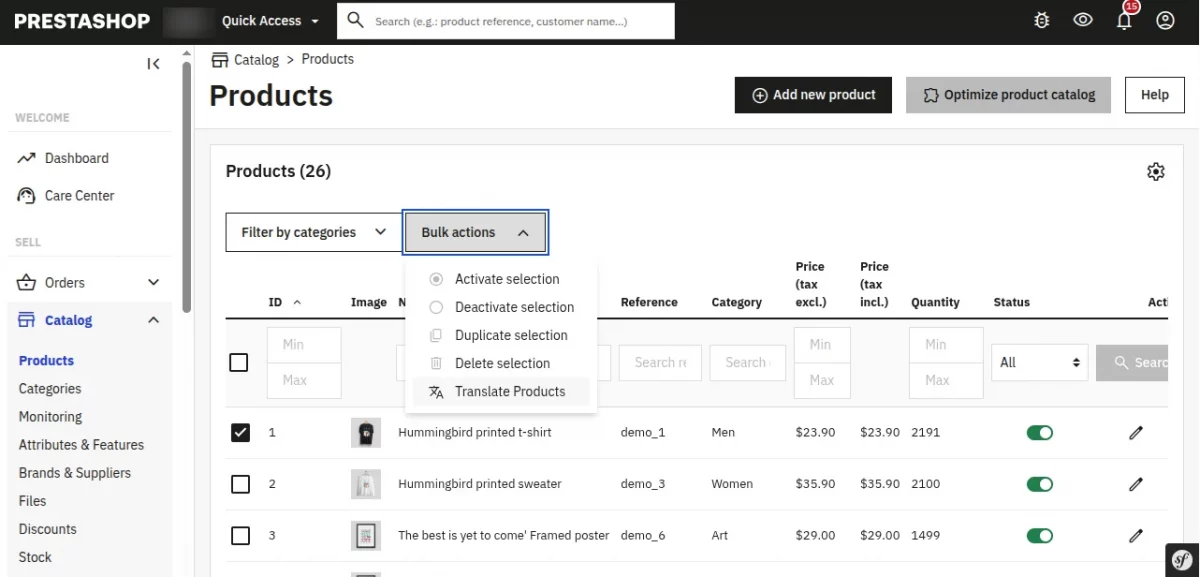
To translate products, pages, attributes, and features in bulk directly from the listing pages, follow the steps below.
- Open the relevant listing page in your admin panel.
- Select the items you want using the checkboxes.
- Choose the Translate bulk action, pick your target language and fields, then confirm to queue them all at once.
Front Office Workflow
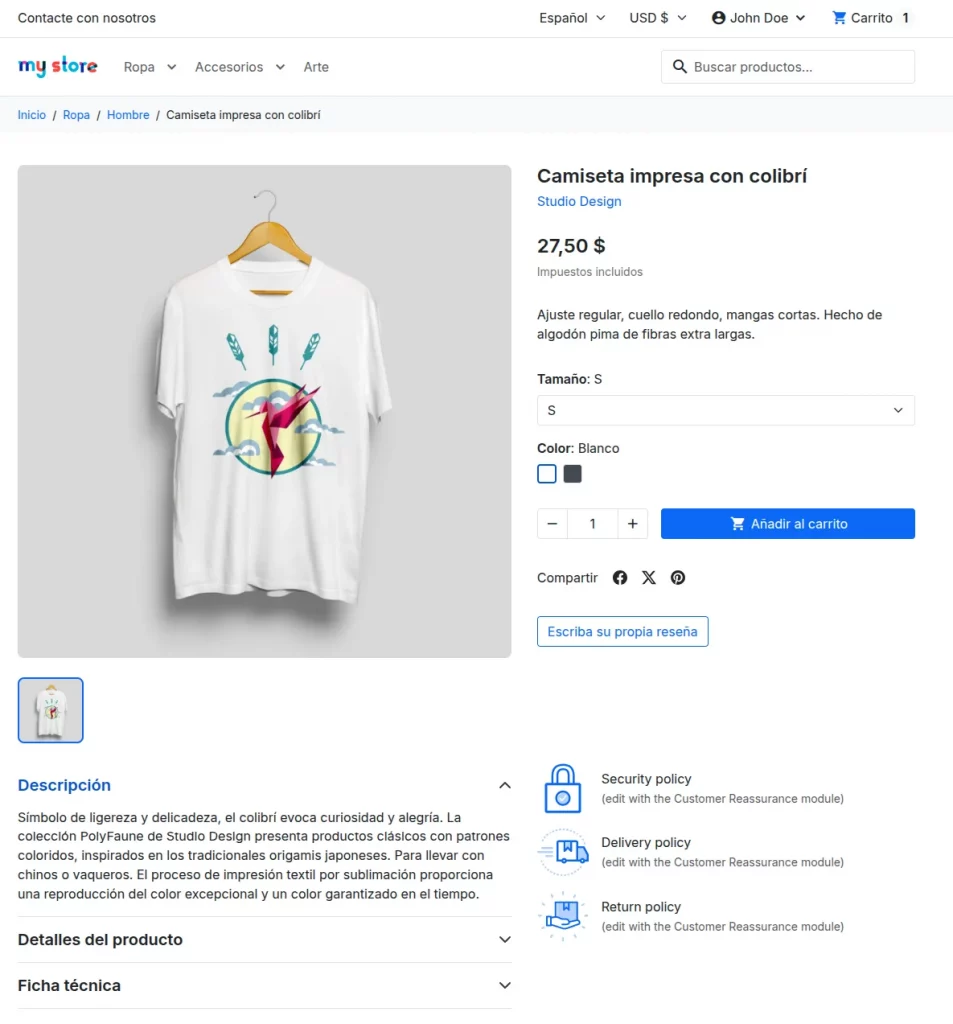
From a customer’s point of view, nothing changes about how the store looks — except that now the words can appear in their language.
When a shopper switches the store language using the language selector, the module shows the AI-translated versions of your content.
Translated content displays automatically wherever that language has been translated. Returning customers who switch languages instantly see the localized version without any extra steps.
This was all about the Prestashop AI Locale Translator Module. I hope this document will help you in checking the functionality of the module in a better way.
Also, do let us know about your views in the comments.
Support
For any kind of technical assistance or query, please raise a ticket or send us an email at [email protected]
Also, please explore our Prestashop development services and vast range of quality Prestashop addons.
Current Product Version - 1.0.0
Supported Framework Version - 9.x.x, 8.x.x, 1.7.x.x

Be the first to comment.