Introduction
Odoo POS Wallee Terminal Integration connects the Wallee payment terminal to Odoo point of sale. This module lets cashiers send and confirm payments seamlessly from one screen.
Unlike Odoo POS Wallee Payment Acquirer, this module ensures smooth card payments through the Wallee Terminal.
In this guide, we will walk you through installing and configuring Odoo POS Wallee Terminal Integration, step by step.
Features of POS Wallee Terminal Integration
- Connect your Wallee terminal with Odoo POS in minutes.
- Configure Wallee API details right inside Odoo POS settings.
- Send card payment requests straight from the POS screen.
- Accept card payments through connected Wallee terminals.
- Get live payment status updates inside Odoo POS.
- Receive instant alerts through secure Wallee webhooks.
- Store every Wallee transaction record inside Odoo.
- Track payment history and status without extra steps.
- Cut manual entry and reconciliation work at checkout.
Installation Process
Setting up Odoo POS Wallee Terminal Integration takes just a few steps. Follow the process below to get your module installed.
1. Once you purchase the App from the Webkul store, you will receive a link to download the module’s zip file.
2. Extract the file on your system after the download finishes. As a result, you will see a folder named ‘pos_wallee_terminal_integration’.
3. Copy and paste this folder into your Odoo Add-Ons path.
4. Now, open Odoo App and click on the Settings menu. Here, click on Activate Developer Mode.
5. Then, open the Apps menu and click on ‘Update Modules List.’
6. In the search bar, remove all the filters and search for ‘pos_wallee_terminal_integration’.
7. You will see the module in the search results. Click on ‘Install’ to install it.
Workflow
Once installed, Odoo POS Wallee Terminal Integration is easy to configure. Follow the steps below to connect your Wallee terminal and start accepting card payments.
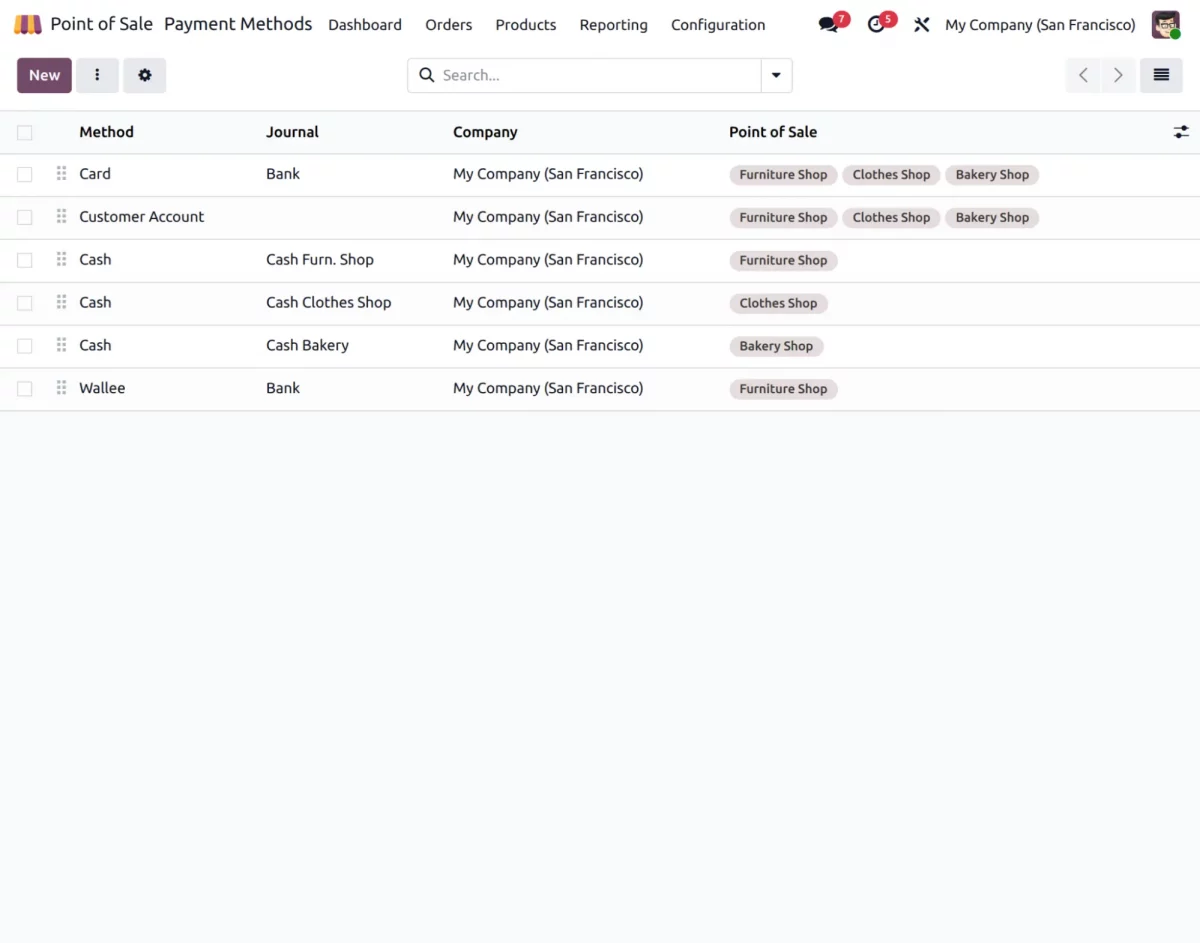
1. After installation, go to Point of Sale > Configuration > Payment Methods and click New to create a Wallee payment method.
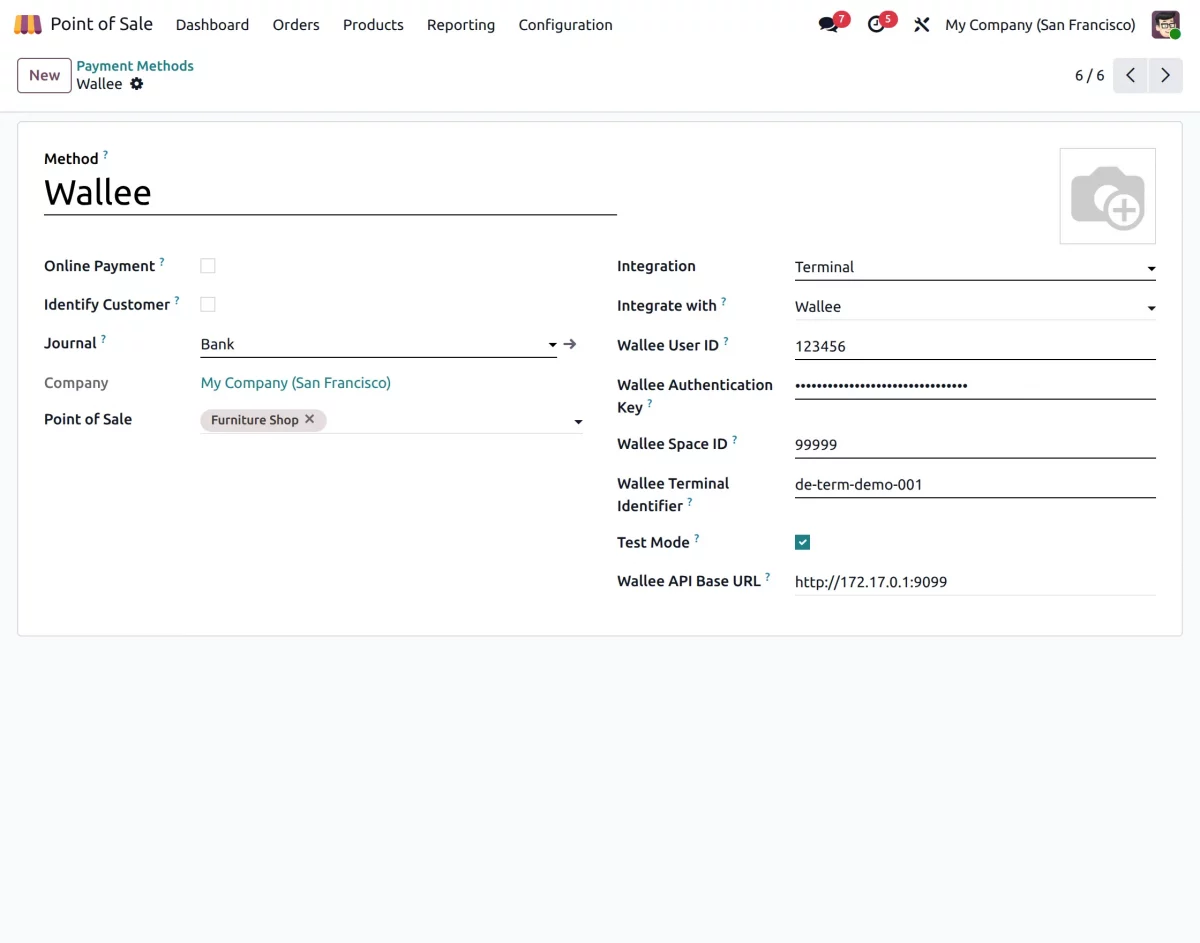
2. Select Wallee as the payment terminal type. Enter your Wallee API credentials, including the Space ID and Wallee Authentication Key.
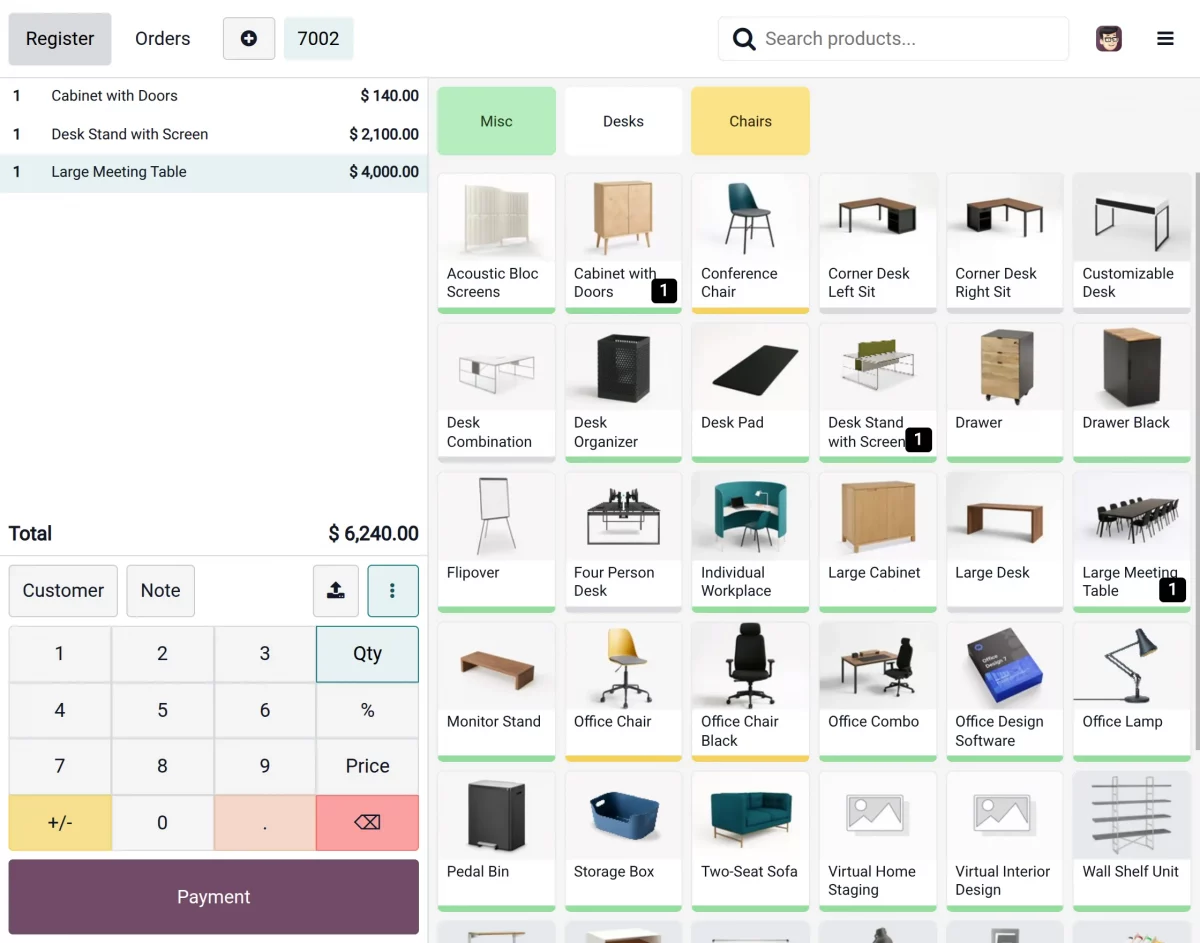
3. Open Odoo point of sale session, go to the checkout view, and click on the payment button.
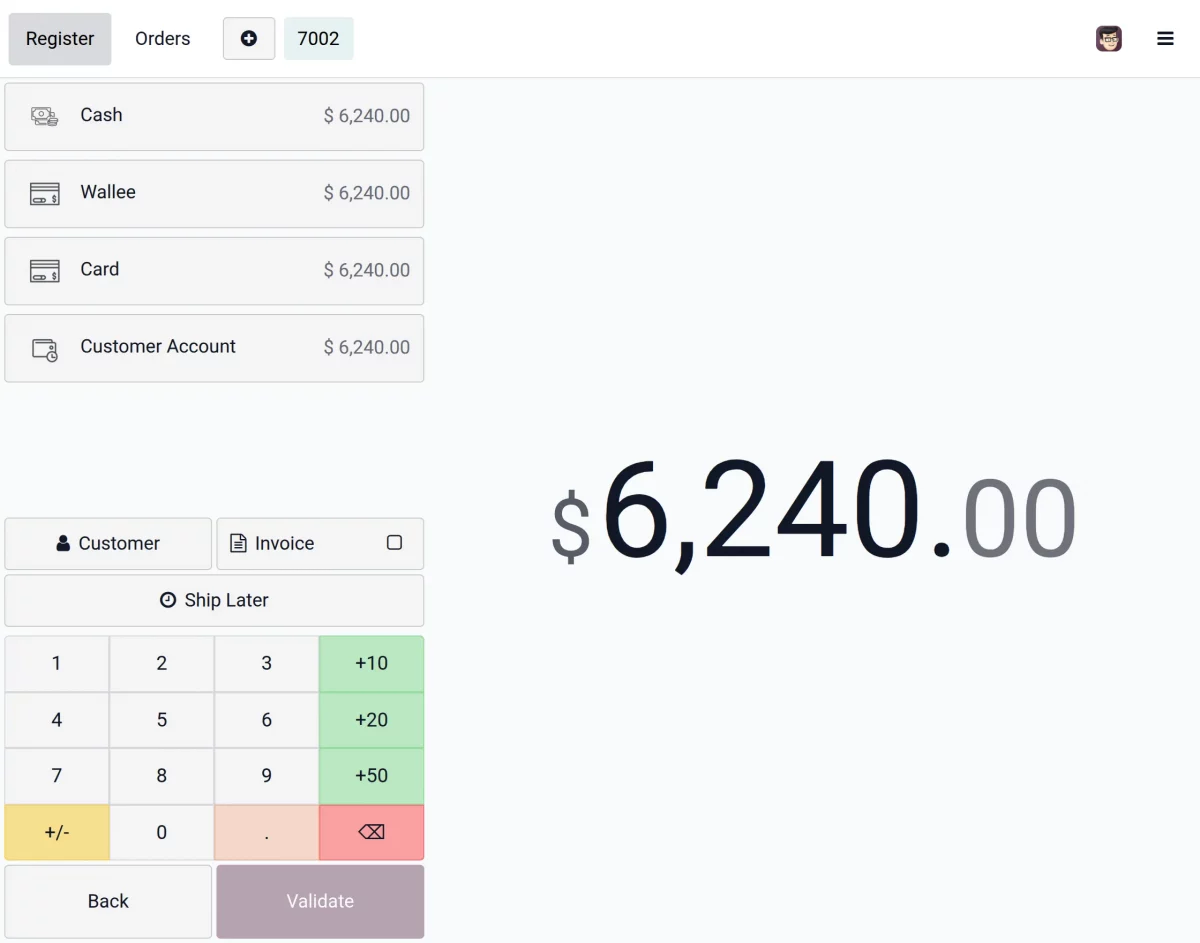
4. You will now see Wallee listed as a payment option on the checkout screen; then select Wallee at checkout.
5. Odoo POS sends the payment request directly to your connected Wallee terminal.
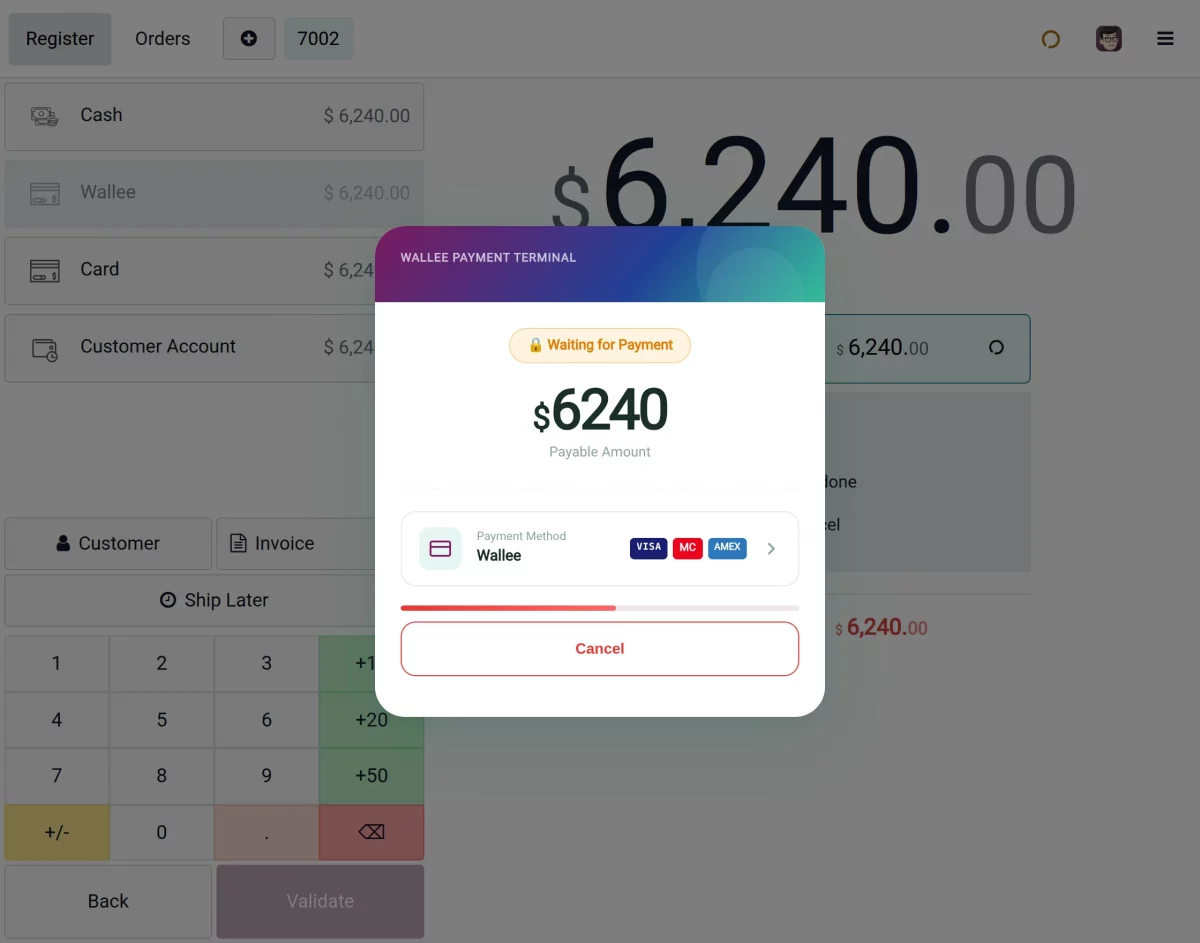
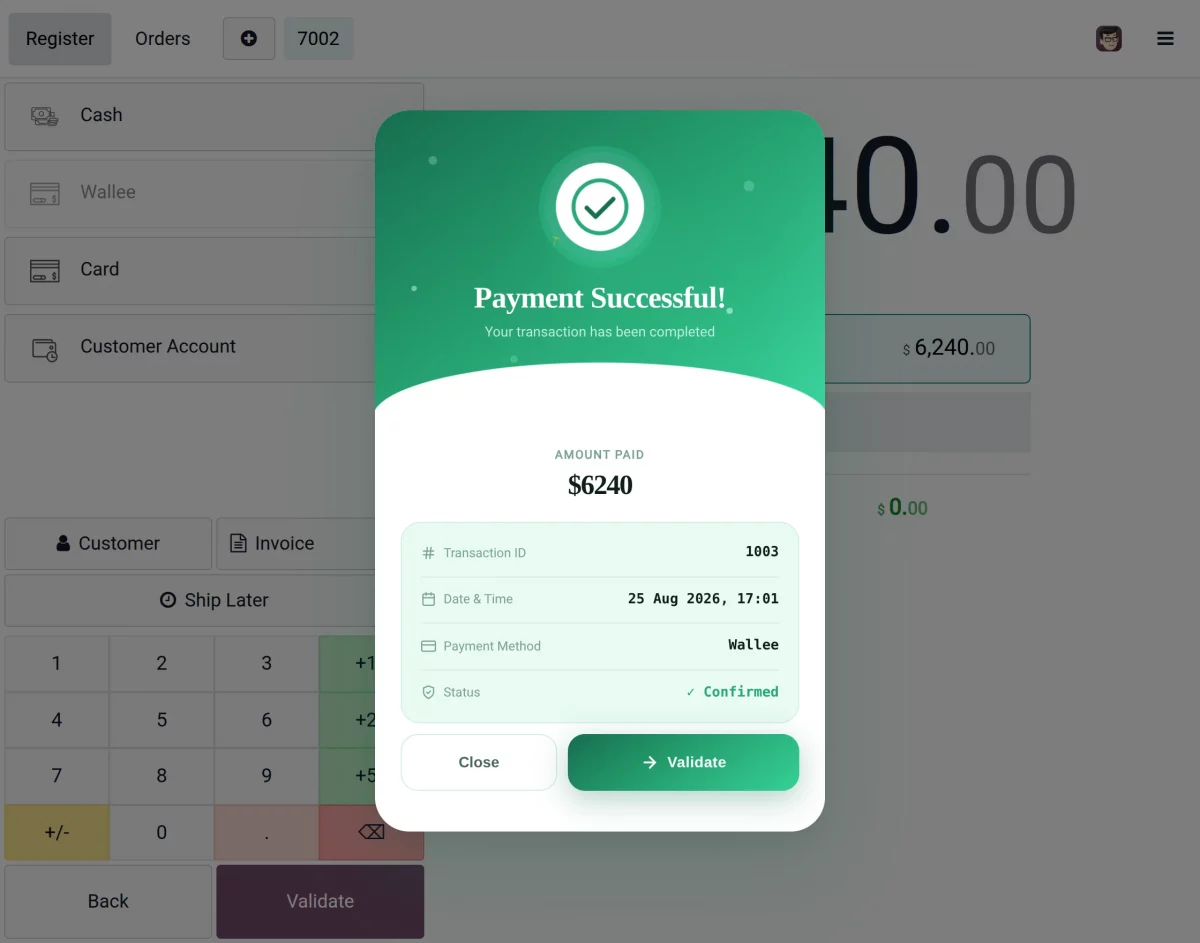
6. After accepting the payment from the customer, a success pop-up will appear on Odoo POS window.
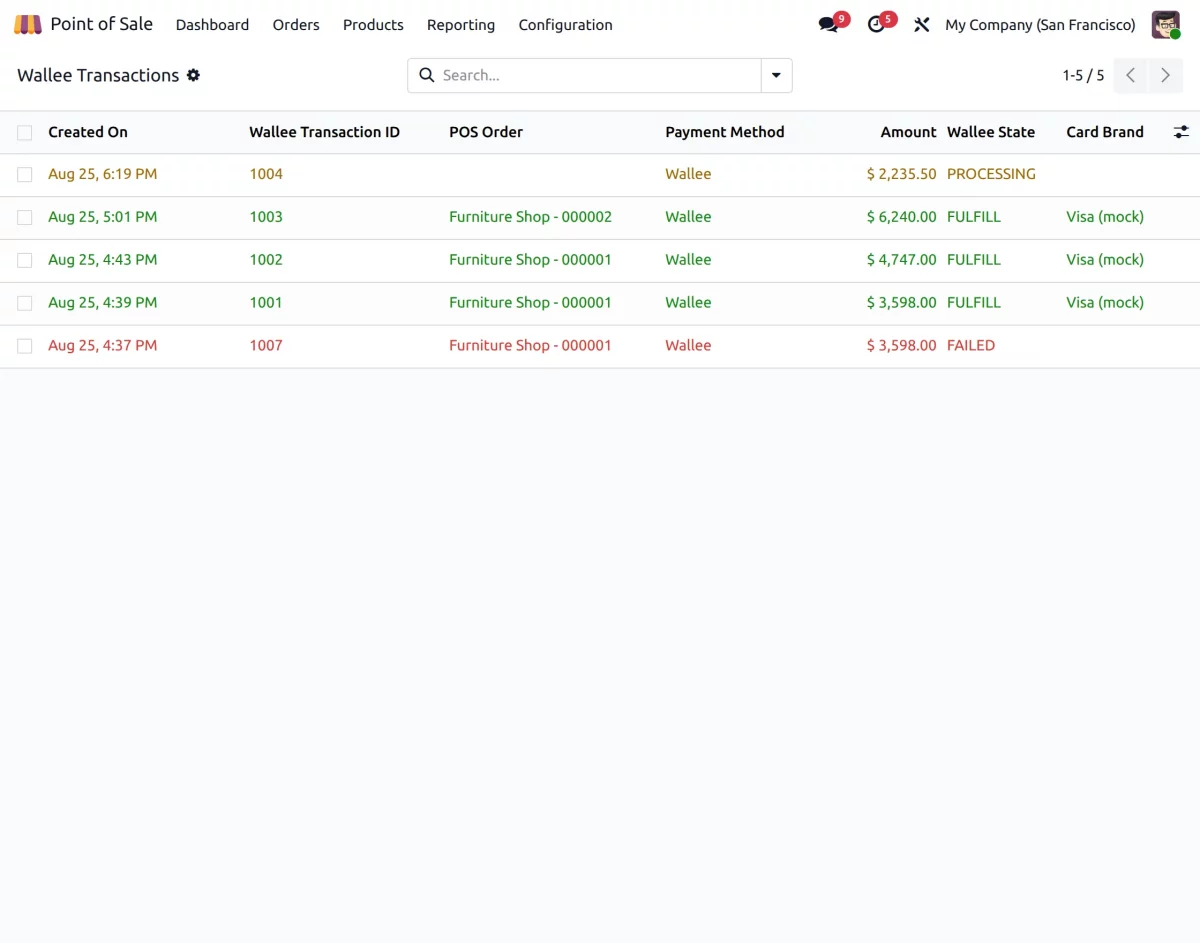
7. To review transaction history, go to Point of Sale > Orders > Wallee Transactions, where every Wallee transaction is logged with its status.
Need Help?
Hope you find this guide on Odoo POS Wallee Terminal Integration helpful! Please share your feedback in the comments below.
If you still have any issues or queries, please raise a ticket.
In case of any further queries, contact us at our support email: [email protected].
Current Product Version - 1.0.0
Supported Framework Version - 19, 18, 17, 16

Be the first to comment.