Opencart Booking & Reservation via QR Code: Through Opencart Booking & Reservation via QR Code.
The admin can easily retrieve the details of any order or change the order status by simply entering the order id of a product.
The QR code is visible to a user in the Order page at the backend, in the Order Information page in the frontend and in the mail which the user receives.
Incorporating Quick Response codes or the QR codes with marketing strategies will amplify a store’s brand image. It is a modern way of executing a business.
The QR codes help the admin fetch the details of order and saves an admin’s time. It is a very interesting feature which will affect sales conversions drastically.
Note:
- Opencart Booking & Reservation via QR Code is the add-on for Advanced Booking and Reservation.
- The user must install the Opencart Advanced Booking and Reservation module.
Check the plugin workflow –
Features
- It is an add-on for Advance Booking and Reservation.
- It generates QR codes for booking products only.
- Admin can easily retrieve the order details using QR codes.
- The admin can change the order status of the product to complete by simply entering the order id in the backend under Orders.
- QR code is attached with the order mail which is sent to customers and store owner.
- The admin can complete the order by simply scanning the QR code using a scanner.
- This add-on works only with the booking products.
Installation
Upload Files
First, extract the downloaded zip file. After that, open the correct Opencart Version Folder. According to Opencart Version installed in your system.
Then, upload admin to the Opencart root directory.

Upload ZIP
Now log in to admin backend and navigate through Extensions -> Extension Installer. Click the Upload button and browse the Zip file, this file is in the ocmod folder.
Please select the correct ocmod folder. According to your Opencart version installed in your system.
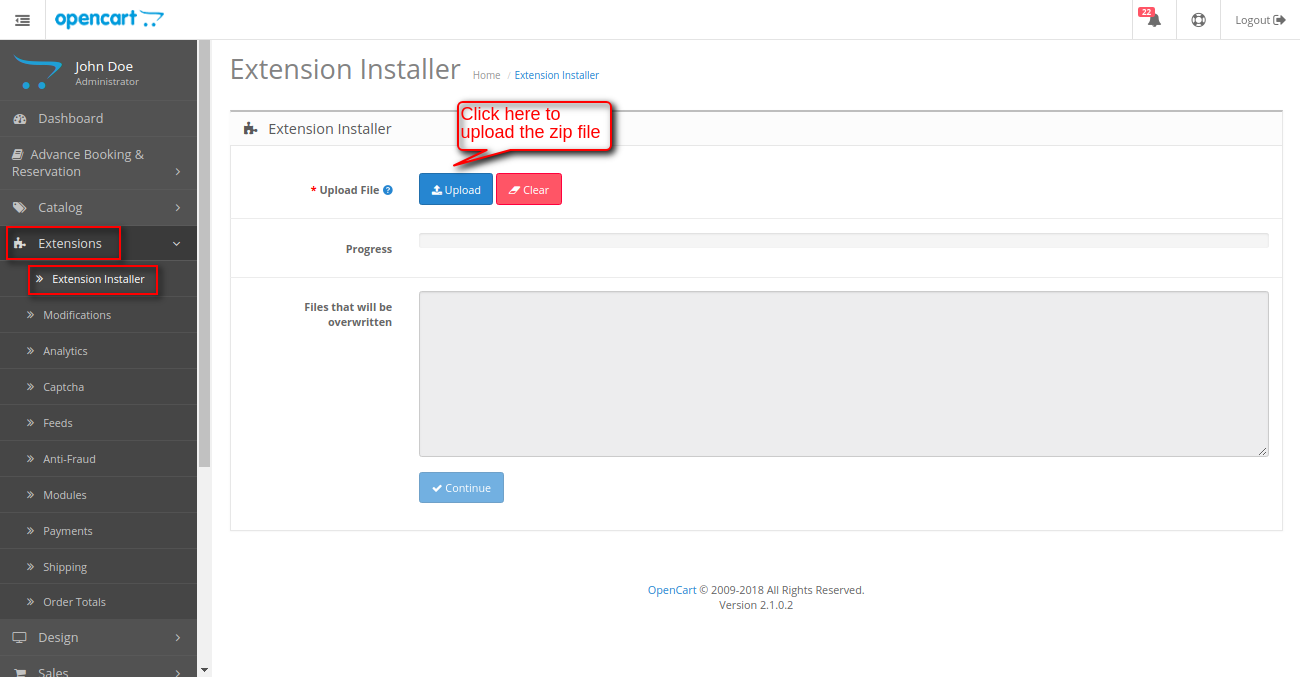
Click Continue after uploading the Zip file.
Refresh Modifications
After uploading the Zip file, please navigate through Extensions > Modifications. Now click the Refresh button as visible in below screenshot.

Edit User Groups
After that, go to System > Users > Usergroups. And then edit ‘Administrator’. Click Select All for both Access Permission and Modify Permission and Save it.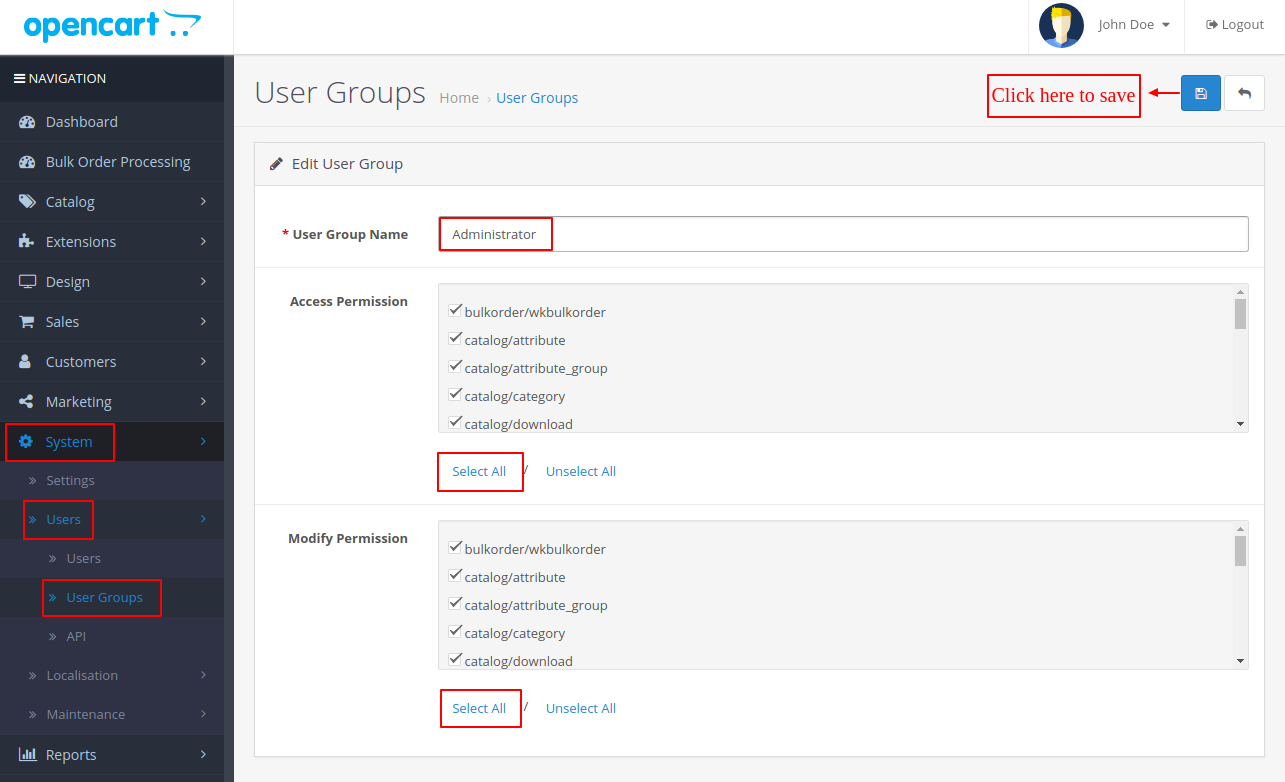
Install
Now navigate to Extensions > Modules. Find Webkul QR Code Generator from the list. Click the Install button as visible in the screenshot below.
Admin-End Configurations
After the successful installation of the Webkul QR Code Generator, the admin can navigate through the Extension > Extensions > Modules as shown in the image. 
The admin can manage the configurations under Extension > Modules > Webkul QR Code Generator.

The admin can click on the edit button for the Webkul QR Code Generator.
Thereafter, the admin can edit the status of the Webkul QR Code Generator by either choosing ‘Enabled’ or ‘Disabled’ against the Status option as shown in the image.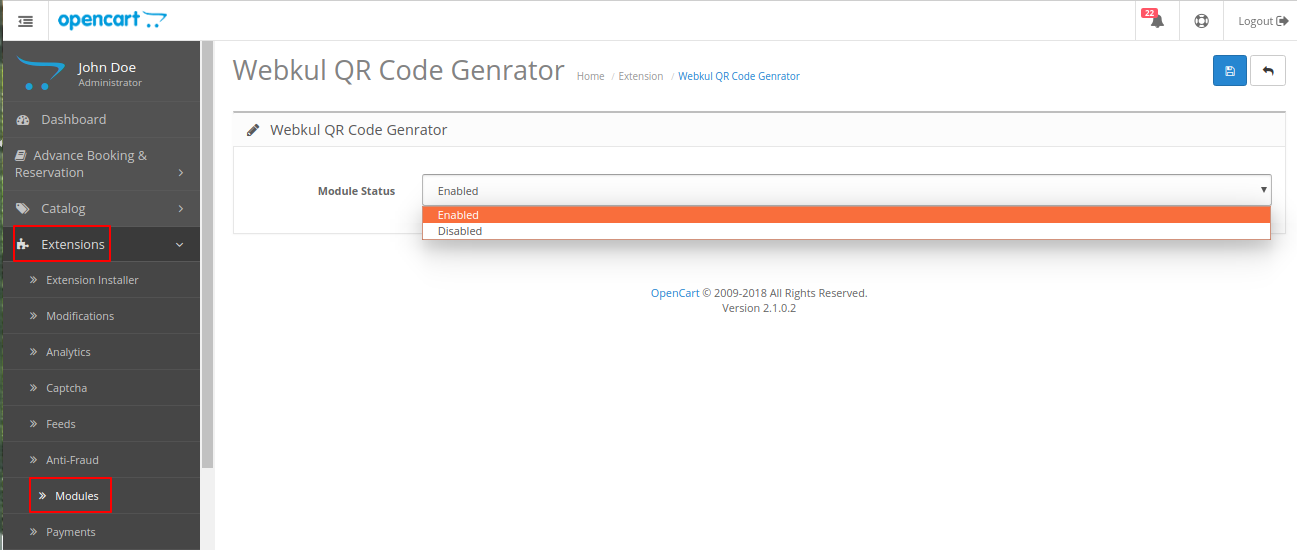
Backend Management
Once the admin configures the Webkul QR Code Generator add-on, under the ‘Sales’ tab, on clicking the “Orders” option, the Orders page opens up.
Under the Order List, in the Orders page, a list of orders is present, displaying the status of the order which may be in ‘complete’ or the pending state. 
In the tab, as shown in the image below, the user will scan the QR code of a product through a scanner and the order-id will display in the tab.
On clicking the view button of any order, the product information will be available as well as the QR code will be visible as shown in the image below.
The status of the order changes to ‘complete’ automatically, as the admin scans the QR code of the product.  The order status of the order in the order list will change from pending to complete as shown in the image below.
Visibility of QR Code
The buyer will place an order for a product, and the QR code for the order is generated automatically.
In the Order History page, the user can see the details of the orders like Order Status, Date Added, No. of Products, Customer, and Total.
The user can click on the view button against the order id to view the complete details of the order.
The order information page opens up which includes the complete details as well as the QR code of the order as shown in the image below.  At the backend, under the ‘Orders’ in the “Sales” tab, will open and the information regarding the Order id is present. The QR code is visible as shown in the image below.
The QR code will be visible in the email which is sent to the customers. Given below is the snapshot of an email sent to a customer displaying the QR code.
That’s all for Opencart Booking & Reservation via QR Code. If you still have any issues, feel free to add a ticket and let us know your views on our Webkul Support System.
Current Product Version - VERSION 1.0.2.3
Supported Framework Version - 3.x.x.x

Be the first to comment.