Introduction
ERPNext Website File Upload allows customers to upload files from the website cart before placing an order.
The uploaded files stay linked to the checkout session and are automatically attached to the related Sales Order after checkout.
You can purchase ERPNext Website File Upload from the Webkul Store.
The module helps businesses collect customer files during checkout instead of requesting them later through email or other platforms.
Many businesses require design files, documents, images, or reference files before processing an order.
ERPNext Website File Upload simplifies this process by collecting the required files during checkout and storing them securely as private Frappe File records.
Prerequisites for using ERPNext Website File Upload
ERPNext Website File Upload works in conjunction with the following modules:
You must install the above-mentioned modules to use ERPNext Website File Upload.
Feature
- Upload files from the website cart page.
- Upload multiple files during checkout.
- Attach uploaded files to the related Sales Order.
- Store uploaded files as private Frappe File records.
- Configure upload limits and allowed file types.
- Manage temporary uploaded files before order creation.
- Delete expired and abandoned uploads automatically.
- Access upload settings from the Website dashboard.
- Validate uploaded files based on configured rules.
Installation
1. After purchasing the app from Webkul Store, you will receive a link to download the module ZIP file.
2. Extract the ZIP file. You will see a folder named ‘erpnext_website_file_upload’.
3. Set up the module in your git repository, then fetch it using:
bench get-app --branch main
https://github.com/your-org/erpnext_website_file_upload
(Replace “main” with your branch name and replace the “HTTPS URL” with your HTTPS clone URL.)
4. Install the app on your site:
bench --site <your-site-name> install-app erpnext_website_file_upload
5. Run bench migrate to complete the setup.
Workflow
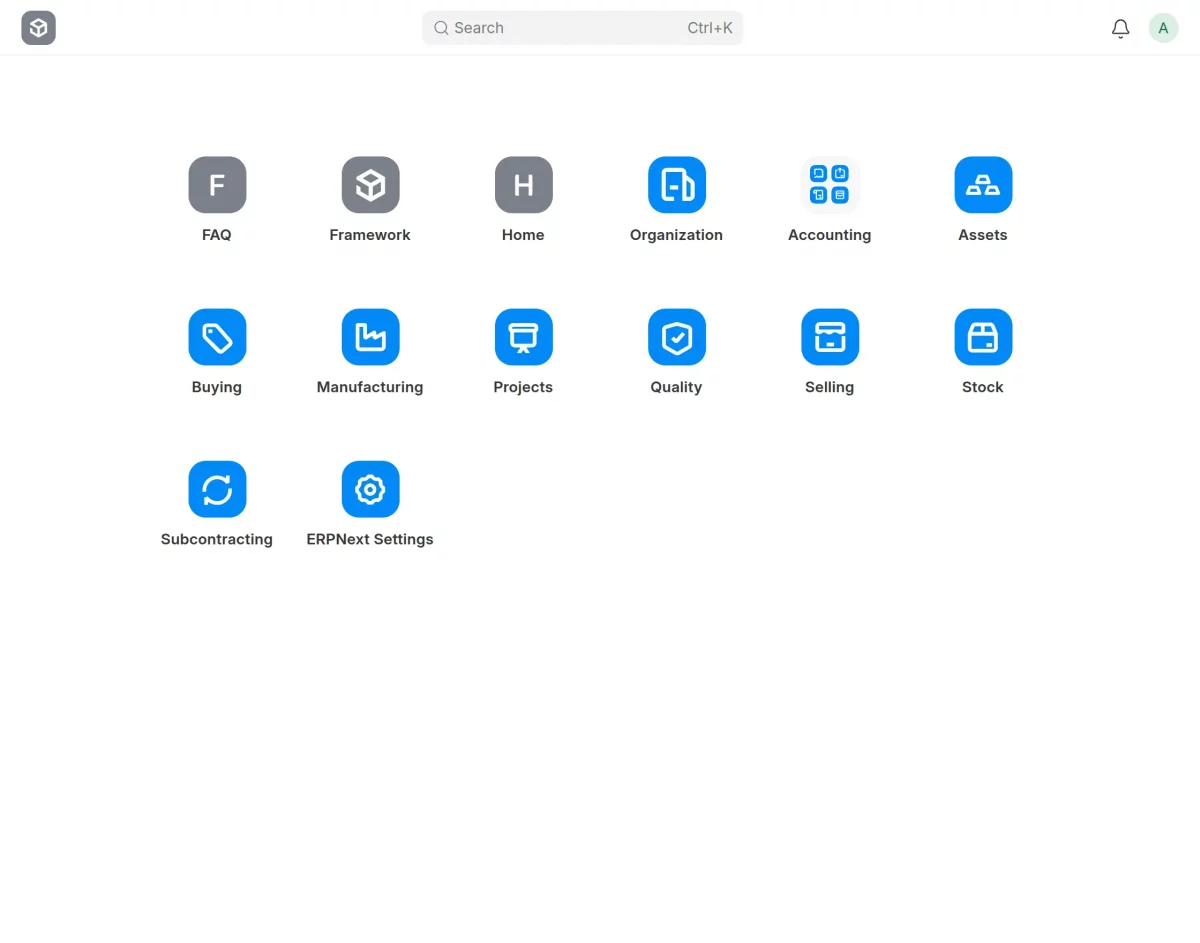
1. First, open the ERPNext backend and click Website. Then, select Website File Upload Settings to configure the module. Here, you can manage all website file upload settings from one place.
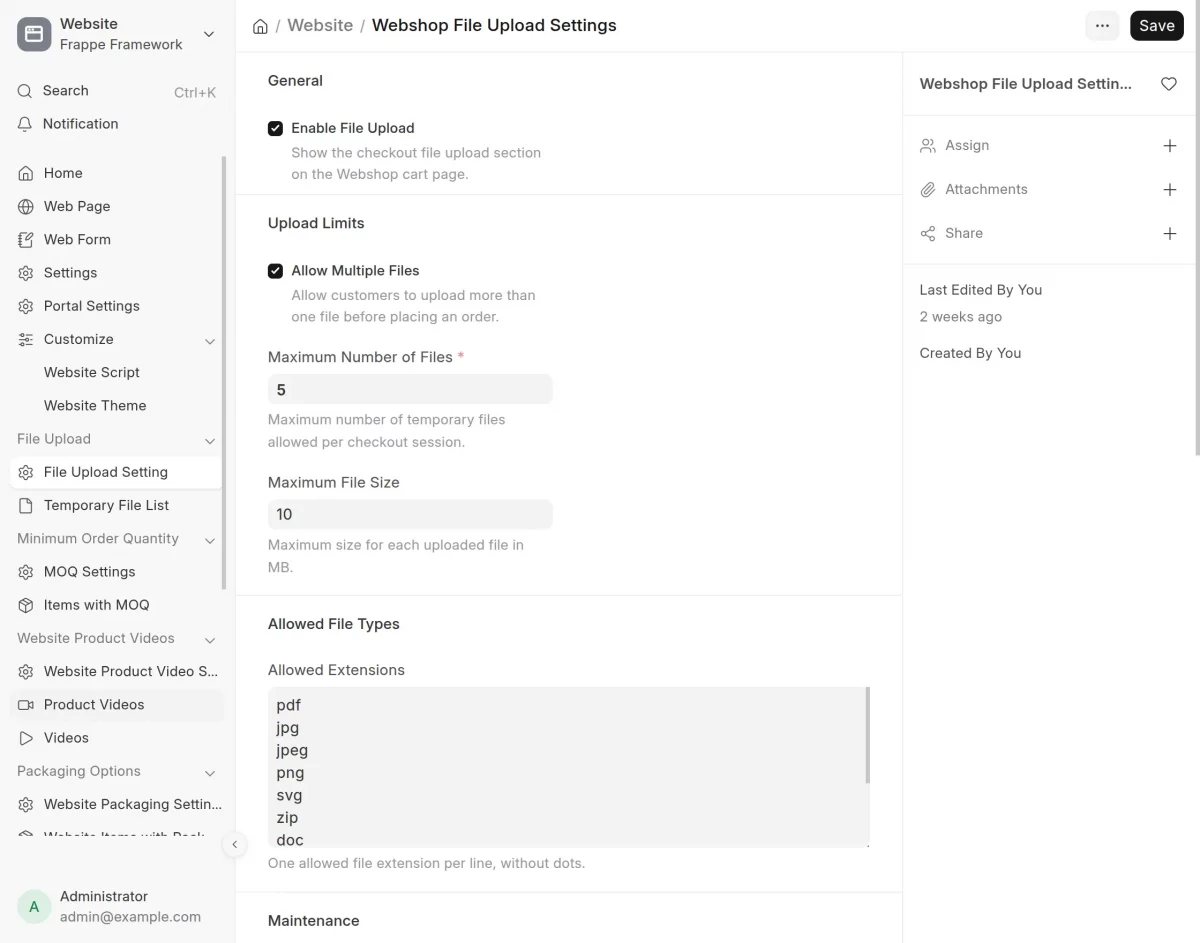
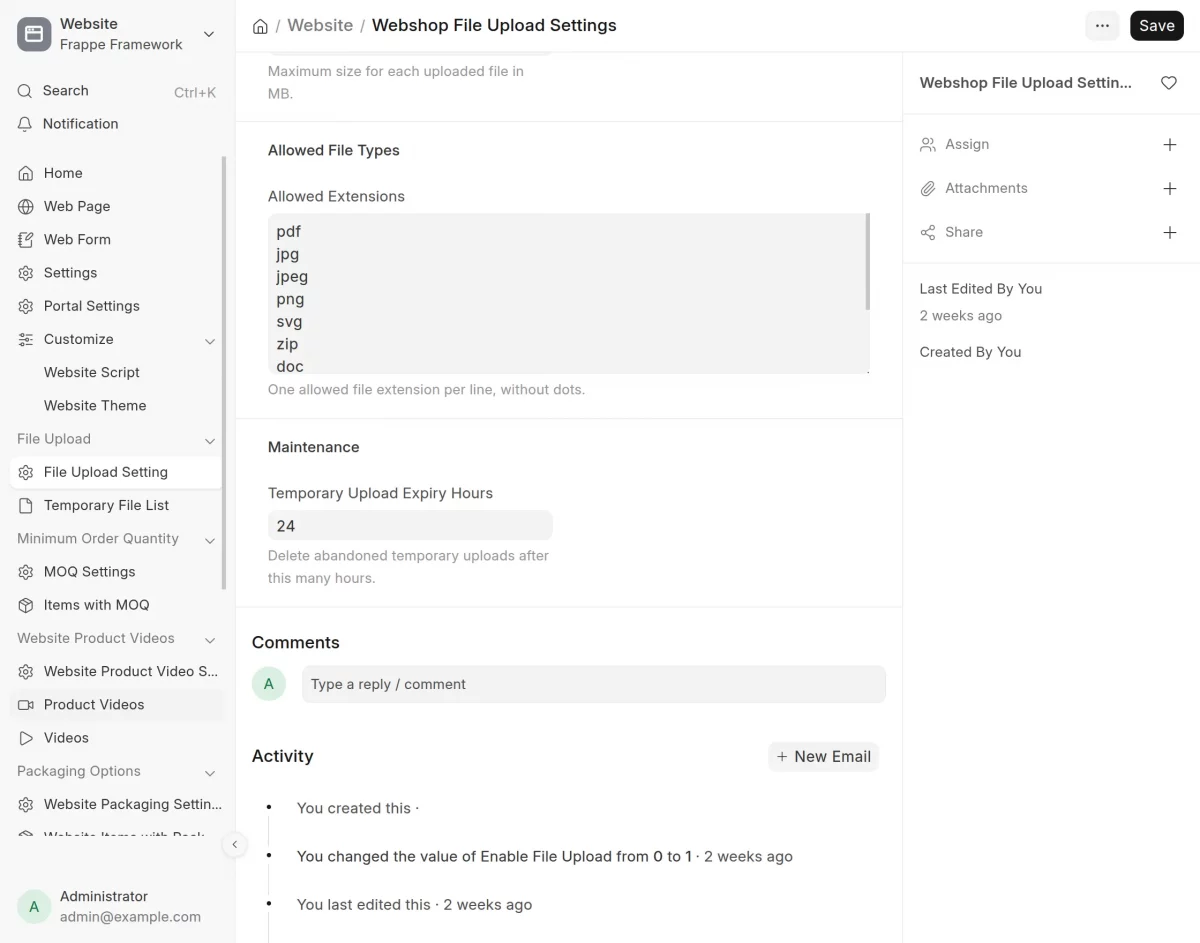
2. Next, the Website File Upload Settings page will open.
Here, you can enable or disable file uploads, define the maximum upload quantity, set the maximum file size, choose the allowed file types, and configure the temporary file expiry time.
After making the required changes, click Save to apply the configuration.
3. Next, open the webshop and browse the available products. Select the required product and click Go to Cart to continue with the purchase.

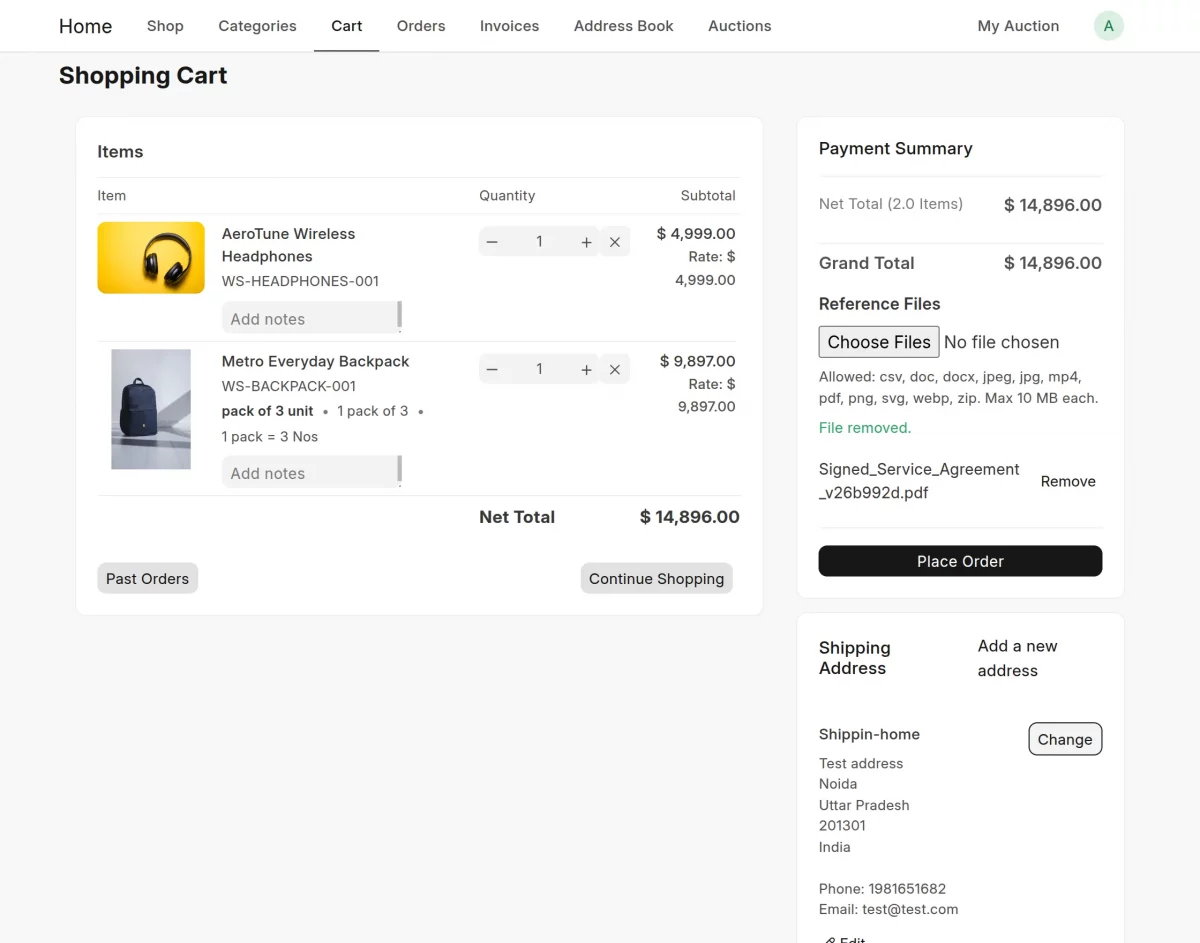
4. The shopping cart will display the File Upload section. Customers can upload one or more files before placing the order.
They can also review the uploaded files or remove any file before continuing with the checkout.
After uploading the required files, click Place Order to complete the purchase.
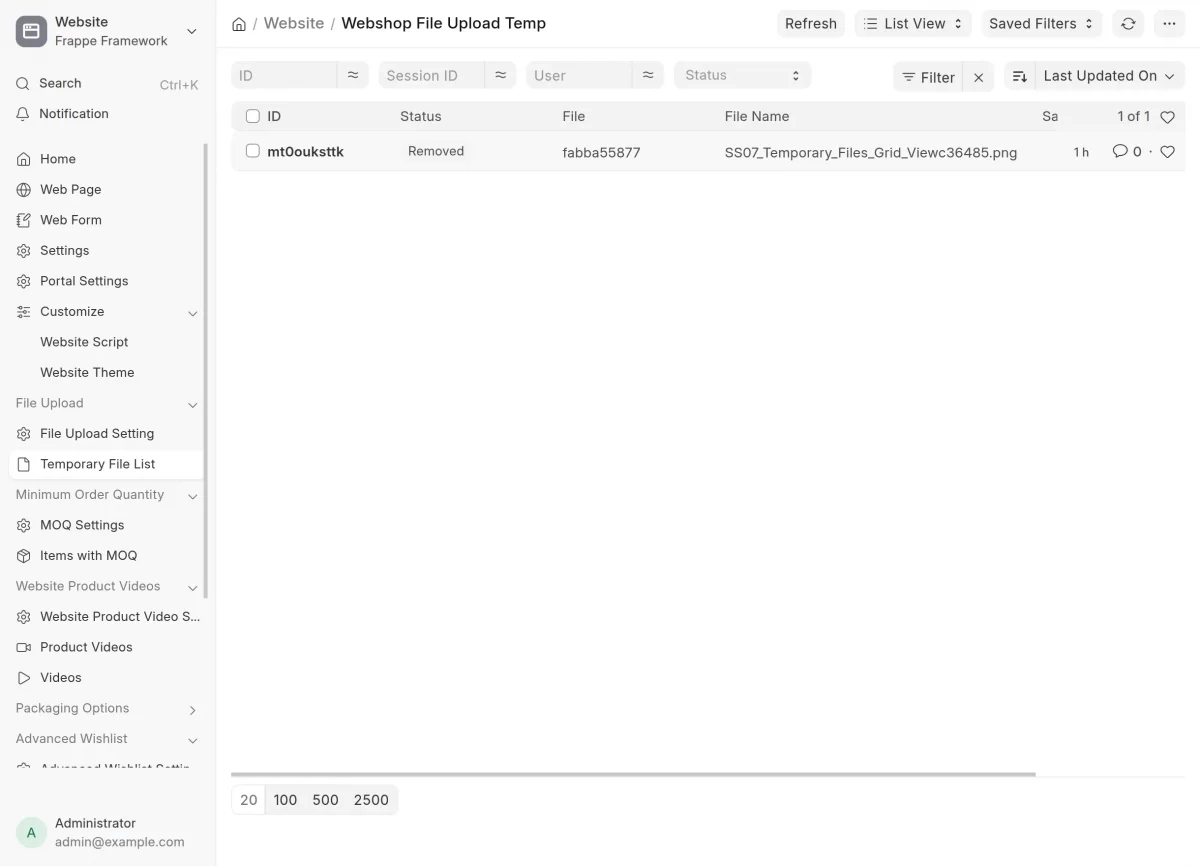
5. After the customer uploads the files, open Website File Upload Temp from the ERPNext backend. Here, you can view all temporary uploaded files before the Sales Order is created.
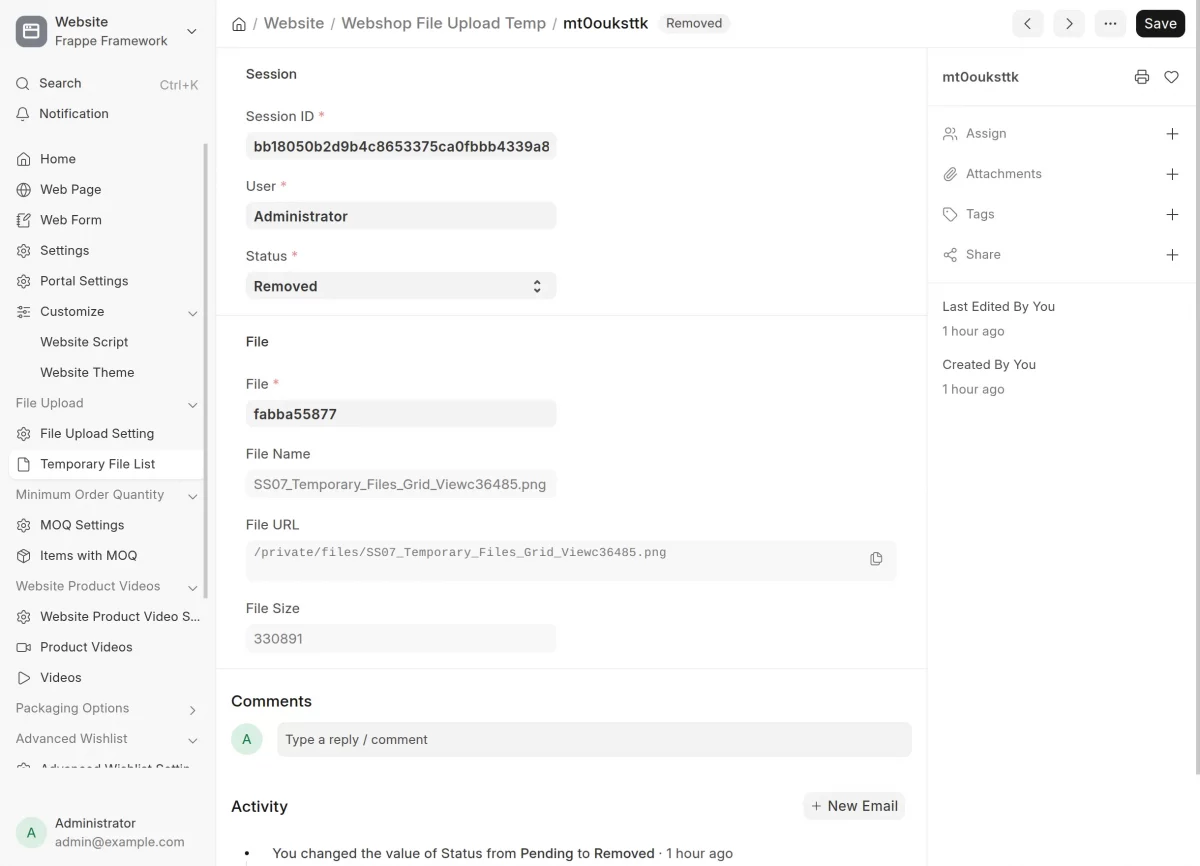
6. Next, click any temporary upload record to view its details. Here, you can review the uploaded file, session ID, user information, and upload status associated with the checkout session.
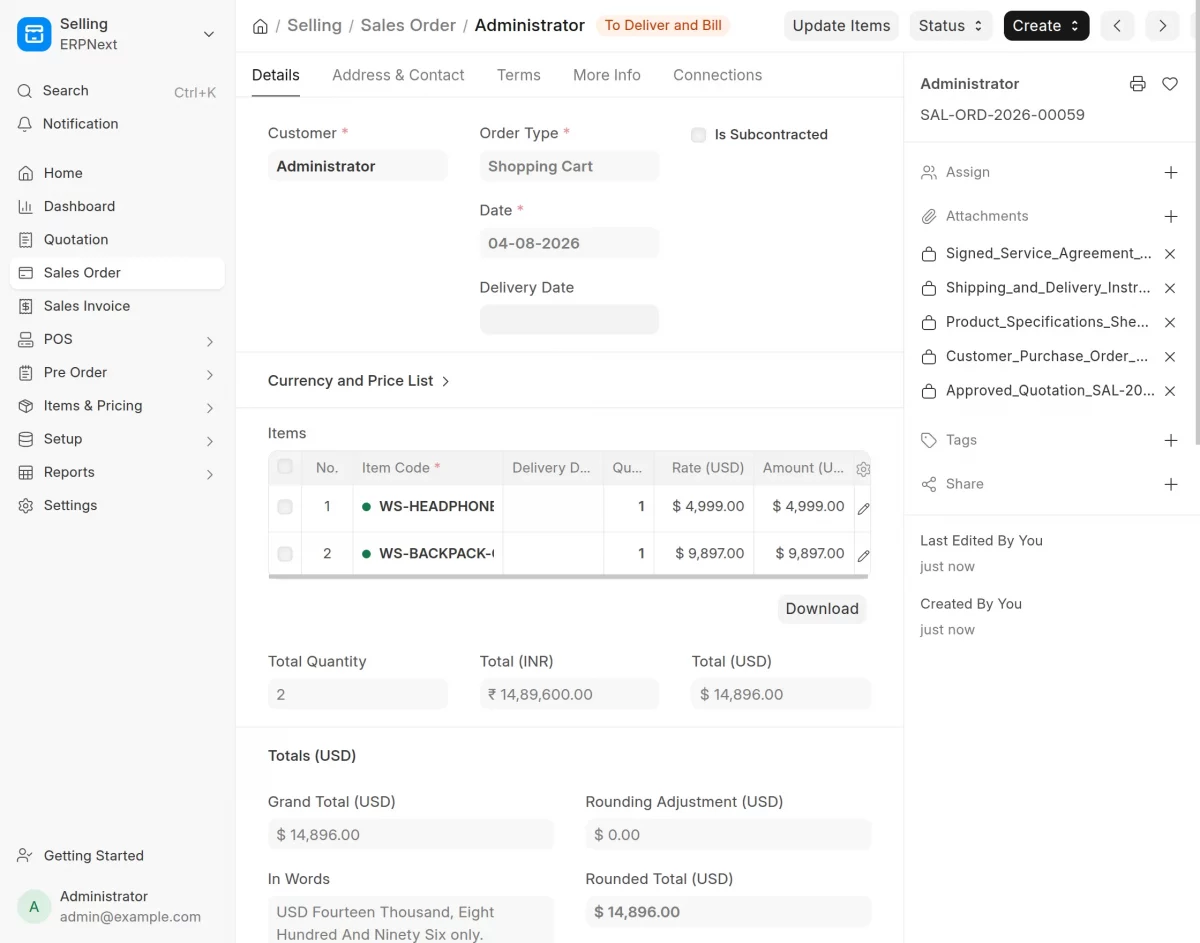
7. After the customer completes the checkout, open Selling > Sales Orders. The Sales Order List displays all customer orders created through the webshop.
Next, open the required Sales Order to view the uploaded file attachments linked to that order.
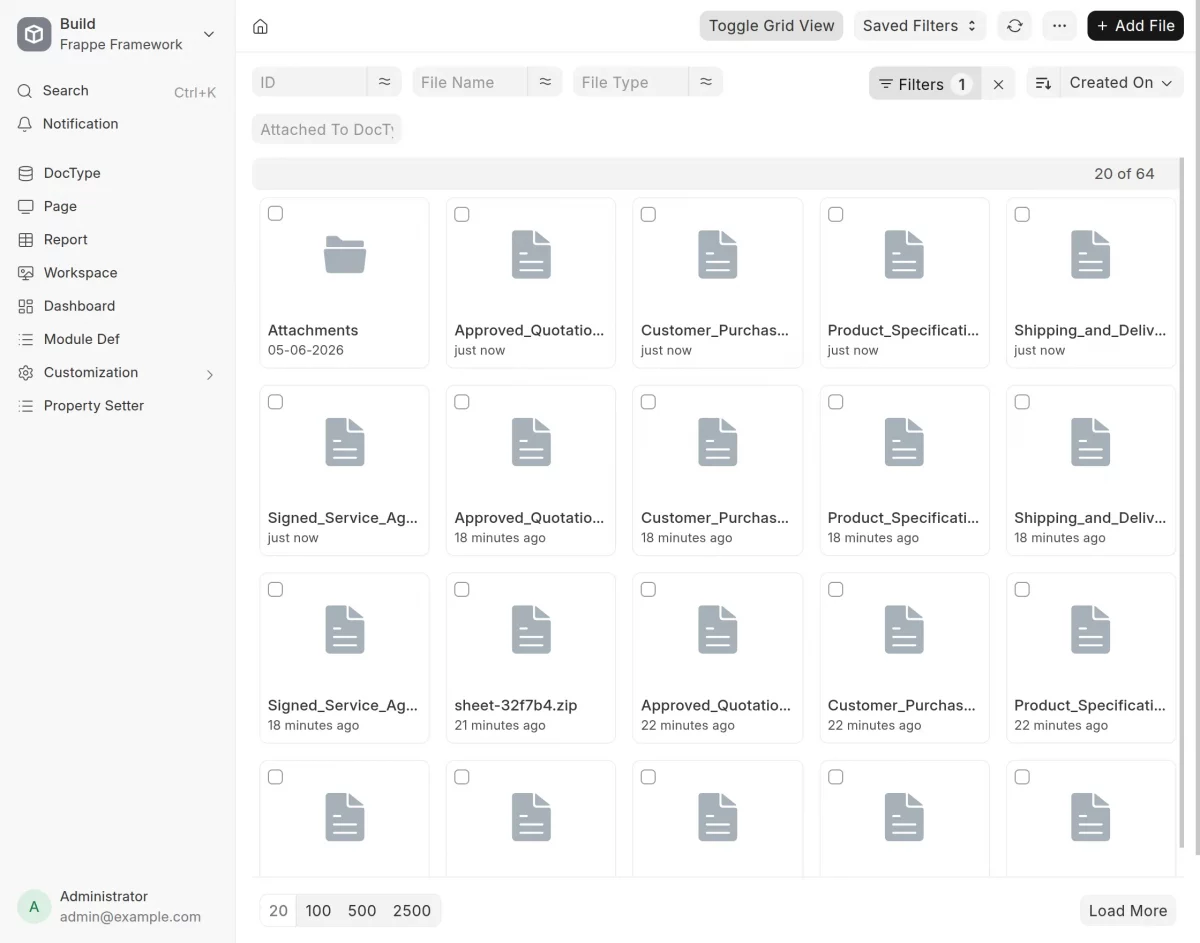
8. Finally, open the File List from the ERPNext backend to view all uploaded files.
You can search for files using the search bar or switch between List View and Grid View to manage uploaded files more easily.
Need Help?
Hope you find guide helpful! Please feel free to share your feedback in the comments below.
If you still have any issues/queries, please create a ticket at the UV Desk.
I hope this helps. In case of any further queries, contact us at our support mail
Thanks for paying attention!!
Current Product Version - 0.0.2
Supported Framework Version - ERPNext V16

Be the first to comment.