Opencart Multi-Level Marketing module allows the admin to add a binary MLM system to an online store.Using this system the admin will get an affiliate reference Id that two different customers can use to become an affiliate.
Once the admin accepts the customer’s request for MLM Membership, the customer will also get the affiliate referral Id that he can share with two other customers to add two affiliates below him.This process of adding affiliates will continue.
Moreover, the Opencart Multi-Level Marketing module provides you with a set of specialized tools required to manage and organize MLM accounts.
Check an overview of the OpenCart MLM Plugin in the video mentioned below –
Features
- This extension allows the affiliate to view the total child affiliates and other details as well.
- Also, the admin can set the commission for the affiliate tree.
- The admin can view the entire affiliate tree.
- The admin can create different levels for the affiliate membership.
- Affiliate can check their child users by checking the MLM tree from the frontend.
Installation
Installation of the Opencart Multi-Level Marketing module is very simple. After you unzip the downloaded zip file. You need to select the folder according to your opencart version.
Further, in your selected folder, you will find admin, catalog, image and ocmod folders. You just need to move admin, catalog, and image folders into the root directory of your opencart website.

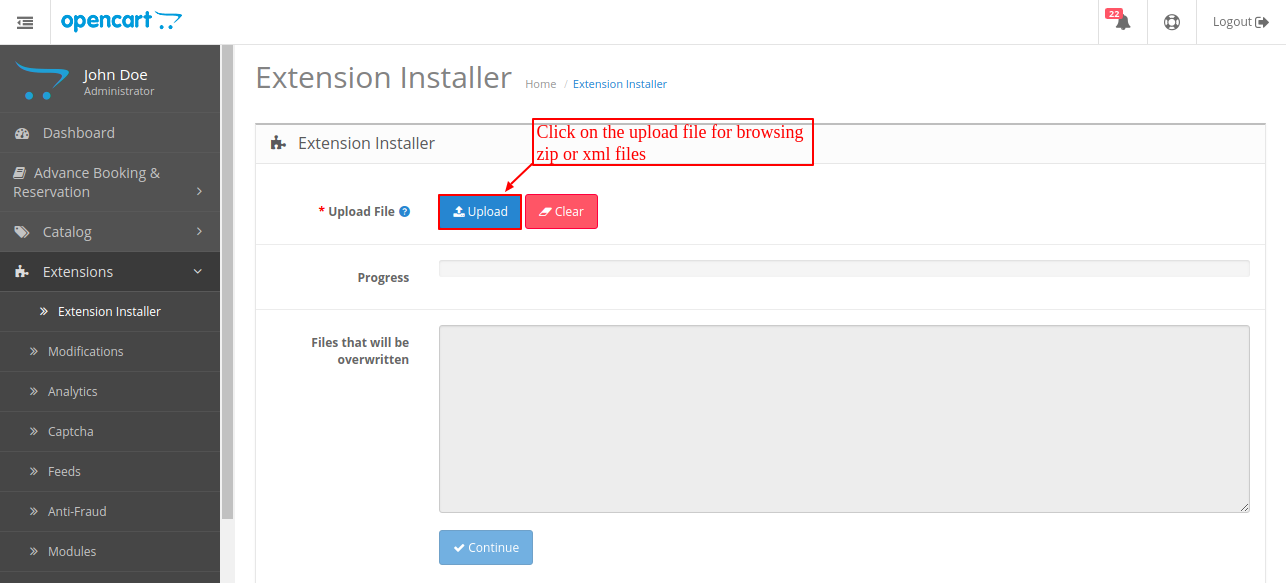
Upload File
Now, navigate to Extensions>Extension Installer. Click the Upload button and browse the XML file, this file is in the ocmod folder.
Please select the correct ocmod folder according to Opencart version installed on your system.
After uploading the file navigate to Extensions>Modification and click on the Refresh button.

Edit Administration
Also, after that, in Admin panel go to System->Users->User Groups and edit ‘Administrator’ and choose to select all for both Access and Modify Permission and save it.

After that under Extension > Module install the module as shown below in the snapshot.

Module Configuration – Opencart Multi-Level Marketing
The admin of the store will manage the backend functionalities. Under the Webkul MLM section, the customer can simply click on Config Setting.
Under the Config Settings the admin will manage the following details:
Status: From here the admin can Enable or Disable the module.
Store: The admin can choose the desired link from this section.
Further, there are four different sections that are available:
Terms & Conditions
Under this section, the admin will enter the text that will be visible to an affiliate user while they are checking their About section in the frontend.

How MLM Work?
Further, under this section, the admin will enter the text that will be visible to the customer below the How MLM Work section in the frontend. .

MLM Configuration
The admin will manage MLM Configuration from the backend with many other functionalities.

- Membership Amount: This membership amount is the value which the user will pay while purchasing webkul MLM product
- Referral Code Can Be Used For: Under this field, the admin can add the number of times any referral code will be used. After that, the referral code will get expire.
- About Referral Code: The admin can add the description for the referral code using this field.
MLM Extra Bonus
The admin can manage the details related to bonus under this section.

- Level Commissions: The table will be visible in which the admin can add the levels of commission by entering the commission amount and their matrix type.
- First Child Bonus: The admin will enter the amount of the first child bonus in this field.
- Matrix Type: The admin will select matrix type as Fixed or Percentage for the first child.
- Amount: The admin will enter the amount of the first child commission depending on the selected matrix.
- Level Completion Bonus: The admin will enter the amount of the second child bonus in this field.
- Matrix Type: The admin will select matrix type as Fixed or Percentage for the second child.
- Amount: The admin will enter the amount of the second child commission depending on the selected matrix.
Customer Registration as an Affiliate
The customer can register as an affiliate from the frontend by navigating to the footer of the page and selecting Affiliates over there as shown in the image below:

Further, the customer will click on the Continue button under the New Affiliate section.

After that, a registration form will appear which is visible in the image below:

The form will include four informative sections, that are:
Your Personal Details: The customer will add the Name, Email, Referral Number.
Your Address Details: Further, the address details will be entered including the company name.
Payment Information: Here the user will enter payment details like Tax Id and Payment Method.
Password: Here the admin will enter and re-enter the desired password.
After the registration, the admin will navigate to the success page.

Request for MLM Membership
The affiliate user can request MLM Membership by navigating to Multi-Level Marketing > About MLM. Further, the affiliate user will click on the Request for Membership button as shown in the image below:

Now the page will be redirected to buy MLM membership. Add this product into the cart to process further for the membership process.

Now, go to the shopping cart and fill the required fields to get the membership.

Once the request is sent, the button tag will be changed to Your Request for Membership is Under Process. It needs to be approved by the admin.

The customer can also log in if registration is previously done. Under the My Account section all the details can be seen:

Affiliate Referral
The affiliate user can check their referral code by navigating to Multi-Level Marketing > My Affiliate Referral as shown in the image below:

MLM Tree
Also, the affiliate user can check their own child tree by navigating to Multi-Level Marketing > MLM Tree as shown in the image below:

About MLM
Under this section, the affiliate user can check the description and details regarding Multi-Level Marketing.

After that, the admin will navigate to Webkul MLM > Membership Request under the admin panel. Further, by clicking on the thumbs-up button under the Action tab.

Finally, the affiliate user can see that the button tag will be changed to You are Already subscribed for the Membership as shown in the image below. That means, now the affiliate user is a subscribed user for membership.

Affiliate Bonus Management
Further, we will check that how exactly the bonus management is done from the admin end. For an instance, we can see that Neo’s balance is 0 at the starting of the process.

Suppose two-child users have joined using Neo’s Referral Number as shown in the image below:

The affiliate can check the bonus received in their MLM Account under Your Transactions section in the frontend as shown in the image below:

Further, the admin will be able to see the bonus for Neo by navigating to Webkul MLM > MLM Received Bonus. A separate bonus is available for first and second child addition.

After the transaction of the first child, the respective amount is added for Neo to the balance under the Membership Request list as shown in the image below:

Similarly the admin will make the second transaction by clicking on the Make Transaction button as shown in the image below:

As visible in the image below, the second transaction amount is also added to the previous balance of Neo which was 300 previously and became 700 after adding the second child transaction.

Moreover, the admin can also view the details of affiliate user by clicking on eye button under action tab as shown in the image below:

Further, the details are visible as shown in the image below:

The admin can check the MLM Tree for any user by navigating to Webkul MLM > MLM Affiliate Tree. Further, admin can enter the name of any user and click on the filter button to check the tree.

That’s all for the Opencart Multi-Level Marketing module. If you have any issues, feel free to add a ticket and let us know your views to make the module better http://webkul.uvdesk.com/.
Current Product Version - 1.0.0.2
Supported Framework Version - 3.x.x.x

Be the first to comment.