INTRODUCTION
Each customer is different so having Variety options for various products is necessary to indulgence different people on your website. If you find it cumbersome to separately manage product variants in Odoo, then Odoo Product custom options provide you with the facility to offers product variety to the customers without actually creating any variants in Odoo.
The Odoo user can add attributes such as color, size, etc. directly into the product template and also manage their prices from the tab.
The attributes can then be added to the orderline while creating a sales order.
FEATURES
- No need to manage the stock for variants of a product separately.
- It provides a simple interface to add custom options of the product on the product view form.
- Adds a configure tab on the order line to choose the options in a few clicks without searching in the whole inventory.
- Displays all the selected options of a product on a single order line in the sales order.
- Set appropriate input method such as the dropdown menu, radio button, enter time, date text or upload a file to add a custom option in an order line.
INSTALLATION
1.) Once you purchase the App from Webkul store, you will receive the link to download the zip file of the module.
2.) Extract the file on your system after the download finishes. You will be able to see a folder named- ‘product_custom_options‘.
3.) Copy and paste this folder inside your Odoo Add-Ons path.
4.) Now, open the Odoo App and click on the Settings menu. Here, click on Activate the Developer Mode.
5.) Then, open on Apps menu and click on ‘Update Modules List’.
6.) In the search bar, remove all the filters and search ‘product_custom_options‘.
7.) You will be able to see the module in the search result. Click on ‘Install’ to install it.
WORKFLOW
1.) In Odoo, goto ‘Product’. Create a new product.
2.) In the product form, you can see a new tab – ‘Custom Options’.
3.) Click on ‘Add a line’.

4.) On the popup that appears, choose a title such as ‘Color’ or ‘Size’.
5.) Choose an input method such as checkbox, dropdown.

6.) Under the field- Option Values (that appear after choosing the input method), add the appropriate option values and their prices.
For Example: in the case of option- ‘color’, option values can be colors in which the product is available.
7.) Save the product.

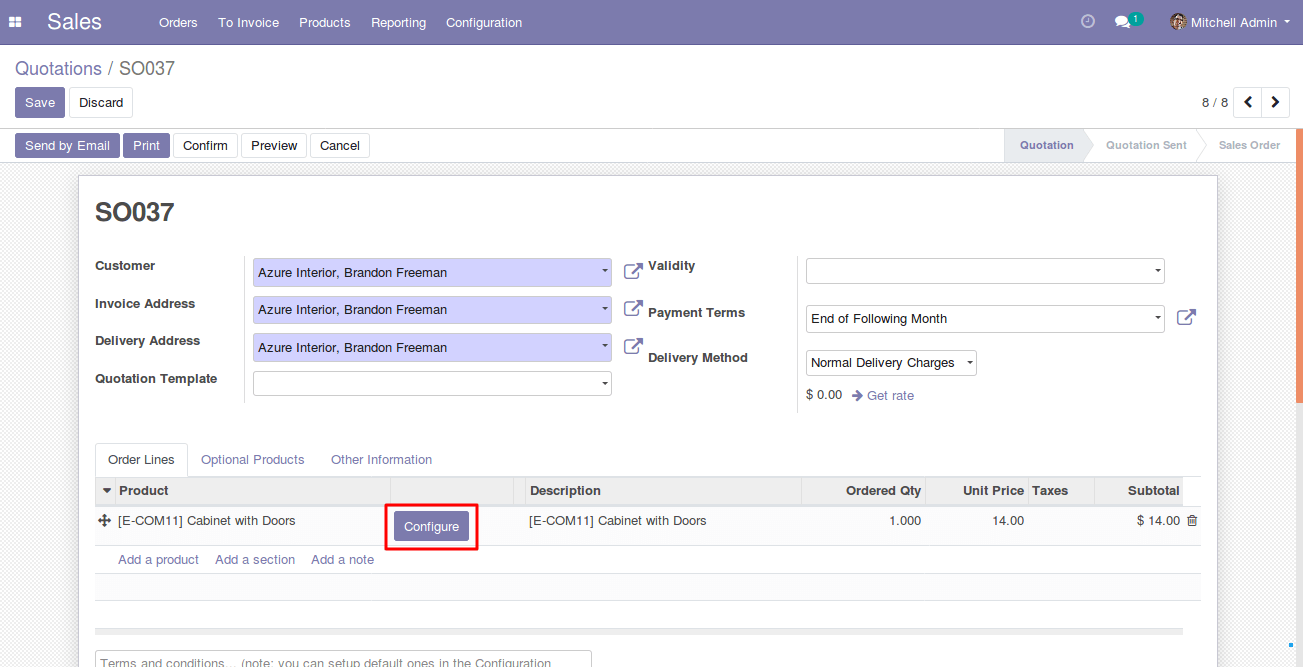
8.) Go the sales and create an order. Here, add the product to an orderline and save the quotation.
9.) Now click on ‘configure’ to add custom option/product variety.
10.) Click on ‘Add option’ and select a custom option and its value.


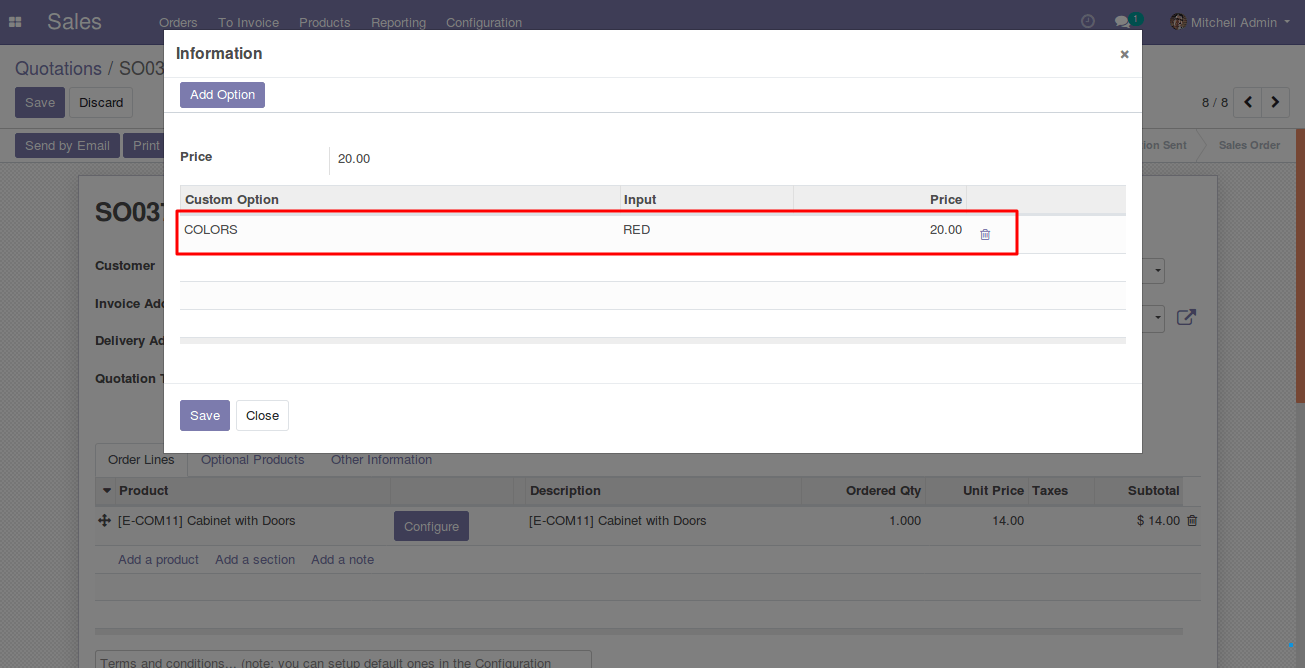
11.) The selected option shows up in the orderline of the product.

Hence you can manage product variants and their attributes without making actually variants of the products in Odoo.
USER GUIDES FOR OTHER MODULES
NEED HELP?
Was this guide helpful? Please share your feedback in the comments below.
If you have any issues/queries regarding the module please raise a ticket at
https://webkul.uvdesk.com/en/customer/create-ticket/
For any doubt contact us at [email protected].
Thanks for reading!!
Current Product Version - 1.0.0
Supported Framework Version - ODOO V11, V12

Be the first to comment.