INTRODUCTION
Rent products with Odoo Website Rental Sale!
Affordability is one of the primary concerns of customers when buying premium products. Hence, this gives rise to the option of renting. Also, renting makes products affordable so customers can use them.
Odoo Website Rental Sale allows you the flexibility to offer products for rent, which will help boost your sales figure.
This module allows the rental feature on the Odoo eCommerce website. Moreover, customers can purchase a product on rent with some tenure value for a while. Customers have to deposit a security amount that will be refundable after the tenure ends and the product is returned. Additionally, customers can opt between standard or customized tenures.
NOTE: Odoo Website Rental Sale Module works in conjunction with the following module:
First, you must install this module in your system for Odoo Website Rental Sale module to work correctly.
FEATURES
- The modules allow customers to rent products from your Odoo website.
- Customers can select the standard tenure or customize one as per their needs.
- Admin can add a security amount for a product that will be refundable after the tenure end.
- Further, customers can choose the tenure value with the offered amount and add the product to the cart.
- Admin can offer tenure based on months, days, hours, years, etc.
- Moreover, the admin can choose the tenure to add to a product and show it on the website.
- Admin can manage rental categories from the Odoo backend.
- Also, the admin can add an agreement PDF file in the backend to show it on the website.
- Adds a separate menu for rental products on the website.
- Customers can view the rental order status and details from the ‘Rental Order’ section.
INSTALLATION
- Once you purchase the App from Webkul store, you will receive the link to download the zip file of the module.
- Extract the file on your system after the download finishes. You will be able to see a folder named- ‘odoo_website_sale_rental.’
- Copy and paste this folder inside your Odoo Add-Ons path.
- Now, open the Odoo App and click on the Settings menu. Here, click on Activate the Developer Mode.
- Then, open the Apps menu and click on ‘Update Modules List.’
- In the search bar, remove all the filters and search ‘odoo_website_sale_rental.’
- You will be able to see the module in the search result. Click on ‘Install’ to install it.
WORKFLOW
CONFIGURATION
1. Log in to your Odoo backend and go to ‘Rental> Configuration> Product Agreements> Create.’
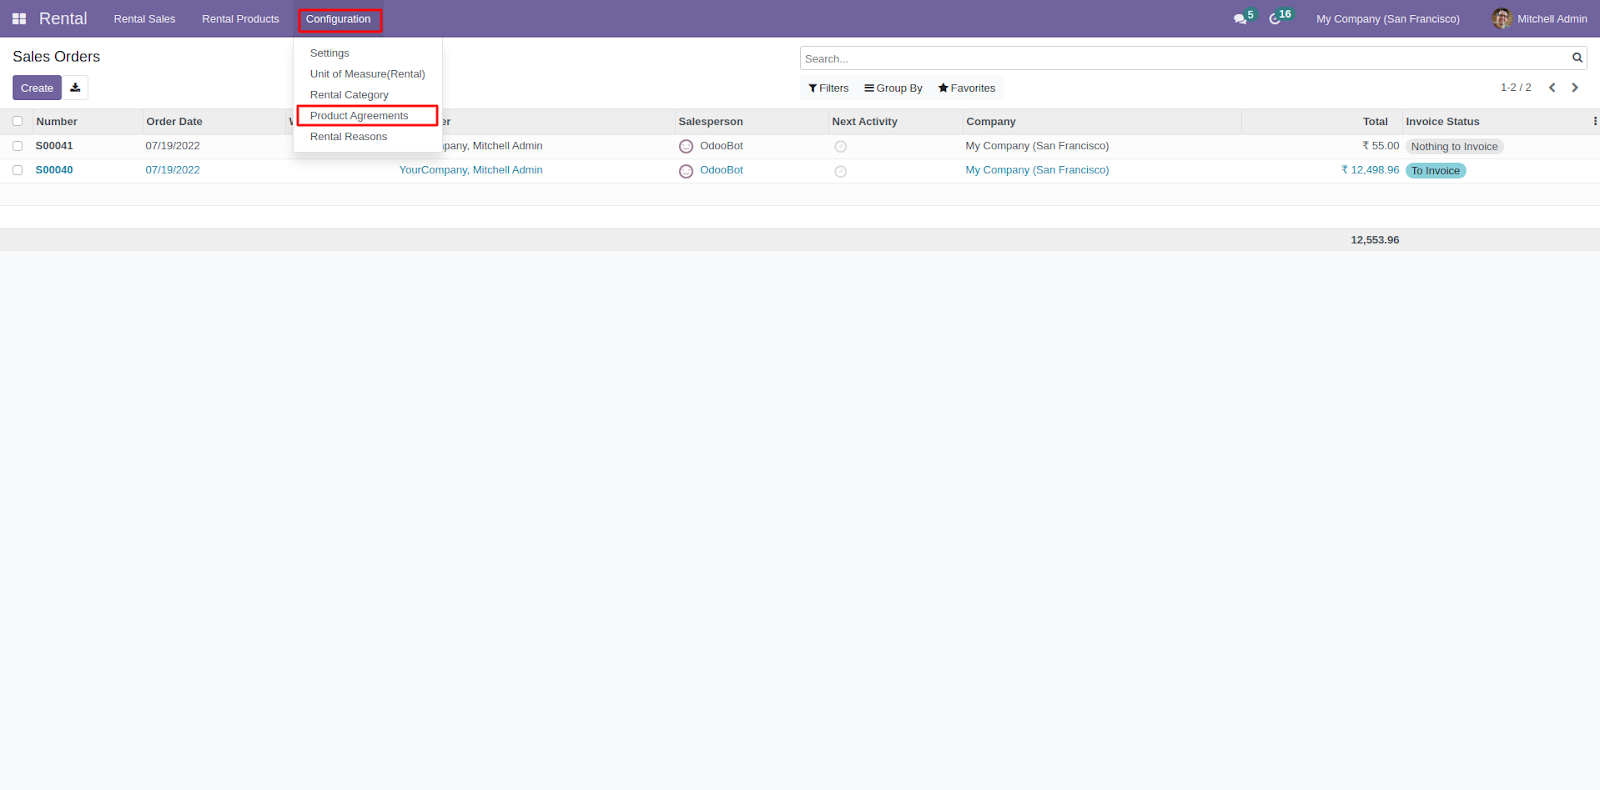
2. Next, enter the Agreement name, Sequence, Upload the product Agreement pdf, add the description and click the ‘Save’ button.

3. Once done, follow the path ‘Configuration> Rental Category> Create.’ Enter the details and click the ‘Save’ button.

4. After that, navigate to ‘Rental Products’ located under ‘Rental Products’ and open a product.
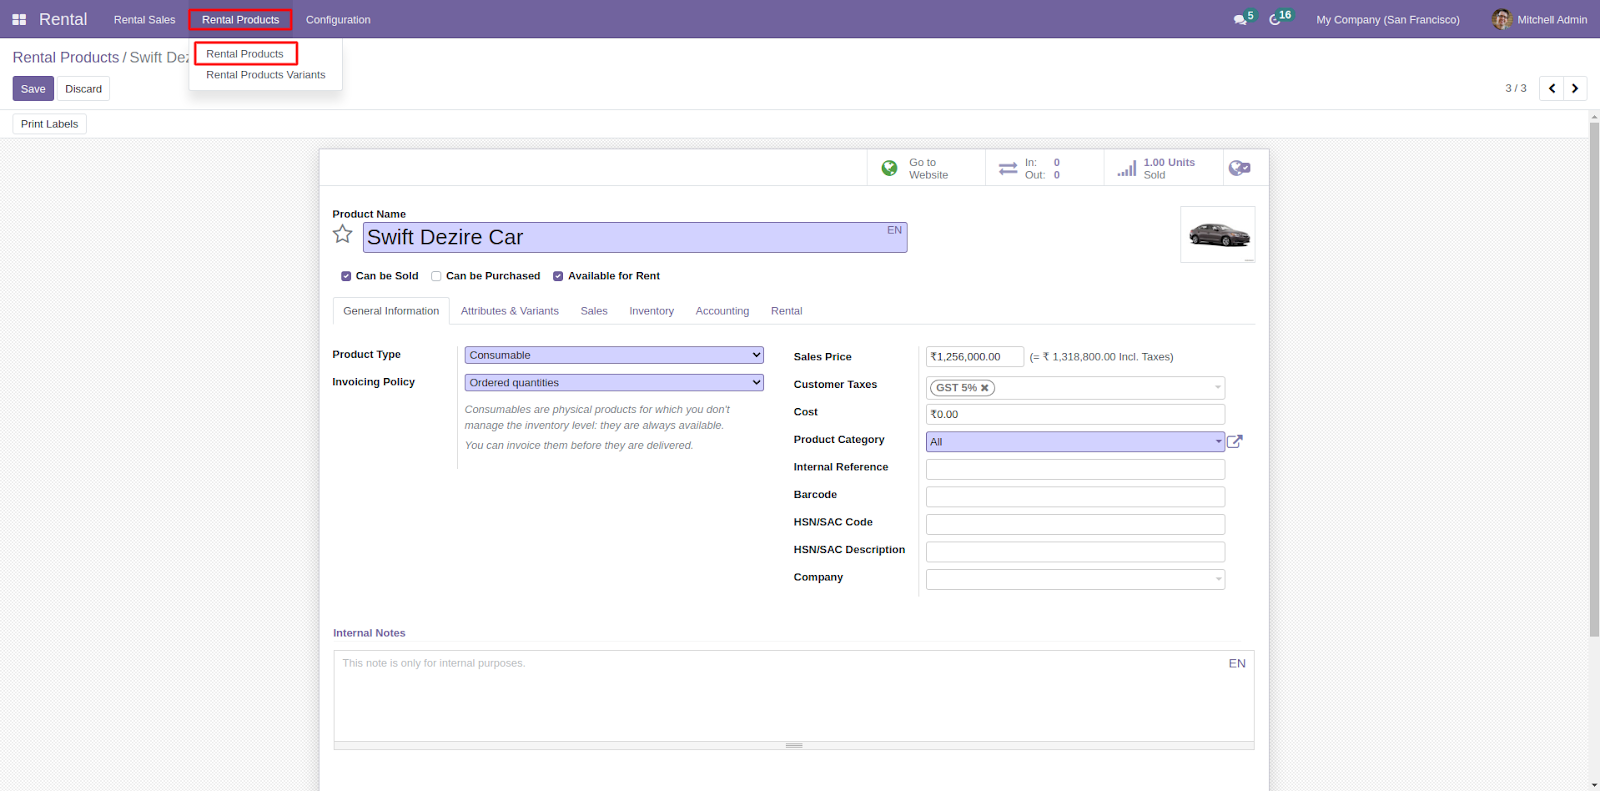
5. Go to the ‘Rental’ tab and enter the following details:
Rental Category, Product Agreement, Security Amount, Rental Tenure, Rental Tenure (Period), and Rental Tenure Starting (day(s) and amount).

FRONTEND
6. Once you configured everything from the backend, go to the website, and from the ‘Customize’ menu, enable ‘Show Rental,’ this will show the ‘Rental’ menu on the website.

7. Next, go to the ‘Rental’ menu. Here, you can see the different rental categories on the top, all product categories on the left, and the Rental Tenure Starting price at the bottom of the product.

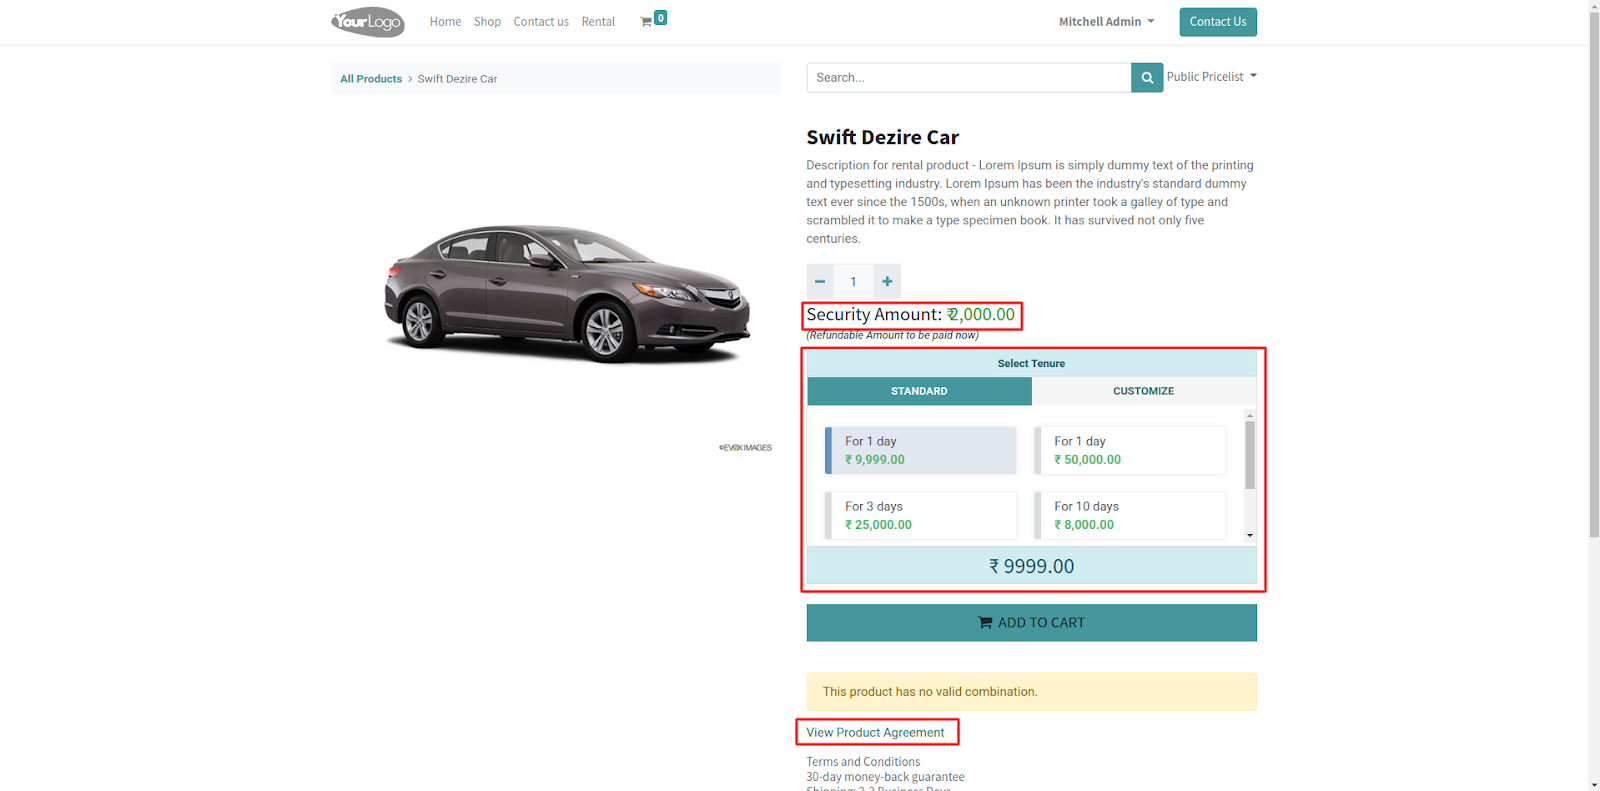
8. Click and open a product page. Now, you can view the ‘Security Amount, Product Description, Select Tenure (Standard or Customized), and View Product Agreement hyperlink.’
8.1. View of Customized tenure options.

9. You can also view rental products on the ‘Shop’ page of the website. Click on the product to open the page.

10. On the product page, you can buy the product (Add to Cart) or click ‘Product Also Available For Rent’ to open the rental details page.

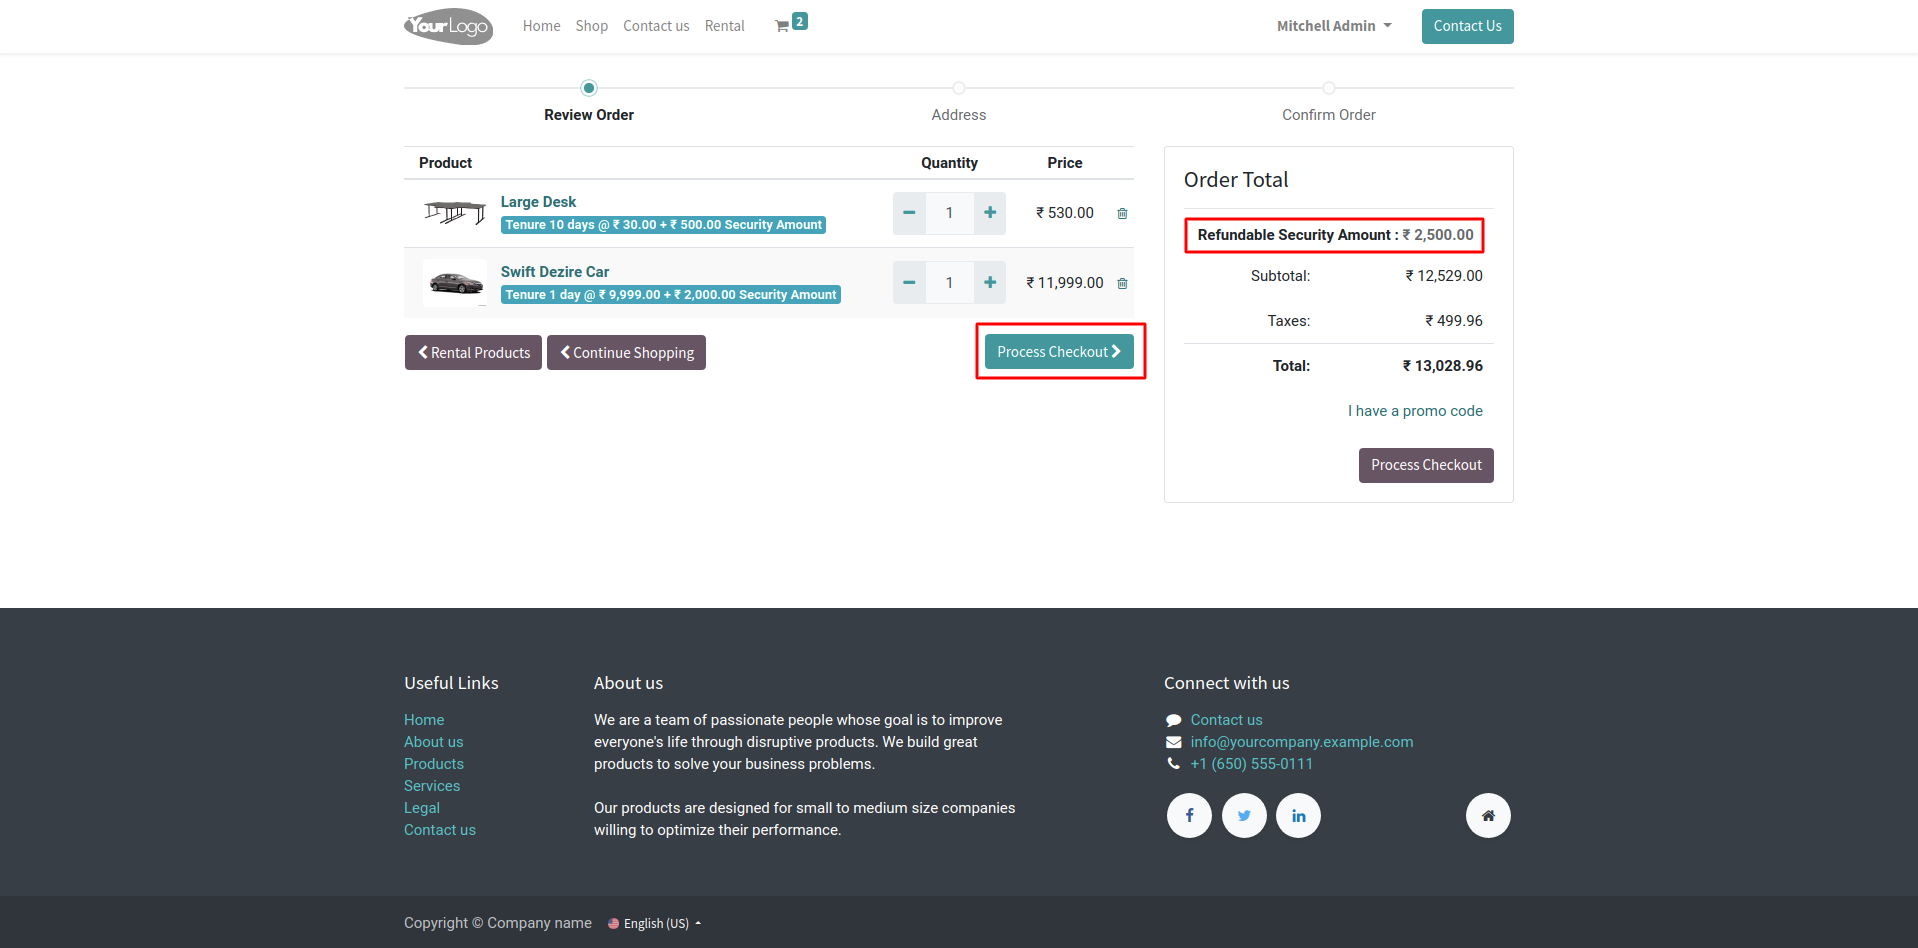
11. Once done, add products to the cart and proceed to checkout. From the ‘Review Order’ page, you can view the total refundable security amount and product tenure. Next, click ‘Process Checkout.’
12. On the ‘Confirm Order’ page, click ‘Pay Now.’

13. Once the payment is finalized, go to ‘My Account> Quotations’ and open the order to view the details.

OTHER ODOO MODULES
- Odoo Marketplace Rental Sale
- POS Rental Management
- Odoo Website Sale Rental for Enterprise
- Odoo SKU Generator
- Marketplace POS Extension
- Odoo Website Auction
NEED HELP?
Hope you find the guide helpful! Please feel free to share your feedback in the comments below.
If you still have any issues/queries regarding the module, please raise a ticket at https://webkul.uvdesk.com/en/customer/create-ticket/.
Also, please explore our Odoo development services & an extensive range of quality Odoo Apps.
For any doubt, contact us at [email protected].
Thanks for paying attention!!
Current Product Version - 1.0.1
Supported Framework Version - V15, V14, V13

Be the first to comment.