INTRODUCTION
Odoo Meta Pixel Integration connects an Odoo website with Meta Pixel to track important customer actions across the online store.
The module sends supported website events from Odoo to Meta Events Manager for event testing, tracking, and review.
Admins can configure Odoo Meta Pixel Integration from the Website settings by adding the required Dataset ID in the Pixel ID field.
Once configured, the module tracks e-commerce actions such as PageView, View Content, Add to Cart, Initiate Checkout, Add Payment Info, and Purchase.
FEATURES
- Connect the Odoo website with Meta Pixel.
- Configure Meta Pixel using the required Dataset ID.
- Track PageView and View Content events.
- Track Add to Cart and Initiate Checkout actions.
- Track Add Payment Info and Purchase events.
- Test Odoo website events in Meta Events Manager.
- Check events received from the connected Odoo website.
- Review active events and their current status.
- Check the total count of tracked Meta events.
INSTALLATION
- Once you purchase the App from Webkul Store, you will receive a link to download the module’s zip file.
- Extract the downloaded file on your system. You will be able to see a folder named fb_pixel.
- Copy and paste the fb_pixel folder inside your Odoo Add-Ons path.
- Open the Odoo App and go to Settings. Activate Developer Mode from the Settings menu.
- Open the Apps menu and click on Update Modules List.
- Remove all existing filters from the search bar and search for fb_pixel.
- The module will appear in the search results. Click on Activate to install it.
WORKFLOW
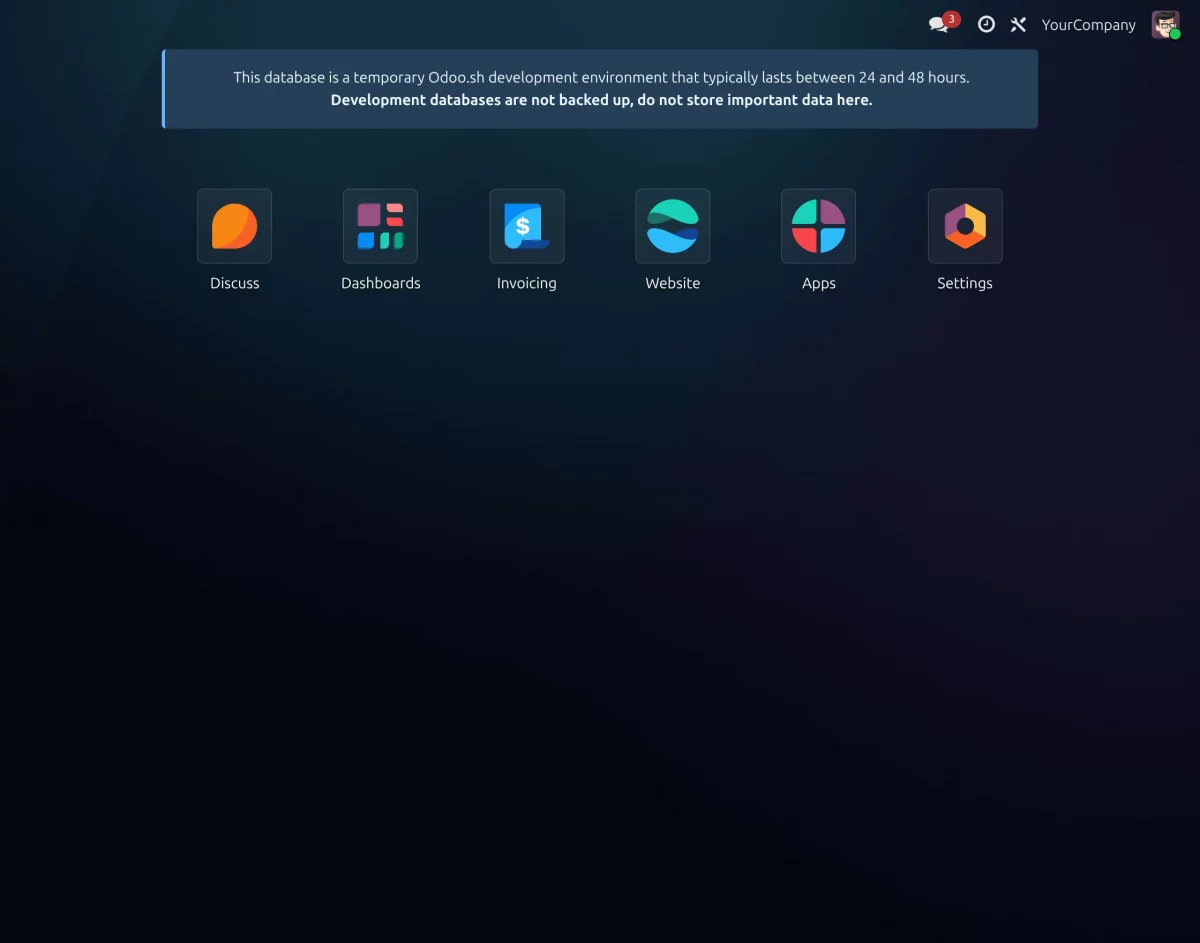
1. After installing Odoo Meta Pixel Integration, open the Odoo dashboard and select the Settings application.
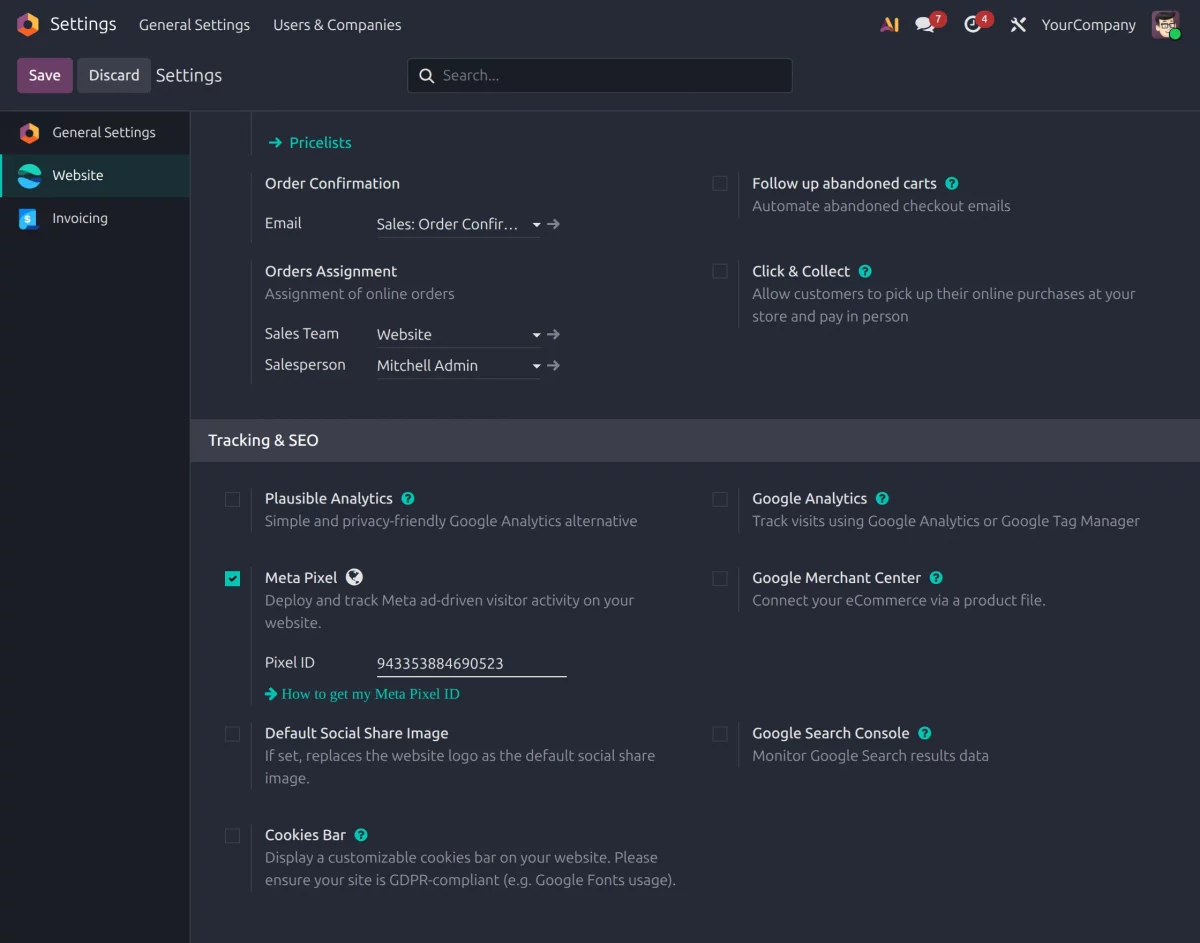
2. In Settings, open the Website section and locate the Tracking & SEO section.
Enable Meta Pixel and enter the required Dataset ID in the Pixel ID field.
Click Save to complete the Meta Pixel configuration for the Odoo website.
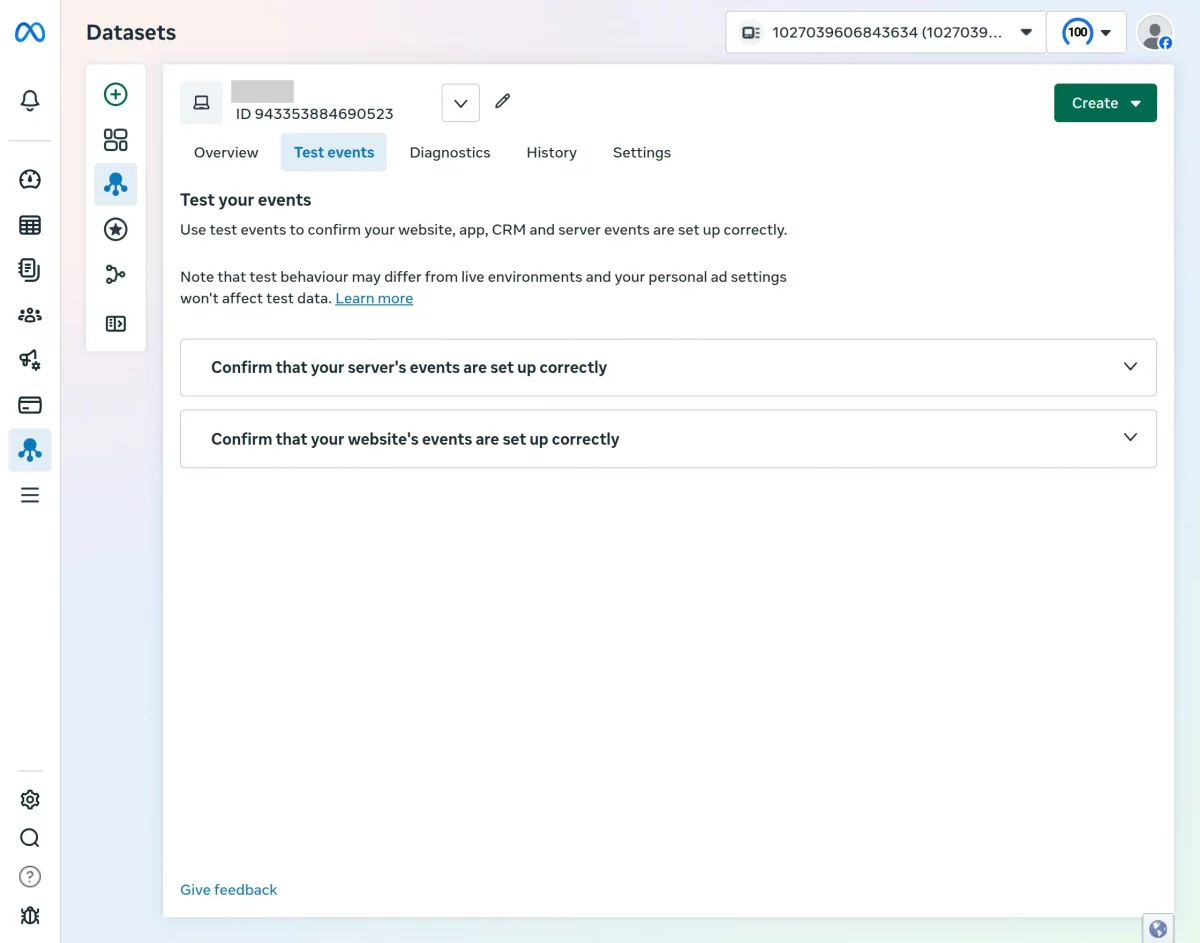
3. Open Meta Events Manager and select the dataset connected with the Odoo website.
Go to the Test events tab to test the events received from the connected website.
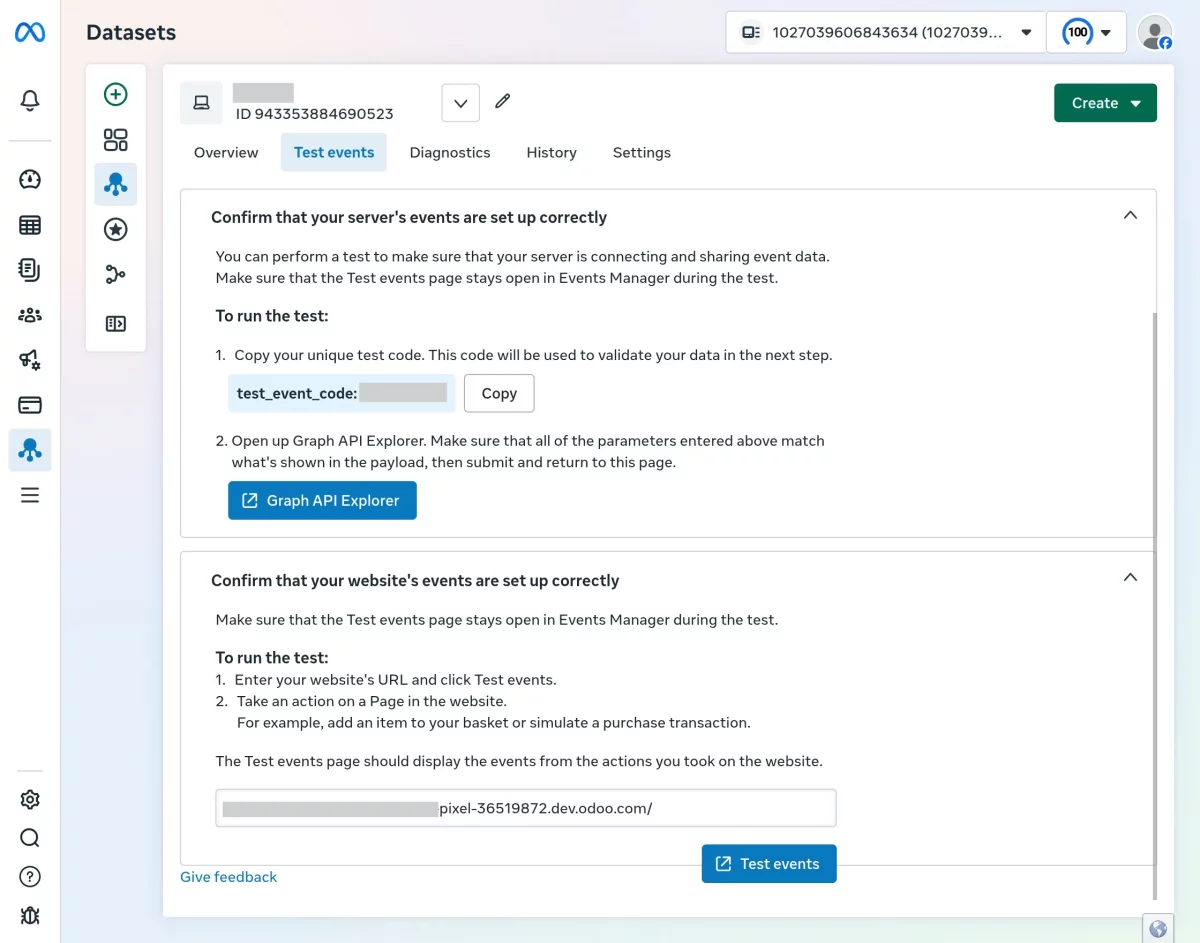
4. Expand the website event testing section under Test events.
Enter the URL of the connected Odoo website in the provided field and click Test events.
5. Open the Odoo website and perform the required store actions during the test.
Odoo Meta Pixel Integration supports the following e-commerce events:
- PageView
- View Content
- Add to Cart
- Initiate Checkout
- Add Payment Info
- Purchase
6. Return to the Test events page after performing the website actions.
The received events appear under Events received, where the admin can check the event name, status, source, setup method, and received time
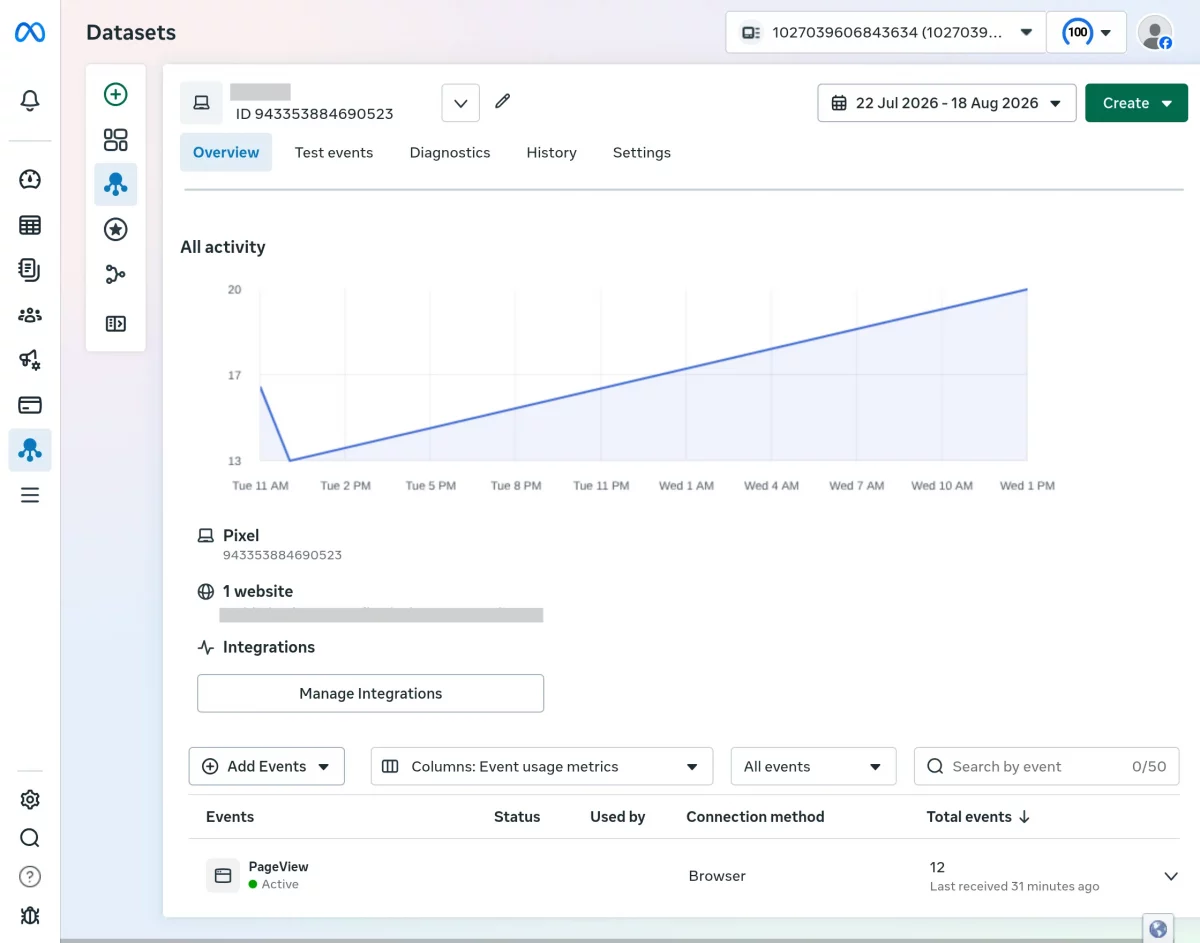
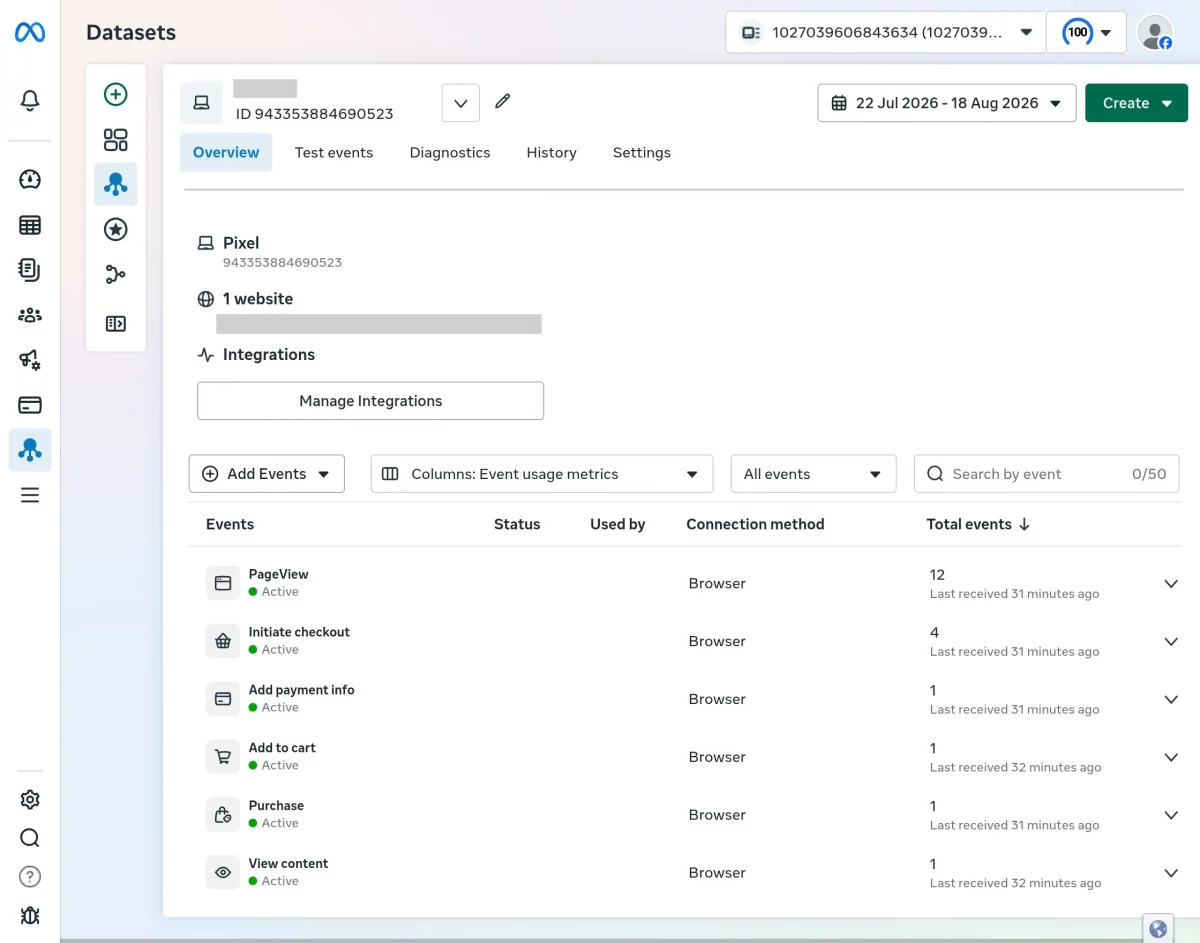
7. Open the Overview tab of the connected dataset in Meta Events Manager.
The Overview displays active events received from the Odoo website along with their status, connection method, and total event count.
NEED HELP?
Hope you find the guide helpful! Please feel free to share your feedback in the comments below.
If you still have any issues or queries, please create a ticket at the UV Desk.
In case of any further queries, contact us at our support mail.
Thanks for paying attention!!
Current Product Version - 1.2.0
Supported Framework Version - V19, V18, V17


Small question is the module able to support multi websites?
Kr