Magento 2 Multi Vendor POS Custom Receipt: Now the vendors can also create customized POS sales receipts for the customers. Using this POS Add-on, the vendors can design multiple POS sales receipts and use them as per the outlet. Upload custom logo image, add header and footer details, and also set custom labels for the discount, tax, change, sub-total, cashier, etc. The vendors can preview the POS receipt also.
Note:
To use this module you must have installed Magento 2 Multi Vendor in the first place along with the Magento 2 POS module.
Check the flow of the plugin in the video mentioned below –
Features for Magento 2 Vendor POS Custom Receipt
- The seller can create multiple receipts layouts.
- Seller can enable/disable/delete receipts layout
- The seller can assign receipts to the outlet as per their need.
Installation for Magento 2 Vendor POS Custom Receipt
Customers will get a zip folder and they have to extract the contents of this zip folder on their system.
The extracted folder has an src folder, inside the src folder you have the app folder. After that, you need to transfer this app folder into the Magento 2 root directory on the server as shown below.

After the successful installation, you have to run these commands in the Magento 2 root directory.
First command – php bin/magento setup:upgrade

Second Command – php bin/magento setup:di:compile

Third Command – php bin/magento setup:static-content:deploy

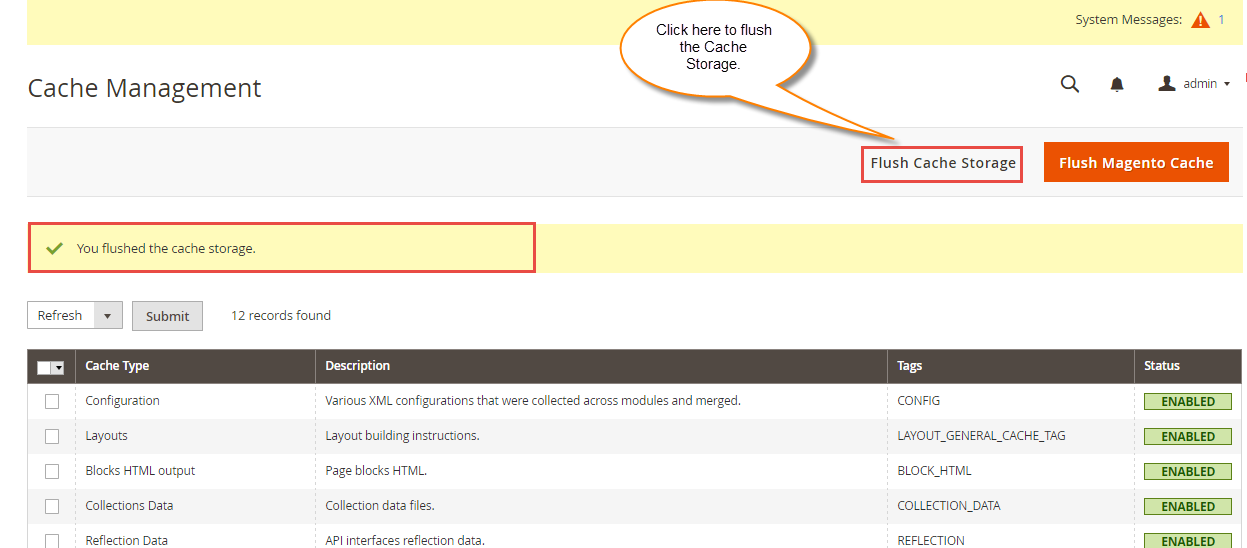
After running the commands, you have to flush the cache from the Magento admin panel by navigating through->System->Cache management as shown below.
Language Translation
For translating the module language, navigate throughsrc/app/code/Webkul/VendorPos/i18n, and edit the en_US.csv file.
Thereafter, rename the CSV as “en_SA.csv” and translate all right side content after the comma in the Arabic language. After editing the CSV, save it.
Then upload it to the path src/app/code/Webkul/VendorPos/i18n where the Magento 2 is installed on the server.
The module gets translated into the Arabic Language. It supports both RTL and LTR languages.

Manage POS Receipts: Admin End
After installing the module, the admin can have a new menu option POS Receipt under the main POS menu section. For this, the admin will navigate to POS -> POS Receipt -> Manage Receipt as shown below.

Clicking the Manage Receipt option will navigate the admin to the receipts list page.

Here, the admin can:
- View the complete list of the existing receipts.
- Change status of the receipts by selecting Enable/Disable option from the Action drop-down list.
- Delete the existing receipts by selecting the Delete option from the Action drop-down list.
- The admin can also Edit the existing receipts by clicking the Edit link.
- Preview the existing receipts to have a quick view.
- Add new receipts by clicking the Add Receipt button.
Add New Receipt: Admin End
In order to add new receipt, click on Add Receipt button.

Clicking the Add Receipt button will navigate the admin to the Add New Receipt page as shown below.

Here, the admin can:
General Settings-
- Status: Enable or Disable the logo status.
- Title: Set the receipt name.
- Display Fields: Enable the fields which will be visible on the receipt. Else, disable them.
- Change Label Names: Set the names of the fields which will be visible on the receipt. Else, the default name will be used for receipt fields.
Receipt Logo-
- Display Logo: Enable it to display the logo on the receipt. Else, disable it.
- Receipt Logo: Upload the logo image.
- Height: The admin can set the logo height as per which the logo will be displayed on the receipt.
- Alt: Define the logo alt text. The text will be used when the image is not loaded.
- Width: The admin can also Define the logo width that will be displayed on the receipt.
Header Content-
Define the content for the receipt which will be visible on the header section of the receipt. The admin can even add the images in the content.

Footer Content-
Define the content for the receipt which will be visible on the footer section of the receipt. The admin can even add the images in the content.

And, lastly hit the Save Configuration button to save the configuration successfully.

After creating the receipt template, the admin can preview it by clicking the Preview link.

Assign Receipt To Outlets
The admin will assign the receipts to the outlets. For this, the admin will navigate to POS-> Add/Manage Outlet as shown below.

Clicking the Add/Manage Outlet option will navigate the admin to the outlet list page.

From the outlet list, the admin will select the outlet for which the admin wants to assign the receipt by clicking the Edit link. This will navigate the admin to the Outlet Edit page.

Under Outlet Information section, the admin select the Manage Receipt menu section –
- Select Receipt: The admin will select the receipt from the drop-down list and assign it to the outlet.
And, lastly hit the Save Outlet button to save the configuration successfully.

Manage POS Receipts: Seller End
Similar to admin, the seller can also manage the POS receipt and create a new one. To do so, the seller will navigate to Marketplace dashboard–> Manage Receipt as shown below.

After that, clicking on the Manage POS Receipt option will navigate the seller to the receipts list page.
Here, the seller will able to do:
- View the complete list of the existing receipts.
- Change status of the receipts by selecting Enable/Disable option from the Action drop-down list.
- Delete the existing receipts by selecting the Delete option from the Action drop-down list.
- The seller can also Edit the existing receipts by clicking the Edit link.
- Preview the existing receipts to have a quick view.
- Add new receipts by clicking the Add New Receipt button.
Add New Receipt
Tapping on Add New Receipt button will navigate to Add New Receipt page as shown below:

Here the seller can:
Receipt Information
- Status: Enable or Disable the logo status.
- Title: Set the receipt name.
- Display Fields: Enable the fields which will be visible on the receipt. Else, disable them.
- Change Label Names: Set the names of the fields which will be visible on the receipt. Else, the default name will be used for receipt fields.
Receipt Logo
- Display Logo: Enable it to display the logo on the receipt. Else, disable it.
- Receipt Logo: Upload the logo image.
- Height: The seller can set the logo height as per which the logo will be displayed on the receipt.
- Alt: Define the logo alt text. The text will be used when the image is not loaded.
- Width: The seller can also Define the logo width that will be displayed on the receipt.
Header Content
After that, define the content for the receipt which will be visible on the header section of the receipt. The seller can even add the images to the content.

Footer Content
Also, define the content for the receipt which will be visible on the footer section of the receipt. The seller can even add the images to the content.

And, lastly hit the Save Configuration button to save the configuration successfully.
After creating the receipt template, the seller can preview it by clicking the Preview link.
Assign Receipt To Outlets: Seller End
The seller will assign the receipts to the outlets. For this, the seller will navigate to POS-> Add/Manage Outlet as shown below.

POS Receipts
Now at the front end, the cashier/agent/seller place orders.

And, after placing the orders will get the custom POS receipts.

The cashier/seller/agent can also download these custom receipts by clicking the Print Invoice button.
Support
That’s all for Magento 2 Multi-Vendor POS Custom Receipt module. Still, have any issue please feel free to add a ticket at HelpDesk System. You may also browse other Magento 2 marketplace addons and our other quality Magento 2 extensions.
Current Product Version - 3.0.0
Supported Framework Version - Magento 2.0.x, 2.1.x, 2.2.x,2.3.x, 2.4.x

Be the first to comment.