Frenet service allows integration with multiple shipping carriers for Brazil postal codes. It offers simple integration between online stores and various carriers.
Using the Frenet gateway one can carry out freight quotes and order tracking.
Magento 2 Marketplace Frenet Shipping module enables the sellers to offer multiple shipping carriers for Brazil postal codes for their products.
So, the sellers can find the best available freight prices and optimize logistics costs.
Using Frenet Freight service it is possible to carry out a freight quote based on the parameters of origin, destination, product dimensions, weight, and the total value of the shopping cart.
Thus, on the checkout page, the customer can choose the most appropriate shipping option offered by Frenet service.
NOTE :
- Frenet is not a carrier. This offers various delivery options into your virtual store and increases your conversion.
- To use this module, you first need to create an account at Frenet administrative website to get access token and configure carriers that you will use.
- This module is an add-on of the Magento 2 Marketplace Module. To use this module you must have installed Webkul Magento 2 Marketplace Extension first.
Watch the below video tutorial to understand the extension workflow :
Features
- This module offers a dynamic shipping method for Freight calculation.
- Easily enable/disable the Frenet Freight Shipping module by merchants.
- The admin can set the Frenet Freight Shipping method name.
- The admin can select the multiple countries to ship the products to specific countries as per the choice. This will only work if the user has purchased an international shipping service.
- The Frenet account details to manage the shipment of the orders by both admin and sellers.
- The store owner can add weight and dimensions to the product to apply the shipping methods.
- The admin and the seller both can set the product dimensions(length, width, and height) for the shipments.
- The admin can configure the weight format for the shipments like kilos, lbs as per the choice.
- Allow customers to choose the Frenet Freight Shipping method on the checkout page.
- Shipping will be calculated using Frenet Freight Gateway.
- The code is fully open and easy to use.
Note-
- For configurable and Bundle Products the shipping charges will be calculated as per their associated products.
Installation
Customers will get one zip folder and they have to extract the contents of the zip folder on their system.
Please select the correct folder according to your Magento version.
The extracted folder has an src folder, inside the src folder you have the app folder. You need to transfer this app folder into the Magento 2 root directory on the server as shown below.

After the successful installation, you have to run these commands in the Magento 2 root directory:
First command –
php bin/magento setup:upgrade
Second Command –
php bin/magento setup:di:compile
Third Command –
php bin/magento setup:static-content:deploy
After running the commands, you have to flush the cache from the Magento admin panel by navigating through->System->Cache management as shown below.

Multi-lingual Configuration
For the multilingual support, the admin will navigate through Store->Configuration->General ->Locale Options and select the locale as German (the language into which admin wants to translate his store content).

Language Translation
If you need to do the module translation, please navigate the following path in your system app/code/Webkul/MarketplaceFrenetShipping/i18n. Now, open the file named en_US.CSV for editing.
Once you have opened the file for editing. Replace the words after the comma(,) on the right with your translated words.
 After editing the CSV file, save it and then upload it to the same folder. Now your module translation is complete.
How to get Frenet Credentials?
To get the Frenet details(Access Key, Password, and Token), you first need to have a Frenet account. Click here to Register yourself. This will navigate you to the login page as per the below image.

After registering yourself successfully, login to your account.

The user will navigate to Register > Register Data to fill in all the details. After filling in all the details, will get the Access Key, Password, and Token.
CARRIERS:
The user can activate the carriers as per the choice. For this, the user will click on the menu option “Carriers”.

CALCULATE SHIPPING:
The user can calculate shipping from the Frenet account. For this, click on Freight Simulator as per the below image.

Frenet Pricing
The Frenet pricing includes a cost list as per the type of service. Thus, this could be verified here- Frenet Plans.
Module Configuration
After the installation, the admin can easily configure the module settings. For this, the admin will navigate to Stores > Configuration > Sales > Shipping Methods > Marketplace Frenet Freight Shipping as per the below image.

Here, the admin will:
- Enabled: Enable/disable the module by selecting either “Yes” or “No”.
- Title: set the Frenet Freight Shipping title which will be displayed at the frontend.
- Access key: enter the Frenet account access key.
- Password: enter the Frenet account password.
- Token: enter the Frenet account token.
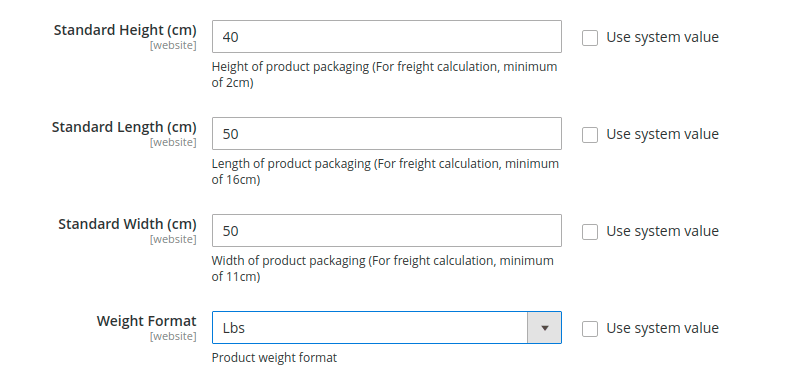
- Use default dimensions: Enable or disable to use the default dimensions for the shipments by selecting Yes or No. If select “Yes”, the other fields for configuring height, length, and width become visible as per the below image.
- Weight Format: Set the weight unit for the shipments between kilo, or lbs as per the choice.
- Displayed Error Message: set the error message which the admin wants to display when this shipping method is not available.
- Ship to Applicable Countries: either allow all the countries for the Frenet Freight shipping else to allow specific countries where the admin wants to allow the shipment.
- Ship to Specific Countries: Select the specific countries where the admin wants to allow the shipment.
- Allow Sellers to Manage Frenet Details: allow the seller to manage the Frenet Details by selecting “Yes” else select “No” for not allowing the seller to manage the Frenet Details.
- Show Method if Not Applicable: choose to display this method name or not on the front end, when it is not applicable.
Note:
- If the user has purchased international shipping service from the Frenet Administrative Panel. Then only, the user will be able to make the shipments to the other countries otherwise not.
Shipping Settings:
The admin needs to set the shipping origin details also. For this, the admin will navigate to Stores > Configuration > Sales > Shipping Settings > Origin as per the below image.

Configure Per Product Dimension:
If the admin doesn’t want to use the default dimensions for a product, then the admin will use default Magento attributes of Length, Height, Width, and Weight.

For this, navigate to the “Product Edit” page.
However, under the Attribute section, the admin will select-
- Fragile Product: set 1 if it contains glass or other fragile materials else set 0.
Note:
- If the admin wants to apply some specific dimensions on any particular product while for the rest of the product default dimensions. Then, the admin will set “Use default dimensions” to No.
- Add weight and dimensions to the product to apply the shipping methods.
- If the user has a Brazilian shipping service then, the sum of every product Length, Width, and Height should be less than or equal to 170 cm. And, the product weight should be less than or equal to 30 kg.
- If the user has also purchased an International shipping service then, the product dimensions and weight may vary from one country to another.
Seller End
If the admin has allowed the sellers to manage the Frenet details then the sellers need to configure the Marketplace Frenet Configuration details. For this, the sellers will log in to their account.
The sellers will click on the menu option “Frenet Configuration” as per the below image.
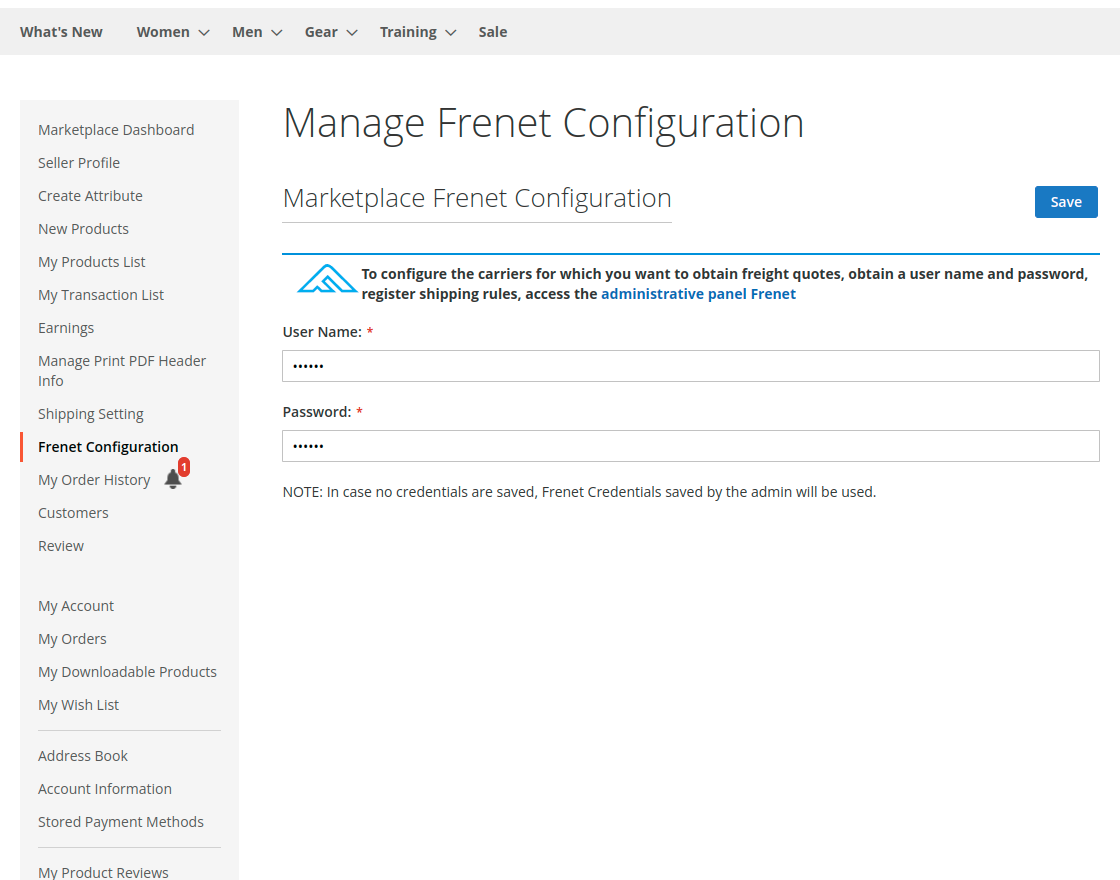
Here, the sellers will:
- User Name: enter the Access Key which they will get from their Frenet account after registration.
- Password: enter the Access Password which they will get from their Frenet account after registration.
Shipping Settings:
The seller will now add the shipping origin address to his account by navigating to Shipping Setting menu option as per the below image.

Configure Per Product Dimension:
If the seller doesn’t want to use the default dimensions for a product, then the seller can configure the dimensions for the individual products as per the choice.
For this, navigate to the “Product Edit” page.
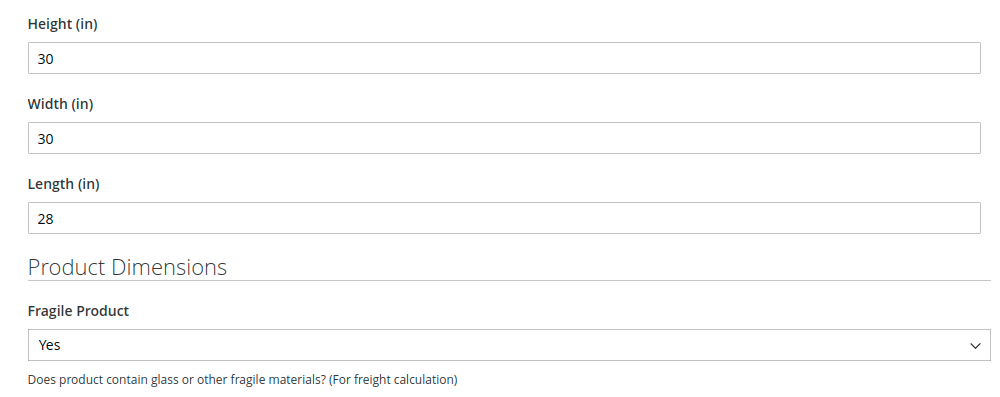
Under the Product Dimension section, the seller will:
- Length, Height, and Width: set the dimensions.
- Fragile Product: set Yes if it contains glass or other fragile materials else set No.
Front-End
After the module setup, the customer can easily use this shipping method for their purchases.

When the customer adds the product to cart then there will be an option to select an address or add a new address. Henceforth, according to the address, shipping methods and prices will be displayed as per the below image.

After selecting the Frenet Freight shipping method, the customer will click the “Next” button to review the order.
On the order review page, the shipping method and the cost of shipping will be displayed as per the below image.

The customer will click on the “Place Order” button to place an order.
Note: The Frenet Freight Shipping rate calculation is based on the parameters of origin, destination, product dimensions, weight, and the total value of the shopping cart.
Manage Orders – Seller End
The sellers can easily manage their orders if the admin has allowed the sellers to manage their orders from the backend. To manage the orders the sellers will navigate to My Order History as per the below image.

Here, the seller can view the complete list of the orders. To manage and generate invoices, the shipment of the orders, the seller selects the order from the list.
So, the seller can even notify the customers by sending them emails and cancel the order.

Hereafter viewing the order the seller can create the invoice, shipping, and Tracking Number for the order.
Seller Invoice
The seller can click on the invoice button to generate a new invoice. The generated invoice is visible in the exclusive invoice tab.

Seller Shipment
The seller can enter the tracking number and generate the shipment.

Manage Orders – Admin End
The admin can view and manage all the orders(along with the seller’s orders). Hence, for this, the admin will navigate to the Sales > Order as per the below image.
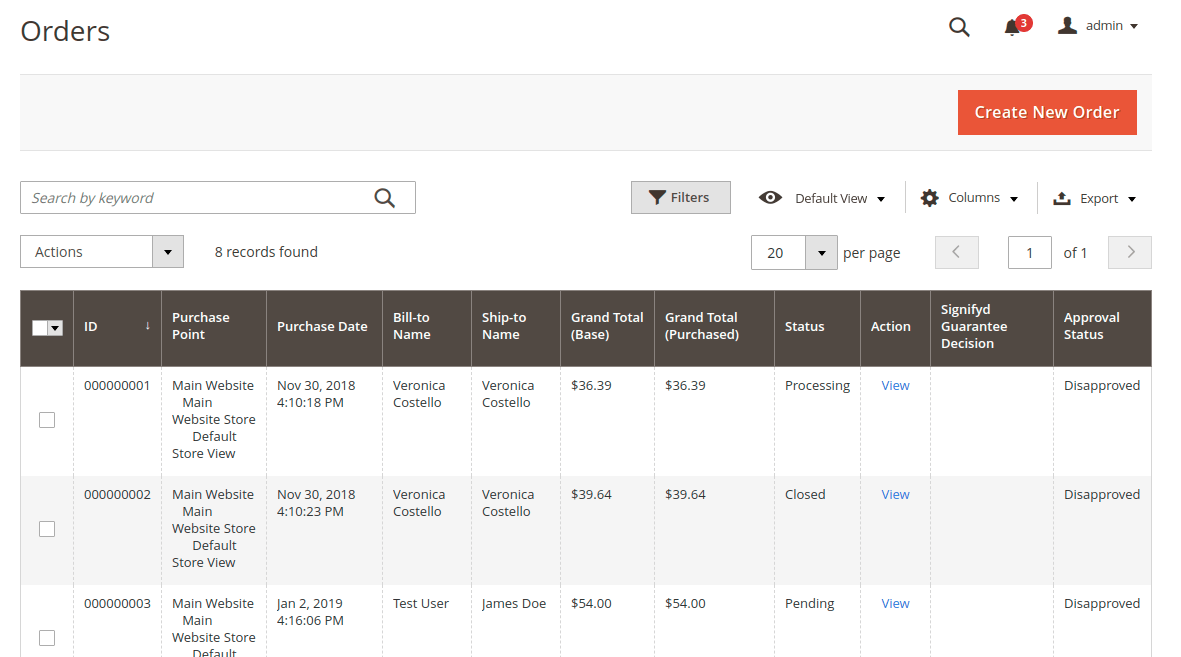
Here, the admin can view the complete list of the orders. Hence, to manage and generate invoices, the shipment of the orders, the admin selects the order from the list.
So, the admin can-
- notify the customers by sending them emails,
- cancel/hold the order and
- even edit/reorder the product order.

Admin Invoice Management
The admin can generate and manage the invoice for there product. However, the store owner can view the invoice of the seller also if its part of the order.

Admin Shipment Generation
Thus, the admin can even generate the shipment of the product which can be viewed in the shipment tab. This will also contain the shipment by the seller if the seller’s product is part of the order.

From here, the admin can even send the tracking details to the customer.
Packing Slip
Thus, the admin can generate the packing slip after creating the shipments by clicking Print.

However, the seller can even generate the packing slip for the customers.

So, that’s all for the Magento 2 Marketplace Frenet Shipping module. Still, have any issues please feel free to add a ticket and let us know your views to make the module better at our HelpDesk System. You may also browse other Magento 2 marketplace addons and our quality Magento 2 extensions.
Current Product Version - 5.0.1-p1
Supported Framework Version - Magento 2.0.x, 2.1.x, 2.2.x,2.3.x, 2.4.x

Be the first to comment.