Laravel eCommerce Google Web Fonts for Bagisto
The Bagisto Laravel eCommerce Google Web Fonts module lets the admin apply any Google font to the storefront, the admin panel, or both.
With this module, the admin can browse the live Google Fonts catalogue and preview each font in its own typeface.
Activate a font in just a few clicks and give your store a distinctive look without editing any theme code. The module is compatible with Bagisto v2.4.10.
Features of Bagisto Laravel eCommerce Google Web Fonts
- Separate targets: apply the active font to the admin panel, the storefront, or both.
- Live font catalogue: browse the complete Google Fonts list and search it by family or category.
- Font preview: every font in the list appears in its own typeface before you save it.
- Add several fonts at once: select multiple fonts in one go, while fonts that already exist are skipped.
- One active font: activating a font asks for confirmation and deactivates the previous one automatically.
- Module switch: enable or disable the whole module from the configuration.
- Font management: delete a single font, or select several fonts and delete them together.
- Instant storefront update: the module clears the full page cache whenever a font is activated or deleted.
- Access control: admin roles decide who can manage Appearance → Web Font.
Installation of the module Laravel eCommerce Google Web Fonts
- Unzip the respective extension zip and then merge the “packages” folder into the project root directory.
- Open the root
composer.jsonand add the namespace underautoload.psr-4:
"Webkul\\Webfont\\": "packages/Webkul/Webfont/src"
- Refresh the autoloader:
composer dump-autoload
- Register the service provider in
bootstrap/providers.php:
Webkul\Webfont\Providers\WebfontServiceProvider::class,
- Run the commands below to run the migrations, publish the assets and clear the caches:
php artisan webfont:install

php artisan optimize:clear
That’s it. The service provider registers everything else itself, so no config/concord.php entry is needed. Now just run the project on your specified domain.
How to generate API key?
The module needs a Google Fonts Developer API key to list the catalogue. However, shoppers and admins never need the key to see the active font.
- Open the Google Fonts Developer API documentation.
- Click on the Get a Key button, then select or create a Google Cloud project.
- Copy the generated key, which the admin then pastes into the module configuration.

Admin configuration
After the successful installation, the admin navigates to Configure >> General >> Design. There, the Web Font section holds the following fields:
- Status: turns the module on or off. The remaining fields appear only once it is switched on.
- API Key: the Google Fonts Developer API key, required while the module is enabled.
- Enable for Admin: set it to Active to apply the active font to the admin panel.
- Enable for Storefront: set it to Active to apply the active font to the storefront.

Step-by-Step: Configure the Web Font Module
- First, go to Configure >> General >> Design.
- Next, switch on Status in the Web Font section.
- Then paste your Google Fonts key into API Key.
- Choose Active or Inactive for Enable for Admin and Enable for Storefront.
- Finally, click on the Save Configuration button.
How to set Font style?
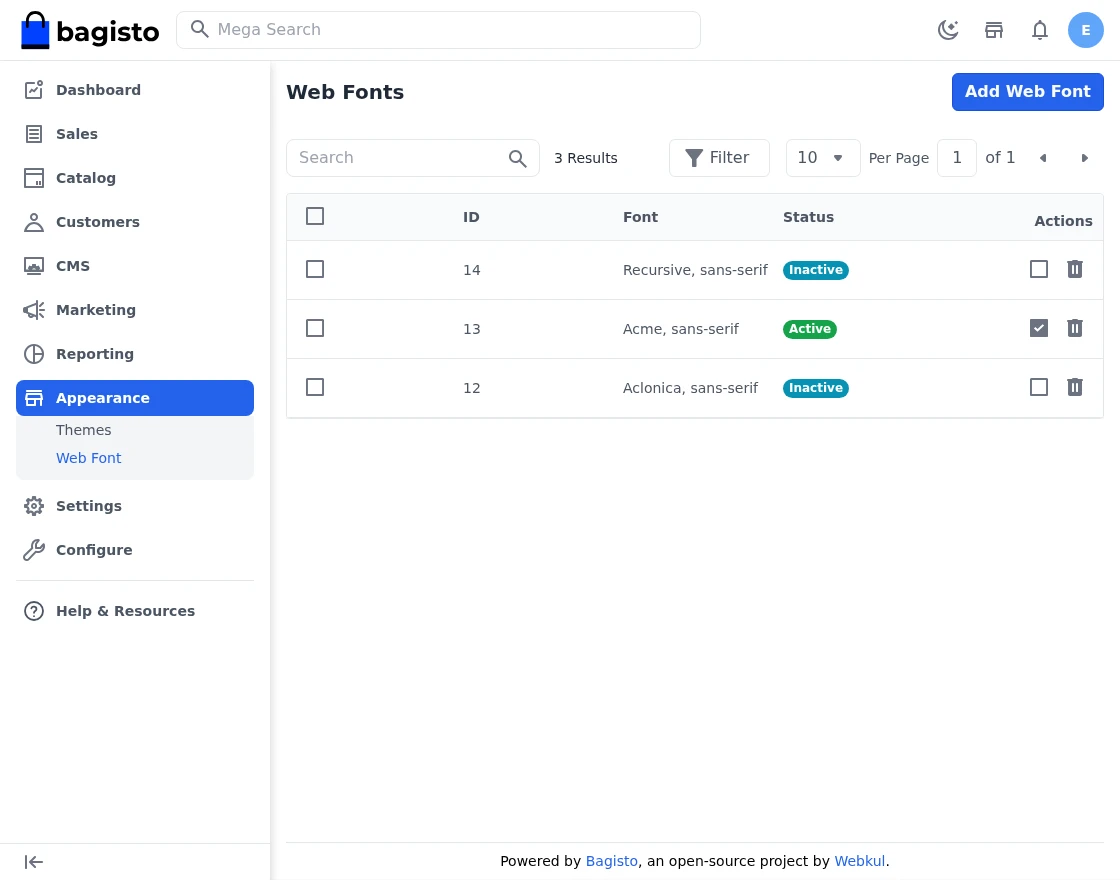
To manage fonts, the admin navigates to Appearance >> Web Font. This page lists every saved font with its ID, font name and status.
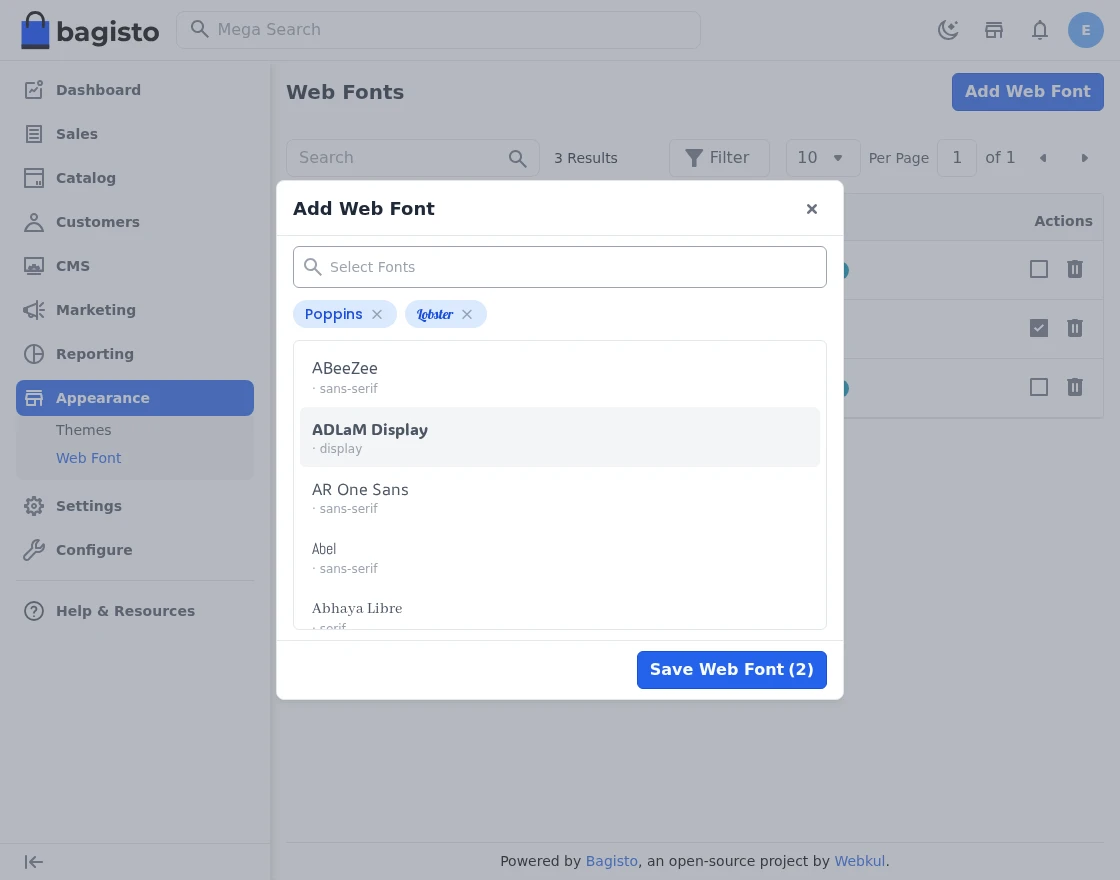
Clicking on the Add Web Font button opens the font catalogue. Here, the admin searches for fonts, previews each one in its own typeface and selects as many as needed.
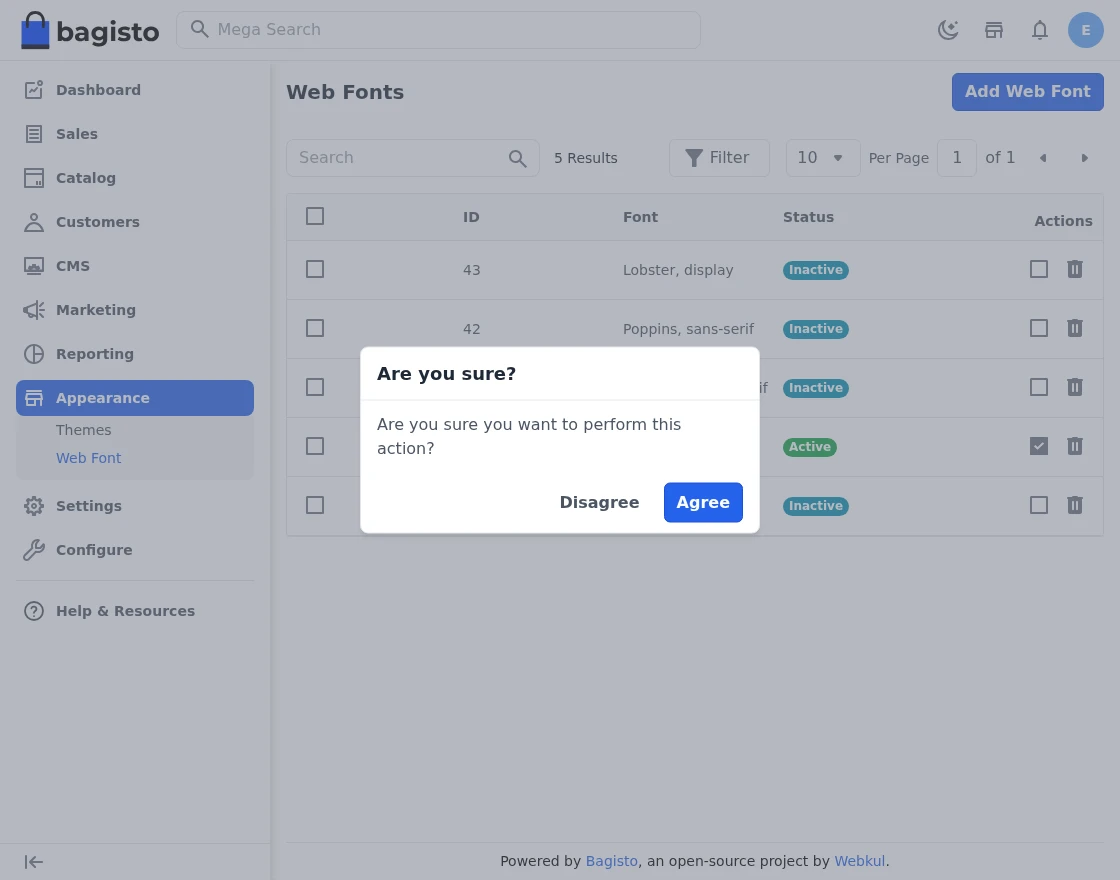
After saving, the new fonts appear in the list as Inactive. Next, clicking on the check icon of a font opens a confirmation dialog.
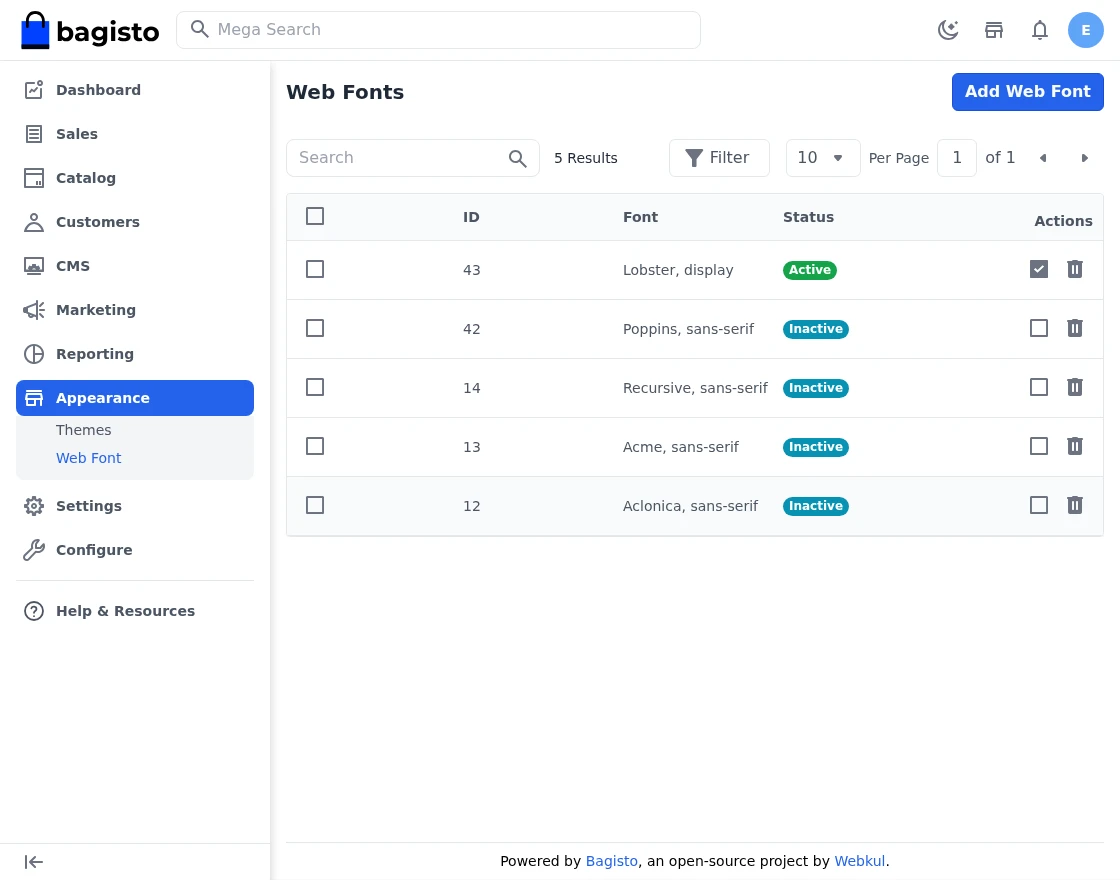
Once the admin clicks on Agree, that font becomes Active and every other font turns inactive. Because only one font can be active, the store always uses a single typeface.
Step-by-Step: Add and Activate a Web Font
- Go to Appearance >> Web Font.
- Click on the Add Web Font button.
- Type a name in Select Fonts and click on the fonts you want; each one appears as a chip.
- After that, click on the Save Web Font button.
- In the list, click on the check icon of the font to use.
- Lastly, click on Agree to activate it.
Step-by-Step: Delete Web Fonts
- To delete one font, click on its delete icon in Appearance >> Web Font, then click on Agree.
- To delete several fonts, tick their checkboxes and choose Delete from the Select Action menu.
- Then confirm the deletion by clicking on Agree.
Store front layout
After activation, the storefront switches to the active font, as the image below shows. Moreover, cached storefront pages refresh right away, because the module clears the full page cache.

Step-by-Step: Apply the Font to the Storefront
- Make sure Status is on and Enable for Storefront is set to Active.
- Activate a font in Appearance >> Web Font.
- Then open the storefront to see the new font.
Admin Panel layout
Similarly, the admin panel uses the active font when Enable for Admin is set to Active, as shown in the image below.

Step-by-Step: Apply the Font to the Admin Panel
- Set Enable for Admin to Active in Configure >> General >> Design.
- Activate a font in Appearance >> Web Font.
- Next, reload any admin page to see the font applied.
Support
So, that was all about the Bagisto Laravel eCommerce Google Web Fonts module. For any queries or doubts, reach out to us at [email protected]. You can also raise a ticket at our HelpDesk System.
Current Product Version - 2.4.10
Supported Framework Version - v2.4.10

Be the first to comment.